ECO mode SKODA SUPERB 2010 Owner´s Manual
[x] Cancel search | Manufacturer: SKODA, Model Year: 2010, Model line: SUPERB, Model: SKODA SUPERB 2010Pages: 252, PDF Size: 16.33 MB
Page 193 of 252
Specifications and capacity (in l) for vehicles with fixed service intervalsPetrol enginesSpecificationCapacity1.4 l/92 kW TSIVW 501 01, VW 502 003.6
1.8 l/112, 118 kW TSI
VW 502 00
4.6
applies to RussiaSAE 0W-30
VW 502 00 / 505 00
2.0 l/147 kW TSI
VW 502 00
4.6
applies to Russia SAE 0W-30
VW 502 00 / 505 003.6 l/191 kW FSIVW 502 005.5Diesel engines a)SpecificationCapacity1.6 l/77 kW TDI CRVW 507 004.32.0 ltr/103 kW TDI CR DPFVW 507 004.32.0 ltr/125 kW TDI CR DPFVW 507 004.3a)
Engine oil VW 505 01 can optionally be used in diesel engines
without DPF
CAUTION
■
If the above engine oils are not available, a different engine oil can be used in
an emergency. To prevent damage to the engine, a maximum of 0.5 litres only
of the following engine oils may be used until the next oil change: ■ For petrol engine models: ACEA A3/ACEA B4 or API SN/API SM;
■ For diesel engine models: ACEA C3 or API CJ-4.
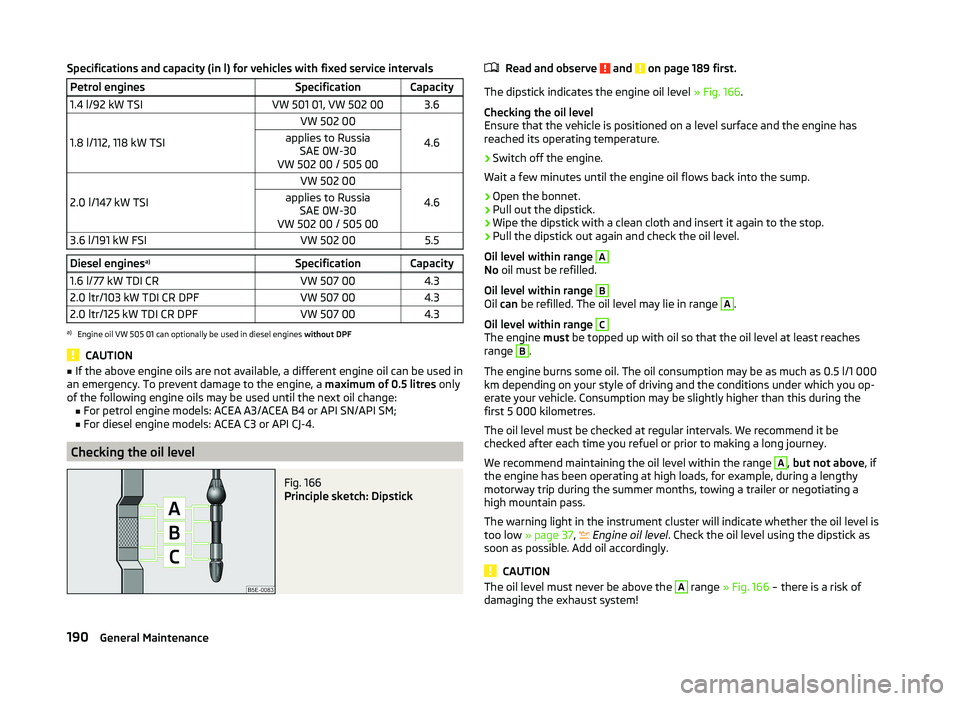
Checking the oil level
Fig. 166
Principle sketch: Dipstick
Read and observe and on page 189 first.
The dipstick indicates the engine oil level » Fig. 166.
Checking the oil level
Ensure that the vehicle is positioned on a level surface and the engine has
reached its operating temperature.
›
Switch off the engine.
Wait a few minutes until the engine oil flows back into the sump.
›
Open the bonnet.
›
Pull out the dipstick.
›
Wipe the dipstick with a clean cloth and insert it again to the stop.
›
Pull the dipstick out again and check the oil level.
Oil level within range
A
No oil must be refilled.
Oil level within range
B
Oil can be refilled. The oil level may lie in range
A
.
Oil level within range
C
The engine must be topped up with oil so that the oil level at least reaches
range
B
.
The engine burns some oil. The oil consumption may be as much as 0.5 l/1 000
km depending on your style of driving and the conditions under which you op-
erate your vehicle. Consumption may be slightly higher than this during the
first 5 000 kilometres.
The oil level must be checked at regular intervals. We recommend it be
checked after each time you refuel or prior to making a long journey.
We recommend maintaining the oil level within the range
A
, but not above , if
the engine has been operating at high loads, for example, during a lengthy
motorway trip during the summer months, towing a trailer or negotiating a
high mountain pass.
The warning light in the instrument cluster will indicate whether the oil level is
too low » page 37 ,
Engine oil level
. Check the oil level using the dipstick as
soon as possible. Add oil accordingly.
CAUTION
The oil level must never be above the A range » Fig. 166 – there is a risk of
damaging the exhaust system!190General Maintenance
Page 204 of 252
CAUTION■Only use the manual pressure and do not hit the full wheel trim – there is a
risk of damaging the trim.■
When using the anti-theft wheel bolt, ensure that it is in the hole in the
valve area.
■
If wheel trims are fitted, an adequate flow of air must be assured in order to
cool the brake system.
Note
We recommend that you use wheel trims from ŠKODA Original Accessories.
Wheel bolts
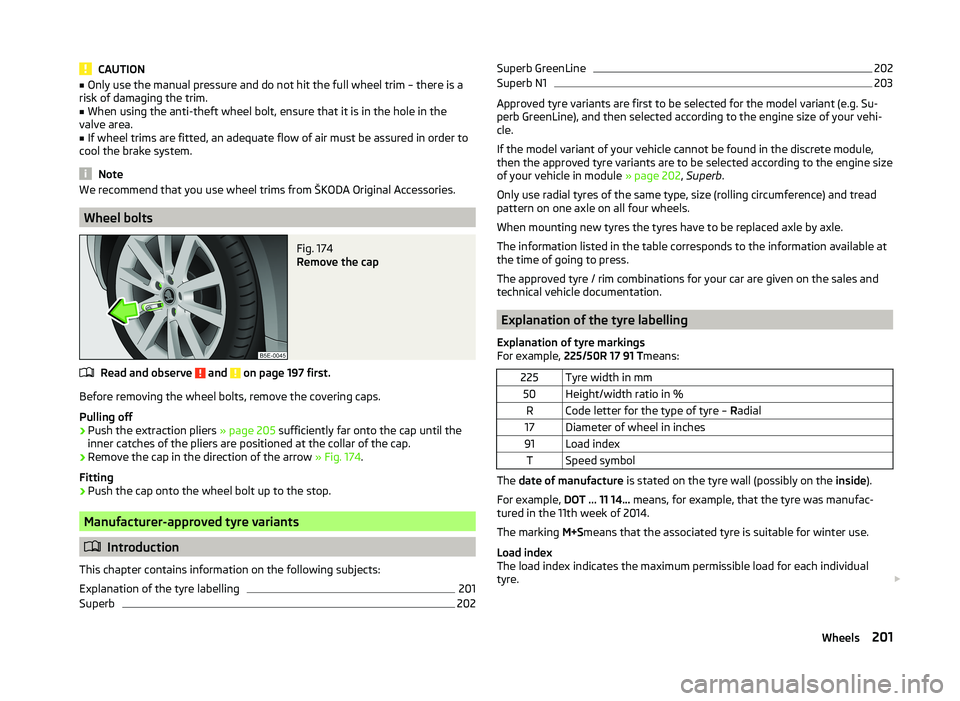
Fig. 174
Remove the cap
Read and observe and on page 197 first.
Before removing the wheel bolts, remove the covering caps.
Pulling off
›
Push the extraction pliers » page 205 sufficiently far onto the cap until the
inner catches of the pliers are positioned at the collar of the cap.
›
Remove the cap in the direction of the arrow » Fig. 174.
Fitting
›
Push the cap onto the wheel bolt up to the stop.
Manufacturer-approved tyre variants
Introduction
This chapter contains information on the following subjects:
Explanation of the tyre labelling
201
Superb
202Superb GreenLine202Superb N1203
Approved tyre variants are first to be selected for the model variant (e.g. Su-
perb GreenLine), and then selected according to the engine size of your vehi-
cle.
If the model variant of your vehicle cannot be found in the discrete module,
then the approved tyre variants are to be selected according to the engine size
of your vehicle in module » page 202, Superb .
Only use radial tyres of the same type, size (rolling circumference) and tread
pattern on one axle on all four wheels.
When mounting new tyres the tyres have to be replaced axle by axle.
The information listed in the table corresponds to the information available at the time of going to press.
The approved tyre / rim combinations for your car are given on the sales and
technical vehicle documentation.
Explanation of the tyre labelling
Explanation of tyre markings
For example, 225/50R 17 91 T means:
225Tyre width in mm50Height/width ratio in %RCode letter for the type of tyre – Radial17Diameter of wheel in inches91Load indexTSpeed symbol
The date of manufacture is stated on the tyre wall (possibly on the inside).
For example, DOT ... 11 14... means, for example, that the tyre was manufac-
tured in the 11th week of 2014.
The marking M+Smeans that the associated tyre is suitable for winter use.
Load index
The load index indicates the maximum permissible load for each individual
tyre.
201Wheels
Page 210 of 252

After changing the wheel, the tyre pressure should be adjusted. In vehicles
with tyre pressure monitoring, tyre pressure values are to be stor-
ed » page 166 .
Replace the damaged wheel or consult a specialist garage about repair op-
tions.WARNINGDrive cautiously and only at a moderate speed until the tightening torque
has been checked.
Loosening/tightening wheel bolts
Fig. 179
Changing a wheel: Loosening the
wheel bolts
Read and observe on page 206 first.
Before removing the wheel bolts, the caps for the wheel bolts must be pulled off.
Releasing
›
Push the wheel wrench onto the wheel bolt as far as the stop 1)
.
›
Grip the wrench at its end and turn the bolt about one turn in the direction of
the arrow » Fig. 179.
Tightening
›
Push the wheel wrench onto the wheel bolt as far as the stop 1)
.
›
Grip the wrench at its end and turn the bolt against the direction of the ar-
row » Fig. 179 until it is tight.
After tightening the wheel bolts, the covering caps must be replaced.
WARNING■ Undo the wheel bolts only a little (about one turn) provided that the vehi-
cle has not yet been jacked up. Otherwise the wheel could become loose
and fall off.■
If it proves difficult to undo the bolts, carefully apply pressure to the end
of the wrench with your foot. Keep hold of the vehicle when doing so, and
make sure you keep your footing.
Raising the vehicle
Fig. 180
Jacking points for positioning
lifting jack
Fig. 181
Attach lifting jack
Read and observe
on page 206 first.
In order to raise the vehicle, the jack from the tool kit is to be used.
Position the car jack at the jacking point closest to the flat tyre .
1)
Use the appropriate adapter for undoing and tightening the anti-theft wheel bolts
» page 208.
207Emergency equipment and self-help
Page 240 of 252
BootAutomatic retraction (Superb Combi)101
Extending variable loading floor105
Folding hook99
Non-closable side pocket (Superb Combi)102
Removable Light (Superb Combi)103
Roll up boot cover (Superb Combi)101
Side compartment with battery102
Boot cover (Superb Combi)101
Boot lid57
automatic locking58
Warning light36
(Superb Combi)58
Brake booster144
Brake fluid192
Checking193
Information messages35
specification193
Brake linings warning light
41
Brakes Brake assist systems
154
Brake booster144
Brake fluid193
Handbrake144
Information messages35
Running in149
Warning light35
Braking Information on braking
143
Break recommendation See Fatigue detection
165
Button in the driver's door Electrical power windows
61
C
Car care
173
Jack180
Car computer See multifunction display
44
Car park ticket holder89
Carrier Roof rack
108
Cavity protection180
CD changer136
Central locking50
Central locking button55
Changing brake fluid
193
bulbs223
Wheels205
Changing a wheel Follow-up work
206
Preliminary work206
Remove and attaching a wheel206
Changing brake fluid
193
Charging a vehicle battery196
Check Fit ball head properly
168
Checking Battery electrolyte level
195
Brake fluid193
Coolant192
Engine oil190
Oil level190
Windscreen washer fluid188
Checks Statutory checks
173
Children and safety22
Child safety Side airbag
24
Child safety lock55
Child seat Classification
25
ISOFIX25
on the front passenger seat23
TOP TETHER27
Use of child seats25
Use of ISOFIX child seats26
Chrome parts refer to Taking care of your vehicle178
Cigarette lighter91
Cleaning Alcantara
182
Covers of electrically heated seats182
Fabrics182
Headlight lenses179
Natural leather181
Plastic parts178
Synthetic leather182
Wheels180
Cleaning the vehicle Towing device
180
Cleaning vehicle176
Climatronic115
Air recirculation117
automatic mode116
Control elements115
Controlling blower118
Cooling system116
Defrosting windscreen118
Setting the temperature116
Clothes hook94
Cockpit 12-Volt power outlet
92
Ashtray91
Cigarette lighter91
General view29
Lighting73
Practical features88
Storage compartments88
Comfort control window
63
COMING HOME72
Compartments88
Components of the puncture repair kits209
Computer See multifunction display
44
237Index
Page 243 of 252
HBA155
Head airbag20
Headlight cleaning system Headlight cleaning system
79
Headlights Driving abroad
153
Headlight cleaning system79
Replacing a bulb224
Head restraint83
Head restraints83
Heater Windscreen and rear window
75
Heating Exterior mirrors
80
Seats85
HHC156
Hill Hold Control (HHC)156
Hitch166
Accessories169
Drawback load166
Horn29
Hydraulic Brake Assist (HBA)155
I
Ignition
139
Immobilizer139
Individual settings Locking
54
Unlocking54
Inertia reels15
Information messages see KESSY
53
Information system42
Compass point display48
Display a low temperature43
Door warning44
Gear recommendation43
MAXI DOT display46
Multifunction display44
Operation42
Service interval display48
instrument cluster Auto Check Control
33
Instrument cluster30
Counter for distance driven32
Display31
Display of the second speed33
Fuel gauge32
Overview30
Revolution counter31
see instrument cluster30
Speedometer31
Temperature gauge31
Warning lights34
Interior monitor56
Internet connection129
ISOFIX25
J
Jack
205
Maintenance180
Jacking points Raise vehicle
207
Jump-starting211
K
KESSY Information messages
53
Lock / unlock the steering141
Locking53
Starting the engine142
Switching off the engine142
Switch off ignition141
Switch on ignition141
Unlocking53
Key Starting the engine
139
Stopping the engine140
Knee airbag18
L
Lamp failure Warning light
38
Lamps Warning light
38
LEAVING HOME72
Lever Main beam
69
Turn signal69
Windscreen wipers78
Light Cockpit
73
COMING HOME / LEAVING HOME72
Fog lights with CORNER function71
Headlight range control68
Instrument illumination68
Low beam68
Parking light68
switching on and off68
Travel mode71
Light bulbs Rear light (Superb Combi)
226
Lighting Luggage compartment
97
Lights67
Adaptive headlights (AFS)70
Automatic driving lamp control70
Daylight running69
Fog lights71
Hazard warning light system72
Headlight flasher69
Main beam69
Parking lights73
Rear fog light71
Replacing bulbs223
Tourist lights71
Turn signal69
Warning lights34
Lock Vehicle key
51
240Index
Page 244 of 252
LockingIndividual settings54
KESSY53
Remote control52
Locking and unlocking the vehicle from the in- side
55
Locking the door without a locking cylinder Emergency
217
Long cargo channel96
Low beam68
Warning light41
Low tyre pressure warning refer to the tyre pressure monitoring
165
Luggage compartment97
Class N1 vehicles98
Cover100
Emergency unlocking217
Fastening elements99
Fix floor covering100
Fixing nets99
Lighting97
Luggage net100
see boot lid57
Side pockets101
Unlocking the boot lid217
Variable loading floor104
Luggage compartment cover100
Luggage compartment lid57
Luggage net100
M
Main beam
69
Warning light41
Maintenance151
Decorative films179
Manual air conditioning adjusting
114
Recirculated air mode114
Manual gear changing see gear changing
144
Manually setting air conditioningControl elements112
MAXI DOT See MAXI DOT display
46
MAXI DOT display46
Main menu47
Operation42
Settings47
maximum allowable weights
228
MDI Installation in the storage compartment
92
Media see radio / navigation system
4
MFD See multifunction display
44
Mirror Exterior mirrors
80
Mirrors Interior mirror
79
Vanity76
Mobile phone121, 124, 126
Connecting to the hands-free system124, 127
Modifications173
Modifications and technical alterations Airbags
175
Service174
Spoiler175
Multifunction display Functions
44
Information45
Memory44
Operation42
Multimedia134
AUX135
MDI135
N
N1
98
nameplate228
Navigation system4
Net partition107
Behind the front seats108
Behind the rear seats107
Removing and refitting the housing108
Nets99
Non-closable side pocket (Superb Combi)102
Notes for driving with tyre repaired211
O
Oil Note messages
36
See Engine oil190
Oil pressure Note messages
36
On-board computer See multifunction display
44
Operating the sun screen
66
Operating weight229
Operation in winter Diesel fuel
185
Vehicle battery195
Original accessories174
Outside temperature45
Overview Engine compartment
188
Warning lights34
P
Paintwork See Paintwork care
178
Paintwork care178
Park assist157
Departing from a parallel parking space160
Finding a parking space158
Information messages160
Parking159
241Index