remote control SKODA SUPERB 2010 Owner´s Manual
[x] Cancel search | Manufacturer: SKODA, Model Year: 2010, Model line: SUPERB, Model: SKODA SUPERB 2010Pages: 252, PDF Size: 16.33 MB
Page 6 of 252
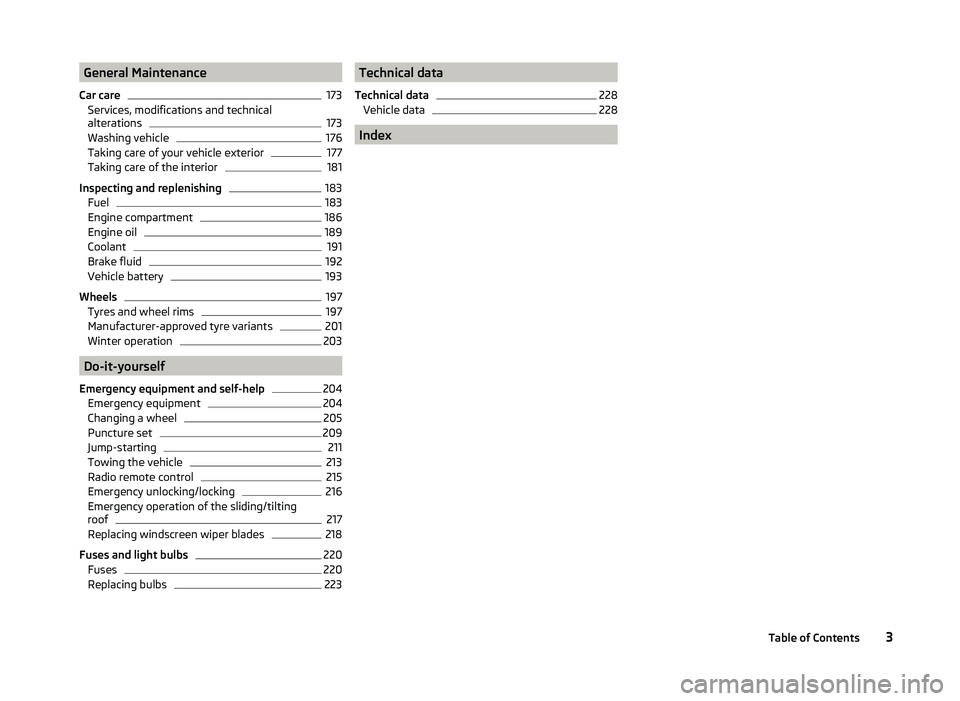
General Maintenance
Car care173
Services, modifications and technical
alterations
173
Washing vehicle
176
Taking care of your vehicle exterior
177
Taking care of the interior
181
Inspecting and replenishing
183
Fuel
183
Engine compartment
186
Engine oil
189
Coolant
191
Brake fluid
192
Vehicle battery
193
Wheels
197
Tyres and wheel rims
197
Manufacturer-approved tyre variants
201
Winter operation
203
Do-it-yourself
Emergency equipment and self-help
204
Emergency equipment
204
Changing a wheel
205
Puncture set
209
Jump-starting
211
Towing the vehicle
213
Radio remote control
215
Emergency unlocking/locking
216
Emergency operation of the sliding/tilting
roof
217
Replacing windscreen wiper blades
218
Fuses and light bulbs
220
Fuses
220
Replacing bulbs
223Technical data
Technical data228
Vehicle data
228
Index
3Table of Contents
Page 10 of 252
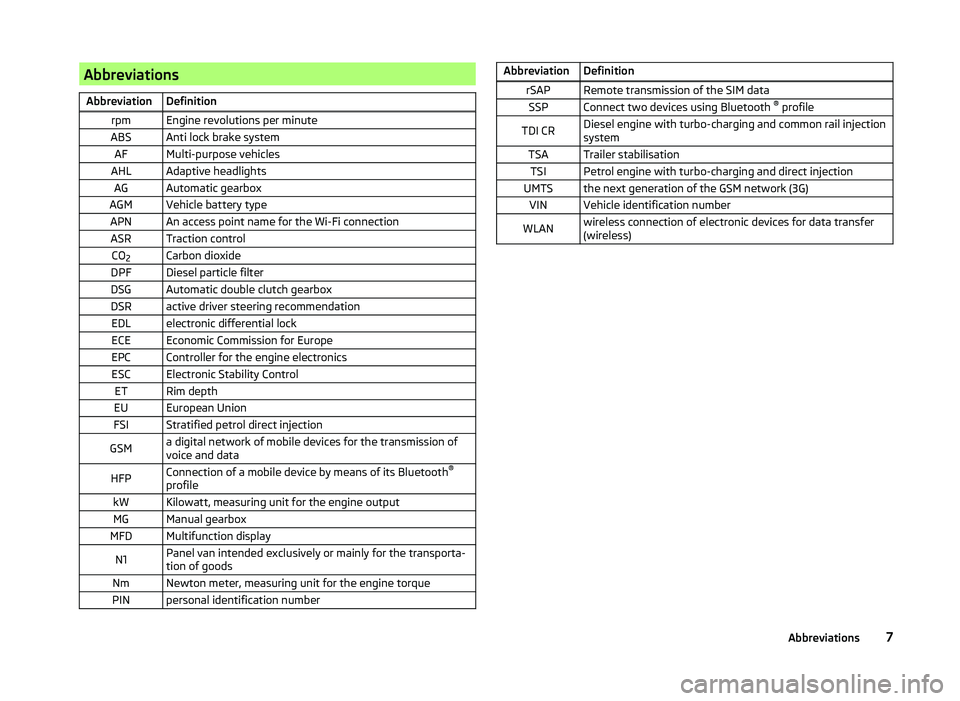
AbbreviationsAbbreviationDefinitionrpmEngine revolutions per minuteABSAnti lock brake systemAFMulti-purpose vehiclesAHLAdaptive headlightsAGAutomatic gearboxAGMVehicle battery typeAPNAn access point name for the Wi-Fi connectionASRTraction controlCO2Carbon dioxideDPFDiesel particle filterDSGAutomatic double clutch gearboxDSRactive driver steering recommendationEDLelectronic differential lockECEEconomic Commission for EuropeEPCController for the engine electronicsESCElectronic Stability ControlETRim depthEUEuropean UnionFSIStratified petrol direct injectionGSMa digital network of mobile devices for the transmission of
voice and dataHFPConnection of a mobile device by means of its Bluetooth ®
profilekWKilowatt, measuring unit for the engine outputMGManual gearboxMFDMultifunction displayN1Panel van intended exclusively or mainly for the transporta-
tion of goodsNmNewton meter, measuring unit for the engine torquePINpersonal identification numberAbbreviationDefinitionrSAPRemote transmission of the SIM dataSSPConnect two devices using Bluetooth ®
profileTDI CRDiesel engine with turbo-charging and common rail injection
systemTSATrailer stabilisationTSIPetrol engine with turbo-charging and direct injectionUMTSthe next generation of the GSM network (3G)VINVehicle identification numberWLANwireless connection of electronic devices for data transfer
(wireless)7Abbreviations
Page 53 of 252
Information on the oil change service is displayed at first, followed by informa-
tion on the inspection when button 3 is pressed again.
› The number
1 or 2 is displayed in position A
.
› The symbol
and the number of days remaining until the next service inter-
val are displayed in position
B
.
› The symbol
and the number of kilometres remaining until the next service
interval are displayed in position
C
.
Resetting the service interval display
We recommend that the display reset is completed by a specialist garage.
We recommend that you do not reset the service interval display yourself. In-
correctly setting the service interval display could cause problems to the vehi-
cle.
Variable service interval
For vehicles with variable service intervals, after resetting the oil change serv-
ice display, the values of a new service interval are displayed, which are based
on the previous operating conditions of the vehicle.
These values are then continuously matched according to the actual operating
conditions of the vehicle.
Unlocking and opening
Unlocking and locking
Introduction
This chapter contains information on the following subjects:
Vehicle key
51
Unlocking/locking with the remote control key
52
Opening/closing a door
52
Unlocking / locking - KESSY
53
Information messages KESSY
53
Safe securing
54
Individual settings
54
Locking/unlocking the vehicle from the inside
55
Child safety lock
55
Your car is equipped with a central locking system.
The central locking system allows you to lock and unlock all doors, the fuel fill-
er flap and luggage compartment lid at the same time based on the current
setting 1)
.
The safe securing system » page 54 is integrated in the central locking sys-
tem. Once the car is locked from the outside, the door locks 2)
are automatically
blocked by the safe securing system »
.
The following is true after unlocking 1)
› The doors, the boot lid and the fuel filler flap are unlocked.
› The interior light, which is switched by the door contact, illuminates.
› The safe securing system is switched off 2)
.
› The warning icon in the driver door stops flashing.
› The anti-theft alarm system is deactivated.
The following is true after locking 1)
› The doors, the boot lid and the fuel filler flap are locked.
› The interior light switched by the door contact goes off.
› The safe securing system is switched on 2)
.
1)
Depending on the individual setting
» page 54.
2)
This function applies only to vehicles with specific equipment or for some countries.
50Operation
Page 54 of 252
›The warning light in the driver door begins flashing.
› The anti-theft alarm system is activated.
Displaying an error If the warning icon in the driver's door initially flashes quickly for around 2 sec-
onds, and then illuminates for 30 seconds without interruption before flashing
again slowly, you will need to seek the assistance of a specialist garage.WARNING■ Never leave the key in the vehicle when you exit the vehicle. Unauthor-
ized persons, such as children, for example, could lock the car, turn on the
ignition or start the engine - there is a danger of injury and accidents!■
When leaving the vehicle, never leave people who are not completely in-
dependent, such as children, unattended in the vehicle. The children might,
for example, release the handbrake or take the vehicle out of gear. The ve-
hicle could then start to move – risk of injury and accidents! These individu-
als might also not be able to leave the vehicle on their own or to help
themselves. Can be fatal at very high or very low temperatures!
■
If the car is locked from the outside and the safe lock system is switched
on, no one must be in the car, as it is then not possible to open either a
door or a window from the inside. The locked doors make it more difficult
for rescuers to get into the vehicle in an emergency – risk to life.
Note
■ When leaving the vehicle, always check if it is locked.■In the event of an accident in which the airbags are deployed, the locked
doors are automatically unlocked in order to enable rescuers to gain access to
the vehicle.■
Upon failure of the central locking system the key can only be used to unlock
and lock the driver's door. The other doors and the boot lid can be emergency
opened or emergency released. ■ Emergency locking of the door » page 216.
■ Emergency unlocking of the boot lid » page 217.
Vehicle keyFig. 31
Remote control key
Read and observe on page 51 first.
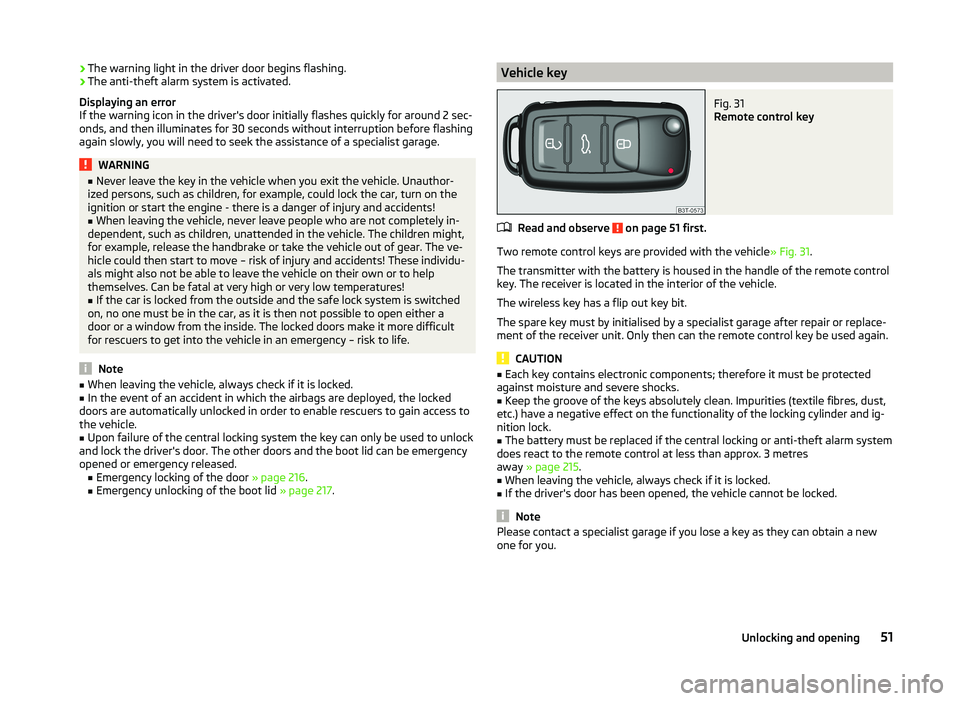
Two remote control keys are provided with the vehicle » Fig. 31.
The transmitter with the battery is housed in the handle of the remote control
key. The receiver is located in the interior of the vehicle.
The wireless key has a flip out key bit.
The spare key must by initialised by a specialist garage after repair or replace- ment of the receiver unit. Only then can the remote control key be used again.
CAUTION
■ Each key contains electronic components; therefore it must be protected
against moisture and severe shocks.■
Keep the groove of the keys absolutely clean. Impurities (textile fibres, dust,
etc.) have a negative effect on the functionality of the locking cylinder and ig-
nition lock.
■
The battery must be replaced if the central locking or anti-theft alarm system
does react to the remote control at less than approx. 3 metres
away » page 215 .
■
When leaving the vehicle, always check if it is locked.
■
If the driver's door has been opened, the vehicle cannot be locked.
Note
Please contact a specialist garage if you lose a key as they can obtain a new
one for you.51Unlocking and opening
Page 55 of 252
Unlocking/locking with the remote control keyFig. 32
Remote control key
Read and observe on page 51 first.
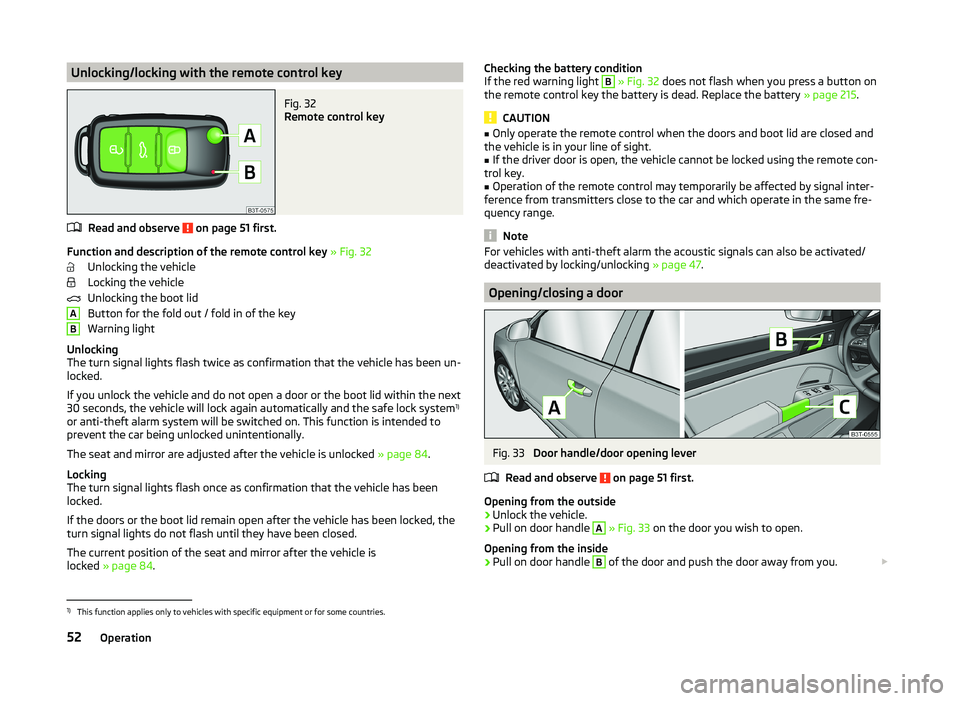
Function and description of the remote control key » Fig. 32
Unlocking the vehicle
Locking the vehicle
Unlocking the boot lid
Button for the fold out / fold in of the key
Warning light
Unlocking
The turn signal lights flash twice as confirmation that the vehicle has been un-
locked.
If you unlock the vehicle and do not open a door or the boot lid within the next
30 seconds, the vehicle will lock again automatically and the safe lock system 1)
or anti-theft alarm system will be switched on. This function is intended to prevent the car being unlocked unintentionally.
The seat and mirror are adjusted after the vehicle is unlocked » page 84.
Locking
The turn signal lights flash once as confirmation that the vehicle has been
locked.
If the doors or the boot lid remain open after the vehicle has been locked, the
turn signal lights do not flash until they have been closed.
The current position of the seat and mirror after the vehicle is
locked » page 84 .
ABChecking the battery condition
If the red warning light B » Fig. 32 does not flash when you press a button on
the remote control key the battery is dead. Replace the battery » page 215.
CAUTION
■
Only operate the remote control when the doors and boot lid are closed and
the vehicle is in your line of sight.■
If the driver door is open, the vehicle cannot be locked using the remote con-
trol key.
■
Operation of the remote control may temporarily be affected by signal inter-
ference from transmitters close to the car and which operate in the same fre-
quency range.
Note
For vehicles with anti-theft alarm the acoustic signals can also be activated/
deactivated by locking/unlocking » page 47.
Opening/closing a door
Fig. 33
Door handle/door opening lever
Read and observe
on page 51 first.
Opening from the outside
›
Unlock the vehicle.
›
Pull on door handle
A
» Fig. 33 on the door you wish to open.
Opening from the inside
›
Pull on door handle
B
of the door and push the door away from you.
1)
This function applies only to vehicles with specific equipment or for some countries.
52Operation
Page 56 of 252
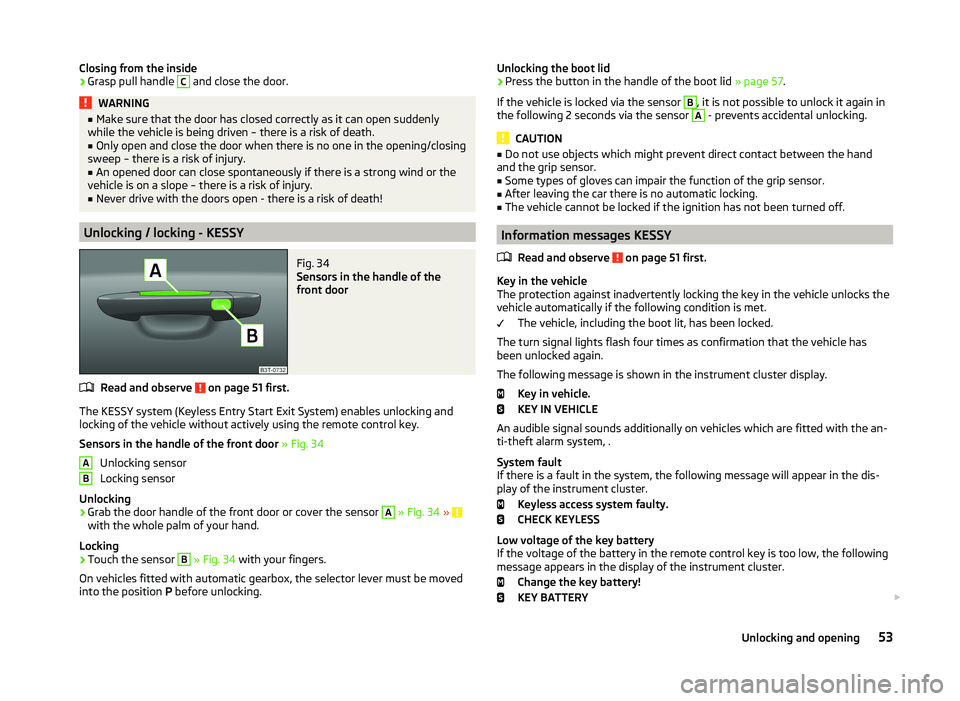
Closing from the inside›Grasp pull handle C and close the door.WARNING■Make sure that the door has closed correctly as it can open suddenly
while the vehicle is being driven – there is a risk of death.■
Only open and close the door when there is no one in the opening/closing
sweep – there is a risk of injury.
■
An opened door can close spontaneously if there is a strong wind or the
vehicle is on a slope – there is a risk of injury.
■
Never drive with the doors open - there is a risk of death!
Unlocking / locking - KESSY
Fig. 34
Sensors in the handle of the
front door
Read and observe on page 51 first.
The KESSY system (Keyless Entry Start Exit System) enables unlocking and
locking of the vehicle without actively using the remote control key.
Sensors in the handle of the front door » Fig. 34
Unlocking sensor
Locking sensor
Unlocking
›
Grab the door handle of the front door or cover the sensor
A
» Fig. 34 » with the whole palm of your hand.
Locking
›
Touch the sensor
B
» Fig. 34 with your fingers.
On vehicles fitted with automatic gearbox, the selector lever must be moved
into the position P before unlocking.
ABUnlocking the boot lid›Press the button in the handle of the boot lid » page 57.
If the vehicle is locked via the sensor B
, it is not possible to unlock it again in
the following 2 seconds via the sensor
A
- prevents accidental unlocking.
CAUTION
■ Do not use objects which might prevent direct contact between the hand
and the grip sensor.■
Some types of gloves can impair the function of the grip sensor.
■
After leaving the car there is no automatic locking.
■
The vehicle cannot be locked if the ignition has not been turned off.
Information messages KESSY
Read and observe
on page 51 first.
Key in the vehicle
The protection against inadvertently locking the key in the vehicle unlocks the
vehicle automatically if the following condition is met.
The vehicle, including the boot lit, has been locked.
The turn signal lights flash four times as confirmation that the vehicle has
been unlocked again.
The following message is shown in the instrument cluster display. Key in vehicle.
KEY IN VEHICLE
An audible signal sounds additionally on vehicles which are fitted with the an-
ti-theft alarm system, .
System fault
If there is a fault in the system, the following message will appear in the dis-
play of the instrument cluster.
Keyless access system faulty.
CHECK KEYLESS
Low voltage of the key battery
If the voltage of the battery in the remote control key is too low, the following
message appears in the display of the instrument cluster.
Change the key battery!
KEY BATTERY
53Unlocking and opening
Page 59 of 252
›Opening the bonnet.
› Opening the boot lid.
› Opening the doors.
› Manipulation of the ignition lock.
› Towing the vehicle
» page 56.
› Movement in the vehicle
» page 56.
› Sudden and significant voltage drop of the electrical system.
› Uncoupling the trailer
» page 170, Attaching and detaching trailers .
If the driver's door of a vehicle with a remote control is unlocked and opened
by the lock cylinder, then the alarm is triggered.
Switching off the alarm
The alarm is turned off by pressing the button on the radio remote control
key or switching on the ignition.
CAUTION
Before leaving the vehicle, it must be checked that all of the windows, doors
and the sliding/tilting roof are locked in order to ensure the full functionality of
the anti-theft alarm system.
Note
The working life of the alarm siren is 5 years.
Activating/deactivating
Read and observe
on page 56 first.
Activating
The anti-theft alarm system is activated automatically approximately 30 sec-
onds after the vehicle is locked.
If the vehicle is unlocked and a door or the boot lid not opened within the next
30 seconds, the vehicle will lock again automatically and the SafeLock system
or anti-theft alarm system will be switched back on. This function is intended
to prevent the car being unlocked unintentionally.
Deactivating
The anti-theft alarm system is deactivated automatically after the vehicle is
unlocked. If the vehicle is not opened within 30 seconds, the anti-theft alarm
system is automatically activated again.
The alarm system is also deactivated if you unlock the driver door using the
key within 45 seconds of locking the vehicle.
Note■ If the car is unlocked with the key in the driver door, insert the key into the
ignition and switch the ignition to deactivate the alarm system.■
You can switch the audible signalling of the activation of the warning system
on and off in the MAXI DOT display in the menu item ATA confirm » page 47 .
Interior monitor and towing protection
Fig. 37
Button for interior monitor and
towing protection
Read and observe on page 56 first.
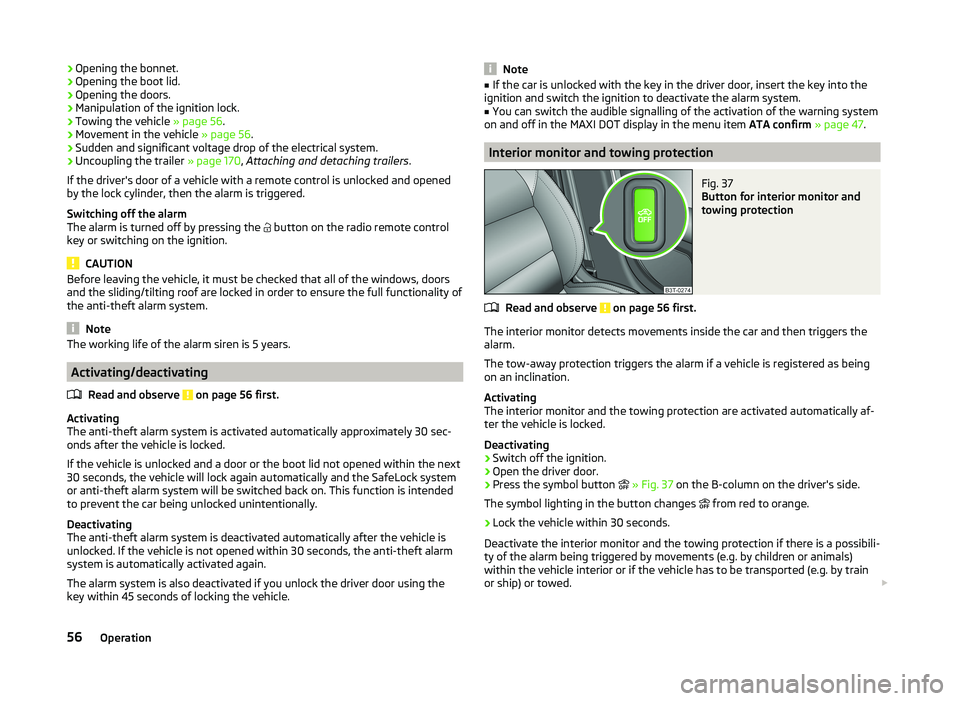
The interior monitor detects movements inside the car and then triggers the alarm.
The tow-away protection triggers the alarm if a vehicle is registered as being
on an inclination.
Activating
The interior monitor and the towing protection are activated automatically af-
ter the vehicle is locked.
Deactivating
›
Switch off the ignition.
›
Open the driver door.
›
Press the symbol button
» Fig. 37 on the B-column on the driver's side.
The symbol lighting in the button changes
from red to orange.
›
Lock the vehicle within 30 seconds.
Deactivate the interior monitor and the towing protection if there is a possibili-
ty of the alarm being triggered by movements (e.g. by children or animals)
within the vehicle interior or if the vehicle has to be transported (e.g. by train
or ship) or towed.
56Operation
Page 60 of 252
CAUTION■The opened glasses storage compartment reduces the effectiveness of the
interior monitor. To ensure the full functionality of the interior monitor, the
glasses storage compartment must always be closed before locking the vehi-
cle.■
The anti-theft alarm system is activated when the vehicle is locked, even if
the SafeLock system is deactivated. The interior monitor is however not acti-
vated.
Luggage compartment lid
Introduction
This chapter contains information on the following subjects:
Twindoor - open/close small boot lid
57
TwinDoor - open / close large boot
58
Open / close (Superb Combi)
58
Delayed locking of the boot lid
58WARNING■ Ensure that the lock is properly engaged after closing the boot lid. Other-
wise, the lid might open suddenly while the vehicle is moving, even if the
lid was locked – risk of accident!■
Never drive with the luggage compartment lid open or ajar, as otherwise
exhaust gases may get into the interior of the vehicle – risk of poisoning!
■
Do not press on the rear window when closing the boot lid, as otherwise
this could crack – there is a risk of injury.
■
Make sure that when closing the boot lid, no body parts are crushed -
there is danger of injury!
CAUTION
If the vehicle was locked before the boot lid was closed, the lid is immediately
locked automatically when closed » page 58.Note■
The function of the button in the grip above the licence plate is deactivated
when starting off or at a speed of 5 km/hour or more for vehicles with central
locking. The function is restored after the vehicle stops and the door is
opened.■
Repeated opening and closing of the boot lid can lead to a temporary failure
of the function due to the overheating protection of the motors of the Twin-
door system.
Twindoor - open/close small boot lid
Fig. 38
Handle of boot lid/opened small boot lid
Read and observe
and on page 57 first.
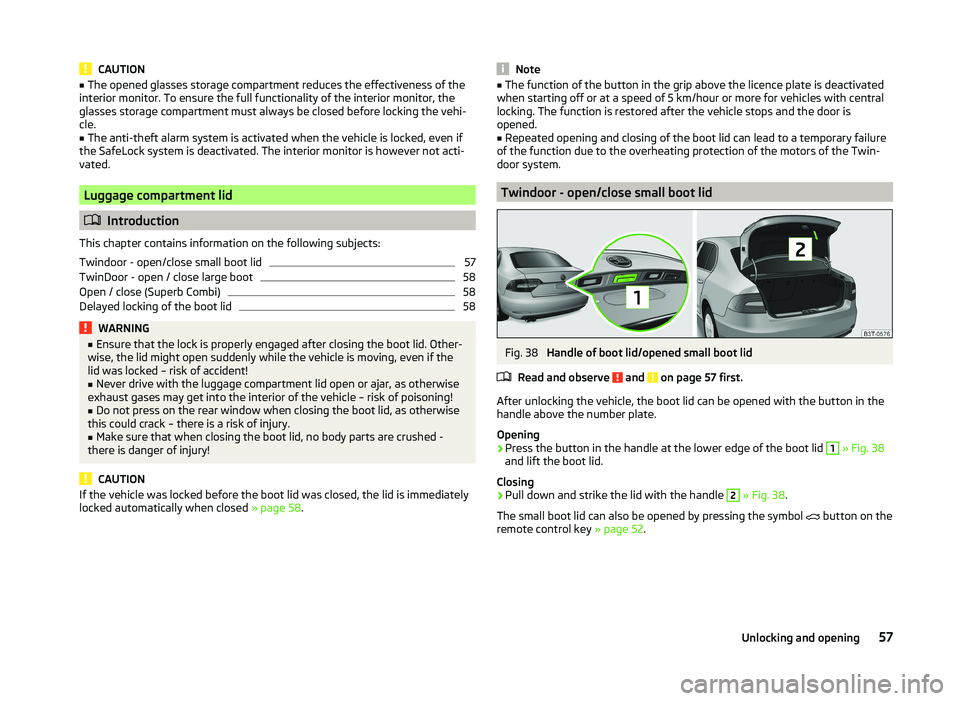
After unlocking the vehicle, the boot lid can be opened with the button in the
handle above the number plate.
Opening
›
Press the button in the handle at the lower edge of the boot lid
1
» Fig. 38
and lift the boot lid.
Closing
›
Pull down and strike the lid with the handle
2
» Fig. 38 .
The small boot lid can also be opened by pressing the symbol button on the
remote control key » page 52.
57Unlocking and opening
Page 61 of 252

TwinDoor - open / close large bootFig. 39
Handle of boot lid / opened large boot lid
Read and observe
and on page 57 first.
After unlocking the vehicle, the boot lid can be opened with the button in the
handle above the number plate.
Opening
›
Press the button in the handle at the lower edge of the boot lid
1
» Fig. 39 .
›
Wait until the brake light
2
in the rear window flashes twice and then lift
the lid.
Closing
›
Pull down and strike the lid with the handle
3
» Fig. 39 .
Open / close (Superb Combi)
Fig. 40
Boot lid handle/opening the boot lid
Fig. 41
Handle in the inner panelling of
the boot lid
Read and observe and on page 57 first.
After unlocking the vehicle, the boot lid can be opened with the button in the
handle above the number plate.
Opening
›
Press the handle
A
» Fig. 40 and raise the lid in the direction of the arrow
B
.
Closing
›
Pull the lid down with the handle
C
» Fig. 41 and close with a slight swing.
Delayed locking of the boot lid
Read and observe
and on page 57 first.
If the boot lid is unlocked with the symbol button on the remote control
key, then the door is automatically locked after closing.
The period after which the boot lid is locked automatically can be extended by a specialist garage.
After activation of delayed locking, the boot lid can be opened again after clos-
ing within a limited period.
Delayed locking can be deactivated by a specialist garage at any time.
CAUTION
There is a risk of unwanted entry into the vehicle before the boot lid is locked
automatically. We therefore recommend locking the vehicle with the symbol
button
on the remote control key.58Operation
Page 63 of 252
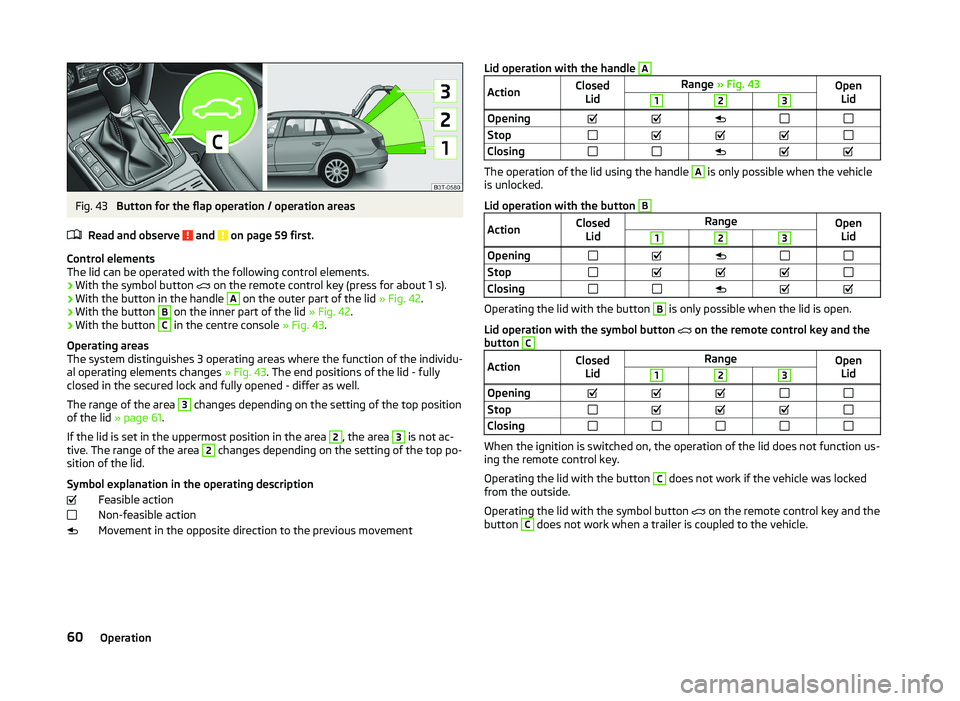
Fig. 43
Button for the flap operation / operation areas
Read and observe
and on page 59 first.
Control elements
The lid can be operated with the following control elements.
› With the symbol button
on the remote control key (press for about 1 s).
› With the button in the handle
A
on the outer part of the lid
» Fig. 42.
› With the button
B
on the inner part of the lid
» Fig. 42.
› With the button
C
in the centre console
» Fig. 43.
Operating areas
The system distinguishes 3 operating areas where the function of the individu-
al operating elements changes » Fig. 43. The end positions of the lid - fully
closed in the secured lock and fully opened - differ as well.
The range of the area
3
changes depending on the setting of the top position
of the lid » page 61 .
If the lid is set in the uppermost position in the area
2
, the area
3
is not ac-
tive. The range of the area
2
changes depending on the setting of the top po-
sition of the lid.
Symbol explanation in the operating description Feasible action
Non-feasible action
Movement in the opposite direction to the previous movement
Lid operation with the handle AActionClosed LidRange » Fig. 43Open
Lid123OpeningStopClosing
The operation of the lid using the handle
A
is only possible when the vehicle
is unlocked.
Lid operation with the button
BActionClosed LidRangeOpenLid123OpeningStopClosing
Operating the lid with the button
B
is only possible when the lid is open.
Lid operation with the symbol button on the remote control key and the
button
CActionClosed LidRangeOpenLid123OpeningStopClosing
When the ignition is switched on, the operation of the lid does not function us-
ing the remote control key.
Operating the lid with the button
C
does not work if the vehicle was locked
from the outside.
Operating the lid with the symbol button on the remote control key and the
button
C
does not work when a trailer is coupled to the vehicle.
60Operation