remote start SKODA SUPERB 2010 Owner´s Manual
[x] Cancel search | Manufacturer: SKODA, Model Year: 2010, Model line: SUPERB, Model: SKODA SUPERB 2010Pages: 252, PDF Size: 16.33 MB
Page 6 of 252
General Maintenance
Car care173
Services, modifications and technical
alterations
173
Washing vehicle
176
Taking care of your vehicle exterior
177
Taking care of the interior
181
Inspecting and replenishing
183
Fuel
183
Engine compartment
186
Engine oil
189
Coolant
191
Brake fluid
192
Vehicle battery
193
Wheels
197
Tyres and wheel rims
197
Manufacturer-approved tyre variants
201
Winter operation
203
Do-it-yourself
Emergency equipment and self-help
204
Emergency equipment
204
Changing a wheel
205
Puncture set
209
Jump-starting
211
Towing the vehicle
213
Radio remote control
215
Emergency unlocking/locking
216
Emergency operation of the sliding/tilting
roof
217
Replacing windscreen wiper blades
218
Fuses and light bulbs
220
Fuses
220
Replacing bulbs
223Technical data
Technical data228
Vehicle data
228
Index
3Table of Contents
Page 54 of 252
›The warning light in the driver door begins flashing.
› The anti-theft alarm system is activated.
Displaying an error If the warning icon in the driver's door initially flashes quickly for around 2 sec-
onds, and then illuminates for 30 seconds without interruption before flashing
again slowly, you will need to seek the assistance of a specialist garage.WARNING■ Never leave the key in the vehicle when you exit the vehicle. Unauthor-
ized persons, such as children, for example, could lock the car, turn on the
ignition or start the engine - there is a danger of injury and accidents!■
When leaving the vehicle, never leave people who are not completely in-
dependent, such as children, unattended in the vehicle. The children might,
for example, release the handbrake or take the vehicle out of gear. The ve-
hicle could then start to move – risk of injury and accidents! These individu-
als might also not be able to leave the vehicle on their own or to help
themselves. Can be fatal at very high or very low temperatures!
■
If the car is locked from the outside and the safe lock system is switched
on, no one must be in the car, as it is then not possible to open either a
door or a window from the inside. The locked doors make it more difficult
for rescuers to get into the vehicle in an emergency – risk to life.
Note
■ When leaving the vehicle, always check if it is locked.■In the event of an accident in which the airbags are deployed, the locked
doors are automatically unlocked in order to enable rescuers to gain access to
the vehicle.■
Upon failure of the central locking system the key can only be used to unlock
and lock the driver's door. The other doors and the boot lid can be emergency
opened or emergency released. ■ Emergency locking of the door » page 216.
■ Emergency unlocking of the boot lid » page 217.
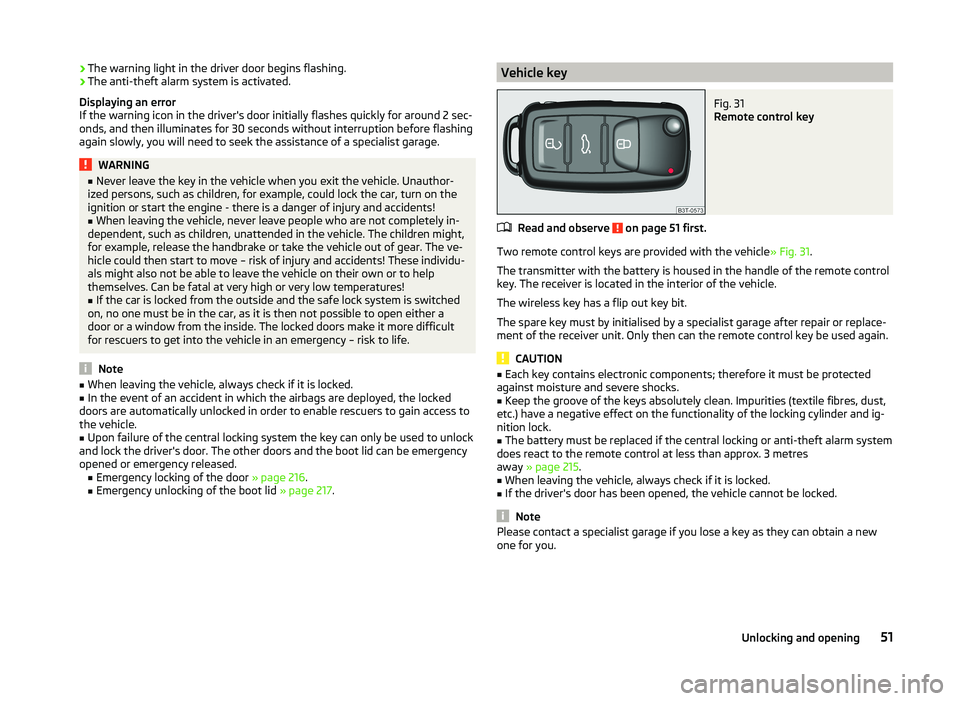
Vehicle keyFig. 31
Remote control key
Read and observe on page 51 first.
Two remote control keys are provided with the vehicle » Fig. 31.
The transmitter with the battery is housed in the handle of the remote control
key. The receiver is located in the interior of the vehicle.
The wireless key has a flip out key bit.
The spare key must by initialised by a specialist garage after repair or replace- ment of the receiver unit. Only then can the remote control key be used again.
CAUTION
■ Each key contains electronic components; therefore it must be protected
against moisture and severe shocks.■
Keep the groove of the keys absolutely clean. Impurities (textile fibres, dust,
etc.) have a negative effect on the functionality of the locking cylinder and ig-
nition lock.
■
The battery must be replaced if the central locking or anti-theft alarm system
does react to the remote control at less than approx. 3 metres
away » page 215 .
■
When leaving the vehicle, always check if it is locked.
■
If the driver's door has been opened, the vehicle cannot be locked.
Note
Please contact a specialist garage if you lose a key as they can obtain a new
one for you.51Unlocking and opening
Page 56 of 252
Closing from the inside›Grasp pull handle C and close the door.WARNING■Make sure that the door has closed correctly as it can open suddenly
while the vehicle is being driven – there is a risk of death.■
Only open and close the door when there is no one in the opening/closing
sweep – there is a risk of injury.
■
An opened door can close spontaneously if there is a strong wind or the
vehicle is on a slope – there is a risk of injury.
■
Never drive with the doors open - there is a risk of death!
Unlocking / locking - KESSY
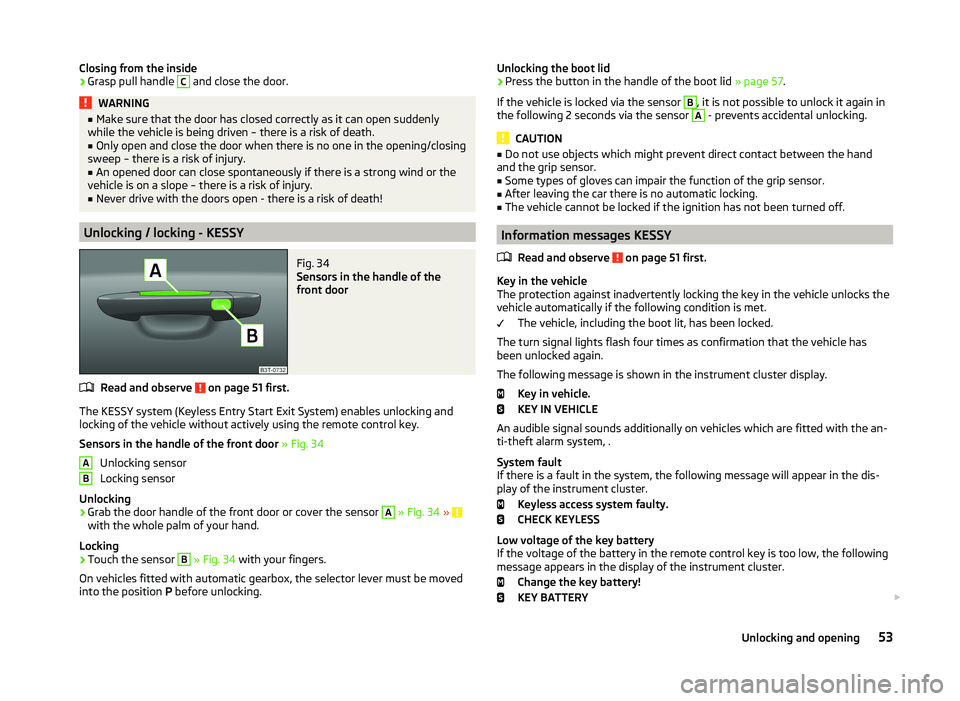
Fig. 34
Sensors in the handle of the
front door
Read and observe on page 51 first.
The KESSY system (Keyless Entry Start Exit System) enables unlocking and
locking of the vehicle without actively using the remote control key.
Sensors in the handle of the front door » Fig. 34
Unlocking sensor
Locking sensor
Unlocking
›
Grab the door handle of the front door or cover the sensor
A
» Fig. 34 » with the whole palm of your hand.
Locking
›
Touch the sensor
B
» Fig. 34 with your fingers.
On vehicles fitted with automatic gearbox, the selector lever must be moved
into the position P before unlocking.
ABUnlocking the boot lid›Press the button in the handle of the boot lid » page 57.
If the vehicle is locked via the sensor B
, it is not possible to unlock it again in
the following 2 seconds via the sensor
A
- prevents accidental unlocking.
CAUTION
■ Do not use objects which might prevent direct contact between the hand
and the grip sensor.■
Some types of gloves can impair the function of the grip sensor.
■
After leaving the car there is no automatic locking.
■
The vehicle cannot be locked if the ignition has not been turned off.
Information messages KESSY
Read and observe
on page 51 first.
Key in the vehicle
The protection against inadvertently locking the key in the vehicle unlocks the
vehicle automatically if the following condition is met.
The vehicle, including the boot lit, has been locked.
The turn signal lights flash four times as confirmation that the vehicle has
been unlocked again.
The following message is shown in the instrument cluster display. Key in vehicle.
KEY IN VEHICLE
An audible signal sounds additionally on vehicles which are fitted with the an-
ti-theft alarm system, .
System fault
If there is a fault in the system, the following message will appear in the dis-
play of the instrument cluster.
Keyless access system faulty.
CHECK KEYLESS
Low voltage of the key battery
If the voltage of the battery in the remote control key is too low, the following
message appears in the display of the instrument cluster.
Change the key battery!
KEY BATTERY
53Unlocking and opening
Page 60 of 252
CAUTION■The opened glasses storage compartment reduces the effectiveness of the
interior monitor. To ensure the full functionality of the interior monitor, the
glasses storage compartment must always be closed before locking the vehi-
cle.■
The anti-theft alarm system is activated when the vehicle is locked, even if
the SafeLock system is deactivated. The interior monitor is however not acti-
vated.
Luggage compartment lid
Introduction
This chapter contains information on the following subjects:
Twindoor - open/close small boot lid
57
TwinDoor - open / close large boot
58
Open / close (Superb Combi)
58
Delayed locking of the boot lid
58WARNING■ Ensure that the lock is properly engaged after closing the boot lid. Other-
wise, the lid might open suddenly while the vehicle is moving, even if the
lid was locked – risk of accident!■
Never drive with the luggage compartment lid open or ajar, as otherwise
exhaust gases may get into the interior of the vehicle – risk of poisoning!
■
Do not press on the rear window when closing the boot lid, as otherwise
this could crack – there is a risk of injury.
■
Make sure that when closing the boot lid, no body parts are crushed -
there is danger of injury!
CAUTION
If the vehicle was locked before the boot lid was closed, the lid is immediately
locked automatically when closed » page 58.Note■
The function of the button in the grip above the licence plate is deactivated
when starting off or at a speed of 5 km/hour or more for vehicles with central
locking. The function is restored after the vehicle stops and the door is
opened.■
Repeated opening and closing of the boot lid can lead to a temporary failure
of the function due to the overheating protection of the motors of the Twin-
door system.
Twindoor - open/close small boot lid
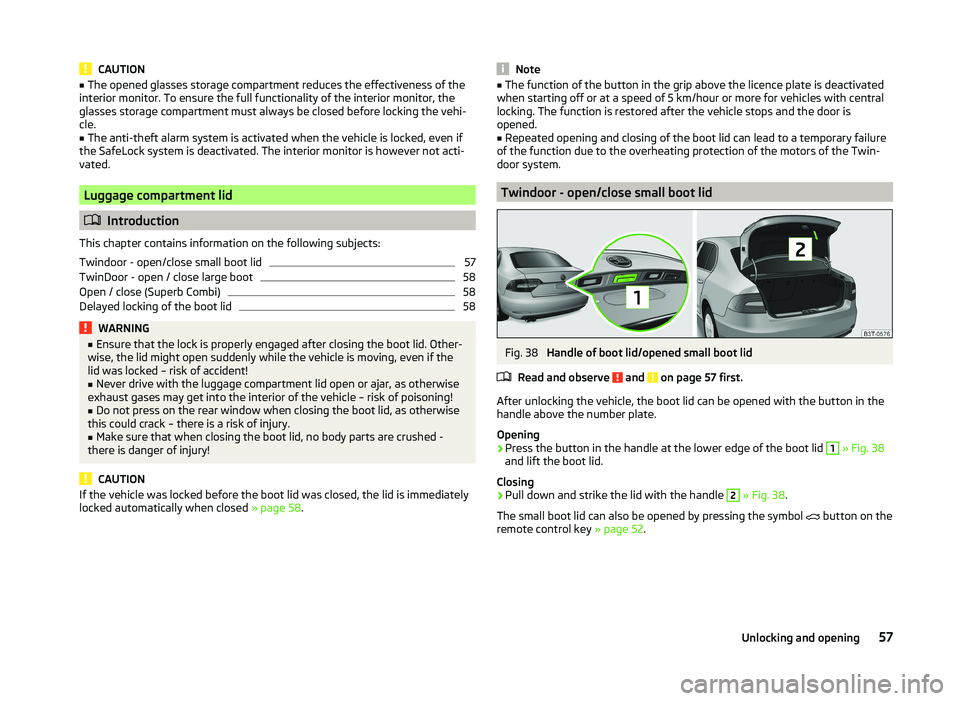
Fig. 38
Handle of boot lid/opened small boot lid
Read and observe
and on page 57 first.
After unlocking the vehicle, the boot lid can be opened with the button in the
handle above the number plate.
Opening
›
Press the button in the handle at the lower edge of the boot lid
1
» Fig. 38
and lift the boot lid.
Closing
›
Pull down and strike the lid with the handle
2
» Fig. 38 .
The small boot lid can also be opened by pressing the symbol button on the
remote control key » page 52.
57Unlocking and opening
Page 123 of 252
■Starting time 1 , Starting time 2 , Starting time 3 - for each pre-set time, the
day and the time (hour and minute) can be set for switching on the auxiliary
heating. An empty position can be found between Sunday and Monday when
selecting the day. If this empty position is selected, the activation is per-
formed without taking into account the day.
■ Activate - Activate pre-set mode;
■ Deactivate - Deactivate pre-set mode;
■ Factory settings - Restore factory settings
■ Back - Return to main menu
Only one programmed pre-set time can be active.
The last programmed pre-set time remains active.
After the auxiliary heating activates automatically at the set time, it is neces-
sary to pre-set a time again.
If the menu item Back is selected or no changes are made on the display for
longer than 10 seconds, the set values are stored, but the pre-set time is not
activated.
The system switches itself off at the end of the running time set under the
menu item Running time .
Note
A warning light on the button » Fig. 127 illuminates when the system is run-
ning.
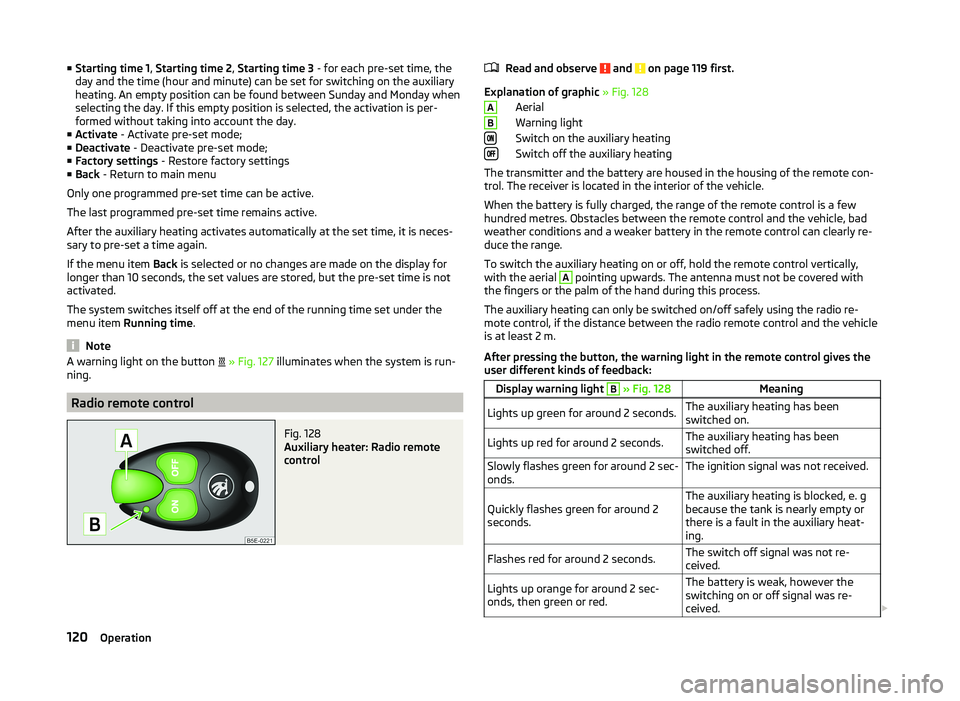
Radio remote control
Fig. 128
Auxiliary heater: Radio remote
control
Read and observe and on page 119 first.
Explanation of graphic » Fig. 128
Aerial
Warning light
Switch on the auxiliary heating
Switch off the auxiliary heating
The transmitter and the battery are housed in the housing of the remote con- trol. The receiver is located in the interior of the vehicle.
When the battery is fully charged, the range of the remote control is a few
hundred metres. Obstacles between the remote control and the vehicle, bad
weather conditions and a weaker battery in the remote control can clearly re-
duce the range.
To switch the auxiliary heating on or off, hold the remote control vertically,
with the aerial
A
pointing upwards. The antenna must not be covered with
the fingers or the palm of the hand during this process.
The auxiliary heating can only be switched on/off safely using the radio re-
mote control, if the distance between the radio remote control and the vehicle
is at least 2 m.
After pressing the button, the warning light in the remote control gives the
user different kinds of feedback:
Display warning light B » Fig. 128MeaningLights up green for around 2 seconds.The auxiliary heating has been
switched on.Lights up red for around 2 seconds.The auxiliary heating has been
switched off.Slowly flashes green for around 2 sec-
onds.The ignition signal was not received.Quickly flashes green for around 2
seconds.The auxiliary heating is blocked, e. g
because the tank is nearly empty or
there is a fault in the auxiliary heat-
ing.Flashes red for around 2 seconds.The switch off signal was not re-
ceived.Lights up orange for around 2 sec-
onds, then green or red.The battery is weak, however the
switching on or off signal was re-
ceived. AB120Operation
Page 239 of 252
Index
A
Abroad Driving abroad
153
Unleaded petrol153
ABS Operation
155
Warning light38
Accessories173
Adaptive headlights (AHL)70
Adjust Auxiliary heating (auxiliary heating and ventila- tion)
119
Head restraints83
Adjusting Belt height
15
Exterior mirrors80
Interior mirror79
Manual air conditioning114
Seats81, 82
Steering wheel10
Adjusting the seats9, 81
Adjustment Range of light
68
Aerial177
See windows179
AHL70
Warning light38
Airbag16
Deactivating21
Deactivating the front passenger airbag21
Deployment16
Front airbag17
Head airbag20
Indicator light40
Knee airbag18
Modifications and damage to the airbag system 175
Side airbag
19
Airbag system16
Air conditioning system110
Air outlets110
Climatronic115
Manual air conditioning system112
Air outlets110
Air recirculation Climatronic
117
Alarm Switching off
55
Triggering55
Anti-theft alarm system Activating/deactivating
56
Trailer172
Anti-theft wheel bolts208
Antilock brake system (ABS)155
Armrest Front
87
rear96
Rear87
Ashtray91
ASR Operation
155
warning light37
Assist systems154
ABS38, 155
ASR37, 155
Cruise Control System161
DSR155
EDL155
ESC37, 154
HBA155
HHC156
Park assist157
Parking aid156
START STOP162
Audio see radio / navigation system
4
Auto Check Control33
Automatic driving lamp control70
Automatic gearbox Selector lever-emergency unlocking217
Starting off and driving147
Tiptronic146
Using the selector lever145
Automatic gearbox modes145
Automatic load deactivation197
Automatic retractable cargo cover (Superb Combi))
101
Automatic transmission145
Kickdown147
Malfunction148
Selector lever lock146
AUX Installation in the storage compartment
92
Auxiliary heating (auxiliary heating and ventila- tion)
118
Adjust119
Radio remote control120
Switching on/off119
Avoiding damage to the vehicle Driving through water
152
Avoiding damage to your vehicle152
B
Ball head Check fitting
168
Fitting168
Ready position167
Removing169
Battery In the remote control key
215
Replace the remote control of the auxiliary heater (parking heater)
216
Belts12
Belt tensioners15
Bonnet Closing
187
Opening187
Warning light36
236Index
Page 246 of 252
S
SAFE see Safe securing
54
SAFELOCK see Safe securing
54
Safe securing54
Safety8
Child safety22
Child safety seats22
Correct seated position9
Head restraints83
ISOFIX25
TOP TETHER27
Saving electrical energy149
Screens see Sun screen in the rear doors
76
Seals Taking care of your vehicle
178
Seat belt warning light
35
Seat belts12
Belt tensioners15
Cleaning183
fastening and unfastening14
Height adjustment15
Inertia reels15
The physical principle of a frontal collision13
Seat features85
Seats Convenience features of passenger seat
87
Electric adjustment82
Front armrest87
Head restraints83
Heating85
Manually adjusting82
Rear armrest87
save84
Seat backrests87
Storing in memory of remote control key84
Ventilated front seats86
Seats and practical features81
Adjusting the seats81
see Automatic gearbox Manual gear shifting on the multifunction steering wheel
146
Selector lever Refer to Selector lever
145
Selector lever lock / starter (system KESSY) Warning light
41
Service174
Service interval display48
Setting32
Setting the32
Shelves88
Shifting gears Driving and saving energy
149
Side airbag19
Side compartment in boot with battery102
Side compartments in the luggage compart- ment
101
ski bag97
Sliding/tilting roof Close (Superb Combi)
66
Closing64
Closing the sun screen (Superb Combi)66
Electric sliding/tilting roof64
Emergency operation218
Opening/closing the sun screen (Superb Combi) 66
Opening and tilting
64
Opening and tilting (Superb Combi)66
Operation64
Operation (Superb Combi)66
Snow chains203
Spare wheel200
Speedometer31
See speedometer31
Speed symbol Refer to Wheels202
Spoiler175
Starting and stopping the engine - KESSY140
Starting and stopping the engine using the key 138
Starting engine Jump-starting
211
Starting the engine Jump-starting
211
Key139
see KESSY142
START STOP162
Information messages164
Jump-starting212
Manually deactivating/activating the system164
Operating conditions for the system163
operation in vehicles with automatic gearbox163
operation in vehicles with manual gearbox163
system related automatic start-up164
Steering lock / unlock see KESSY
141
Steering wheel10
Stopping the engine Key
140
Storage compartment in rear centre console95
Storage compartment on passenger side94
Storage compartments88
Storage compartment under passenger seat94
Storage pockets on the front seats95
Storing skis96
Sun screen76
Sun screen in the rear doors76
Sun visors76
Switch see Ignition
139
Switching off the engine see KESSY
142
Switch light on and off68
243Index