stop start SKODA SUPERB 2012 2.G / (B6/3T) Columbus Navigation System Manual
[x] Cancel search | Manufacturer: SKODA, Model Year: 2012, Model line: SUPERB, Model: SKODA SUPERB 2012 2.G / (B6/3T)Pages: 44, PDF Size: 1.42 MB
Page 6 of 44
After a four-digit order has been entered, the group of digits will turn grey (inac-
tive) and no further digits can be accepted in the entry line.
› To delete the digits in the entry line from right to left, press the function key
on the screen.
› When the correct code is displayed in the entry line, press the function key
OK .
Incorrect code number
If an incorrect code is confirmed after entry of the code, the procedure can be re-
peated once again . The number of attempts is shown in the bottom screen line.
If the code is entered incorrectly a second time, the unit will be blocked for ap-
prox. one hour. It is possible to enter again the safety code after one hour has ex-
pired, when the unit and the ignition have been switched on.
If two invalid attempts are then made again, the radio navigation system will be
blocked again for one hour. Note
The code is normally saved in the instrument cluster memory. This ensures that it
is automatically decoded (convenience coding). Manual input of the code is nor-
mally not necessary. ÐScreen display
The screen of the unit displays information such as from the Climatronic, the vehi-
cle distance to an obstacle if the
“parking aid” has been activated, etc. ÐProduct Overview
-
Setting up button
› for switching the equipment on and off (press)
› for volume adjustment of audio source currently being played /
voice control (turn) 5
RADIO - Radio operation 13
MEDIA - MEDIA operation 14
PHONE - Phone mode 22
TONE - tone and volume settings 25
MAP - Map display 26
NAV - Navigation operation 291
2
3
4
5
6
7 TMC
- Displaying TMC traffic alerts 37
SETUP - Settings in the individual operating modes 9
and
- buttons for moving forwards/backwards
› RADIO-Mode
- for the selection of the stations from the preset
list.
› MEDIA-Mode - for the selection of the previous or following
track.
› TV-Mode
- for the selection of the TV stations.
CD/DVD case 14
Display 5
- Eject CD/DVD 15
- Switch on voice control 7
Menu button
› RADIO mode
- turn for manual station adjustment; press briefly
to start/stop the automatic play (Scan).
› MEDIA-Mode - turn to change track; press briefly to start/stop
the automatic play (Scan) when in audio mode.
› Turn map display (MAP)
- in order to change the map scale;
press briefly for repeating a navigation announcement during
active route guidance.
› Navigation (NAV) - press briefly to repeat a navigation an-
nouncement during active route guidance.
Memory card case 16
Ð Switching the unit on and off
› To switch the unit on/off, press button 1
.
After switching on the unit, the last audio source that was active before switch-
ing off will be played.
If the key is pulled out of the ignition lock while the unit is switched on, the unit
will switch off automatically.
If your vehicle is fitted with the KESSY system, the unit will switch off automati-
cally after the engine is turned off and the door opened. If you open the door be-
fore turning off the engine, the unit will not switch off until the vehicle is locked.
When the ignition is switched off, the system switches off automatically after ap-
prox. half an hour (discharge protection of the vehicle battery). Ð 8
9
10
11
12
13
14
15
16
4
General information
Page 16 of 44
MEDIA mode
Main menu MEDIA
Fig. 5
Main menu MEDIA
Depending on the selected media source, the main menu MEDIA is shown as Au-
dio or Video .
Calling up the main menu MEDIA and changing the media source
› Press the key
MEDIA to open the main menu
MEDIA. The last used media
source will continue to play.
› If video and audio and video sources are selectable at the unit, use the
MEDIArange selector key to change between the last audio and the last video source.
■ Call up the MEDIA - main menu MEDIA and change the media source.
■ CD - changes over to an inserted CD/DVD.
■ CD int. - CD in the unit's internal drive
■ CD ext. - CD in the external CD changer
■ SD card - changes over to an inserted memory card
» page 16, Memory card
■ HDD - changes to the audio data stored on the internal hard disk
» page 18,
Hard drive (HDD)
■ AUX - changes over to an external audio source connected to the AUX multi-
media port » page 17 , AUX input
■ AUX - changes over to an external audio source connected to the AUX multi-
media port » page 17 , MDI input- multimedia socket
■ - changes over to a connected
®
external audio source.
■ Video - Video sources - Menu
Video » page 18, Video mode , » page 20, TV
mode . ■
Repeat - displays repeat options
■ Titel - repeats current title
■ CD - repeats all titles on the current CD
■ Folder - repeats all titles in the current folder (MP3 mode)
■ Extras - displays playback options
■ Mix - plays all tracks in the current audio source in random order
■ Mix - returns to normal playback
■ Scan - plays all the titles of the current media source for approximately 10
seconds The auto-play feature can also be started or stopped by briefly
pressing the menu button 15
.
■ Scan - returns to normal playback
■ HDD capacity - Information on the filled/empty space on the free memory card
on the disk drive (HDD).
■ Switch off display - it is possible to switch the display to energy saving mode –
the display goes black and the current information about the audio source is
shown in the bottom row. The display can be switched on again by touching
the screen or any key other than the operating knob.
■ Select. - opens the title list of the current audio source in order to select an-
other title or audio source.
■ - displays higher-level folder, changes over to the main menu of the au-
dio sources
■ Title - starts the playback function of the selected title.
■ - saves folder, playlist and data medium to the HDD
» page 18, Hard
drive (HDD) .
Unit buttons for controlling the current audio or video source
The arrow buttons or
on the unit will always affect the audio source you are
currently listening to, irrespective of the current menu used.
- pressing this briefly changes over to the beginning of the current title or
chapter, repeated pressing changes over to the beginning of the previous title or
chapter.
- pressing this briefly changes over to the beginning of the next title or chap-
ter, repeated pressing changes over to the beginning of the next title or chapter.
It is also possible to change tracks in the menu of the currently played audio
source using the menu button 15
.
Unit buttons for controlling the current audio and video source - pressing this briefly changes over to the beginning of the current title or
chapter, repeated pressing changes over to the beginning of the previous title or
chapter.
- pressing this briefly changes over to the next title or chapter.
14 MEDIA mode
Page 17 of 44
- Pause: the play function is stopped in the current position and the symbol
changes to - after pressing, the play function will continue in this position.
Note
If the volume is reduced to 0 during playback from a CD, the hard drive or another
audio source, the symbol changes to
and playback is interrupted.
ÐIntroductory information about CD/DVD mode
Insert CD/DVD
› Insert a CD/DVD, with the labelled side facing up, into the CD/DVD slot 11
until
it is automatically drawn in. The play function will start automatically.
Remove CD/DVD
› Press the button
– die CD/DVD is ejected.
If the ejected CD /DVD is not taken out within 10 seconds, it will be retracted
again for safety reasons.
CD not legible
If you insert a CD/DVD which cannot be read by the unit, a pop-up window is dis-
played with a note. The CD/DVD is moved to the eject position again after a few
seconds.
If the CD/DVD is not taken out within 10 seconds, it is drawn in again for safety
reasons.
CD to jump
Uneven road surfaces and strong vibrations may cause the CD to jump.
Formation of condensation
When it is cold and after rain showers, moisture can deposit in the CD/DVD drive
(condensation). This can effect the CD jump or impair the play function. In such
cases, wait until the moisture has dissipated.
Notes for the care of the CD/DVDs
If a CD/DVD is soiled, never clean it in a circular motion but rather from inside to
outside with a soft lint-free cloth. In case of severe layers of dirt we recommend
to clean the CD/DVD with a commercially available CD/DVD cleaner. Also in this
case, do not clean the CD/DVD in a circular motion but rather from inside to out-
side, and then let it dry. MP3 and WMA Data (Windows Media Audio)
Playable MP3 and WMA data can also be stored on the hard disk of the
unit
» page 18, Hard drive (HDD) .
The copyright of audio data compressed by Windows Media Audio, can also be
protected by the DRM procedure ( Digital Rights Management). Such WMA data is
not supported by the unit. WARNING
The CD/DVD player is a 1st class laser product. There is a risk of injury from in-
visible laser beams if you open the CD/DVD player. CAUTION
■ Audio-CDs (CD-A) and Audio-DVDs, MP3-CDs and MP3-DVDs as well as Video-
DVDs can be played in the internal CD/DVD drive.
■ Never insert CDs with the designation “Do not insert in drives without a drawer”
or Eco Disc into the internal drive.
■ Inserting a second CD/DVD while a CD/DVD is being ejected can damage the
CD/DVD drive in the unit. After pressing the Eject button , there is a delay of a
few seconds before the CD is ejected. During this time the lock in front of the CD/
DVD case is open. It is essential that you wait until the CD/DVD has been fully
ejected before you try to insert a new CD/DVD. ■ If the CD/DVD drive becomes mechanically defective or a CD/DVD has been in-
serted incorrectly or not fully, “CD fault will be displayed. Please check CD. ” and
then the “DVD drive fault ” indicated on the touch-screen. Check the CD/DVD
check and insert it again correctly and completely into the drive. If a “CD/DVD
drive fault ” is indicated again, please contact your ŠKODA Service Partner.
■ If the inside temperature of the unit is too high, no CDs/DVDs will be accepted.
The unit switches into the last active operating mode.
■ Never use liquids such as benzine, paint thinner or record cleaner, otherwise
the surface of the CD/DVD may be damaged!
■ Never expose the CD/DVD to direct sun light!
■ Only write on the CD/DVD with appropriate writing tools.
■ Do not affix anything to the CD/DVD! Note
■ If the function key CD is inactive, no new Audio CD/DVD has been inserted or an
inserted Audio CD/DVD is not readable. ■ It is possible that CDs/DVDs protected by copyright and non-original CD-R, CD-
RW and DVD-RWs are not returned at all or only in certain circumstances.
15
MEDIA mode
Page 28 of 44
MAP mode
Map display
Fig. 10
Maps display with split-screen
for compass display
Press the button MAP .
■ - maps goes to full-screen display
■ Change the display type
■ -2D - 2D display
■ -3D - 3D display
■ -Topograph. - Plan view of 2D map display with coloured display of various
terrains (Mountains, Valleys etc.)
■ Function key
“Navigation” - the menu is dependent on the operating type of the
route guidance » page 27, Function key “Navigation”
■ A - indicates which source medium is currently active
■ choose another radio station from the memory
■ - pressing briefly changes to the beginning of the current title, repeated
pressing changes to the beginning of the previous title.
■ - brief pressing changes over to the beginning of the next title.
■ - the play function is stopped in the current position and the symbol
changes to - after pressing
the play function continues in this position.
■ In the menu Systems Setup if the time display is activated » page 10, Setup Sys-
tem , at position A
the current time is displayed.
■ Extras ■
Destination view - shows the currently selected travel destination in the map
display in the main menu Navigation. Use the function key on the right under
the compass display to center the map again on the vehicle position.
■ Split-screen - the menu is dependent on the operating type of the route guid-
ance » page 28, Function key “
Split-screen”
■ Day/night - changes between day and night design. ■
POI selection - selects points of interest category, which is displayed on the
map using symbols » page 10, Setup Map
■ Lane guidance - during route guidance, when driving and turning on roads
with more than one lane, a small split-screen with lane guidance will be inser-
ted in the map display.
■ Switch off display - it is possible to switch the display to energy saving mode –
the display goes black and the current information about the audio source is
shown in the bottom row. The display can be switched on again by touching
the screen or any key other than the operating knob 1
.
Change the map scale and display
Pressing the function key with the display of the currently selected map scale at
the bottom right will show further function keys for changing the map detail and
the map scale. If not used, these function keys fade out again after a few sec-
onds.
- briefly switches the map display to the overview display (small scale). It re-
turns again to the last display (large scale) after a few seconds.
+ or
- - to zoom in or out of the map, i.e.changing the map scale. The map scale
can also be changed by moving the slider along the scale.
- changes to the overview map with start and finish point during route guid-
ance.
- automatic zoom during route guidance. If Autozoom is active, the map scale
will change automatically depending on the driven route (Motorway trip: large
map scale - city: small map scale). The switched-on Autozoom is displayed in the
scale display by . The Autozoom is turned off by pressing the scale again or
manually with the menu button 15
.
Moving the map section using the vehicle position or destination
Move displayed map section by pressing and holding a finger on the screen and
dragging it across the screen without lifting the finger.
Function keys and symbols during route guidance - current vehicle position
- centres the map section using the vehicle position
- centres the map section using the destination
Ð
26 MAP mode
Page 29 of 44
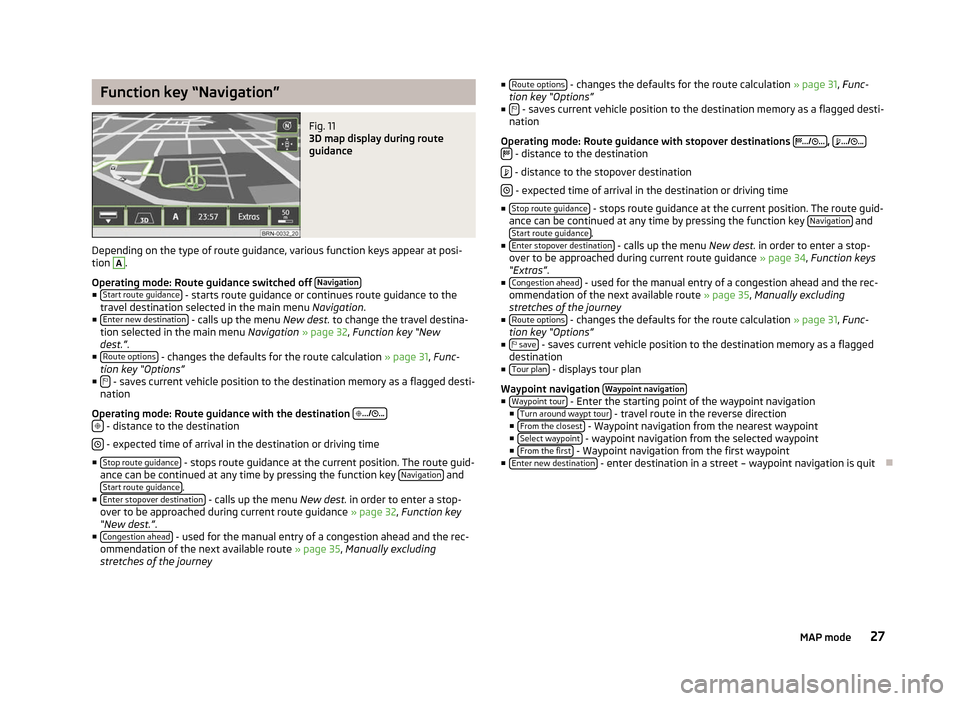
Function key “Navigation”
Fig. 11
3D map display during route
guidance
Depending on the type of route guidance, various function keys appear at posi-
tion A
.
Operating mode: Route guidance switched off Navigation■
Start route guidance - starts route guidance or continues route guidance to the
travel destination selected in the main menu Navigation.
■ Enter new destination - calls up the menu
New dest. to change the travel destina-
tion selected in the main menu Navigation » page 32, Function key
“New
dest.”.
■ Route options - changes the defaults for the route calculation
»
page 31, Func-
tion key “Options”
■ - saves current vehicle position to the destination memory as a flagged desti-
nation
Operating mode: Route guidance with the destination
.../ ...
- distance to the destination
- expected time of arrival in the destination or driving time
■ Stop route guidance - stops route guidance at the current position. The route guid-
ance can be continued at any time by pressing the function key Navigation and
Start route guidance .
■ Enter stopover destination - calls up the menu
New dest. in order to enter a stop-
over to be approached during current route guidance » page 32, Function key
“New dest.”.
■ Congestion ahead - used for the manual entry of a congestion ahead and the rec-
ommendation of the next available route » page 35, Manually excluding
stretches of the journey ■
Route options - changes the defaults for the route calculation
» page 31, Func-
tion key
“Options”
■ - saves current vehicle position to the destination memory as a flagged desti-
nation
Operating mode: Route guidance with stopover destinations
.../ ... ,
.../ ...
- distance to the destination
- distance to the stopover destination
- expected time of arrival in the destination or driving time
■ Stop route guidance - stops route guidance at the current position. The route guid-
ance can be continued at any time by pressing the function key Navigation and
Start route guidance .
■ Enter stopover destination - calls up the menu
New dest. in order to enter a stop-
over to be approached during current route guidance » page 34, Function keys
“Extras”.
■ Congestion ahead - used for the manual entry of a congestion ahead and the rec-
ommendation of the next available route » page 35, Manually excluding
stretches of the journey
■ Route options - changes the defaults for the route calculation
» page 31, Func-
tion key
“Options”
■ save - saves current vehicle position to the destination memory as a flagged
destination
■ Tour plan - displays tour plan
Waypoint navigation Waypoint navigation ■
Waypoint tour - Enter the starting point of the waypoint navigation
■ Turn around waypt tour - travel route in the reverse direction
■ From the closest - Waypoint navigation from the nearest waypoint
■ Select waypoint - waypoint navigation from the selected waypoint
■ From the first - Waypoint navigation from the first waypoint
■ Enter new destination - enter destination in a street – waypoint navigation is quit
Ð
27
MAP mode
Page 31 of 44
NAV mode (Navigation)
Introductory information
The route is recalculated each time if you ignore driving recommendations or
change the route. This process takes only a few seconds. Driving recommenda-
tions can only then be re-transmitted.
In regions that are not or only partially digitalised and stored on the navigation
DVD, the radio navigation system will continue to try to provide guidance to the
destination. Please note that under these circumstances the guidance to the des-
tination may not be completely correct if, for example, one-way streets and road
categories (motorway, country road, etc.) are not or only partially included in the
navigation data used.
When entering an address (city, street), only those letters or symbols which make
up a logical entry will be presented. A list of possible names will be shown. Do not
forget to enter the blank space in names made up of more than one word, such
as High Wycombe.
The last voice output can be repeated by pressing the button or the menu button 15
. The volume of a navigation recommendation can be changed whilst it is being
made.
The GPS satellites will not be able to reach the aerial once you are in a tunnel or
underground garage. In these cases, the unit uses only the vehicle's sensors and
an internal gyroscope for navigation. WARNING
■ Please concentrate fully at all times on your driving! Driver inattention can
lead to accidents and injuries. As the driver you are fully responsible for road
safety. Only use the functions of the radio navigation system in such a way
that you are always in full control of your vehicle in all traffic situations!
■ The following must always have priority over the driving recommendations:
■ the road traffic legislation, even if the driving recommendations contradict
the StVO,
■ the actual acknowledgement of traffic signs, light signals or signs placed
by the police at the relevant location,
■ the facts and circumstances prevailing at the relevant location. WARNING (Continued)
■ Please observe the respective traffic regulations when driving.
■ Traffic signs and traffic regulations always have priority over the driving rec-
ommendations provided by the navigation system.
■ Route guidance is subject to constant changes, particularly to information
relating to one-way streets, pedestrian zones etc. stored in the navigation da-
ta. Information on traffic lights, stop and right of way signs, parking and stop-
ping restrictions as well as lane constrictions and speed restrictions is not in-
cluded in the radio navigation system. ■ Adjust your speed to suit weather, road and traffic conditions. Do not allow,
for example, the radio navigation system to make you drive faster in fog - risk
of accident!
■ Only if the traffic situation allows it should you operate the radio navigation
system with its wide range of possibilities.
■ The driving recommendations provided may vary from current situations,
e.g. due to road works or out of date navigation data. In such a case, always
observe the traffic regulations and ignore the driving recommendations. ■ Adjust the volume to ensure that acoustic signals from outside, e.g. sirens
from vehicles which have the right of way, such as police, ambulance and fire
brigade vehicles, can be heard at all time. Note
■ It is not necessary to enter the destinations (country, city, road, point of interest
names) including all country-specific (or language-specific for points of interest)
special characters. ■ Depending on the country, some functions of the radio navigation system can
no longer be selected on the screen at certain speeds. This is not a malfunction,
but corresponds to the legal requirements of the particular country. Ð Navigation data and the navigation DVD
The navigation data are already available after the memory of the radio naviga-
tion system is switched on first and can be used directly for route guidance.
Storing the updated navigation data can take up to one hour. Route guidance will
start via the navigation DVD while the navigation data is being stored. Please
note that route guidance will be interrupted if the navigation DVD is removed.
Route guidance must then be restarted with details supplied from the navigation
system memory of the unit.
29
NAV mode (Navigation)
Page 33 of 44
■
Options - opens the menu for defining the route options
» page 31, Function
key “Options ”
■ Curr. pos. - split-screen with the coordinates of the position where you are cur-
rently located
■ - stores the current position as “Flagdest.” in the destination memory.
■ New dest. - used for the entry of a new destination.
■
Address - enter an address in the input screen to specify the destination ad-
dress » page 32 , Function key
“ Address”
■ POI - open the search screen for searching for a point of interest from a
specific category or by entering a name or a telephone number
» page 32,
Function key “ POI”
■ Map/GPS - Specify a point on the map as a destination » page 32,
Function
key “ Map/GPS”
■ Home - Start route guidance from the address saved as the “Home ad-
dress
” » page 32, Function key “ Home address”
■ Last destinations - open the list of the last automatically saved destinations,
start route guidance by pressing one of the displayed destina-
tions
» page 32, Function key “ Last destinations”
■ Fav. destinations - open the list of favourite destinations, start route guidance
by pressing one of the displayed destinations
» page 33, Function key “
Favourites”
■ Fav. destinations - open the list of favourite destinations, start route guidance
by pressing one of the displayed destinations
■ SD destinations - view destinations that are stored on the SD card as visiting
cards or pictures, including GPS coordinates » page 33, Function key “ SD
destinations
”
■ Presets - open menu for saving the current position as a destination, for saving
and displaying saved destinations and for waypoint navigation » page 34,
Function key
“Memory”, » page 35, Select and edit the saved waypoint tour
■ Route - open information and congestion menu for the route during route guid-
ance » page 35, Permanent block
■ Extras - open menu for entering a stopover and create a new route in tour
mode » page 34, Function keys “Extras”
■ Start /
Stop - starts/stops route guidance
Special destinations
The navigation data in your system or on your DVD contain a database of special
destinations (points of interest) that can be used to find a destination more easi-
ly »
page 32, Function key “ POI”. SD destinations
By using a web application that can be found on
ŠKODA's web site, it is possible
to create destinations as visiting cards or pictures. These destinations can then
easily be imported via the SD card into the radio navigation system » page 33,
Save destination in the destination memory .Ð Selecting the route guidance mode
Press the button NAV →
Extras .
■ Tour mode - mode with stopovers
» page 34, Tour mode
■ Waypoint navigation - waypoint navigation
» page 35, Waypoint mode Ð Function key “Options”
Press the button NAV →
Options .
■ Route - Route
■ Fast - calculates the fastest route to the destination, even if a detour is nec-
essary - appears in orange
■ Shortest - shortest route to the destination even if a longer driving time is
required - appears in red
■ Most economical - calculates the quickest route possible over the shortest
route – displayed in blue
■ Dynamic route - dynamic route
» page 36, Dynamic route guidance with TMC
use
■ Off - switches off
■ Manual - manual
■ Automatic - automatic
■ Motorways - this type of road is “excluded” from the route calculation
■ Toll roads - this type of road is “excluded” from the route calculation
■ Excluded rds. - manually blocked sections of road are included in the route cal-
culation » page 35, Manually excluding stretches of the journey
■ Ferries - this type of transportation is “excluded” from the route calculation
■
Tunnels - Tunnels are “blocked” in the route calculation
Ð
31
NAV mode (Navigation)
Page 36 of 44
■
Edit memory - display saved destinations
■ Destination memory entries - entries in the destination memory
■ Sort - sort destinations
■ By names - sort alphabetically
■ By distance - sort by distance
■ By date - sort by date
■ - Options for editing the entry
■ Last destinations - last destinations
■ Sort - sort destinations
■ By names - sort alphabetically
■ By date - sort by date
■ - Options for editing the entry
■ Delete destination memory - delete destination memory
■ Delete - delete destination memory
■ Cancel - Cancel
■ Delete all last destinations - delete all last destinations
■ Delete - delete all destinations
■ Cancel - Cancel
Options for editing the destination ■
Show details - display details for the destination
■ Show on map - show destination on map
■ Delete - delete destination
■ Edit - edit destination
■ Load - start route guidance for the selected destination
ÐTour mode
Function key “Memory”
Save tour
Press the button NAV →
Memory .
■ Save tour - save displayed tour in the destination memory, a
maximum of
10 tours can be saved. First enter the tour name.
Options for saved tours
Press the button NAV →
Memory . ■
Load tour - load saved tour; when you directly press the name of the tour, the
tour appears in the main menu of the main menu Navigation
■ - call up details for the tour
■ Selection - display tour in the main menu of the
Navigation
■ Edit tour memory - edit tour memory
■ Delete/rename tours - delete individual tours, rename tours
■ Delete all tours - delete all tours
Ð Function keys “Extras”
Enter a stopover
After you have selected the tour » page 34, Options for saved tours, press the
function key Extras :
■ Enter stopover destination - enter the stopover to be driven to during the route
guidance ■ Exactly - the tour is routed via the stopover destination
■ Close to - the tour is routed in the proximity of the stopover destination.
Enter tour
Press the button NAV →
Extras .
■ New tour - create a new tour in tour mode
■ - Options for editing the entry
■ Destination entry - enter home address
■ Exactly - exact destination entry
■ Close to - destination entry in the proximity of the stopover
Edit saved tour
Press the button NAV →
Extras .
■ Edit tour - edit saved tour
■ - Options for editing the entry
■ Details - display tour details
■ Show on map - show destination on map
■ - change back to the tour details
■ Change type - changes a precise “Stopover” in “Close to” and vice versa.
■ Start – renewed pressing on
Start will only start the route guidance to this
tour destination, possible stopover destinations will be ignored. Press Back to change back to the display of the tour plan without starting the route
guidance.
■ Delete - deletes after further confirming the displayed tour destination.
34 NAV mode (Navigation)
Page 42 of 44
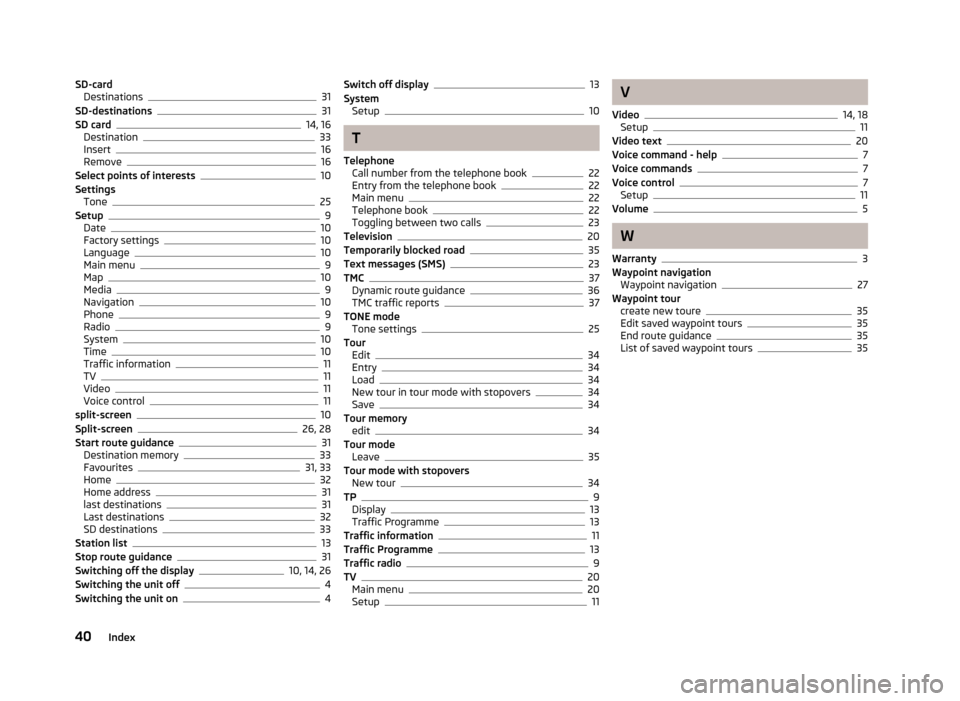
SD-card
Destinations 31
SD-destinations 31
SD card 14, 16
Destination 33
Insert 16
Remove 16
Select points of interests 10
Settings Tone 25
Setup 9
Date 10
Factory settings 10
Language 10
Main menu 9
Map 10
Media 9
Navigation 10
Phone 9
Radio 9
System 10
Time 10
Traffic information 11
TV 11
Video 11
Voice control 11
split-screen 10
Split-screen 26, 28
Start route guidance 31
Destination memory 33
Favourites 31, 33
Home 32
Home address 31
last destinations 31
Last destinations 32
SD destinations 33
Station list 13
Stop route guidance 31
Switching off the display 10, 14, 26
Switching the unit off 4
Switching the unit on 4Switch off display 13
System Setup 10
T
Telephone Call number from the telephone book 22
Entry from the telephone book 22
Main menu 22
Telephone book 22
Toggling between two calls 23
Television 20
Temporarily blocked road 35
Text messages (SMS) 23
TMC 37
Dynamic route guidance 36
TMC traffic reports 37
TONE mode Tone settings 25
Tour Edit 34
Entry 34
Load 34
New tour in tour mode with stopovers 34
Save 34
Tour memory edit 34
Tour mode Leave 35
Tour mode with stopovers New tour 34
TP 9
Display 13
Traffic Programme 13
Traffic information 11
Traffic Programme 13
Traffic radio 9
TV 20
Main menu 20
Setup 11 V
Video 14, 18
Setup 11
Video text 20
Voice command - help 7
Voice commands 7
Voice control 7
Setup 11
Volume 5
W
Warranty 3
Waypoint navigation Waypoint navigation 27
Waypoint tour create new toure 35
Edit saved waypoint tours 35
End route guidance 35
List of saved waypoint tours 35
40 Index