bulb SKODA SUPERB 2012 2.G / (B6/3T) Owner's Manual
[x] Cancel search | Manufacturer: SKODA, Model Year: 2012, Model line: SUPERB, Model: SKODA SUPERB 2012 2.G / (B6/3T)Pages: 235, PDF Size: 5.86 MB
Page 6 of 235
Driving Tips
Driving and the Environment 158
The first 1 500 km 158
Catalytic converter 158
Economical and environmentally friendly
driving 159
Environmental compatibility 161
Driving abroad 162
Avoiding damage to your vehicle 162
Driving through water on the street 163
Towing a trailer 164
Towing a trailer 164
General Maintenance
Taking care of and cleaning the vehicle 167
Taking care of your vehicle 167
Inspecting and replenishing 174
Fuel 174
Engine compartment 176
Vehicle battery 182
Wheels and Tyres 187
Tyres 187
Accessories, changes and replacement of parts 194
Introductory information 194
Changes and impairments of the airbag
system 194
Do-it-yourself
Do-it-yourself 195
First-aid box 195
Warning triangle 195
Fire extinguisher 195
Vehicle tool kit 196Changing a wheel 196
Breakdown kit 200
Jump-starting 202
Towing the vehicle 204
Fuses and light bulbs 207
Fuses 207
Bulbs 210
Technical data
Technical data 216
Introductory information 216
Data on the vehicle data sticker and the type
plate 216
Dimensions 218
Specification and engine oil capacity 219
Vehicle-specific information depending on
engine type 220
Multi-purpose vehicles (AF) 224
Index
4 Table of Contents
Page 25 of 235
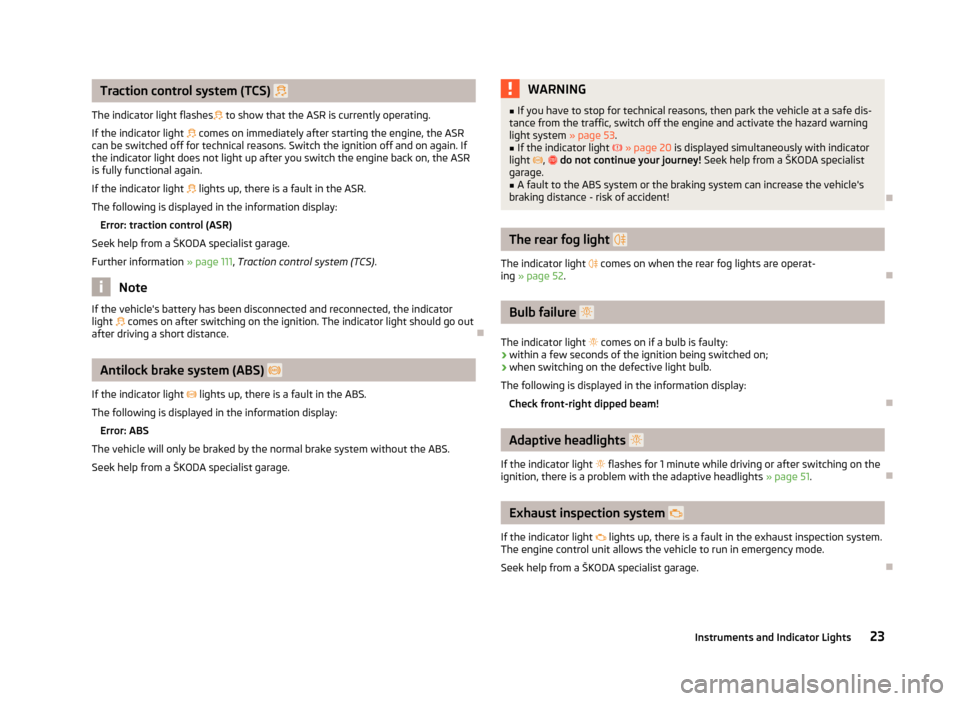
Traction control system (TCS)
The indicator light flashes to show that the ASR is currently operating.
If the indicator light comes on immediately after starting the engine, the ASR
can be switched off for technical reasons. Switch the ignition off and on again. If
the indicator light does not light up after you switch the engine back on, the ASR
is fully functional again.
If the indicator light lights up, there is a fault in the ASR.
The following is displayed in the information display: Error: traction control (ASR)
Seek help from a ŠKODA
specialist garage.
Further information » page 111, Traction control system (TCS).Note
If the vehicle's battery has been disconnected and reconnected, the indicator
light comes on after switching on the ignition. The indicator light should go out
after driving a short distance. ÐAntilock brake system (ABS)
If the indicator light lights up, there is a fault in the ABS.
The following is displayed in the information display: Error: ABS
The vehicle will only be braked by the normal brake system without the ABS.
Seek help from a
ŠKODA specialist garage. WARNING
■ If you have to stop for technical reasons, then park the vehicle at a safe dis-
tance from the traffic, switch off the engine and activate the hazard warning
light system » page 53.
■ If the indicator light » page 20 is displayed simultaneously with indicator
light , do not continue your journey!
Seek help from a ŠKODA specialist
garage.
■ A fault to the ABS system or the braking system can increase the vehicle's
braking distance - risk of accident! Ð The rear fog light
The indicator light
comes on when the rear fog lights are operat-
ing » page 52. Ð Bulb failure
The indicator light comes on if a bulb is faulty:
› within a few seconds of the ignition being switched on;
› when switching on the defective light bulb.
The following is displayed in the information display: Check front-right dipped beam! Ð Adaptive headlights
If the indicator light flashes for 1 minute while driving or after switching on the
ignition, there is a problem with the adaptive headlights »
page 51. Ð Exhaust inspection system
If the indicator light lights up, there is a fault in the exhaust inspection system.
The engine control unit allows the vehicle to run in emergency mode.
Seek help from a
ŠKODA specialist garage. Ð
23
Instruments and Indicator Lights
Page 55 of 235
Instrument lighting
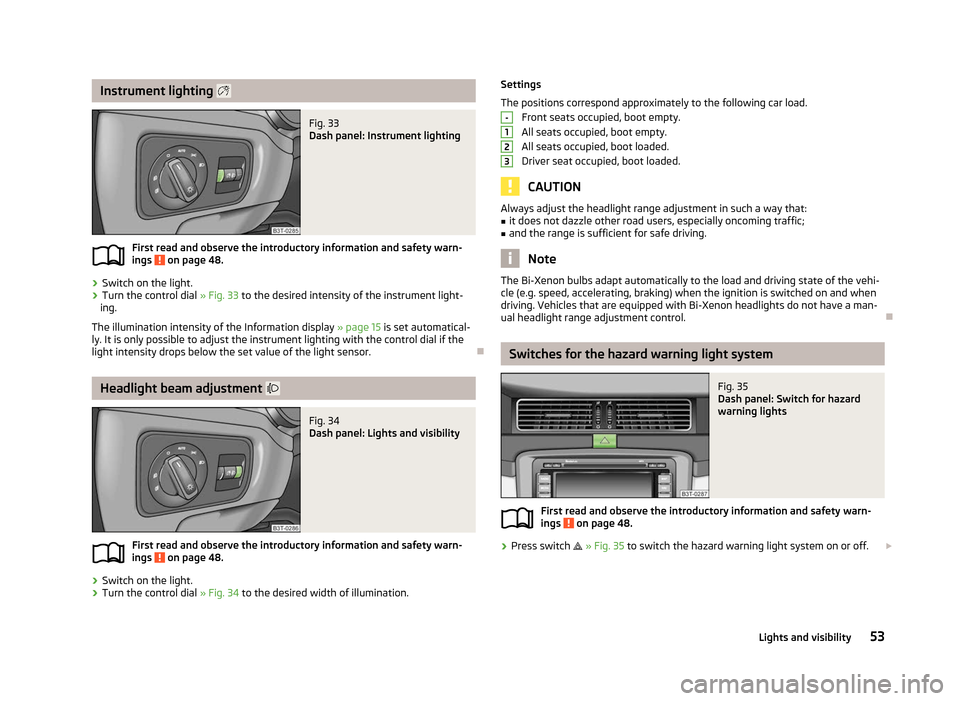
Fig. 33
Dash panel: Instrument lighting
First read and observe the introductory information and safety warn-
ings on page 48.
›
Switch on the light.
› Turn the control dial
» Fig. 33 to the desired intensity of the instrument light-
ing.
The illumination intensity of the Information display »
page 15 is set automatical-
ly. It is only possible to adjust the instrument lighting with the control dial if the
light intensity drops below the set value of the light sensor. ÐHeadlight beam adjustment
Fig. 34
Dash panel: Lights and visibility
First read and observe the introductory information and safety warn-
ings on page 48.
›
Switch on the light.
› Turn the control dial
» Fig. 34 to the desired width of illumination.
ä
ä Settings
The positions correspond approximately to the following car load.
Front seats occupied, boot empty.
All seats occupied, boot empty.
All seats occupied, boot loaded.
Driver seat occupied, boot loaded. CAUTION
Always adjust the headlight range adjustment in such a way that:
■ it does not dazzle other road users, especially oncoming traffic;
■ and the range is sufficient for safe driving. Note
The Bi-Xenon bulbs adapt automatically to the load and driving state of the vehi-
cle (e.g. speed, accelerating, braking) when the ignition is switched on and when
driving. Vehicles that are equipped with Bi-Xenon headlights do not have a man-
ual headlight range adjustment control. Ð Switches for the hazard warning light system
Fig. 35
Dash panel: Switch for hazard
warning lights
First read and observe the introductory information and safety warn-
ings on page 48.
›
Press switch
» Fig. 35 to switch the hazard warning light system on or off. £ -
1
2
3
ä
53
Lights and visibility
Page 56 of 235
All the turn signal lights on the vehicle flash at the same time when the hazard
warning light system is switched on. The indicator light for the turn signals and
the indicator light in the switch also flash at the same time. The hazard warning
light system can also be operated if the ignition is switched off.
The hazard warning light system is switched on automatically if an airbag is de-
ployed in the event of an accident.
Note
The hazard warning light system must be switched on if, for example:
■ you encounter a traffic congestion;
■ your vehicle breaks down or an emergency situation occurs. ÐTurn signal and main beam lever
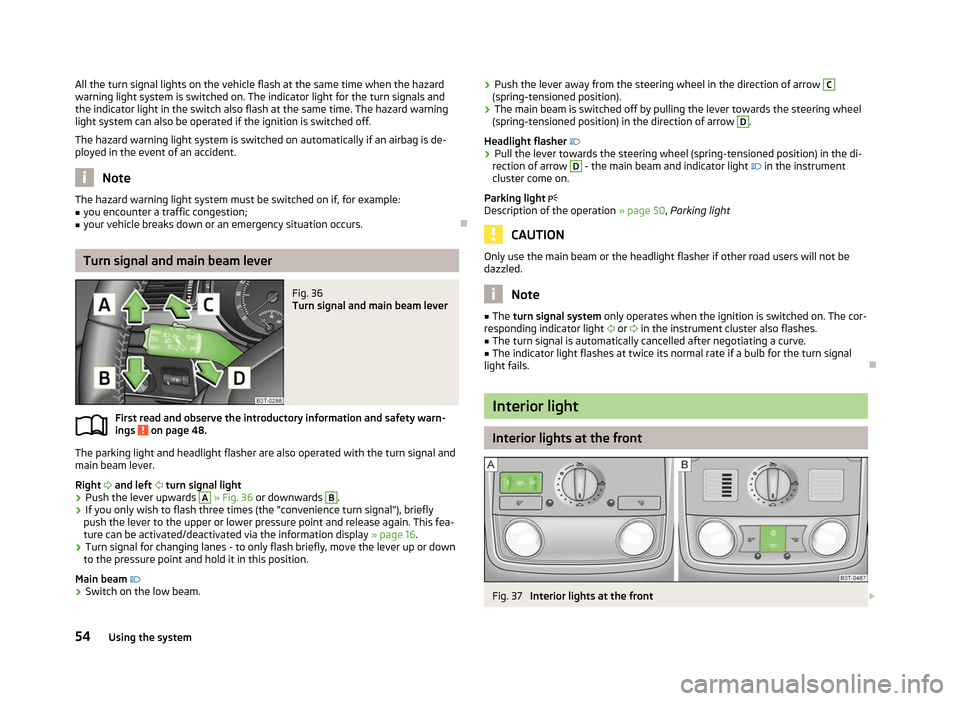
Fig. 36
Turn signal and main beam lever
First read and observe the introductory information and safety warn-
ings on page 48.
The parking light and headlight flasher are also operated with the turn signal and
main beam lever.
Right and left turn signal light
› Push the lever upwards A
» Fig. 36
or downwards B
.
› If you only wish to flash three times (the "convenience turn signal"), briefly
push the lever to the upper or lower pressure point and release again. This fea-
ture can be activated/deactivated via the information display » page 16.
› Turn signal for changing lanes - to only flash briefly, move the lever up or down
to the pressure point and hold it in this position.
Main beam
› Switch on the low beam.
ä ›
Push the lever away from the steering wheel in the direction of arrow C
(spring-tensioned position).
› The main beam is switched off by pulling the lever towards the steering wheel
(spring-tensioned position) in the direction of arrow D
.
Headlight flasher
› Pull the lever towards the steering wheel (spring-tensioned position) in the di-
rection of arrow D
- the main beam and indicator light
in the instrument
cluster come on.
Parking light
Description of the operation » page 50, Parking light CAUTION
Only use the main beam or the headlight flasher if other road users will not be
dazzled. Note
■ The turn signal system only operates when the ignition is switched on. The cor-
responding indicator light or
in the instrument cluster also flashes.
■ The turn signal is automatically cancelled after negotiating a curve.
■ The indicator light flashes at twice its normal rate if a bulb for the turn signal
light fails. Ð Interior light
Interior lights at the front
Fig. 37
Interior lights at the front £
54 Using the system
Page 57 of 235

Switching on
›
Press the switch in the area of the symbol
» Fig. 37.
Switching off
› Press the switch in the area of the symbol
O.
Operating with the door contact switch
› Place the switch into the middle position. On vehicles without an interior moni-
tor, the middle position is marked with the symbol » Fig. 37 - .
If operating lights with the door contact switch is enabled, the light will come on
when:
› the vehicle is unlocked;
› one of the doors is opened;
› or the ignition key is removed.
If operating lights with the door contact switch is enabled, the light will go off
when:
› the vehicle is locked;
› the ignition is switched on;
› about 30 seconds after all the doors have been closed.
If a door remains open, or if the switch is in the position the interior light goes
out after 10
minutes to prevent the battery from discharging. Note
■ Two diffuse lights are integrated in the front interior lighting, that illuminate
the gearshift lever and the middle of the dash panel. These are switched on auto-
matically when the parking light is activated. ■ Furthermore, after switching on the ignition when the parking lights are switch-
ed on, the door handle lighting comes on. ■ We recommend having these bulbs replaced by a ŠKODA specialist garage. Ð Front reading lights
Fig. 38
Reading lights
Front reading lights › Press switch
» Fig. 38 to switch the reading lights on or off. Ð Lit storage compartment on the front passenger side
› When opening the flap of the storage compartment on the front passenger
side the lighting in the storage compartment comes on.
› The light switches on automatically when the parking light is switched on and
goes out when the flap is closed. Ð Interior light and rear reading lights
Fig. 39
Interior light and rear reading
lights
Interior light › The rear interior light is operated together with the front interior
light » page 54. £
55
Lights and visibility
Page 59 of 235

Boot light (Combi)
Removable lamp
Fig. 42
Removeable lamp
A removable lamp is fitted on the left side of the boot. This lamp has two func-
tions:
› lighting the boot - it illuminates part B
» Fig. 42 (the lamp is in the holder),
› portable lamp - it illuminates part C
(the lamp has been removed from the
holder).
If the lamp is in the holder, it is automatically switched on when the boot lid is
opened. If the boot lid remains open for more than 10 minutes, the light switches
off automatically.
The lamp is supplied by three rechargeable type AAA batteries. The rechargeable
batteries are constantly charged when the engine is running. It takes approx. 3
hours to fully charge the rechargeable batteries.
The lamp is fitted with magnets. Therefore it is possible to attach the lamp, for
example on the vehicle body, after removing it. ÐTaking out the lamp
Taking out the lamp › Grasp the lamp in the areas of the arrows D
» Fig. 42 on page 57
and swivel it
in the direction of the arrow E
. Reinserting the lamp the holder
›
First of all place the deactivated lamp in the holder on the side facing the boot
lid and then press on the lamp from the other side until it is clicks into place.
Operation of the lamp › If you press the button A
once, the lamp lights up with 100 % light intensity.
› If you press the button A
again, the lamp lights up with 50 % light intensity.
› If you press the button A
once again, the lamp goes out.
CAUTION
The removable lamp is not watertight and must therefore be protected against
moisture. Note
■ If the lamp is not correctly inserted into the holder, it does not light up when
the boot lid is opened and the rechargeable batteries are not charged. ■ If the lamp is not switched off and it is correctly inserted in the holder, the bulbs
in the front part C
» Fig. 42 on page 57 of the lamp are automatically switched
off.
■ The removed light can operate for a max. of 24 hours at an intensity of 100 %
and a max.of
48 hours at an intensity of 50 %. Ð Replacing the rechargeable batteries of the lamp
Proceed as follows if you wish to replace the faulty rechargeable batteries your-
self:
› Remove the lamp.
› Lever off the cover for the rechargeable batteries with a narrow and pointed
object from the location of the lock-off clips F
» Fig. 42 on page 57
.
› Remove the faulty rechargeable batteries from the lamp.
› Insert the new rechargeable batteries.
› Insert the cover for the rechargeable batteries and press it down until it clicks
into place. CAUTION
We recommend having the faulty rechargeable batteries replaced by a ŠKODA
specialist garage. If the lamp is not correctly opened, it can be damaged. £
57
Lights and visibility
Page 185 of 235

Charging a vehicle battery 185
Disconnecting and reconnecting the vehicle battery 186
Replacing the vehicle battery 186
Automatic load deactivation 186
Warning symbols on the vehicle battery Symbol Importance
Always wear eye protection.
Battery acid is severely caustic. Always wear gloves and eye protec-
tion.
Keep fire, sparks, open flames and lit cigarettes well clear of the ve-
hicle battery.
When charging the vehicle battery, a highly explosive gas mixture is
produced.
Keep children away from the vehicle battery. Improper handling of the vehicle battery can cause damage. We therefore recom-
mend that any work on the vehicle battery is carried out by a
ŠKODA Service Part-
ner.
There is a risk of injuries, scalding, accidents and burns when carrying out any
work on the battery and on the electrical system. For this reason, it is essential to
comply with the warning instructions stated below and with the general applica-
ble rules of safety. WARNING
■ The battery acid is strongly corrosive and must, therefore, be handled with
the greatest of care. Always wear protective gloves, eye and skin protection
when handling the vehicle battery. Corrosive fumes in the air irritate the air
passages and lead to conjunctivitis and inflammation of the air passages in
the lungs. Battery acid corrodes tooth enamel. After contact with the skin, the
acid creates deep wounds which take a long time to heal. Repeated contact
with diluted acids causes skin diseases (inflammations, ulcers, slin cracks).
Acids coming into contact with water are diluted accompanied by significant
development of heat.
■ Do not tilt the battery otherwise battery electrolyte may flow out of the bat-
tery vent openings. Protect the eyes with safety glasses or a shield! There is
the danger of suffering blindness! If any battery electrolyte comes into con-
tact with your eyes, rinse the relevant eye immediately with clear water for
several minutes. Then consult a doctor immediately. ■ Splashes of acid on your skin or clothes should be neutralised as soon as
possible using soap suds and then rinsed with plenty of water. If acid was
swallowed, seek immediate medical attention.
■ Keep children away from the vehicle battery.
■ When you charge a battery, hydrogen is released, and a highly explosive gas
mixture is also produced. An explosion can be caused through sparkling over
during unclamping or loosening of the cable plug while the ignition is on. ■ Bridging of the poles will create a short circuit (e.g. through metal objects,
cables). Possible consequences of a short circuit: Melting of lead struts, explo-
sion and burning of the battery, jets of acid spurting out.
■ It is prohibited to work with a naked flame and light, to smoke or to carry
out any activities which produce sparks. Avoid creating sparks when working
with cables and electrical devices. Strong sparking represents a risk of injury. ■ Before carrying out any work on the electrical system, switch off the engine,
the ignition and all of the electrical components and disconnect the negative
terminal
(-) on the battery. If you wish to replace a bulb it suffices to switch off
the relevant light. ■ Never charge a frozen or thawed vehicle battery - risk of explosion and
caustic burns! Replace a frozen vehicle battery. ■ Never jump-start vehicle batteries with an electrolyte level that is too low -
risk of explosion and caustic burns. ■ Never use a damaged vehicle battery - risk of explosion! Replace a damaged
vehicle battery immediately. £
183
Inspecting and replenishing
Page 198 of 235
WARNING
The fire extinguisher must always be secured safely so that they do not come
loose when making an emergency braking or in a vehicle collision which could
cause injuries to occupants. Note
■ The fire extinguisher must comply with the relevant applicable national legal re-
quirements. ■ Pay attention to the expiration date of the fire extinguisher. If the fire extin-
guisher is used after the expiration date, its proper function is no longer assured.
■ The fire extinguisher is part of the scope of delivery in certain countries only. ÐVehicle tool kit
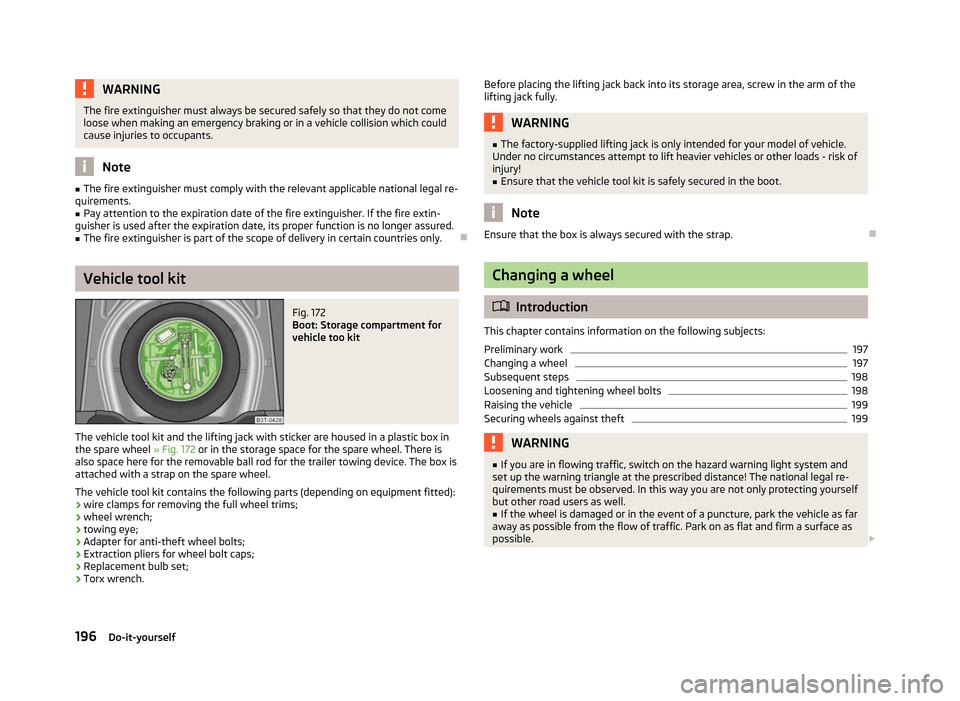
Fig. 172
Boot: Storage compartment for
vehicle too kit
The vehicle tool kit and the lifting jack with sticker are housed in a plastic box in
the spare wheel » Fig. 172 or in the storage space for the spare wheel. There is
also space here for the removable ball rod for the trailer towing device. The box is
attached with a strap on the spare wheel.
The vehicle tool kit contains the following parts (depending on equipment fitted):
› wire clamps for removing the full wheel trims;
› wheel wrench;
› towing eye;
› Adapter for anti-theft wheel bolts;
› Extraction pliers for wheel bolt caps;
› Replacement bulb set;
› Torx wrench. Before placing the lifting jack back into its storage area, screw in the arm of the
lifting jack fully. WARNING
■ The factory-supplied lifting jack is only intended for your model of vehicle.
Under no circumstances attempt to lift heavier vehicles or other loads - risk of
injury! ■ Ensure that the vehicle tool kit is safely secured in the boot. Note
Ensure that the box is always secured with the strap. Ð Changing a wheel
ä
Introduction
This chapter contains information on the following subjects:
Preliminary work 197
Changing a wheel 197
Subsequent steps 198
Loosening and tightening wheel bolts 198
Raising the vehicle 199
Securing wheels against theft 199
WARNING
■ If you are in flowing traffic, switch on the hazard warning light system and
set up the warning triangle at the prescribed distance! The national legal re-
quirements must be observed. In this way you are not only protecting yourself
but other road users as well.
■ If the wheel is damaged or in the event of a puncture, park the vehicle as far
away as possible from the flow of traffic. Park on as flat and firm a surface as
possible. £
196 Do-it-yourself
Page 209 of 235

Fuses and light bulbs
Fuses
ä
Introduction
This chapter contains information on the following subjects:
Fuses in the dash panel 208
Fuses in the engine compartment 209
Individual electrical circuits are protected by fuses.
› Before replacing a fuse, switch off the ignition and the appropriate consumer
› Find out which fuse belongs to the component that is not operat-
ing » page 208, Fuses in the dash panel or » page 209, Fuses in the engine
compartment .
› Take the plastic clip out of its fixture in the cover of the fuse box, place it on the
relevant fuse and pull it out.
› A blown fuses is recognisable by the molten metal strip. Replace the faulty fuse
with a new one of the
same amperage.
Colour coding of fuses Colour Maximum amperage
light brown 5
dark brown 7.5
red 10
blue 15
yellow 20
white 25
green 30
orange 40
red 50WARNING
Always read and observe the warnings before completing any work in the en-
gine compartment » page 176, Engine compartment . CAUTION
■ Never “repair” fuses and also do not replace them with a fuse of a higher am-
perage - risk of fire! This may also cause damage at another part of the electrical
system.
■ Have the electrical system checked as quickly as possible by a ŠKODA specialist
garage if a newly inserted fuse blows again after a short time.
■ When unlocking and locking the cover for the fuse box in the engine compart-
ment, it must be pressed on the sides of the box, otherwise the locking mecha-
nism can be damaged. ■ The cover for the fuse box in the engine compartment must always be applied
correctly. Water can penetrate and cause damage to the vehicle if the cover was
not applied correctly! Note
■ We recommend always carrying replacement fuses in the vehicle. A box of re-
placement fuses can be purchased from
ŠKODA Original Accessories.
■ Multiple fuses may exist for a single power consuming device.
■ Multiple power consuming devices can share a single fuse.
■ Electrically adjustable seats are protected by automatic circuit breakers, which
switch on again automatically after a few seconds after the overload has been
eliminated. Ð
207
Fuses and light bulbs
Page 211 of 235

No. Power consumer
43 Control unit for trailer detection
44 Control unit for trailer detection 45 Control unit for trailer detection
46 Switch for seat heating 47 Telephone preinstallation
48 Preparation for the aftermarket radio 49 Not assigned Ð
Fuses in the engine compartment
Fig. 184
Schematic diagram of the fuse box - version A/version B Fig. 185
Cover for the fuse box in the en-
gine compartment
First read and observe the introductory information and safety warn-
ings on page 207.
ä On some vehicles, the battery cover must be removed before removing the cover
for the fuse box
» page 184.
› The cover for the fuse box is removed by pushing the circlips A
» Fig. 185
up-
wards as far as the stop. The symbol is displayed behind the clip. Now remove
the cover.
› Once the fuse has been removed, place the cover on the fuse box and push the
circlips A
back as far as the stop. The symbol is displayed behind the clip. The
cover is locked into position.
Fuse assignment in the engine compartment - version A No. Power consumer
F1 Front right main headlight, right tail light
F2 Valves for ABS
F3-4 Not assigned F5 Horn
F6-12 Not assigned F13 Control unit for automatic gearbox
F14 Not assigned F15 Coolant pump
F16 Not assigned F17 Instrument cluster, windscreen wiper lever, and turn signal lever
F18 Audio amplifier (sound system) F19 Radio
F20-22 Not assigned F23 Engine control unit
F24 Data bus control unit
F25-26 Not assigned F27 Fuel dosage valve
F28 Engine control unit F29 Main relay
F30 Auxiliary heating and ventilation control unit F31 Windscreen wipers
F32-37 Not assigned F38 Radiator fan, valvesF39 Clutch/brake pad sensor £ 209
Fuses and light bulbs