radio SKODA SUPERB 2013 2.G / (B6/3T) Bolero Car Radio Manual
[x] Cancel search | Manufacturer: SKODA, Model Year: 2013, Model line: SUPERB, Model: SKODA SUPERB 2013 2.G / (B6/3T)Pages: 24, PDF Size: 1.92 MB
Page 1 of 24
www.skoda-auto.com
Bolero: Yeti, Superb
Rádio anglicky 11.2013
S00.5615.05.20
5L0 012 720 DD
SIMPLY CLEVER
Radio Bolero
Owner's Manual
Page 3 of 24
Table of Contents
General information
Important information
2
Anti-theft protection
2
Device desrciption and operation
3
Device setup
Tone settings
6
Settings main menu (Setup)
6
Setup radio
6
Traffic station set-ups
7
Setup Media
7
Setup system
7
Telephone set-ups
7
Radio
Using the system
9
Media
Using the system
12
External sources
Using the system
15
Phone
Using the system
17Parking and manoeuvring
Visual parking system201Table of Contents
Page 4 of 24
General information
Important information
Introductory information
Please read this Radio Bolero (from here on referred to only as device) Owner's Manual carefully, because operation in accordance with these instructions is a
prerequisite for proper use of the unit.
These operating instructions describe all possible equipment variants without
identifying them as special equipment, model variants or market-dependent
equipment.
Consequently, this vehicle does not need to contain all of the equipment compo-
nents described in these operating instructions.
The scope of equipment of your vehicle refers to your purchase contract for the
vehicle. More information is available from the ŠKODA Partner 1)
where you bought
the vehicle.
Please note that these instructions are meant only as an addendum to the infor-
mation provided in your vehicle's owner's manual. Therefore, they can be used
only in conjunction with the latest manual for this vehicle. For a detailed descrip-
tion of some of the functions listed in these instructions, see the owner's manual
for your vehicle.
If you have any questions about your radio navigation system, please contact a
ŠKODA Partner.
The illustrations can differ in minor details from your radio navigation system;
they are only intended for general information.
Device operation
The device should only be used when traffic conditions permit safe use.
WARNING■ Concentrate fully on your driving at all times! As the driver you are wholly re-
sponsible for the operation of your vehicle.■
Only use the device such that you are in full control of your vehicle in every
traffic situation – do not run the risk of an accident.
■
Adjust the volume to ensure that audible signals from outside the vehicle,
e.g. sirens from vehicles with right-of-way such as police cars, ambulances
and fire engines, can be heard at all times.
■
High volumes can cause hearing damage!
Screen care
CAUTION
■ Do not use solvents such as petrol or turpentine which could damage the
screen surface.■
Treat the screen with care. Finger pressure or contact with sharp objects may
cause dents and scratches on the surface.
Note
The screen can be cleaned with a soft cloth and alcohol if necessary.
Anti-theft protection
Anti-theft coding
Your device is equipped with a convenience coding. If the device is being operat-
ed for the first time, the safety code is not only stored in the radio but also in the
vehicle.
After disconnecting and reconnecting the battery, you must first switch on the ig-
nition using the ignition key before switching on the device.
If you want to install the device in another vehicle you will need to enter the safe-ty code. In this case you will have to call on a specialist 1)
garage.
1)
Explanation of terms
» Owner's Manual , chapter Foreword .
2General information
Page 6 of 24
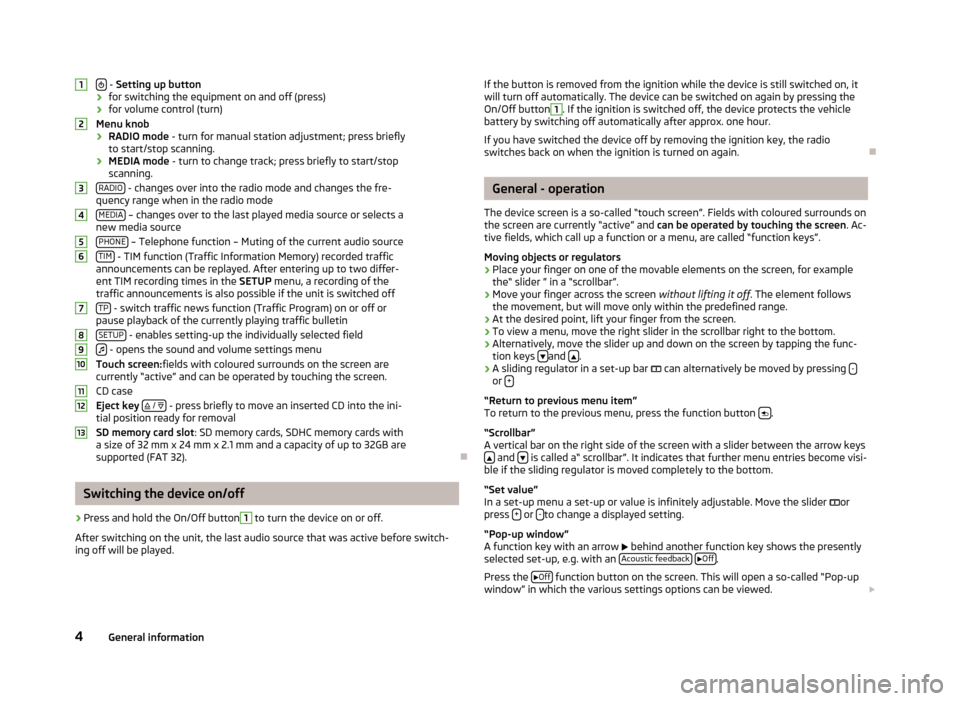
- Setting up button
› for switching the equipment on and off (press)
› for volume control (turn)
Menu knob
› RADIO mode
- turn for manual station adjustment; press briefly
to start/stop scanning.
› MEDIA mode
- turn to change track; press briefly to start/stop
scanning.
RADIO
- changes over into the radio mode and changes the fre-
quency range when in the radio mode
MEDIA
– changes over to the last played media source or selects a
new media source
PHONE
– Telephone function – Muting of the current audio source
TIM - TIM function (Traffic Information Memory) recorded traffic
announcements can be replayed. After entering up to two differ-
ent TIM recording times in the SETUP menu, a recording of the
traffic announcements is also possible if the unit is switched off
TP
- switch traffic news function (Traffic Program) on or off or
pause playback of the currently playing traffic bulletin
SETUP
- enables setting-up the individually selected field
- opens the sound and volume settings menu
Touch screen: fields with coloured surrounds on the screen are
currently “active” and can be operated by touching the screen.
CD case
Eject key
/
- press briefly to move an inserted CD into the ini-
tial position ready for removal
SD memory card slot : SD memory cards, SDHC memory cards with
a size of 32 mm x 24 mm x 2.1 mm and a capacity of up to 32GB are supported (FAT 32).
Switching the device on/off
›
Press and hold the On/Off button
1
to turn the device on or off.
After switching on the unit, the last audio source that was active before switch-
ing off will be played.
12345678910111213If the button is removed from the ignition while the device is still switched on, it
will turn off automatically. The device can be switched on again by pressing the
On/Off button1
. If the ignition is switched off, the device protects the vehicle
battery by switching off automatically after approx. one hour.
If you have switched the device off by removing the ignition key, the radio
switches back on when the ignition is turned on again.
General - operation
The device screen is a so-called “touch screen”. Fields with coloured surrounds on the screen are currently “active” and can be operated by touching the screen . Ac-
tive fields, which call up a function or a menu, are called “function keys”.
Moving objects or regulators
›
Place your finger on one of the movable elements on the screen, for example the“ slider ” in a “scrollbar”.
›
Move your finger across the screen without lifting it off. The element follows
the movement, but will move only within the predefined range.
›
At the desired point, lift your finger from the screen.
›
To view a menu, move the right slider in the scrollbar right to the bottom.
›
Alternatively, move the slider up and down on the screen by tapping the func- tion keys and .
›
A sliding regulator in a set-up bar
can alternatively be moved by pressing -or +
“Return to previous menu item”
To return to the previous menu, press the function button .
“Scrollbar”
A vertical bar on the right side of the screen with a slider between the arrow keys
and is called a“ scrollbar”. It indicates that further menu entries become visi-
ble if the sliding regulator is moved completely to the bottom.
“Set value”
In a set-up menu a set-up or value is infinitely adjustable. Move the slider
or
press +
or -to change a displayed setting.
“Pop-up window”
A function key with an arrow
behind another function key shows the presently
selected set-up, e.g. with an Acoustic feedback
Off.
Press the
Off
function button on the screen. This will open a so-called “Pop-up
window” in which the various settings options can be viewed.
4General information
Page 8 of 24
Device setup
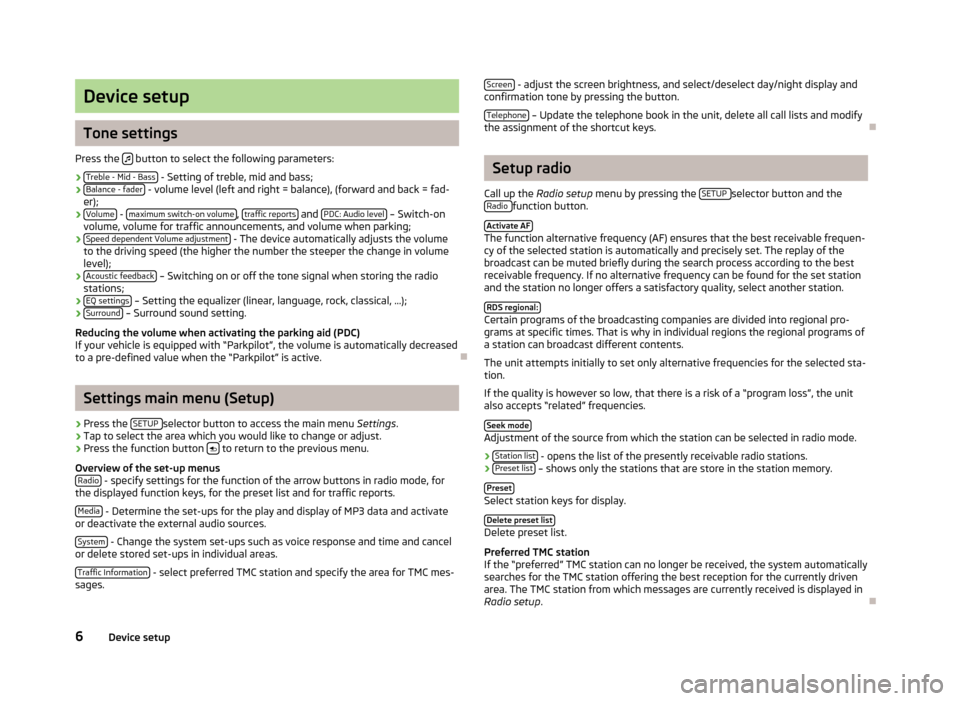
Tone settings
Press the
button to select the following parameters:
› Treble - Mid - Bass
- Setting of treble, mid and bass;
› Balance - fader - volume level (left and right = balance), (forward and back = fad-
er);
› Volume
-
maximum switch-on volume, traffic reports and PDC: Audio level – Switch-on
volume, volume for traffic announcements, and volume when parking;
› Speed dependent Volume adjustment
- The device automatically adjusts the volume
to the driving speed (the higher the number the steeper the change in volume level);
› Acoustic feedback
– Switching on or off the tone signal when storing the radio
stations;
› EQ settings
– Setting the equalizer (linear, language, rock, classical, ...);
› Surround – Surround sound setting.
Reducing the volume when activating the parking aid (PDC)
If your vehicle is equipped with “Parkpilot”, the volume is automatically decreased
to a pre-defined value when the “Parkpilot” is active.
Settings main menu (Setup)
›
Press the SETUP selector button to access the main menu
Settings.
›
Tap to select the area which you would like to change or adjust.
›
Press the function button to return to the previous menu.
Overview of the set-up menus Radio
- specify settings for the function of the arrow buttons in radio mode, for
the displayed function keys, for the preset list and for traffic reports.
Media
- Determine the set-ups for the play and display of MP3 data and activate
or deactivate the external audio sources.
System
- Change the system set-ups such as voice response and time and cancel
or delete stored set-ups in individual areas.
Traffic Information
- select preferred TMC station and specify the area for TMC mes-
sages.
Screen - adjust the screen brightness, and select/deselect day/night display and
confirmation tone by pressing the button.
Telephone
– Update the telephone book in the unit, delete all call lists and modify
the assignment of the shortcut keys.
Setup radio
Call up the Radio setup menu by pressing the SETUP
selector button and the
Radio function button.
Activate AF
The function alternative frequency (AF) ensures that the best receivable frequen-
cy of the selected station is automatically and precisely set. The replay of the
broadcast can be muted briefly during the search process according to the best
receivable frequency. If no alternative frequency can be found for the set station
and the station no longer offers a satisfactory quality, select another station.
RDS regional:
Certain programs of the broadcasting companies are divided into regional pro-
grams at specific times. That is why in individual regions the regional programs of a station can broadcast different contents.
The unit attempts initially to set only alternative frequencies for the selected sta-
tion.
If the quality is however so low, that there is a risk of a “program loss”, the unit also accepts “related” frequencies.
Seek mode
Adjustment of the source from which the station can be selected in radio mode.
› Station list
- opens the list of the presently receivable radio stations.
› Preset list – shows only the stations that are store in the station memory.
Preset
Select station keys for display. Delete preset list
Delete preset list.
Preferred TMC station
If the “preferred” TMC station can no longer be received, the system automatically
searches for the TMC station offering the best reception for the currently driven area. The TMC station from which messages are currently received is displayed in
Radio setup .
6Device setup
Page 11 of 24
Radio
Using the system
Select radio station
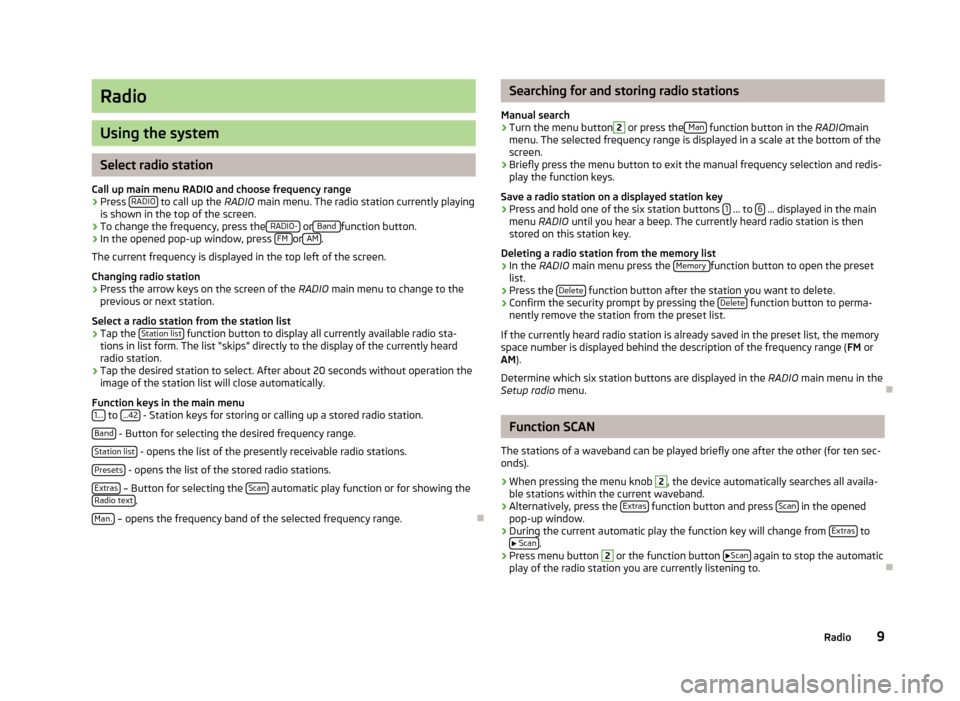
Call up main menu RADIO and choose frequency range
›
Press RADIO to call up the
RADIO main menu. The radio station currently playing
is shown in the top of the screen.
›
To change the frequency, press the RADIO- or Band function button.
›
In the opened pop-up window, press FM or AM.
The current frequency is displayed in the top left of the screen.
Changing radio station
›
Press the arrow keys on the screen of the RADIO main menu to change to the
previous or next station.
Select a radio station from the station list
›
Tap the Station list function button to display all currently available radio sta-
tions in list form. The list “skips” directly to the display of the currently heard
radio station.
›
Tap the desired station to select. After about 20 seconds without operation the
image of the station list will close automatically.
Function keys in the main menu 1...
to ...42 - Station keys for storing or calling up a stored radio station.
Band
- Button for selecting the desired frequency range.
Station list
- opens the list of the presently receivable radio stations.
Presets
- opens the list of the stored radio stations.
Extras
– Button for selecting the Scan automatic play function or for showing the
Radio text.
Man.
– opens the frequency band of the selected frequency range.
Searching for and storing radio stations
Manual search›
Turn the menu button
2
or press the Man function button in the
RADIOmain
menu. The selected frequency range is displayed in a scale at the bottom of the
screen.
›
Briefly press the menu button to exit the manual frequency selection and redis-
play the function keys.
Save a radio station on a displayed station key
›
Press and hold one of the six station buttons 1 ... to 6 ... displayed in the main
menu RADIO until you hear a beep. The currently heard radio station is then
stored on this station key.
Deleting a radio station from the memory list
›
In the RADIO main menu press the Memory function button to open the preset
list.
›
Press the Delete function button after the station you want to delete.
›
Confirm the security prompt by pressing the Delete function button to perma-
nently remove the station from the preset list.
If the currently heard radio station is already saved in the preset list, the memory
space number is displayed behind the description of the frequency range ( FM or
AM ).
Determine which six station buttons are displayed in the RADIO main menu in the
Setup radio menu.
Function SCAN
The stations of a waveband can be played briefly one after the other (for ten sec- onds).
›
When pressing the menu knob
2
, the device automatically searches all availa-
ble stations within the current waveband.
›
Alternatively, press the Extras function button and press Scan in the opened
pop-up window.
›
During the current automatic play the function key will change from Extras to
Scan.
›
Press menu button
2
or the function button
Scan again to stop the automatic
play of the radio station you are currently listening to.
9Radio
Page 12 of 24
RDS function
Switching radio text on and off›
In the RADIO main menu press the Extras button and then the Radio text func-
tion button. Instead of the six station buttons, a window now opens in the bot-
tom half of the screen to display the radio text.
›
The window for displaying the radio text must fade out again to enable the sta-
tion keys to be displayed again. Briefly tap in the display window of the radio text.
›
Alternatively, tap the Extras function button and then on the highlighted
Radio Text function button shown in the opened pop-up window.
RDS (“ Radio Data System”) serves to transmit program identification and addi-
tional services therefore also enabling automatic tracking of stations.
In the case of RDS-compatible radio stations, if there is sufficient reception the
station name will be displayed instead of the station frequency.
If a radio station sends additional information via the RDS function while a station
is being stored, it can occur that the name of the radio station is later displayed
incorrectly in the preset list.
Traffic information function
›
Press the TP button to switch the traffic information function on or off.
The display “ TP” in combination with a station name (e.g. in the station or preset
list), indicates a traffic programme station.
Irrespective of which radio station you are listening to, an additional receiver part in the device ensures that a traffic information station can always be received aslong as the traffic information function is switched on.
The availability of traffic information monitoring is identified by the letters “ TP” at
the top right of the screen.
If no traffic programme station can be received because, for example, radio recep-
tion in general is poor, instead of“ TP”,“No TP ” will be displayed. Car parks, tun-
nels, tall buildings or mountains can disrupt the radio signal, even causing it to fail
completely.
Incoming traffic announcement
While a traffic bulletin is being played, a pop-up window opens.
To pause the playback of the announcement, in the Traffic bulletin
pop-up win-
dow press Cancel the function button. The traffic function remains available but a
subsequent traffic bulletin is played in the current audio mode. Press the function
button TP deact.
to switch off the traffic information function permanently.
Note
Some radio stations misleadingly identify themselves as traffic programs. It is
therefore not an error with the unit that there are no traffic news on these sta-
tions.
Traffic information memory
Automatic recording of traffic reports
If the traffic information function is switched on and ready to receive the traffic
information station, incoming traffic reports are recorded as long as the ignition is
switched on. This means you can always find out about the current traffic situa-
tion, even if the device is switched off while driving for long periods.
If the car is parked (ignition off) while a traffic radio station is in range and the
traffic is turned on, incoming traffic reports from this station are recorded for two
hours.
When the ignition is switched off, for about five seconds the current traffic infor-
mation station from which traffic reports will be recorded for the next two hours
is shown. During this five-second display you can use the arrow keys on the de-
vice to select another traffic information station from which to record.
If, when the vehicle is not in use, the reception of the set traffic information sta-
tion is too poor because of external influences, it will automatically search for an-
other traffic information station.
A maximum of nine traffic announcements with a total length of up to four mi- nutes can be recorded. The oldest traffic report will always be overwritten if the
memory is full.
TIM recording times
It is also possible to set two TIM recording times at which the device should also
record traffic information even if the vehicle is switched off. The device then
starts recording all the incoming traffic reports on the traffic information station
set according to the set TIM recording time.
10Radio
Page 13 of 24
For example, if you drive to work every day at a certain time the vehicle, simply
enter the approximate start time. The unit starts recording 90 minutes before the
set start time and ends recording 30 minutes after it. You can then listen to the
latest traffic reports before each journey and adjust your route to the current
traffic situation.
Note
■ In case of a message of over four minutes long, the beginning is overwritten.■If the vehicle has not been used for more than three days, no further traffic re-
ports are recorded, in order to stop the vehicle battery from running down.
Playing traffic reports
›
Press TIM to listen to the saved traffic reports. The play function starts with the
last recorded traffic report and runs through to the oldest recorded traffic re- port.
›
Tap the function button to go to the beginning of the traffic report to which
you are currently listening.
›
To skip a traffic bulletin, tap the function button .
›
Playback is interrupted by pressing the button. The function button changes
to . Tapping the function button resumes playback at the last position.
11Radio
Page 15 of 24
CAUTION■For playback in the internal drive, never use CDs marked “Do not insert in drives
without a drawer” or Eco Disc.■
After pressing the
/
icon there is a time delay of a few seconds before the
CD is ejected. During this time the lock in front of the CD slot is open.
■
Be sure to wait until the CD has been fully ejected before you try to insert a new
CD. You might otherwise damage the drive inside the unit.
■
A dirty, mechanically damaged, unreadable or incorrectly inserted CD can cause
playback problems. The CD may not be playable or may jump because of this.
Check the CD and insert it properly into the unit. Should the problem persist , try
using another CD and visit a specialist garage if necessary.
■
If the internal temperature of the device is too high, no CDs will be accepted.
The unit switches to the last active operating mode.
■
Never use liquids such as petrol, paint thinner or record cleaner to clean the sur-
face of the CD - this may cause damage.
■
Never expose the CD to direct sunlight!
■
Only write on the CD using appropriate pens.
■
Do not stick anything to the CD.
Note
■ Poor or unsealed road surfaces and severe vibrations may cause the CD to jump.■Damp (condensation) may form in the device in cold weather or after showers.
This can effect the CD jump or impair the play function. Wait until the moisture
has evaporated if this happens.■
If a CD is dirty, never clean it in a circular motion, but instead work from the in-
side out. Use a soft, lint-free cloth. If badly soiled, we recommend that you clean
the CD with a commercially available CD cleaner and allow it to dry.
■
It is possible that CDs protected by copyright or home-made CD-R and CD-RW
will not be played back at all or only in certain circumstances.
■
Please also note the additional information for MP3 mode.
■
The copyright laws which apply in your country must be observed.
■
The CD player does not contain parts that need to be serviced or repaired. In the
case of a defective CD player, please visit a specialist garage.
■
If the ejected CD is not taken out, it will be retracted again for safety reasons.
■
If a TP station was set before changing to CD mode, CD playback will be inter-
rupted during the traffic news and the device switches to radio mode. Once the
traffic news have ended, CD playback will resume.
Inserting or removing SD memory card
Inserting SD memory card›
Push the SD memory card into the memory card slot, with the angled corner for-
ward and right, until it clicks into place. Playback will start automatically.
Removing an SD memory card
›
Press the inserted SD memory card against the spring resistance, the memory card “jumps” back into the removal position.
Only MP3 data and unprotected WMA files can be read from the SD card. All other
data is ignored.
SD memory card empty or data not readable
If an SD memory card is inserted on which no data has been stored or data is not
legible, the unit will not be switched to the SD memory card mode after the load-
ing procedure. In the MEDIA menu the SD card
function button at the top of the
screen is inactive and the function is not selectable.
SD card requirements
Memory cards measuring 32 mm x 24 mm x 2.1 mm or 1.4 mm can be inserted into
the memory card slot.
Other similar-sized memory cards such as SDHC cards are not read by the device.
Selecting a CD from the CD changer
›
Press the MEDIA button to open the
MEDIA .
›
If the device is not already in the CD mode, tap the CD function button at the
top of the screen.
›
Tap the Selection function button to display the title list of the CD currently play-
ing.
›
Tap the function button repeatedly until the CD menu is displayed.
›
Press the function keys
CD 1: to
CD 6: to begin playback of the respective
CD.
If the currently played CD is selected in the CD selection menu, the title list is
opened.
A CD compartment in which there is no CD inserted is indicated as “ Empty” and
the function button is displayed as inactive.
The CD which is being played is displayed in the main menu MEDIA, top left of the
screen.
13Media
Page 18 of 24
›Activate the AUX-IN jack by pressing the
MEDIA button followed by the selec-
tion button AUX.
Playback starts automatically after connecting the source.
External audio sources connected via the AUX-IN input cannot be controlled via
your radio.
MDI input - multimedia input
The input for external MDI audio sources is located under the front armrest in the
storage compartment of the front passenger side or in the storage compartment of the centre console (according to vehicle model).
A special adapter is required to connect audio sources via the MDI input.
›
The MDI input is activated by pressing the MEDIA button followed by the MDIselection button.
Audio files in MP3, WMA, OGG Vorbis and AAC format from external data storage
devices connected to the MDI input can be played through the device.
External audio sources connected to the MDI input can be controlled from the de-
vice.
16External sources