change time SKODA SUPERB 2014 2.G / (B6/3T) User Guide
[x] Cancel search | Manufacturer: SKODA, Model Year: 2014, Model line: SUPERB, Model: SKODA SUPERB 2014 2.G / (B6/3T)Pages: 246, PDF Size: 17.16 MB
Page 128 of 246
The following functions are available for each phone contact.
■ Display telephone number
■ Voice tag - Voice tag for the contact
■ Replay - Play a voice tag
■ Record - Record a voice contact
Dial number
Any telephone number can be entered in the Dial number menu item. The re-
quired digits must be selected one after the other using the adjustment wheel,
and then confirmed by pressing the adjustment wheel. You can select digits
0-9 , symbols +,
, # and the Delete, Call and Back functions.
Call list
The following menu items can be selected in the Call list menu item.
■ Missed calls - List of missed calls
■ Received calls - list of received calls
■ Calls dialled - dialled calls
■ Delete lists - Delete call registers
Voice mailbox
In the Voice mailbox menu item, you can set or save the number of the voice
mailbox and then dial the number. The required digits must be selected one
after the other using the adjustment wheel, and then confirmed by pressing
the adjustment wheel. You can select digits 0-9, symbols +,
, #
and the De-
lete , Call , Save and Back functions.
SMS 1)
A list of received text messages is displayed in the SMS menu item. After call-
ing a message, the following functions appear. ■ Show - Display text message
■ Read - The system reads out the selected text message through the vehi-
cle's speakers
■ Send time - Display message send time
■ Callback - Dial the phone number of the sender of the text message
■ Copy - Copy the received text message to the SIM card
■ Delete - Delete the messageBluetooth
The following menu items can be selected from the Bluetooth menu item.
■ User - Overview of the stored telephones
■ Connect - Connection with the telephone
■ Disconnect - Disconnection of telephone
■ Rename - Rename the telephone
■ Delete - Delete the telephone
■ New user - Search for new mobile phones that are in the reception range
■ Visibility - Switches on the visibility of the hands-free system for other devi-
ces
■ Media player - Media player
■ Active device - Connected device
■ Paired devices - List of paired devices
■ Connect - Connection with the device
■ Rename - Rename the device
■ Delete - Delete the device
■ Authorisation - Authorise the device
■ Search - Search for available media players
■ Visibility - Switch on the visibility of the hands-free system for media play-
ers in the vicinity
■ Modem - overview of the active and paired devices for the connection to the
internet
■ Active device - Connected device
■ Paired devices - List of paired devices
■ Phone name - option to change the name of the phone (default SKODA_BT)
WLAN
Wi-Fi menu item » page 128, Use WLAN network in MAXI DOT display .
Settings
The following menu items can be selected from the Settings menu item.
■ Phone book - Phonebook
■ Update - Read in the phone book
■ Select memory - Select memory with phone contacts
■ SIM & phone - Download the contacts of the SIM card and the phone
■ SIM card - Download the contacts from the SIM card
■ Mobile phone - Initial setting to also import contacts from the SIM card; it
is necessary to switch to the SIM & phone menu item 1)
Only applies when connecting the telephone to the hands-free system via the rSAP profile.
126Operation
Page 129 of 246
■List - Arrange the entries in the phone book
■ Surname - Arrange according to surname
■ First name - Arrange according to first name
■ Own number - Optionally display your own telephone number on the display
of the device of the person you are calling (this function is network-depend-
ent)
■ Network depnd. - Network-dependent own number display
■ Yes - Allow display of your own number
■ No - Prohibit display of your own number
■ Signal settings - Signal settings
■ Ring tone - Ring tone setting
■ Volume - Signal volume settings
■ Turn vol. up - Increase volume
■ Turn vol. down - Decrease volume
■ Phone settings - Phone settings
■ Select operator - Select operator
■ Automatic - Automatic operator selection
■ Manual - Manual operator selection
■ Network mode - Network mode
■ UMTS - UMTS
■ GSM - GSM
■ Automatic - automatic
■ SIM mode - Applies to telephones with the rSAP profile that simultaneously
support the operation of two SIM cards - there is an option to choose which
SIM card to connect to the hands-free system ■ SIM mode 1 - SIM 1 is connected to the hands-free system
■ SIM mode 2 - SIM 2 is connected to the hands-free system
■ Phone mode - Toggle between rSAP and HFP mode
■ Premium - rSAP mode
■ Handsfree - HFP mode
■ Off time - Set the off time in increments of 5 min
■ Access point - Set the Internet access point
■ APN - Change the access point name
■ User name - User Name
■ Password - Password
■ Switch off ph. - Switch off the hands-free system (the mobile phone remains
paired)
Back
Return to the main menu in the MAXI DOT display.Internet connection via Bluetooth ®
A notebook can, for example, be connected to the Internet via the hands-free
system.
The control unit of the hands-free system supports the GPRS, EDGE and
UMTS/3G technologies.
An Internet can only be established via a telephone which is connected via the rSAP profile.
The procedure for connecting to the Internet can vary depending on the type
and version of the operating system as well as the type of the device to be
connected. Successfully connecting to the internet requires appropriate
knowledge of the operating system for connecting the device .
Process of connection›
Connect the mobile phone with the hands-free system.
›
Set the access point in the Mobile phone - Settings - Access point menu (de-
pending on the operator, usually “Internet”).
›
Switch on the visibility of the hands-free system for other devices in the Mo-
bile phone - Bluetooth - Visibility menu.
›
Use the device that is to be connected to search for available Bluetooth ®
de-
vices.
›
Select the hands-free system (as standard “SKODA_BT”) from the list of found devices.
›
Enter the password on the device being connected and follow any instruc-
tions given on this device or in the MAXI DOTdisplay.
›
Enter the desired Internet address in the Internet browser. The operating system requests the entry of the telephone number for the internet access
(depending on the operator, usually “*99#”).
WLAN
Introduction
This chapter contains information on the following subjects:
Switching Wi-Fi network on/off
128
Connecting an external device to the WLAN network
128
Use WLAN network in MAXI DOT display
128
Wi-Fi is a wireless network for connecting to the Internet.
127Communication and multimedia
Page 131 of 246
■Delete lists - Delete device lists
■ Known devices - Delete the list of known devices
■ Device blocked - Delete the list of blocked devices
■ Both lists - Delete both device lists
■ Password - Use of password to log on to the WLAN network
■ Show - Display a password to log on to the WLAN network
■ Generate - Generate a new password to log on to the WLAN network
■ WLAN name - Use of WLAN network name
■ Show - Display the WLAN network name
■ Rename - Rename the WLAN network
■ WPS config. - Wi-Fi network connection using WPS
■ Pushbutton - Automatic connection
■ WPS PIN - PIN entry for the connection
■ Data counter - Display information about the volume of data transferred
■ Act Conn. - display of the volume of data transferred for the current con-
nection
■ Total - Display the total volume of data transferred
■ Reset - Reset the information about the volume of data transferred
■ Settings - WLAN network settings
■ Access point - Access point settings
■ Settings - Access point management
■ APN - Change the access point name
■ User name - User Name
■ Password - Password
■ Reset - Reset access point factory settings
■ Prioritisation - Set the connection priority
■ Calls - Set the connection priority for calls
■ Data - Set the connection priority for data transfer
■ Encryption - Set the encryption
■ WPA2 - Enable WPA 2 encryption
■ Open - No encryption
■ Visibility - Set the WLAN network visibility
■ Visible - WLAN network is visible to other devices
■ Invisible - WLAN network is not visible to other devices
■ Data roaming - Set the data roaming
■ No roaming - Data roaming is not allowed
■ Allow - Data roaming is allowed
■ Always ask - Question setting for data roaming■
WLAN channel - Select WLAN network channels (preferably set to channel
11) ■ Channel 1 ... Channel 11 - Display the WLAN network channels
■ Reset - Reset Wi-Fi network factory settings
Voice control
Introduction
This chapter contains information on the following subjects:
Dialogue
129
Voice commands - GSM II
130
Voice commands - GSM III
131
Dialogue
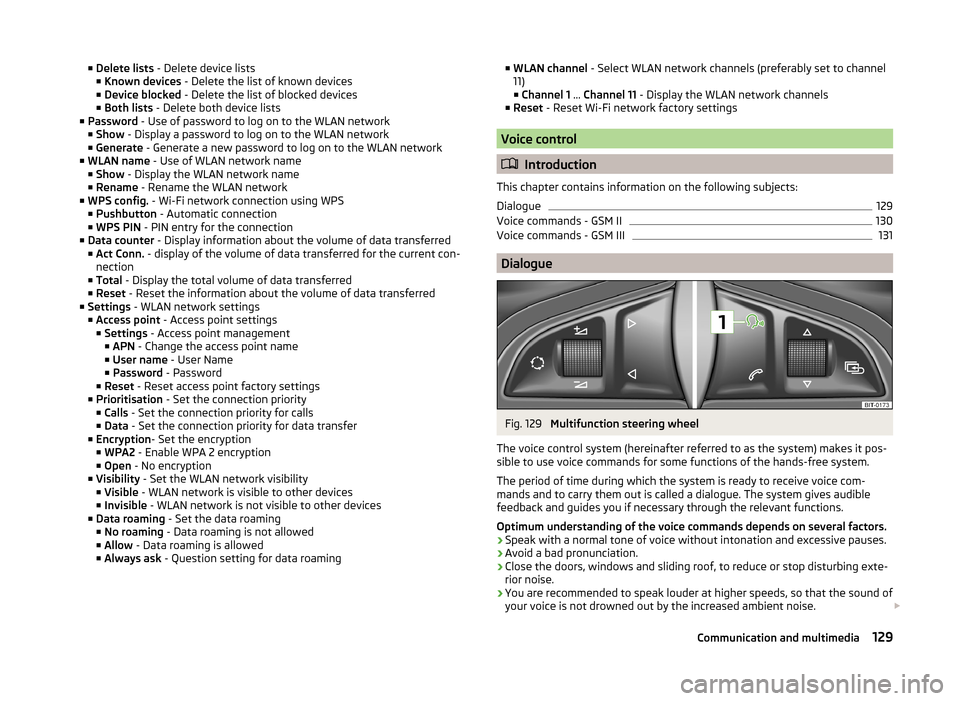
Fig. 129
Multifunction steering wheel
The voice control system (hereinafter referred to as the system) makes it pos-
sible to use voice commands for some functions of the hands-free system.
The period of time during which the system is ready to receive voice com-
mands and to carry them out is called a dialogue. The system gives audible
feedback and guides you if necessary through the relevant functions.
Optimum understanding of the voice commands depends on several factors. › Speak with a normal tone of voice without intonation and excessive pauses.
› Avoid a bad pronunciation.
› Close the doors, windows and sliding roof, to reduce or stop disturbing exte-
rior noise.
› You are recommended to speak louder at higher speeds, so that the sound of
your voice is not drowned out by the increased ambient noise.
129Communication and multimedia
Page 133 of 246
Voice commandActionSETTINGSSelection for setting Bluetooth®
, dialogue etc.CANCELThe dialogue is ended.a)
On vehicles fitted with the Amundsen+ navigation system, this function can be accessed via the naviga-
tion system menu; refer to the » operating instructions for the Amundsen+ navigation system .
If a voice command is not detected, the system answers with “ Sorry?”, and a
new entry can be made. After the 2nd error the system repeats the aid. After
the 3rd After the 3rd attempt the answer “ Cancelled” is given and the dialogue
is ended.
Store voice recording of a contact
If automatic name recognition does not work reliably for some contacts, you
can choose to save your own voice tag for the contact in the Phone book -
Voice tag - Record menu item.
Your own voice tag can also be saved using the voice control in the FURTHER
OPTIONS menu.
Voice commands - GSM III
Basic voice commands
Voice commandActionHELPAfter this command the system repeats all possible
commands.CALL NAMEAfter this command, a name can be entered to es-
tablish a connection with the requested party.DIAL NUMBERAfter this command, a telephone number can be
entered in order to establish a connection with the
requested party.REDIALThe last selected telephone number is selected.READ ADDRESSBOOKThe system reads out contacts from the telephone
book.READ MESSAGESThe system reads the messages which were re-
ceived while the telephone was connected to the
control unit.SHORT DIALOGUEThe help is significantly reduced (good operating
knowledge provided).LONG DIALOGUEThe help is not reduced (suitable for beginners).CANCELThe dialogue is ended.If the system does not recognise the command, it repeats the first part of the
help thus enabling a new entry to be completed. After the 2nd error the sys-
tem repeats the second part of the aid. After the 3rd After the 3rd attempt the
answer “ Cancelled ” is given and the dialogue is ended.
Store voice recording of a contact
If automatic name recognition does not work reliably for some contacts, you
can choose to save your own voice tag for the contact in the Phone book -
Voice tag - Record menu item.
Your own voice tag can also be saved using the voice control in the FURTHER
OPTIONS menu.
Multimedia
Introduction
This chapter contains information on the following subjects:
Music playback via Bluetooth ®
131
Operating the radio and navigation system on the multifunction steering
wheel
132
AUX- and MDIinputs
133
CD change
133
DVD-preinstallation
134
Music playback via Bluetooth ®
The universal telephone preinstallation makes it possible to play back music
via Bluetooth ®
from devices such as MP3 players, mobile phones or notebooks.
To ensure that music can be played via Bluetooth ®
, you must first pair the de-
vice with the hands-free system in the Phone - Bluetooth - Media player
menu.
The music playback process is performed on the connected device.
The universal telephone preinstallation GSM II ensures that the music played
back via the hands-free system can be controlled with the remote con-
trol » page 130 , Voice commands - GSM II .
Note
The device being connected must support the Bluetooth ®
A2DP profile; refer
to the operating instructions for the relevant device being connected.131Communication and multimedia
Page 135 of 246
Button/wheel
» Fig. 13 0
ActionRadioTVAudio sourcesDVD videoNavigation
5
Turn upwardsSwitch to the previous station and at the same time
display list of saved/available stationsSkip to next chan- nelSkip to next trackSkip to next chap- terShow the option
to stop navigation or display the list
of recent destina- tions5
Turn downwardsSwitch to the next station and at the same time
display list of saved/available stationsSwitch to previous channelSwitch to start of tracka)Switch to previous
chapter6Press brieflyCall up the main menua)
To go to the previous track, press the adjustment wheel twice or rotate it by two positions.
AUX- and MDIinputs
The AUX and MDI inputs are used to connect external audio sources (e.g. iPod
or mp3 player) and to play back music from these devices via the factory-fitted
radio or navigation system.
The AUX input for external audio sources is located below the armrest of the
front seats and is marked with the symbol. 1)
.
The MDI input is located in the storage compartment below the front armrest.
For a description of use, refer to the relevant operating instructions for the ra-
dio or navigation system.
CD change
Fig. 131
The CD changer
The CD changer for the radio and navigation system is located in the right side
compartment of the boot.
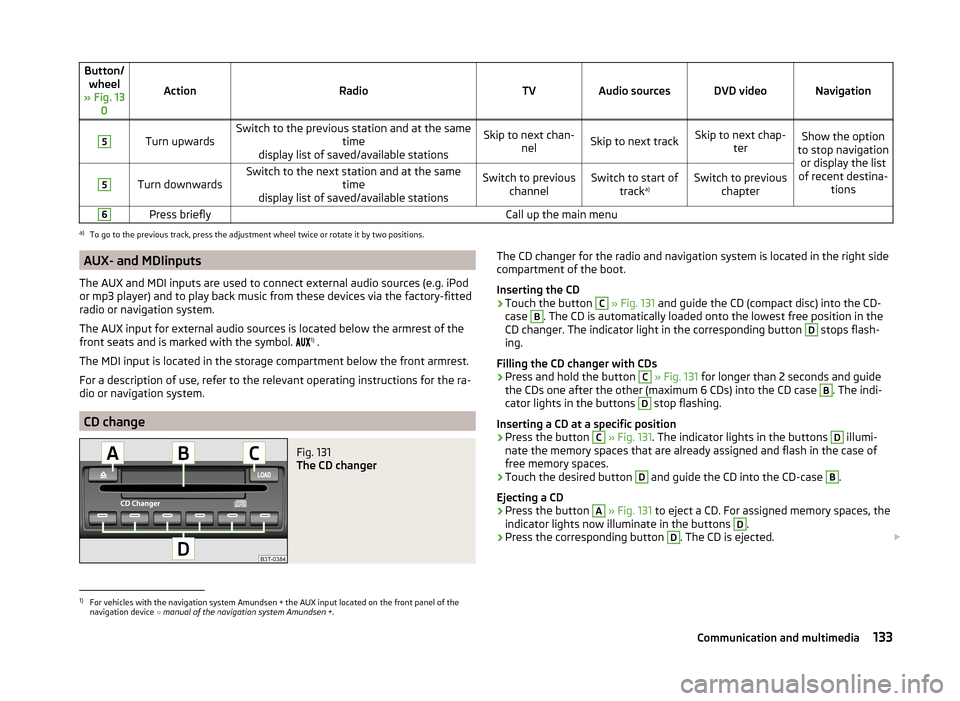
Inserting the CD›
Touch the button
C
» Fig. 131 and guide the CD (compact disc) into the CD-
case
B
. The CD is automatically loaded onto the lowest free position in the
CD changer. The indicator light in the corresponding button
D
stops flash-
ing.
Filling the CD changer with CDs
›
Press and hold the button
C
» Fig. 131 for longer than 2 seconds and guide
the CDs one after the other (maximum 6 CDs) into the CD case
B
. The indi-
cator lights in the buttons
D
stop flashing.
Inserting a CD at a specific position
›
Press the button
C
» Fig. 131 . The indicator lights in the buttons
D
illumi-
nate the memory spaces that are already assigned and flash in the case of
free memory spaces.
›
Touch the desired button
D
and guide the CD into the CD-case
B
.
Ejecting a CD
›
Press the button
A
» Fig. 131 to eject a CD. For assigned memory spaces, the
indicator lights now illuminate in the buttons
D
.
›
Press the corresponding button
D
. The CD is ejected.
1)
For vehicles with the navigation system Amundsen + the AUX input located on the front panel of the
navigation device » manual of the navigation system Amundsen + .
133Communication and multimedia
Page 153 of 246
Assist systems
Brake assist systems
Introduction
This chapter contains information on the following subjects:
Electronic Stability Control (ESC)
151
Antilock brake system (ABS)
152
Traction Control System (TCS)
152
Electronic Differential Lock (EDL)
152
Driver Steering Recommendation (DSR)
152
Hydraulic Brake Assist (HBA)
152
Hill Hold Control (HHC)
153WARNING■ A lack of fuel can cause irregular engine running or cause the engine to
shut down. The brake assist systems would then fail to function – risk of
accident!■
Adjust the speed and driving style to the current visibility, weather, road
and traffic conditions. The increased safety provided by the brake assist
systems must not tempt you to take safety risks – risk of accident!
■
In the event of an ABS fault, visit a specialist garage immediately. Adjust
your style of driving according to the damage to the ABS, as you will not
know the exact extent of the damage or the extent to which this is limiting the braking efficiency.
CAUTION
■ All four wheels must be fitted with the same tyres approved by the manufac-
turer to ensure the brake assist systems operate correctly.■
Changes to the vehicle (e.g. to the engine, brakes, chassis) can influence the
functionality of the brake assist systems » page 169, Services, modifications,
and technical alterations .
■
If a fault occurs in the ABS system, the ESC, ASR and EDL will also not work.
An ABS fault is indicated by the warning light
» page 36 .
Electronic Stability Control (ESC)Fig. 145
ESC system: TCS button
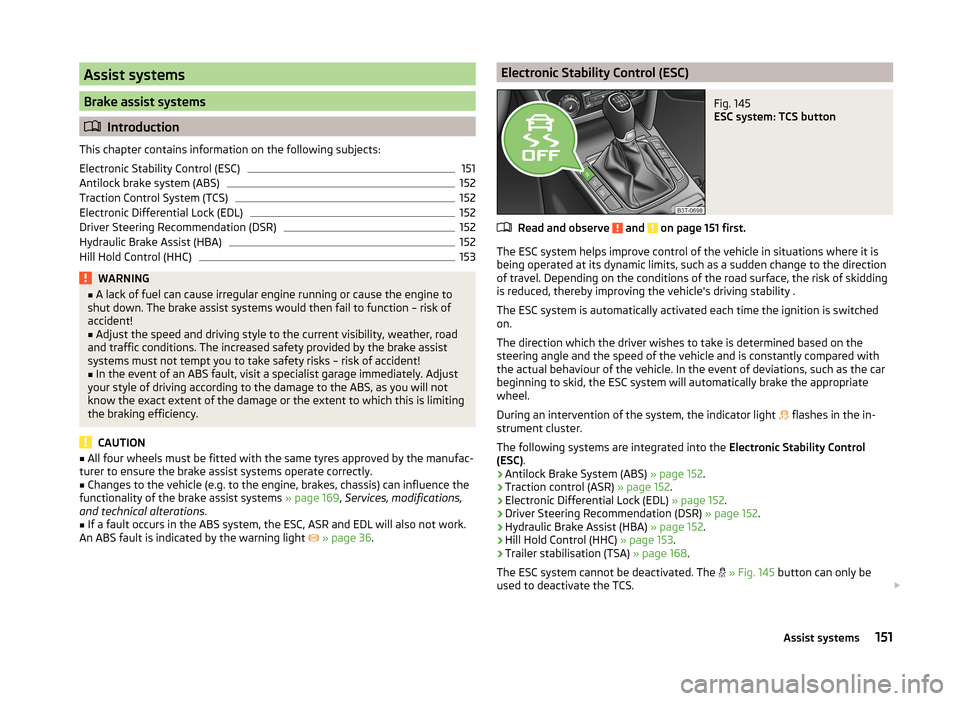
Read and observe and on page 151 first.
The ESC system helps improve control of the vehicle in situations where it is
being operated at its dynamic limits, such as a sudden change to the direction
of travel. Depending on the conditions of the road surface, the risk of skidding
is reduced, thereby improving the vehicle's driving stability .
The ESC system is automatically activated each time the ignition is switched
on.
The direction which the driver wishes to take is determined based on the
steering angle and the speed of the vehicle and is constantly compared with
the actual behaviour of the vehicle. In the event of deviations, such as the car
beginning to skid, the ESC system will automatically brake the appropriate
wheel.
During an intervention of the system, the indicator light flashes in the in-
strument cluster.
The following systems are integrated into the Electronic Stability Control
(ESC) .
› Antilock Brake System (ABS)
» page 152.
› Traction control (ASR)
» page 152.
› Electronic Differential Lock (EDL)
» page 152.
› Driver Steering Recommendation (DSR)
» page 152.
› Hydraulic Brake Assist (HBA)
» page 152.
› Hill Hold Control (HHC)
» page 153.
› Trailer stabilisation (TSA)
» page 168.
The ESC system cannot be deactivated. The
» Fig. 145 button can only be
used to deactivate the TCS.
151Assist systems
Page 158 of 246
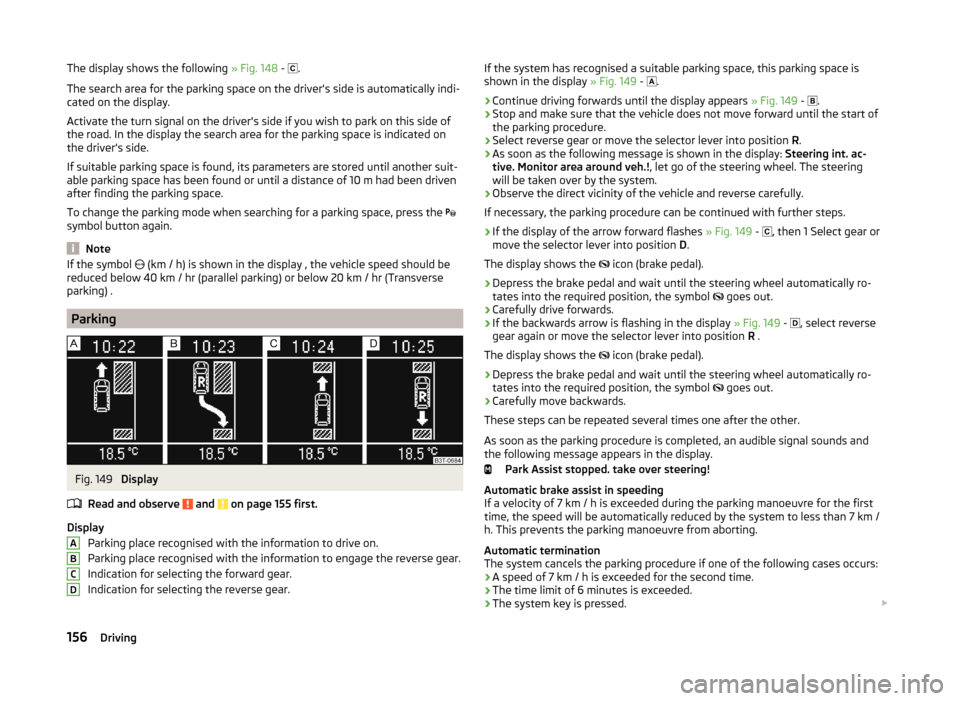
The display shows the following » Fig. 148 - .
The search area for the parking space on the driver's side is automatically indi- cated on the display.
Activate the turn signal on the driver's side if you wish to park on this side of
the road. In the display the search area for the parking space is indicated on
the driver's side.
If suitable parking space is found, its parameters are stored until another suit-
able parking space has been found or until a distance of 10 m had been driven
after finding the parking space.
To change the parking mode when searching for a parking space, press the
symbol button again.
Note
If the symbol (km / h) is shown in the display , the vehicle speed should be
reduced below 40 km / hr (parallel parking) or below 20 km / hr (Transverse
parking) .
Parking
Fig. 149
Display
Read and observe
and on page 155 first.
Display Parking place recognised with the information to drive on.
Parking place recognised with the information to engage the reverse gear.
Indication for selecting the forward gear.
Indication for selecting the reverse gear.
ABCDIf the system has recognised a suitable parking space, this parking space is
shown in the display » Fig. 149 - .›
Continue driving forwards until the display appears » Fig. 149 -
.
›
Stop and make sure that the vehicle does not move forward until the start of
the parking procedure.
›
Select reverse gear or move the selector lever into position R.
›
As soon as the following message is shown in the display: Steering int. ac-
tive. Monitor area around veh.! , let go of the steering wheel. The steering
will be taken over by the system.
›
Observe the direct vicinity of the vehicle and reverse carefully.
If necessary, the parking procedure can be continued with further steps.
›
If the display of the arrow forward flashes » Fig. 149 -
, then 1 Select gear or
move the selector lever into position D.
The display shows the icon (brake pedal).
›
Depress the brake pedal and wait until the steering wheel automatically ro-
tates into the required position, the symbol goes out.
›
Carefully drive forwards.
›
If the backwards arrow is flashing in the display
» Fig. 149 -
, select reverse
gear again or move the selector lever into position R .
The display shows the icon (brake pedal).
›
Depress the brake pedal and wait until the steering wheel automatically ro-
tates into the required position, the symbol goes out.
›
Carefully move backwards.
These steps can be repeated several times one after the other.
As soon as the parking procedure is completed, an audible signal sounds and
the following message appears in the display.
Park Assist stopped. take over steering!
Automatic brake assist in speeding
If a velocity of 7 km / h is exceeded during the parking manoeuvre for the first
time, the speed will be automatically reduced by the system to less than 7 km /
h. This prevents the parking manoeuvre from aborting.
Automatic termination
The system cancels the parking procedure if one of the following cases occurs:
› A speed of 7 km / h is exceeded for the second time.
› The time limit of 6 minutes is exceeded.
› The system key is pressed.
156Driving
Page 173 of 246
ŠKODA service partners are liable for any ŠKODA Genuine Part defects for aperiod of 2 years after installation or delivery in accordance with the materials
defect liability, provided that nothing else was agreed in the purchase contract
or in any other agreements. You should keep the approved warranty certificate
and the bill for these components for this period of time, so that commence-
ment of the term may be verified.
In addition, ŠKODA Service Partners also stock a range of suitable car care
products as well as those parts which are subject to natural wear-and-tear,
such as tyres, batteries, bulbs and wiper blades.
Note
The accessories authorized by the company ŠKODA AUTO a.s. will be offered
by the ŠKODA partners in all countries where the company ŠKODA AUTO a.s.
has a sales and service network. This will usually be in the form of a printed
catalogue of Original ŠKODA Accessories, in the form of separate printed bro-
chures or in the form of offers for ŠKODA Genuine Accessories on the ŠKODA
partner web pages.
Spoiler
Read and observe
on page 169 first.
If your new vehicle is fitted with a spoiler on the front bumper in combination
with the spoiler on the luggage compartment lid, the following instructions
must be adhered to.
› For safety reasons, the vehicle must only be fitted with a spoiler on the front
bumper in combination with the associated spoiler on the luggage compart-
ment lid.
› This kind of spoiler cannot be left on the front bumper either on its own, in
combination with another spoiler not on the luggage compartment lid or in
combination with an unsuitable spoiler on the luggage compartment lid.
› We recommend that you consult the ŠKODA Service Partner for any repairs
to or replacement, addition or removal of spoilers.
WARNINGIf work on your vehicle's spoilers is not carried out properly, this can lead to
operational faults - risk of accident and serious injuries.Airbags
Read and observe
on page 169 first.
The system components of the airbag system can be situated in the front
bumper, doors, front seats, roof lining or body.
WARNINGAny work on the airbag system including the installation and removal of
system components due to other repair work (e.g. removal of the steering
wheel) must only be carried out by a specialist garage.■
Modifications, repairs and technical alterations that have been carried out
unprofessionally can cause damage and operational faults, and can also se-
riously impair the effectiveness of the airbag system – risk of accident and
fatal injury!
■
The airbag system must then be replaced if the airbag has been deployed.
Airbag modules cannot be repaired.
WARNINGInformation on the use of the airbag system■It is prohibited to manipulate individual parts of the airbag system, as this
might result in the airbag being deployed.■
Never install any airbag parts into the vehicle that have been removed
from old cars or have been recycled.
■
Never install damaged airbag parts in the vehicle. The airbags may then
not be deployed properly or even at all in the event of an accident.
■
No modifications of any kind must be made to parts of the airbag system.
WARNING■ A change to the vehicle's wheel suspension, including the use of non-ap-
proved wheels and tire combinations, can alter the functioning of the air-
bag system - risk of accident and fatal injury!■
Never make any changes to the front bumper or the bodywork.
171Car care
Page 179 of 246
CAUTION■Be sure to check clothing for colourfastness to avoid any damage or visible
stains on the material (leather), panels and textiles.■
Remove fresh stains such as those from ball-point pens, ink, lipstick, shoe
polish, etc., from the material (leather), panels and textiles as quickly as possi-
ble.
■
Air fresheners and scents can be hazardous to heath when the temperature
inside the vehicle is high.
■
Do not attach scents or air fresheners to the dash panel – there is a risk of
damage to the dash panel.
■
Do not stick any stickers on the inside of the rear windows, the rear side win-
dows and in the vicinity of the heating elements on the windscreen or near the
window aerial. These may get damaged.
■
Do not clean the roof panelling with a brush – risk of damage to the surface
of the panelling.
■
Cleaner that contain solvents can damage the material being cleaned.
■
Apply only a small amount of the cleaning and care product.
For the sake of the environment
Used cans of vehicle care product represent hazardous waste that is harmful
to the environment. These must be disposed of in accordance with national
legislation.
Note
Because of the special tools and knowledge required, and to avoid any poten-
tial problems with the cleaning and care of the interior of your vehicle, we rec-
ommend that cleaning and care of the interior of your vehicle be carried out by
a ŠKODA Service Partner.
Natural leather
Read and observe
and on page 176 first.
Leather is a natural material with specific properties, and requires regular
cleaning and maintenance.
The leather should be cleaned on a regular basis depending on the amount of
wear-and-tear.
Dust and dirt in the pores and folds act as abrasive materials. This leads to se-
vere corrosion and the premature brittleness of the leather surface.
We recommend that you remove dust regularly and at short intervals using a
cloth or vacuum cleaner.
Clean soiled leather surfaces with a water-dampened cotton or woollen cloth
and then dry with a clean, dry cloth »
.
Clean severely soiled areas with a cloth soaked in a mild soap solution (2 ta-
blespoons of neutral soap to 1 litre of water).
To remove stains , use a cleaning agent specially designed for this purpose.
Treat the leather regularly and at suitable intervals using a suitable leather
care product.
CAUTION
■ Ensure that no part of the leather is soaked through during cleaning and that
no water gets into the seams. Otherwise, the leather could become brittle or
cracked.■
Avoid leaving the vehicle for lengthy periods in bright sunlight to avoid the
leather from bleaching. If the vehicle is parked in the open for lengthy periods,
protect the leather from direct sunlight by covering it.
■
Sharp-edged objects on items of clothing such as zip fasteners, rivets, sharp-
edged belts, jewellery and pendants may leave permanent scratches or signs
of rubbing on the surface. Such damage cannot be subsequently recognised as
a justified complaint.
■
The use of a mechanical steering wheel lock may damage the leather surface
of the steering wheel.
■
Use a care cream with light blocker and impregnation effect on a regular ba-
sis and each time after cleaning. The cream nourishes the leather, allows it to
breathe and keeps it supple and also provides moisture. It also creates surface
protection.
■
Some clothing materials, e.g. dark denim, do not have sufficient colour fast-
ness. This can cause damage or clearly visible discolouration to seat covers,
even when used correctly. This applies particularly to light-coloured seat cov-
ers. This does not relate to a fault in the seat cover, but rather to poor colour
fastness of the clothing textiles.
Note
When using the vehicle, minor visible changes may occur to the leather parts
of the covers (e.g. wrinkles or creases) as a result of the stress applied to the
covers.177Car care
Page 180 of 246
Artificial leather, cloths and Alcantara®
Read and observe
and on page 176 first.
Artificial leather
Clean artificial leather with a damp cloth.
If this method does not completely clean the artificial leather, use a mild soap
solution or cleaning products specially designed for this purpose.
Fabric
Clean upholstery cover materials and cloth trims on doors, boot cover, etc. us-
ing specific cleaning agents, e.g., dry foam.
Use a soft sponge, brush, or commercially available microfibre cloth.
Use a cloth and special detergent to clean the roof trim.
Remove any lumps on the cover fabric and any fabric residue using a brush.
Remove stubborn hair using a “cleaning glove”.
Alcantara ®
Dust and fine dirt particles in pores, creases and seams may chafe and damage
the surface.
If you leave your vehicle parked in the open for lengthy periods, protect the Al-
cantara ®
seat covers from the direct rays of the sun to prevent fading.
Minor changes in colour caused by use are normal.
CAUTION
■ Do not use any leather cleaners on Alcantara ®
seat covers.■For Alcantara ®
seat covers do not use any solvents, floor wax, shoe cream,
stain remover, or similar agents.■
Avoid leaving the vehicle in bright sunlight for long periods of time in order
to stop the fabric from bleaching. If the vehicle is parked outside for long peri-
ods of time, cover the fabric to protect it from direct sunlight.
■
Some clothing materials, e.g. dark denim, do not have sufficient colour fast-
ness. This can cause damage or clearly visible discolouration to seat covers,
even when used correctly. This applies particularly to light-coloured seat cov-
ers. This does not relate to a fault in the seat cover, but rather to poor colour
fastness of the clothing textiles.
Seat covers
Read and observe
and on page 176 first.
Electrically heated seats
Do not clean the covers by moistening, as this can damage the seat heating
system.
Use a specific cleaning agent such as dry foam or similar to clean the covers.
Seats without seat heating
Thoroughly vacuum the seat covers with a vacuum cleaner before cleaning.
Clean the seat covers with a damp cloth or cleaning products specially de-
signed for this purpose.
Indented points arising on the fabrics by everyday use, can be removed by
brushing against the direction of hair with a damp brush.
Always clean all parts of the covers, so that there are no visible edges. Then
allow the seat to dry completely.
CAUTION
■ Regularly remove dust from the seat covers using a vacuum cleaner.■Electrically heated seats must not be dried after cleaning by switching on the
heater.■
Do not sit on wet seats - risk of seat deformation.
■
Always clean the seats “from seam to seam”.
Seat belts
Read and observe
and on page 176 first.
The belt webbing must always be kept clean.
Wash dirty seat belts with mild soapy water.
Remove coarse dirt with a soft brush.
Dirty belt webbing may impair the correct functioning of the inertia reel.
WARNING■ The seat belts must not be removed for cleaning.■Never clean the seat belts chemically as chemical cleaning products could
destroy the fabric. 178General Maintenance