mirror SKODA SUPERB 2014 2.G / (B6/3T) Owner's Manual
[x] Cancel search | Manufacturer: SKODA, Model Year: 2014, Model line: SUPERB, Model: SKODA SUPERB 2014 2.G / (B6/3T)Pages: 246, PDF Size: 17.16 MB
Page 5 of 246
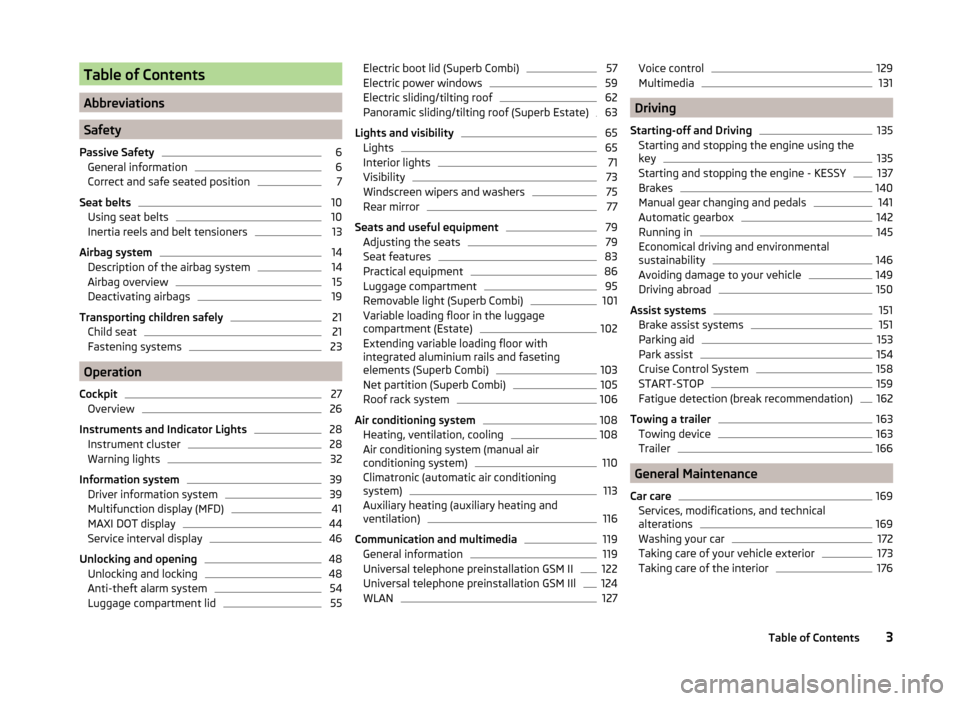
Table of Contents
Abbreviations
Safety
Passive Safety
6
General information
6
Correct and safe seated position
7
Seat belts
10
Using seat belts
10
Inertia reels and belt tensioners
13
Airbag system
14
Description of the airbag system
14
Airbag overview
15
Deactivating airbags
19
Transporting children safely
21
Child seat
21
Fastening systems
23
Operation
Cockpit
27
Overview
26
Instruments and Indicator Lights
28
Instrument cluster
28
Warning lights
32
Information system
39
Driver information system
39
Multifunction display (MFD)
41
MAXI DOT display
44
Service interval display
46
Unlocking and opening
48
Unlocking and locking
48
Anti-theft alarm system
54
Luggage compartment lid
55Electric boot lid (Superb Combi)57Electric power windows59
Electric sliding/tilting roof
62
Panoramic sliding/tilting roof (Superb Estate)
63
Lights and visibility
65
Lights
65
Interior lights
71
Visibility
73
Windscreen wipers and washers
75
Rear mirror
77
Seats and useful equipment
79
Adjusting the seats
79
Seat features
83
Practical equipment
86
Luggage compartment
95
Removable light (Superb Combi)
101
Variable loading floor in the luggage
compartment (Estate)
102
Extending variable loading floor with
integrated aluminium rails and faseting
elements (Superb Combi)
103
Net partition (Superb Combi)
105
Roof rack system
106
Air conditioning system
108
Heating, ventilation, cooling
108
Air conditioning system (manual air
conditioning system)
110
Climatronic (automatic air conditioning
system)
113
Auxiliary heating (auxiliary heating and
ventilation)
116
Communication and multimedia
119
General information
119
Universal telephone preinstallation GSM II
122
Universal telephone preinstallation GSM IIl
124
WLAN
127Voice control129Multimedia131
Driving
Starting-off and Driving
135
Starting and stopping the engine using the key
135
Starting and stopping the engine - KESSY
137
Brakes
140
Manual gear changing and pedals
141
Automatic gearbox
142
Running in
145
Economical driving and environmental
sustainability
146
Avoiding damage to your vehicle
149
Driving abroad
150
Assist systems
151
Brake assist systems
151
Parking aid
153
Park assist
154
Cruise Control System
158
START-STOP
159
Fatigue detection (break recommendation)
162
Towing a trailer
163
Towing device
163
Trailer
166
General Maintenance
Car care
169
Services, modifications, and technical
alterations
169
Washing your car
172
Taking care of your vehicle exterior
173
Taking care of the interior
1763Table of Contents
Page 8 of 246
Safety
Passive Safety
General information
Introduction
This chapter contains information on the following subjects:
Before setting off
6
Driving safety
6
Safety equipment
6
In this section you will find important information, tips and notes on the sub-
ject of passive safety in your vehicle.
We have combined everything here which you should be familiar with, for ex-
ample, regarding seat belts, airbags, child seats and safety of children.
WARNING■ This chapter contains important information on how to use the vehicle for
the driver and his occupants.■
You can find further information on safety concerning you and those trav-
elling with you in the following chapters of this owner's manual.
■
The complete on-board literature should always be in the vehicle. This
applies in particular, if you rent out or sell the vehicle.
Before setting off
Read and observe
on page 6 first.
For your own safety and the safety of the people travelling with you, please
pay attention to the following points before setting off.
Ensure that the lighting and the turn signal system are functioning proper-
ly.
Ensure that the function of the wiper and the condition of the wiper
blades are free of any defects.
Ensure that all of the windows offer good visibility to the outside.
Adjust the rear-view mirror so that vision to the rear is guaranteed.
Ensure that the mirrors are not covered.
Check the tyre inflation pressure.
Check the engine oil, brake fluid and coolant level.
Secure all items of luggage.
Do not exceed the permissible axle loads and permissible gross weight of
the vehicle.
Close all doors as well as the bonnet and boot lid.
Ensure that no objects can obstruct the pedals.
Protect children in suitable child seats with correctly fastened seat
belts » page 21 , Transporting children safely .
Adopt the correct seated position » page 7, Correct and safe seated
position . Tell your passengers to assume the correct seated position.
Driving safety
Read and observe
on page 6 first.
The driver is fully responsible for himself and his occupants. If your driving
safety is effected, you place yourself and the oncoming traffic at risk.
The following guidelines must therefore be observed. Do not become distracted from concentrating on the traffic situation, e.g.
by your passengers or mobile phone calls.
Never drive when your driving ability is impaired, e.g. due to medication, al-
cohol or drugs.
Keep to the traffic regulations and the permissible speed limit.
Always adjust the driving speed to the road, traffic and weather condi-
tions.
Take regular breaks on long journeys – at least every two hours.
Safety equipment
Read and observe
on page 6 first.
The following list contains only part of the safety equipment in your vehicle.
› Three-point seat belts for all the seats.
› Belt force limiter for front and outer rear seats.
› Belt tensioner for front and outer rear seats.
› Seat belt height adjusters for the front seats.
› Front airbag for the driver and the front passenger.
› Driver’s knee airbag.
6Safety
Page 29 of 246
Operation
Cockpit
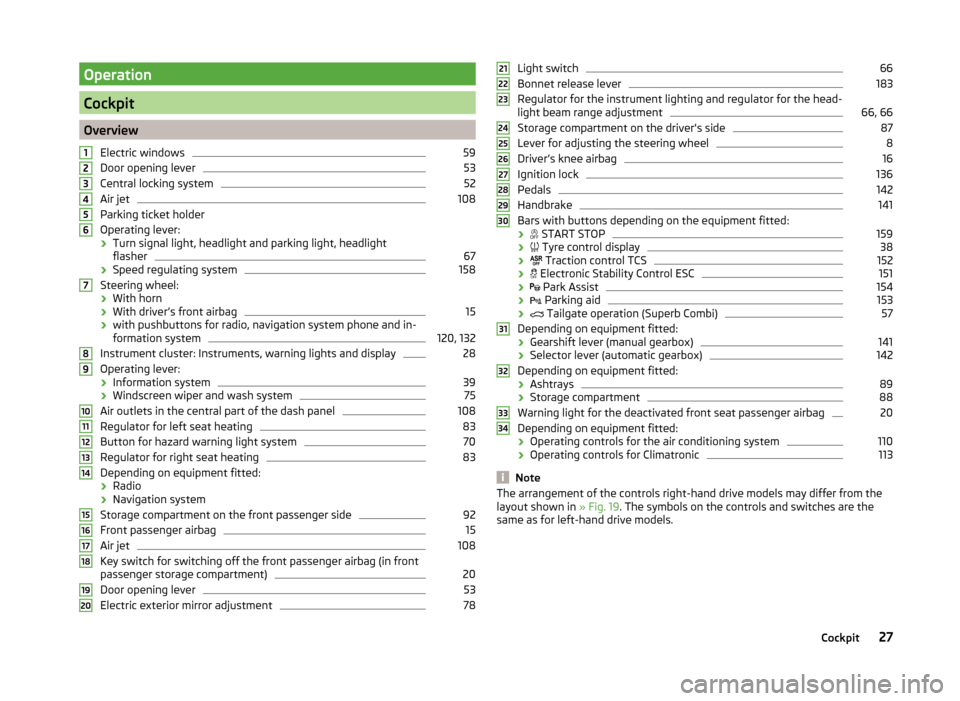
OverviewElectric windows
59
Door opening lever
53
Central locking system
52
Air jet
108
Parking ticket holder
Operating lever: › Turn signal light, headlight and parking light, headlight
flasher
67
› Speed regulating system
158
Steering wheel:
› With horn
› With driver’s front airbag
15
›with pushbuttons for radio, navigation system phone and in-
formation system
120, 132
Instrument cluster: Instruments, warning lights and display
28
Operating lever:
› Information system
39
›Windscreen wiper and wash system
75
Air outlets in the central part of the dash panel
108
Regulator for left seat heating
83
Button for hazard warning light system
70
Regulator for right seat heating
83
Depending on equipment fitted:
› Radio
› Navigation system
Storage compartment on the front passenger side
92
Front passenger airbag
15
Air jet
108
Key switch for switching off the front passenger airbag (in front
passenger storage compartment)
20
Door opening lever
53
Electric exterior mirror adjustment
781234567891011121314151617181920Light switch66
Bonnet release lever
183
Regulator for the instrument lighting and regulator for the head-
light beam range adjustment
66, 66
Storage compartment on the driver's side
87
Lever for adjusting the steering wheel
8
Driver’s knee airbag
16
Ignition lock
136
Pedals
142
Handbrake
141
Bars with buttons depending on the equipment fitted:
›
START STOP
159
›
Tyre control display
38
›
Traction control TCS
152
›
Electronic Stability Control ESC
151
›
Park Assist
154
›
Parking aid
153
›
Tailgate operation (Superb Combi)
57
Depending on equipment fitted:
› Gearshift lever (manual gearbox)
141
›Selector lever (automatic gearbox)
142
Depending on equipment fitted:
› Ashtrays
89
›Storage compartment
88
Warning light for the deactivated front seat passenger airbag
20
Depending on equipment fitted:
› Operating controls for the air conditioning system
110
›
Operating controls for Climatronic
113
Note
The arrangement of the controls right-hand drive models may differ from the
layout shown in » Fig. 19. The symbols on the controls and switches are the
same as for left-hand drive models.212223242526272829303132333427Cockpit
Page 47 of 246
SettingsRead and observe
and on page 44 first.
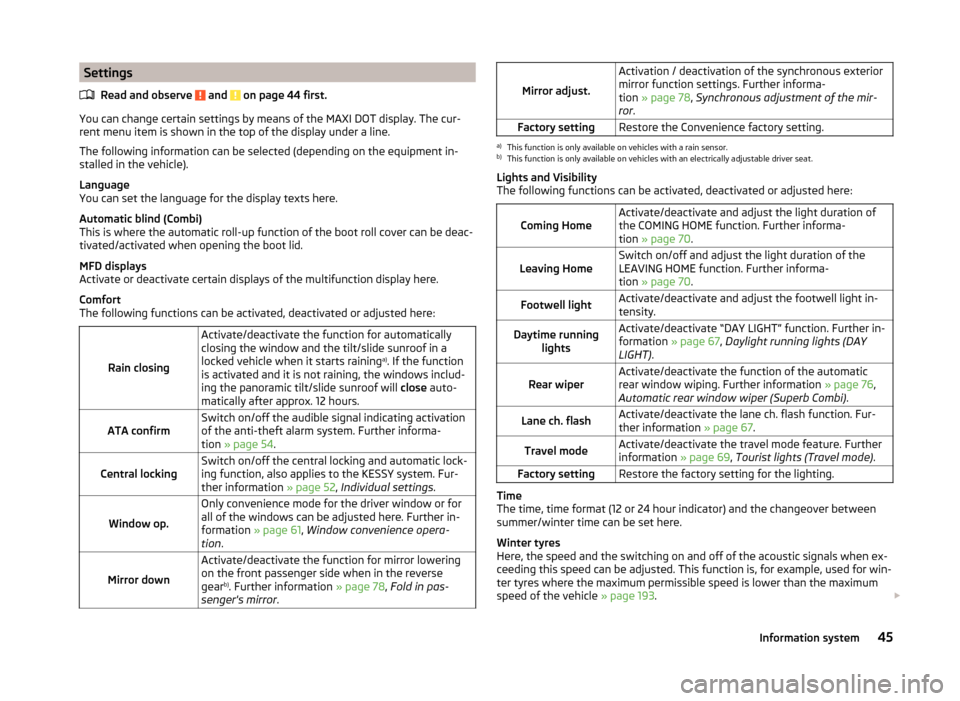
You can change certain settings by means of the MAXI DOT display. The cur-
rent menu item is shown in the top of the display under a line.
The following information can be selected (depending on the equipment in- stalled in the vehicle).
Language
You can set the language for the display texts here.
Automatic blind (Combi)
This is where the automatic roll-up function of the boot roll cover can be deac-
tivated/activated when opening the boot lid.
MFD displays
Activate or deactivate certain displays of the multifunction display here.
Comfort
The following functions can be activated, deactivated or adjusted here:
Rain closing
Activate/deactivate the function for automatically
closing the window and the tilt/slide sunroof in a
locked vehicle when it starts raining a)
. If the function
is activated and it is not raining, the windows includ-
ing the panoramic tilt/slide sunroof will close auto-
matically after approx. 12 hours.ATA confirmSwitch on/off the audible signal indicating activation
of the anti-theft alarm system. Further informa-
tion » page 54 .Central lockingSwitch on/off the central locking and automatic lock-
ing function, also applies to the KESSY system. Fur-
ther information » page 52, Individual settings .
Window op.
Only convenience mode for the driver window or for
all of the windows can be adjusted here. Further in-
formation » page 61, Window convenience opera-
tion .
Mirror down
Activate/deactivate the function for mirror lowering
on the front passenger side when in the reverse
gear b)
. Further information » page 78, Fold in pas-
senger's mirror .
Mirror adjust.
Activation / deactivation of the synchronous exterior
mirror function settings. Further informa-
tion » page 78 , Synchronous adjustment of the mir-
ror .Factory settingRestore the Convenience factory setting.a)
This function is only available on vehicles with a rain sensor.
b)
This function is only available on vehicles with an electrically adjustable driver seat.
Lights and Visibility
The following functions can be activated, deactivated or adjusted here:
Coming HomeActivate/deactivate and adjust the light duration of
the COMING HOME function. Further informa-
tion » page 70 .Leaving HomeSwitch on/off and adjust the light duration of the
LEAVING HOME function. Further informa-
tion » page 70 .Footwell lightActivate/deactivate and adjust the footwell light in-
tensity.Daytime running lightsActivate/deactivate “DAY LIGHT” function. Further in-
formation » page 67, Daylight running lights (DAY
LIGHT) .Rear wiperActivate/deactivate the function of the automatic
rear window wiping. Further information » page 76,
Automatic rear window wiper (Superb Combi) .Lane ch. flashActivate/deactivate the lane ch. flash function. Fur-
ther information » page 67.Travel modeActivate/deactivate the travel mode feature. Further
information » page 69, Tourist lights (Travel mode) .Factory settingRestore the factory setting for the lighting.
Time
The time, time format (12 or 24 hour indicator) and the changeover between
summer/winter time can be set here.
Winter tyres
Here, the speed and the switching on and off of the acoustic signals when ex-
ceeding this speed can be adjusted. This function is, for example, used for win-
ter tyres where the maximum permissible speed is lower than the maximum
speed of the vehicle » page 193.
45Information system
Page 51 of 246
Vehicle keyFig. 30
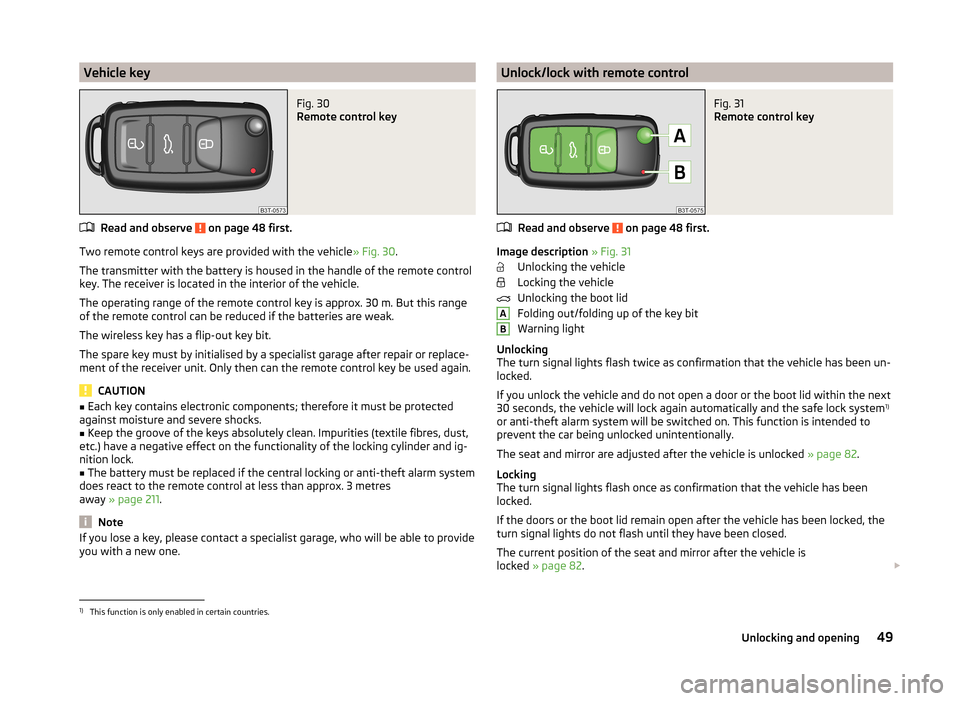
Remote control key
Read and observe on page 48 first.
Two remote control keys are provided with the vehicle» Fig. 30.
The transmitter with the battery is housed in the handle of the remote control key. The receiver is located in the interior of the vehicle.
The operating range of the remote control key is approx. 30 m. But this range of the remote control can be reduced if the batteries are weak.
The wireless key has a flip-out key bit.
The spare key must by initialised by a specialist garage after repair or replace- ment of the receiver unit. Only then can the remote control key be used again.
CAUTION
■ Each key contains electronic components; therefore it must be protected
against moisture and severe shocks.■
Keep the groove of the keys absolutely clean. Impurities (textile fibres, dust,
etc.) have a negative effect on the functionality of the locking cylinder and ig-
nition lock.
■
The battery must be replaced if the central locking or anti-theft alarm system
does react to the remote control at less than approx. 3 metres
away » page 211 .
Note
If you lose a key, please contact a specialist garage, who will be able to provide
you with a new one.Unlock/lock with remote controlFig. 31
Remote control key
Read and observe on page 48 first.
Image description » Fig. 31
Unlocking the vehicle
Locking the vehicle
Unlocking the boot lid
Folding out/folding up of the key bit
Warning light
Unlocking
The turn signal lights flash twice as confirmation that the vehicle has been un-
locked.
If you unlock the vehicle and do not open a door or the boot lid within the next
30 seconds, the vehicle will lock again automatically and the safe lock system 1)
or anti-theft alarm system will be switched on. This function is intended to prevent the car being unlocked unintentionally.
The seat and mirror are adjusted after the vehicle is unlocked » page 82.
Locking
The turn signal lights flash once as confirmation that the vehicle has been
locked.
If the doors or the boot lid remain open after the vehicle has been locked, the
turn signal lights do not flash until they have been closed.
The current position of the seat and mirror after the vehicle is
locked » page 82 .
AB1)
This function is only enabled in certain countries.
49Unlocking and opening
Page 62 of 246
WARNING■Ensure that no persons are still left in the vehicle when locking the vehi-
cle. In an emergency, the windows will no longer be able to be opened from
the inside.■
The system is fitted with a force limiter » page 61. If there is an obsta-
cle, the closing process is stopped and the window goes down by several
centimetres. However, the windows should be closed carefully – risk of in-
jury.
■
Deactivating the electrically operated power windows in the rear doors is
recommended (safety push button)
S
when children are being transported
in the rear seats » Fig. 43 on page 60 .
CAUTION
■
Keep the windows clean to ensure the correct functionality of the electric
windows.■
In the event that the windows are frozen, first of all eliminate the
ice » page 175 , Windows and exterior mirrors and only then operate the elec-
trical power windows. Otherwise, the window sealing and the electrical power
window mechanism could be damaged.
■
In the winter, ice accumulating on the surface of the window may cause
there to be more resistance when closing the window. The window will stop
and move back several centimetres.
■
It is necessary to deactivate the force limiter to close the win-
dow » page 61 .
■
Make sure that the windows are closed whenever you leave the locked vehi-
cle.
For the sake of the environment
At high speeds, you should keep the windows closed to prevent unnecessarily high fuel consumption.Note■ After switching the ignition off, it is still possible to open or close the win-
dows for approx. 10 minutes. After the driver's or front passenger's door has
been opened, the windows can only be operated by using button A
» Fig. 43
on page 60 .
■
When driving always use the existing heating, air conditioning and ventila-
tion system for ventilating the interior of the vehicle. If the windows are
opened, dust as well as other dirt can get into the vehicle and in addition the
wind noise is more at certain speeds.
■
The window lift system is equipped with protection against overheating. Re-
peated opening and closing of the window can cause this mechanism to over-
heat. If this happens, it will not be possible to operate the window for a short
time. You will be able to operate the window again as soon as the overheating
protection has cooled down.
Opening/closing the window from the driver seat
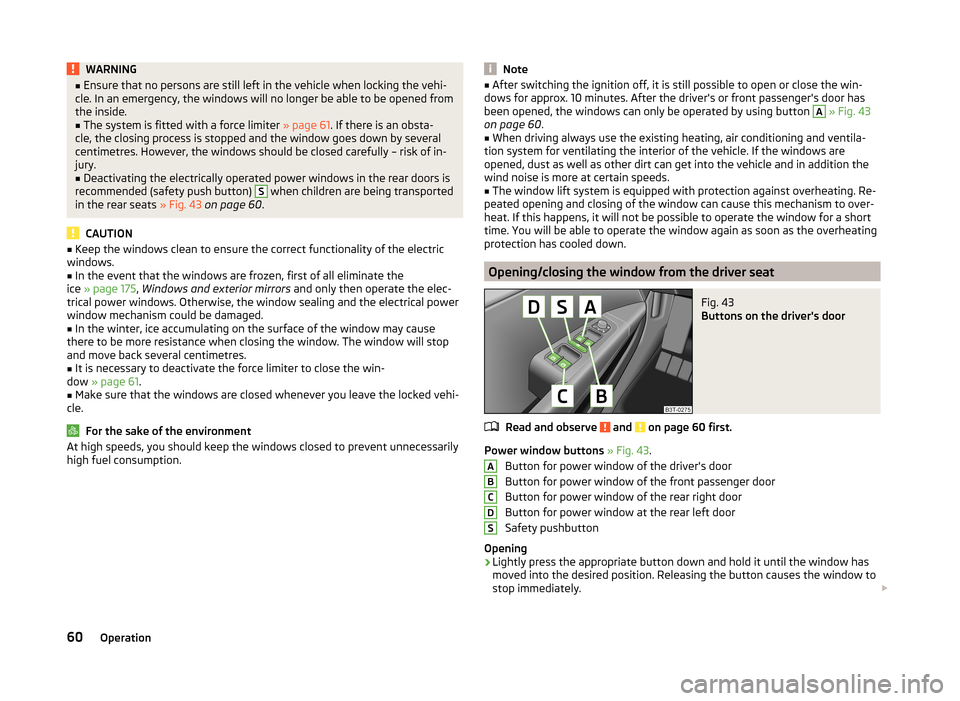
Fig. 43
Buttons on the driver's door
Read and observe and on page 60 first.
Power window buttons » Fig. 43 .
Button for power window of the driver's door
Button for power window of the front passenger door
Button for power window of the rear right door
Button for power window at the rear left door
Safety pushbutton
Opening
›
Lightly press the appropriate button down and hold it until the window has
moved into the desired position. Releasing the button causes the window to
stop immediately.
ABCDS60Operation
Page 70 of 246
The “Intelligent turn signal” can be activated or deactivated via the Maxi DOT
display in the Intelligent turn signal » page 45 menu item.WARNINGOnly turn on the main beam or the headlight flasher if other road users will
not be dazzled.
Note
The headlight flasher can be operated even if the ignition is switched off.
Automatic driving lamp control
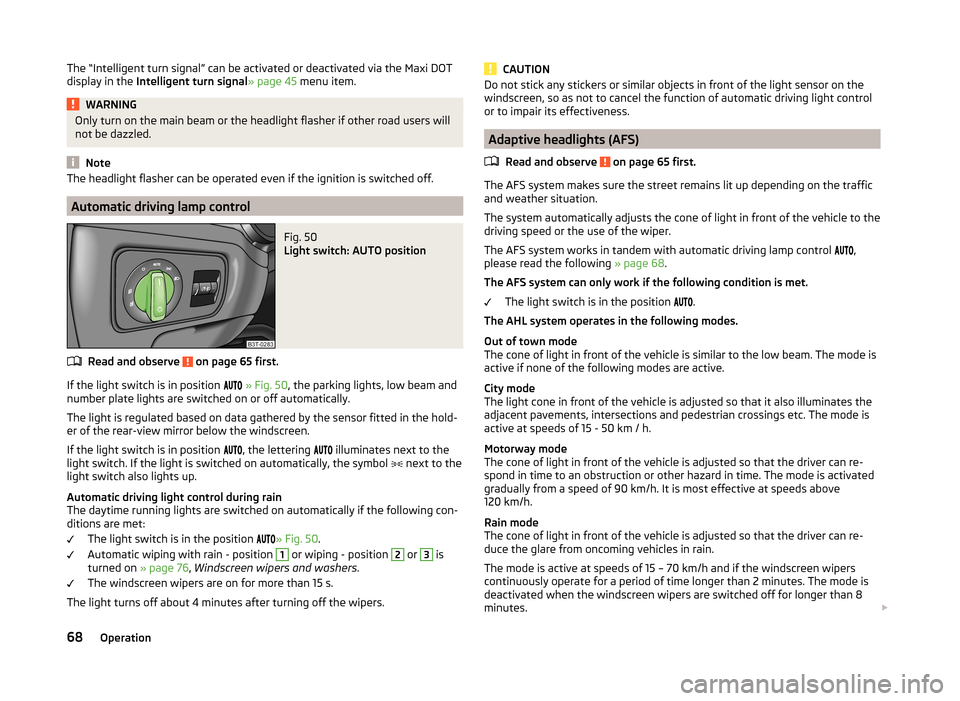
Fig. 50
Light switch: AUTO position
Read and observe on page 65 first.
If the light switch is in position
» Fig. 50 , the parking lights, low beam and
number plate lights are switched on or off automatically.
The light is regulated based on data gathered by the sensor fitted in the hold- er of the rear-view mirror below the windscreen.
If the light switch is in position
, the lettering
illuminates next to the
light switch. If the light is switched on automatically, the symbol
next to the
light switch also lights up.
Automatic driving light control during rain
The daytime running lights are switched on automatically if the following con-
ditions are met:
The light switch is in the position
» Fig. 50 .
Automatic wiping with rain - position
1
or wiping - position
2
or
3
is
turned on » page 76, Windscreen wipers and washers .
The windscreen wipers are on for more than 15 s.
The light turns off about 4 minutes after turning off the wipers.
CAUTIONDo not stick any stickers or similar objects in front of the light sensor on the
windscreen, so as not to cancel the function of automatic driving light control
or to impair its effectiveness.
Adaptive headlights (AFS)
Read and observe
on page 65 first.
The AFS system makes sure the street remains lit up depending on the trafficand weather situation.
The system automatically adjusts the cone of light in front of the vehicle to the
driving speed or the use of the wiper.
The AFS system works in tandem with automatic driving lamp control ,
please read the following » page 68.
The AFS system can only work if the following condition is met. The light switch is in the position .
The AHL system operates in the following modes.
Out of town mode
The cone of light in front of the vehicle is similar to the low beam. The mode is active if none of the following modes are active.
City mode
The light cone in front of the vehicle is adjusted so that it also illuminates the
adjacent pavements, intersections and pedestrian crossings etc. The mode is
active at speeds of 15 - 50 km / h.
Motorway mode
The cone of light in front of the vehicle is adjusted so that the driver can re-
spond in time to an obstruction or other hazard in time. The mode is activated
gradually from a speed of 90 km/h. It is most effective at speeds above
120 km/h.
Rain mode
The cone of light in front of the vehicle is adjusted so that the driver can re-
duce the glare from oncoming vehicles in rain.
The mode is active at speeds of 15 – 70 km/h and if the windscreen wipers
continuously operate for a period of time longer than 2 minutes. The mode is
deactivated when the windscreen wipers are switched off for longer than 8
minutes.
68Operation
Page 72 of 246
The rear fog light is switched off in the reverse order.
The warning light
lights up in the instrument cluster when the rear fog light
is switched on » page 32.
When in reverse gear only the rear fog lamp illuminates on the driver's side.
Only the rear fog light on the trailer lights up if the vehicle has a factory-fitted
towing device or a towing device from ŠKODA original accessories and it is
driven with a trailer.
COMING HOME / LEAVING HOME
Read and observe
on page 65 first.
COMING HOME/LEAVING HOME (hereafter referred to only as function)
switches on the lights for a short time after leaving the vehicle or when ap-
proaching the vehicle.
The daytime running lights are switched on automatically if the following
conditions are met:
The light switch is in the position » Fig. 50
on page 68 .
The visibility in the vehicle environment is reduced.
The ignition is switched off.
The parking aid is activated.
The function switches on the following light, depending on the equipment
fitted.
› Parking lights
› Low beam
› Entry lighting in the exterior mirrors
› Licence plate light
The light is controlled on the basis of information that is collected from the
holder mounted in the rear-view mirror sensor » page 68 .
COMING HOME
The light turns on automatically when you open the driver's door on (within 60
seconds of turning off the ignition).
The light turns off 10 seconds after closing all the doors and the boot lid or af-
ter the pre-set time has expired.
If a door or the boot lid remains open, the light goes out after 60 seconds.
LEAVING HOME
The light turns on automatically after the vehicle is unlocked with the remote
control.
The light turns off after 10 seconds or after a pre-set time or after the vehicle
is locked.
Activate/deactivate the function
The functions and settings of the illumination time can be activated/deactiva- ted via the MAXI DOT display in the menu items Coming Home or Leaving
Home » page 45 .
CAUTION
■
Do not attach any stickers or similar objects in front of the light sensor on
the windscreen to avoid impairing the function or its reliability.■
If this function is activated constantly, the battery will be heavily discharged
particularly in short-haul traffic.
Hazard warning light system
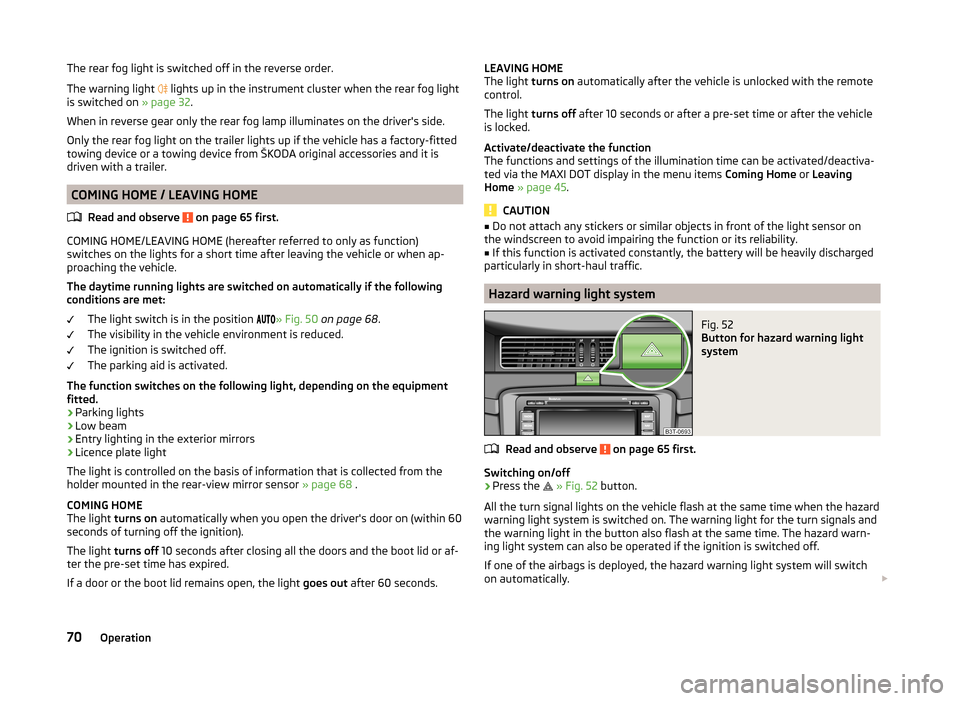
Fig. 52
Button for hazard warning light
system
Read and observe on page 65 first.
Switching on/off
›
Press the
» Fig. 52 button.
All the turn signal lights on the vehicle flash at the same time when the hazard
warning light system is switched on. The warning light for the turn signals and
the warning light in the button also flash at the same time. The hazard warn-
ing light system can also be operated if the ignition is switched off.
If one of the airbags is deployed, the hazard warning light system will switch
on automatically.
70Operation
Page 75 of 246
NoteIf the door is open and the ignition switched off, the light extinguishes auto-
matically after around 20 minutes.
Entry lighting
The lighting is positioned on the bottom edge of the exterior mirror and illumi-
nates the entry area of the front door.
The light comes on after the vehicle has been unlocked or on opening the
front door. The lighting goes out about 30 seconds after the doors are closed
or if the ignition is switched on.
WARNINGIf the entry light is on, do not touch its cover – risk of burns!
Note
If the door is open and the ignition switched off, the light will extinguish auto-
matically after around 1 minutes.
Visibility
Introduction
This chapter contains information on the following subjects:
Windscreen and rear window heater
73
Sun visors
74
Sun screen
74
Sun screen in the rear doors
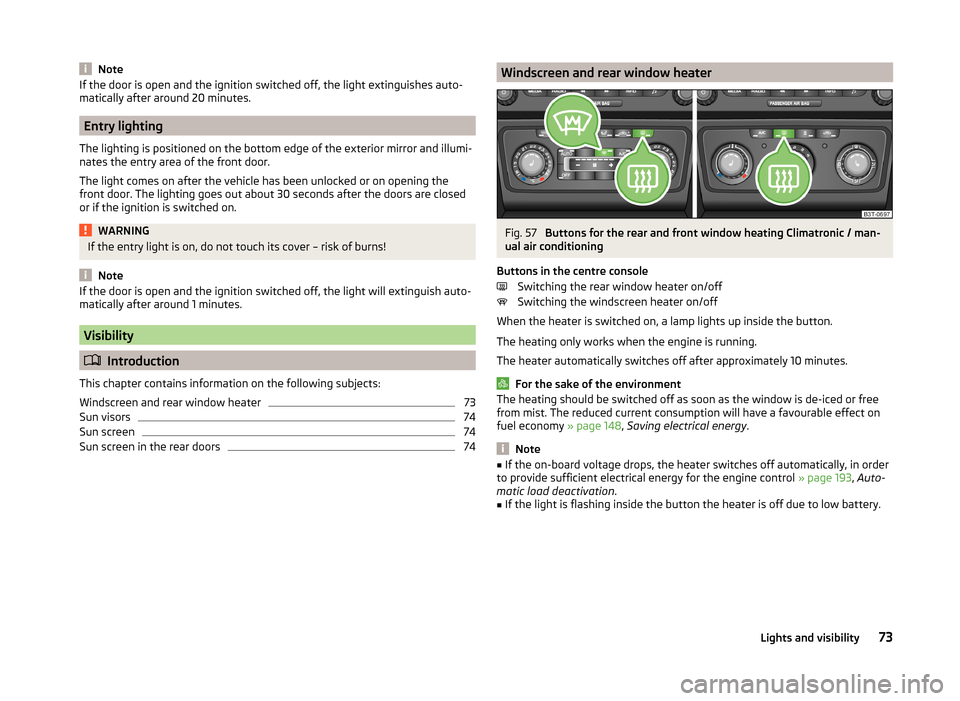
74Windscreen and rear window heaterFig. 57
Buttons for the rear and front window heating Climatronic / man-
ual air conditioning
Buttons in the centre console Switching the rear window heater on/off
Switching the windscreen heater on/off
When the heater is switched on, a lamp lights up inside the button.
The heating only works when the engine is running.
The heater automatically switches off after approximately 10 minutes.
For the sake of the environment
The heating should be switched off as soon as the window is de-iced or free
from mist. The reduced current consumption will have a favourable effect on
fuel economy » page 148, Saving electrical energy .
Note
■
If the on-board voltage drops, the heater switches off automatically, in order
to provide sufficient electrical energy for the engine control » page 193, Auto-
matic load deactivation .■
If the light is flashing inside the button the heater is off due to low battery.
73Lights and visibility
Page 76 of 246
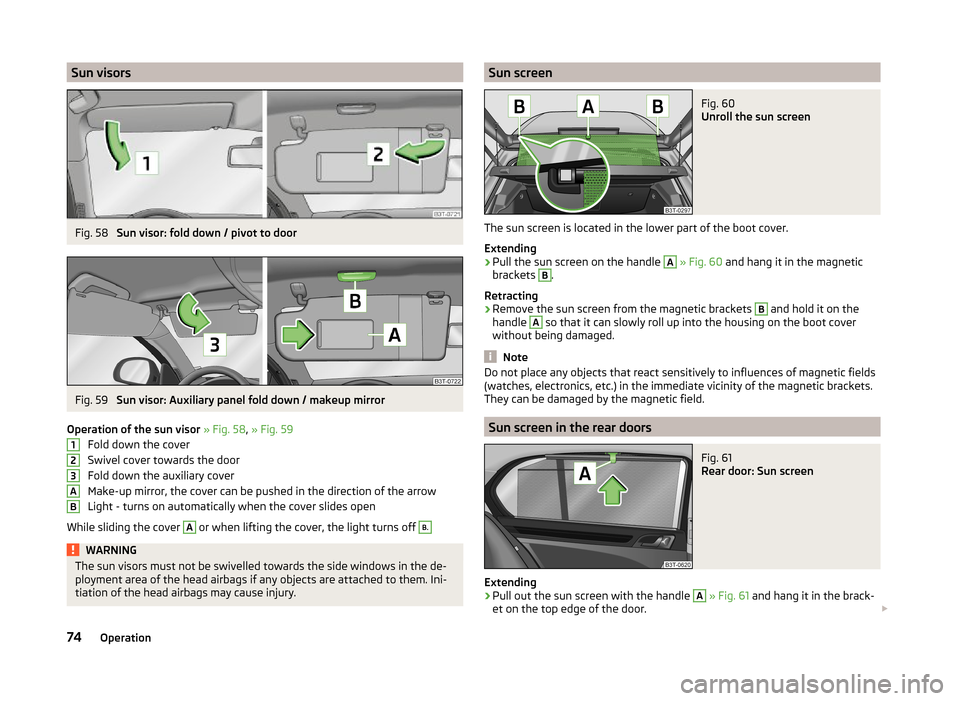
Sun visorsFig. 58
Sun visor: fold down / pivot to door
Fig. 59
Sun visor: Auxiliary panel fold down / makeup mirror
Operation of the sun visor » Fig. 58 , » Fig. 59
Fold down the cover
Swivel cover towards the door
Fold down the auxiliary cover
Make-up mirror, the cover can be pushed in the direction of the arrow
Light - turns on automatically when the cover slides open
While sliding the cover
A
or when lifting the cover, the light turns off
B.WARNINGThe sun visors must not be swivelled towards the side windows in the de-
ployment area of the head airbags if any objects are attached to them. Ini-
tiation of the head airbags may cause injury.123ABSun screenFig. 60
Unroll the sun screen
The sun screen is located in the lower part of the boot cover.
Extending
›
Pull the sun screen on the handle
A
» Fig. 60 and hang it in the magnetic
brackets
B
.
Retracting
›
Remove the sun screen from the magnetic brackets
B
and hold it on the
handle
A
so that it can slowly roll up into the housing on the boot cover
without being damaged.
Note
Do not place any objects that react sensitively to influences of magnetic fields
(watches, electronics, etc.) in the immediate vicinity of the magnetic brackets.
They can be damaged by the magnetic field.
Sun screen in the rear doors
Fig. 61
Rear door: Sun screen
Extending
›
Pull out the sun screen with the handle
A
» Fig. 61 and hang it in the brack-
et on the top edge of the door.
74Operation