spare tire SKODA SUPERB 2014 2.G / (B6/3T) Owner's Manual
[x] Cancel search | Manufacturer: SKODA, Model Year: 2014, Model line: SUPERB, Model: SKODA SUPERB 2014 2.G / (B6/3T)Pages: 246, PDF Size: 17.16 MB
Page 200 of 246

Please note the following if you intend to use the temporary spare wheel.› The warning label must not be covered after installing the wheel.
› Be particularly observant when driving.
› The temporary spare wheel is inflated to the maximum inflation pressure for
the vehicle » Fig. 168 on page 194 .
› The tyre inflation pressure of the spare wheel R 18 is 420 kPa.
› Only use this temporary spare wheel to reach the nearest specialist garage,
as it is not intended for long-term use.WARNING■ Never drive with more than one temporary spare wheel mounted!■Never use the temporary spare wheel if it is damaged.■
If the dimensions or design of the temporary spare wheel differ from the
fitted tyres, never drive faster than 80 km/h (or 50 mph).
■
Avoid accelerating at full throttle, sharp braking and fast cornering.
CAUTION
Observe the instructions on the warning sign of the temporary spare wheel.
Full wheel trim
Read and observe
and on page 193 first.
Pulling off
›
Hook the clamp found in the vehicle tool kit » page 201 into the reinforced
edge of the wheel trim.
›
Push the wheel wrench through the clamp, support on the tyre and pull off
the wheel trim.
Fitting
›
Press the wheel trim onto the wheel rim at the designated valve opening.
›
Then press the trim into the wheel rim until its entire circumference locks
correctly in place.
CAUTION
■ Use the pressure of your hand only, do not strike the full wheel trim. Avoid
heavy impacts when the trim has not yet been inserted into the wheel rim.
This could cause damage to the guide and centring elements of the trim.■
When using the anti-theft wheel bolt, ensure that it is in the hole in the
valve area » page 204 , Securing wheels against theft .
■
If wheel trims are retrofitted it must be ensured that an adequate flow of air
is assured to cool the brake system.
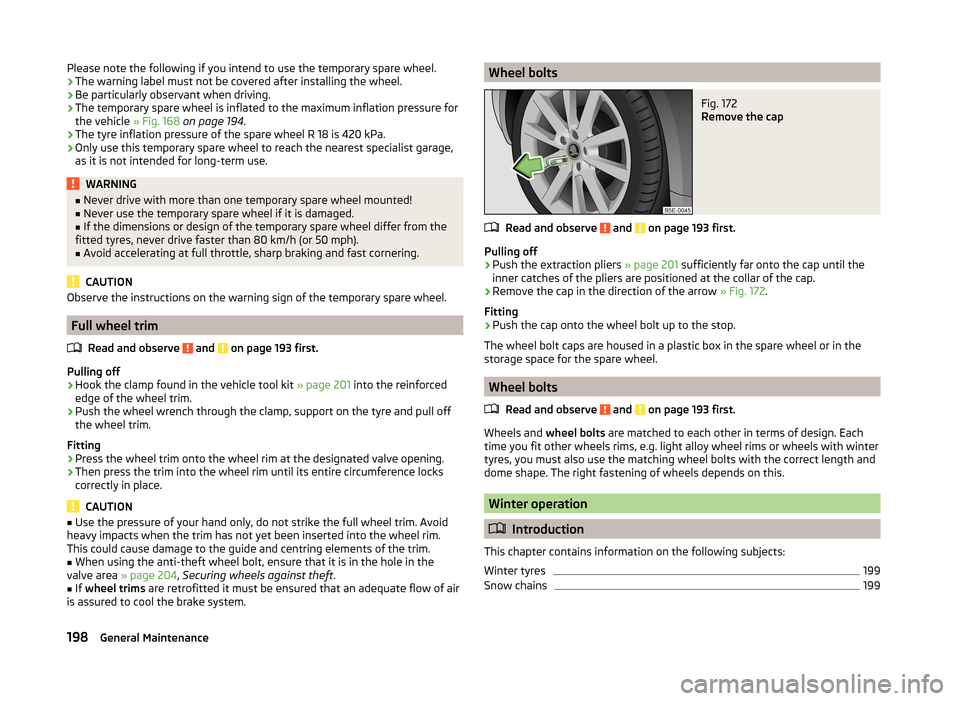
Wheel boltsFig. 172
Remove the cap
Read and observe and on page 193 first.
Pulling off
›
Push the extraction pliers » page 201 sufficiently far onto the cap until the
inner catches of the pliers are positioned at the collar of the cap.
›
Remove the cap in the direction of the arrow » Fig. 172.
Fitting
›
Push the cap onto the wheel bolt up to the stop.
The wheel bolt caps are housed in a plastic box in the spare wheel or in the
storage space for the spare wheel.
Wheel bolts
Read and observe
and on page 193 first.
Wheels and wheel bolts are matched to each other in terms of design. Each
time you fit other wheels rims, e.g. light alloy wheel rims or wheels with winter
tyres, you must also use the matching wheel bolts with the correct length and
dome shape. The right fastening of wheels depends on this.
Winter operation
Introduction
This chapter contains information on the following subjects:
Winter tyres
199
Snow chains
199198General Maintenance