ESP SKODA SUPERB 2015 3.G / (B8/3V) Columbus Infotainment System Manual
[x] Cancel search | Manufacturer: SKODA, Model Year: 2015, Model line: SUPERB, Model: SKODA SUPERB 2015 3.G / (B8/3V)Pages: 100, PDF Size: 11.13 MB
Page 35 of 100
DVD video
Video player
Introduction
This chapter contains information on the following subjects:
Main menu
32
Select a video source
32
Video playback
32
DVD menu
33
Supported video sources and file formats
33
Settings
33
First and foremost, pay attention to the safety instructions » page 6 , Impor-
tant notes .
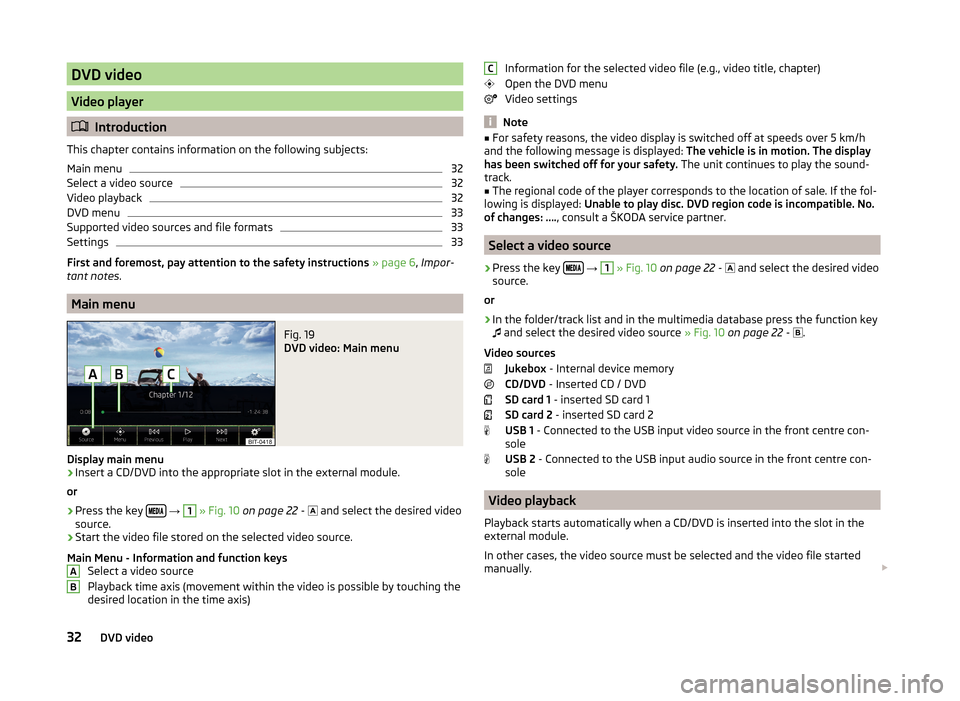
Main menu
Fig. 19
DVD video: Main menu
Display main menu
›
Insert a CD/DVD into the appropriate slot in the external module.
or
›
Press the key
→
1
» Fig. 10 on page 22 -
and select the desired video
source.
›
Start the video file stored on the selected video source.
Main Menu - Information and function keys Select a video source
Playback time axis (movement within the video is possible by touching the
desired location in the time axis)
ABInformation for the selected video file (e.g., video title, chapter)
Open the DVD menu
Video settings
Note
■ For safety reasons, the video display is switched off at speeds over 5 km/h
and the following message is displayed: The vehicle is in motion. The display
has been switched off for your safety. The unit continues to play the sound-
track.■
The regional code of the player corresponds to the location of sale. If the fol-
lowing is displayed: Unable to play disc. DVD region code is incompatible. No.
of changes: …. , consult a ŠKODA service partner.
Select a video source
›
Press the key
→
1
» Fig. 10 on page 22 -
and select the desired video
source.
or
›
In the folder/track list and in the multimedia database press the function key
and select the desired video source
» Fig. 10 on page 22 -
.
Video sources Jukebox - Internal device memory
CD/DVD - Inserted CD / DVD
SD card 1 - inserted SD card 1
SD card 2 - inserted SD card 2
USB 1 - Connected to the USB input video source in the front centre con-
sole
USB 2 - Connected to the USB input audio source in the front centre con-
sole
Video playback
Playback starts automatically when a CD/DVD is inserted into the slot in the
external module.
In other cases, the video source must be selected and the video file started
manually.
C32DVD video
Page 36 of 100
OperationActionPlay / PausePress from /Play the previous videoPress from (within 3 seconds after
the start of the playback)Play the current video from the startPress from after about 3 seconds
after the start of the playbackFast rewindPress and hold a)Play the next videoPress from
Fast forwardPress and hold a)a)
The longer the button is pressed, the faster the fast forward/reverse.
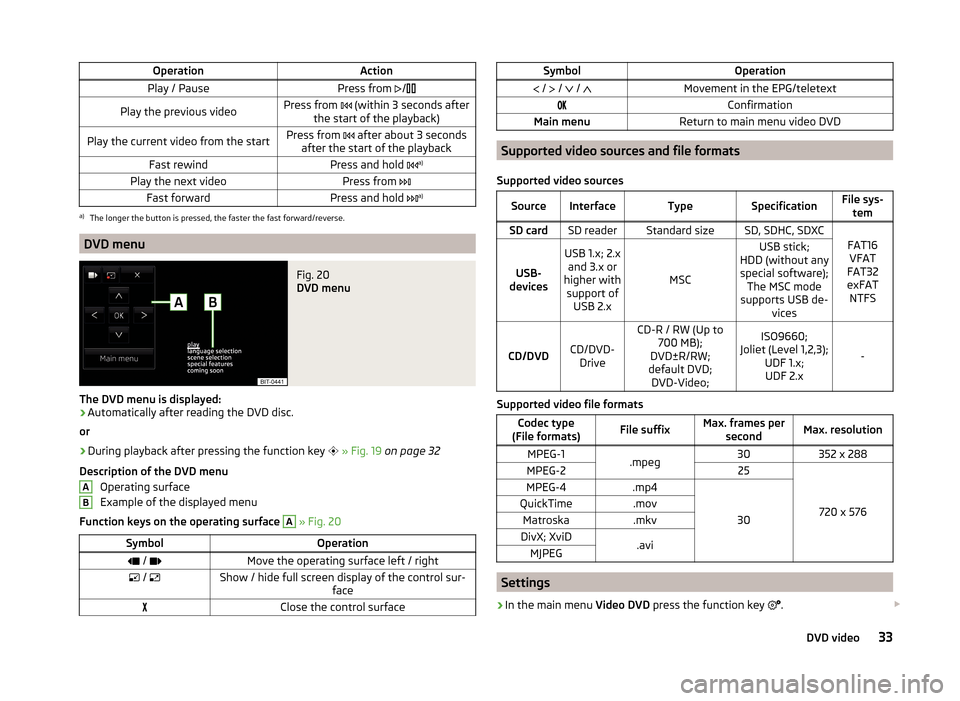
DVD menu
Fig. 20
DVD menu
The DVD menu is displayed:
›
Automatically after reading the DVD disc.
or
›
During playback after pressing the function key
» Fig. 19 on page 32
Description of the DVD menu Operating surface
Example of the displayed menu
Function keys on the operating surface
A
» Fig. 20
SymbolOperation / Move the operating surface left / right / Show / hide full screen display of the control sur-
faceClose the control surfaceABSymbolOperation / / / Movement in the EPG/teletextConfirmationMain menuReturn to main menu video DVD
Supported video sources and file formats
Supported video sources
SourceInterfaceTypeSpecificationFile sys- temSD cardSD readerStandard sizeSD, SDHC, SDXC
FAT16VFAT
FAT32
exFAT NTFSUSB-
devices
USB 1.x; 2.x and 3.x or
higher with support of USB 2.x
MSC
USB stick;
HDD (without any special software); The MSC mode
supports USB de- vices
CD/DVDCD/DVD-Drive
CD-R / RW (Up to 700 MB);
DVD±R/RW;
default DVD; DVD-Video;ISO9660;
Joliet (Level 1,2,3); UDF 1.x;UDF 2.x
-
Supported video file formats
Codec type
(File formats)File suffixMax. frames per secondMax. resolutionMPEG-1.mpeg30352 x 288MPEG-225
720 x 576
MPEG-4.mp4
30
QuickTime.movMatroska.mkvDivX; XviD.aviMJPEG
Settings
›
In the main menu Video DVD press the function key
.
33DVD video
Page 38 of 100
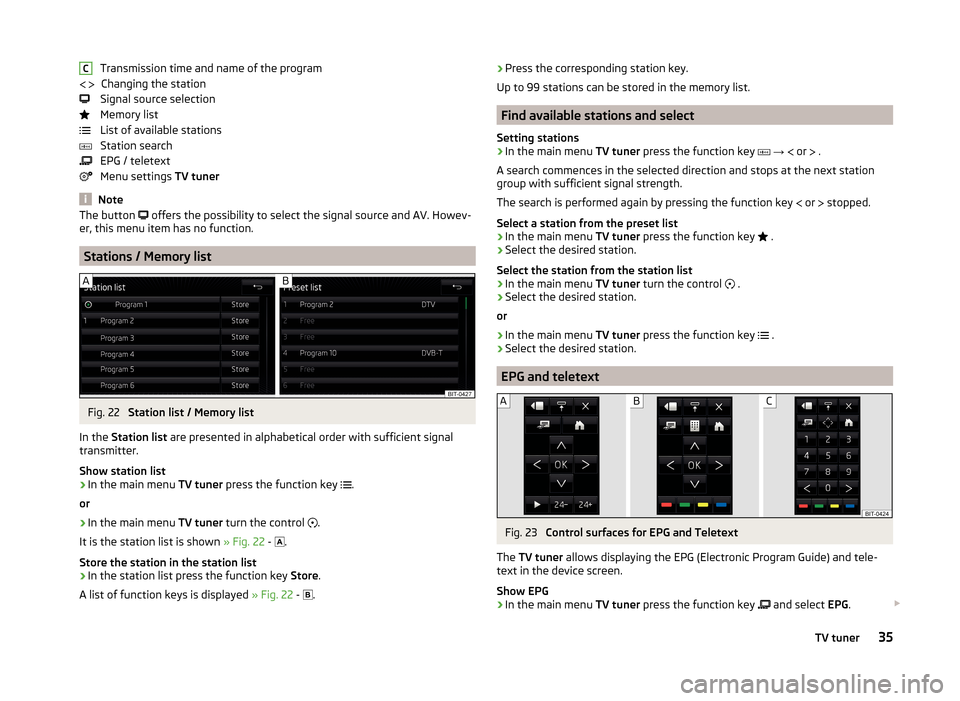
Transmission time and name of the programChanging the station
Signal source selection
Memory list
List of available stations
Station search
EPG / teletext
Menu settings TV tuner
Note
The button offers the possibility to select the signal source and AV. Howev-
er, this menu item has no function.
Stations / Memory list
Fig. 22
Station list / Memory list
In the Station list are presented in alphabetical order with sufficient signal
transmitter.
Show station list
›
In the main menu TV tuner press the function key
.
or
›
In the main menu TV tuner turn the control
.
It is the station list is shown » Fig. 22 -
.
Store the station in the station list
›
In the station list press the function key Store.
A list of function keys is displayed » Fig. 22 -
.
C › Press the corresponding station key.
Up to 99 stations can be stored in the memory list.
Find available stations and select
Setting stations
›
In the main menu TV tuner press the function key
→
or
.
A search commences in the selected direction and stops at the next station
group with sufficient signal strength.
The search is performed again by pressing the function key
or
stopped.
Select a station from the preset list
›
In the main menu TV tuner press the function key
.
›
Select the desired station.
Select the station from the station list
›
In the main menu TV tuner turn the control
.
›
Select the desired station.
or
›
In the main menu TV tuner press the function key
.
›
Select the desired station.
EPG and teletext
Fig. 23
Control surfaces for EPG and Teletext
The TV tuner allows displaying the EPG (Electronic Program Guide) and tele-
text in the device screen.
Show EPG
›
In the main menu TV tuner press the function key
and select
EPG.
35TV tuner
Page 52 of 100
View details of participant
Talk to a participant separately from the conference
End the call to a conference participant
Text messages (SMS)
Introduction
This chapter contains information on the following subjects:
Main menu
49
New text message
49
Received text message
50
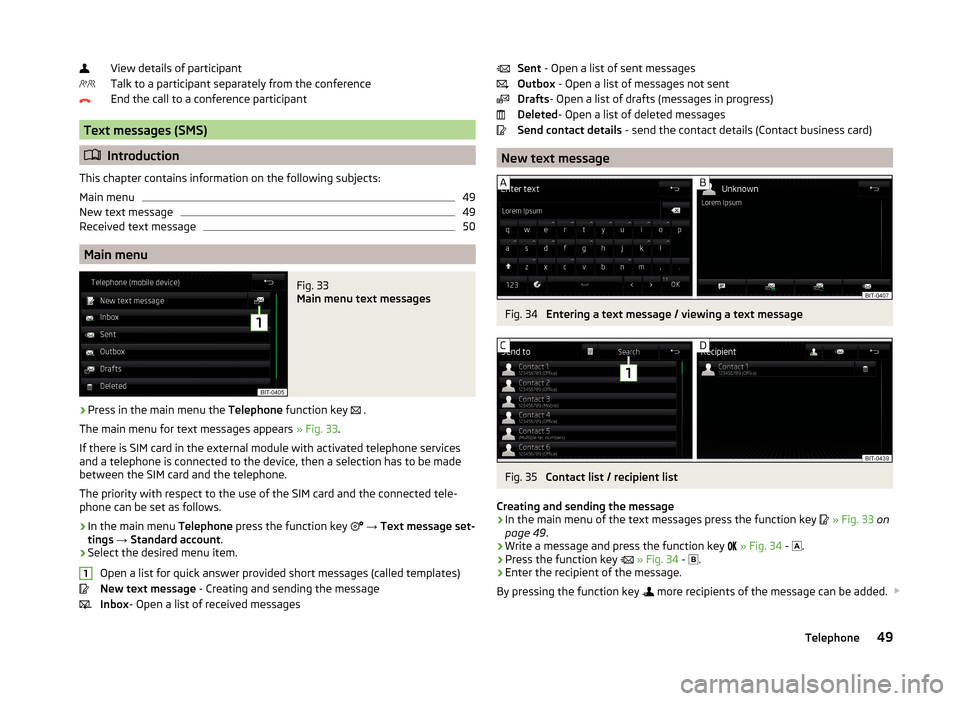
Main menu
Fig. 33
Main menu text messages
›
Press in the main menu the Telephone function key
.
The main menu for text messages appears » Fig. 33.
If there is SIM card in the external module with activated telephone services
and a telephone is connected to the device, then a selection has to be made
between the SIM card and the telephone.
The priority with respect to the use of the SIM card and the connected tele-
phone can be set as follows.
›
In the main menu Telephone press the function key
→ Text message set-
tings → Standard account .
›
Select the desired menu item.
Open a list for quick answer provided short messages (called templates)
New text message - Creating and sending the message
Inbox - Open a list of received messages
1Sent
- Open a list of sent messages
Outbox - Open a list of messages not sent
Drafts - Open a list of drafts (messages in progress)
Deleted - Open a list of deleted messages
Send contact details - send the contact details (Contact business card)
New text message
Fig. 34
Entering a text message / viewing a text message
Fig. 35
Contact list / recipient list
Creating and sending the message
›
In the main menu of the text messages press the function key
» Fig. 33 on
page 49 .
›
Write a message and press the function key
» Fig. 34 -
.
›
Press the function key
» Fig. 34 -
.
›
Enter the recipient of the message.
By pressing the function key
more recipients of the message can be added.
49Telephone
Page 56 of 100
SmartLink
Introductory information
Introduction
This chapter contains information on the following subjects:
Main menu
53
List of connected devices
54
Settings
54
The SmartLink function offers the possibility to display and operate certified
applications of a connected device (such as a telephone) in the device screen.
Depending on the connected device some applications can be started using
the voice activation, via the device screen, using the operating elements on
the device or using the buttons on the multi-function steering wheel.
The voice control of the connected device can be activated by pressing and
holding the button
or by pressing and holding the symbol key
on the
multifunction steering wheel.
For reasons of safety, the operation of some applications while driving is limi-
ted or not possible.
Using the applications in the connected device it is possible to use the naviga-
tion, to make a call, to listed to music or similar things.
The SmartLinkFunction supports the following connection types.
› Android Auto ™
› Apple CarPlay
› MirrorLink ™
The device allows only one active connection.
CAUTION■ ŠKODA is not responsible for damage to the unit or to the vehicle by the use
of faulty or incorrectly programmed applications in the connected device.■
Due to the low charging current from the USB input, intensive use of the
SmartLink function can lead to the discharge of the battery of the connected
device.
■
To establish the connection, it is necessary that the date and time values in
the device are set correctly. If the setting of the date and time values are
based on the GPS signal, then a connection may not be possible with bad sig-
nal reception. If there is sufficient signal reception, the synchronization of the
device with the GPS signal may take up to ten minutes.
Note
■ We recommend that you use extension cords from ŠKODA Original Accesso-
ries.■
The device saves the last 10 connected devices.
■
With some connected devices, it is necessary that the connected device is
“unlocked” over the entire duration of the connection for trouble-free func-
tioning of the SmartLink function.
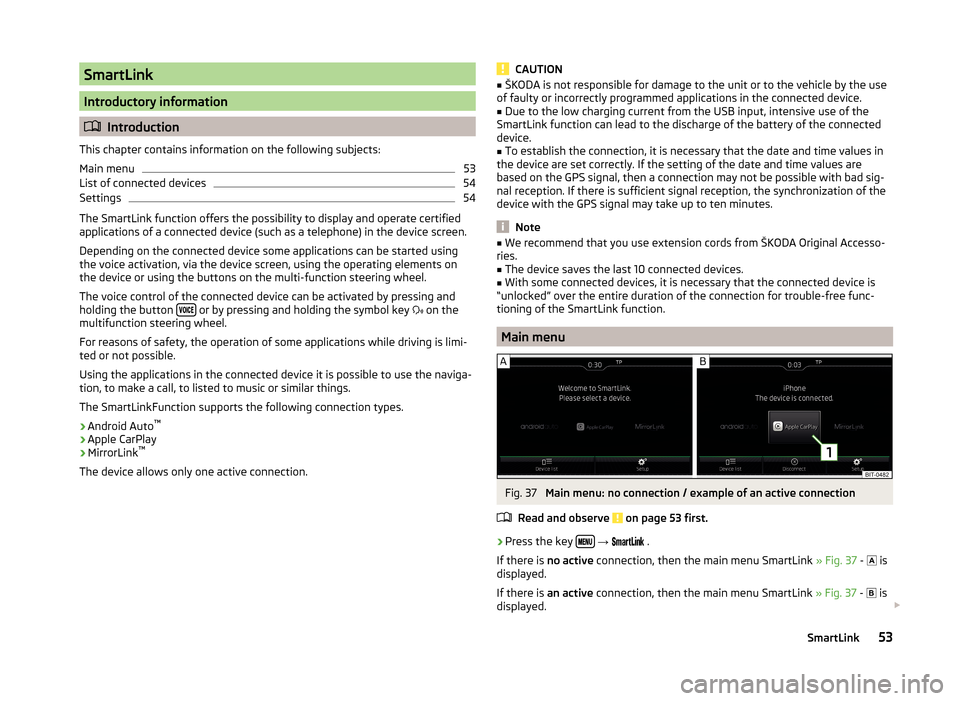
Main menu
Fig. 37
Main menu: no connection / example of an active connection
Read and observe
on page 53 first.
›
Press the key
→
.
If there is no active connection, then the main menu SmartLink » Fig. 37 -
is
displayed.
If there is an active connection, then the main menu SmartLink » Fig. 37 -
is
displayed.
53SmartLink
Page 65 of 100
There is a maximum of 6 places shown in this list, each is identified with a let-
ter. Then these places are shown in the map with the icon and labelled with
a letter which corresponds with letter in the list.
If more than 6 places were found, then the list can be scrolled through by turn-
ing the knob
or sliding the slider.
Enter POI
›
If no guidance takes place, then in the menu Navigation, press the function
key
→ Options → POI .
›
If guidance takes place, then in the menu Navigation, press the function key
→ New dest./stopover → Options → POI .
›
Enter and confirm the destination » page 65.
›
Press the function key Start.
If the menu setting for the alternative routes is turned on, the guidance for
this route type (economic / fast / short) must be selected before starting.
If the destination entry occurs during route guidance, the destination change
must be confirmed by pressing the function key Start in addition to confirming
in the following menu that appears.
Enter destination on the map
Fig. 46
Enter destination on the map
›
If no guidance takes place, then in the menu Navigation, press the function
key
→ Options → On map .
›
If guidance takes place, then in the menu Navigation, press the function key
→ New dest./stopover → Options → On map .
›
Move the destination onto the cross line position on the map.
›
Press the function key
→ Start .
If the menu setting for the alternative routes is turned on, the guidance for
this route type (economic / fast / short) must be selected before starting.
If the destination entry occurs during route guidance, the destination change
must be confirmed by pressing the function key Start in addition to confirming
in the following menu that appears.
Map zoom in / out Map display with full screen display
Map display with small screen display
Enter destination via GPS coordinates
Fig. 47
Enter destination through GPS coordinates
›
If no guidance takes place, then in the menu Navigation, press the function
key
→ Options → On map .
›
If guidance takes place, then in the menu Navigation, press the function key
→ New dest./stopover → Options → On map .
›
Press the desired function key to set the latitude and longitude value.
›
Set the desired value using the function keys
/
.
›
Touch the screen outside of the function keys, the input of GPS coordinates
is ended.
›
Press the function key
→ Start .
If the menu setting for the alternative routes is turned on, the guidance for
this route type (economic / fast / short) must be selected before starting.
If the destination entry occurs during route guidance, the destination change
must be confirmed by pressing the function key Start in addition to confirming
in the following menu that appears.
Enter destination in route
›
If guidance takes place, then in the menu Navigation, press the function key
→ New dest./stopover .
62Navigation
Page 71 of 100
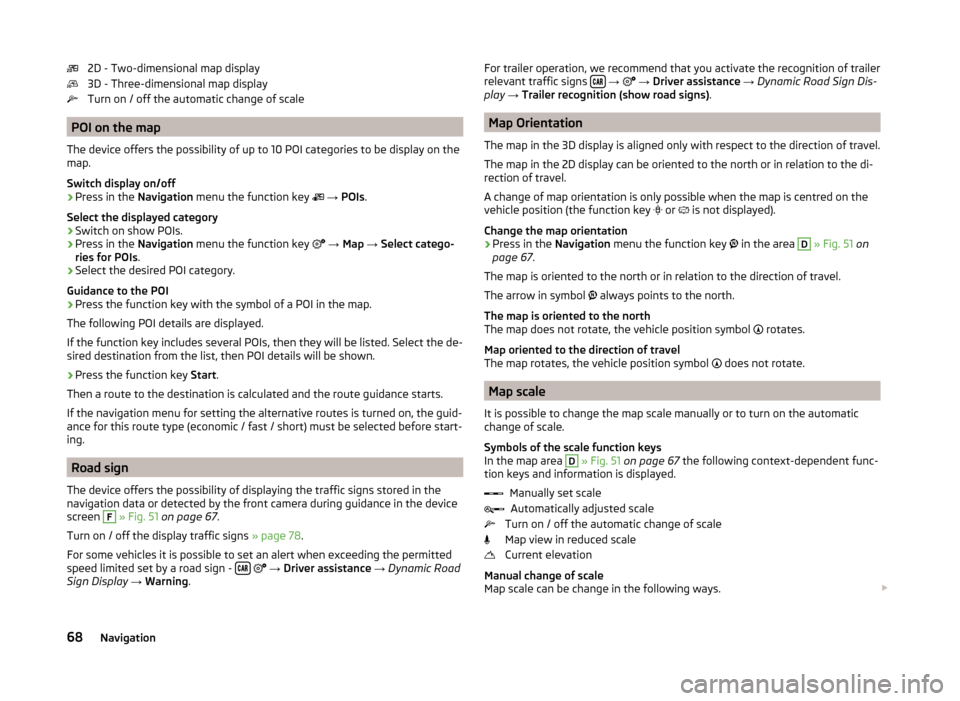
2D - Two-dimensional map display
3D - Three-dimensional map display
Turn on / off the automatic change of scale
POI on the map
The device offers the possibility of up to 10 POI categories to be display on the
map.
Switch display on/off
›
Press in the Navigation menu the function key
→ POIs .
Select the displayed category
›
Switch on show POIs.
›
Press in the Navigation menu the function key
→ Map → Select catego-
ries for POIs .
›
Select the desired POI category.
Guidance to the POI
›
Press the function key with the symbol of a POI in the map.
The following POI details are displayed.
If the function key includes several POIs, then they will be listed. Select the de-
sired destination from the list, then POI details will be shown.
›
Press the function key Start.
Then a route to the destination is calculated and the route guidance starts.
If the navigation menu for setting the alternative routes is turned on, the guid-
ance for this route type (economic / fast / short) must be selected before start-
ing.
Road sign
The device offers the possibility of displaying the traffic signs stored in the
navigation data or detected by the front camera during guidance in the device
screen
F
» Fig. 51 on page 67 .
Turn on / off the display traffic signs » page 78.
For some vehicles it is possible to set an alert when exceeding the permitted
speed limited set by a road sign -
→ Driver assistance → Dynamic Road
Sign Display → Warning .
For trailer operation, we recommend that you activate the recognition of trailer
relevant traffic signs
→ → Driver assistance → Dynamic Road Sign Dis-
play → Trailer recognition (show road signs) .
Map Orientation
The map in the 3D display is aligned only with respect to the direction of travel.
The map in the 2D display can be oriented to the north or in relation to the di-
rection of travel.
A change of map orientation is only possible when the map is centred on the
vehicle position (the function key
or is not displayed).
Change the map orientation
›
Press in the Navigation menu the function key
in the area
D
» Fig. 51 on
page 67 .
The map is oriented to the north or in relation to the direction of travel.
The arrow in symbol always points to the north.
The map is oriented to the north
The map does not rotate, the vehicle position symbol rotates.
Map oriented to the direction of travel
The map rotates, the vehicle position symbol does not rotate.
Map scale
It is possible to change the map scale manually or to turn on the automatic
change of scale.
Symbols of the scale function keys
In the map area
D
» Fig. 51 on page 67 the following context-dependent func-
tion keys and information is displayed.
Manually set scaleAutomatically adjusted scale
Turn on / off the automatic change of scale
Map view in reduced scale
Current elevation
Manual change of scale
Map scale can be change in the following ways.
68Navigation
Page 79 of 100
Route guidance
During the guidance along a waypoint tour, no navigation announcements are
made by the device. When driving along the waypoint tour shown, follow as
closely as possible the information shown on the device screen.
While driving along a waypoint tour the split screen shows the Waypoints and
the direction to drive as well as the distance to the next waypoint, the se-
quence number of the next waypoint and the total number of waypoints 1
» Fig. 62 -
.
The waypoint tour from the vehicle location to the next waypoint “reduces”
continuously while driving “ ”
2
» Fig. 62 -
.
If you drive past but very close to the next waypoint, the route guidance will
continue with the subsequent waypoint.
If you drive past a waypoint and this does “not disappear” from the waypoint tour (e.g. because the distance to this waypoint is too large), then there is the
possibility to “skip” over this waypoint and continue the guidance to the next
waypoint.
› Press the function key
→ Skip waypoint .
Exit navigation
› Press the function key
→ Stop route guidance .
The guidance also stops when the waypoint mode is exited.
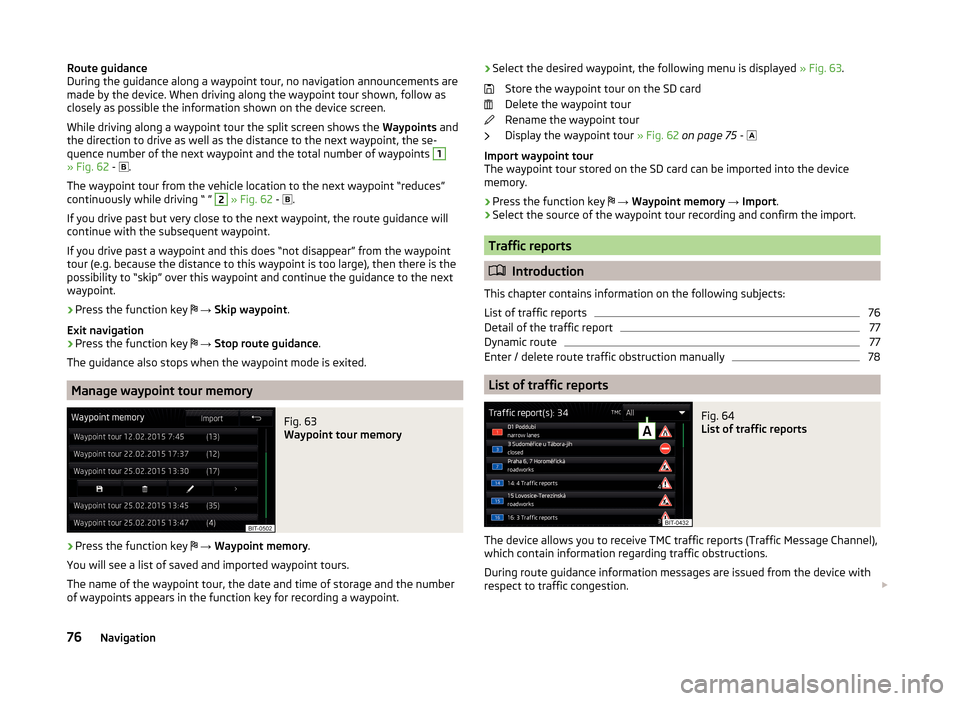
Manage waypoint tour memory
Fig. 63
Waypoint tour memory
›
Press the function key
→ Waypoint memory .
You will see a list of saved and imported waypoint tours.
The name of the waypoint tour, the date and time of storage and the number
of waypoints appears in the function key for recording a waypoint.
› Select the desired waypoint, the following menu is displayed
» Fig. 63.
Store the waypoint tour on the SD card
Delete the waypoint tour
Rename the waypoint tour
Display the waypoint tour » Fig. 62 on page 75 -
Import waypoint tour
The waypoint tour stored on the SD card can be imported into the device
memory.
› Press the function key
→ Waypoint memory → Import .
› Select the source of the waypoint tour recording and confirm the import.
Traffic reports
Introduction
This chapter contains information on the following subjects:
List of traffic reports
76
Detail of the traffic report
77
Dynamic route
77
Enter / delete route traffic obstruction manually
78
List of traffic reports
Fig. 64
List of traffic reports
The device allows you to receive TMC traffic reports (Traffic Message Channel),
which contain information regarding traffic obstructions.
During route guidance information messages are issued from the device with
respect to traffic congestion.
76Navigation
Page 84 of 100
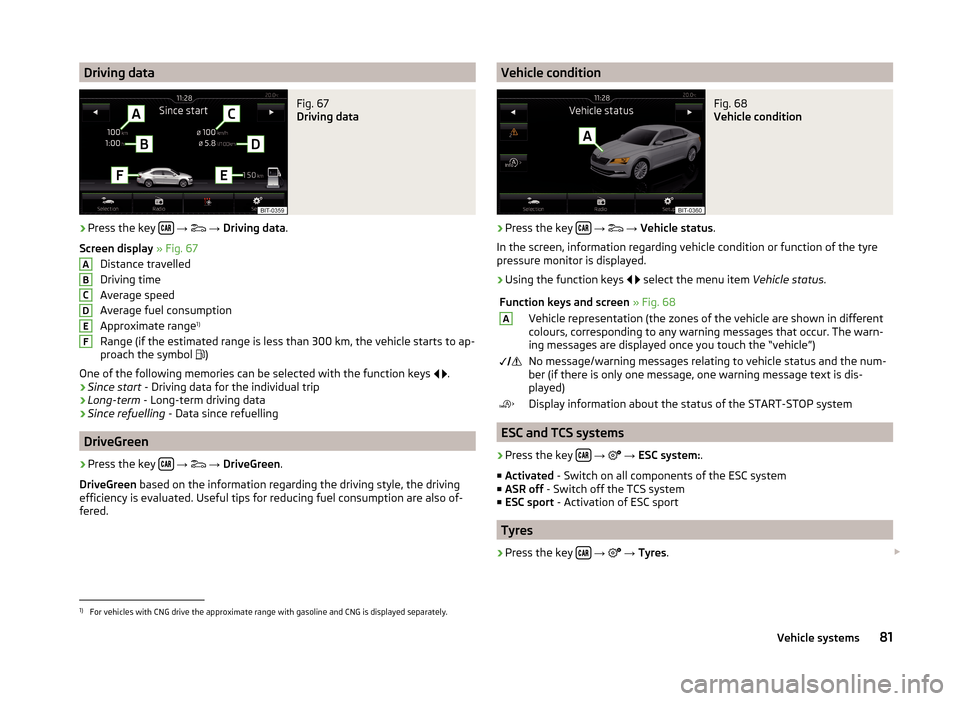
Driving dataFig. 67
Driving data
›
Press the key
→
→ Driving data .
Screen display » Fig. 67
Distance travelled
Driving time
Average speed
Average fuel consumption
Approximate range 1)
Range (if the estimated range is less than 300 km, the vehicle starts to ap-
proach the symbol )
One of the following memories can be selected with the function keys
.
› Since start
- Driving data for the individual trip
› Long-term
- Long-term driving data
› Since refuelling
- Data since refuelling
DriveGreen
›
Press the key
→
→ DriveGreen .
DriveGreen based on the information regarding the driving style, the driving
efficiency is evaluated. Useful tips for reducing fuel consumption are also of-
fered.
ABCDEFVehicle conditionFig. 68
Vehicle condition
›
Press the key
→
→ Vehicle status .
In the screen, information regarding vehicle condition or function of the tyre
pressure monitor is displayed.
›
Using the function keys
select the menu item
Vehicle status.
Function keys and screen » Fig. 68AVehicle representation (the zones of the vehicle are shown in different
colours, corresponding to any warning messages that occur. The warn-
ing messages are displayed once you touch the “vehicle”) No message/warning messages relating to vehicle status and the num-
ber (if there is only one message, one warning message text is dis-
played)Display information about the status of the START-STOP system
ESC and TCS systems
›
Press the key
→
→ ESC system: .
■ Activated - Switch on all components of the ESC system
■ ASR off - Switch off the TCS system
■ ESC sport - Activation of ESC sport
Tyres
›
Press the key
→
→ Tyres .
1)
For vehicles with CNG drive the approximate range with gasoline and CNG is displayed separately.
81Vehicle systems