change time SKODA SUPERB 2015 3.G / (B8/3V) Columbus Infotainment System Manual
[x] Cancel search | Manufacturer: SKODA, Model Year: 2015, Model line: SUPERB, Model: SKODA SUPERB 2015 3.G / (B8/3V)Pages: 100, PDF Size: 11.13 MB
Page 6 of 100
Important information about this manual
This Owner's Manual is valid for the different versions of the Infotainment Co-
lumbus (hereinafter referred to only as device). The device may differ depend-
ing on the vehicle model, in which it is installed in both its appearance and in
the arrangement of the controls.
This Owner's Manual describes all possible device functions without identify-
ing them as special equipment, model variants or market-dependent equip-
ment. Consequently, the device on this vehicle does not need to contain all of
the functions described in this Owner's Manual.
For example, if the vehicle is not factory equipped with the CANTON sound
system, the menu points CANTON Optimisation, CANTON Surround and CAN-
TON Equaliser are not shown.
The availability of some features described in this manual depends on the
type of external devices (for example, telephone, music player, etc.).
Information on the compatibility of external devices can be found on ŠKODAIn- ternet pages http://infotainment.skoda-auto.com .
The Images in these Operating Instructions are for illustrative purposes only.
The illustrations can differ in minor details from your vehicle; they are only in-
tended to provide general information.
ŠKODA AUTO a.s. pursues a policy of ongoing product and model development
with all vehicles. Changes in terms of supply scope are possible at any time
with regard to design, equipment and technology. The information listed in
these Operating Instructions corresponds to the information available at the
time of going to press.
It is therefore not possible for legal claims to be made based on the technical
data, illustrations and information contained in these Operating Instructions.
Declaration of conformity
ŠKODA AUTO a.s. hereby declares that the ŠKODA Infotainment systems meet
the basic requirements and additional provisions of Directive 1999/5/EC with
reference to radio equipment and telecommunications devices.
Applies to Nigeria: ŠKODA AUTO a.s. hereby declares that the “connection and
the use of this communication device is granted by the Nigerian Communica-
tions Commission.”3Important information about this manual
Page 8 of 100
AbbreviationsAbbreviationDefinition2Dplanar map display3Dspatial map displayA2DPa Bluetooth®
profile for the one-sided audio data transmis-
sionACCAdaptive cruise controlAFAlternative frequencies for the current radio stationAMIdentification of the radio-frequency rangeTCSTraction Control of the drive wheelsaviCompressed video formatAVRCPA Bluetooth ®
profile for the operation associated with the
transmission of audio data multimedia functionsBTBluetooth ®
- wireless communication for reception and
transmission of voice and data informationDABDigital radio receptionDRMA system for monitoring or restricting the use of digital me-
dia contentDTMFA dialling tone during a telephone communicationESCElectronic Stability ControlFMIdentification of the radio-frequency rangeHFPA Bluetooth ®
- profile for communication between a mobile
telephone and the InfotainmentGPSSatellite system for determining the positionGPTMethod for the division of the areas in the data devices (to
be used for mass storage resources)GSMGlobal system for mobile communicationsID3 tagAn additional feature of a music file, which allows for the
display of artist, title, album name, etc.MAPA Bluetooth ®
- profile for the exchange of text messages
(SMS) between the device and a connected devicemp3Compressed audio formatmp4Compressed video formatAbbreviationDefinitionMSCA communication protocol for a USB deviceMTPA communication protocol for a data devicePBAPA Bluetooth ®
profile for the download of telephone contacts
to the device memoryPI codeA program identification of the radio station, which allows a
group sort of radio stationsPINPersonal identification numberRDSA system for the transmission of additional information for
FM radio receptionrSAPA Bluetooth ®
profile for the communication between a mo-
bile telephone and Infotainment in the mode for distance
transmission of SIM dataMessagesA service for short text messagesSSPThe quick pairing method of a Bluetooth ®
deviceTMCTraffic reports, which may affect the navigationTPIdentification of a traffic information stationUPnPApplication for a simple wireless connection of the device to
the deviceVINVehicle identification numberwavAudio formatWLANWireless Local Area NetworkwmaCompressed audio formatwmvCompressed video format5Abbreviations
Page 11 of 100
Automatic Power On of the device
If the device was not turned off with the control switch before the ignition
was turned off, it will automatically switch on after the ignition is switched on.
Automatic Power Off of the device
If the vehicle key is pulled out of the ignition lock while the unit is switched on,
the device will switch off automatically.
If the vehicle is fitted with the starter button, the device will switch off auto-
matically after the engine is switched off and the door is opened.
With the ignition off, the device will automatically turn off after about 30 mi-
nutes.
The device turns off automatically under certain circumstances. The device in-
forms you for a few seconds by means of a text message on the device screen.
› Warning: 12 V battery low. Please start the engine or switch off the info-
tainment system. - The vehicle battery is low, start the engine or turn the
unit off.
› 12 V battery almost empty. The infotainment system will be switched off.
-
The vehicle battery is discharged, the device switches itself off.
› Operating temperature not maintained. The infotainment system will be
switched off. - The device temperature is too low or too high, the device
switches itself off.
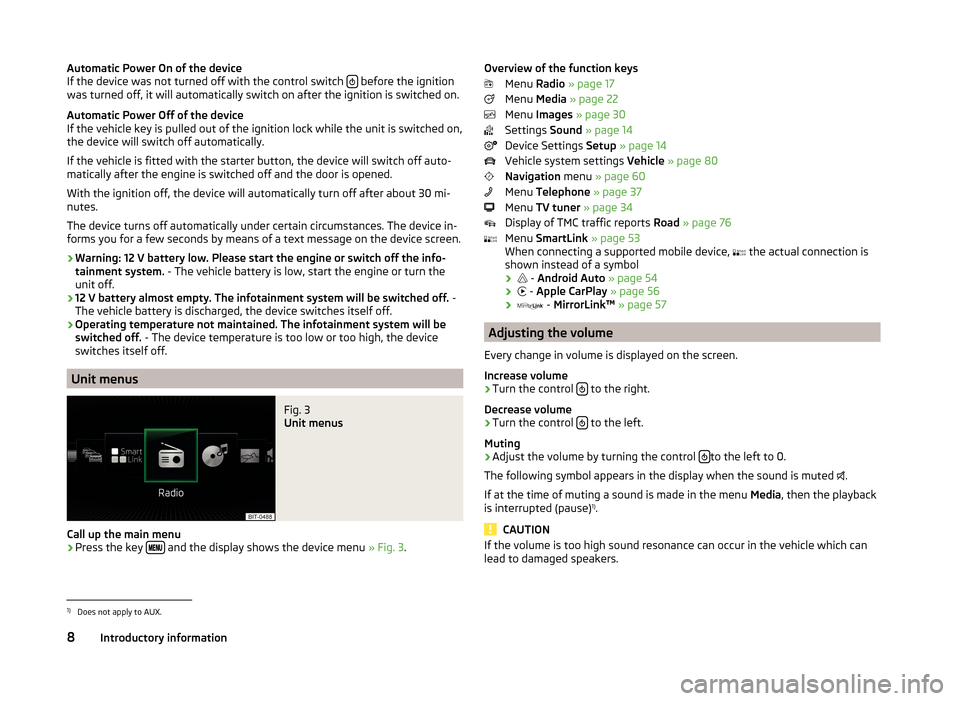
Unit menus
Fig. 3
Unit menus
Call up the main menu
›
Press the key and the display shows the device menu
» Fig. 3.
Overview of the function keys
Menu Radio » page 17
Menu Media » page 22
Menu Images » page 30
Settings Sound » page 14
Device Settings Setup » page 14
Vehicle system settings Vehicle » page 80
Navigation menu » page 60
Menu Telephone » page 37
Menu TV tuner » page 34
Display of TMC traffic reports Road » page 76
Menu SmartLink » page 53
When connecting a supported mobile device, the actual connection is
shown instead of a symbol
›
-
Android Auto » page 54
›
-
Apple CarPlay » page 56
›
-
MirrorLink™ » page 57
Adjusting the volume
Every change in volume is displayed on the screen.
Increase volume
›
Turn the control to the right.
Decrease volume
›
Turn the control to the left.
Muting
›
Adjust the volume by turning the control to the left to 0.
The following symbol appears in the display when the sound is muted .
If at the time of muting a sound is made in the menu Media, then the playback
is interrupted (pause) 1)
.
CAUTION
If the volume is too high sound resonance can occur in the vehicle which can
lead to damaged speakers.1)
Does not apply to AUX.
8Introductory information
Page 15 of 100
Operation principleRead and observe
and on page 11 first.
The voice commands are only then to be spoken when the symbol is dis-
played in the device screen or in the display of the combined instrument
is
displayed .
The voice control system can usually be operated through the method “ say
what you see ” .
For example, you select the function key Dial number with the voice command
“ Dial number ”.
After switching on the voice control, the function buttons that can be selected
with a voice command are highlighted in green.
During voice control operation, the following symbols appear in the device
screen.
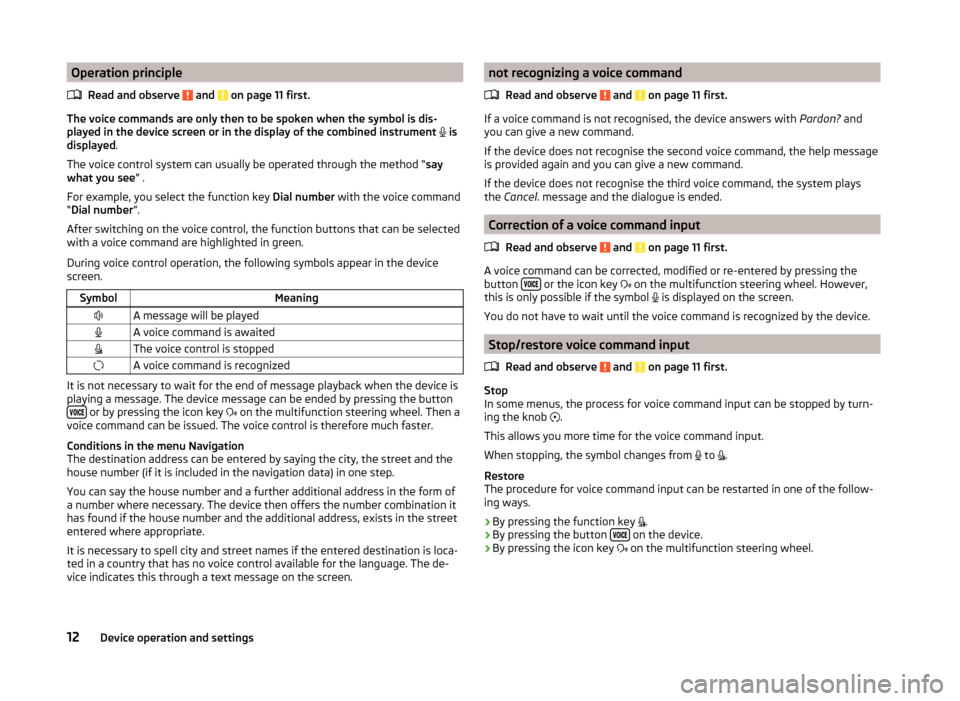
SymbolMeaningA message will be playedA voice command is awaitedThe voice control is stoppedA voice command is recognized
It is not necessary to wait for the end of message playback when the device is
playing a message. The device message can be ended by pressing the button
or by pressing the icon key on the multifunction steering wheel. Then a
voice command can be issued. The voice control is therefore much faster.
Conditions in the menu Navigation
The destination address can be entered by saying the city, the street and the
house number (if it is included in the navigation data) in one step.
You can say the house number and a further additional address in the form of
a number where necessary. The device then offers the number combination it
has found if the house number and the additional address, exists in the street
entered where appropriate.
It is necessary to spell city and street names if the entered destination is loca-
ted in a country that has no voice control available for the language. The de-
vice indicates this through a text message on the screen.
not recognizing a voice command
Read and observe
and on page 11 first.
If a voice command is not recognised, the device answers with Pardon? and
you can give a new command.
If the device does not recognise the second voice command, the help message
is provided again and you can give a new command.
If the device does not recognise the third voice command, the system plays
the Cancel. message and the dialogue is ended.
Correction of a voice command input
Read and observe
and on page 11 first.
A voice command can be corrected, modified or re-entered by pressing the
button or the icon key
on the multifunction steering wheel. However,
this is only possible if the symbol is displayed on the screen.
You do not have to wait until the voice command is recognized by the device.
Stop/restore voice command input
Read and observe
and on page 11 first.
Stop
In some menus, the process for voice command input can be stopped by turn- ing the knob .
This allows you more time for the voice command input.
When stopping, the symbol changes from to
.
Restore
The procedure for voice command input can be restarted in one of the follow-
ing ways.
› By pressing the function key
.
› By pressing the button
on the device.
› By pressing the icon key
on the multifunction steering wheel.
12Device operation and settings
Page 19 of 100
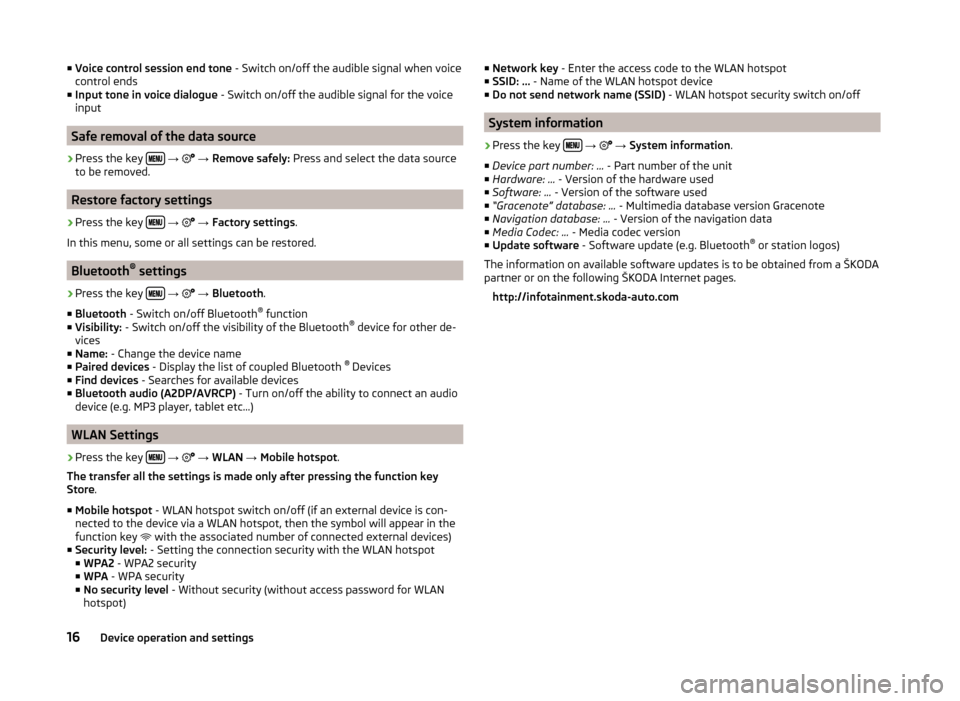
■Voice control session end tone - Switch on/off the audible signal when voice
control ends
■ Input tone in voice dialogue - Switch on/off the audible signal for the voice
input
Safe removal of the data source
›
Press the key
→
→ Remove safely: Press and select the data source
to be removed.
Restore factory settings
›
Press the key
→
→ Factory settings .
In this menu, some or all settings can be restored.
Bluetooth ®
settings
›
Press the key
→
→ Bluetooth .
■ Bluetooth - Switch on/off Bluetooth ®
function
■ Visibility: - Switch on/off the visibility of the Bluetooth ®
device for other de-
vices
■ Name: - Change the device name
■ Paired devices - Display the list of coupled Bluetooth ®
Devices
■ Find devices - Searches for available devices
■ Bluetooth audio (A2DP/AVRCP) - Turn on/off the ability to connect an audio
device (e.g. MP3 player, tablet etc...)
WLAN Settings
›
Press the key
→
→ WLAN → Mobile hotspot .
The transfer all the settings is made only after pressing the function key
Store .
■ Mobile hotspot - WLAN hotspot switch on/off (if an external device is con-
nected to the device via a WLAN hotspot, then the symbol will appear in the
function key with the associated number of connected external devices)
■ Security level: - Setting the connection security with the WLAN hotspot
■ WPA2 - WPA2 security
■ WPA - WPA security
■ No security level - Without security (without access password for WLAN
hotspot)
■ Network key - Enter the access code to the WLAN hotspot
■ SSID: ... - Name of the WLAN hotspot device
■ Do not send network name (SSID) - WLAN hotspot security switch on/off
System information
›
Press the key
→
→ System information .
■ Device part number: ... - Part number of the unit
■ Hardware: ... - Version of the hardware used
■ Software: ... - Version of the software used
■ “Gracenote” database: ... - Multimedia database version Gracenote
■ Navigation database: ... - Version of the navigation data
■ Media Codec: ... - Media codec version
■ Update software - Software update (e.g. Bluetooth ®
or station logos)
The information on available software updates is to be obtained from a ŠKODA
partner or on the following ŠKODA Internet pages.
http://infotainment.skoda-auto.com
16Device operation and settings
Page 25 of 100
Media
Operation
Introduction
This chapter contains information on the following subjects:
Main menu
22
Select audio source
22
Playback
23
Folder / track list
23
Multimedia database
24
Settings
24
The device allows you to play audio files from different media and connected
devices (hereinafter only “audio sources”).
Main menu
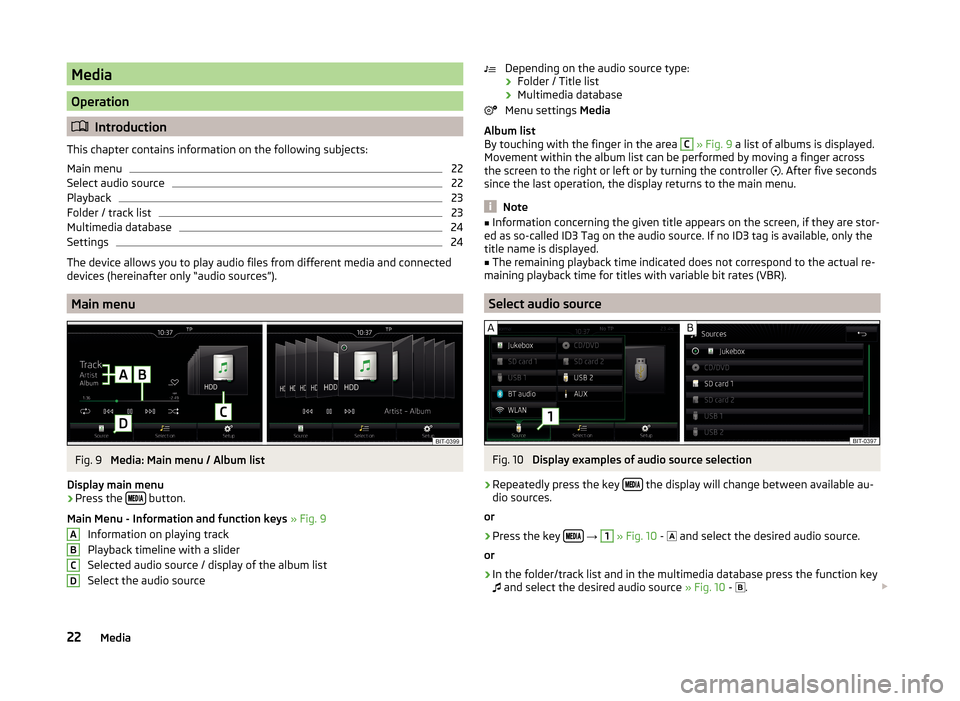
Fig. 9
Media: Main menu / Album list
Display main menu
›
Press the button.
Main Menu - Information and function keys » Fig. 9
Information on playing track
Playback timeline with a slider
Selected audio source / display of the album list
Select the audio source
ABCDDepending on the audio source type:
› Folder / Title list
› Multimedia database
Menu settings Media
Album list
By touching with the finger in the area C
» Fig. 9 a list of albums is displayed.
Movement within the album list can be performed by moving a finger across
the screen to the right or left or by turning the controller
. After five seconds
since the last operation, the display returns to the main menu.
Note
■ Information concerning the given title appears on the screen, if they are stor-
ed as so-called ID3 Tag on the audio source. If no ID3 tag is available, only the
title name is displayed.■
The remaining playback time indicated does not correspond to the actual re-
maining playback time for titles with variable bit rates (VBR).
Select audio source
Fig. 10
Display examples of audio source selection
›
Repeatedly press the key the display will change between available au-
dio sources.
or
›
Press the key
→
1
» Fig. 10 -
and select the desired audio source.
or
›
In the folder/track list and in the multimedia database press the function key
and select the desired audio source » Fig. 10 -
.
22Media
Page 35 of 100
DVD video
Video player
Introduction
This chapter contains information on the following subjects:
Main menu
32
Select a video source
32
Video playback
32
DVD menu
33
Supported video sources and file formats
33
Settings
33
First and foremost, pay attention to the safety instructions » page 6 , Impor-
tant notes .
Main menu
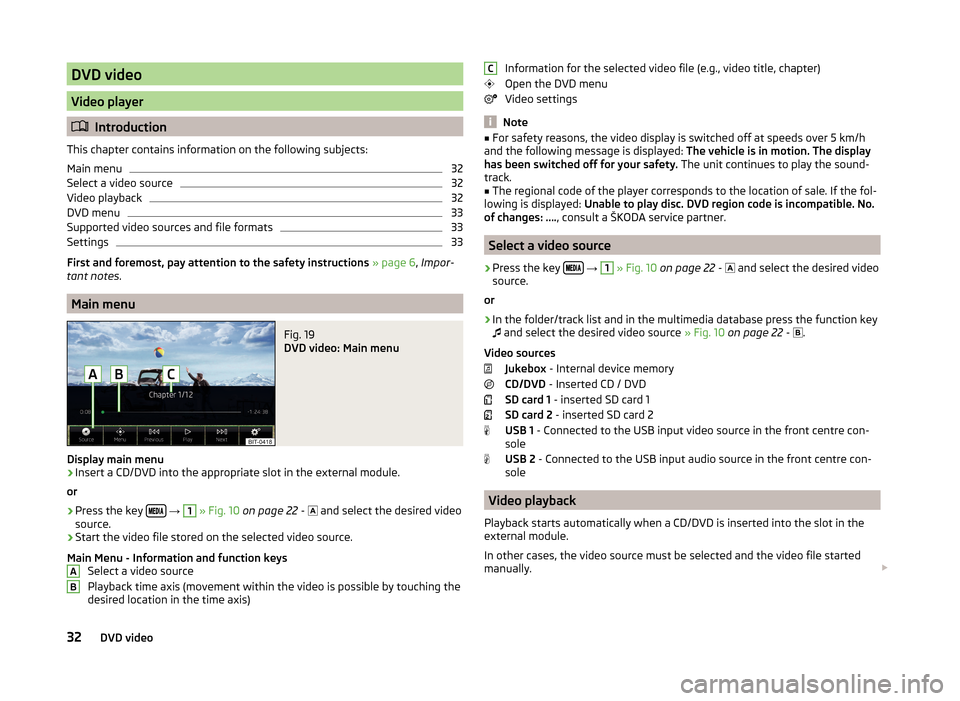
Fig. 19
DVD video: Main menu
Display main menu
›
Insert a CD/DVD into the appropriate slot in the external module.
or
›
Press the key
→
1
» Fig. 10 on page 22 -
and select the desired video
source.
›
Start the video file stored on the selected video source.
Main Menu - Information and function keys Select a video source
Playback time axis (movement within the video is possible by touching the
desired location in the time axis)
ABInformation for the selected video file (e.g., video title, chapter)
Open the DVD menu
Video settings
Note
■ For safety reasons, the video display is switched off at speeds over 5 km/h
and the following message is displayed: The vehicle is in motion. The display
has been switched off for your safety. The unit continues to play the sound-
track.■
The regional code of the player corresponds to the location of sale. If the fol-
lowing is displayed: Unable to play disc. DVD region code is incompatible. No.
of changes: …. , consult a ŠKODA service partner.
Select a video source
›
Press the key
→
1
» Fig. 10 on page 22 -
and select the desired video
source.
or
›
In the folder/track list and in the multimedia database press the function key
and select the desired video source
» Fig. 10 on page 22 -
.
Video sources Jukebox - Internal device memory
CD/DVD - Inserted CD / DVD
SD card 1 - inserted SD card 1
SD card 2 - inserted SD card 2
USB 1 - Connected to the USB input video source in the front centre con-
sole
USB 2 - Connected to the USB input audio source in the front centre con-
sole
Video playback
Playback starts automatically when a CD/DVD is inserted into the slot in the
external module.
In other cases, the video source must be selected and the video file started
manually.
C32DVD video
Page 47 of 100
- Delete all device
- Delete the desired device
› Confirm the deletion by pressing the function key
Delete.
Note
The Bluetooth ®
audio profile can be turned off/on by pressing the button →
→ Bluetooth → Bluetooth audio (A2DP/AVRCP) .
Connection using the SIM card in the external module
Introduction
This chapter contains information on the following subjects:
Slot in SIM card and establish connection
44
Remove SIM card
45
The device allows the use of a connection in the external module of the device
by means of the inserted SIM card.
The SIM card can be used for data and telephone services.
The services are available (with the ignition on when the ignition is switched off or if a telephone call is made).
The SIM card slot is located in an external module in the glove box on the front
passenger side.
A SIM card size mini (standard size 25x15 mm) is to be used.
CAUTION
■
When inserting an improperly sized SIM card, there is a risk of damaging the
device.■
Avoid using a an adapter for the SIM card as the SIM card may fall out while
driving due to vehicle vibrations. There is a risk of damage to the external
module.
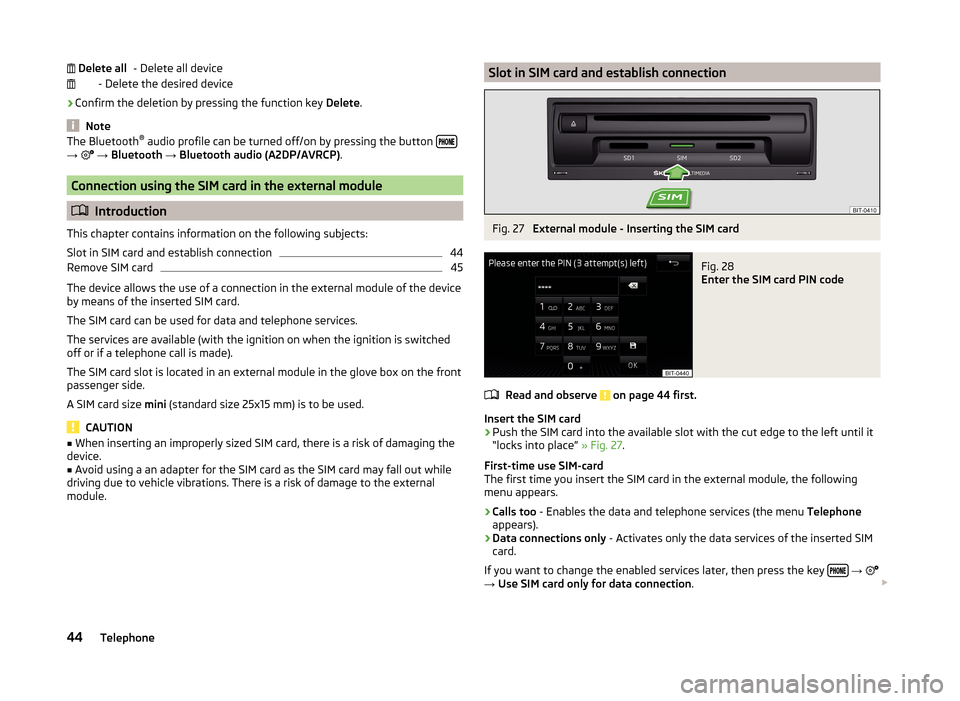
Delete allSlot in SIM card and establish connectionFig. 27
External module - Inserting the SIM card
Fig. 28
Enter the SIM card PIN code
Read and observe on page 44 first.
Insert the SIM card
›
Push the SIM card into the available slot with the cut edge to the left until it
“locks into place” » Fig. 27.
First-time use SIM-card
The first time you insert the SIM card in the external module, the following
menu appears.
›
Calls too - Enables the data and telephone services (the menu Telephone
appears).
›
Data connections only - Activates only the data services of the inserted SIM
card.
If you want to change the enabled services later, then press the key
→
→ Use SIM card only for data connection .
44Telephone
Page 48 of 100
Enter the PIN code and save
If the SIM card is protected by a PIN code then a menu appears after inserting
the SIM card, for entering and storing the PIN code » Fig. 28.›
Enter the PIN code of the SIM card.
›
If you would like to save the entered PIN code in the device memory, then
press the function key
(The next time the SIM card is inserted the device
PIN code will not be required).
›
Press the entered PIN code by pressing the function key
.
Establish a data connection using the SIM-card
After entering the PIN code a request is made by the device for data connec-
tion » page 52 .
The following menu is displayed.
›
Cancel - No data connection takes place
›
Connect - Data connection establishment
If the network is not sufficiently setup the device prompts for network set-
tings.
›
Press the function key Network settings.
›
Press the function key with the name of your data connection provider.
›
Set the parameters for the data connection » page 52.
Change PIN code
›
Press the key
→
→ PIN settings → Change PIN .
›
Enter the new PIN code and confirm.
Remove SIM card
Read and observe
on page 44 first.
›
Press on the inserted SIM memory card.
The SIM card “jumps” into the eject position.
›
Remove the SIM card from the slot.
CAUTION
If you let the SIM card protrude out from the slot, then it may fall out of the
slot while driving due to vehicle vibrations.Telephone functions
Introduction
This chapter contains information on the following subjects:
Enter a telephone number and dial
45
List of telephone contacts
46
Manage preferred contacts
47
Call list
47
Telephone conversation
48
Conference
48
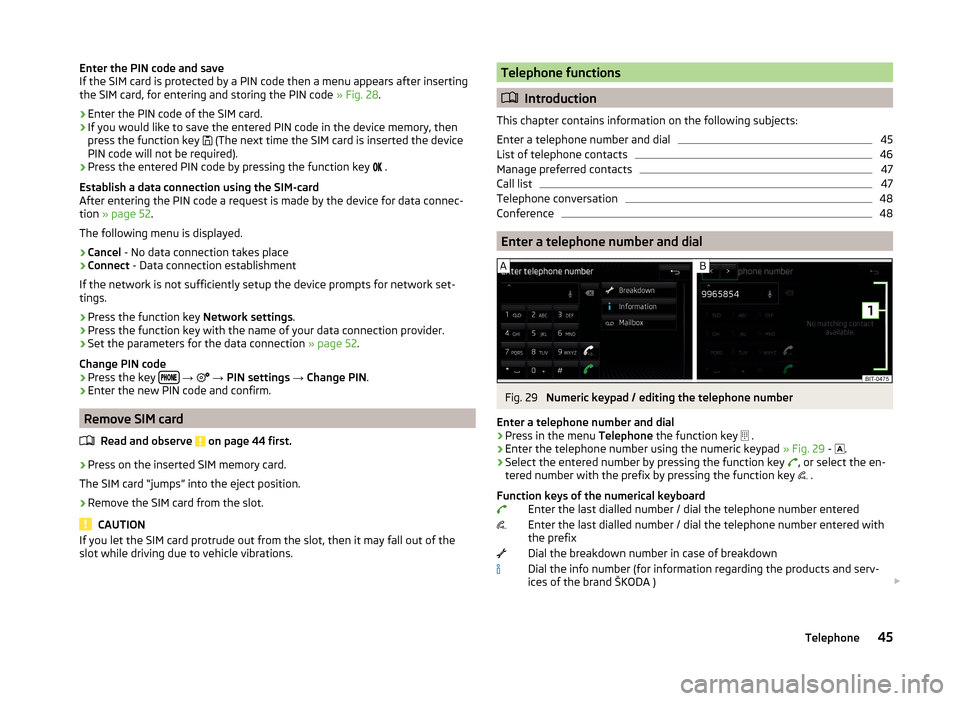
Enter a telephone number and dial
Fig. 29
Numeric keypad / editing the telephone number
Enter a telephone number and dial
›
Press in the menu Telephone the function key
.
›
Enter the telephone number using the numeric keypad
» Fig. 29 -
.
›
Select the entered number by pressing the function key
, or select the en-
tered number with the prefix by pressing the function key .
Function keys of the numerical keyboard Enter the last dialled number / dial the telephone number entered
Enter the last dialled number / dial the telephone number entered with
the prefix
Dial the breakdown number in case of breakdown
Dial the info number (for information regarding the products and serv-
ices of the brand ŠKODA )
45Telephone
Page 70 of 100
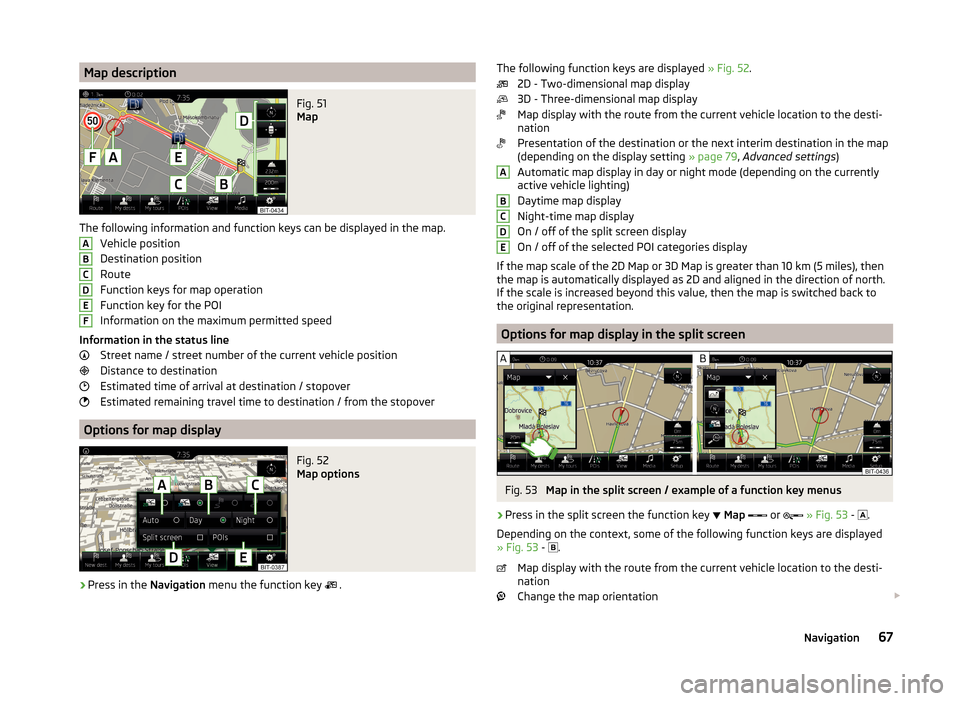
Map descriptionFig. 51
Map
The following information and function keys can be displayed in the map.Vehicle position
Destination position
Route
Function keys for map operation
Function key for the POI
Information on the maximum permitted speed
Information in the status line Street name / street number of the current vehicle position
Distance to destination
Estimated time of arrival at destination / stopover
Estimated remaining travel time to destination / from the stopover
Options for map display
Fig. 52
Map options
›
Press in the Navigation menu the function key
.
ABCDEFThe following function keys are displayed
» Fig. 52.
2D - Two-dimensional map display
3D - Three-dimensional map display
Map display with the route from the current vehicle location to the desti-
nation
Presentation of the destination or the next interim destination in the map
(depending on the display setting » page 79, Advanced settings )
Automatic map display in day or night mode (depending on the currently
active vehicle lighting)
Daytime map display
Night-time map display
On / off of the split screen display
On / off of the selected POI categories display
If the map scale of the 2D Map or 3D Map is greater than 10 km (5 miles), then
the map is automatically displayed as 2D and aligned in the direction of north.
If the scale is increased beyond this value, then the map is switched back to
the original representation.
Options for map display in the split screen
Fig. 53
Map in the split screen / example of a function key menus
›
Press in the split screen the function key
Map
or
» Fig. 53 -
.
Depending on the context, some of the following function keys are displayed
» Fig. 53 -
.
Map display with the route from the current vehicle location to the desti-
nation
Change the map orientation
ABCDE67Navigation