stop start SKODA SUPERB 2015 3.G / (B8/3V) Columbus Infotainment System Manual
[x] Cancel search | Manufacturer: SKODA, Model Year: 2015, Model line: SUPERB, Model: SKODA SUPERB 2015 3.G / (B8/3V)Pages: 100, PDF Size: 11.13 MB
Page 15 of 100
Operation principleRead and observe
and on page 11 first.
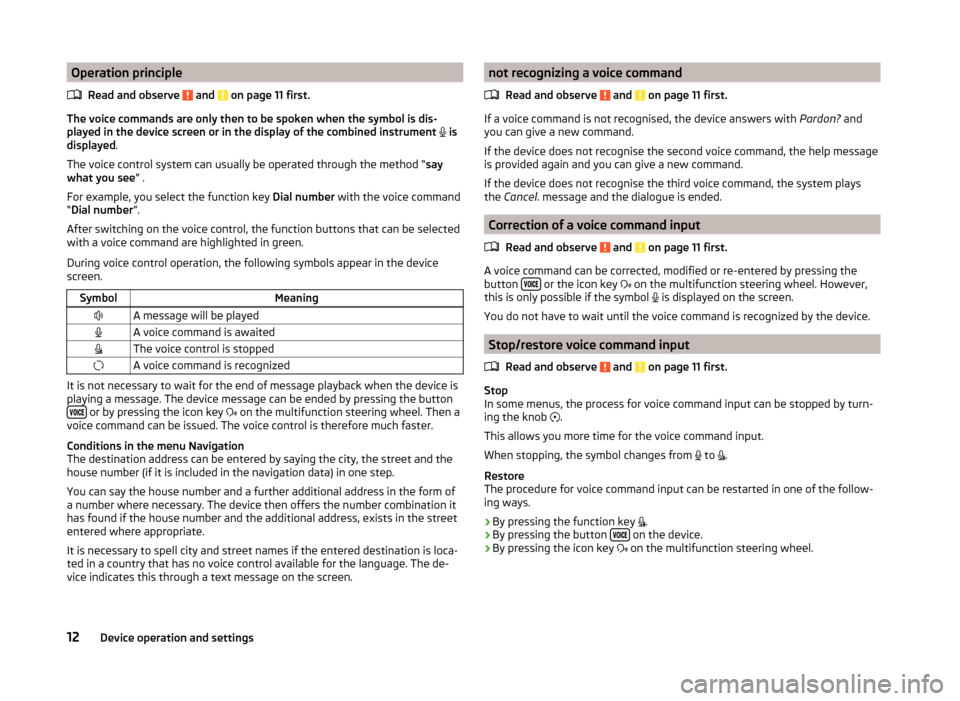
The voice commands are only then to be spoken when the symbol is dis-
played in the device screen or in the display of the combined instrument
is
displayed .
The voice control system can usually be operated through the method “ say
what you see ” .
For example, you select the function key Dial number with the voice command
“ Dial number ”.
After switching on the voice control, the function buttons that can be selected
with a voice command are highlighted in green.
During voice control operation, the following symbols appear in the device
screen.
SymbolMeaningA message will be playedA voice command is awaitedThe voice control is stoppedA voice command is recognized
It is not necessary to wait for the end of message playback when the device is
playing a message. The device message can be ended by pressing the button
or by pressing the icon key on the multifunction steering wheel. Then a
voice command can be issued. The voice control is therefore much faster.
Conditions in the menu Navigation
The destination address can be entered by saying the city, the street and the
house number (if it is included in the navigation data) in one step.
You can say the house number and a further additional address in the form of
a number where necessary. The device then offers the number combination it
has found if the house number and the additional address, exists in the street
entered where appropriate.
It is necessary to spell city and street names if the entered destination is loca-
ted in a country that has no voice control available for the language. The de-
vice indicates this through a text message on the screen.
not recognizing a voice command
Read and observe
and on page 11 first.
If a voice command is not recognised, the device answers with Pardon? and
you can give a new command.
If the device does not recognise the second voice command, the help message
is provided again and you can give a new command.
If the device does not recognise the third voice command, the system plays
the Cancel. message and the dialogue is ended.
Correction of a voice command input
Read and observe
and on page 11 first.
A voice command can be corrected, modified or re-entered by pressing the
button or the icon key
on the multifunction steering wheel. However,
this is only possible if the symbol is displayed on the screen.
You do not have to wait until the voice command is recognized by the device.
Stop/restore voice command input
Read and observe
and on page 11 first.
Stop
In some menus, the process for voice command input can be stopped by turn- ing the knob .
This allows you more time for the voice command input.
When stopping, the symbol changes from to
.
Restore
The procedure for voice command input can be restarted in one of the follow-
ing ways.
› By pressing the function key
.
› By pressing the button
on the device.
› By pressing the icon key
on the multifunction steering wheel.
12Device operation and settings
Page 16 of 100
Voice commands not included in the helpRead and observe
and on page 11 first.
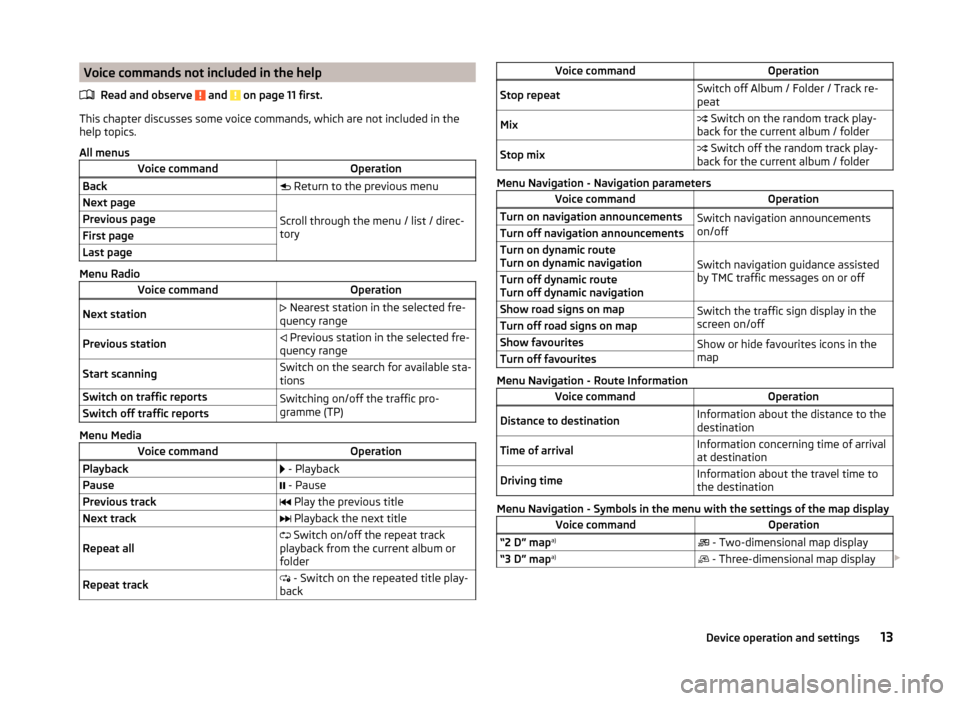
This chapter discusses some voice commands, which are not included in thehelp topics.
All menus
Voice commandOperationBack Return to the previous menuNext page
Scroll through the menu / list / direc-
tory
Previous pageFirst pageLast page
Menu Radio
Voice commandOperationNext station Nearest station in the selected fre-
quency rangePrevious station Previous station in the selected fre-
quency rangeStart scanningSwitch on the search for available sta-
tionsSwitch on traffic reportsSwitching on/off the traffic pro-
gramme (TP)Switch off traffic reports
Menu Media
Voice commandOperationPlayback - PlaybackPause - PausePrevious track Play the previous titleNext track Playback the next titleRepeat all Switch on/off the repeat track
playback from the current album or
folderRepeat track - Switch on the repeated title play-
backVoice commandOperationStop repeatSwitch off Album / Folder / Track re-
peatMix Switch on the random track play-
back for the current album / folderStop mix Switch off the random track play-
back for the current album / folder
Menu Navigation - Navigation parameters
Voice commandOperationTurn on navigation announcementsSwitch navigation announcements
on/offTurn off navigation announcementsTurn on dynamic route
Turn on dynamic navigation
Switch navigation guidance assisted
by TMC traffic messages on or off
Turn off dynamic route
Turn off dynamic navigationShow road signs on mapSwitch the traffic sign display in the
screen on/offTurn off road signs on mapShow favouritesShow or hide favourites icons in the
mapTurn off favourites
Menu Navigation - Route Information
Voice commandOperationDistance to destinationInformation about the distance to the
destinationTime of arrivalInformation concerning time of arrival
at destinationDriving timeInformation about the travel time to
the destination
Menu Navigation - Symbols in the menu with the settings of the map display
Voice commandOperation“2 D” map a)
- Two-dimensional map display“3 D” map a)
- Three-dimensional map display 13Device operation and settings
Page 31 of 100
Bluetooth®
player
Read and observe
and on page 25 first.
The unit allows audio files of a connected Bluetooth ®
player to play using the
A2DP and AVRCP audio profile.
Connect the Bluetooth ®
player
›
Connect the player to the device - follow the same instructions as for pairing
the device with a telephone » page 41.
›
Select the audio source
BT audio » page 22 , Select audio source and then
the desired player.
Separate the Bluetooth ®
player
›
Terminate the connection in the list of paired devices » page 43.
Automatic playback stop and disconnection
If an Apple device is connected as a Bluetooth ®
player and is it connected to
the USB input (for example, for the purpose of charging the connected device),
then playback via Bluetooth ®
stops and playback is then only possible via USB.
If the audio source is switched from Bluetooth ®
Players to USB, then there is
an automatic interruption of the Bluetooth ®
connection. The following warning
message appears in the screen Bluetooth audio (A2DP) … Connection cancel-
led.
If the Bluetooth ®
player audio source is connected to the AUX input, then the
audio output is switched from the AUX input of the connected device. For fur-
ther playback the audio source is to be switched to AUX.
Note
If a device is connected to the device using Apple CarPlay, then a connection
using Bluetooth ®
is possible.
WLAN
Read and observe
and on page 25 first.
The device allows you to play audio files connected from a WLAN device to the
device.
Play over WLAN
›
Connect the player to the device's WLAN » page 51, WLAN Hotspot - Con-
nection to the external device with the device WLAN .
›Start the UPnP application in the connected device or connect a device that
allows you to set up a DLNA server.›
Select the audio source
WLAN » page 22 , Select audio source .
AUX - input
Fig. 17
AUX input
Read and observe and on page 25 first.
The AUX input is located in the centre console and is marked with the lettering
. The exact location of the input
» Vehicle Operating Instructions .
Connecting AUX audio sources
›
Insert the plug of the audio source in the corresponding well.
›
Select the audio source
AUX » page 22 , Select audio source .
›
Start playback on the connected audio source.
Disconnect AUX audio source
›
Disconnect the connector of the audio source.
CAUTION
■ The AUX input must only be used for audio devices!■If an external audio source is connected to the AUX input, which is equipped
with an adapter for external power supply, the sound may be impaired.
Note
■ The 3.5 mm stereo jack plug is used for the AUX input.■We recommend that you use extension cords from ŠKODA Original Accesso-
ries.28Media
Page 59 of 100
MessageMeaning… Unable to connect to mobile device. … is already connected via Android Au-
to.The device allows only one active connection.Check the setting on the mobile device and the connection.Stop the vehicle, “unlock” the display of the connected device and follow the
instructions displayed on the connected device.Apple CarPlay
Introduction
This chapter contains information on the following subjects:
Home menu
56
Function problems
57
The Apple CarPlay connection can be set up under the following conditions. The ignition is switched on.
The unit is switched on.
The device to be connected is switched on.
The data connection is turned on in the device to be connected.
The Siri voice control is switched on in the device to be connected.
By establishing an Apple CarPlay connection all existing Bluetooth ®
connec-
tions to the device are terminated and a connection using Apple CarPlay to the
connected device is established. During the Apple CarPlay connection the use
of the menu Telephone is not possible.
A device connected with Apple CarPlay cannot be used as an audio source in
the menu Media.
If at this moment the route guidance is active by means of the menu Naviga-
tion , then the guidance by the device is terminated by the start of the route
guidance in the Apple CarPlay application. This is also true reciprocally.
A list of devices, supported regions and applications that the Apple CarPlay
connection supports, can be obtained from the Apple website.
Home menuFig. 40
Apple CarPlay: Main menu
Connection set-up
›
Connect the device to the USB input » Vehicle operating instructions .
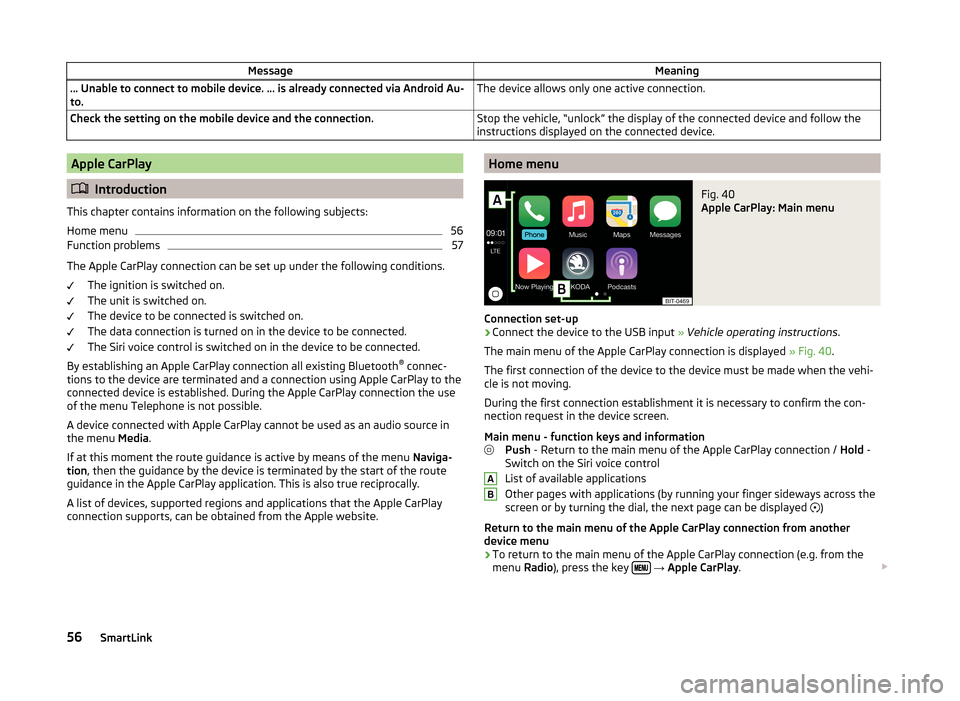
The main menu of the Apple CarPlay connection is displayed » Fig. 40.
The first connection of the device to the device must be made when the vehi-
cle is not moving.
During the first connection establishment it is necessary to confirm the con-
nection request in the device screen.
Main menu - function keys and information Push - Return to the main menu of the Apple CarPlay connection / Hold -
Switch on the Siri voice control
List of available applications
Other pages with applications (by running your finger sideways across the
screen or by turning the dial, the next page can be displayed )
Return to the main menu of the Apple CarPlay connection from another device menu
› To return to the main menu of the Apple CarPlay connection (e.g. from the
menu Radio), press the key
→ Apple CarPlay .
AB56SmartLink
Page 64 of 100
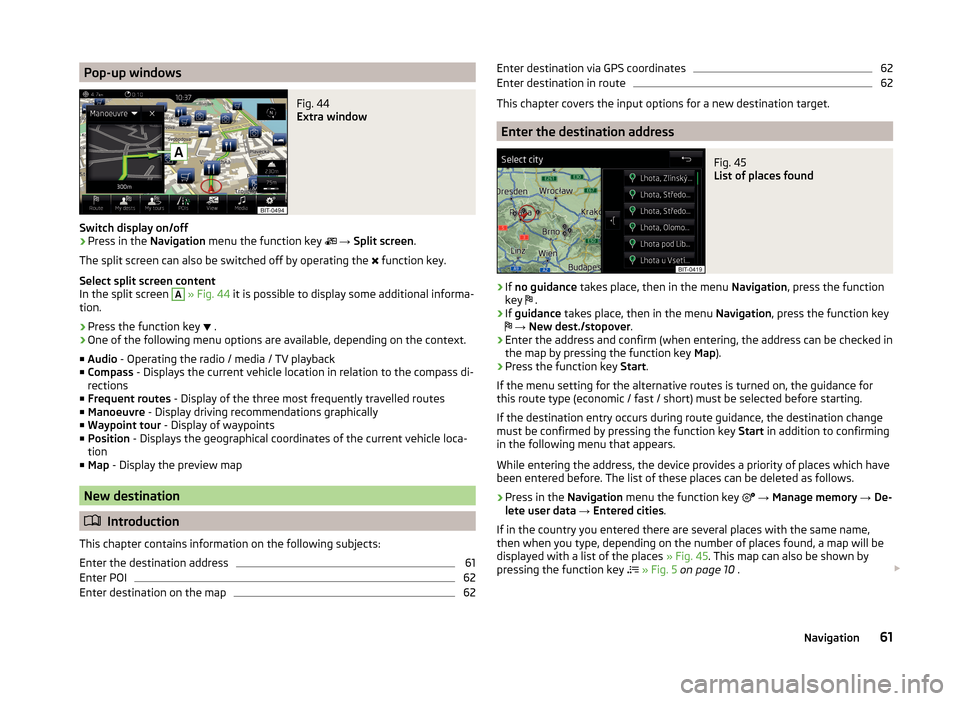
Pop-up windowsFig. 44
Extra window
Switch display on/off
›
Press in the Navigation menu the function key
→ Split screen .
The split screen can also be switched off by operating the function key.
Select split screen content
In the split screen
A
» Fig. 44 it is possible to display some additional informa-
tion.
› Press the function key
.
› One of the following menu options are available, depending on the context.
■ Audio - Operating the radio / media / TV playback
■ Compass - Displays the current vehicle location in relation to the compass di-
rections
■ Frequent routes - Display of the three most frequently travelled routes
■ Manoeuvre - Display driving recommendations graphically
■ Waypoint tour - Display of waypoints
■ Position - Displays the geographical coordinates of the current vehicle loca-
tion
■ Map - Display the preview map
New destination
Introduction
This chapter contains information on the following subjects:
Enter the destination address
61
Enter POI
62
Enter destination on the map
62Enter destination via GPS coordinates62Enter destination in route62
This chapter covers the input options for a new destination target.
Enter the destination address
Fig. 45
List of places found
›
If no guidance takes place, then in the menu Navigation, press the function
key .
›
If
guidance takes place, then in the menu Navigation, press the function key
→ New dest./stopover .
›
Enter the address and confirm (when entering, the address can be checked in
the map by pressing the function key Map).
›
Press the function key Start.
If the menu setting for the alternative routes is turned on, the guidance for
this route type (economic / fast / short) must be selected before starting.
If the destination entry occurs during route guidance, the destination change
must be confirmed by pressing the function key Start in addition to confirming
in the following menu that appears.
While entering the address, the device provides a priority of places which have
been entered before. The list of these places can be deleted as follows.
› Press in the
Navigation menu the function key
→ Manage memory → De-
lete user data → Entered cities .
If in the country you entered there are several places with the same name,
then when you type, depending on the number of places found, a map will be
displayed with a list of the places » Fig. 45. This map can also be shown by
pressing the function key
» Fig. 5 on page 10 .
61Navigation
Page 65 of 100
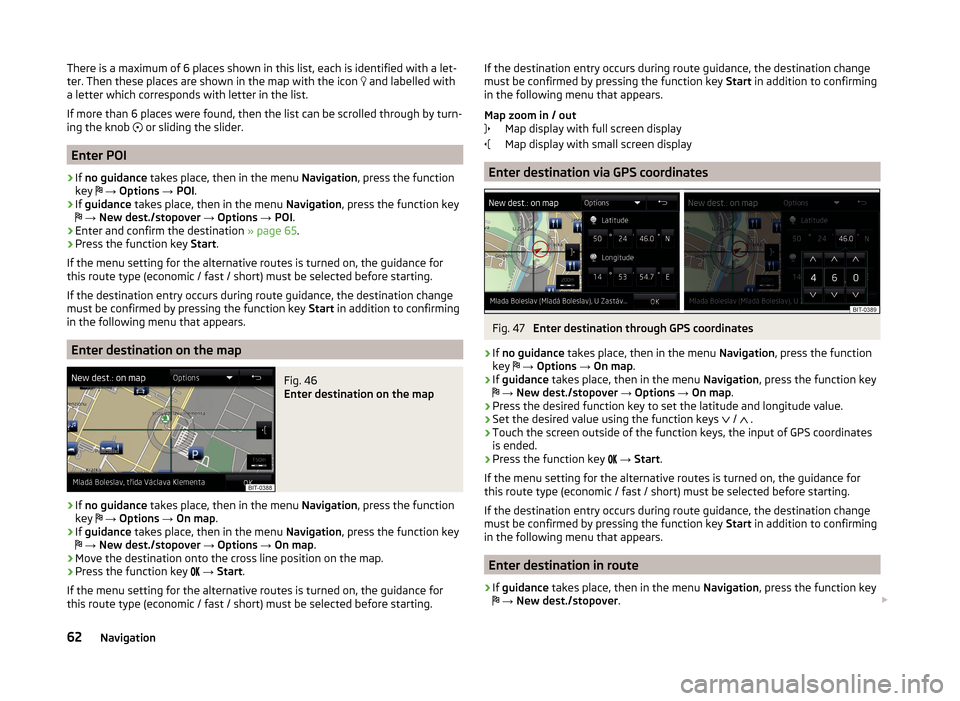
There is a maximum of 6 places shown in this list, each is identified with a let-
ter. Then these places are shown in the map with the icon and labelled with
a letter which corresponds with letter in the list.
If more than 6 places were found, then the list can be scrolled through by turn-
ing the knob
or sliding the slider.
Enter POI
›
If no guidance takes place, then in the menu Navigation, press the function
key
→ Options → POI .
›
If guidance takes place, then in the menu Navigation, press the function key
→ New dest./stopover → Options → POI .
›
Enter and confirm the destination » page 65.
›
Press the function key Start.
If the menu setting for the alternative routes is turned on, the guidance for
this route type (economic / fast / short) must be selected before starting.
If the destination entry occurs during route guidance, the destination change
must be confirmed by pressing the function key Start in addition to confirming
in the following menu that appears.
Enter destination on the map
Fig. 46
Enter destination on the map
›
If no guidance takes place, then in the menu Navigation, press the function
key
→ Options → On map .
›
If guidance takes place, then in the menu Navigation, press the function key
→ New dest./stopover → Options → On map .
›
Move the destination onto the cross line position on the map.
›
Press the function key
→ Start .
If the menu setting for the alternative routes is turned on, the guidance for
this route type (economic / fast / short) must be selected before starting.
If the destination entry occurs during route guidance, the destination change
must be confirmed by pressing the function key Start in addition to confirming
in the following menu that appears.
Map zoom in / out Map display with full screen display
Map display with small screen display
Enter destination via GPS coordinates
Fig. 47
Enter destination through GPS coordinates
›
If no guidance takes place, then in the menu Navigation, press the function
key
→ Options → On map .
›
If guidance takes place, then in the menu Navigation, press the function key
→ New dest./stopover → Options → On map .
›
Press the desired function key to set the latitude and longitude value.
›
Set the desired value using the function keys
/
.
›
Touch the screen outside of the function keys, the input of GPS coordinates
is ended.
›
Press the function key
→ Start .
If the menu setting for the alternative routes is turned on, the guidance for
this route type (economic / fast / short) must be selected before starting.
If the destination entry occurs during route guidance, the destination change
must be confirmed by pressing the function key Start in addition to confirming
in the following menu that appears.
Enter destination in route
›
If guidance takes place, then in the menu Navigation, press the function key
→ New dest./stopover .
62Navigation
Page 66 of 100
›Enter destination.›Press the function key
Start→ Stopover .
In the displayed menu of a new tour the order of the stopovers can be
changed by pressing the function key
and moving the stopover to a differ-
ent position.›
Press the function key Calculate.
A route is created by inserting the destination in the route. For more informa-
tion on the tour » page 73.
Note
Up to 20 destinations can be included in a tour.
My Destinations
Introduction
This chapter contains information on the following subjects:
List of registered destinations
63
Home address
63
Current vehicle position Store(flagged destination)
64
This chapter discusses the entry options and selecting the destinations stored
in the device memory.
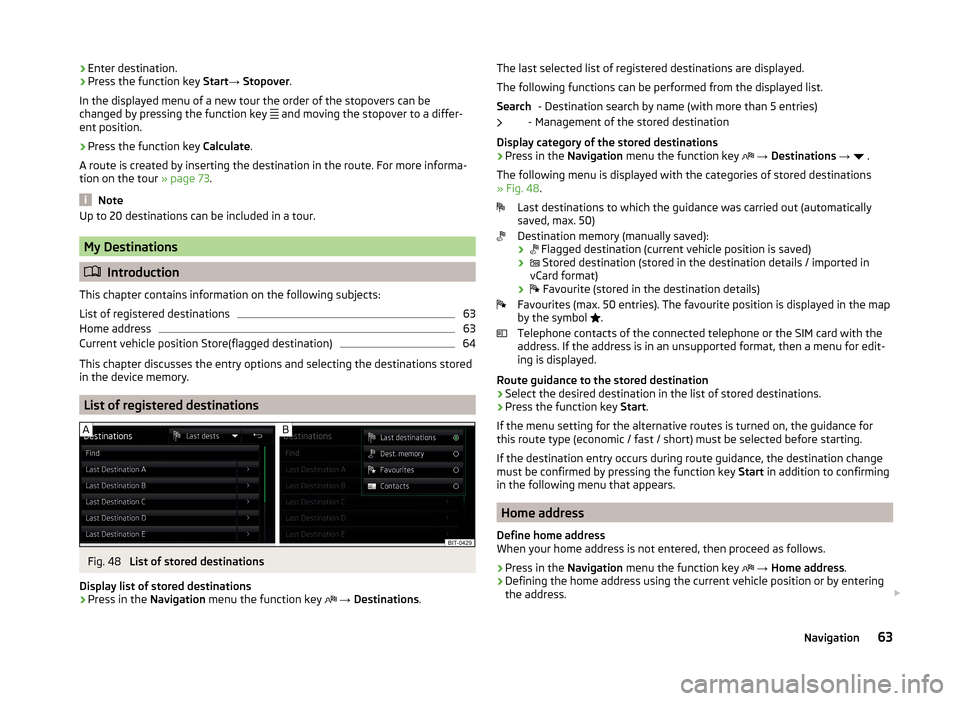
List of registered destinations
Fig. 48
List of stored destinations
Display list of stored destinations
› Press in the
Navigation menu the function key
→ Destinations .
The last selected list of registered destinations are displayed.
The following functions can be performed from the displayed list. - Destination search by name (with more than 5 entries)
- Management of the stored destination
Display category of the stored destinations
› Press in the
Navigation menu the function key
→ Destinations →
.
The following menu is displayed with the categories of stored destinations
» Fig. 48 .
Last destinations to which the guidance was carried out (automatically
saved, max. 50)
Destination memory (manually saved):
›
Flagged destination (current vehicle position is saved)
›
Stored destination (stored in the destination details / imported in
vCard format)
›
Favourite (stored in the destination details)
Favourites (max. 50 entries). The favourite position is displayed in the map
by the symbol .
Telephone contacts of the connected telephone or the SIM card with the
address. If the address is in an unsupported format, then a menu for edit-
ing is displayed.
Route guidance to the stored destination
› Select the desired destination in the list of stored destinations.
› Press the function key
Start.
If the menu setting for the alternative routes is turned on, the guidance for
this route type (economic / fast / short) must be selected before starting.
If the destination entry occurs during route guidance, the destination change
must be confirmed by pressing the function key Start in addition to confirming
in the following menu that appears.
Home address
Define home address
When your home address is not entered, then proceed as follows.
›
Press in the Navigation menu the function key
→ Home address .
›
Defining the home address using the current vehicle position or by entering
the address.
Search63Navigation
Page 68 of 100
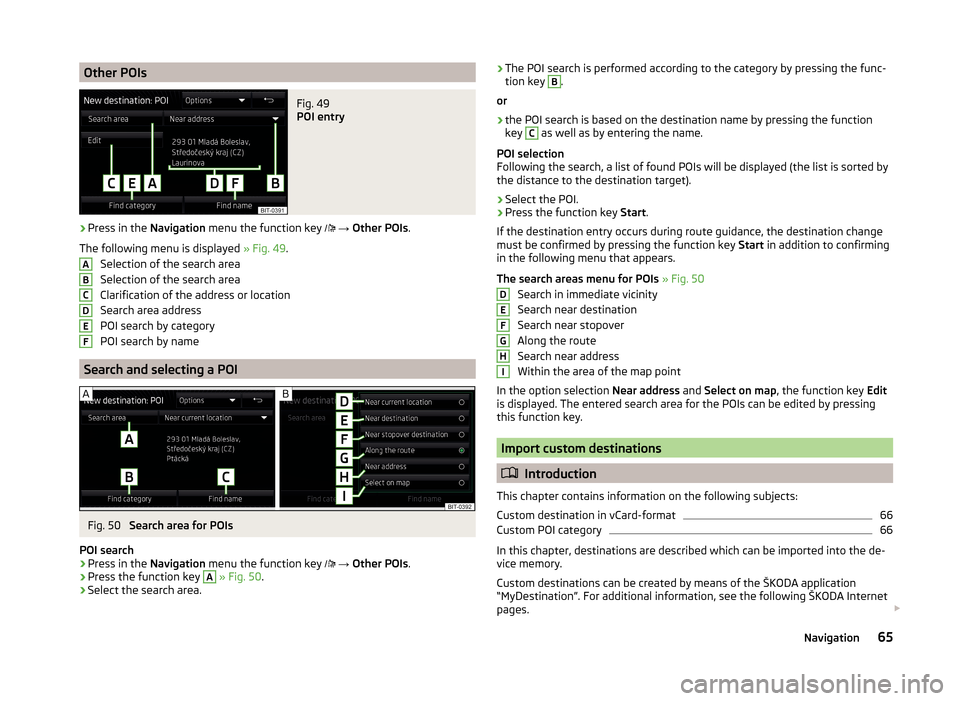
Other POIsFig. 49
POI entry
›
Press in the Navigation menu the function key
→ Other POIs .
The following menu is displayed » Fig. 49.
Selection of the search area
Selection of the search area
Clarification of the address or location
Search area address
POI search by category
POI search by name
Search and selecting a POI
Fig. 50
Search area for POIs
POI search
›
Press in the Navigation menu the function key
→ Other POIs .
›
Press the function key
A
» Fig. 50 .
›
Select the search area.
ABCDEF›The POI search is performed according to the category by pressing the func-
tion key B.
or›
the POI search is based on the destination name by pressing the function
key
C
as well as by entering the name.
POI selection
Following the search, a list of found POIs will be displayed (the list is sorted by
the distance to the destination target).
›
Select the POI.
›
Press the function key Start.
If the destination entry occurs during route guidance, the destination change
must be confirmed by pressing the function key Start in addition to confirming
in the following menu that appears.
The search areas menu for POIs » Fig. 50
Search in immediate vicinity
Search near destination
Search near stopover
Along the route
Search near address
Within the area of the map point
In the option selection Near address and Select on map , the function key Edit
is displayed. The entered search area for the POIs can be edited by pressing
this function key.
Import custom destinations
Introduction
This chapter contains information on the following subjects:
Custom destination in vCard-format
66
Custom POI category
66
In this chapter, destinations are described which can be imported into the de-
vice memory.
Custom destinations can be created by means of the ŠKODA application
“MyDestination”. For additional information, see the following ŠKODA Internet
pages.
DEFGHI65Navigation
Page 73 of 100
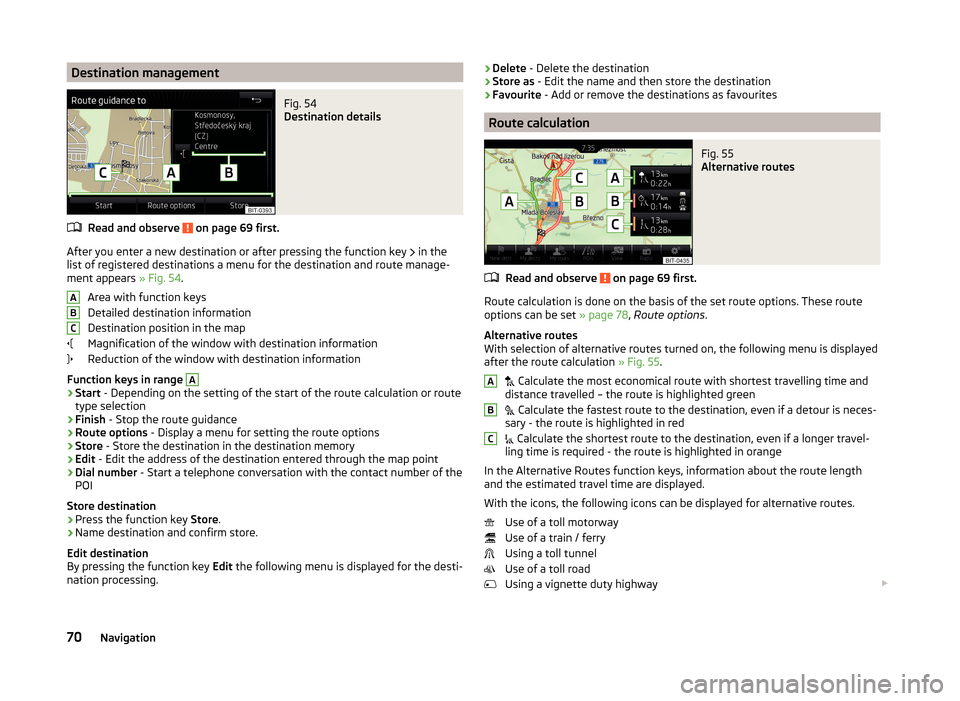
Destination managementFig. 54
Destination details
Read and observe on page 69 first.
After you enter a new destination or after pressing the function key in the
list of registered destinations a menu for the destination and route manage-
ment appears » Fig. 54.
Area with function keys
Detailed destination information
Destination position in the map
Magnification of the window with destination information
Reduction of the window with destination information
Function keys in range
A
› Start
- Depending on the setting of the start of the route calculation or route
type selection
› Finish
- Stop the route guidance
› Route options
- Display a menu for setting the route options
› Store
- Store the destination in the destination memory
› Edit
- Edit the address of the destination entered through the map point
› Dial number
- Start a telephone conversation with the contact number of the
POI
Store destination
› Press the function key
Store.
› Name destination and confirm store.
Edit destination
By pressing the function key Edit the following menu is displayed for the desti-
nation processing.
ABC› Delete
- Delete the destination
› Store as
- Edit the name and then store the destination
› Favourite
- Add or remove the destinations as favourites
Route calculation
Fig. 55
Alternative routes
Read and observe on page 69 first.
Route calculation is done on the basis of the set route options. These route
options can be set » page 78, Route options .
Alternative routes
With selection of alternative routes turned on, the following menu is displayed
after the route calculation » Fig. 55.
Calculate the most economical route with shortest travelling time and
distance travelled – the route is highlighted green
Calculate the fastest route to the destination, even if a detour is neces-
sary - the route is highlighted in red
Calculate the shortest route to the destination, even if a longer travel-
ling time is required - the route is highlighted in orange
In the Alternative Routes function keys, information about the route length
and the estimated travel time are displayed.
With the icons, the following icons can be displayed for alternative routes. Use of a toll motorway
Use of a train / ferry
Using a toll tunnel
Use of a toll road
Using a vignette duty highway
ABC70Navigation
Page 76 of 100
›Press in the
Navigation menu the function key → Stop route guidance .›If a route guidance is in progress, then a new tour is to be entered and finish-
ing the guidance by pressing the function key Finish.›
Switch off the ignition for more than 120 min.
Abort route guidance
Read and observe
on page 69 first.
If the ignition is switched off and on again, then the route guidance is contin-ued depending on the stop time in one of the following ways.
› Within 15 min. - route guidance is continued taking into account the calcula-
ted route.
› Between 15 min and 120 min - the screen displays the message
Continue
route guidance? , after you confirm the message, the route guidance contin-
ues using the calculated route.
› After 120 min - the route guidance is cancelled.
Tour
Introduction
This chapter contains information on the following subjects:
Tour setting
73
Edit tour
73
Tour memory management
74
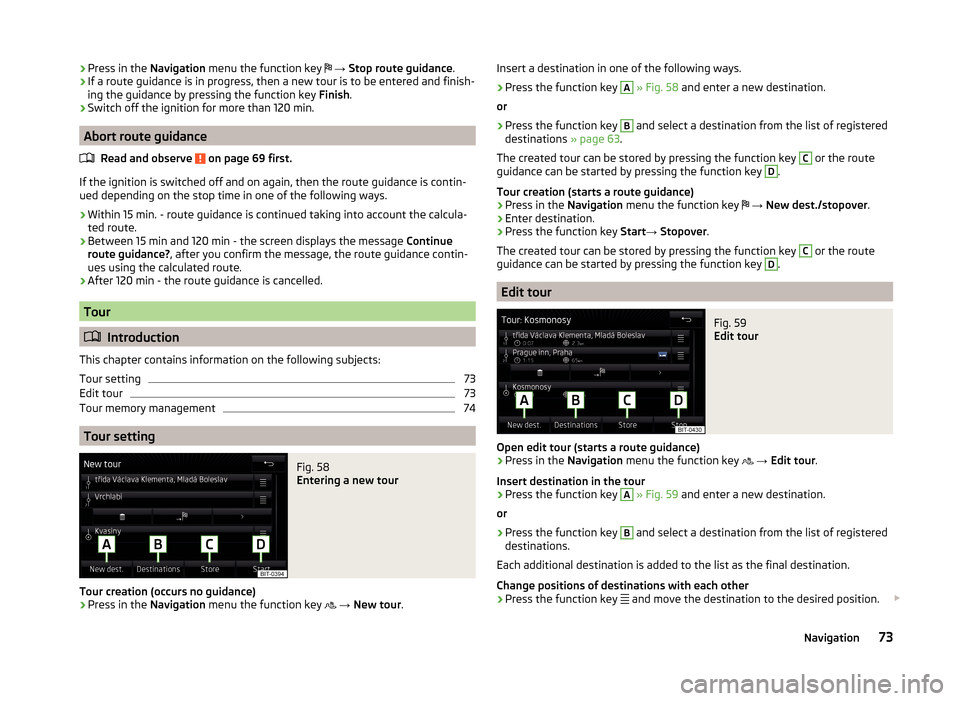
Tour setting
Fig. 58
Entering a new tour
Tour creation (occurs no guidance)
›
Press in the Navigation menu the function key
→ New tour .
Insert a destination in one of the following ways.›
Press the function key
A
» Fig. 58 and enter a new destination.
or
›
Press the function key
B
and select a destination from the list of registered
destinations » page 63.
The created tour can be stored by pressing the function key
C
or the route
guidance can be started by pressing the function key
D
.
Tour creation (starts a route guidance)
›
Press in the Navigation menu the function key
→ New dest./stopover .
›
Enter destination.
›
Press the function key Start→ Stopover .
The created tour can be stored by pressing the function key
C
or the route
guidance can be started by pressing the function key
D
.
Edit tour
Fig. 59
Edit tour
Open edit tour (starts a route guidance)
›
Press in the Navigation menu the function key
→ Edit tour .
Insert destination in the tour
›
Press the function key
A
» Fig. 59 and enter a new destination.
or
›
Press the function key
B
and select a destination from the list of registered
destinations.
Each additional destination is added to the list as the final destination.
Change positions of destinations with each other
›
Press the function key and move the destination to the desired position.
73Navigation