gearbox SKODA SUPERB 2015 3.G / (B8/3V) Owner's Manual
[x] Cancel search | Manufacturer: SKODA, Model Year: 2015, Model line: SUPERB, Model: SKODA SUPERB 2015 3.G / (B8/3V)Pages: 276, PDF Size: 42.14 MB
Page 9 of 276
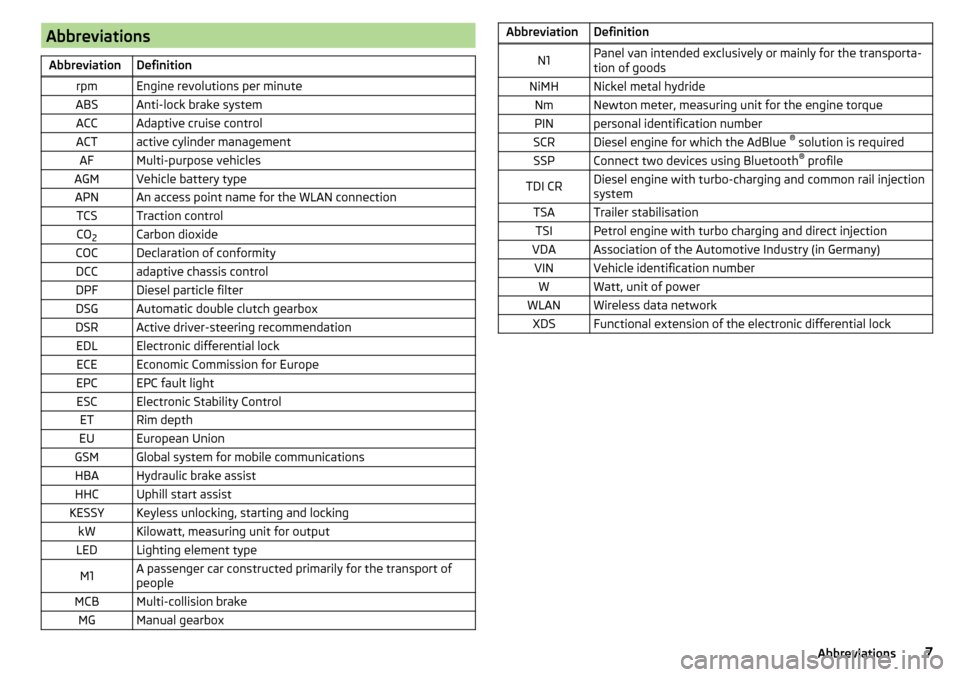
AbbreviationsAbbreviationDefinitionrpmEngine revolutions per minuteABSAnti-lock brake systemACCAdaptive cruise controlACTactive cylinder managementAFMulti-purpose vehiclesAGMVehicle battery typeAPNAn access point name for the WLAN connectionTCSTraction controlCO2Carbon dioxideCOCDeclaration of conformityDCCadaptive chassis controlDPFDiesel particle filterDSGAutomatic double clutch gearboxDSRActive driver-steering recommendationEDLElectronic differential lockECEEconomic Commission for EuropeEPCEPC fault lightESCElectronic Stability ControlETRim depthEUEuropean UnionGSMGlobal system for mobile communicationsHBAHydraulic brake assistHHCUphill start assistKESSYKeyless unlocking, starting and lockingkWKilowatt, measuring unit for outputLEDLighting element typeM1A passenger car constructed primarily for the transport of
peopleMCBMulti-collision brakeMGManual gearboxAbbreviationDefinitionN1Panel van intended exclusively or mainly for the transporta-
tion of goodsNiMHNickel metal hydrideNmNewton meter, measuring unit for the engine torquePINpersonal identification numberSCRDiesel engine for which the AdBlue ®
solution is requiredSSPConnect two devices using Bluetooth ®
profileTDI CRDiesel engine with turbo-charging and common rail injection
systemTSATrailer stabilisationTSIPetrol engine with turbo charging and direct injectionVDAAssociation of the Automotive Industry (in Germany)VINVehicle identification numberWWatt, unit of powerWLANWireless data networkXDSFunctional extension of the electronic differential lock7Abbreviations
Page 31 of 276
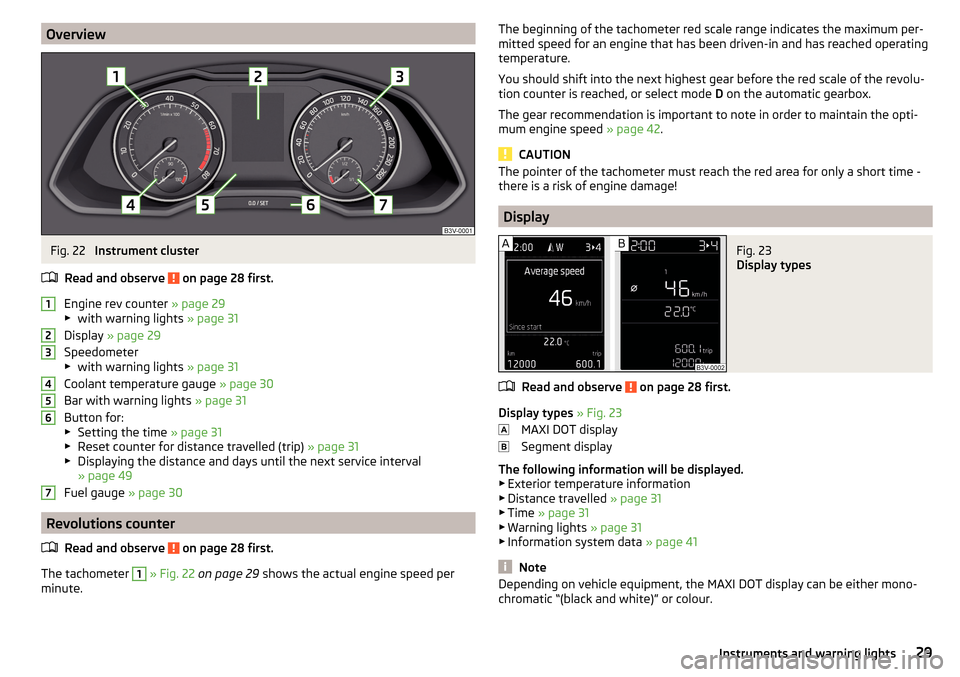
OverviewFig. 22
Instrument cluster
Read and observe
on page 28 first.
Engine rev counter » page 29
▶ with warning lights » page 31
Display » page 29
Speedometer
▶ with warning lights » page 31
Coolant temperature gauge » page 30
Bar with warning lights » page 31
Button for: ▶ Setting the time » page 31
▶ Reset counter for distance travelled (trip) » page 31
▶ Displaying the distance and days until the next service interval
» page 49
Fuel gauge » page 30
Revolutions counter
Read and observe
on page 28 first.
The tachometer
1
» Fig. 22 on page 29 shows the actual engine speed per
minute.
1234567The beginning of the tachometer red scale range indicates the maximum per-
mitted speed for an engine that has been driven-in and has reached operating
temperature.
You should shift into the next highest gear before the red scale of the revolu-
tion counter is reached, or select mode D on the automatic gearbox.
The gear recommendation is important to note in order to maintain the opti-
mum engine speed » page 42.
CAUTION
The pointer of the tachometer must reach the red area for only a short time -
there is a risk of engine damage!
Display
Fig. 23
Display types
Read and observe on page 28 first.
Display types » Fig. 23
MAXI DOT display
Segment display
The following information will be displayed.
▶ Exterior temperature information
▶ Distance travelled » page 31
▶ Time » page 31
▶ Warning lights » page 31
▶ Information system data » page 41
Note
Depending on vehicle equipment, the MAXI DOT display can be either mono-
chromatic “(black and white)” or colour.29Instruments and warning lights
Page 39 of 276
Speed regulating system / Speed limiterRead and observe
on page 32 first.
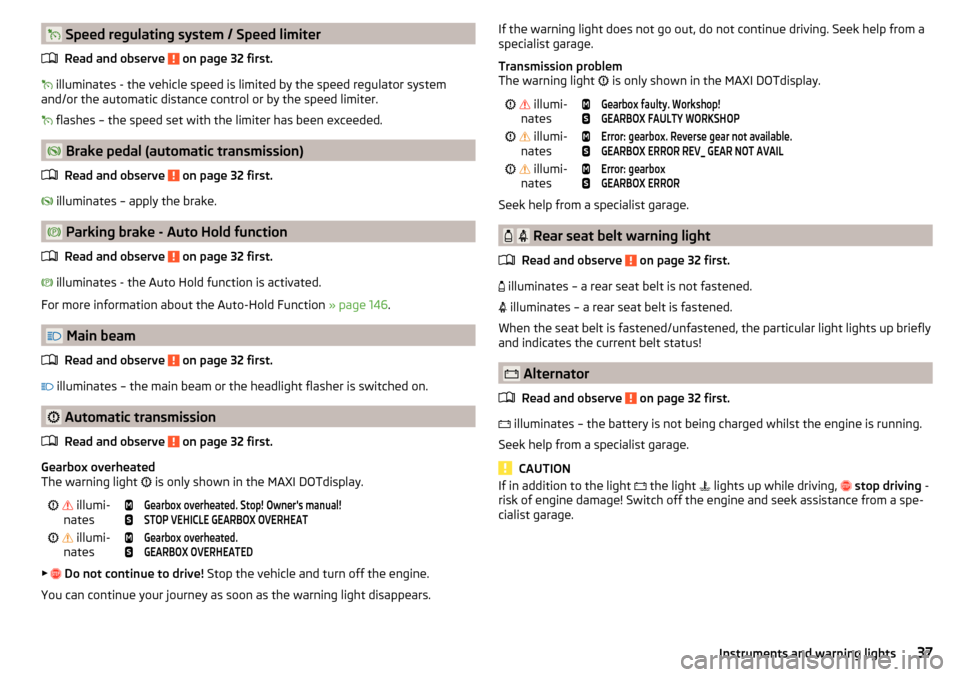
illuminates - the vehicle speed is limited by the speed regulator system
and/or the automatic distance control or by the speed limiter.
flashes – the speed set with the limiter has been exceeded.
Brake pedal (automatic transmission)
Read and observe
on page 32 first.
illuminates – apply the brake.
Parking brake - Auto Hold function
Read and observe
on page 32 first.
illuminates - the Auto Hold function is activated.
For more information about the Auto-Hold Function » page 146.
Main beam
Read and observe
on page 32 first.
illuminates – the main beam or the headlight flasher is switched on.
Automatic transmission
Read and observe
on page 32 first.
Gearbox overheated
The warning light is only shown in the MAXI DOTdisplay.
illumi-
nates
Gearbox overheated. Stop! Owner's manual!STOP VEHICLE GEARBOX OVERHEAT illumi-
nates
Gearbox overheated.GEARBOX OVERHEATED
▶
Do not continue to drive! Stop the vehicle and turn off the engine.
You can continue your journey as soon as the warning light disappears.
If the warning light does not go out, do not continue driving. Seek help from a
specialist garage.
Transmission problem
The warning light
is only shown in the MAXI DOTdisplay. illumi-
nates
Gearbox faulty. Workshop!GEARBOX FAULTY WORKSHOP illumi-
nates
Error: gearbox. Reverse gear not available.GEARBOX ERROR REV_ GEAR NOT AVAIL illumi-
nates
Error: gearboxGEARBOX ERROR
Seek help from a specialist garage.
Rear seat belt warning light
Read and observe
on page 32 first.
illuminates – a rear seat belt is not fastened.
illuminates – a rear seat belt is fastened.
When the seat belt is fastened/unfastened, the particular light lights up briefly
and indicates the current belt status!
Alternator
Read and observe
on page 32 first.
illuminates – the battery is not being charged whilst the engine is running.
Seek help from a specialist garage.
CAUTION
If in addition to the light the light lights up while driving, stop driving -
risk of engine damage! Switch off the engine and seek assistance from a spe-
cialist garage.37Instruments and warning lights
Page 41 of 276
AdBlue®
Read and observe
on page 32 first.
AdBlue ®
level too low
Information on the amount of AdBlue ®
to be added is also shown. The values
"min" and "max" stand for the minimum and maximum AdBlue ®
replenishment
amounts.
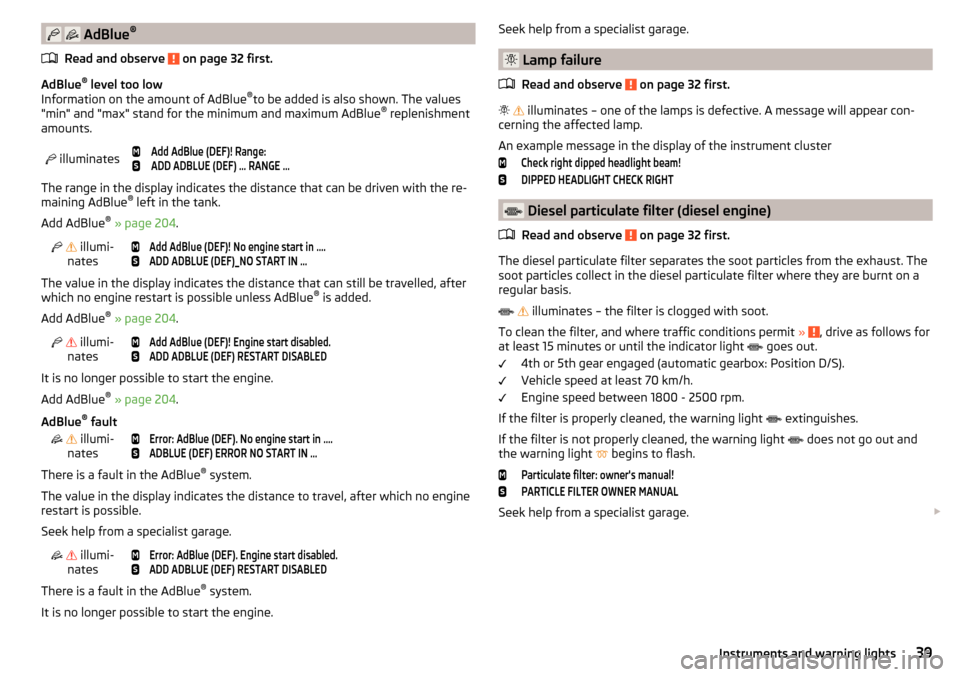
illuminates
Add AdBlue (DEF)! Range:ADD ADBLUE (DEF) … RANGE …
The range in the display indicates the distance that can be driven with the re-
maining AdBlue ®
left in the tank.
Add AdBlue ®
» page 204 .
illumi-
nates
Add AdBlue (DEF)! No engine start in ….ADD ADBLUE (DEF)_NO START IN …
The value in the display indicates the distance that can still be travelled, after
which no engine restart is possible unless AdBlue ®
is added.
Add AdBlue ®
» page 204 .
illumi-
nates
Add AdBlue (DEF)! Engine start disabled.ADD ADBLUE (DEF) RESTART DISABLED
It is no longer possible to start the engine.
Add AdBlue ®
» page 204 .
AdBlue ®
fault
illumi-
nates
Error: AdBlue (DEF). No engine start in ….ADBLUE (DEF) ERROR NO START IN …
There is a fault in the AdBlue ®
system.
The value in the display indicates the distance to travel, after which no engine
restart is possible.
Seek help from a specialist garage.
illumi-
nates
Error: AdBlue (DEF). Engine start disabled.ADD ADBLUE (DEF) RESTART DISABLED
There is a fault in the AdBlue ®
system.
It is no longer possible to start the engine.
Seek help from a specialist garage.
Lamp failure
Read and observe
on page 32 first.
illuminates – one of the lamps is defective. A message will appear con-
cerning the affected lamp.
An example message in the display of the instrument cluster
Check right dipped headlight beam!DIPPED HEADLIGHT CHECK RIGHT
Diesel particulate filter (diesel engine)
Read and observe
on page 32 first.
The diesel particulate filter separates the soot particles from the exhaust. The soot particles collect in the diesel particulate filter where they are burnt on a
regular basis.
illuminates – the filter is clogged with soot.
To clean the filter, and where traffic conditions permit »
, drive as follows for
at least 15 minutes or until the indicator light goes out.
4th or 5th gear engaged (automatic gearbox: Position D/S).
Vehicle speed at least 70 km/h.
Engine speed between 1800 - 2500 rpm.
If the filter is properly cleaned, the warning light extinguishes.
If the filter is not properly cleaned, the warning light does not go out and
the warning light begins to flash.
Particulate filter: owner's manual!PARTICLE FILTER OWNER MANUAL
Seek help from a specialist garage.
39Instruments and warning lights
Page 43 of 276

Advance warning / emergency braking (Front Assist)Read and observe
on page 32 first.
illuminates – the system has detected the risk of a collision or automatically
triggered an emergency braking manoeuvre.
Information on the Front Assist system » page 168.
Economy mode
Read and observe
on page 32 first.
illuminates - the vehicle is in economy mode through the intervention of
the active cylinder management or in the neutral position of the automatic
transmission.
Adaptive chassis control (DCC) fault
Read and observe
on page 32 first.
The warning light is only shown in the MAXI DOTdisplay.
illumi-
nates
Fault: damperDAMPER FAULT
A DCC-fault is present.
Seek help from a specialist garage.
Service
Read and observe
on page 32 first.
illuminates – service is due
» page 49, Service interval display .
Information system
Driver information system
Introduction
This chapter contains information on the following subjects:
Door, luggage compartment or bonnet warning
41
Auto-check control
41
Overspeed warning at 120 km/h
42
Gear recommendation
42
Depending on the vehicle's equipment, the information system vie the display
of the instrument cluster provides the following information.
▶ Driving data (multifunction display) » page 42.
▶ Data relating to the Maxi DOT display » page 45.
▶ Service interval display » page 49.
▶ Selector lever positions for an automatic gearbox » page 136.
▶ Information and alerts in the Assist systems » page 142.
WARNINGConcentrate fully at all times on your driving! As the driver you are fully re-
sponsible for the operation of your vehicle.
Door, luggage compartment or bonnet warning
Read and observe
on page 41 first.
If at least one door is open, or the boot or bonnet is open, the display indicates
the relevant open door or boot/bonnet.
An acoustic signal will also sound if you drive the vehicle above 6 km/h when a
door is open.
Auto-check control
Read and observe
on page 41 first.
Certain functions and conditions of individual vehicle systems are checked
continuously when the ignition is switched on.
41Information system
Page 56 of 276

CAUTION■The operation of the remote control may temporarily be affected by signal in-
terference from transmitters close to the car and which operate in the same
frequency range.■
The operating range of the remote control key is approx. 30 m. But this range
of the remote control can be reduced if the batteries are weak.
■
The battery must be replaced if the central locking does react to the remote
control at less than around 3 metres away » page 234.
Note
The remote control will operate only when visual contact with the vehicle.
KESSY override key removal
Fig. 38
KESSY key
Read and observe
and on page 53 first.
›
Remove retainer tabs
A
in the direction of arrow
1
» Fig. 38 .
›
Remove the emergency key
B
in the direction of the arrow
2
.
Unlocking / locking - KESSYFig. 39
The front door handle
Read and observe
and on page 53 first.
The KESSY system (Keyless Entry Start Exit System) enables unlocking and
locking of the vehicle without actively using the remote control key » Fig. 39.
The sensors for unlocking or locking are located in the handle of the front
door.
Unlocking
Locking
When unlocking or locking the vehicle, the key must be at a maximum distance
of approximately 1.5 m from the front door handle.
Locking
On vehicles fitted with automatic gearbox, the selector lever must be moved
into the position P before unlocking.
The vehicle cannot be locked from the outside if the ignition has not been
turned off.
After locking the car, it is not possible to unlock within the next 2 seconds by
touching the door handle. This can be used to check whether the vehicle is
locked.
Protection against inadvertently locking the key in the vehicle
If one of the doors is closed after the vehicle has been locked and the key with
which the vehicle was locked remains in the passenger compartment, the ve-
hicle will be automatically unlocked. After unlocking the vehicle again, the turn
signal lights will flash four times. If no door is opened within 45 seconds, the
vehicle is automatically locked again.
54Using the system
Page 131 of 276
Under certain circumstances (e.g. after switching off the ignition and opening
the driver's door), the steering is enabled only when the ignition is switched on
or the engine is started.WARNINGNever let the vehicle roll with locked steering lock - there is a risk of acci-
dent!
Switch ignition on / off
Read and observe
and on page 128 first.
›
Press the button » Fig. 162 on page 128 briefly.
The ignition is switched on or off.
On vehicles fitted with a manual gearbox, the clutch pedal must not be de-
pressed while switching the ignition on or off, otherwise the system would try
to start.
On vehicles fitted with a automatic gearbox, the brake pedal must not be de-
pressed while switching the ignition on or off, otherwise the system would try
to start.
If the driver's door is opened while the ignition is on, an audible signal sounds
and the following message appears in the instrument cluster display.
Ignition switched on.IGNITION STILL ON
When leaving the vehicle always switch off the ignition.
Starting the engine
Read and observe
and on page 128 first.
Starting the engine
›
The parking brake switch.
›
For vehicles with manual transmission , shift gear stick to neutral, depress
the clutch pedal and hold it there until the engine starts.
›
On vehicles with automatic transmission , place the selector lever in position
P or N and depress the brake pedal until the engine starts.
›
Press the starter button » Fig. 162 on page 128 briefly – the engine starts au-
tomatically.
In vehicles with diesel engines after pressing the button, the glow plug warn-
ing light illuminates. The engine can be started after the indicator light goes
out.
Note
■ The engine running noises may louder at first be louder for a short time after
starting the cold engine. This is quite normal and is not an operating problem.■
You should not switch on any major electrical components during the heat-
ing period otherwise the vehicle battery will be drained unnecessarily.
Switching off the engine
Read and observe
and on page 128 first.
Stop
›
Stop the vehicle » page 134, Parking .
›
Press the button » Fig. 162 on page 128 briefly.
The engine and the ignition are switched off simultaneously.
Emergency shut-down
If necessary and in exceptional cases, the engine may even be turned off while
driving.
›
Press the starter button » Fig. 162 on page 128 for longer than 1 second or
twice within 1 second.
After the emergency stop of the engine, the steering lock will remain un-
locked.
CAUTION
Do not switch the engine off immediately at the end of your journey after the
engine has been operated over a prolonged period at high loads but leave it to
run at an idling speed for about 1 minute. This prevents any possible accumula-
tion of heat when the engine is switched off.
Note
After switching off the ignition, the radiator fan may intermittently continue to
operate for approx. 10 minutes.129Starting-off and Driving
Page 138 of 276

WARNING (Continued)■If the vehicle is in the D, S , R or Tiptronic mode and comes to a standstill
while at idle the engine stops, then prevent the vehicle from rolling away
with the brake pedal, the parking brake of the auto-hold function. Even
when the engine is idling, the power transmission is never completely in-
terrupted – the vehicle creeps.■
When leaving the vehicle, the selector lever is always to put in the P
mode. Otherwise, the vehicle could start to move - risk of accident.
CAUTION
■ If the selector lever is moved to mode N while driving, the accelerator pedal
must be released and you will need to wait until the engine has reached its
idling speed before moving the selector lever to a forward driving mode again.■
When the outdoor temperature is below -10 ° C, the selector lever when
starting must always be in P mode.
■
When stopping on a slope, never try to hold the vehicle using the accelerator
pedal – this may lead to gear damage.
Note
After the ignition is switched off, the ignition key can only be withdrawn if the
selector lever is in the position P.
Modes and use of selector lever
Fig. 169
Selector lever/display
Read and observe and on page 135 first.
When the ignition is switched on, the gearbox mode and the currently selected
gear are indicated in the display » Fig. 169.
The following modes can be selected with the selector lever » Fig. 169.
P – Parking mode
The driven wheels are locked mechanically in this mode.
The parking mode must only be selected when the vehicle is stationary.R
- Reverse gear
Reverse gear can only be engaged when the vehicle is stationary and the en-
gine is at idling speed.
N
- Neutral
The power transmission to the drive wheels is interrupted in this mode.
D
/
S
- mode for driving forward (Normal program) / mode for driving
forward (Sport program)
The system switches from one mode to the other by moving the selector lever
into the spring-loaded position
» Fig. 169 .
In mode D or S, the forward gears are shifted automatically depending on the
engine load, the operation of the accelerator pedal, the vehicle speed, and the
selected driving mode .
In mode S , the forward gears are shifted automatically up and down at high-
er engine speeds than in mode D.
If the Sport driving mode is selected with the engine running » page 171, Se-
lection of the driving mode(Driving Mode Selection) , the transmission is auto-
matically set in the S mode.
E – Economical driving mode
If the driving mode Eco or Individual (engine - Eco) » page 171 is selected and
the selection lever is in the setting D/S, the transmission is automatically set
to mode E. This mode cannot be selected with the selector lever.
In mode E , the forward gears are shifted automatically up and down at lower
engine speeds than in mode D.
136Driving
Page 140 of 276

Note■It may be beneficial, for example, when travelling downhill, to use manual
shifting of gears. Shifting to a lower gear reduces the load on the brakes and
hence the wear of the brakes » page 132.■
When accelerating, the gearbox automatically shifts up into the higher gear
just before the maximum permissible engine speed is reached.
■
If a lower gear is selected, the gearbox does not shift down until there is no
risk of the engine over revving.
Starting-off and driving
Read and observe
and on page 135 first.
Starting off
›
Start the engine.
›
Firmly depress and hold the brake pedal.
›
Press the lock button in the direction of
1
» Fig. 170 on page 137 and hold.
›
Move the selector lever into the desired position » page 136 and then release
the lock button.
›
Release the brake pedal and accelerate.
Stopping (while the car is moving)
›
Depress the brake pedal and bring the vehicle to a stop.
›
Keep holding the brake pedal until driving is resumed.
The selector lever position N does not have to be selected when stopping for a
short time, such as at a cross roads.
Kick down
The kick down function allows you to achieve the maximum acceleration of
your vehicle while driving.
When the accelerator pedal is fully depressed, the kick down function is activa-
ted in any forward driving mode.
The gearbox shifts down one or more gears depending on the vehicle speed
and engine speed, and the vehicle accelerates.
The gearbox does not shift up into the highest gear until the engine has
reached its maximum revolutions for this gear range.
Driving in neutral position in mode E (free-wheel)
›
Move the selector lever into the position D/S.
›Select the driving mode Eco or Individual (Drive - Eco)
» page 171, Selection
of the driving mode(Driving Mode Selection) .›
Remove your foot from the accelerator pedal (the speed is higher than 20
km/h).
The vehicle moves without the braking effect of the engine.
The gear is selected again automatically, when you briefly depress the acceler- ator brake pedal or pull the left rocker switch -
towards the steering wheel
» page 137 , Manual gear shifting (Tiptronic) .
This function is not available when towing a trailer or when another accessory
is connected to the trailer socket.
Launch control 1)
The launch control function allows the vehicle in mode S or Tiptronic to reach
its maximum acceleration when starting off.
›
Disable the TCS » page 143, Braking and stabilisation systems .
›
START STOP deactivate » page 132, Manually deactivating/activating the
system .
›
Fully depress and hold the brake pedal with your left foot.
›
Fully depress the accelerator pedal with your right foot.
›
Release the brake pedal.
The vehicle starts off with maximum acceleration.
›
Reactivate the TCS and START STOP when the desired speed has been
reached.
WARNINGRapid acceleration, particularly on slippery roads, can lead to loss of control
of the vehicle – risk of accident!
Running-in and economical driving
Introduction
This chapter contains information on the following subjects:
Running-in
139
Tips for economical driving
139
1)
This function is only valid for some engines.
138Driving
Page 174 of 276

Normal
Read and observe on page 171 first.
This mode is suitable for a conventional driving.
Sport
mode
Read and observe
on page 171 first.
This mode is suitable for a sporty driving.
Selecting this mode primarily affects the function of the following systems.
DCC
The DCC adjusts the chassis for the sporty driving style.
Steering
The power steering is reduced slightly, i.e., the driver needs to exert more
force for steering .
Engine / drive
The vehicle acceleration is more dynamic than in
Normal
mode.
Adaptive Cruise Control (ACC)
The acceleration is quicker than in
Normal
mode with distance control
» page 163 .
Xenon headlight
The headlamps adapt to the driving style more dynamically than in mode
Nor-mal
» page 69 .
ProActive passenger protection
The first level of protection is deactivated » page 173.
Eco
mode
Read and observe
on page 171 first.
This mode is suitable for a relaxed style of driving and helps to save fuel.
Selecting this mode primarily affects the function of the following systems.
Engine / drive
Vehicle acceleration is more relaxed than in
Normal
mode.
The recommended gear is controlled such to achieve the lowest possible fuel
consumption » page 42.
When the START-STOP system was deactivated manually » page 130, it is au-
tomatically activated.
The automatic gearbox is set automatically to mode E » page 135 .
Adaptive Cruise Control (ACC)
Acceleration occurs more relaxed than in Normal
» page 163 mode with distance
control.
Xenon headlight
The system is in economic mode » page 69. The headlamps are in basic setting
and do not adapt to the direction of travel.
Air conditioning (Climatronic)
The air conditioning is controlled so as to save energy. For this reason, for ex-
ample, it may take longer to reach the desired interior temperature in mode
Normal
.
Note
■ The mode Eco is not available when towing a trailer or when another acces-
sory is connected to the trailer socket. If the vehicle is in drive mode Eco
and a
trailer is hitched up or another accessory is connected, the vehicle is automati-
cally set to the driving mode
Normal
.
■
The maximum vehicle acceleration (kick down function) is possible also in
driving mode
Eco
.
Individual
mode
Read and observe
on page 171 first.
In the mode
Individual
each system can be set independently » page 173, Mode
settings
Individual
.
172Driving