park assist SKODA SUPERB 2015 3.G / (B8/3V) Owner's Manual
[x] Cancel search | Manufacturer: SKODA, Model Year: 2015, Model line: SUPERB, Model: SKODA SUPERB 2015 3.G / (B8/3V)Pages: 276, PDF Size: 42.14 MB
Page 4 of 276
Table of Contents
On-board literature4
Notes
5
Structure and more information about the
Owner's Manual
6
Abbreviations
Safety
Passive Safety
8
General information
8
Correct and safe seated position
8
Seat belts
11
Using seat belts
11
Belt retractors and belt tensioners, reversible
seat belts
13
Airbag system
14
Description of the airbag system
14
Airbag overview
15
Deactivating airbags
19
Transporting children safely
20
Child seat
20
Fastening systems
23
Using the system
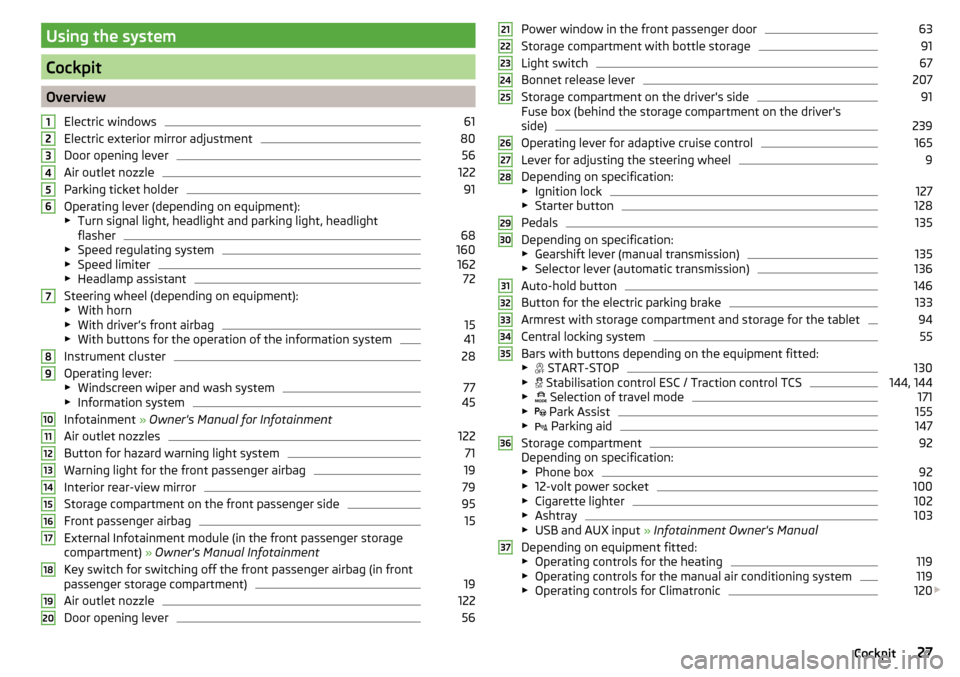
Cockpit
27
Overview
26
Instruments and warning lights
28
Instrument cluster
28
Warning lights
31
Information system
41
Driver information system
41
Driving data (Multifunction display)
42MAXI DOT display45Service interval display49
SmartGate
50
Unlocking and opening
52
Unlocking and locking
52
Anti-theft alarm system
57
Luggage compartment lid
58
Electric boot lid
59
Window operation
61
Panorama sliding/tilting roof
64
Lights and visibility
67
Lights
67
Headlamp Assistant (Light Assist / Dynamic
Light Assist)
72
Interior lights
74
Visibility
75
Windscreen wipers and washers
77
Rear mirror
79
Seats and head restraints
81
Front seats
81
Rear seats
85
Head restraints
87
Seat heating and ventilation
88
Transporting and practical equipment
90
Useful equipment
90
Electrical sockets and cigarette lighter
99
Ashtrays
103
Tablet holder
104
Luggage compartment and transport of
cargo
105
Variable loading floor in the luggage
compartment (Estate)
115Net partition116Roof rack117
Heating and ventilation
118
Heating, manual air conditioning system,
Climatronic
118
Auxiliary heating (auxiliary heating and
ventilation)
123
Driving
Starting-off and Driving
126
Starting and stopping the engine using the
key
126
Starting and stopping the engine at the push
of the button
128
START-STOPsystem
130
Brakes and parking
132
Manual gear changing and pedals
135
Automatic transmission
135
Running-in and economical driving
138
Avoiding damage to your vehicle
141
Assist systems
142
General information
142
Braking and stabilisation systems
143
Parking aid (ParkPilot)
147
Rear Traffic Alert
149
Rear View Camera
151
Park Assist
155
Cruise Control System
160
Speed Limiter
162
Adaptive Cruise Control (ACC)
163
Front Assist
168
Selection of the driving mode(Driving Mode
Selection)
171
Proactive passenger protection (Crew Protect
Assist)
173
Lane Departure Warning (Lane Assist)
174
Assistant for “blind spot monitoring”
1772Table of Contents
Page 29 of 276
Using the system
Cockpit
OverviewElectric windows
61
Electric exterior mirror adjustment
80
Door opening lever
56
Air outlet nozzle
122
Parking ticket holder
91
Operating lever (depending on equipment):
▶ Turn signal light, headlight and parking light, headlight
flasher
68
▶ Speed regulating system
160
▶Speed limiter
162
▶Headlamp assistant
72
Steering wheel (depending on equipment):
▶ With horn
▶ With driver’s front airbag
15
▶With buttons for the operation of the information system
41
Instrument cluster
28
Operating lever:
▶ Windscreen wiper and wash system
77
▶Information system
45
Infotainment » Owner's Manual for Infotainment
Air outlet nozzles
122
Button for hazard warning light system
71
Warning light for the front passenger airbag
19
Interior rear-view mirror
79
Storage compartment on the front passenger side
95
Front passenger airbag
15
External Infotainment module (in the front passenger storage
compartment) » Owner's Manual Infotainment
Key switch for switching off the front passenger airbag (in front
passenger storage compartment)
19
Air outlet nozzle
122
Door opening lever
561234567891011121314151617181920Power window in the front passenger door63
Storage compartment with bottle storage
91
Light switch
67
Bonnet release lever
207
Storage compartment on the driver's side
91
Fuse box (behind the storage compartment on the driver's
side)
239
Operating lever for adaptive cruise control
165
Lever for adjusting the steering wheel
9
Depending on specification:
▶ Ignition lock
127
▶Starter button
128
Pedals
135
Depending on specification:
▶ Gearshift lever (manual transmission)
135
▶Selector lever (automatic transmission)
136
Auto-hold button
146
Button for the electric parking brake
133
Armrest with storage compartment and storage for the tablet
94
Central locking system
55
Bars with buttons depending on the equipment fitted:
▶ START-STOP
130
▶
Stabilisation control ESC / Traction control TCS
144, 144
▶
Selection of travel mode
171
▶
Park Assist
155
▶
Parking aid
147
Storage compartment
92
Depending on specification:
▶ Phone box
92
▶12-volt power socket
100
▶Cigarette lighter
102
▶Ashtray
103
▶USB and AUX input » Infotainment Owner's Manual
Depending on equipment fitted: ▶ Operating controls for the heating
119
▶Operating controls for the manual air conditioning system
119
▶Operating controls for Climatronic
120
212223242526272829303132333435363727Cockpit
Page 34 of 276
Engine electronics check (petrol engine)35 Safety systems35
Tyre pressure
35
Brake linings
36
Fuel reserve
36
Lane departure warning (Lane Assist)
36
Turn signal system
36
Trailer turn signal lights
36
Fog lights
36
Speed regulating system / Speed limiter
37
Brake pedal (automatic transmission)
37
Parking brake - Auto Hold function
37
Main beam
37
Automatic transmission
37
Rear seat belt warning light
37
Alternator
37
Coolant
38
Engine oil pressure too low
38
Engine oil level
38
AdBlue ®
39
Lamp failure
39
Diesel particulate filter (diesel engine)
39
Windscreen washer fluid level
40
Headlamp assistant
40
START-STOP system
40
Low temperature displayed
40
Water in the fuel filter (diesel engine)
40
Automatic Distance Control (ACC)
40
Distance warning (Front Assist)
40
Advance warning / emergency braking (Front Assist)
41
Economy mode
41
Adaptive chassis control (DCC) fault
41
Service
41
The warning lights in the instrument cluster indicate certain functions or
faults.
Some warning lights can be accompanied by acoustic signals and messages in
the display of the instrument cluster.
After switching on the ignition, some warning lights light up briefly as a func-
tion test.
If the tested systems are OK, the corresponding warning lights go out a few
seconds after switching on the ignition or after starting the engine.
Warning lights in the display
Depending on the importance the warning light
(danger) or
(warning) illu-
minate along with some of the warning lights in the list with the warning
lights.
Depending on vehicle specification, some warning lights may be displayed in
colour on the display. For example. the coolant warning lamp may be represen-
ted as follows.
▶ - Segment Display / monochromatic (“black and white”) MAXI DOT display
▶ - colour MAXI DOT displayWARNING■
Ignoring illuminated warning lights and related messages or instructions
in the display of the instrument cluster may lead to serious personal injury
or damage to the vehicle.■
If you have to stop for technical reasons, then park the vehicle at a safe
distance from the traffic, switch off the engine and switch on the hazard
warning lights » page 71. Place the warning triangle at the prescribed dis-
tance.
■
The engine compartment of your car is a hazardous area. The following
warning instructions must be followed at all times when working in the en-
gine compartment » page 206, Engine compartment .
Parking brake
Read and observe
on page 32 first.
illuminates - the hand brake light is switched on.
Parking brake error
illumi-
nates
Fault: electric parking brakePARKING BRAKE FAULT
Seek help from a specialist garage.
Parking on a slope that is too steep
illumi-
nates
Parking brake: grad. too steep. Owner's manual!GRADIENT TOO STEEP
32Using the system
Page 35 of 276
Find a parking space on a flat surface or on a slope that is not so steep.
Brake systemRead and observe
on page 32 first.
illuminates – the brake fluid level in the braking system is too low.
Brake fluid: Owner's manual!BRAKE FLUID PLEASE CHECK›
Stop the vehicle, switch off the engine, and check the level of the brake fluid
» page 212 .
WARNING■
If the warning light illuminates simultaneously with warning light
» page 34 , Anti-lock braking system (ABS) , do not continue your
journey! Seek help from a specialist garage.■
A fault to the ABS system or the braking system can increase the vehi-
cle's braking distance – risk of accident!
Seat belt warning light
Read and observe
on page 32 first.
illuminates - the driver or front passenger has not fastened their seat belt.
At a speed of more than approximately 30 km/h the warning light flashes
and an audible warning sounds at a time.
If the seat belt is not fastened by the driver or front passenger during the next
approx. 2 seconds, the warning signal is deactivated and the warning light
lights up permanently.
Automatic Distance Control (ACC)
Read and observe
on page 32 first.
illuminates - ACC deceleration is insufficient.
Apply the brake!›
Apply the brake.
For more information about the ACC system » page 163.
Power steering / steering lock (KESSY system)
Read and observe
on page 32 first.
Fault in the power steering
illuminates – this indicates a complete failure of the power steering and the
steering assist has failed (significantly higher steering forces).
illuminates – this indicates a partial failure of the power steering and the
steering forces can be greater.
Seek help from a specialist garage.
Steering lock defect (KESSY system)
An audible signal sounds as a warning.
flashes
Steering lock faulty. Stop!STOP VEHICLE STEERING FAULTY
Park the vehicle, do not continue to drive
. After switching off the ignition, it
is no longer possible to lock the steering, to activate the electrical components
(e.g. Infotainment ), to switch on the ignition again and to start the engine.
Seek help from a specialist garage.
flashes
Steering lock: Workshop!STEERING WORKSHOP
Seek help from a specialist garage.
Steering column lock not unlocked (System KESSY)
flashes
Move the steering wheel!MOVE STEERING WHEEL
▶ Move the steering wheel slightly back and forth, thereby facilitating unlock-
ing the steering lock.
If the steering does also not unlock then, the help of a specialist garage is re-
quired.
Disconnecting the vehicle battery
If the vehicle's battery has been disconnected and reconnected, the indicator
light comes on after switching on the ignition.
The warning light should go out after driving a short distance.
If, after the motor is restarted and a short drive, the indicator light does not go
out, there is a system error.
33Instruments and warning lights
Page 39 of 276
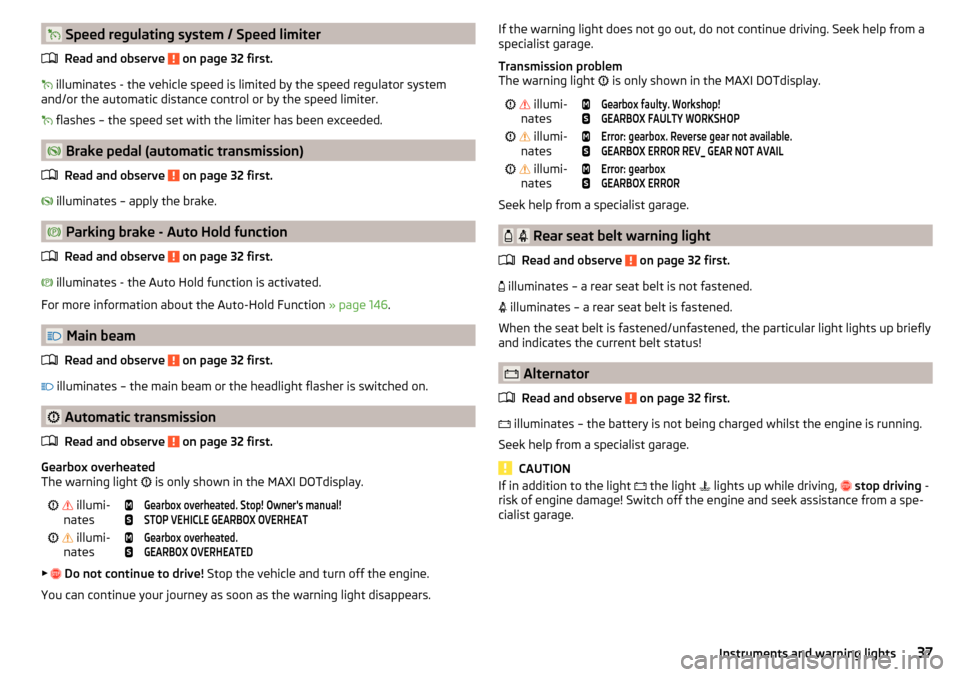
Speed regulating system / Speed limiterRead and observe
on page 32 first.
illuminates - the vehicle speed is limited by the speed regulator system
and/or the automatic distance control or by the speed limiter.
flashes – the speed set with the limiter has been exceeded.
Brake pedal (automatic transmission)
Read and observe
on page 32 first.
illuminates – apply the brake.
Parking brake - Auto Hold function
Read and observe
on page 32 first.
illuminates - the Auto Hold function is activated.
For more information about the Auto-Hold Function » page 146.
Main beam
Read and observe
on page 32 first.
illuminates – the main beam or the headlight flasher is switched on.
Automatic transmission
Read and observe
on page 32 first.
Gearbox overheated
The warning light is only shown in the MAXI DOTdisplay.
illumi-
nates
Gearbox overheated. Stop! Owner's manual!STOP VEHICLE GEARBOX OVERHEAT illumi-
nates
Gearbox overheated.GEARBOX OVERHEATED
▶
Do not continue to drive! Stop the vehicle and turn off the engine.
You can continue your journey as soon as the warning light disappears.
If the warning light does not go out, do not continue driving. Seek help from a
specialist garage.
Transmission problem
The warning light
is only shown in the MAXI DOTdisplay. illumi-
nates
Gearbox faulty. Workshop!GEARBOX FAULTY WORKSHOP illumi-
nates
Error: gearbox. Reverse gear not available.GEARBOX ERROR REV_ GEAR NOT AVAIL illumi-
nates
Error: gearboxGEARBOX ERROR
Seek help from a specialist garage.
Rear seat belt warning light
Read and observe
on page 32 first.
illuminates – a rear seat belt is not fastened.
illuminates – a rear seat belt is fastened.
When the seat belt is fastened/unfastened, the particular light lights up briefly
and indicates the current belt status!
Alternator
Read and observe
on page 32 first.
illuminates – the battery is not being charged whilst the engine is running.
Seek help from a specialist garage.
CAUTION
If in addition to the light the light lights up while driving, stop driving -
risk of engine damage! Switch off the engine and seek assistance from a spe-
cialist garage.37Instruments and warning lights
Page 74 of 276

When the hazard warning system is on and the indicator light is switched on
(e.g. when turning), the hazard warning lights are switched off temporarily and
only the turn signal flashes on the relevant side of the vehicle.
Parking lights
Read and observe
on page 67 first.
The side light is provided for lighting of the parked vehicle.
Switching on the side light
on one side
›
Switch off the ignition.
›
Press the control lever to position
A
or
B
as far as the stop » Fig. 55 on
page 68 .
The parking lights on the right or left side of the vehicle are turned on.
Switching on the side light on both sides
›
With the ignition switched on turn the light switch to position .
›
Switch off the ignition.
›
Lock the vehicle.
After pulling out the ignition key and opening the driver's door, an audible
warning sounds.
After a few seconds or after closing the driver's door, the audible alarm is
turned off, but the parking lights will remain switched on.
CAUTION
■ Turning on the parking light means the battery is heavily loaded.■The parking light cannot be turned off automatic due to the low battery
charge level.■
If the two-sided parking lights are switched on when the ignition is off, then
there is no automatic switching off of the parking light.
Driving abroad
Read and observe
on page 67 first.
When driving in countries with opposing traffic system (traffic on the
left/right), your headlights may dazzle oncoming traffic. In order to avoid this,
the headlights must be adjusted at a specialist garage.
You can adjust the Xenon headlights yourself by setting the travel mode in In- fotainment » Owner´s Manual Infotainment , chapter CARVehicle settings .
Headlamp Assistant (Light Assist / Dynamic Light Assist)
Introduction
Fig. 59
Camera view window for the
headlamp assistant
This chapter contains information on the following subjects:
Function
73
Switching on and off
73
Information messages
73
The headlamp assistant (following as system) can prevent the dazzling of oth-
er road users.
The system automatically switches the high beam on / off, if necessary, ad-
justs the beam of the headlights in accordance with the existing traffic (other
vehicles) and environmental conditions (e.g. driving through a lighted village).
The switching on / off of the high beam, if necessary adaptation of the head-
lamp is controlled by a camera » Fig. 59.
Depending on the equipment, the following system versions can exist. ▶
Light Assist
▶
Dynamic Light AssistLight Assist
The system automatically switches the high beam on / off.
Dynamic Light Assist
The system automatically adjusts the light cone shape of the headlights in or-
der to prevent the dazzling oncoming and preceding vehicles, while ensuring
the highest possible illumination of the road edges.
72Using the system
Page 149 of 276

WARNINGThe increased stopping and starting comfort brought by the system must
not tempt you to take any safety risks.■
The system is not able to stop the vehicle under all circumstances, such
as on icy or otherwise slippery ground, or on gradients.
■
When stopping and parking always make sure that the vehicle is correctly
secured » page 134 , Parking .
CAUTION
In some washing systems it is necessary that the vehicle can roll freely. There-
fore, the system must be deactivated before driving through a car wash.
Note
The system is able to secure the vehicle for about 10 minutes, after which the
vehicle will be automatically secured by the parking brake.
Parking aid (ParkPilot)
Introduction
This chapter contains information on the following subjects:
Function
147
Display in the Infotainment display
148
Activation / deactivation
149
Automatic system activation when moving forward
149
The parking aid (hereinafter referred to as system) draws attention via acous-
tic signals or the Infotainment display when manoeuvring around obstacles in
the vicinity of the vehicle.
WARNING■ The general information relating to the use of assistance systems must
be observed » page 142, in section Introduction .■
Moving persons or objects may not be recognized by the system sensors.
■
Under certain circumstances, surfaces of certain objects and types of
clothing cannot reflect the system signals. For this reason, such people or
objects may not be recognised by the system sensors.
WARNING (Continued)■ External noise sources may affect the signals of the system sensors. Un-
der adverse conditions, this may cause objects or people not to be recog-
nised by the system.■
Before reversing, you should make sure that there are no small obstacles,
such as rocks, thin posts, trailer draw bars etc. in front or behind your vehi-
cle. Such obstacles may not be recognised by the system sensors.
CAUTION
■ Keep the system sensors » Fig. 177 on page 147 clean, snow-and ice-free
and do not cover with any objects of any kind, otherwise the system function-
ing may be impaired.■
Under adverse weather conditions (heavy rain, water vapour, very low or
high temperatures, etc.), the system function may be limited - “incorrect recog-
nition of obstacle”.
■
Accessories fitted to the vehicle rear, such as bicycle carriers, can impair the
system function.
Function
Fig. 177
Installation locations of the sensors on the left side of the vehi-
cle: front/rear
147Assist systems
Page 150 of 276

Fig. 178
Sampled areas and range of the
sensors
Read and observe and on page 147 first.
The system uses ultrasound waves to calculate the distance between the
bumper and an obstacle. The ultrasonic sensors are, depending on vehicle
equipment, located in the back or in the front bumper » Fig. 177.
Depending on the equipment, the following system variants are possible
» Fig. 178 .
▶ Variant 1: warns of obstacles in the areas
C
,
D
.
▶ Variant 2: warns of obstacles in the areas
A
,
B
,
C
,
D
.
▶ Variant 3: warns of obstacles in the regions
A
,
B
,
C
,
D
,
E
.
Approximate range of sensors (in cm)
Area » Fig. 178Variant 1
(4 sensors)Version 2
(8 sensors)Variant 3
(12 sensors)A-120120B-6090C160160160D606090E--90
Audible signals
The interval between the acoustic signals becomes shorter as the clearance is
reduced. A continuous tone sounds from a distance of approx. 30 cm - danger
area. From this moment on do not continue driving!
The acoustic signals can be set in the Infotainment » Owner´s Manual Infotain-
ment , chapter CAR - Vehicle Settings .
Towing a trailer
When towing, or when another accessory is connected to the trailer socket on-
ly the areas
A
and
B
» Fig. 178 are active in the system.
Note■
If with Version 3 vehicles not all fields around the vehicle are active after ac-
tivation the vehicle should be moved forwards or backwards.■
The signal tones for front obstacle recognition are factory-set to be higher
than for rear obstacle recognition.
Display in the Infotainment display
Fig. 179
Display
Read and observe and on page 147 first.
Function buttons and obstacle warning » Fig. 179ARoad display. Depending on the Infotainment type: Switching off park assistant dis-
play. Switching audible parking signals on/off.Change to rear-view camera display .Message: Look! Safe to move?Colour of an object detected in the collision area (the distance to the
obstacle is less than 30 cm).
Do not continue driving in the direc-
tion of the obstacle!Colour of an object detected in the manoeuvring area (the distance to
the obstacle is more than 30 cm).Colour of an object detected in the outside the manoeuvring area (the
distance to the obstacle is more than 30 cm).System failure (there is no indication of obstacles).
Road display
The roadway display varies depending on the steering angle
A
» Fig. 179 and
displays the roadway on which the vehicle would take with the current steer-
ing wheel position.
148Driving
Page 151 of 276
The road ahead is displayed when a forward gear or Neutral is engaged or the
selector lever is in mode D/S or position N is set.
The road behind the vehicle is displayed when reverse gear is engaged or the
selector lever is in mode R.
Activation / deactivation
Fig. 180
System key (option 2, 3)
Read and observe and on page 147 first.
Activation
The activation of the system is initiated when the reverse gear is engaged, or
vehicles with the Variant 2 and 3 , also by pressing the symbol key
» Fig. 180
.
This is confirmed by a short acoustic signal ( the symbol in the button is lit).
Deactivation
On vehicles with Version 1, the system can be deactivated by moving out of re-
verse gear.
For vehicles with the variants 2 and 3 the system is automatically deactivated
by pressing the symbol key or at a speed over 15 km/h (the symbol
in the
button goes out).
Fault display
Vehicles with Variant 1
▶ After system activation an acoustic signal sounds for about 3 seconds (there
is no obstacle near the vehicle).
Vehicles with the Variants 2 and 3
▶ After system activation the symbol flashes in the button.
▶ In the display of the instrument cluster a message about an error of the
ParkPilot system appears (at the same time there is an audible signal).
Seek help from a specialist garage.
Note
The system can only be activated with the symbol key at a speed of below
approx. 15 km / hr.
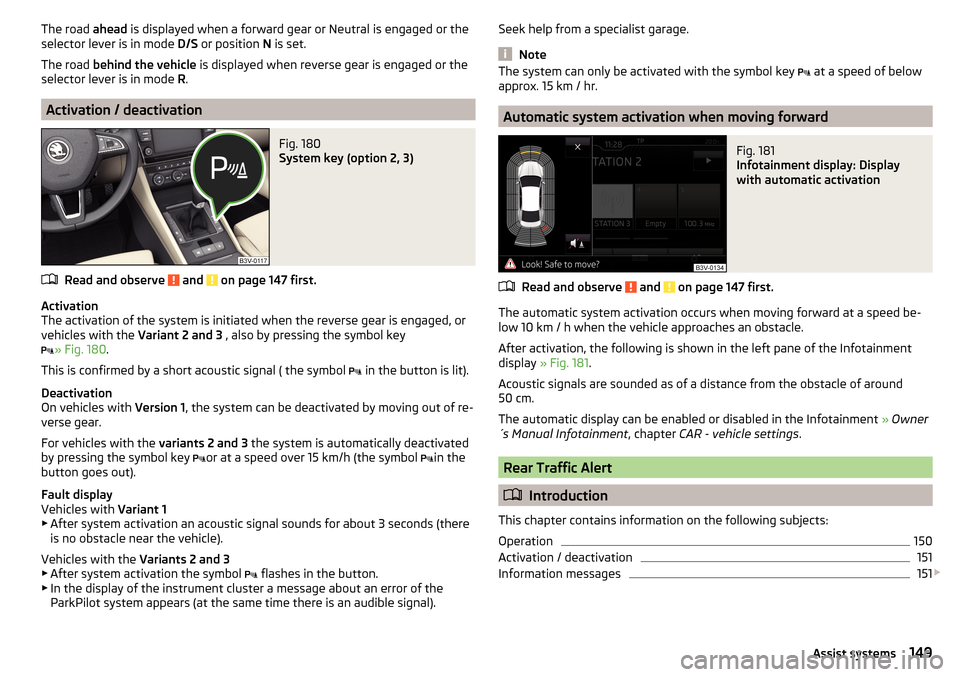
Automatic system activation when moving forward
Fig. 181
Infotainment display: Display
with automatic activation
Read and observe and on page 147 first.
The automatic system activation occurs when moving forward at a speed be-
low 10 km / h when the vehicle approaches an obstacle.
After activation, the following is shown in the left pane of the Infotainment
display » Fig. 181 .
Acoustic signals are sounded as of a distance from the obstacle of around
50 cm.
The automatic display can be enabled or disabled in the Infotainment » Owner
´s Manual Infotainment , chapter CAR - vehicle settings .
Rear Traffic Alert
Introduction
This chapter contains information on the following subjects:
Operation
150
Activation / deactivation
151
Information messages
151
149Assist systems
Page 152 of 276
The Rear Traffic Alert (hereinafter referred to as system) warns when leaving a
parking space from a transverse parking space about any approaching vehi-
cles.
If necessary, the system tries to avoid a collision with automatic braking, or at
least to mitigate the consequences.WARNINGThe general information relating to the use of assistance systems must be
observed » page 142, in section Introduction .
Operation
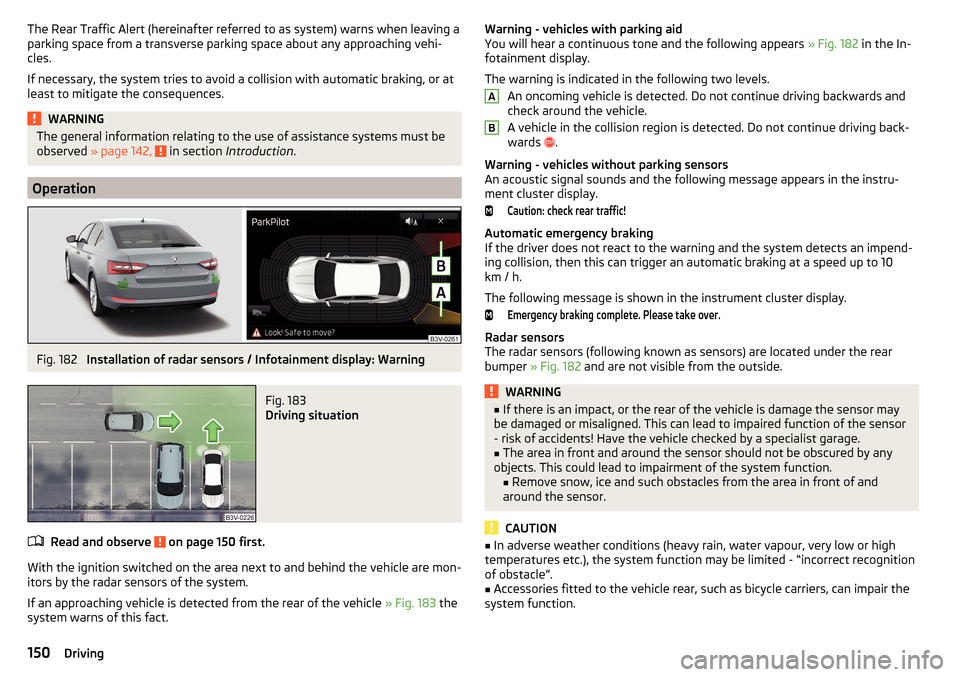
Fig. 182
Installation of radar sensors / Infotainment display: Warning
Fig. 183
Driving situation
Read and observe on page 150 first.
With the ignition switched on the area next to and behind the vehicle are mon-
itors by the radar sensors of the system.
If an approaching vehicle is detected from the rear of the vehicle » Fig. 183 the
system warns of this fact.
Warning - vehicles with parking aid
You will hear a continuous tone and the following appears » Fig. 182 in the In-
fotainment display.
The warning is indicated in the following two levels. An oncoming vehicle is detected. Do not continue driving backwards and
check around the vehicle.
A vehicle in the collision region is detected. Do not continue driving back-
wards
.
Warning - vehicles without parking sensors
An acoustic signal sounds and the following message appears in the instru-
ment cluster display.Caution: check rear traffic!
Automatic emergency braking
If the driver does not react to the warning and the system detects an impend-
ing collision, then this can trigger an automatic braking at a speed up to 10
km / h.
The following message is shown in the instrument cluster display.
Emergency braking complete. Please take over.
Radar sensors
The radar sensors (following known as sensors) are located under the rear
bumper » Fig. 182 and are not visible from the outside.
WARNING■
If there is an impact, or the rear of the vehicle is damage the sensor may
be damaged or misaligned. This can lead to impaired function of the sensor
- risk of accidents! Have the vehicle checked by a specialist garage.■
The area in front and around the sensor should not be obscured by any
objects. This could lead to impairment of the system function. ■Remove snow, ice and such obstacles from the area in front of and
around the sensor.
CAUTION
■ In adverse weather conditions (heavy rain, water vapour, very low or high
temperatures etc.), the system function may be limited - “incorrect recognition
of obstacle”.■
Accessories fitted to the vehicle rear, such as bicycle carriers, can impair the
system function.
AB150Driving