remote start SKODA SUPERB 2015 3.G / (B8/3V) Owner's Manual
[x] Cancel search | Manufacturer: SKODA, Model Year: 2015, Model line: SUPERB, Model: SKODA SUPERB 2015 3.G / (B8/3V)Pages: 276, PDF Size: 42.14 MB
Page 5 of 276
Traffic jam assistant179Assistant for emergencies179
Traffic sign recognition
180
Fatigue detection
182
Tyre pressure monitoring
183
Hitch and trailer
184
Hitch
184
Trailer
185
General Maintenance
Care and maintenance
190
Service work, adjustments and technical
alterations
190
Washing vehicle
193
Cleaning vehicle exterior
194
Interior care
198
Inspecting and replenishing
201
Fuel
201
AdBlue ®
and its refilling
204
Engine compartment
206
Engine oil
209
Coolant
210
Brake fluid
212
Vehicle battery
213
Wheels
217
Tyres and wheel rims
217
Winter operation
220
Do-it-yourself
Emergency equipment and self-help
222
Emergency equipment
222
Changing a wheel
224
Puncture repair kit
228
Jump-starting
230
Towing the vehicle
231
Remote control and removable light
233Emergency unlocking/locking235Replacing windscreen wiper blades237
Fuses and light bulbs
238
Fuses
238
Bulbs
242
Technical data
Technical data
246
Basic vehicle data
246
Vehicle-specific information depending on
engine type
252
Index
3Table of Contents
Page 54 of 276

After changing the password/PIN, the connection to SmartGate must be re-es-
tablished on the communication device to be connected using the new pass-
word or new PIN code.
If the password/PIN code is still set to the preset factory password/PIN code,
you are requested to change the password/PIN code after starting the ŠKODA
application. Without changing the password/PIN code, you are unable to use
the application.
Changing the password for the Wi-Fi connection›
Open the SmartGate web interface.
›
In the menu item “WPA / WPA2 key:” enter the new password (8 to 63 alpha-
numeric, special, lower and upper case characters).
›
Confirm the password change by tapping on the “Save” button.
›
Restart SmartGate by tapping on the “Reboot” 1)
button.
Changing the PIN code for the Wi-Fi Direct connection
›
Open the SmartGate web interface.
›
In the menu item “WiFi Direct PIN:” Enter the new PIN code (6 digits).
›
Confirm the PIN code change by tapping on the “Save” button.
›
Restart SmartGate by tapping on the “Reboot” 1)
button.
Note
If you have forgotten your password/PIN code for connecting to SmartGate,
SmartGate must be reset to the factory settings in a specialist workshop.Unlocking and opening
Unlocking and locking
Introduction
This chapter contains information on the following subjects:
Unlocking / locking with the remote control key
53
KESSY override key removal
54
Unlocking / locking - KESSY
54
Locking / unlocking the vehicle with the central locking button
55
Safe securing system
55
Individual settings
56
Opening/closing a door
56
Child safety lock
57
Malfunctions
57
Your car is equipped with a central locking system.
The central locking system allows you to lock and unlock all doors, the fuel fill-
er flap and boot lid at the same time. The functions of the central locking sys-
tem can be individually adjusted » page 56.
After unlocking, depending on vehicle equipment and setting the following is
valid for the central locking. ▶ The turn signal lights flash twice as confirmation that the vehicle has been
unlocked.
▶ An double audible signal sounds additionally on vehicles which are fitted
with the anti-theft alarm system.
▶ The doors, the boot lid and the fuel filler flap are unlocked.
▶ The interior lamp illuminates.
▶ The SafeLock system is switched off.
▶ The indicator light in the driver door stops flashing.
▶ The exterior mirrors are set into the driving position.
▶ The anti-theft alarm system is deactivated.
1)
If the “Reboot” button is not displayed, you must manually restore the web browser display.
52Using the system
Page 55 of 276

After locking, depending on vehicle equipment and setting the following is
valid for the central locking. ▶ The turn signal lights flash once as confirmation that the vehicle has been
locked.
▶ An audible signal sounds additionally on vehicles which are fitted with the
anti-theft alarm system.
▶ The doors, the boot lid and the fuel filler flap are locked.
▶ The interior lamp goes out.
▶ The SafeLock system is switched on.
▶ The indicator light in the driver door begins flashing.
▶ The exterior mirrors are folded back into the park position.
▶ The anti-theft alarm system is activated.
If the doors or the boot lid remain open after the vehicle has been locked, the
turn signal lights do not flash until they have been closed.
Protection against unwanted vehicle unlocking
If you unlock the vehicle and do not open a door or the boot lid within the next
45 seconds, the vehicle will lock again automatically and the SafeLock system
or anti-theft alarm system will be switched on.WARNING■ Never leave the key in the vehicle when you exit the vehicle. Unauthor-
ized persons, such as children, for example, could lock the car, turn on the
ignition or start the engine - there is a danger of injury and accidents!■
When leaving the vehicle, never leave people who are not completely in-
dependent, such as children, unattended in the vehicle. These individuals
might not be able to leave the vehicle on their own or to help themselves.
Can be fatal at very high or very low temperatures!
CAUTION
■ Each key contains electronic components; therefore it must be protected
against moisture and severe shocks.■
Keep the groove of the keys absolutely clean. Impurities (textile fibres, dust,
etc.) have a negative effect on the functionality of the locking cylinder and ig-
nition lock.
■
If the driver's door has been opened, the vehicle cannot be locked.
Unlocking / locking with the remote control keyFig. 37
Key: Remote key / KESSY
Read and observe
and on page 53 first.
Function and description of the key » Fig. 37
Unlocking the vehicle
Locking the vehicle
Depending on equipment fitted:
▶ Boot lid unlock/unlatch (vehicles fitted with manual operation)
▶ Luggage compartment door open/close/movement of the luggage com-
partment door stop (vehicles with electric operation)
Button for the extension / retraction of the key Warning light for the battery condition
If the red warning light does not flash when you press a button on the key,
the battery is discharged.
Boot lid unlock/unlatch for vehicles fitted with manual operation
By pressing briefly symbol key
the boot lid unlocks.
Press and hold the symbol key
to release the lid (partially opened).
If the lid is unlocked or released with the key symbol on the key, then the
lid is automatically locked after closing. You can set a lock delay » page 59.
AB53Unlocking and opening
Page 56 of 276

CAUTION■The operation of the remote control may temporarily be affected by signal in-
terference from transmitters close to the car and which operate in the same
frequency range.■
The operating range of the remote control key is approx. 30 m. But this range
of the remote control can be reduced if the batteries are weak.
■
The battery must be replaced if the central locking does react to the remote
control at less than around 3 metres away » page 234.
Note
The remote control will operate only when visual contact with the vehicle.
KESSY override key removal
Fig. 38
KESSY key
Read and observe
and on page 53 first.
›
Remove retainer tabs
A
in the direction of arrow
1
» Fig. 38 .
›
Remove the emergency key
B
in the direction of the arrow
2
.
Unlocking / locking - KESSYFig. 39
The front door handle
Read and observe
and on page 53 first.
The KESSY system (Keyless Entry Start Exit System) enables unlocking and
locking of the vehicle without actively using the remote control key » Fig. 39.
The sensors for unlocking or locking are located in the handle of the front
door.
Unlocking
Locking
When unlocking or locking the vehicle, the key must be at a maximum distance
of approximately 1.5 m from the front door handle.
Locking
On vehicles fitted with automatic gearbox, the selector lever must be moved
into the position P before unlocking.
The vehicle cannot be locked from the outside if the ignition has not been
turned off.
After locking the car, it is not possible to unlock within the next 2 seconds by
touching the door handle. This can be used to check whether the vehicle is
locked.
Protection against inadvertently locking the key in the vehicle
If one of the doors is closed after the vehicle has been locked and the key with
which the vehicle was locked remains in the passenger compartment, the ve-
hicle will be automatically unlocked. After unlocking the vehicle again, the turn
signal lights will flash four times. If no door is opened within 45 seconds, the
vehicle is automatically locked again.
54Using the system
Page 73 of 276
Fog lights with the CORNER functionRead and observe
on page 67 first.
The function CORNER provides better illumination of the nearby environment
when turning, manoeuvring or anything similar.
The function automatically switches on the fog lights on each side of the ve- hicle, if the following conditions are met.
The turn signal is switched on or the front wheels are turned sharply 1)
.
The vehicle speed is below 40 km/h.
The low beam is switched on.
The fog lights are not switched on.
Note
The two fog lights are switched on when you shift into the reverse gear.
COMING HOME / LEAVING HOME
Read and observe
on page 67 first.
The function COMING HOME ensures that the vehicle's environment is illumi-
nated after switching off the ignition and opening the driver's door.
The function LEAVING HOME ensures that the vehicle's environment is illumi-
nated after unlocking the vehicle with the radio remote control unit.
The function switches the light on only if there is poorer visibility and the light
switch is in the position .
Enabling / disabling and setting functions
The functions and setting of the lighting duration can be activated or deactiva-
ted in the Infotainment system » Owner´s Manual Infotainment , chap-
ter CARVehicle settings .
CAUTION■
Poorer visibility is evaluated by a motor mounted below the windscreen in
the holder of the interior mirror sensor. Do not attach any stickers or similar
objects in front of the light sensor on the windscreen in order to avoid impair-
ing the function or its reliability.■
If this option is always enabled, then the battery is heavily loaded.
Hazard warning light system
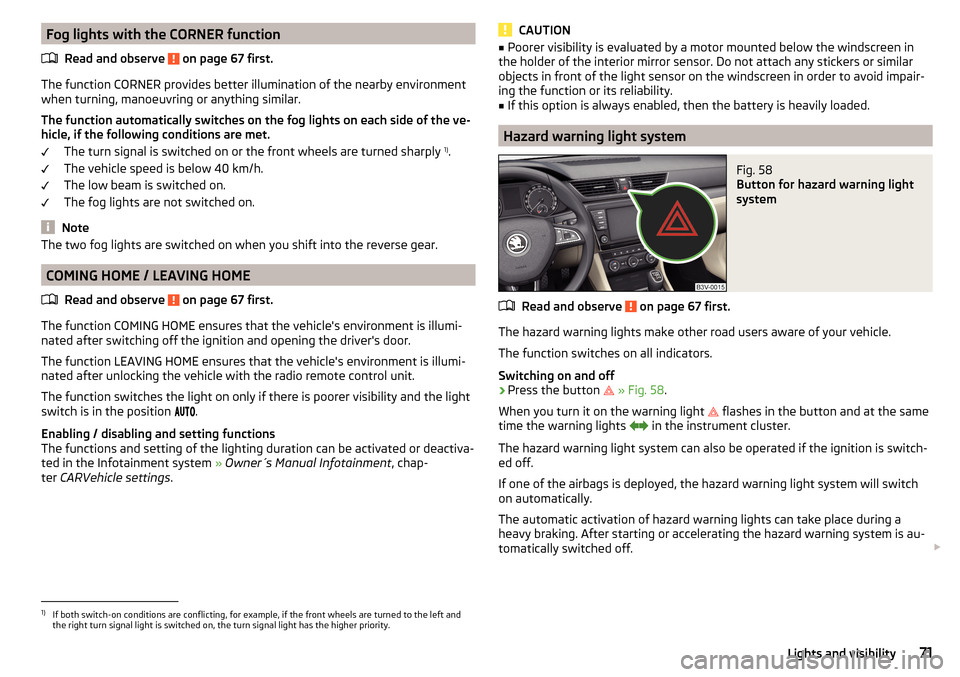
Fig. 58
Button for hazard warning light
system
Read and observe on page 67 first.
The hazard warning lights make other road users aware of your vehicle.
The function switches on all indicators.
Switching on and off
›
Press the button
» Fig. 58 .
When you turn it on the warning light
flashes in the button and at the same
time the warning lights
in the instrument cluster.
The hazard warning light system can also be operated if the ignition is switch-
ed off.
If one of the airbags is deployed, the hazard warning light system will switch
on automatically.
The automatic activation of hazard warning lights can take place during a
heavy braking. After starting or accelerating the hazard warning system is au-
tomatically switched off.
1)
If both switch-on conditions are conflicting, for example, if the front wheels are turned to the left and
the right turn signal light is switched on, the turn signal light has the higher priority.
71Lights and visibility
Page 235 of 276
Removing/installing the towing eye›Manually screw the towing eye as far as it will go in the direction of the ar-
row 3
» Fig. 252 » .
For tightening purposes, we recommend, for example, using the wheel
wrench, towing eye from another vehicle or a similar object that can be pushed through the eye.
›
Unscrew the towing eye against the direction of the arrow
3
.
WARNINGThe towing eye must always be screwed in fully and firmly tightened, oth-
erwise the towing eye can tear when towing in or tow-starting.
Rear towing eye
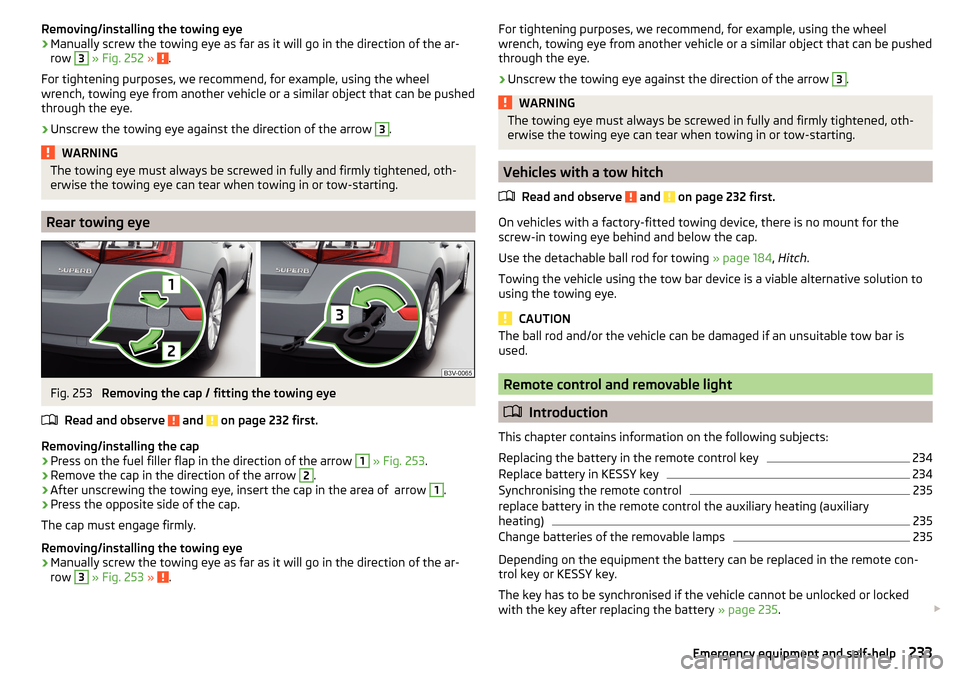
Fig. 253
Removing the cap / fitting the towing eye
Read and observe
and on page 232 first.
Removing/installing the cap
›
Press on the fuel filler flap in the direction of the arrow
1
» Fig. 253 .
›
Remove the cap in the direction of the arrow
2
.
›
After unscrewing the towing eye, insert the cap in the area of arrow
1
.
›
Press the opposite side of the cap.
The cap must engage firmly.
Removing/installing the towing eye
›
Manually screw the towing eye as far as it will go in the direction of the ar-
row
3
» Fig. 253 » .
For tightening purposes, we recommend, for example, using the wheel
wrench, towing eye from another vehicle or a similar object that can be pushed
through the eye.›
Unscrew the towing eye against the direction of the arrow
3
.
WARNINGThe towing eye must always be screwed in fully and firmly tightened, oth-
erwise the towing eye can tear when towing in or tow-starting.
Vehicles with a tow hitch
Read and observe
and on page 232 first.
On vehicles with a factory-fitted towing device, there is no mount for the
screw-in towing eye behind and below the cap.
Use the detachable ball rod for towing » page 184, Hitch .
Towing the vehicle using the tow bar device is a viable alternative solution to
using the towing eye.
CAUTION
The ball rod and/or the vehicle can be damaged if an unsuitable tow bar is
used.
Remote control and removable light
Introduction
This chapter contains information on the following subjects:
Replacing the battery in the remote control key
234
Replace battery in KESSY key
234
Synchronising the remote control
235
replace battery in the remote control the auxiliary heating (auxiliary
heating)
235
Change batteries of the removable lamps
235
Depending on the equipment the battery can be replaced in the remote con-
trol key or KESSY key.
The key has to be synchronised if the vehicle cannot be unlocked or locked
with the key after replacing the battery » page 235.
233Emergency equipment and self-help
Page 242 of 276
Installing the storage compartment›Raise the storage compartment in the direction of the arrow 4.›
Overcome the resistance of the detents
A
.
›
Insert the brake control linkage in the opposite direction to arrow
2
.
›
Lock the brake control linkage in the opposite direction to arrow
1
.
›
Close the storage compartment.
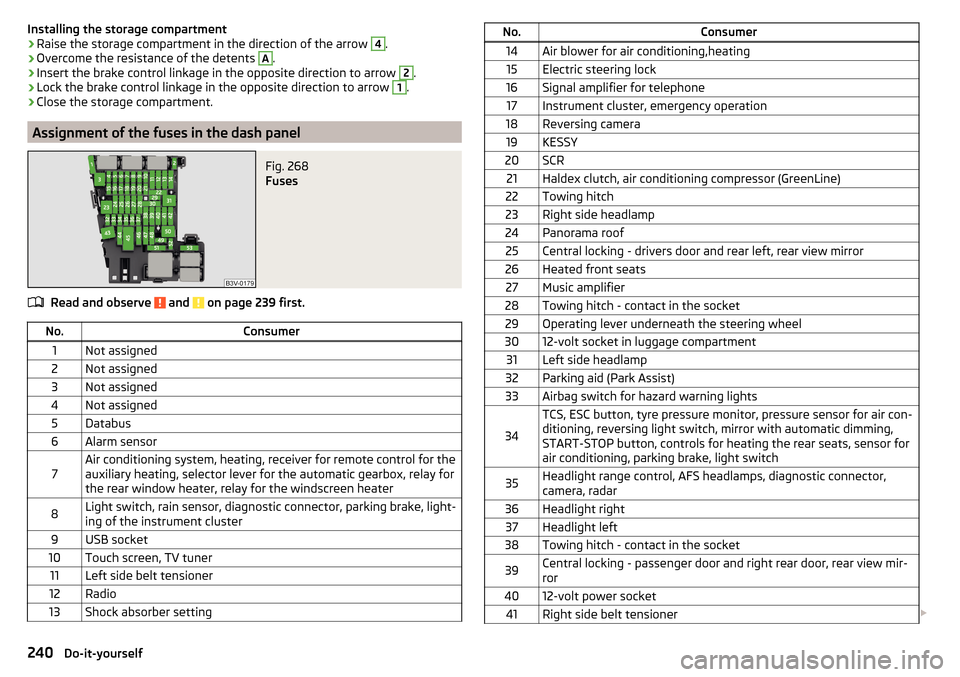
Assignment of the fuses in the dash panel
Fig. 268
Fuses
Read and observe and on page 239 first.
No.Consumer1Not assigned2Not assigned3Not assigned4Not assigned5Databus6Alarm sensor7Air conditioning system, heating, receiver for remote control for the
auxiliary heating, selector lever for the automatic gearbox, relay for
the rear window heater, relay for the windscreen heater8Light switch, rain sensor, diagnostic connector, parking brake, light-
ing of the instrument cluster9USB socket10Touch screen, TV tuner11Left side belt tensioner12Radio13Shock absorber settingNo.Consumer14Air blower for air conditioning,heating15Electric steering lock16Signal amplifier for telephone17Instrument cluster, emergency operation18Reversing camera19KESSY20SCR21Haldex clutch, air conditioning compressor (GreenLine)22Towing hitch23Right side headlamp24Panorama roof25Central locking - drivers door and rear left, rear view mirror26Heated front seats27Music amplifier28Towing hitch - contact in the socket29Operating lever underneath the steering wheel3012-volt socket in luggage compartment31Left side headlamp32Parking aid (Park Assist)33Airbag switch for hazard warning lights
34
TCS, ESC button, tyre pressure monitor, pressure sensor for air con-
ditioning, reversing light switch, mirror with automatic dimming,
START-STOP button, controls for heating the rear seats, sensor for
air conditioning, parking brake, light switch35Headlight range control, AFS headlamps, diagnostic connector,
camera, radar36Headlight right37Headlight left38Towing hitch - contact in the socket39Central locking - passenger door and right rear door, rear view mir-
ror4012-volt power socket41Right side belt tensioner 240Do-it-yourself
Page 261 of 276
Fuel supply30
Gear changes42
Service interval49
Disposal Acceptance and recycling of used vehicles
193
Distance driven31
Distance warning Warning light
40
Door Child safety lock
57
Closing56
Emergency locking236
Emergency locking the driver's door236
Opening56
Door warning41
Drive Driving through water
141
DriveGreen140
Driver Steering Recommendation (DSR)145
Driving Emissions
248
Fuel consumption248
through water141
driving data operation
43
Driving mode171
driving mode select Normal mode
172
Driving Mode Selection171
DSR145
Dynamic Light Assist72
E
ECO-TIP
49
Eco-tips49
Economical driving Tips
139
Economy mode Warning light
41
EDL145
Electrical boot lid set the top position of the lid
60
Electrical power windows Buttons in the driver's door
62
Electric boot lid Force limit
59
Manual operation59
Electric luggage compartment lid Malfunctions
61
Operating60
Electric parking brake133
Electric window lifter61, 63
Button in the passenger door63
Button in the rear doors63
Window operation malfunctions64
Electronic differential lock (EDL, XDS)145
Electronic immobilizer126
emergency replace battery in the remote control
235
Emergency Changing a wheel
224
Hazard warning light system71
Jump-starting230
Locking the door without a locking cylinder236
Locking the driver's door236
Selector lever-unlocking237
Switch off the engine by pressing a button129
Towing the using the tow hitch233
Towing the vehicle231
Tyre repair228
Unlocking the driver's door236
emergency equipment reflective vest
223
Emergency equipment Fire extinguisher
223
First aid kit222
Jack223
Vehicle tool kit223
Warning triangle222
Emissions248
Engine Information messages
38
Running-in139
Engine compartment206
Brake fluid212
Overview208
Vehicle battery213
Engine number246
engine oil specification
209
Engine oil209
Checking210
Replenishing210
Warning light38
EPC Warning light
35
ESC Operation
144
Warning light34
ESC Sport144
Exhaust emissions control system Warning light
34
F
Fastening elements
106
Fatigue detection182
Function182
Information messages182
Films195
Fire extinguisher223
First aid kit222
Floor covering Fixing
108
in the luggage compartment108
Fog lights Warning light
36
Fog Lights70
Fold in passenger's mirror80
259Index
Page 263 of 276
Interior lightFront74
Interior lighting Ambient lighting
75
Interior monitor58
iPad holder behind the head restraint
104
Handling104
in the rear armrest105
ISOFIX23
J
Jack
223
- fit226
Maintenance197
Jump-starting230
K
KESSY Boot lid
61
Locking54
Unlocking54
Virtual pedal61
Key Start the engine
127
Stopping the engine127
Switch off the ignition127
Switch on the ignition127
Key CAR see Infotainment
4
key for KESSY Remove emergency key
54
Key for KESSY Replacing the battery
234
Knee airbag17
L
Lamp failure Warning light
39
LampsWarning light39
Lane Assist see Lane Departure Warning
174
Warning light36
Lane Departure Warning174
Activation / deactivation176
Information messages176
Operation175
Leather Natural leather care
199
LEAVING HOME71
Lever Main beam
68
Turn signal68
Levers Windscreen wipers
78
Light Cockpit
74
COMING HOME / LEAVING HOME71
Fog Lights70
Headlamp Assistant72
Headlights with CORNER function71
Rear fog light70
Replacing bulbs242
travel mode70
Xenon headlight69
Light Assist72
lighting entry space
75
Lighting Luggage compartment
105
Lights67
Automatic driving lamp control69
Daylight running68
Hazard warning light system71
Headlight flasher68
Headlight range adjustment67
Low beam67
Main beam68
Parking lights67, 72
Switching on and off67
Turn signal68
Warning lights31
Load248
Locking Individual settings
56
KESSY54
Remote control53
Locking and unlocking the vehicle from the in- side
55
Locking the door without a locking cylinder Emergency
236
Long cargo channel86
Low beam67
Low temperature warning light Warning light
40
Low tyre pressure warning refer to the tyre pressure monitoring
183
Luggage compartment105
Cover108
Fastening elements106
Fix floor covering108
Fixing nets107
floor covering on both sides108
foldable hook107
Lighting105
Luggage net108
Net partition116
removable light114
Roll-up cover109
Side pockets112
Storage compartments under the floor cover- ing
113
tray with cargo element112
unlock manually236
Unlock the boot lid236
Variable loading floor115
261Index