engine SKODA SUPERB 2016 3.G / (B8/3V) Owner's Manual
[x] Cancel search | Manufacturer: SKODA, Model Year: 2016, Model line: SUPERB, Model: SKODA SUPERB 2016 3.G / (B8/3V)Pages: 336, PDF Size: 53.89 MB
Page 5 of 336
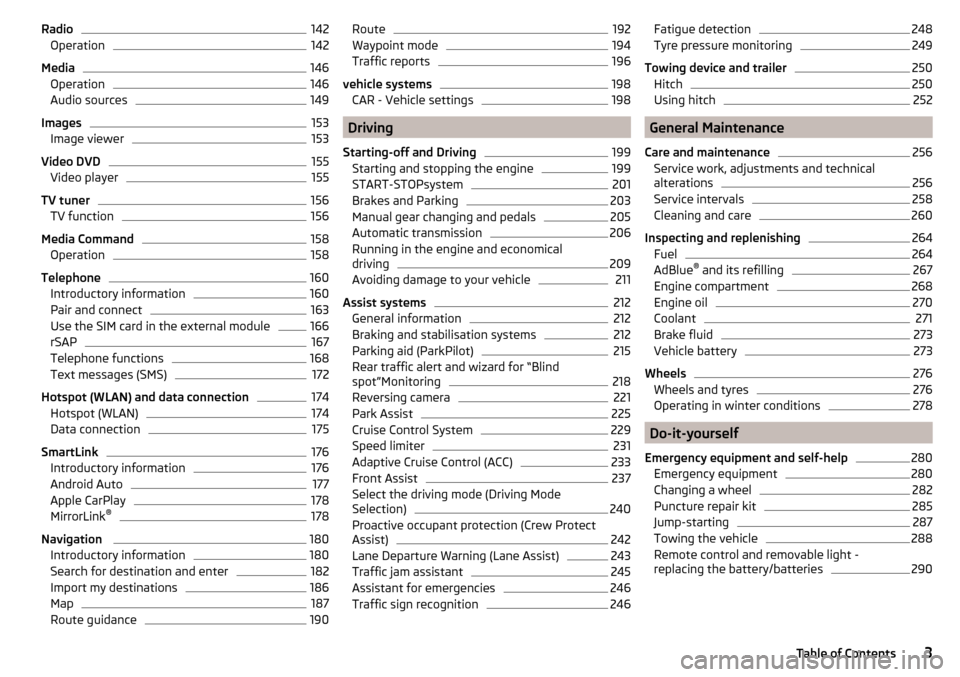
Radio142Operation142
Media
146
Operation
146
Audio sources
149
Images
153
Image viewer
153
Video DVD
155
Video player
155
TV tuner
156
TV function
156
Media Command
158
Operation
158
Telephone
160
Introductory information
160
Pair and connect
163
Use the SIM card in the external module
166
rSAP
167
Telephone functions
168
Text messages (SMS)
172
Hotspot (WLAN) and data connection
174
Hotspot (WLAN)
174
Data connection
175
SmartLink
176
Introductory information
176
Android Auto
177
Apple CarPlay
178
MirrorLink®
178
Navigation
180
Introductory information
180
Search for destination and enter
182
Import my destinations
186
Map
187
Route guidance
190Route192Waypoint mode194
Traffic reports
196
vehicle systems
198
CAR - Vehicle settings
198
Driving
Starting-off and Driving
199
Starting and stopping the engine
199
START-STOPsystem
201
Brakes and Parking
203
Manual gear changing and pedals
205
Automatic transmission
206
Running in the engine and economical
driving
209
Avoiding damage to your vehicle
211
Assist systems
212
General information
212
Braking and stabilisation systems
212
Parking aid (ParkPilot)
215
Rear traffic alert and wizard for “Blind
spot”Monitoring
218
Reversing camera
221
Park Assist
225
Cruise Control System
229
Speed limiter
231
Adaptive Cruise Control (ACC)
233
Front Assist
237
Select the driving mode (Driving Mode
Selection)
240
Proactive occupant protection (Crew Protect
Assist)
242
Lane Departure Warning (Lane Assist)
243
Traffic jam assistant
245
Assistant for emergencies
246
Traffic sign recognition
246Fatigue detection248Tyre pressure monitoring249
Towing device and trailer
250
Hitch
250
Using hitch
252
General Maintenance
Care and maintenance
256
Service work, adjustments and technical
alterations
256
Service intervals
258
Cleaning and care
260
Inspecting and replenishing
264
Fuel
264
AdBlue ®
and its refilling
267
Engine compartment
268
Engine oil
270
Coolant
271
Brake fluid
273
Vehicle battery
273
Wheels
276
Wheels and tyres
276
Operating in winter conditions
278
Do-it-yourself
Emergency equipment and self-help
280
Emergency equipment
280
Changing a wheel
282
Puncture repair kit
285
Jump-starting
287
Towing the vehicle
288
Remote control and removable light -
replacing the battery/batteries
2903Table of Contents
Page 6 of 336
Emergency unlocking / unlocking of doors292Replacing windscreen wiper blades294
Fuses and light bulbs
295
Fuses
295
Bulbs
299
Technical data
Technical data
303
Basic vehicle data
303
Vehicle-specific details per engine type
309
Index
4Table of Contents
Page 12 of 336
Structure of the Owner´s Manual and further
information
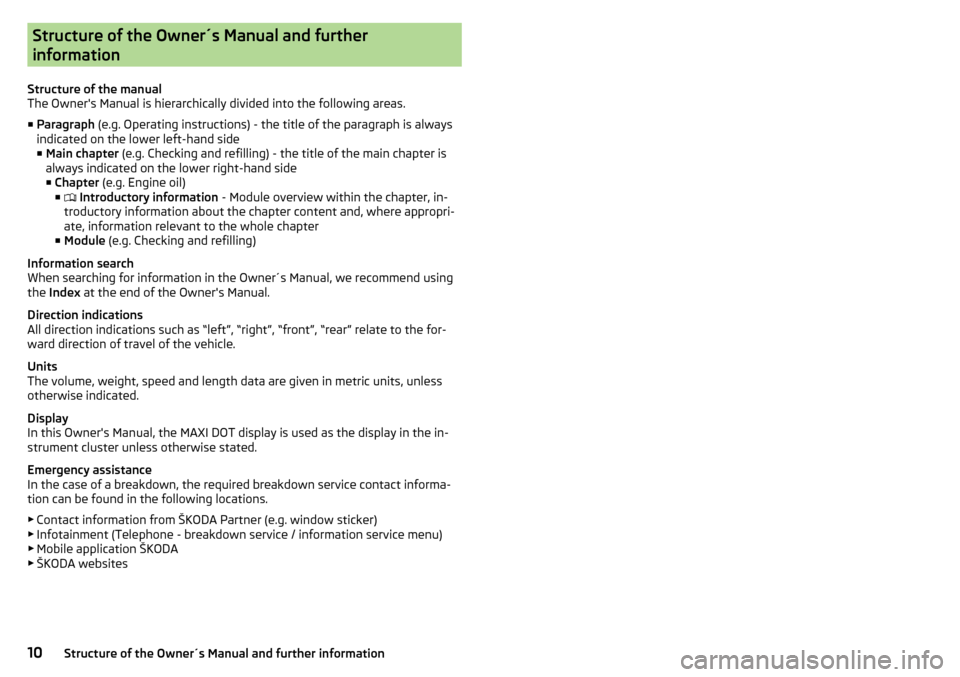
Structure of the manual
The Owner's Manual is hierarchically divided into the following areas.
■ Paragraph (e.g. Operating instructions) - the title of the paragraph is always
indicated on the lower left-hand side ■ Main chapter (e.g. Checking and refilling) - the title of the main chapter is
always indicated on the lower right-hand side ■ Chapter (e.g. Engine oil)
■ Introductory information
- Module overview within the chapter, in-
troductory information about the chapter content and, where appropri-
ate, information relevant to the whole chapter
■ Module (e.g. Checking and refilling)
Information search
When searching for information in the Owner´s Manual, we recommend using
the Index at the end of the Owner's Manual.
Direction indications
All direction indications such as “left”, “right”, “front”, “rear” relate to the for- ward direction of travel of the vehicle.
Units
The volume, weight, speed and length data are given in metric units, unless
otherwise indicated.
Display
In this Owner's Manual, the MAXI DOT display is used as the display in the in-
strument cluster unless otherwise stated.
Emergency assistance
In the case of a breakdown, the required breakdown service contact informa- tion can be found in the following locations.
▶ Contact information from ŠKODA Partner (e.g. window sticker)
▶ Infotainment (Telephone - breakdown service / information service menu)
▶ Mobile application ŠKODA
▶ ŠKODA websites10Structure of the Owner´s Manual and further information
Page 13 of 336
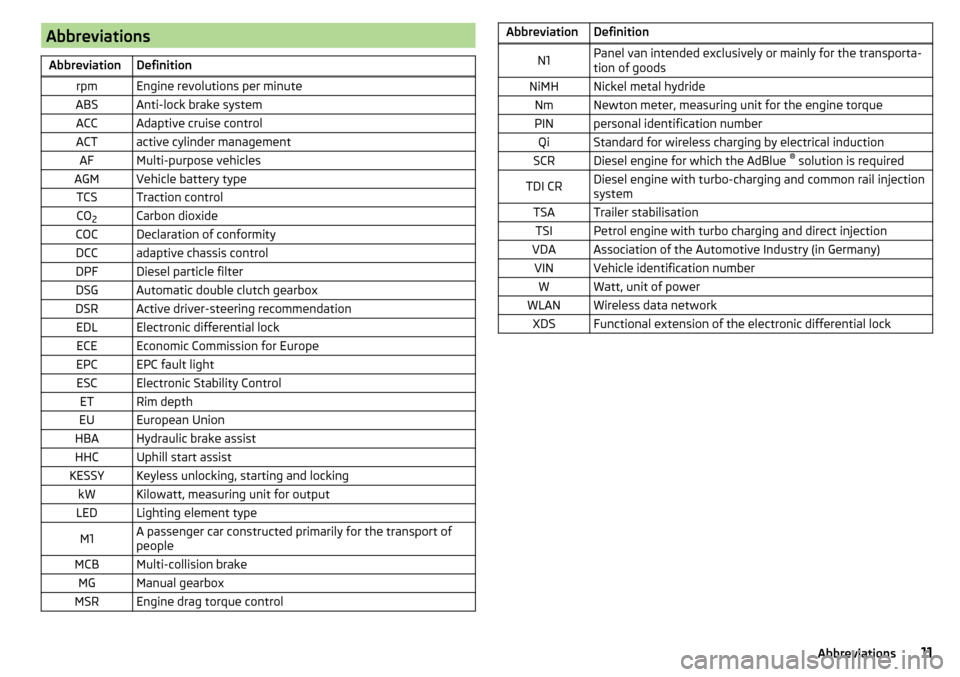
AbbreviationsAbbreviationDefinitionrpmEngine revolutions per minuteABSAnti-lock brake systemACCAdaptive cruise controlACTactive cylinder managementAFMulti-purpose vehiclesAGMVehicle battery typeTCSTraction controlCO2Carbon dioxideCOCDeclaration of conformityDCCadaptive chassis controlDPFDiesel particle filterDSGAutomatic double clutch gearboxDSRActive driver-steering recommendationEDLElectronic differential lockECEEconomic Commission for EuropeEPCEPC fault lightESCElectronic Stability ControlETRim depthEUEuropean UnionHBAHydraulic brake assistHHCUphill start assistKESSYKeyless unlocking, starting and lockingkWKilowatt, measuring unit for outputLEDLighting element typeM1A passenger car constructed primarily for the transport of
peopleMCBMulti-collision brakeMGManual gearboxMSREngine drag torque controlAbbreviationDefinitionN1Panel van intended exclusively or mainly for the transporta-
tion of goodsNiMHNickel metal hydrideNmNewton meter, measuring unit for the engine torquePINpersonal identification numberQiStandard for wireless charging by electrical inductionSCRDiesel engine for which the AdBlue ®
solution is requiredTDI CRDiesel engine with turbo-charging and common rail injection
systemTSATrailer stabilisationTSIPetrol engine with turbo charging and direct injectionVDAAssociation of the Automotive Industry (in Germany)VINVehicle identification numberWWatt, unit of powerWLANWireless data networkXDSFunctional extension of the electronic differential lock11Abbreviations
Page 14 of 336
Safety
Passive Safety
General information
Introduction
This chapter contains information on the following subjects:
Before setting off
12
Driving safety
12
This section of the manual includes important information on the subject of
passive safety. We have combined everything here which you should be famili-
ar with, for example, regarding seat belts, airbags, safety of children and any-
thing similar.
Other important safety information can also be found in the following chapters
of this Owner´s Manual. The Owner´s Manual should therefore always be in
the vehicle.
Before setting off
For your own safety and the safety of the people travelling with you, please
pay attention to the following points before setting off.
▶ Check the function of the lighting and turn signal systems.
▶ Check the function of the wipers and check the wiper blades for wear. Check
the windscreen washer fluid level.
▶ Ensure that all of the windows offer good visibility to the outside.
▶ Adjust the rear-view mirror so that vision to the rear is guaranteed. Ensure
that the mirrors are not covered.
▶ Check the tyre inflation pressure.
▶ Check the engine oil, brake fluid and coolant level.
▶ Secure all items of luggage.
▶ Do not exceed the permissible axle loads and permissible gross weight of the
vehicle.
▶ Close all doors as well as the bonnet and boot lid.
▶ Ensure that no objects can obstruct the pedals.
▶
Protect children by using a suitable child seat » page 22, Transporting chil-
dren safely .
▶ Adopt the correct seated position. Instruct your passengers to assume the
correct seated position » page 12, Correct and safe seated position .
Driving safety
In the interests of traffic safety, the following information must be observed. ▶ Do not become distracted from concentrating on the traffic situation, (e.g. by
your passengers or mobile telephone calls).
▶ Never drive when your driving ability is impaired, (e.g. due to medication, al-
cohol or drugs).
▶ Keep to the traffic regulations and the permissible speed limit.
▶ Always adjust the driving speed to the road, traffic and weather conditions.
▶ Take regular breaks on long journeys (at least every two hours).
Correct and safe seated position
Introduction
This chapter contains information on the following subjects:
Driver’s correct seating position
13
Adjusting the steering wheel position
13
Correct seating position of the passenger
14
Correct seating position for the passengers in the rear seats
14
Always assume the correct seated position before setting off and do not
change this position while driving. Also advise your passengers to adopt the
correct seated position and not to change this position while the car is moving.
The following list contains instructions for the Passenger which, if not ob-
served, may cause serious injuries or death. ▶ Do not lean against the dash panel.
▶ Do not put your feet on the dash panel.
The following list contains instructions for all Passengers which, if not ob-
served, may cause serious injuries or death.
▶ Do not sit only on the front part of the seat.
▶ Do not sit facing to the side.
▶ Do not lean out of the window.
▶ Do not put your limbs out of the window.
▶ Do not put your feet on the seat cushion.
12Safety
Page 21 of 336
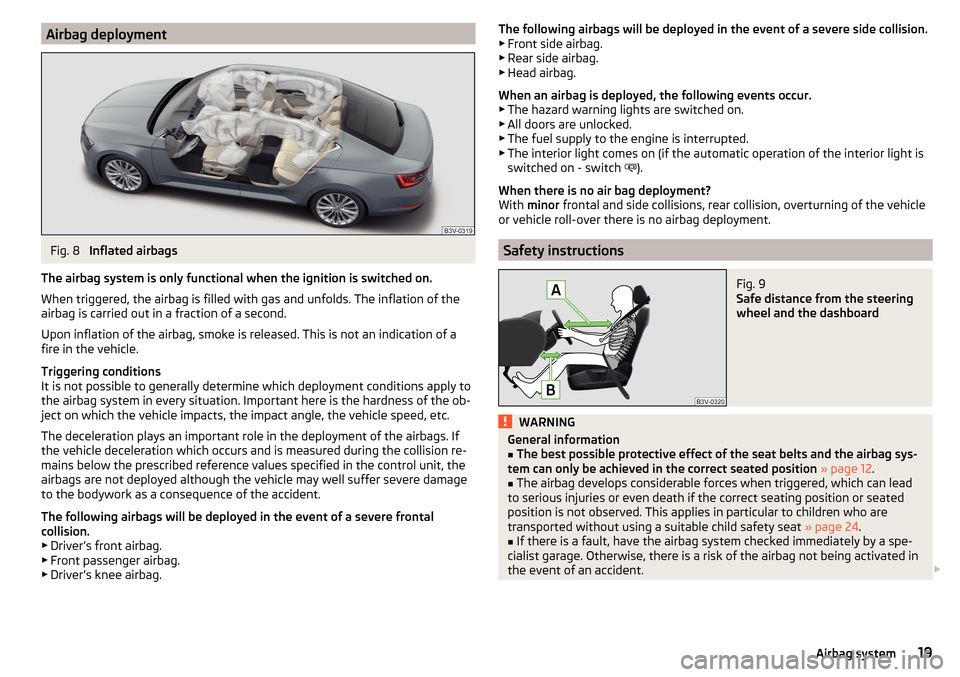
Airbag deploymentFig. 8
Inflated airbags
The airbag system is only functional when the ignition is switched on.
When triggered, the airbag is filled with gas and unfolds. The inflation of the
airbag is carried out in a fraction of a second.
Upon inflation of the airbag, smoke is released. This is not an indication of a fire in the vehicle.
Triggering conditions
It is not possible to generally determine which deployment conditions apply to
the airbag system in every situation. Important here is the hardness of the ob-
ject on which the vehicle impacts, the impact angle, the vehicle speed, etc.
The deceleration plays an important role in the deployment of the airbags. If
the vehicle deceleration which occurs and is measured during the collision re-
mains below the prescribed reference values specified in the control unit, the
airbags are not deployed although the vehicle may well suffer severe damage
to the bodywork as a consequence of the accident.
The following airbags will be deployed in the event of a severe frontal
collision.
▶ Driver’s front airbag.
▶ Front passenger airbag.
▶ Driver’s knee airbag.
The following airbags will be deployed in the event of a severe side collision.
▶ Front side airbag.
▶ Rear side airbag.
▶ Head airbag.
When an airbag is deployed, the following events occur. ▶ The hazard warning lights are switched on.
▶ All doors are unlocked.
▶ The fuel supply to the engine is interrupted.
▶ The interior light comes on (if the automatic operation of the interior light is
switched on - switch
).
When there is no air bag deployment?
With minor frontal and side collisions, rear collision, overturning of the vehicle
or vehicle roll-over there is no airbag deployment.
Safety instructions
Fig. 9
Safe distance from the steering
wheel and the dashboard
WARNINGGeneral information■The best possible protective effect of the seat belts and the airbag sys-
tem can only be achieved in the correct seated position » page 12 .■
The airbag develops considerable forces when triggered, which can lead
to serious injuries or even death if the correct seating position or seated
position is not observed. This applies in particular to children who are
transported without using a suitable child safety seat » page 24.
■
If there is a fault, have the airbag system checked immediately by a spe-
cialist garage. Otherwise, there is a risk of the airbag not being activated in
the event of an accident.
19Airbag system
Page 34 of 336
Instruments and warning lights
Instrument cluster
Introduction
Fig. 18
Instrument cluster
This chapter contains information on the following subjects:
Engine revolutions counter
32
Coolant temperature gauge
32
Fuel gauge
33
Display in the rear centre console
33
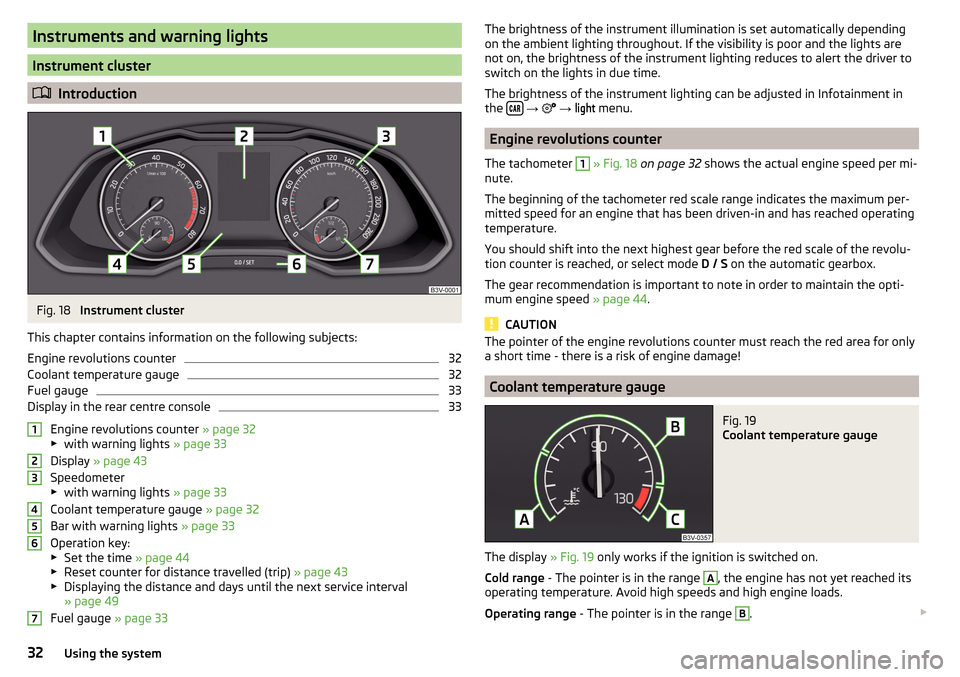
Engine revolutions counter » page 32
▶ with warning lights » page 33
Display » page 43
Speedometer
▶ with warning lights » page 33
Coolant temperature gauge » page 32
Bar with warning lights » page 33
Operation key:
▶ Set the time » page 44
▶ Reset counter for distance travelled (trip) » page 43
▶ Displaying the distance and days until the next service interval
» page 49
Fuel gauge » page 33
1234567The brightness of the instrument illumination is set automatically depending
on the ambient lighting throughout. If the visibility is poor and the lights are
not on, the brightness of the instrument lighting reduces to alert the driver to
switch on the lights in due time.
The brightness of the instrument lighting can be adjusted in Infotainment in
the
→
→
light
menu.
Engine revolutions counter
The tachometer
1
» Fig. 18 on page 32 shows the actual engine speed per mi-
nute.
The beginning of the tachometer red scale range indicates the maximum per-
mitted speed for an engine that has been driven-in and has reached operating
temperature.
You should shift into the next highest gear before the red scale of the revolu-
tion counter is reached, or select mode D / S on the automatic gearbox.
The gear recommendation is important to note in order to maintain the opti-
mum engine speed » page 44.
CAUTION
The pointer of the engine revolutions counter must reach the red area for only
a short time - there is a risk of engine damage!
Coolant temperature gauge
Fig. 19
Coolant temperature gauge
The display » Fig. 19 only works if the ignition is switched on.
Cold range - The pointer is in the range
A
, the engine has not yet reached its
operating temperature. Avoid high speeds and high engine loads.
Operating range - The pointer is in the range
B
.
32Using the system
Page 35 of 336
High temperature range - The pointer is in the range C. The coolant tempera-
ture is too high. The warning light illuminates in the instrument clus-
ter » page 39 .
Fuel gauge
Fig. 20
Fuel gauge
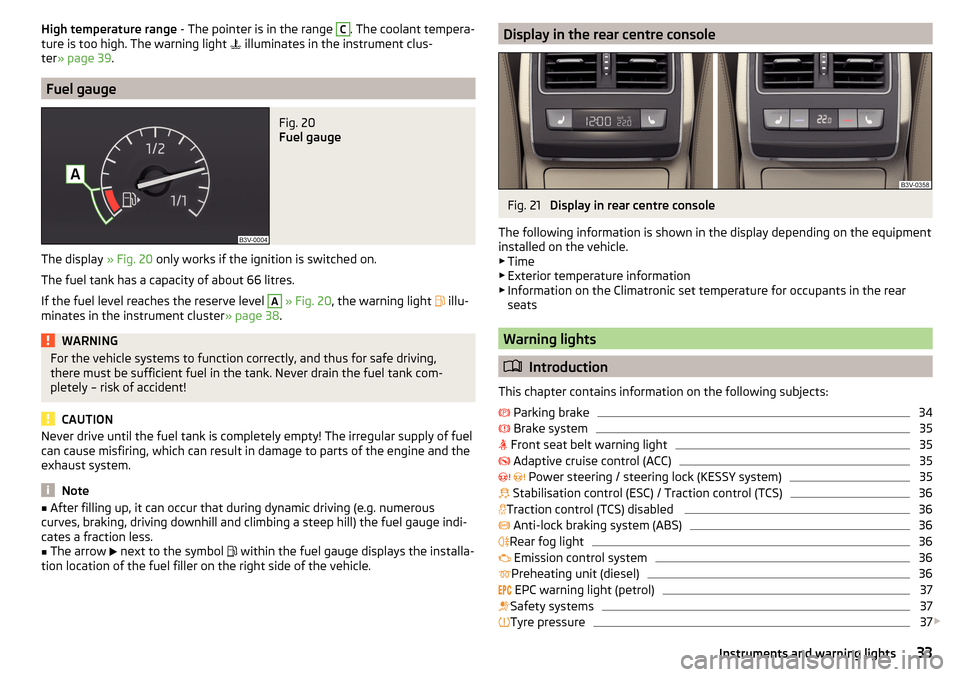
The display » Fig. 20 only works if the ignition is switched on.
The fuel tank has a capacity of about 66 litres.
If the fuel level reaches the reserve level
A
» Fig. 20 , the warning light
illu-
minates in the instrument cluster » page 38.
WARNINGFor the vehicle systems to function correctly, and thus for safe driving,
there must be sufficient fuel in the tank. Never drain the fuel tank com-
pletely – risk of accident!
CAUTION
Never drive until the fuel tank is completely empty! The irregular supply of fuel
can cause misfiring, which can result in damage to parts of the engine and the
exhaust system.
Note
■ After filling up, it can occur that during dynamic driving (e.g. numerous
curves, braking, driving downhill and climbing a steep hill) the fuel gauge indi-
cates a fraction less.■
The arrow
next to the symbol
within the fuel gauge displays the installa-
tion location of the fuel filler on the right side of the vehicle.
Display in the rear centre consoleFig. 21
Display in rear centre console
The following information is shown in the display depending on the equipment
installed on the vehicle.
▶ Time
▶ Exterior temperature information
▶ Information on the Climatronic set temperature for occupants in the rear
seats
Warning lights
Introduction
This chapter contains information on the following subjects:
Parking brake
34
Brake system
35
Front seat belt warning light
35
Adaptive cruise control (ACC)
35
Power steering / steering lock (KESSY system)
35
Stabilisation control (ESC) / Traction control (TCS)
36
Traction control (TCS) disabled
36
Anti-lock braking system (ABS)
36
Rear fog light
36
Emission control system
36
Preheating unit (diesel)
36
EPC warning light (petrol)
37
Safety systems
37
Tyre pressure
37
33Instruments and warning lights
Page 36 of 336
Brake linings38 Fuel reserve38
Lane Departure Warning (Lane Assist)
38
Turn signal system
38
Trailer turn signal lights
38
Fog lights
38
Speed regulating system / speed limiter
38
Brake pedal (automatic gearbox)
38
Auto Hold function
39
Main beam
39
Automatic gearbox
39
Rear seat belt warning light
39
Generator
39
Coolant
39
Engine oil pressure
40
Engine oil level
40
AdBlue ®
40
Lamp failure
41
Diesel particle filter (diesel)
41
Windscreen washer fluid level
41
Headlight assistant
41
START-STOPsystem
41
Display - a low temperature
42
Water in the fuel filter (diesel)
42
Adaptive cruise control (ACC)
42
Distance warning (Front Assist)
42
front Assist
42
Economy mode
42
Adaptive Chassis Control (DCC)
42
Service
42
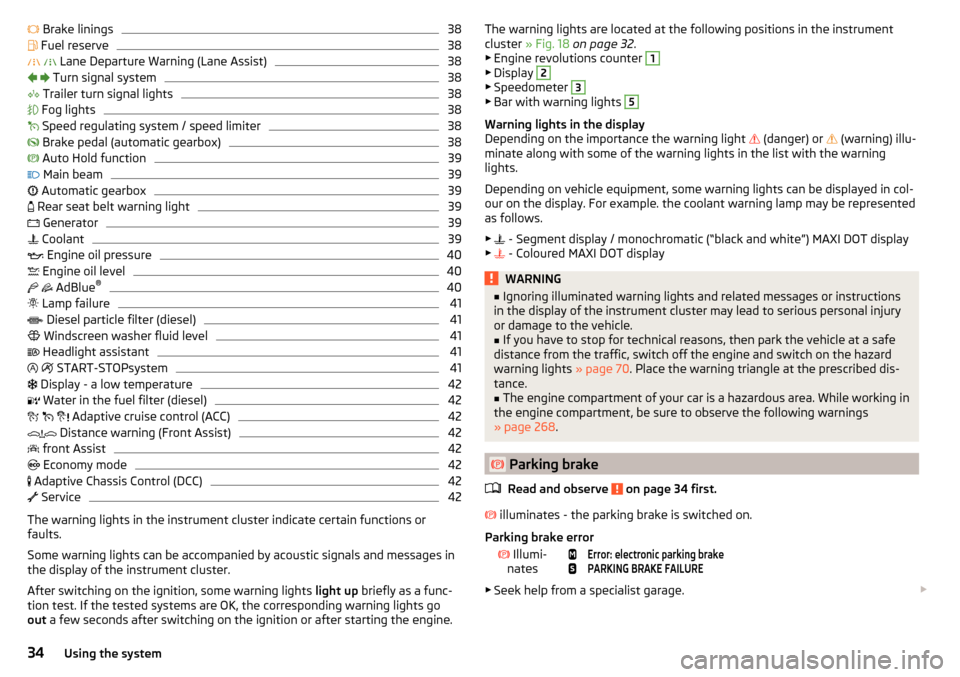
The warning lights in the instrument cluster indicate certain functions or
faults.
Some warning lights can be accompanied by acoustic signals and messages in
the display of the instrument cluster.
After switching on the ignition, some warning lights light up briefly as a func-
tion test. If the tested systems are OK, the corresponding warning lights go
out a few seconds after switching on the ignition or after starting the engine.
The warning lights are located at the following positions in the instrument
cluster » Fig. 18 on page 32 .
▶ Engine revolutions counter 1
▶Display
2
▶Speedometer
3
▶Bar with warning lights
5
Warning lights in the display
Depending on the importance the warning light
(danger) or
(warning) illu-
minate along with some of the warning lights in the list with the warning
lights.
Depending on vehicle equipment, some warning lights can be displayed in col-
our on the display. For example. the coolant warning lamp may be represented
as follows.
▶ - Segment display / monochromatic (“black and white”) MAXI DOT display
▶ - Coloured MAXI DOT display
WARNING■
Ignoring illuminated warning lights and related messages or instructions
in the display of the instrument cluster may lead to serious personal injury
or damage to the vehicle.■
If you have to stop for technical reasons, then park the vehicle at a safe
distance from the traffic, switch off the engine and switch on the hazard
warning lights » page 70. Place the warning triangle at the prescribed dis-
tance.
■
The engine compartment of your car is a hazardous area. While working in
the engine compartment, be sure to observe the following warnings
» page 268 .
Parking brake
Read and observe
on page 34 first.
illuminates - the parking brake is switched on.
Parking brake error
Illumi-
nates
Error: electronic parking brakePARKING BRAKE FAILURE
▶ Seek help from a specialist garage.
34Using the system
Page 37 of 336
Parking on a slope that is too steep Illumi-
nates
Parking brake: Gradient too steep. Log book!GRADIENT TOO STEEP
▶ Find a parking space on a flat surface or on a slope that is not so steep.
Brake system
Read and observe
on page 34 first.
illuminates – the brake fluid level in the brake system is too low.
▶ Stop the vehicle, switch off the engine, and check the level of the brake fluid
» page 273 .
WARNING■
If warning light illuminates simultaneously with warning light
» page 36 , Anti-lock braking system (ABS) , stop driving! Seek help
from a specialist garage.■
A fault to the ABS system or the braking system can increase the vehi-
cle's braking distance – risk of accident!
Front seat belt warning light
Read and observe
on page 34 first.
lights up - the driver or front passenger has not fastened their seat belt.
At a speed of more than approximately 30 km/h, the warning light flashes
and an audible warning sounds at the same time.
If the seat belt is not fastened by the driver or front passenger during the next
approx. 2 minutes, the warning signal is deactivated and the warning light
illuminates permanently.
Adaptive cruise control (ACC)
Read and observe
on page 34 first.
illuminates - the ACC delay is not sufficient.
▶ Apply the brake.
For more information about the ACC system » page 233.
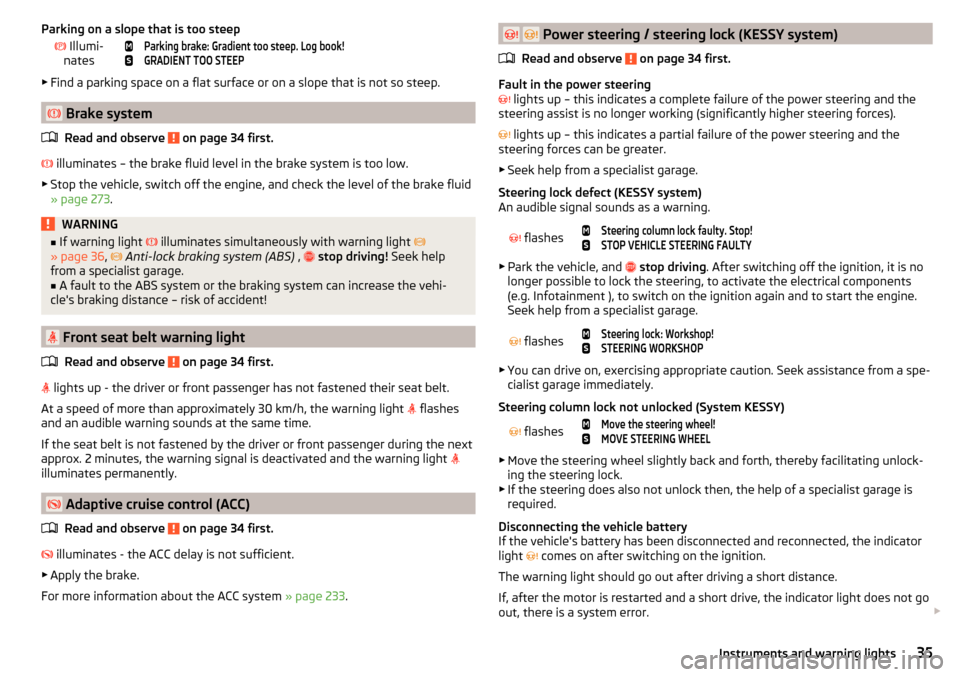
Power steering / steering lock (KESSY system)
Read and observe
on page 34 first.
Fault in the power steering
lights up – this indicates a complete failure of the power steering and the
steering assist is no longer working (significantly higher steering forces).
lights up – this indicates a partial failure of the power steering and the
steering forces can be greater.
▶ Seek help from a specialist garage.
Steering lock defect (KESSY system)
An audible signal sounds as a warning.
flashes
Steering column lock faulty. Stop!STOP VEHICLE STEERING FAULTY
▶ Park the vehicle, and
stop driving . After switching off the ignition, it is no
longer possible to lock the steering, to activate the electrical components
(e.g. Infotainment ), to switch on the ignition again and to start the engine.
Seek help from a specialist garage.
flashes
Steering lock: Workshop!STEERING WORKSHOP
▶ You can drive on, exercising appropriate caution. Seek assistance from a spe-
cialist garage immediately.
Steering column lock not unlocked (System KESSY)
flashes
Move the steering wheel!MOVE STEERING WHEEL
▶ Move the steering wheel slightly back and forth, thereby facilitating unlock-
ing the steering lock.
▶ If the steering does also not unlock then, the help of a specialist garage is
required.
Disconnecting the vehicle battery
If the vehicle's battery has been disconnected and reconnected, the indicator
light comes on after switching on the ignition.
The warning light should go out after driving a short distance.
If, after the motor is restarted and a short drive, the indicator light does not go
out, there is a system error.
35Instruments and warning lights