Steering wheel SKODA SUPERB 2016 3.G / (B8/3V) Owner's Guide
[x] Cancel search | Manufacturer: SKODA, Model Year: 2016, Model line: SUPERB, Model: SKODA SUPERB 2016 3.G / (B8/3V)Pages: 336, PDF Size: 53.89 MB
Page 241 of 336
Advance warning
If the system detects a risk of collision, the warning light appears on the dis-
play
» Fig. 300 and an audible signal is emitted.
The pre-warning display can occur in the following situations.
▶ If there is a risk of collision with a moving obstacle at a driving speed range
of approx. 30 km/h to approx. 210 km/h.
▶ If there is a risk of collision with a stationary obstacle at a driving speed
range of approx. 30 km/h to approx. 85 km/h.
With a warning the brake pedal must be pressed or the moving obstacle is to
be avoided!
Acute alert
If the driver does not react to the advance warning when in danger of a colli-
sion with a moving obstacle, the system briefly applies the brake automatically
via an active brake intervention to draw attention to the potential danger of a
collision again.
Automatic Braking
If the driver does not respond to acute warning, the system begins to auto-
matically brake the vehicle.
If an automatic brake intervention is triggered by the system, the pressure in
the brake system increases and the brake pedal cannot be operated with the
normal pedal stroke.
The automatic braking interventions can be cancelled by pressing the acceler-
ator pedal or by means of a steering intervention.
Brake assist
If the driver brakes inadequate with an impending collision, the system auto-
matically increases braking force.
The braking assistance only occurs as long as the brake pedal is being firmly
pressed down.Deactivation/activationFig. 301
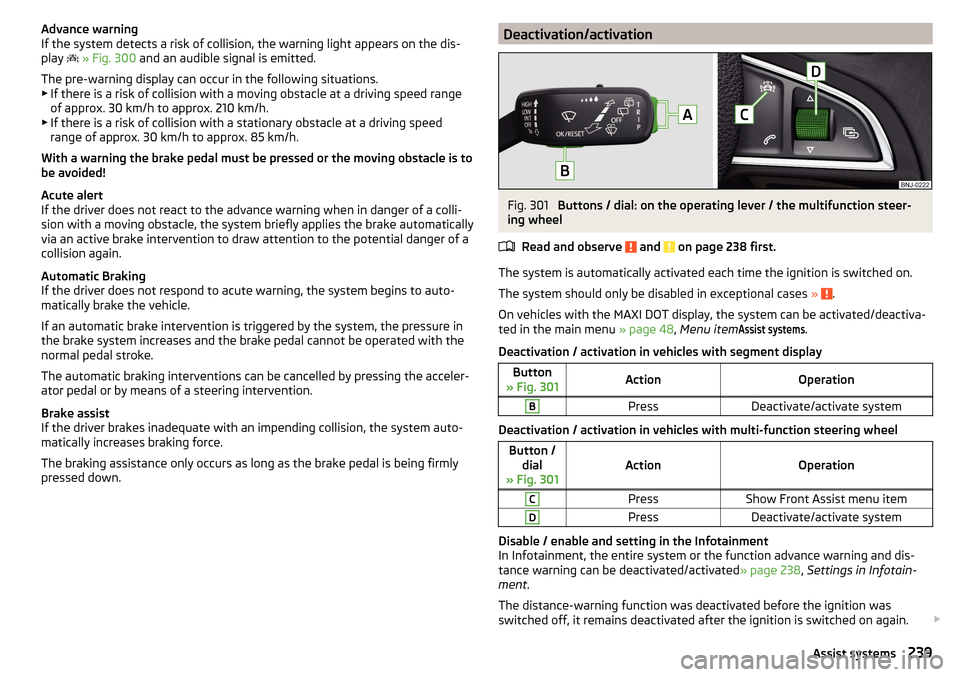
Buttons / dial: on the operating lever / the multifunction steer-
ing wheel
Read and observe
and on page 238 first.
The system is automatically activated each time the ignition is switched on.
The system should only be disabled in exceptional cases »
.
On vehicles with the MAXI DOT display, the system can be activated/deactiva- ted in the main menu » page 48, Menu item
Assist systems
.
Deactivation / activation in vehicles with segment display
Button
» Fig. 301ActionOperationBPressDeactivate/activate system
Deactivation / activation in vehicles with multi-function steering wheel
Button / dial
» Fig. 301ActionOperation
CPressShow Front Assist menu itemDPressDeactivate/activate system
Disable / enable and setting in the Infotainment
In Infotainment, the entire system or the function advance warning and dis-
tance warning can be deactivated/activated » page 238, Settings in Infotain-
ment .
The distance-warning function was deactivated before the ignition was
switched off, it remains deactivated after the ignition is switched on again.
239Assist systems
Page 245 of 336

The first protection level can be deactivated in one of the following ways.
▶ in the menu in Infotainment
→ →
Driver assistance
.
▶ Deactivating the TCS » page 214.
▶ By selecting the driving mode
Sport
» page 241 .
Provided that the driving mode
Sport
is not selected, the system is activated
over the two levels of protection after switching the ignition off and on again.
The second level of protection
The system intervenes only if the situation is evaluated as critical, such as
when panic braking at high speeds.
This level of protection cannot be deactivated.
Vehicles with the Front Assist system
Using this information, a system intervention may also occur when there is the danger of a collision with an obstacle detected in front of the vehicle.
Lane Departure Warning (Lane Assist)
Introduction
Fig. 303
Sensor for Lane Assist
This chapter contains information on the following subjects:
Settings in Infotainment
243
Operation
244
Activation / deactivation
245
Malfunctions
245
The lane departure warning (following known as system) helps to keep the ve-
hicle between the boundary lines of a lane.
The system recognises the boundary lines of the lane using a sensor
» Fig. 303 .
When the vehicle approaches a detected line between lanes, the system
makes a light movement of the steering wheel in the opposite direction to the
boundary line. This corrective steering intervention can be manually overrid-
den at any time.WARNING■ Please take note of the general points relating to the use of assistance
systems » page 212, in section Introduction .■
Lane Assist can help you keep the vehicle within the lane. However, it
does not steer the vehicle for you. The driver retains full responsibility for
steering at all times.
■
Some objects or markings on the road can be recognised as the boundary
lines - an erroneous steering intervention may be the result.
WARNINGThe system may not be able to recognise the boundary line, or recognise it
incorrectly, for example, in the following situations.■
When visibility is poor, (e.g. fog, heavy rain, thick snowfall).
■
When driving in “sharp” bends.
■
The sensor is blinded by the sun or oncoming traffic.
■
The field of view of the sensor is limited by an obstacle or a preceding ve-
hicle.
CAUTION
Do not attach any stickers or similar objects in front of the sensor on the wind-
screen to avoid impairing the functions of the system.
Note
■ The system is designed for driving on motorways and roads with adequate
longitudinal markings.■
The system can detect both continuous and broken lines.
Settings in Infotainment
Read and observe
and on page 243 first.
›
Press the button, then tap on the function surface
→
Driver assistance
.
■ Lane Assist (lane departure warning sys.) - Settings for Lane Assist
■
Active
- Activate/deactivate the assistant
■
Adaptive lane guidance
- Activate/deactivate adaptive lane guidance
243Assist systems
Page 246 of 336
OperationFig. 304
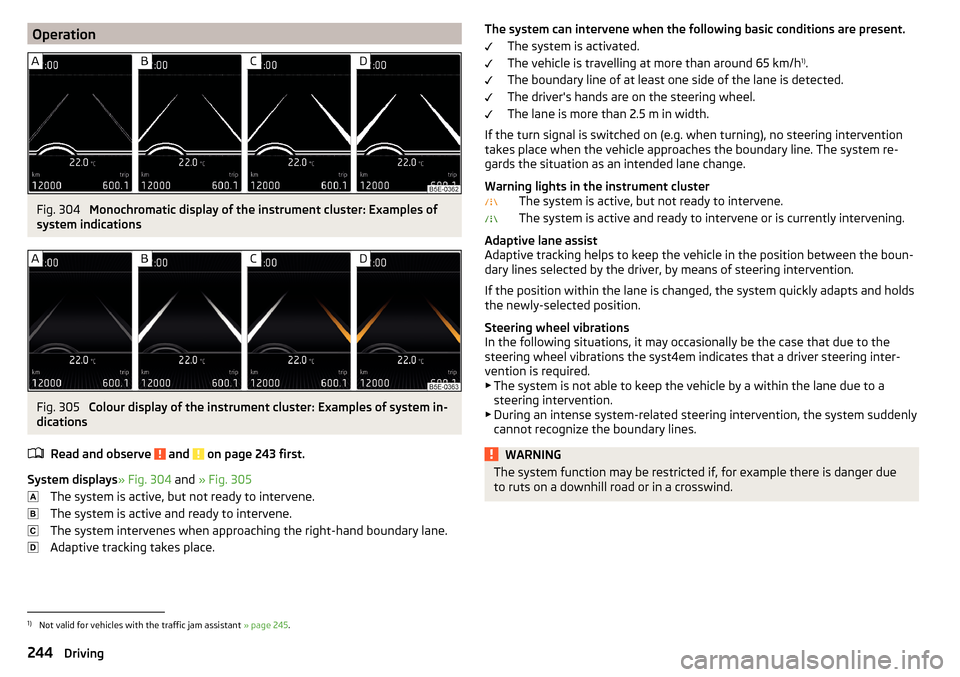
Monochromatic display of the instrument cluster: Examples of
system indications
Fig. 305
Colour display of the instrument cluster: Examples of system in-
dications
Read and observe
and on page 243 first.
System displays » Fig. 304 and » Fig. 305
The system is active, but not ready to intervene.
The system is active and ready to intervene.
The system intervenes when approaching the right-hand boundary lane.
Adaptive tracking takes place.
The system can intervene when the following basic conditions are present. The system is activated.
The vehicle is travelling at more than around 65 km/h 1)
.
The boundary line of at least one side of the lane is detected.
The driver's hands are on the steering wheel.
The lane is more than 2.5 m in width.
If the turn signal is switched on (e.g. when turning), no steering intervention takes place when the vehicle approaches the boundary line. The system re-
gards the situation as an intended lane change.
Warning lights in the instrument cluster The system is active, but not ready to intervene.
The system is active and ready to intervene or is currently intervening.
Adaptive lane assist
Adaptive tracking helps to keep the vehicle in the position between the boun-
dary lines selected by the driver, by means of steering intervention.
If the position within the lane is changed, the system quickly adapts and holds
the newly-selected position.
Steering wheel vibrations
In the following situations, it may occasionally be the case that due to the
steering wheel vibrations the syst4em indicates that a driver steering inter-
vention is required.
▶ The system is not able to keep the vehicle by a within the lane due to a
steering intervention.
▶ During an intense system-related steering intervention, the system suddenly
cannot recognize the boundary lines.WARNINGThe system function may be restricted if, for example there is danger due
to ruts on a downhill road or in a crosswind.1)
Not valid for vehicles with the traffic jam assistant » page 245.
244Driving
Page 247 of 336
Activation / deactivationRead and observe
and on page 243 first.
The activation/deactivation of the system can be carried out in one of two
ways. ▶ In the instrument cluster display » page 48, Menu item
Assist systems
.
▶ In Infotainment » page 243, Settings in Infotainment .
Adaptive tracking can also be enabled or disabled In Infotainment.
After switching off and switching on the ignition, the system setting is re-
tained.
Note
The system setting is stored (depending on the Infotainment type) in the ac-
tive user account personalisation » page 49.
Malfunctions
Read and observe
and on page 243 first.
If, for some unknown reason, the system is not available, an appropriate mes-
sage appears in the display of the instrument cluster.
Sensor covered / dirty
If the windscreen is dirty, iced or misted up in the sensor area, a message ap-
pears indicating that there is no sensor view. Clean the windscreen or remove
the obstacles from the sensor area.
System unavailable
If the system is currently unavailable, a message concerning the unavailability
appears. Try to re-activate the machine. If the system still is not available, seek
the assistance of a specialist garage.
System fault
In the case of a system fault, an error message appears. Seek help from a spe-
cialist garage.
Request to take over steering
If the system detects that there are no hands are on the steering wheel, this
will not work properly. You will be prompted to take over steering. Place your
hands on the steering wheel.
Traffic jam assistant
Introduction
This chapter contains information on the following subjects:
Function
245
Operating conditions
245WARNING■ Please take note of the general points relating to the use of assistance
systems » page 212, in section Introduction .■
The driver must always have hands on the steering wheel and be ready to
take over steering of the vehicle himself (accelerate or brake).
Note
The system is designed primarily for use on motorways.
Function
Read and observe
on page 245 first.
The traffic jam assistant (referred to as system) helps to keep the vehicle with-
in the lane at speeds below 65 km/h while keeping the distance to the vehicle
ahead.
The system is only available for vehicles with Automatic transmission.
The traffic jam assistant is an extension of the systems Lane Assist » page 243
and ACC » page 233 and works by using the functions of these two systems.
For this reason, the chapters on System Lane Assist and ACC are to be read
carefully and the safety notes are to be observed.
Operating conditions
Read and observe
on page 245 first.
The system activation occurs automatically whilst fulfilling the following ba-sic conditions.
Lane Assist with the adaptive tracking is enabled, the boundary lines on
both sides are recognized lane » page 243.
ACC is activated and the regulation » page 233 follows.
The vehicle speed is below 65 km/h.
245Assist systems
Page 260 of 336
WARNING■No changes may be made to parts of the airbag system, the front bumper
and the body.■
Any work on the airbag system including the installation and removal of
system components due to other repair work (e.g. removal of the steering
wheel) must only be carried out by a specialist garage.
■
Do not manipulate individual parts of the airbag system, as this might re-
sult in the airbag being deployed.
■
If the airbag is triggered, the airbag system must be exchanged.
WARNINGThe airbag system operates using pressure sensors located in the front
doors. For this reason, no adjustments may be carried out to the doors or
door panels (e.g. installation of additional loudspeakers). The resulting
damage can negatively affect the function of the airbag system - there is a
risk of accidents and fatal injuries! The following guidelines must be ob-
served.■
Any work on the front doors and their door panels must be carried out by
a specialist garage.
■
Never drive with removed inner door panels or openings in the panels.
Acceptance and recycling of used vehicles
Read and observe
on page 256 first.
All new ŠKODA vehicles are 95% recyclable.
Service intervals
Introduction
This chapter contains information on the following subjects:
Overview of service intervals
259
Fixed service intervals QI1 - QI4
259
Flexible service interval QI6
259
Digital Service Plan
260
The service interval display in the display of the instrument cluster will remind
you to carry out every service stipulated by the manufacturer at the right time
in order to prevent you from forgetting them » page 49.
The completion of services can be verified through the printed verification
from the digital service schedule and the respective receipts.
The specified service intervals are tailored to normal operating conditions.
In the case of difficult operating conditions, it is necessary to have some serv-
ice work performed before the date of the next service or between the speci-
fied service intervals. This applies mainly to the cleaning or the replacement of
the air filter insert in regions with heavy dust pollution as well as checking and
replacing the toothed belt, but also to vehicles with diesel particle filters,
which can put greater strain on the engine oil.
The following is understood under difficult conditions:
▶ Fuel containing sulphur.
▶ Frequent short trips.
▶ Longer periods of engine idling (e.g. taxis).
▶ Operation in areas with heavy dust pollution.
▶ Frequent trailer operation.
▶ Predominantly stop-and-go traffic as is often the case in city driving, for ex-
ample.
▶ Operation predominantly during winter.
You will be told at the specialist garage whether the operating conditions of your vehicle may make it necessary for service work to be carried out between
the normal service intervals.
Different service charges may apply from the particular scope of work required,
depending on the vehicle type and equipment and the status of your vehicle.
Note
■ The customer is responsible for covering the cost of all services including
changing or replenishing the oil, even during the warranty period, unless sta-
ted otherwise in the ŠKODA AUTO. warranty terms or other agreements.■
You will be informed about the current service scopes for the particular serv-
ice work by the specialist garage.
258General Maintenance
Page 265 of 336
■Door lock cylinder
■ Make sure that as little water as possible gets into the locking cylinder
when washing the vehicle - there is a risk of freezing the lock cylinder!■
Wheels
■ Heavy contamination of the wheels can affect the balance of the wheels -
this can result in vibrations and, under some circumstances, can cause pre-
mature wear of the steering wheel.
Remove ice and snow from the windows
Fig. 313
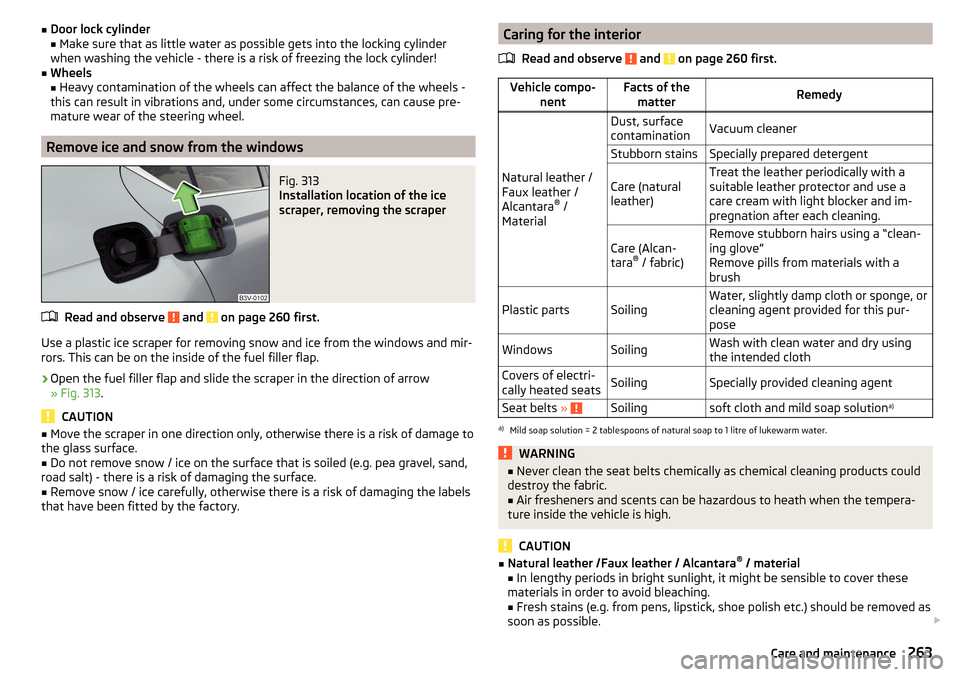
Installation location of the ice
scraper, removing the scraper
Read and observe and on page 260 first.
Use a plastic ice scraper for removing snow and ice from the windows and mir-
rors. This can be on the inside of the fuel filler flap.
›
Open the fuel filler flap and slide the scraper in the direction of arrow
» Fig. 313 .
CAUTION
■
Move the scraper in one direction only, otherwise there is a risk of damage to
the glass surface.■
Do not remove snow / ice on the surface that is soiled (e.g. pea gravel, sand,
road salt) - there is a risk of damaging the surface.
■
Remove snow / ice carefully, otherwise there is a risk of damaging the labels
that have been fitted by the factory.
Caring for the interior
Read and observe
and on page 260 first.
Vehicle compo- nentFacts of thematterRemedy
Natural leather /
Faux leather /
Alcantara ®
/
Material
Dust, surface
contaminationVacuum cleanerStubborn stainsSpecially prepared detergentCare (natural
leather)Treat the leather periodically with a
suitable leather protector and use a
care cream with light blocker and im-
pregnation after each cleaning.Care (Alcan-
tara ®
/ fabric)Remove stubborn hairs using a “clean-
ing glove”
Remove pills from materials with a
brushPlastic partsSoilingWater, slightly damp cloth or sponge, or
cleaning agent provided for this pur-
poseWindowsSoilingWash with clean water and dry using
the intended clothCovers of electri-
cally heated seatsSoilingSpecially provided cleaning agentSeat belts » Soilingsoft cloth and mild soap solution a)a)
Mild soap solution = 2 tablespoons of natural soap to 1 litre of lukewarm water.
WARNING■
Never clean the seat belts chemically as chemical cleaning products could
destroy the fabric.■
Air fresheners and scents can be hazardous to heath when the tempera-
ture inside the vehicle is high.
CAUTION
■ Natural leather /Faux leather / Alcantara ®
/ material
■ In lengthy periods in bright sunlight, it might be sensible to cover these
materials in order to avoid bleaching. ■ Fresh stains (e.g. from pens, lipstick, shoe polish etc.) should be removed as
soon as possible. 263Care and maintenance
Page 279 of 336
Tyre pressureFig. 325
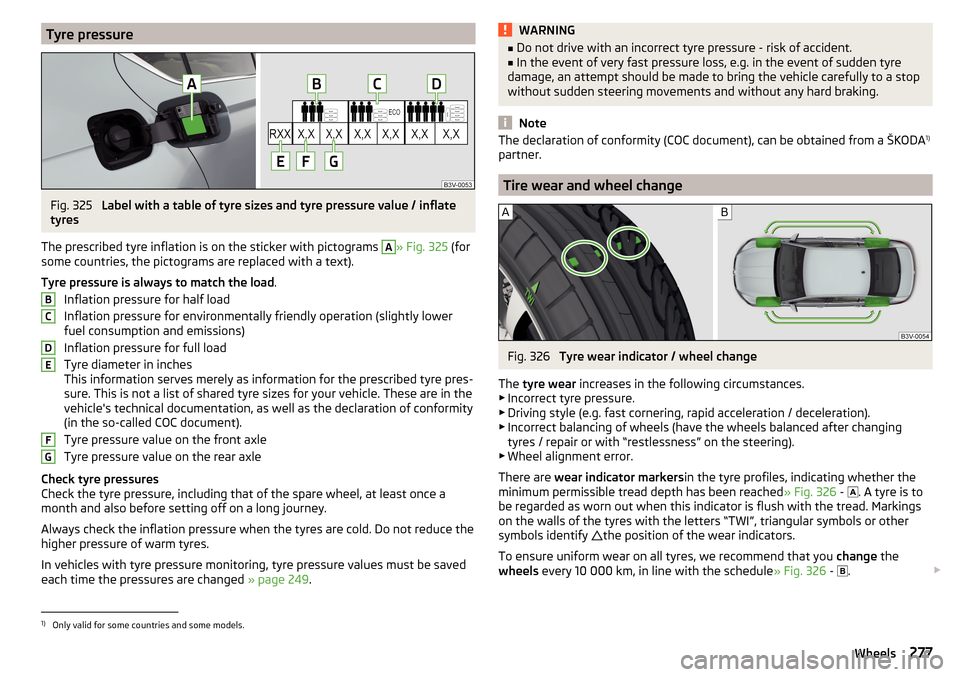
Label with a table of tyre sizes and tyre pressure value / inflate
tyres
The prescribed tyre inflation is on the sticker with pictograms
A
» Fig. 325 (for
some countries, the pictograms are replaced with a text).
Tyre pressure is always to match the load .
Inflation pressure for half load
Inflation pressure for environmentally friendly operation (slightly lower
fuel consumption and emissions)
Inflation pressure for full load
Tyre diameter in inches
This information serves merely as information for the prescribed tyre pres-
sure. This is not a list of shared tyre sizes for your vehicle. These are in the
vehicle's technical documentation, as well as the declaration of conformity
(in the so-called COC document).
Tyre pressure value on the front axle
Tyre pressure value on the rear axle
Check tyre pressures
Check the tyre pressure, including that of the spare wheel, at least once a
month and also before setting off on a long journey.
Always check the inflation pressure when the tyres are cold. Do not reduce the
higher pressure of warm tyres.
In vehicles with tyre pressure monitoring, tyre pressure values must be saved
each time the pressures are changed » page 249.
BCDEFGWARNING■
Do not drive with an incorrect tyre pressure - risk of accident.■In the event of very fast pressure loss, e.g. in the event of sudden tyre
damage, an attempt should be made to bring the vehicle carefully to a stop
without sudden steering movements and without any hard braking.
Note
The declaration of conformity (COC document), can be obtained from a ŠKODA 1)
partner.
Tire wear and wheel change
Fig. 326
Tyre wear indicator / wheel change
The tyre wear increases in the following circumstances.
▶ Incorrect tyre pressure.
▶ Driving style (e.g. fast cornering, rapid acceleration / deceleration).
▶ Incorrect balancing of wheels (have the wheels balanced after changing
tyres / repair or with “restlessness” on the steering).
▶ Wheel alignment error.
There are wear indicator markers in the tyre profiles, indicating whether the
minimum permissible tread depth has been reached » Fig. 326 -
. A tyre is to
be regarded as worn out when this indicator is flush with the tread. Markings
on the walls of the tyres with the letters “TWI”, triangular symbols or other
symbols identify the position of the wear indicators.
To ensure uniform wear on all tyres, we recommend that you change the
wheels every 10 000 km, in line with the schedule » Fig. 326 -
.
1)
Only valid for some countries and some models.
277Wheels
Page 291 of 336
The maximum towing speed is 50 km/h.
The vehicle must be transported on a special breakdown vehicle or trailer
if it is not possible to tow in the vehicle in the way described or if the tow-
ing distance is greater than 50 km.
Driver of the tow vehicle›
On vehicles with manual transmission , engage gear slowly when starting.
›
On vehicles with automatic transmission , accelerate with particular care.
›
Only then approach correctly when the rope is taut.
Driver of the towed vehicle
›
If possible, the vehicle should be towed with the engine running. Operate the
brake booster and power steering only if the engine is running, otherwise
the brake pedal must be depressed more strongly and more power has to be
directed to the steering.
›
If it is not possible to start the engine, switch on the ignition so that the
steering wheel is not locked and so that the turn signal lights, windscreen
wipers and windscreen washer system can be used.
›
Take the vehicle out of gear or move the selector lever into position N if the
vehicle is fitted with an automatic gearbox.
›
Always keep the tow rope taut during the towing procedure.
WARNING■ Wound tow ropes must not be used for towing » Fig. 340- , the towing
eye may unscrew out of the vehicle - risk of accident.■
Ensure tow rope is not twisted - risk of accident.
CAUTION
■ Do not tow-start the engine – risk of damaging the engine! The battery from
another vehicle can be used as a jump-start aid » page 287, Jump-starting .■
In the case of off-road towing manoeuvres, for both vehicles there is the risk
that the fastening parts could be overloaded and damaged.
Note
We recommend that you use the tow rope from ŠKODA Original Accessories.Front towing eyeFig. 341
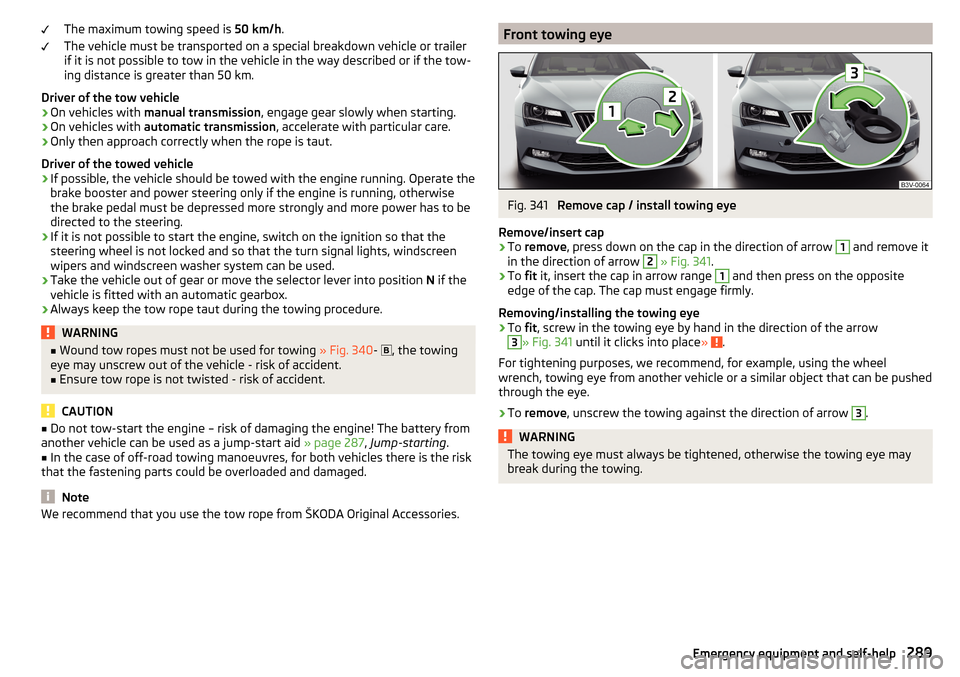
Remove cap / install towing eye
Remove/insert cap
›
To remove , press down on the cap in the direction of arrow
1
and remove it
in the direction of arrow
2
» Fig. 341 .
›
To fit it, insert the cap in arrow range
1
and then press on the opposite
edge of the cap. The cap must engage firmly.
Removing/installing the towing eye
›
To fit, screw in the towing eye by hand in the direction of the arrow
3
» Fig. 341 until it clicks into place » .
For tightening purposes, we recommend, for example, using the wheel
wrench, towing eye from another vehicle or a similar object that can be pushed
through the eye.
›
To remove , unscrew the towing against the direction of arrow
3
.
WARNINGThe towing eye must always be tightened, otherwise the towing eye may
break during the towing.289Emergency equipment and self-help
Page 299 of 336
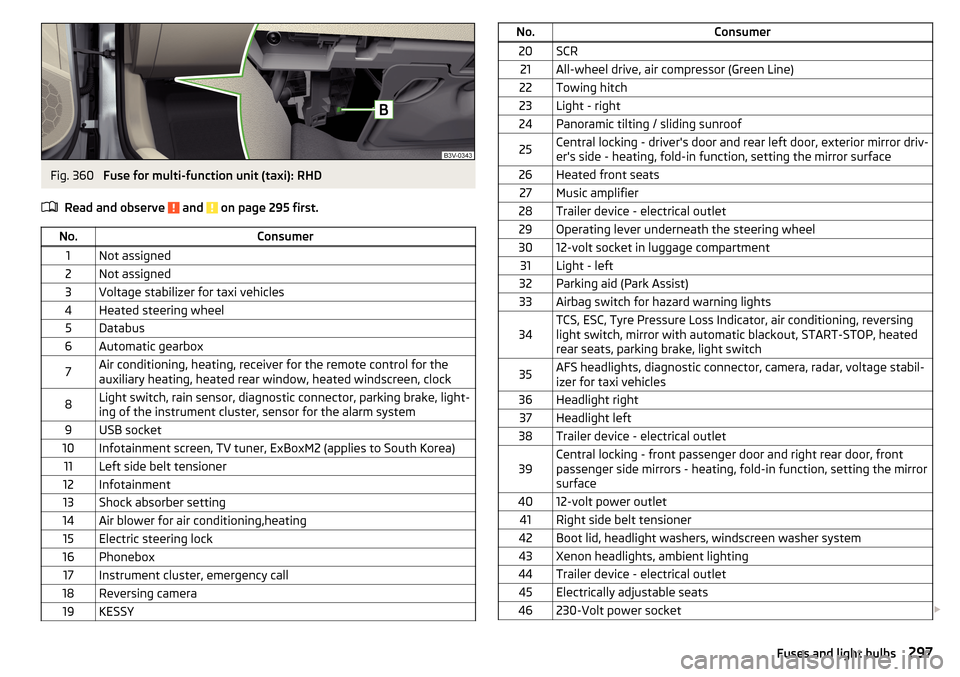
Fig. 360
Fuse for multi-function unit (taxi): RHD
Read and observe
and on page 295 first.
No.Consumer1Not assigned2Not assigned3Voltage stabilizer for taxi vehicles4Heated steering wheel5Databus6Automatic gearbox7Air conditioning, heating, receiver for the remote control for the
auxiliary heating, heated rear window, heated windscreen, clock8Light switch, rain sensor, diagnostic connector, parking brake, light-
ing of the instrument cluster, sensor for the alarm system9USB socket10Infotainment screen, TV tuner, ExBoxM2 (applies to South Korea)11Left side belt tensioner12Infotainment13Shock absorber setting14Air blower for air conditioning,heating15Electric steering lock16Phonebox17Instrument cluster, emergency call18Reversing camera19KESSYNo.Consumer20SCR21All-wheel drive, air compressor (Green Line)22Towing hitch23Light - right24Panoramic tilting / sliding sunroof25Central locking - driver's door and rear left door, exterior mirror driv-
er's side - heating, fold-in function, setting the mirror surface26Heated front seats27Music amplifier28Trailer device - electrical outlet29Operating lever underneath the steering wheel3012-volt socket in luggage compartment31Light - left32Parking aid (Park Assist)33Airbag switch for hazard warning lights34TCS, ESC, Tyre Pressure Loss Indicator, air conditioning, reversing
light switch, mirror with automatic blackout, START-STOP, heated
rear seats, parking brake, light switch35AFS headlights, diagnostic connector, camera, radar, voltage stabil-
izer for taxi vehicles36Headlight right37Headlight left38Trailer device - electrical outlet39Central locking - front passenger door and right rear door, front
passenger side mirrors - heating, fold-in function, setting the mirror
surface4012-volt power outlet41Right side belt tensioner42Boot lid, headlight washers, windscreen washer system43Xenon headlights, ambient lighting44Trailer device - electrical outlet45Electrically adjustable seats46230-Volt power socket 297Fuses and light bulbs
Page 315 of 336
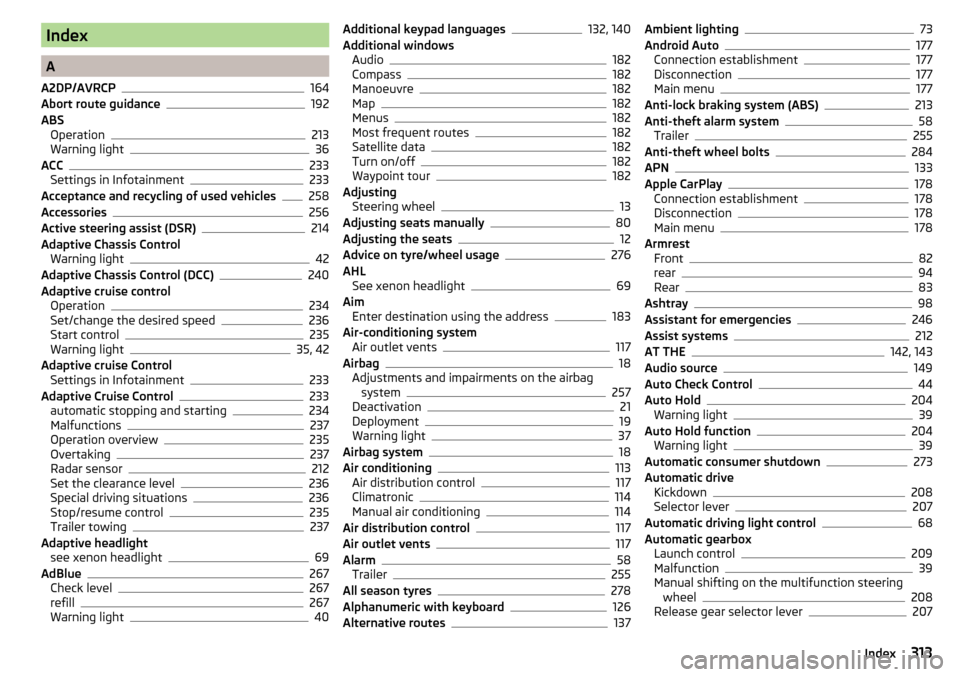
Index
A
A2DP/AVRCP
164
Abort route guidance192
ABS Operation
213
Warning light36
ACC233
Settings in Infotainment233
Acceptance and recycling of used vehicles258
Accessories256
Active steering assist (DSR)214
Adaptive Chassis Control Warning light
42
Adaptive Chassis Control (DCC)240
Adaptive cruise control Operation
234
Set/change the desired speed236
Start control235
Warning light35, 42
Adaptive cruise Control Settings in Infotainment
233
Adaptive Cruise Control233
automatic stopping and starting234
Malfunctions237
Operation overview235
Overtaking237
Radar sensor212
Set the clearance level236
Special driving situations236
Stop/resume control235
Trailer towing237
Adaptive headlight see xenon headlight
69
AdBlue267
Check level267
refill267
Warning light40
Additional keypad languages132, 140
Additional windows Audio
182
Compass182
Manoeuvre182
Map182
Menus182
Most frequent routes182
Satellite data182
Turn on/off182
Waypoint tour182
Adjusting Steering wheel
13
Adjusting seats manually80
Adjusting the seats12
Advice on tyre/wheel usage276
AHL See xenon headlight
69
Aim Enter destination using the address
183
Air-conditioning system Air outlet vents
117
Airbag18
Adjustments and impairments on the airbag system
257
Deactivation21
Deployment19
Warning light37
Airbag system18
Air conditioning113
Air distribution control117
Climatronic114
Manual air conditioning114
Air distribution control117
Air outlet vents117
Alarm58
Trailer255
All season tyres278
Alphanumeric with keyboard126
Alternative routes137
Ambient lighting73
Android Auto177
Connection establishment177
Disconnection177
Main menu177
Anti-lock braking system (ABS)213
Anti-theft alarm system58
Trailer255
Anti-theft wheel bolts284
APN133
Apple CarPlay178
Connection establishment178
Disconnection178
Main menu178
Armrest Front
82
rear94
Rear83
Ashtray98
Assistant for emergencies246
Assist systems212
AT THE142, 143
Audio source149
Auto Check Control44
Auto Hold204
Warning light39
Auto Hold function204
Warning light39
Automatic consumer shutdown273
Automatic drive Kickdown
208
Selector lever207
Automatic driving light control68
Automatic gearbox Launch control
209
Malfunction39
Manual shifting on the multifunction steering wheel
208
Release gear selector lever207
313Index