CD player SKODA SUPERB 2016 3.G / (B8/3V) Owner's Manual
[x] Cancel search | Manufacturer: SKODA, Model Year: 2016, Model line: SUPERB, Model: SKODA SUPERB 2016 3.G / (B8/3V)Pages: 336, PDF Size: 53.89 MB
Page 5 of 336
Radio142Operation142
Media
146
Operation
146
Audio sources
149
Images
153
Image viewer
153
Video DVD
155
Video player
155
TV tuner
156
TV function
156
Media Command
158
Operation
158
Telephone
160
Introductory information
160
Pair and connect
163
Use the SIM card in the external module
166
rSAP
167
Telephone functions
168
Text messages (SMS)
172
Hotspot (WLAN) and data connection
174
Hotspot (WLAN)
174
Data connection
175
SmartLink
176
Introductory information
176
Android Auto
177
Apple CarPlay
178
MirrorLink®
178
Navigation
180
Introductory information
180
Search for destination and enter
182
Import my destinations
186
Map
187
Route guidance
190Route192Waypoint mode194
Traffic reports
196
vehicle systems
198
CAR - Vehicle settings
198
Driving
Starting-off and Driving
199
Starting and stopping the engine
199
START-STOPsystem
201
Brakes and Parking
203
Manual gear changing and pedals
205
Automatic transmission
206
Running in the engine and economical
driving
209
Avoiding damage to your vehicle
211
Assist systems
212
General information
212
Braking and stabilisation systems
212
Parking aid (ParkPilot)
215
Rear traffic alert and wizard for “Blind
spot”Monitoring
218
Reversing camera
221
Park Assist
225
Cruise Control System
229
Speed limiter
231
Adaptive Cruise Control (ACC)
233
Front Assist
237
Select the driving mode (Driving Mode
Selection)
240
Proactive occupant protection (Crew Protect
Assist)
242
Lane Departure Warning (Lane Assist)
243
Traffic jam assistant
245
Assistant for emergencies
246
Traffic sign recognition
246Fatigue detection248Tyre pressure monitoring249
Towing device and trailer
250
Hitch
250
Using hitch
252
General Maintenance
Care and maintenance
256
Service work, adjustments and technical
alterations
256
Service intervals
258
Cleaning and care
260
Inspecting and replenishing
264
Fuel
264
AdBlue ®
and its refilling
267
Engine compartment
268
Engine oil
270
Coolant
271
Brake fluid
273
Vehicle battery
273
Wheels
276
Wheels and tyres
276
Operating in winter conditions
278
Do-it-yourself
Emergency equipment and self-help
280
Emergency equipment
280
Changing a wheel
282
Puncture repair kit
285
Jump-starting
287
Towing the vehicle
288
Remote control and removable light -
replacing the battery/batteries
2903Table of Contents
Page 135 of 336
Voice control settings›
Press the button, then tap on the function surface
Tap →
Voice control
.
■
Example commands (Infotainment system)
- Switch on/off the menu display contain-
ing basic voice commands when voice control is activated
■
Voice control session start tone
- Switch on/off the audible signal when turning on
the voice control
■
Voice control session end tone
- Switch on/off the audible signal when voice con-
trol ends
■
Input tone in voice dialogue
- Switch on/off the audible signal for the voice input
■
End tone in voice dialogue
- Switch on/off the audible after the voice input
Safe removal of the external device
›
Press the button, then tap on the function surface
Remove safely
and
select the external device to be removed.
Reset to factory settings
›
Press the button, then tap on the function surface
→
Factory settings
.
In this menu, all or only chosen settings can be restored.
Bluetooth ®
Settings
›
Press the button, then tap on the function surface
Tap
→
Bluetooth
.
■
Bluetooth
- Switch on/off Bluetooth ®
function
■
Visibility:
- Switch on/off the visibility of the Bluetooth ®
device for other Blue-
tooth ®
devices
■
Name:
- Changing the name of the Bluetooth ®
unit
■
Paired devices
- Display the list of coupled Bluetooth ®
devices
■
Find devices
- Searches for available Bluetooth ®
devices
■
Bluetooth audio (A2DP/AVRCP)
- Turn on/off the ability to connect a Bluetooth ®
audio device (e.g. MP3 player, tablet etc...)
Wireless settings
Applies to Infotainment Columbus, Amundsen.
›
Press the button, then tap on the function surface
Tap
→
WLAN
.
■WLAN - List of available hotspots of external devices
■WLAN
- Turn on / off Infotainment wireless
■
WPS Quick Connect (WPS button)
- Establishing a secure connection to the hot-
spot of the external device using WPS (applies to Infotainment Amundsen)
■
Manual settings
- Setting the parameters for search and connection to the
hotspot of the external device ■
Network name
- Enter the Hotspot name
■
Network key
- Setting the access password
■
Security level:
- Adjustment of security
■
WPA2
- WPA2 security
■
WPA
- WPA security
■
No security level
- No coverage (without required entry of the access pass-
word)
■
Connect
- Connection establishment
■
Search
- Search / Restore the list of available hotspots
■
Mobile hotspot
- Setting Infotainment hotspot (in the functional surface the
symbol is displayed with the number of connected external devices)
■
Mobile hotspot
- Turn on / off Infotainment hotspot
■
WPS Quick Connect (WPS button)
- Establishing a secure connection to the Info-
tainment hotspot via WPS (applies to Amundsen)
■
Hotspot (WLAN) settings
- Setting the parameters for the connection to Info-
tainment hotspot
■
Security level:
- Setting the connection security
■
WPA2
- WPA2 security
■
WPA
- WPA security
■
No security level
- No coverage (without required entry of the access pass-
word)
■
Network key
- Entering the access password
■
SSID: ...
- Name of the Infotainment hotspot
■
Do not send network name (SSID)
-Turn Infotainment hotspot visibility on/off
■
Store
- Storage of Infotainment hotspot parameters
Network settings
Applies to Infotainment Columbus with the SIM card inserted in the external
module.
›
Press the button, then tap on the function surface
→
Network
.
■
Network settings
- Data connection settings of the associated telephone serv-
ice provider (APN settings) ■
Access point name: ...
- Setting of the access point name
■
User name: …
- Setting of user name
133Infotainment settings - Columbus, Amundsen, Bolero
Page 142 of 336
■Automatic summer time - switch on/off the automatic daylight savings time
change
■Date:
- Date settings
■
Date format:
- Setting the date format
Setting the Infotainment language
›
Press the button, then tap the function surface
Language
.
›
Select the Infotainment language.
Additional keypad language settings
›
Press the
button, then tap the function surface
Additional keypad languages
.
In this menu, a keyboard language set can be added to allow the entering of
characters other than those in the currently selected language.
Unit settings
›
Press the button, then tap the function surface
Units
.
■
Distance:
- Distance units
■
Speed:
- Speed units
■
Temperature:
- Temperature units
■
Volume:
- Volume units
■
Consumption:
- Fuel consumption units
■
CNG consump.:
- CNG consumption units
■
Pressure:
- Pressure units for tire pressure
Safe removal of the data source
›
Press the button, then tap the function surface
Remove SD card safely
/
Re-move USB Safely
.
The appropriate message concerning the safe removal of the source is dis-
played in the screen.
Now the external source can be removed or separated.
Restore factory settings
›
Press the button, then tap the function surface
Factory settings
.
In this menu individual settings or all settings can be restored at the same
time.
Bluetooth ®
settings›
Press the button, then tap the function surface
Bluetooth
.
■
Bluetooth
- Switch on/off Bluetooth ®
function
■
Visibility:
- Switch on/off the visibility of the Bluetooth ®
device for other Blue-
tooth ®
devices
■
1st name
- Changing the name of the Bluetooth ®
unit
■
Paired devices
- Display the list of coupled Bluetooth ®
Devices
■
Find devices
- Searches for available Bluetooth ®
devices
■
BT audio (A2DP/AVRCP)
- Turn on/off the ability to connect a Bluetooth ®
audio
device (e.g. MP3 player, tablet etc...)
System information
›
Press the button, then tap the function surface
System information
.
■
Update software
- Update software (e.g. Bluetooth ®
)
■ Bluetooth: ... - version number of the Bluetooth ®
software
■ Device part number: ... - Infotainment part number
■ Hardware: ... - Hardware version
■ Software: ... - Software version
The information on available software updates is obtained from a ŠKODA Part-
ner or from the following ŠKODA Internet pages.
http://go.skoda.eu/infotainment
Radio menu settings
Settings for all broadcasting areas
›
Tap the Radio main menu function
surface.
■
Scan
- Automatically play short portions of all available stations of the current
frequency range
■
Arrow buttons:
- Setting the function of the function surfaces
■
Presets
- Change between stations stored under the preset buttons
■
Stations
- Change between all available stations of the selected broadcast-
ing range
■
Traffic program (TP)
- Switches traffic programme on/off
■
Radio text
- Switching the text display radio (FM and DAB) on and off
140Infotainment
Page 151 of 336
Select the audio source
Tap - selection of the parent folder / Hold - selection of the audio source
Audio sources
Introduction to the subject
›
To playback connect or insert the desired audio source. Starts playback auto-
matically, then select the audio source » page 146.
If AUX is selected as the audio source, the playback must be started on the
connected device.
CAUTION
■ Do not save any important data or that which has not been backed up on the
connected audio sources. ŠKODA assumes no responsibility for lost or dam-
aged files or connected audio sources.■
When changing or connecting an audio source, this may cause sudden
changes in volume. Reduce the volume before changing or connecting an au-
dio source.
■
When connecting an external audio source, the external source information
messages can be displayed. These messages must be observed and confirmed
if necessary (e.g. enabling data transfer etc).
Note
The national copyright laws that apply in your country must be observed.
CD / DVD
Only applies to Infotainment Columbus.
Fig. 186
CD / DVD slot
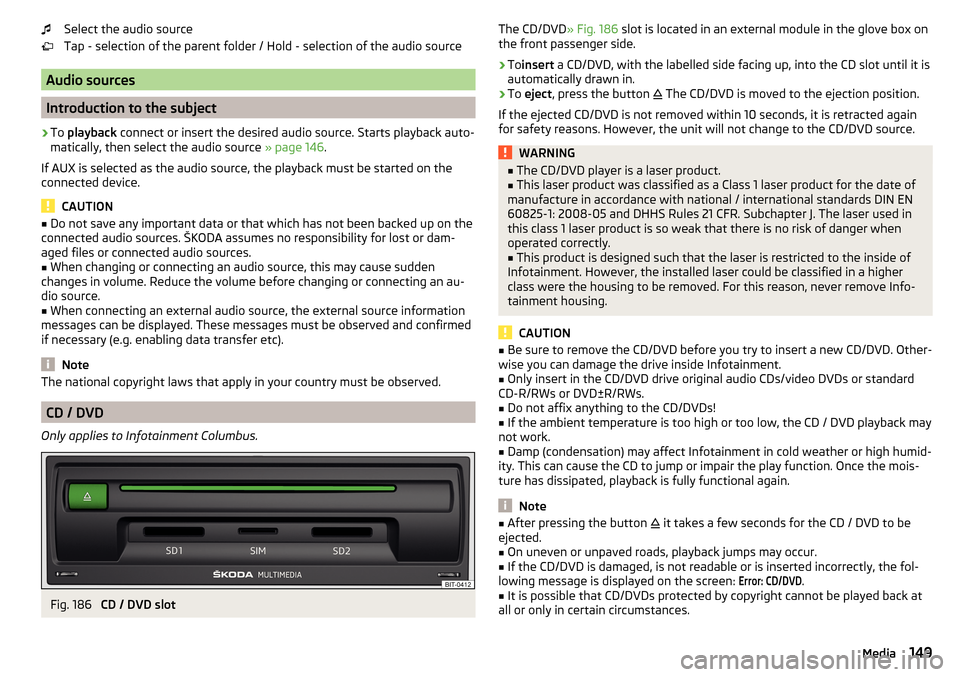
The CD/DVD
» Fig. 186 slot is located in an external module in the glove box on
the front passenger side.›
To insert a CD/DVD, with the labelled side facing up, into the CD slot until it is
automatically drawn in.
›
To eject , press the button
The CD/DVD is moved to the ejection position.
If the ejected CD/DVD is not removed within 10 seconds, it is retracted again
for safety reasons. However, the unit will not change to the CD/DVD source.
WARNING■ The CD/DVD player is a laser product.■This laser product was classified as a Class 1 laser product for the date of
manufacture in accordance with national / international standards DIN EN
60825-1: 2008-05 and DHHS Rules 21 CFR. Subchapter J. The laser used in
this class 1 laser product is so weak that there is no risk of danger when
operated correctly.■
This product is designed such that the laser is restricted to the inside of
Infotainment. However, the installed laser could be classified in a higher
class were the housing to be removed. For this reason, never remove Info-
tainment housing.
CAUTION
■ Be sure to remove the CD/DVD before you try to insert a new CD/DVD. Other-
wise you can damage the drive inside Infotainment.■
Only insert in the CD/DVD drive original audio CDs/video DVDs or standard
CD-R/RWs or DVD±R/RWs.
■
Do not affix anything to the CD/DVDs!
■
If the ambient temperature is too high or too low, the CD / DVD playback may
not work.
■
Damp (condensation) may affect Infotainment in cold weather or high humid-
ity. This can cause the CD to jump or impair the play function. Once the mois-
ture has dissipated, playback is fully functional again.
Note
■ After pressing the button it takes a few seconds for the CD / DVD to be
ejected.■
On uneven or unpaved roads, playback jumps may occur.
■
If the CD/DVD is damaged, is not readable or is inserted incorrectly, the fol-
lowing message is displayed on the screen:
Error: CD/DVD
.
■
It is possible that CD/DVDs protected by copyright cannot be played back at
all or only in certain circumstances.
149Media
Page 153 of 336
Bluetooth®
player
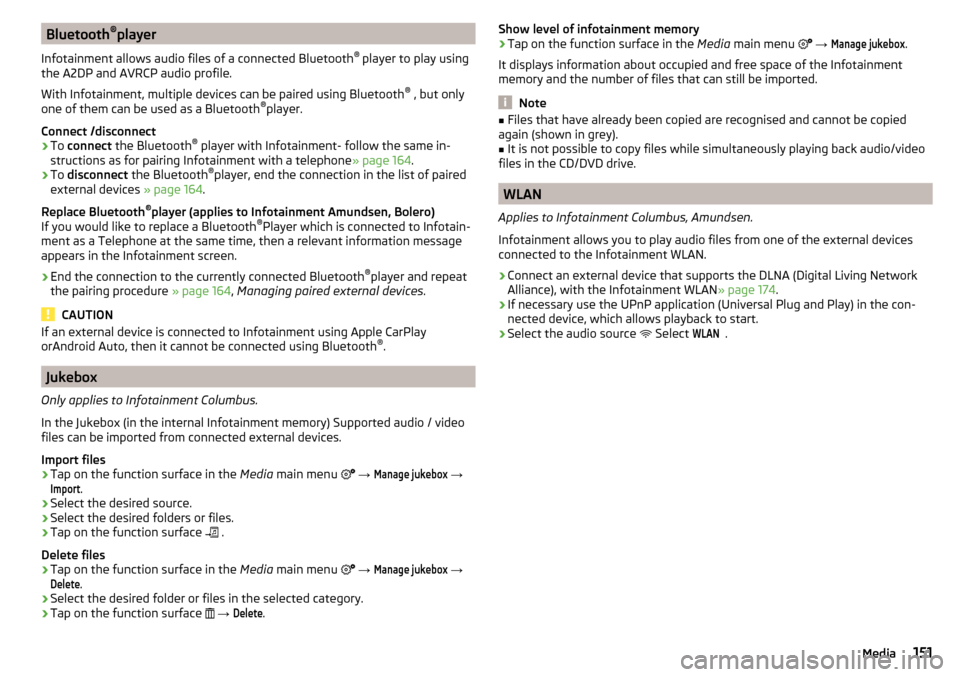
Infotainment allows audio files of a connected Bluetooth ®
player to play using
the A2DP and AVRCP audio profile.
With Infotainment, multiple devices can be paired using Bluetooth ®
, but only
one of them can be used as a Bluetooth ®
player.
Connect /disconnect›
To connect the Bluetooth ®
player with Infotainment- follow the same in-
structions as for pairing Infotainment with a telephone » page 164.
›
To disconnect the Bluetooth ®
player, end the connection in the list of paired
external devices » page 164.
Replace Bluetooth ®
player (applies to Infotainment Amundsen, Bolero)
If you would like to replace a Bluetooth ®
Player which is connected to Infotain-
ment as a Telephone at the same time, then a relevant information message
appears in the Infotainment screen.
›
End the connection to the currently connected Bluetooth ®
player and repeat
the pairing procedure » page 164, Managing paired external devices .
CAUTION
If an external device is connected to Infotainment using Apple CarPlay
orAndroid Auto, then it cannot be connected using Bluetooth ®
.
Jukebox
Only applies to Infotainment Columbus.
In the Jukebox (in the internal Infotainment memory) Supported audio / video
files can be imported from connected external devices.
Import files
›
Tap on the function surface in the Media main menu
→
Manage jukebox
→
Import
.
›
Select the desired source.
›
Select the desired folders or files.
›
Tap on the function surface
.
Delete files
›
Tap on the function surface in the Media main menu
→
Manage jukebox
→
Delete
.
›
Select the desired folder or files in the selected category.
›
Tap on the function surface
→
Delete
.
Show level of infotainment memory›Tap on the function surface in the Media main menu →
Manage jukebox
.
It displays information about occupied and free space of the Infotainment
memory and the number of files that can still be imported.
Note
■ Files that have already been copied are recognised and cannot be copied
again (shown in grey).■
It is not possible to copy files while simultaneously playing back audio/video
files in the CD/DVD drive.
WLAN
Applies to Infotainment Columbus, Amundsen.
Infotainment allows you to play audio files from one of the external devices
connected to the Infotainment WLAN.
›
Connect an external device that supports the DLNA (Digital Living Network
Alliance), with the Infotainment WLAN » page 174.
›
If necessary use the UPnP application (Universal Plug and Play) in the con-
nected device, which allows playback to start.
›
Select the audio source Select
WLAN
.
151Media
Page 155 of 336
Supported audio sources and file formats - Swing
Supported audio sourcesSourceInterfaceTypeSpecificationFile systemSD cardSD readerStandard sizeSD, SDHC, SDXC
FAT16VFAT
FAT32
exFATUSB
devices
USB 1.x; 2.x and 3.x or
higher with support
fromUSB 2.x
MSC
USB stick;
HDD (without any spe- cial software);
USB devices supporting MSC operation
MTP
Devices with the An-
droid operating system or Windows Telephone
(mobile Telephone, tab- let)AppleDevices with the iOSoperating system
(iPhone, iPod, iPad)Bluetooth ®
Player--Bluetooth protocols
A2DP and AVRCP (1.0 - 1.4)-
Supported audio file formats
Codec type
(File formats)File suffixMax bit rateMaximum sampling ratePlaylistsWindows MediaAudio 9 and 10wma384 kbit / s96 kHzm3u pls
wpl asxMPEG-1; 2 and 2.5 (Layer-3)mp3320 kbit / s48 kHz
The GPT standards (GUID partition table) method structured audio sources are
not supported by Infotainment.
Files that are protected by Digital Rights Management (DRM) technology can-
not be played back by Infotainment.
Images
Image viewer
main menu
Does not apply for Infotainment Swing.
Fig. 189
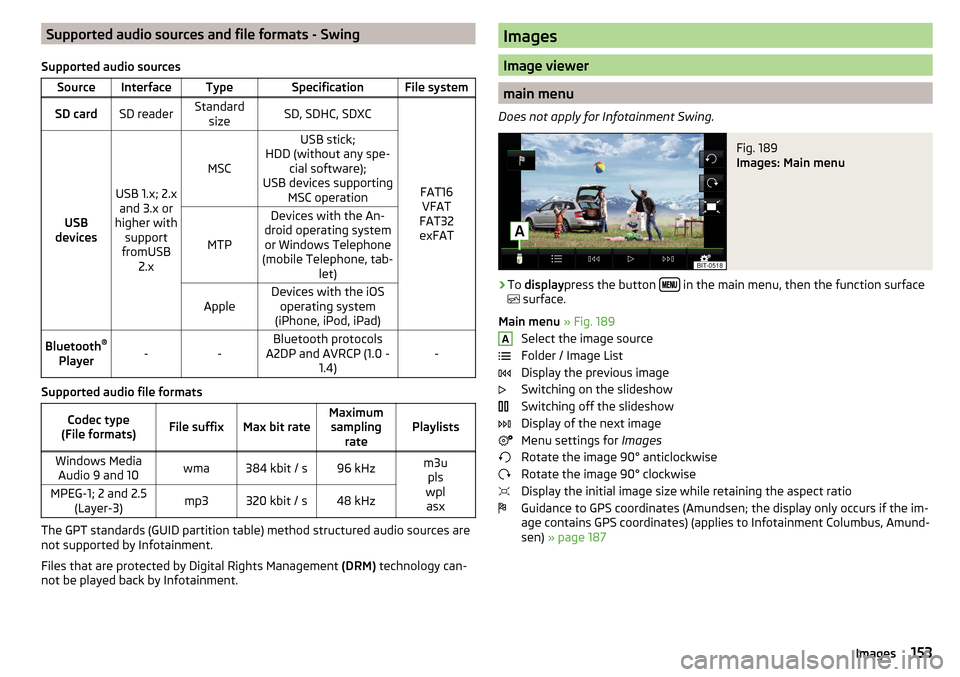
Images: Main menu
›
To display press the button in the main menu, then the function surface
surface.
Main menu » Fig. 189
Select the image source
Folder / Image List
Display the previous image
Switching on the slideshow
Switching off the slideshow
Display of the next image
Menu settings for Images
Rotate the image 90° anticlockwise
Rotate the image 90° clockwise
Display the initial image size while retaining the aspect ratio
Guidance to GPS coordinates (Amundsen; the display only occurs if the im-
age contains GPS coordinates) (applies to Infotainment Columbus, Amund-
sen) » page 187
A153Images
Page 157 of 336
Video DVD
Video player
Main menu
Only applies to Infotainment Columbus.
Fig. 190
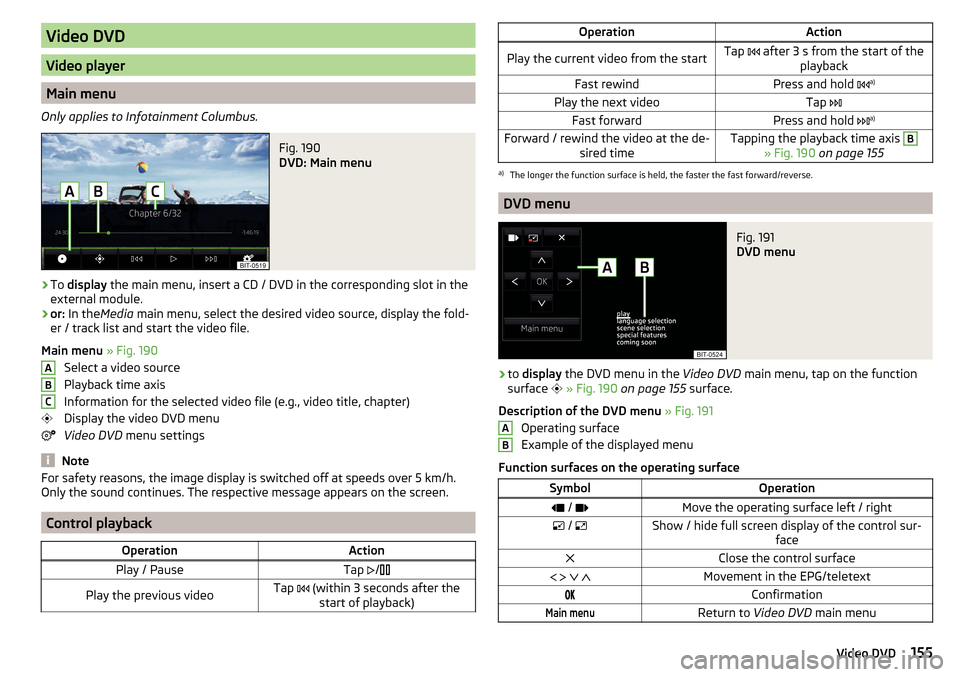
DVD: Main menu
›
To display the main menu, insert a CD / DVD in the corresponding slot in the
external module.
›
or: In the Media main menu, select the desired video source, display the fold-
er / track list and start the video file.
Main menu » Fig. 190
Select a video source
Playback time axis
Information for the selected video file (e.g., video title, chapter)
Display the video DVD menu
Video DVD menu settings
Note
For safety reasons, the image display is switched off at speeds over 5 km/h.
Only the sound continues. The respective message appears on the screen.
Control playback
OperationActionPlay / PauseTap /Play the previous videoTap (within 3 seconds after the
start of playback)ABCOperationActionPlay the current video from the startTap after 3 s from the start of the
playbackFast rewindPress and hold a)Play the next videoTap
Fast forwardPress and hold a)Forward / rewind the video at the de-
sired timeTapping the playback time axis B
» Fig. 190 on page 155
a)
The longer the function surface is held, the faster the fast forward/reverse.
DVD menu
Fig. 191
DVD menu
›
to display the DVD menu in the Video DVD main menu, tap on the function
surface
» Fig. 190 on page 155 surface.
Description of the DVD menu » Fig. 191
Operating surface
Example of the displayed menu
Function surfaces on the operating surface
SymbolOperation / Move the operating surface left / right / Show / hide full screen display of the control sur-
faceClose the control surface Movement in the EPG/teletextConfirmationMain menuReturn to Video DVD main menuAB155Video DVD
Page 163 of 336
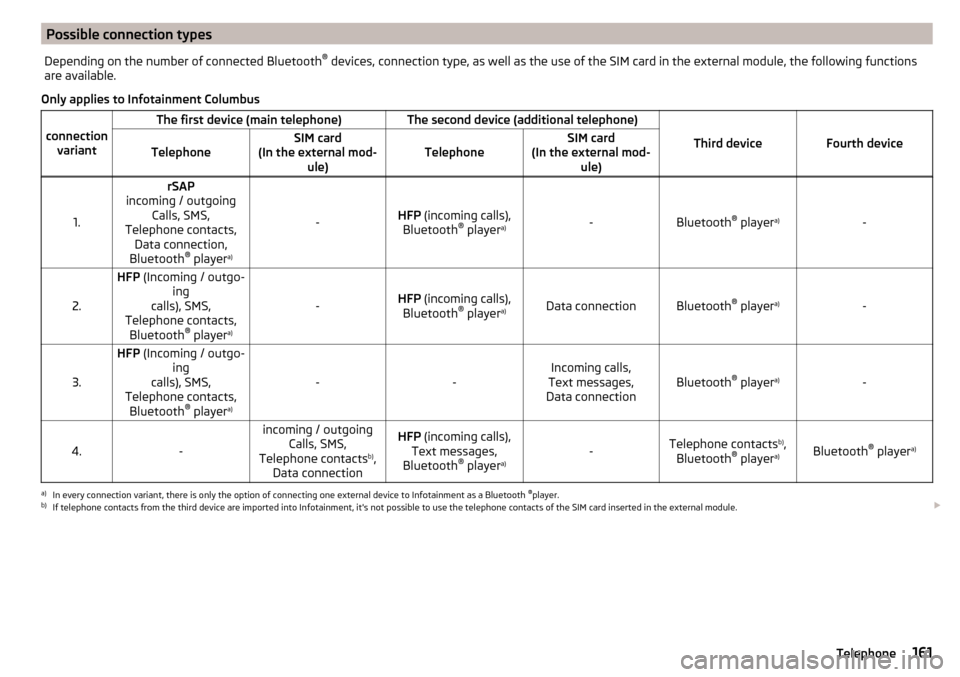
Possible connection typesDepending on the number of connected Bluetooth®
devices, connection type, as well as the use of the SIM card in the external module, the following functions
are available.
Only applies to Infotainment Columbus
connection variant
The first device (main telephone)The second device (additional telephone)
Third deviceFourth deviceTelephoneSIM card
(In the external mod- ule)TelephoneSIM card
(In the external mod- ule)
1.
rSAP
incoming / outgoing Calls, SMS,
Telephone contacts, Data connection,
Bluetooth ®
player a)
-HFP
(incoming calls),
Bluetooth ®
player a)-Bluetooth
®
player a)-2.
HFP
(Incoming / outgo-
ing
calls), SMS,
Telephone contacts, Bluetooth ®
player a)
-HFP
(incoming calls),
Bluetooth ®
player a)Data connectionBluetooth ®
player a)-3.
HFP
(Incoming / outgo-
ing
calls), SMS,
Telephone contacts, Bluetooth ®
player a)
--Incoming calls,
Text messages,
Data connectionBluetooth ®
player a)-4.-
incoming / outgoing
Calls, SMS,
Telephone contacts b)
,
Data connectionHFP (incoming calls),
Text messages,
Bluetooth ®
player a)-Telephone contacts b)
,
Bluetooth ®
player a)Bluetooth ®
player a)
a)
In every connection variant, there is only the option of connecting one external device to Infotainment as a Bluetooth
®
player.
b)
If telephone contacts from the third device are imported into Infotainment, it's not possible to use the telephone contacts of the SIM card inserted in the external module.
161Telephone
Page 164 of 336
Applies to Infotainment Amundsen, BoleroThe first device (main telephone)The second device (additional tele-phone)HFP (Incoming / outgoing calls), SMS,
Telephone contacts,Bluetooth ®
player a)HFP
(incoming calls),
Bluetooth ®
player a)a)
Only an external device can be connected to Infotainment as a Bluetooth
®
player.
Applies to Infotainment Swing
The first device (main telephone)The second device (additional tele- phone)HFP (Incoming / outgoing calls),
Telephone contacts,Bluetooth ®
player a)Bluetooth ®
player a)
a)
Only an external device can be connected to Infotainment as a Bluetooth
®
player.
Telephone
Applies to Infotainment Columbus, Amundsen, Bolero.
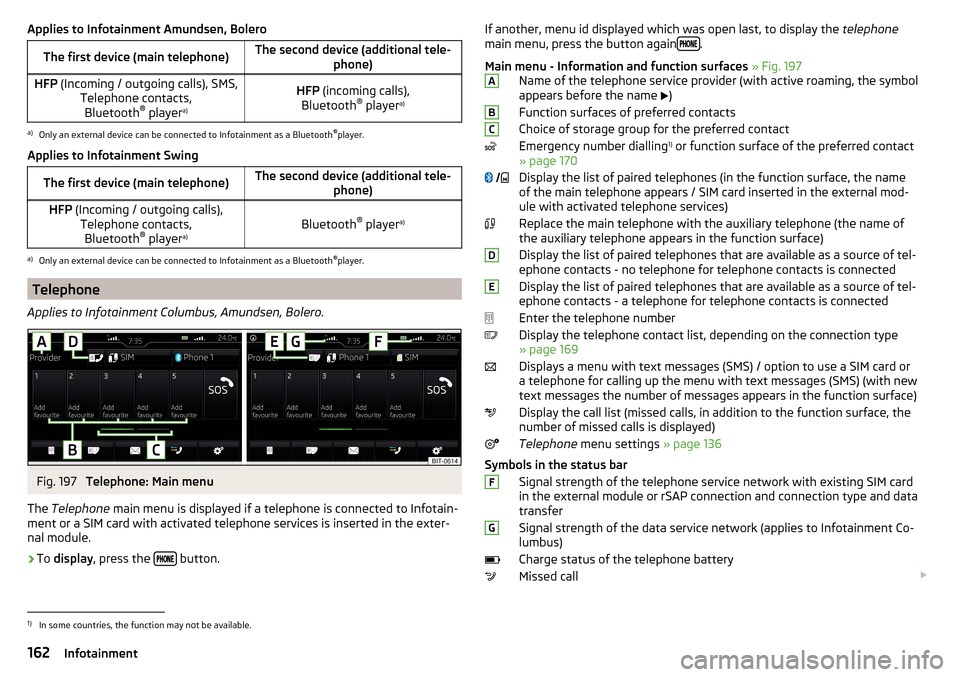
Fig. 197
Telephone: Main menu
The Telephone main menu is displayed if a telephone is connected to Infotain-
ment or a SIM card with activated telephone services is inserted in the exter-
nal module.
›
To display , press the button.
If another, menu id displayed which was open last, to display the
telephone
main menu, press the button again .
Main menu - Information and function surfaces » Fig. 197
Name of the telephone service provider (with active roaming, the symbol
appears before the name
)
Function surfaces of preferred contacts
Choice of storage group for the preferred contact
Emergency number dialling 1)
or function surface of the preferred contact
» page 170
Display the list of paired telephones (in the function surface, the name
of the main telephone appears / SIM card inserted in the external mod-
ule with activated telephone services)
Replace the main telephone with the auxiliary telephone (the name of
the auxiliary telephone appears in the function surface)
Display the list of paired telephones that are available as a source of tel-
ephone contacts - no telephone for telephone contacts is connected
Display the list of paired telephones that are available as a source of tel-
ephone contacts - a telephone for telephone contacts is connected
Enter the telephone number
Display the telephone contact list, depending on the connection type
» page 169
Displays a menu with text messages (SMS) / option to use a SIM card or a telephone for calling up the menu with text messages (SMS) (with new
text messages the number of messages appears in the function surface)
Display the call list (missed calls, in addition to the function surface, the
number of missed calls is displayed)
Telephone menu settings » page 136
Symbols in the status bar Signal strength of the telephone service network with existing SIM card
in the external module or rSAP connection and connection type and data
transfer
Signal strength of the data service network (applies to Infotainment Co-
lumbus)
Charge status of the telephone battery
Missed call ABC
DEFG1)
In some countries, the function may not be available.
162Infotainment
Page 166 of 336
Conditions for pairingFig. 199
QR code with reference to the
ŠKODA websites
The telephone can be paired with Infotainment under the following conditions.
The ignition is switched on.
The Bluetooth ®
function of Infotainment and the telephone is switched
on.
The visibility of Infotainment and the telephone is switched on.
The telephone is within range of the Bluetooth ®
signal of Infotainment.
The telephone is compatible with Infotainment.
There is no external device connected to Infotainment using Apple
CarPlay.
The pairing can be initiated from Infotainment or from the telephone.
During the pairing and connection process, information messages are dis-
played on the Infotainment screen and the telephone screen. These messages must be observed and if necessary confirmed (e.g. enabling the contact import,
connecting the Bluetooth ®
player among others).
Compatibility and update
By reading the QR code » Fig. 199 or after typing the following address into the
web browser, information about telephone compatibility and available updates
for Infotainment Bluetooth ®
can be displayed.
http://go.skoda.eu/compatibility
Pairing and connection process
Pair the telephone with Infotainment
›
Search available Bluetooth ®
devices in your telephone.
›
Select Infotainment (name of Infotainment
→
Bluetooth
→
Name:
).
›
Confirm or enter the PIN code to confirm the pairing.
The telephone is connected to the infotainment or just coupled, depending on
the number of already connected external devices and using the SIM card in-
serted in the external module (Columbus).
Pair Infotainment with the telephone›
If there is no telephone connected to Infotainment, then press the but-
ton then tap the function surface
Find telephone
.
›
Or If Infotainment is connected to a telephone, then in the main menu tele-
phone tap on the function surface
→
Search telephone
.
›
or: If a SIM card with activated telephone services is inserted in the external
module of Infotainment Columbus, then in the main menu telephone, tap the
function surface
→
Find telephone
.
›
Select the desired telephone from the list of visited external Bluetooth ®
de-
vices.
›
Confirm the PIN code (enter and confirm if necessary to confirm the pairing.
If external Bluetooth ®
devices are already connected to Infotainment, then
during the pairing and connection process messages and options for the possi-
ble connection type (e.g. replacement of the connected external Bluetooth ®
device) are displayed from Infotainment.
Possible connection types for telephones if necessary, for the SIM card in the
external module » page 161.
Managing paired external devices
Fig. 200
Infotainment Columbus: List of paired external devices / list of
available Bluetooth® profiles
164Infotainment