Kessy SKODA SUPERB 2016 3.G / (B8/3V) Owner's Manual
[x] Cancel search | Manufacturer: SKODA, Model Year: 2016, Model line: SUPERB, Model: SKODA SUPERB 2016 3.G / (B8/3V)Pages: 336, PDF Size: 53.89 MB
Page 13 of 336
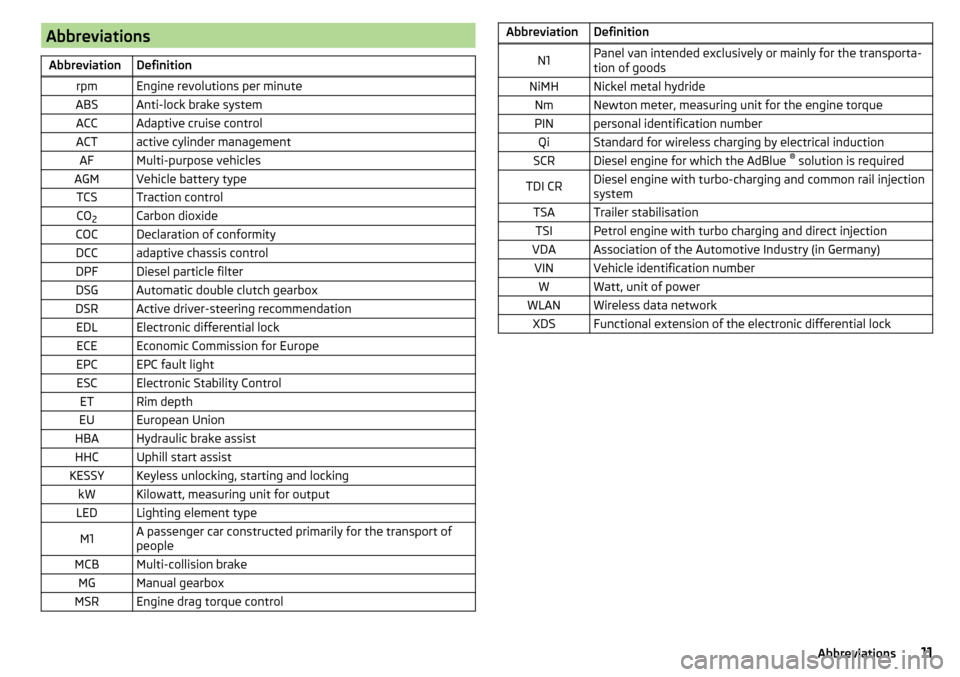
AbbreviationsAbbreviationDefinitionrpmEngine revolutions per minuteABSAnti-lock brake systemACCAdaptive cruise controlACTactive cylinder managementAFMulti-purpose vehiclesAGMVehicle battery typeTCSTraction controlCO2Carbon dioxideCOCDeclaration of conformityDCCadaptive chassis controlDPFDiesel particle filterDSGAutomatic double clutch gearboxDSRActive driver-steering recommendationEDLElectronic differential lockECEEconomic Commission for EuropeEPCEPC fault lightESCElectronic Stability ControlETRim depthEUEuropean UnionHBAHydraulic brake assistHHCUphill start assistKESSYKeyless unlocking, starting and lockingkWKilowatt, measuring unit for outputLEDLighting element typeM1A passenger car constructed primarily for the transport of
peopleMCBMulti-collision brakeMGManual gearboxMSREngine drag torque controlAbbreviationDefinitionN1Panel van intended exclusively or mainly for the transporta-
tion of goodsNiMHNickel metal hydrideNmNewton meter, measuring unit for the engine torquePINpersonal identification numberQiStandard for wireless charging by electrical inductionSCRDiesel engine for which the AdBlue ®
solution is requiredTDI CRDiesel engine with turbo-charging and common rail injection
systemTSATrailer stabilisationTSIPetrol engine with turbo charging and direct injectionVDAAssociation of the Automotive Industry (in Germany)VINVehicle identification numberWWatt, unit of powerWLANWireless data networkXDSFunctional extension of the electronic differential lock11Abbreviations
Page 23 of 336
Airbag deactivation
Introduction
This chapter contains information on the following subjects:
Deactivating airbags
21
Deactivating the front passenger airbag
21
Deactivating airbags
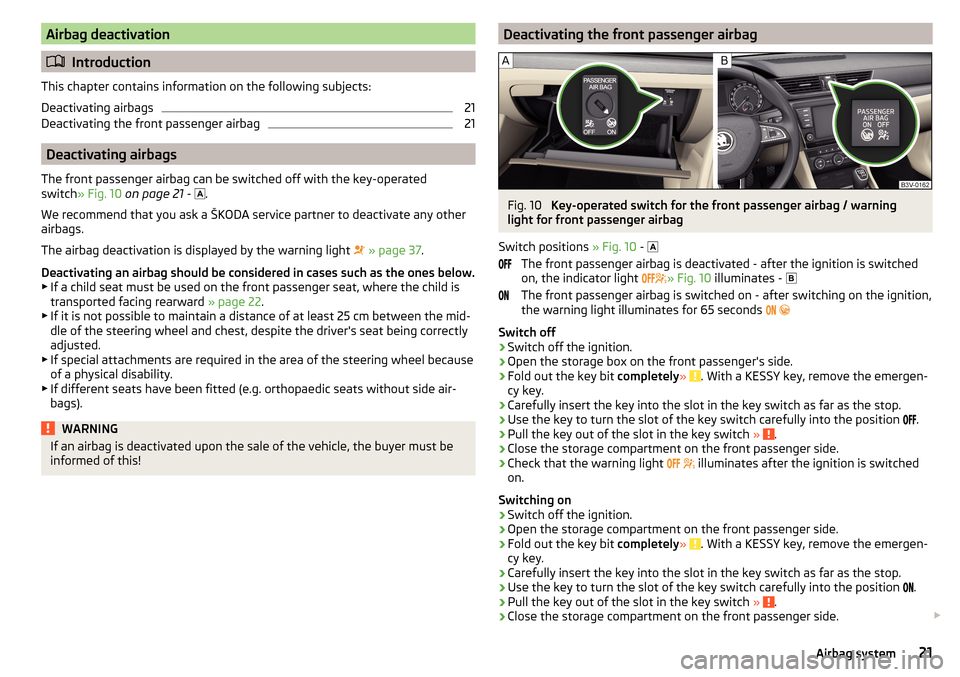
The front passenger airbag can be switched off with the key-operated
switch » Fig. 10 on page 21 -
.
We recommend that you ask a ŠKODA service partner to deactivate any other airbags.
The airbag deactivation is displayed by the warning light
» page 37 .
Deactivating an airbag should be considered in cases such as the ones below. ▶ If a child seat must be used on the front passenger seat, where the child is
transported facing rearward » page 22.
▶ If it is not possible to maintain a distance of at least 25 cm between the mid-
dle of the steering wheel and chest, despite the driver's seat being correctly
adjusted.
▶ If special attachments are required in the area of the steering wheel because
of a physical disability.
▶ If different seats have been fitted (e.g. orthopaedic seats without side air-
bags).
WARNINGIf an airbag is deactivated upon the sale of the vehicle, the buyer must be
informed of this!Deactivating the front passenger airbagFig. 10
Key-operated switch for the front passenger airbag / warning
light for front passenger airbag
Switch positions » Fig. 10 -
The front passenger airbag is deactivated - after the ignition is switched
on, the indicator light » Fig. 10
illuminates -
The front passenger airbag is switched on - after switching on the ignition,
the warning light illuminates for 65 seconds
Switch off
›
Switch off the ignition.
›
Open the storage box on the front passenger's side.
›
Fold out the key bit completely» . With a KESSY key, remove the emergen-
cy key.
›
Carefully insert the key into the slot in the key switch as far as the stop.
›
Use the key to turn the slot of the key switch carefully into the position .
›
Pull the key out of the slot in the key switch
» .
›
Close the storage compartment on the front passenger side.
›
Check that the warning light
illuminates after the ignition is switched
on.
Switching on
›
Switch off the ignition.
›
Open the storage compartment on the front passenger side.
›
Fold out the key bit completely» . With a KESSY key, remove the emergen-
cy key.
›
Carefully insert the key into the slot in the key switch as far as the stop.
›
Use the key to turn the slot of the key switch carefully into the position .
›
Pull the key out of the slot in the key switch
» .
›
Close the storage compartment on the front passenger side.
21Airbag system
Page 35 of 336
High temperature range - The pointer is in the range C. The coolant tempera-
ture is too high. The warning light illuminates in the instrument clus-
ter » page 39 .
Fuel gauge
Fig. 20
Fuel gauge
The display » Fig. 20 only works if the ignition is switched on.
The fuel tank has a capacity of about 66 litres.
If the fuel level reaches the reserve level
A
» Fig. 20 , the warning light
illu-
minates in the instrument cluster » page 38.
WARNINGFor the vehicle systems to function correctly, and thus for safe driving,
there must be sufficient fuel in the tank. Never drain the fuel tank com-
pletely – risk of accident!
CAUTION
Never drive until the fuel tank is completely empty! The irregular supply of fuel
can cause misfiring, which can result in damage to parts of the engine and the
exhaust system.
Note
■ After filling up, it can occur that during dynamic driving (e.g. numerous
curves, braking, driving downhill and climbing a steep hill) the fuel gauge indi-
cates a fraction less.■
The arrow
next to the symbol
within the fuel gauge displays the installa-
tion location of the fuel filler on the right side of the vehicle.
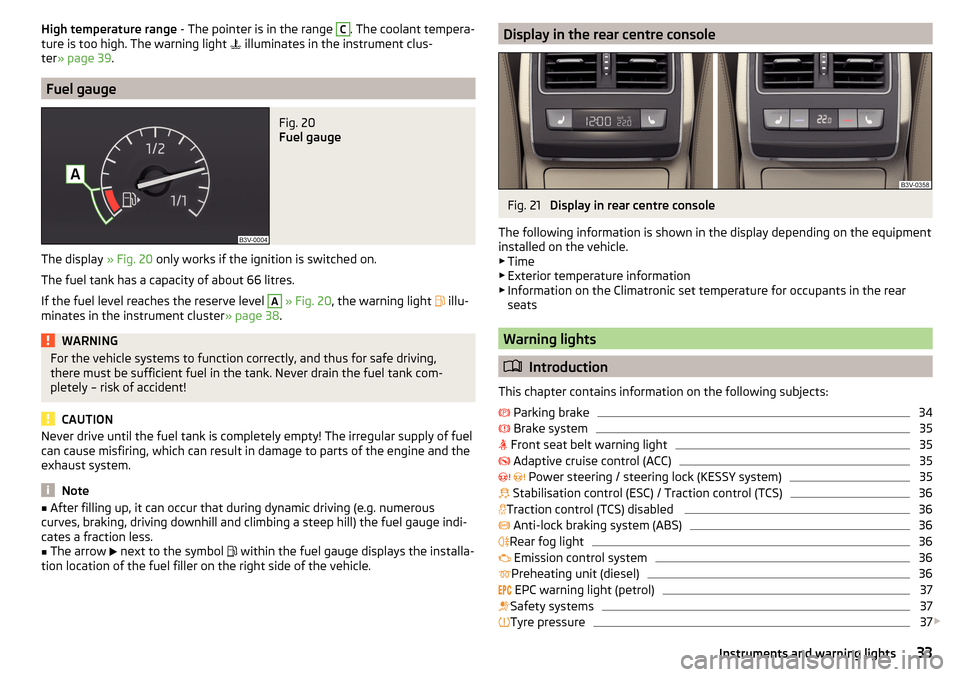
Display in the rear centre consoleFig. 21
Display in rear centre console
The following information is shown in the display depending on the equipment
installed on the vehicle.
▶ Time
▶ Exterior temperature information
▶ Information on the Climatronic set temperature for occupants in the rear
seats
Warning lights
Introduction
This chapter contains information on the following subjects:
Parking brake
34
Brake system
35
Front seat belt warning light
35
Adaptive cruise control (ACC)
35
Power steering / steering lock (KESSY system)
35
Stabilisation control (ESC) / Traction control (TCS)
36
Traction control (TCS) disabled
36
Anti-lock braking system (ABS)
36
Rear fog light
36
Emission control system
36
Preheating unit (diesel)
36
EPC warning light (petrol)
37
Safety systems
37
Tyre pressure
37
33Instruments and warning lights
Page 37 of 336
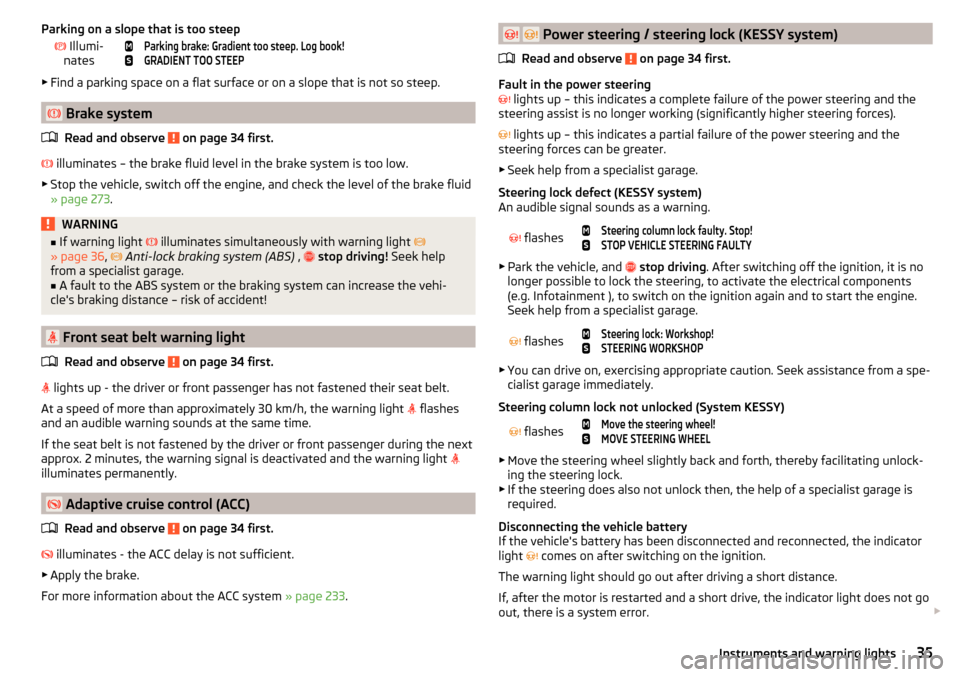
Parking on a slope that is too steep Illumi-
nates
Parking brake: Gradient too steep. Log book!GRADIENT TOO STEEP
▶ Find a parking space on a flat surface or on a slope that is not so steep.
Brake system
Read and observe
on page 34 first.
illuminates – the brake fluid level in the brake system is too low.
▶ Stop the vehicle, switch off the engine, and check the level of the brake fluid
» page 273 .
WARNING■
If warning light illuminates simultaneously with warning light
» page 36 , Anti-lock braking system (ABS) , stop driving! Seek help
from a specialist garage.■
A fault to the ABS system or the braking system can increase the vehi-
cle's braking distance – risk of accident!
Front seat belt warning light
Read and observe
on page 34 first.
lights up - the driver or front passenger has not fastened their seat belt.
At a speed of more than approximately 30 km/h, the warning light flashes
and an audible warning sounds at the same time.
If the seat belt is not fastened by the driver or front passenger during the next
approx. 2 minutes, the warning signal is deactivated and the warning light
illuminates permanently.
Adaptive cruise control (ACC)
Read and observe
on page 34 first.
illuminates - the ACC delay is not sufficient.
▶ Apply the brake.
For more information about the ACC system » page 233.
Power steering / steering lock (KESSY system)
Read and observe
on page 34 first.
Fault in the power steering
lights up – this indicates a complete failure of the power steering and the
steering assist is no longer working (significantly higher steering forces).
lights up – this indicates a partial failure of the power steering and the
steering forces can be greater.
▶ Seek help from a specialist garage.
Steering lock defect (KESSY system)
An audible signal sounds as a warning.
flashes
Steering column lock faulty. Stop!STOP VEHICLE STEERING FAULTY
▶ Park the vehicle, and
stop driving . After switching off the ignition, it is no
longer possible to lock the steering, to activate the electrical components
(e.g. Infotainment ), to switch on the ignition again and to start the engine.
Seek help from a specialist garage.
flashes
Steering lock: Workshop!STEERING WORKSHOP
▶ You can drive on, exercising appropriate caution. Seek assistance from a spe-
cialist garage immediately.
Steering column lock not unlocked (System KESSY)
flashes
Move the steering wheel!MOVE STEERING WHEEL
▶ Move the steering wheel slightly back and forth, thereby facilitating unlock-
ing the steering lock.
▶ If the steering does also not unlock then, the help of a specialist garage is
required.
Disconnecting the vehicle battery
If the vehicle's battery has been disconnected and reconnected, the indicator
light comes on after switching on the ignition.
The warning light should go out after driving a short distance.
If, after the motor is restarted and a short drive, the indicator light does not go
out, there is a system error.
35Instruments and warning lights
Page 55 of 336
›Restart SmartGate by tapping on the “Reboot” 1)
button.
Changing the PIN code for the Wi-Fi Direct connection›
Open the SmartGate web interface » page 52.
›
In the menu item “WiFi Direct PIN:”, enter the new PIN code (6 digits).
›
Confirm the PIN code change by tapping on the “Save” button.
›
Restart SmartGate by tapping on the “Reboot” 1 )
button.
Note
If you have forgotten your password/PIN code for connecting to SmartGate,
SmartGate must be reset to the factory settings in a specialist workshop.Unlocking and opening
Unlocking and locking
Introduction
This chapter contains information on the following subjects:
Unlocking/locking with the remote control key
54
Remove KESSY emergency key
54
Locking / unlocking - KESSY
55
Locking/unlocking the vehicle with the central locking button
55
SafeLock
56
Individual settings
56
Open / close door
57
Child safety lock
57
Malfunctions
57
The vehicle is equipped with a central locking system which makes it possible
to unlock / lock all the doors, the fuel filler flap and boot lid simultaneously.
The door unlocking can be adjusted individually » page 56.
The unlocking of the vehicle is displayed by the turn signal lights flashing
twice.
If you unlock the vehicle and do not open a door or the boot lid within the next
45 seconds, the vehicle will lock again automatically.
The locking of the vehicle is displayed by the turn signal lights flashing once.
If the driver's door has been opened, the vehicle cannot be locked.
If the doors or the boot lid remain open after the vehicle has been locked, the turn signal lights do not flash until they have been closed.
1)
If the “Reboot” button is not displayed, you must manually restore the web browser display.
53Unlocking and opening
Page 56 of 336
WARNING■Never leave the key in the vehicle when you exit the vehicle. Unauthor-
ized persons (e.g. children) could lock the car, turn on the ignition or start
the engine - there is a danger of injury and accidents!■
When leaving the vehicle, never leave people who are not completely in-
dependent, such as children, unattended in the vehicle. These individuals
might not be able to leave the vehicle on their own or to help themselves.
Can be fatal at very high or very low temperatures!
CAUTION
■ Each key contains electronic components; therefore it must be protected
against moisture and severe shocks.■
Keep the keyway clean. Impurities (textile fibres, dust etc.) have a negative
effect on the functionality of the locking cylinder and ignition lock.
Unlocking/locking with the remote control key
Fig. 33
Key with fold/out key bit/KESSY key
Read and observe
and on page 54 first.
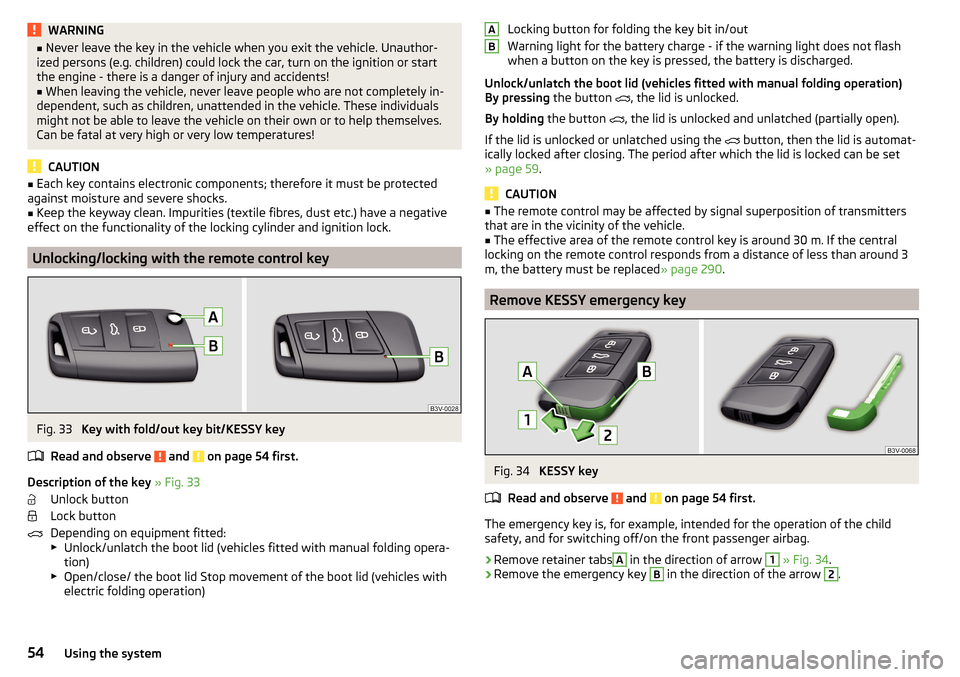
Description of the key » Fig. 33
Unlock button
Lock button
Depending on equipment fitted:
▶ Unlock/unlatch the boot lid (vehicles fitted with manual folding opera-
tion)
▶ Open/close/ the boot lid Stop movement of the boot lid (vehicles with
electric folding operation)
Locking button for folding the key bit in/out
Warning light for the battery charge - if the warning light does not flash
when a button on the key is pressed, the battery is discharged.
Unlock/unlatch the boot lid (vehicles fitted with manual folding operation)
By pressing the button
, the lid is unlocked.
By holding the button
, the lid is unlocked and unlatched (partially open).
If the lid is unlocked or unlatched using the
button, then the lid is automat-
ically locked after closing. The period after which the lid is locked can be set
» page 59 .
CAUTION
■
The remote control may be affected by signal superposition of transmitters
that are in the vicinity of the vehicle.■
The effective area of the remote control key is around 30 m. If the central
locking on the remote control responds from a distance of less than around 3
m, the battery must be replaced » page 290.
Remove KESSY emergency key
Fig. 34
KESSY key
Read and observe
and on page 54 first.
The emergency key is, for example, intended for the operation of the child
safety, and for switching off/on the front passenger airbag.
›
Remove retainer tabs
A
in the direction of arrow
1
» Fig. 34 .
›
Remove the emergency key
B
in the direction of the arrow
2
.
AB54Using the system
Page 57 of 336
Locking / unlocking - KESSYFig. 35
Vehicle unlocking / vehicle locking
Read and observe
and on page 54 first.
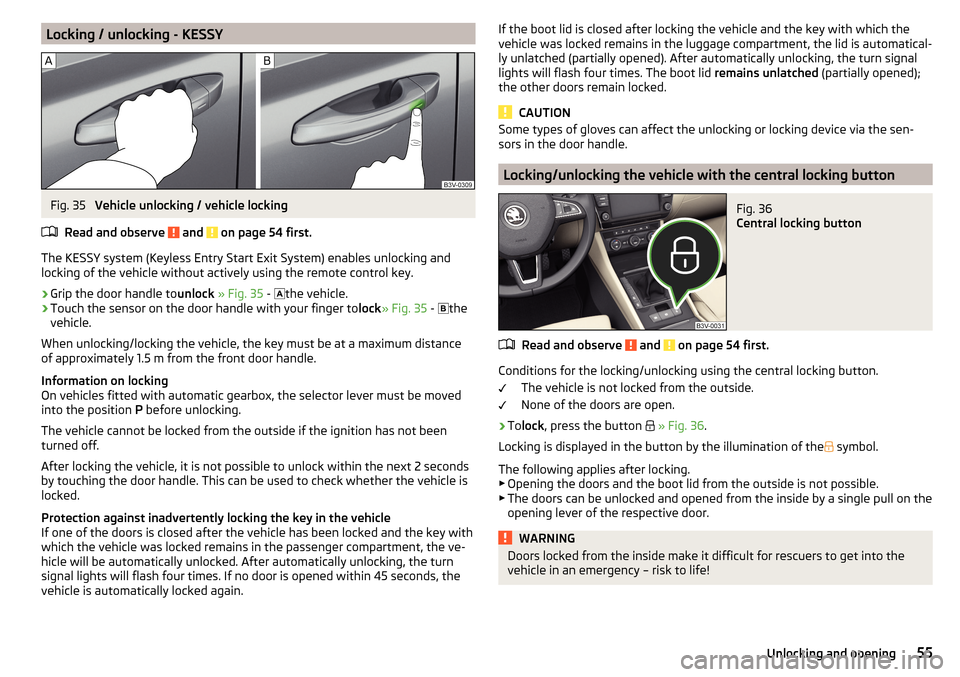
The KESSY system (Keyless Entry Start Exit System) enables unlocking and
locking of the vehicle without actively using the remote control key.
›
Grip the door handle to unlock » Fig. 35 -
the vehicle.
›
Touch the sensor on the door handle with your finger to
lock» Fig. 35 -
the
vehicle.
When unlocking/locking the vehicle, the key must be at a maximum distance
of approximately 1.5 m from the front door handle.
Information on locking
On vehicles fitted with automatic gearbox, the selector lever must be moved
into the position P before unlocking.
The vehicle cannot be locked from the outside if the ignition has not been
turned off.
After locking the vehicle, it is not possible to unlock within the next 2 seconds
by touching the door handle. This can be used to check whether the vehicle is
locked.
Protection against inadvertently locking the key in the vehicle
If one of the doors is closed after the vehicle has been locked and the key with
which the vehicle was locked remains in the passenger compartment, the ve-
hicle will be automatically unlocked. After automatically unlocking, the turn
signal lights will flash four times. If no door is opened within 45 seconds, the
vehicle is automatically locked again.
If the boot lid is closed after locking the vehicle and the key with which the
vehicle was locked remains in the luggage compartment, the lid is automatical-
ly unlatched (partially opened). After automatically unlocking, the turn signal
lights will flash four times. The boot lid remains unlatched (partially opened);
the other doors remain locked.
CAUTION
Some types of gloves can affect the unlocking or locking device via the sen-
sors in the door handle.
Locking/unlocking the vehicle with the central locking button
Fig. 36
Central locking button
Read and observe and on page 54 first.
Conditions for the locking/unlocking using the central locking button.
The vehicle is not locked from the outside.
None of the doors are open.
›
To lock , press the button
» Fig. 36 .
Locking is displayed in the button by the illumination of the
symbol.
The following applies after locking. ▶ Opening the doors and the boot lid from the outside is not possible.
▶ The doors can be unlocked and opened from the inside by a single pull on the
opening lever of the respective door.
WARNINGDoors locked from the inside make it difficult for rescuers to get into the
vehicle in an emergency – risk to life!55Unlocking and opening
Page 58 of 336
SafeLockRead and observe
and on page 54 first.
SafeLock prevents the doors from behind opened from inside as well as win-
dow operation. This makes it more difficult for anyone to break into the vehi-
cle.
Switching on
SafeLock switches on when the vehicle is locked.
This function is pointed out by the following message on the display of the in-
strument cluster after the ignition is switched off.
Observe SAFE interlock! Log book!CHECK SAFELOCK
Switch-on display
With the activated SafeLock, the warning light in the driver´s door flashes for 2
seconds in rapid succession, this then starts to flash at longer intervals.
Switching off ▶ By locking twice within 2 seconds.
▶ or: by deactivating the interior monitor and the towing protection
» page 58 .
The warning light in the driver´s door flashes fast for about 2 seconds, goes
out and starts to flash at longer intervals after about 30 seconds.
If the vehicle is locked and the safe securing system is switched off, the door
can be opened separately from the inside by a single pull on opening lever.
The safelock switches on the next time the vehicle is locked.
WARNINGIf the car is locked and the safe securing system activated, no people must
remain in the car as it will then not be possible to either unlock a door or
open a window from the inside. The locked doors make it more difficult for
rescuers to get into the vehicle in an emergency – risk to life!
Individual settings
Read and observe
and on page 54 first.
The following functions of the central locking can be individually adjusted in
infotainment in the
→
→
Opening and closing
menu.
All doors
The function allows you to unlock all doors, the boot lid and the fuel filler flap.
Single door
The function allows you to unlock only the driver's door and the fuel filler flap
with the radio remote control. KESSY allows the unlocking of a single door
which is in the vicinity of the key, as well as the fuel filler flap. The other doors
and the boot lid are only unlocked once the door handle is unlocked or
touched.
Doors on a vehicle side
This function enables you to unlock both doors on the driver's side and the
fuel filler flap with the radio remote control unit. KESSY allows the unlocking of
both doors which are in the vicinity of the key, as well as the fuel filler flap. The
other doors and the boot lid are only unlocked once the door handle is un-
locked or touched.
Automatic locking/unlocking
This function enables the locking of all doors and the boot lid from a speed of
15 km/h. Opening the doors and the boot lid from the outside is not possible.
The renewed unlocking of the doors and the boot lid is carried out when the
ignition key is removed or when the door is opened from inside (depending on
the individual setting for the central locking system).
Note
The individual adjustment of the central locking system is stored (depending
on the Infotainment type) in the active user account personalisation
» page 49 .56Using the system
Page 60 of 336
Failure of the system KESSY
If there is a fault in the KESSY system, the appropriate error message is dis-
played in the instrument cluster.
Low voltage of the key battery
If the voltage of the key battery is too low, a message appears in the display of
the instrument cluster referring to the need to replace the battery. Replace
the battery » page 290.
Anti-theft alarm system
Introduction
This chapter contains information on the following subjects:
Alarm trigger
58
Interior monitor and towing protection
58
The alarm system triggers audible and visual signals if an attempt is made to
break into the vehicle (hereafter referred to as alarm).
The alarm system is activated automatically approximately 30 seconds after the vehicle is locked. This is automatically disabled after release.
CAUTION
Before leaving the vehicle, it must be checked that all of the windows, doors
and the sliding/tilting roof are locked in order to ensure the full functionality of
the anti-theft alarm system.
Note
The alarm system has its own power source, service life of which is 5 years. In
order to ensure functionality of the alarm system, we recommend that you get
the alarm checked after this time by a specialist garage.
Alarm trigger
Read and observe
on page 58 first.
The alarm is triggered when one of the following unauthorised actions is acti-
vated on the vehicle with an activated warning system. ▶ Opening the bonnet.
▶ Opening the boot lid.
▶ Opening the doors.
▶ Manipulation of the ignition lock.
▶
Towing the vehicle.
▶ Movement in the vehicle.
▶ Sudden and significant voltage drop of the electrical system.
▶ Uncoupling the trailer.
An alarm is triggered also when the driver's door is unlocked and opened by
the lock cylinder.
The alarm is switched off by pressing the
button on the key or switching on
the ignition.
Interior monitor and towing protection
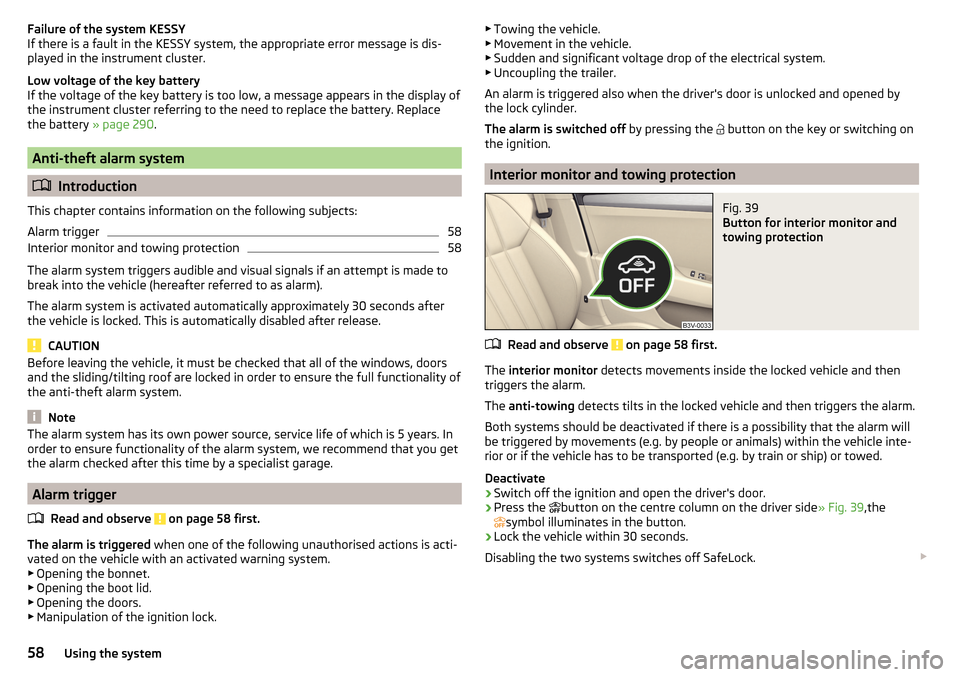
Fig. 39
Button for interior monitor and
towing protection
Read and observe on page 58 first.
The interior monitor detects movements inside the locked vehicle and then
triggers the alarm.
The anti-towing detects tilts in the locked vehicle and then triggers the alarm.
Both systems should be deactivated if there is a possibility that the alarm will
be triggered by movements (e.g. by people or animals) within the vehicle inte-
rior or if the vehicle has to be transported (e.g. by train or ship) or towed.
Deactivate
›
Switch off the ignition and open the driver's door.
›
Press the button on the centre column on the driver side
» Fig. 39,the
symbol illuminates in the button.
›
Lock the vehicle within 30 seconds.
Disabling the two systems switches off SafeLock.
58Using the system
Page 62 of 336
WARNING■Ensure that the lock is properly engaged after closing the lid. Otherwise,
the lid might open suddenly while the vehicle is moving, even if the lid was
locked – risk of accident!■
Never drive with the lid open or unlatched, as otherwise exhaust gases
may get into the interior of the vehicle – risk of poisoning!
■
Only open and close the lid when no one is located in the opening/closing
range – risk of injury!
■
Make sure that no limbs are caught or crushed when closing the lid - risk
of injury!
■
When you open the boot lid make sure that there are no persons in the
opening area of the lid - there is a danger of injury!
CAUTION
■ Do not attempt to close the lid manually during the electrical closing process
- there is a risk of damaging the electric lid operation.■
When washing the vehicle in a car wash, we recommend that you lock the
vehicle (with the central locking button). In some car washes the boot lid might
open automatically due to the pressure action of the washing brushes - there
is a risk of damage to the vehicle interior.
CAUTION
■ Check that no objects are located in the opening/closing area which could
hinder the movement (e.g. cargo on the roof rack or on the trailer etc.) - there
is a risk of damage to the lid!■
In certain circumstances, if the lid is loaded (e.g. by a thick layer of snow), the
opening process of the lid can be interrupted. Remove the snow from the lid to
re-enable the electrical operation.
■
If the lid closes automatically (e.g. under load of snow), you will hear an inter-
mittent beep.
■
The flap is always to be close before disconnecting the battery.
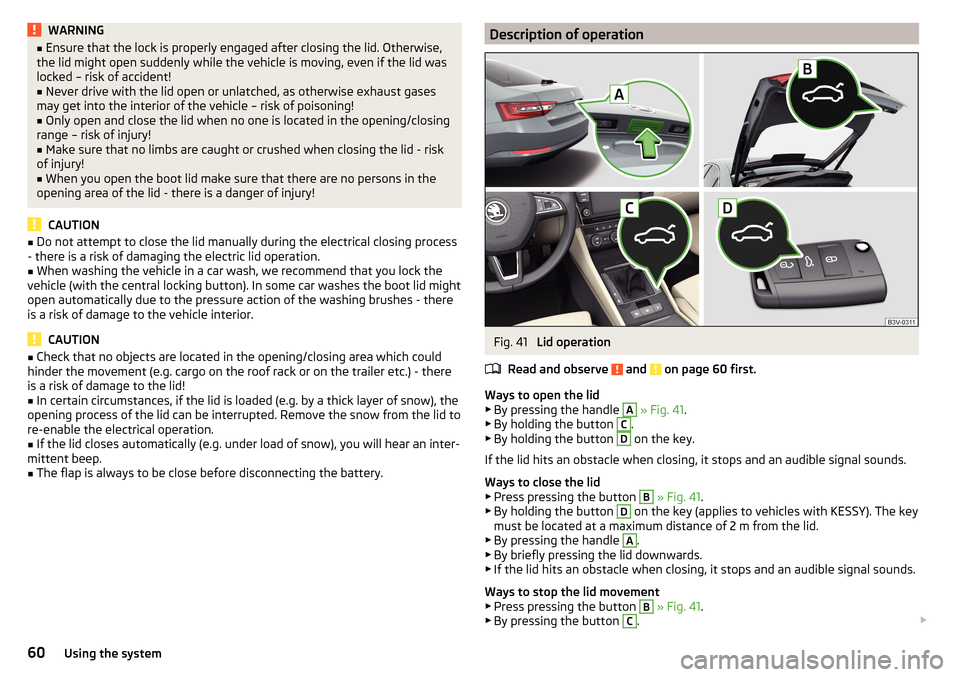
Description of operationFig. 41
Lid operation
Read and observe
and on page 60 first.
Ways to open the lid
▶ By pressing the handle
A
» Fig. 41 .
▶ By holding the button
C
.
▶ By holding the button
D
on the key.
If the lid hits an obstacle when closing, it stops and an audible signal sounds.
Ways to close the lid ▶ Press pressing the button
B
» Fig. 41 .
▶ By holding the button
D
on the key (applies to vehicles with KESSY). The key
must be located at a maximum distance of 2 m from the lid.
▶ By pressing the handle
A
.
▶ By briefly pressing the lid downwards.
▶ If the lid hits an obstacle when closing, it stops and an audible signal sounds.
Ways to stop the lid movement ▶ Press pressing the button
B
» Fig. 41 .
▶ By pressing the button
C
.
60Using the system