fog light bulb SKODA SUPERB 2016 3.G / (B8/3V) Owner's Manual
[x] Cancel search | Manufacturer: SKODA, Model Year: 2016, Model line: SUPERB, Model: SKODA SUPERB 2016 3.G / (B8/3V)Pages: 336, PDF Size: 53.89 MB
Page 40 of 336

Other incidents
The illumination of the warning light ’āć can have the following reasons.
Ō¢Č The vehicle is loaded on one side. Distribute the load evenly.
Ō¢Č The wheels of one axle are loaded more heavily (e.g. when towing a trailer or
when driving uphill or downhill).
Ō¢Č Snow chains are mounted.
Ō¢Č A wheel has been changed.
CAUTION
Under certain circumstances (e.g. sporty style of driving, wintry or unpaved
roads) the warning light ’āć can be delayed or does not light up at all.
’ü® Brake linings
Read and observe
on page 34 first.
’ü® illuminates - the brake pads are worn.
Ō¢Č You can drive on, exercising appropriate caution. Seek assistance from a spe-
cialist garage immediately.
’üē Fuel reserve
Read and observe
on page 34 first.
’üē illuminates ŌĆō the fuel level in the fuel tank is at the reserve level (approxi-
mately 6 litres).
An audible signal sounds as a warning. Ō¢Č Please refuel ┬╗ page 265.
Note
The text in the display goes out after refuelling and driving a short distance.
’āŠ ’āŠ Lane Departure Warning (Lane Assist)
Read and observe
on page 34 first.
The warning lights ’āŠ
’āŠ
indicates the state of the Lane Assist system.
More information about the Lane Assist System ┬╗ page 243.
’āż’āż’āż’üČ ’āČ Turn signal system
Read and observe
on page 34 first.
’üČ flashes ŌĆō the left turn signal is turned on.
’āČ flashes ŌĆō the right turn signal is turned on.
If there is a fault in the turn signal system, the warning light flashes at twice
its normal rate (does not apply when towing).
When the hazard warning light system is switched on, this will cause all of the turn signal lights as well as both warning lights to flash.
’ĆŻ Trailer turn signal lights
Read and observe
on page 34 first.
’ĆŻ flashes ŌĆō the trailer turn signal lights are switched on.
If a trailer is hitched and the warning light ’ĆŻ is not flashing, one of the trailer
turn signal lights has failed.
Ō¢Č Check the trailer bulbs.
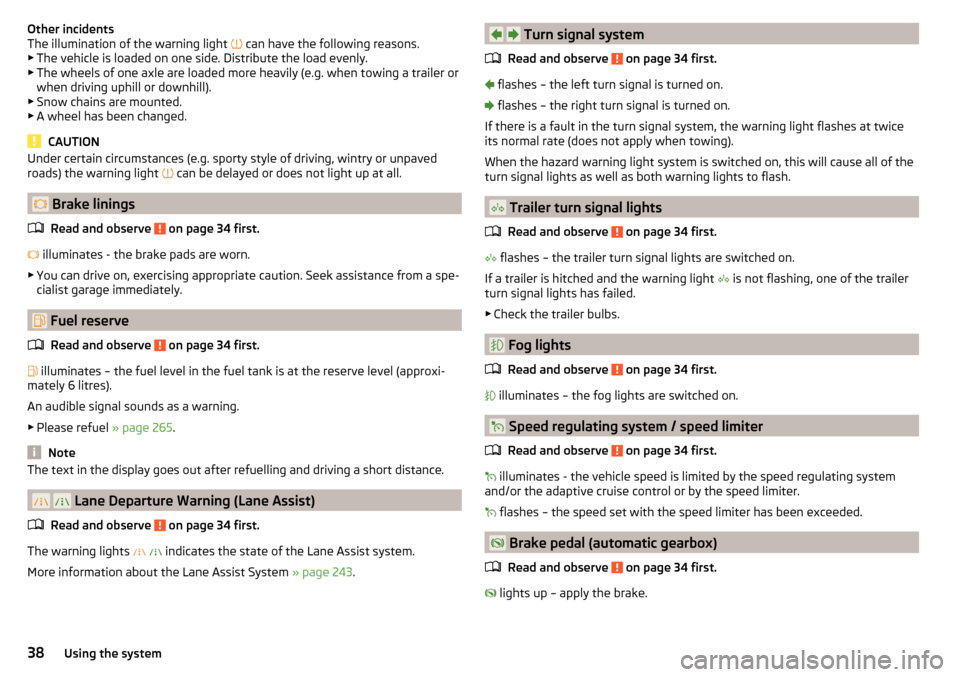
’Ć® Fog lights
Read and observe
on page 34 first.
’Ć® illuminates ŌĆō the fog lights are switched on.
’üØ Speed regulating system / speed limiter
Read and observe
on page 34 first.
’üØ illuminates - the vehicle speed is limited by the speed regulating system
and/or the adaptive cruise control or by the speed limiter.
’üØ flashes ŌĆō the speed set with the speed limiter has been exceeded.
’ü½ Brake pedal (automatic gearbox)
Read and observe
on page 34 first.
’ü½ lights up ŌĆō apply the brake.
’āż’āż’āż’āż’āż38Using the system
Page 301 of 336

No.Consumer17ESC, engine control unit, main relay coil18Databus, battery data module19Windscreen wipers20Anti-theft alarm21Not assigned22Engine control system, voltage stabilizer for taxi vehicles23Starter24Electrical auxiliary heating system31Not assigned32Not assigned33SCR34Not assigned35Not assigned36Not assigned37Aux. heating38Not assigned
Bulbs
’āżIntroduction
This chapter contains information on the following subjects:
Bulb arrangement in the headlights
300
Replacing a bulb for low beam and main beam (halogen headlights)
300
Bulb for turn signal switch (halogen headlight)
300
Changing light bulbs for fog lights
301
Removing/installing tail light
301
Replacing the bulbs in the rear light
302
For this reason, we recommend having bulbs replaced by a specialist garage or
seeking other expert help in the event of any uncertainties.
Ō¢Č Switch off the ignition and all of the lights before replacing a bulb.
Ō¢Č Faulty bulbs must only be replaced with the same type of bulbs. The designa-
tion is located on the light socket or the glass bulb.
We recommend having the headlight settings checked by a specialist garage
after replacing a bulb in the low, high or fog beam.
In the case of failure of a Xenon gas discharge bulb or an LED diode, visit a
specialist garage.WARNINGŌ¢Ā Always read and observe the warnings before completing any work in the
engine compartment ┬╗ page 268.Ō¢Ā
Accidents can be caused if the road in front of the vehicle is not suffi-
ciently illuminated and the vehicle cannot or can only be seen with difficul-
ty by other road users.
Ō¢Ā
H7 and H8 bulbs are pressurised and may burst when changing the bulb -
risk of injury! We therefore recommended wearing gloves and safety
glasses when changing a bulb.
Ō¢Ā
Do not carry out any work on the xenon gas discharge lamps - risk of
death!
CAUTION
Ō¢Ā Do not take hold of the glass bulb with naked fingers (even the smallest
amount of dirt reduces the working life of the light bulb). Use a clean cloth,
napkin, or similar.Ō¢Ā
The cap of the filament bulb must always be seated correctly in the head-
light, otherwise this may allow water and debris to enter the headlight - risk of
damage to the headlights.
Note
Ō¢Ā This Owner's Manual only describes the replacement of bulbs where it is pos-
sible to replace the bulbs on your own without any complications arising. Other
bulbs must be replaced by a specialist garage.Ō¢Ā
We recommend that a box of replacement bulbs always be carried in the ve-
hicle.
299Fuses and light bulbs
Page 303 of 336

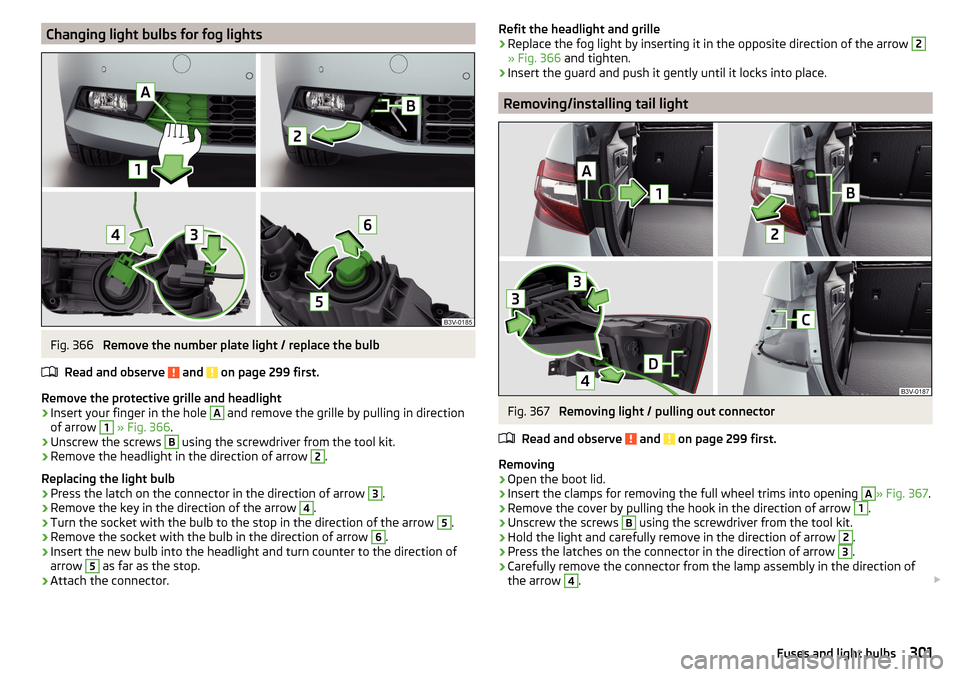
Changing light bulbs for fog lightsFig. 366
Remove the number plate light / replace the bulb
Read and observe
and on page 299 first.
Remove the protective grille and headlight
ŌĆ║
Insert your finger in the hole
A
and remove the grille by pulling in direction
of arrow
1
┬╗ Fig. 366 .
ŌĆ║
Unscrew the screws
B
using the screwdriver from the tool kit.
ŌĆ║
Remove the headlight in the direction of arrow
2
.
Replacing the light bulb
ŌĆ║
Press the latch on the connector in the direction of arrow
3
.
ŌĆ║
Remove the key in the direction of the arrow
4
.
ŌĆ║
Turn the socket with the bulb to the stop in the direction of the arrow
5
.
ŌĆ║
Remove the socket with the bulb in the direction of arrow
6
.
ŌĆ║
Insert the new bulb into the headlight and turn counter to the direction of
arrow
5
as far as the stop.
ŌĆ║
Attach the connector.
’āżRefit the headlight and grilleŌĆ║Replace the fog light by inserting it in the opposite direction of the arrow 2
┬╗ Fig. 366 and tighten.
ŌĆ║
Insert the guard and push it gently until it locks into place.
Removing/installing tail light
Fig. 367
Removing light / pulling out connector
Read and observe
and on page 299 first.
Removing
ŌĆ║
Open the boot lid.
ŌĆ║
Insert the clamps for removing the full wheel trims into opening
A
┬╗ Fig. 367 .
ŌĆ║
Remove the cover by pulling the hook in the direction of arrow
1
.
ŌĆ║
Unscrew the screws
B
using the screwdriver from the tool kit.
ŌĆ║
Hold the light and carefully remove in the direction of arrow
2
.
ŌĆ║
Press the latches on the connector in the direction of arrow
3
.
ŌĆ║
Carefully remove the connector from the lamp assembly in the direction of
the arrow
4
. ’éŻ
’āż301Fuses and light bulbs
Page 324 of 336

Pop-up windowMap189
Power steering35
Practical equipment 230-volt socket
97
Practical features 12-volt socket in the interior
96
12 volt socket in luggage compartment97
Ashtray98
Cigarette lighter99
Parking ticket holder88
Pockets94
Reflective vest280
Seat backrest with long cargo channel95
Storage compartment87
Storage compartment for umbrella93
Storage compartment under the front passen- ger seat
93
Waste container91
Preferred contacts170
Preheating unit36
Preset list TV tuner
157
Principles of Infotainment125
Proactive occupant protection242
Proactive passenger protection Warning light
37
Puncture repair kit285
R
Radiator shutters
210
radio Select station
143
Radio Broadcasting
143
DAB - settings141
DAB settings134
FM - settings134, 141
L-band135
List of available stations143
Main menu142
Operation142
Preface142
Radio station logo145
Save station144
Scan143
Search stations143
Set140
set to134
Station buttons144
Traffic program (TP)145
Voice control128
Radio station logo145
Radio station logos Update
134
Radio stations Choose
143
Logo145
Save station144
Search stations143
Select station143
Station buttons144
Raising the vehicle284
Rear fog light69
Warning light36
Rear seats83
Rear traffic alert218
Rear Traffic Alert Activation / deactivation
221
Malfunctions221
Operation219
Rear view mirror77
Rear window - heating74
Record waypoints195
Refill Windscreen washer fluid
270
refilling AdBlue
267
RefillingCoolant272
Engine oil271
Reflective vest280
Refuelling265
Fuel265
Regulation Headlight beam
67
Remote control Auxiliary heating (auxiliary heating and ventila- tion)
120
Changing battery290
Synchronisation process57
Unlocking/locking54
Remote transmission of SIM data167
Removable light109
Changing batteries292
Removable through-loading bag95
Repairs and technical alterations256
Replace Battery
291
Replacing Bulbs
299
Fuses295
Windscreen wiper blades294
Reproduction Media
147
Video DVD155
Restart Infotainment126
Restaurant184
Reversible seat belts17
Reversing camera221
Activation / deactivation222
Function surfaces223
Mode- Driving up to a trailer / Distance moni- toring
225
Mode- Monitoring the area behind the vehicle 225
Mode - Parallel parking
224
Operation222
Orientation lines and roadway223
322Index