snow chains SKODA SUPERB 2016 3.G / (B8/3V) Owner's Manual
[x] Cancel search | Manufacturer: SKODA, Model Year: 2016, Model line: SUPERB, Model: SKODA SUPERB 2016 3.G / (B8/3V)Pages: 336, PDF Size: 53.89 MB
Page 40 of 336
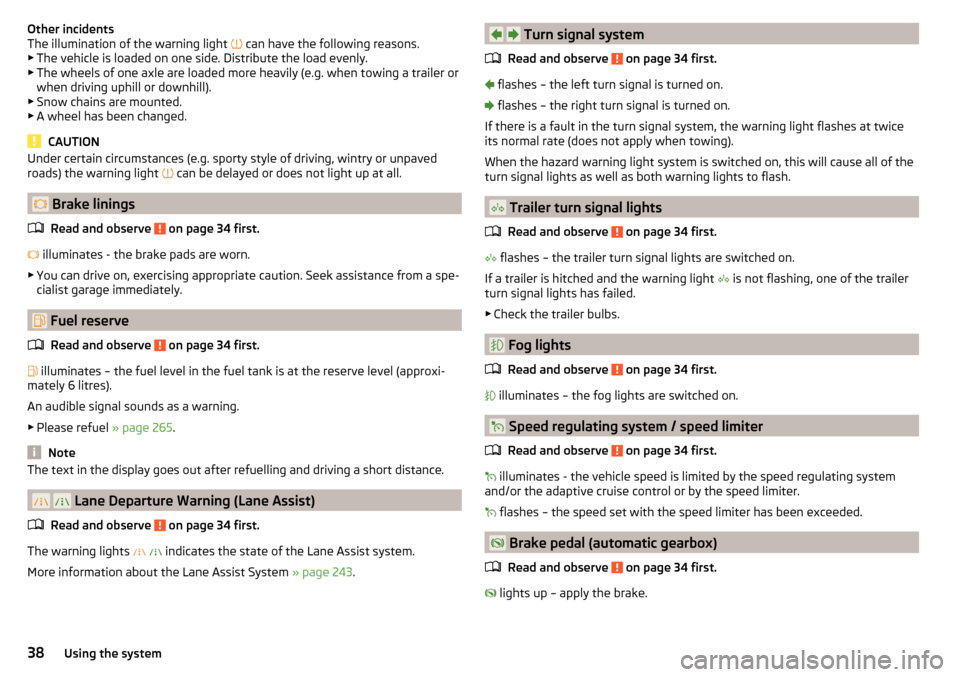
Other incidents
The illumination of the warning light ’āć can have the following reasons.
Ō¢Č The vehicle is loaded on one side. Distribute the load evenly.
Ō¢Č The wheels of one axle are loaded more heavily (e.g. when towing a trailer or
when driving uphill or downhill).
Ō¢Č Snow chains are mounted.
Ō¢Č A wheel has been changed.
CAUTION
Under certain circumstances (e.g. sporty style of driving, wintry or unpaved
roads) the warning light ’āć can be delayed or does not light up at all.
’ü® Brake linings
Read and observe
on page 34 first.
’ü® illuminates - the brake pads are worn.
Ō¢Č You can drive on, exercising appropriate caution. Seek assistance from a spe-
cialist garage immediately.
’üē Fuel reserve
Read and observe
on page 34 first.
’üē illuminates ŌĆō the fuel level in the fuel tank is at the reserve level (approxi-
mately 6 litres).
An audible signal sounds as a warning. Ō¢Č Please refuel ┬╗ page 265.
Note
The text in the display goes out after refuelling and driving a short distance.
’āŠ ’āŠ Lane Departure Warning (Lane Assist)
Read and observe
on page 34 first.
The warning lights ’āŠ
’āŠ
indicates the state of the Lane Assist system.
More information about the Lane Assist System ┬╗ page 243.
’āż’āż’āż’üČ ’āČ Turn signal system
Read and observe
on page 34 first.
’üČ flashes ŌĆō the left turn signal is turned on.
’āČ flashes ŌĆō the right turn signal is turned on.
If there is a fault in the turn signal system, the warning light flashes at twice
its normal rate (does not apply when towing).
When the hazard warning light system is switched on, this will cause all of the turn signal lights as well as both warning lights to flash.
’ĆŻ Trailer turn signal lights
Read and observe
on page 34 first.
’ĆŻ flashes ŌĆō the trailer turn signal lights are switched on.
If a trailer is hitched and the warning light ’ĆŻ is not flashing, one of the trailer
turn signal lights has failed.
Ō¢Č Check the trailer bulbs.
’Ć® Fog lights
Read and observe
on page 34 first.
’Ć® illuminates ŌĆō the fog lights are switched on.
’üØ Speed regulating system / speed limiter
Read and observe
on page 34 first.
’üØ illuminates - the vehicle speed is limited by the speed regulating system
and/or the adaptive cruise control or by the speed limiter.
’üØ flashes ŌĆō the speed set with the speed limiter has been exceeded.
’ü½ Brake pedal (automatic gearbox)
Read and observe
on page 34 first.
’ü½ lights up ŌĆō apply the brake.
’āż’āż’āż’āż’āż38Using the system
Page 216 of 336
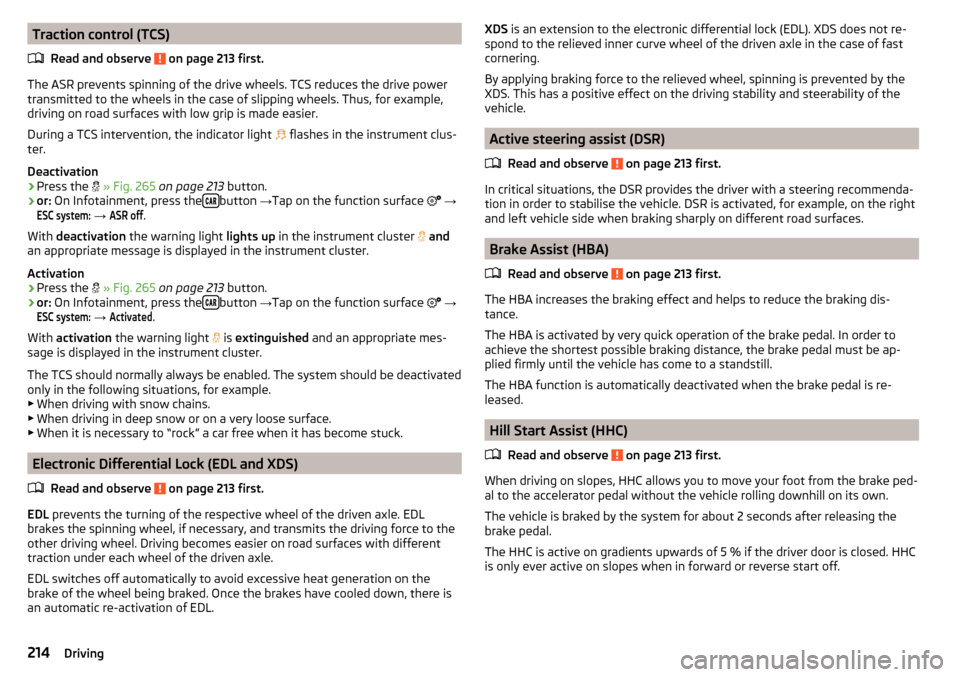
Traction control (TCS)Read and observe
on page 213 first.
The ASR prevents spinning of the drive wheels. TCS reduces the drive powertransmitted to the wheels in the case of slipping wheels. Thus, for example,
driving on road surfaces with low grip is made easier.
During a TCS intervention, the indicator light ’Ćó
flashes in the instrument clus-
ter.
Deactivation
ŌĆ║
Press the ’é½
┬╗ Fig. 265 on page 213 button.
ŌĆ║
or: On Infotainment, press the ’üā’üü’üÆbutton
ŌåÆTap on the function surface
’ā│
ŌåÆ
ESC system:
ŌåÆ
ASR off
.
With deactivation the warning light lights up in the instrument cluster
’é½
and
an appropriate message is displayed in the instrument cluster.
Activation
ŌĆ║
Press the ’é½
┬╗ Fig. 265 on page 213 button.
ŌĆ║
or: On Infotainment, press the ’üā’üü’üÆbutton
ŌåÆTap on the function surface
’ā│
ŌåÆ
ESC system:
ŌåÆ
Activated
.
With activation the warning light
’é½ is
extinguished and an appropriate mes-
sage is displayed in the instrument cluster.
The TCS should normally always be enabled. The system should be deactivated
only in the following situations, for example. Ō¢Č When driving with snow chains.
Ō¢Č When driving in deep snow or on a very loose surface.
Ō¢Č When it is necessary to ŌĆ£rockŌĆØ a car free when it has become stuck.
Electronic Differential Lock (EDL and XDS)
Read and observe
on page 213 first.
EDL prevents the turning of the respective wheel of the driven axle. EDL
brakes the spinning wheel, if necessary, and transmits the driving force to the
other driving wheel. Driving becomes easier on road surfaces with different
traction under each wheel of the driven axle.
EDL switches off automatically to avoid excessive heat generation on the
brake of the wheel being braked. Once the brakes have cooled down, there is
an automatic re-activation of EDL.
’āż’āżXDS is an extension to the electronic differential lock (EDL). XDS does not re-
spond to the relieved inner curve wheel of the driven axle in the case of fast
cornering.
By applying braking force to the relieved wheel, spinning is prevented by the
XDS. This has a positive effect on the driving stability and steerability of the
vehicle.
Active steering assist (DSR)
Read and observe
on page 213 first.
In critical situations, the DSR provides the driver with a steering recommenda-tion in order to stabilise the vehicle. DSR is activated, for example, on the right
and left vehicle side when braking sharply on different road surfaces.
Brake Assist (HBA)
Read and observe
on page 213 first.
The HBA increases the braking effect and helps to reduce the braking dis-
tance.
The HBA is activated by very quick operation of the brake pedal. In order to
achieve the shortest possible braking distance, the brake pedal must be ap-
plied firmly until the vehicle has come to a standstill.
The HBA function is automatically deactivated when the brake pedal is re-
leased.
Hill Start Assist (HHC)
Read and observe
on page 213 first.
When driving on slopes, HHC allows you to move your foot from the brake ped-al to the accelerator pedal without the vehicle rolling downhill on its own.
The vehicle is braked by the system for about 2 seconds after releasing the
brake pedal.
The HHC is active on gradients upwards of 5 % if the driver door is closed. HHC
is only ever active on slopes when in forward or reverse start off.
’āż’āż’āż214Driving
Page 228 of 336
WARNINGŌ¢ĀThe general information relating to the use of assistance systems must
be observed ┬╗ page 212, in section Introduction .Ō¢Ā
During the parking process, the system automatically performs rapid
steering movements. While it is doing so, do not place your hands between
the steering wheel ŌĆō risk of injury!
Ō¢Ā
During a parking manoeuvre on loose or slippery surfaces (gravel, snow,
ice, etc.) you may stray from the calculated road. It is therefore recommen-
ded that you do not use the system in such situations.
CAUTION
The correct evaluation of the parking space and the parking procedure de-
pends on the circumference of the wheels on the vehicle.Ō¢Ā
The system only works correctly if the vehicle is fitted with the wheel size
approved by ┼ĀKODA AUTO.
Ō¢Ā
Abstain from using the system when the vehicle is fitted with snow chains or
a temporary spare wheel.
Ō¢Ā
If wheels other than those approved by ┼ĀKODA AUTO are fitted, the resulting
position of the vehicle in the parking space can differ slightly. This can be avoi-
ded by readjusting the system at a specialist garage.
CAUTION
If other vehicles are parked behind or on the curb, the system can drive your
vehicle over the kerb or up to the kerb - there is a risk of damage to the
wheels. If necessary, intervene in good time.
Note
Ō¢Ā We recommend performing the parking at a safe speed to about 5 km/h.Ō¢ĀThe parking procedure can be stopped at any time by pressing the ’é¤
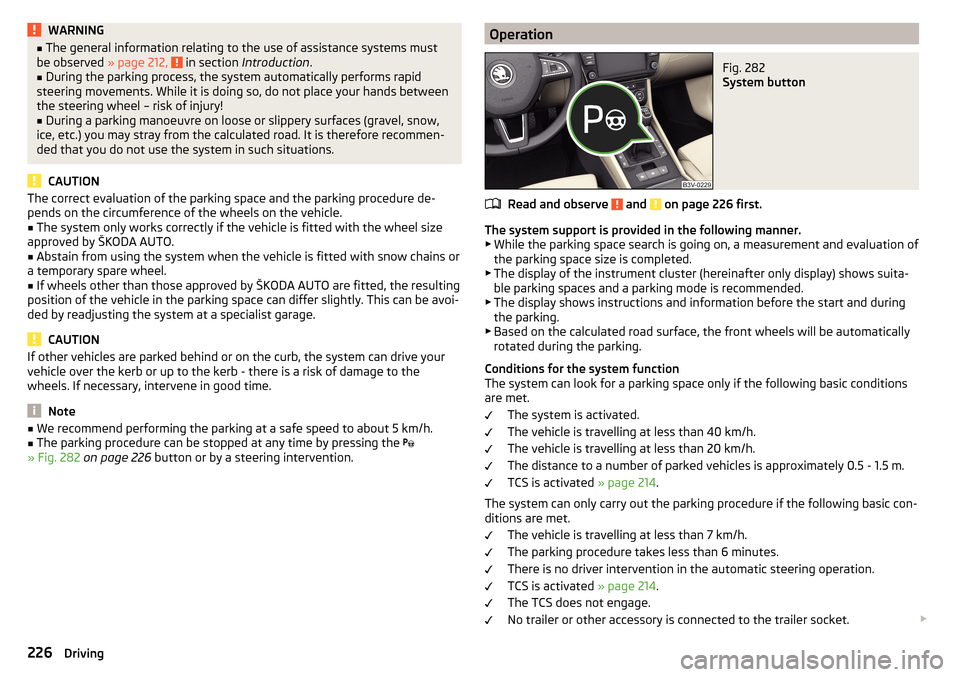
┬╗ Fig. 282 on page 226 button or by a steering intervention.OperationFig. 282
System button
Read and observe and on page 226 first.
The system support is provided in the following manner.
Ō¢Č While the parking space search is going on, a measurement and evaluation of
the parking space size is completed.
Ō¢Č The display of the instrument cluster (hereinafter only display) shows suita-
ble parking spaces and a parking mode is recommended.
Ō¢Č The display shows instructions and information before the start and during
the parking.
Ō¢Č Based on the calculated road surface, the front wheels will be automatically
rotated during the parking.
Conditions for the system function
The system can look for a parking space only if the following basic conditions
are met.
The system is activated.
The vehicle is travelling at less than 40 km/h.
The vehicle is travelling at less than 20 km/h.
The distance to a number of parked vehicles is approximately 0.5 - 1.5 m.
TCS is activated ┬╗ page 214.
The system can only carry out the parking procedure if the following basic con-
ditions are met.
The vehicle is travelling at less than 7 km/h.
The parking procedure takes less than 6 minutes.
There is no driver intervention in the automatic steering operation.
TCS is activated ┬╗ page 214.
The TCS does not engage.
No trailer or other accessory is connected to the trailer socket. ’éŻ
’āż’éź’éź’éź’éź’éź’éź’éź’éź’éź’éź’éź226Driving
Page 278 of 336
Wheels
Wheels and tyres
’āżIntroduction
This chapter contains information on the following subjects:
Advice on tyre/wheel usage
276
Tyre pressure
277
Tire wear and wheel change
277
Spare wheel
278
Tyre marking
278
Advice on tyre/wheel usage
New tyres , during the first 500 km, new tyres do not offer optimum grip and
appropriate care should therefore be taken when driving.
Always fit tyres with a greater profile depth on the front wheels.
Wheels and bolts are matched to each other in terms of design. We recom-
mend that you use wheel rims and wheel bolts from ┼ĀKODA Original Accesso-
ries.
Always store wheels or tyres in a cool, dry and, where possible, dark place. The
tyres themselves should be stored standing.
Tyre life
Tyres age and lose their original characteristics, even if they are not being
used. Therefore, we recommend not using tyres that are more than 6 years
old.
The manufacturing date is indicated on the tyre sidewall (possibly on the in-
side ). E.g. DOT ... 10 16... means, for example, that the tyre was manufactured
in the 10. week of 2016.
Tyre damage
We recommend checking your tyres and wheel rims for damage (punctures,
cuts, splits and bulges, etc.) on a regular basis.
Remove any foreign objects in the tyre tread immediately (e.g. small stones).
Foreign bodies which have penetrated into the tyre (e.g. screws or nails)
should not be removed. Seek help from a specialist garage.
Installation of new tyres
Only fit radial tyres of the same type, size (rolling circumference) and the same
tread pattern on one axle on all 4 wheels.
When mounting new tyres the tyres have to be replaced axle by axle.
Uni-directional tires
The direction of rotation of the tyres is marked by arrows on the wall of the
tyre .
The specified running direction must be strictly adhered to, otherwise the fol-
lowing tyre characteristics may be degraded. Ō¢Č Driving stability.
Ō¢Č Traction.
Ō¢Č Tyre noise and tyre wear.
Tyres with increased puncture resistance
Some vehicles may be fitted with tyres at the factory that have increased
puncture resistance (so-called ŌĆ£SEALŌĆØ tyres). For some countries, vehicles are
equipped with ŌĆ£SEALŌĆØ tyres delivered without a spare wheel and appropriate
tools.
If ŌĆ£SEALŌĆØtyres are replaced with standard tyres, the vehicle must be retrofitted
with a puncture repair kit or spare wheel and appropriate hand tools.WARNINGŌ¢Ā Never use tyres if you do not know anything about the condition and age.Ō¢ĀNever drive with damaged tyres ŌĆō risk of accident.
CAUTION
Ō¢Ā The tyres must be protected from contact with substances such as oil,
grease and fuel, which could damage them. If the tyres come into contact with
these substances, then we recommend you have this checked out in a special-
ist workshop.Ō¢Ā
Do not use rims with ground or polished surface in winter conditions - there
is a risk of wheel damage (e.g. from the road grit).
Note
Ō¢Ā We recommend that any work on the wheels or tyres is carried out by a spe-
cialist garage.Ō¢Ā
We recommend that you use wheel rims, tyres, full wheel trims and snow
chains from ┼ĀKODA Original Accessories.
276General Maintenance
Page 280 of 336
WARNINGŌ¢ĀChange when they are worn down to the wear indicators at the latest -
risk of accident.Ō¢Ā
Improper wheel alignment affects the driving behaviour - there is an acci-
dent.
Ō¢Ā
Unusual vibrations or ŌĆ£pullingŌĆØ of the vehicle to one side could be a sign
of tyre damage. Reduce speed and stop! If no tyre damage is evident, seek
the assistance of a specialist garage.
Spare wheel
Use the emergency spare wheel only to reach the nearest specialist garage, as
it is not intended for permanent use .
A warning label is displayed on the rim of the temporary spare wheel.
Please note the following if you intend to use the temporary spare wheel. Ō¢Č Do not cover the signs.
Ō¢Č Be particularly observant when driving.
Ō¢Č Inflate the temporary spare wheel to the maximum inflation pressure for the
vehicle ┬╗ page 277 (the prescribed tyre pressure of the spare wheel R 18 is
4.2 bar).
In vehicles with tyre pressure monitoring, save the tyre pressure values in the
system ┬╗ page 249 .
WARNINGŌ¢Ā
Never drive with more than one spare wheel mounted!Ō¢ĀWhen driving with the temporary spare wheel at full throttle acceleration,
avoid sharp braking and fast cornering.Ō¢Ā
Do not use snow chains on the temporary spare wheel.
Ō¢Ā
Observe instructions on the warning sign of the emergency wheel.
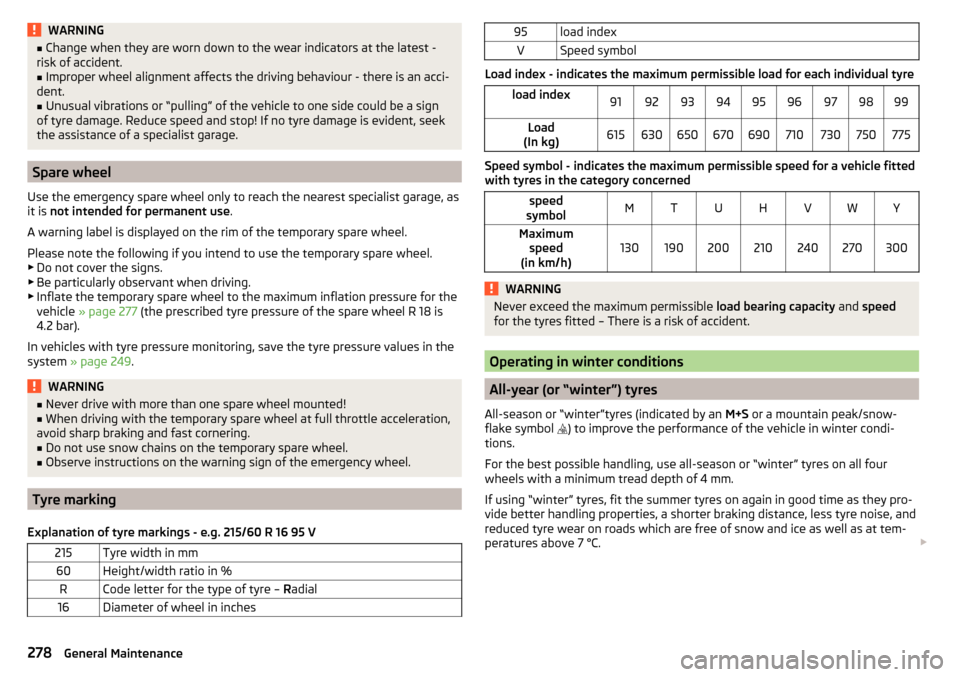
Tyre marking
Explanation of tyre markings - e.g. 215/60 R 16 95 V
215Tyre width in mm60Height/width ratio in %RCode letter for the type of tyre ŌĆō Radial16Diameter of wheel in inches95load indexVSpeed symbol
Load index - indicates the maximum permissible load for each individual tyre
load index919293949596979899Load
(In kg)615630650670690710730750775
Speed symbol - indicates the maximum permissible speed for a vehicle fitted
with tyres in the category concerned
speed
symbolMTUHVWYMaximum speed
(in km/h)130190200210240270300WARNINGNever exceed the maximum permissible load bearing capacity and speed
for the tyres fitted ŌĆō There is a risk of accident.
Operating in winter conditions
All-year (or ŌĆ£winterŌĆØ) tyres
All-season or ŌĆ£winterŌĆØtyres (indicated by an M+S or a mountain peak/snow-
flake symbol ’üĄ) to improve the performance of the vehicle in winter condi-
tions.
For the best possible handling, use all-season or ŌĆ£winterŌĆØ tyres on all four
wheels with a minimum tread depth of 4 mm.
If using ŌĆ£winterŌĆØ tyres, fit the summer tyres on again in good time as they pro-
vide better handling properties, a shorter braking distance, less tyre noise, and
reduced tyre wear on roads which are free of snow and ice as well as at tem-
peratures above 7 ┬░C. ’éŻ
278General Maintenance
Page 281 of 336
Speed symbol
All-season or ŌĆ£winterŌĆØ tyres (marked with M+S and a peak/snowflake symbol
’üĄ ) of a lower speed category than stated in the technical vehicle documenta-
tion can be used, provided the permissible maximum speed of these tyres is
not exceeded even if the possible maximum speed of the vehicle is higher.
The speed limit for all-season or ŌĆ£winterŌĆØ tyres can be adjusted in Infotainment
in the ’üā’üü’üÆ
ŌåÆ ’ā│
ŌåÆ
tire
menu.
If the vehicle has all-season or ŌĆ£winterŌĆØ tyres of a lower speed category then
the specified maximum speed of the vehicle (referring to tyres that have not
been delivered by the factory, a warning label with the maximum value of the
speed category provided for the mounted tyres must be fixed in the interior of
the vehicle in a constantly visible place in the driverŌĆÖs field of vision. The warn-
ing label (sticker) can be replaced by setting the maximum value of the speed
category supplied for the mounted tyres in Infotainment 1)
. This specification
defines the maximum vehicle speed with mounted all-season or ŌĆ£winterŌĆØtyres
that may not be exceeded.
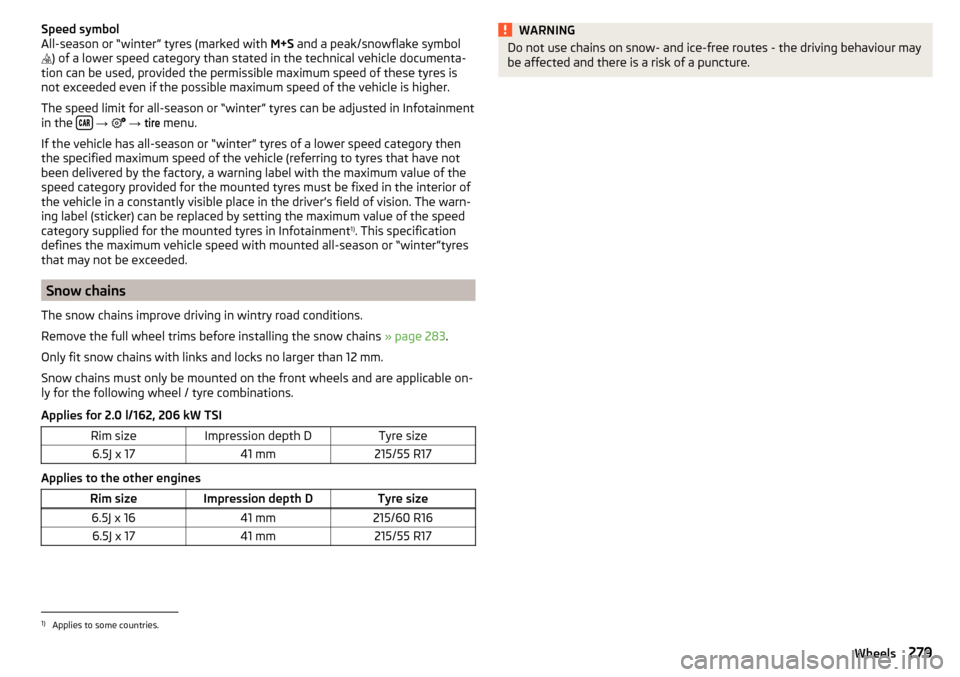
Snow chains
The snow chains improve driving in wintry road conditions.
Remove the full wheel trims before installing the snow chains ┬╗ page 283.
Only fit snow chains with links and locks no larger than 12 mm.
Snow chains must only be mounted on the front wheels and are applicable on-
ly for the following wheel / tyre combinations.
Applies for 2.0 l/162, 206 kW TSI
Rim sizeImpression depth DTyre size6.5J x 1741 mm215/55 R17
Applies to the other engines
Rim sizeImpression depth DTyre size6.5J x 1641 mm215/60 R166.5J x 1741 mm215/55 R17WARNINGDo not use chains on snow- and ice-free routes - the driving behaviour may
be affected and there is a risk of a puncture.1)
Applies to some countries.
279Wheels
Page 326 of 336
External device data transfer132
FM134, 141
Images135
Information regarding the version of the navi- gation data
138
Infotainment131, 139
Infotainment language132, 140
Infotainment screen132, 139
Manage favourites170
Manage memory137
Map137
Media135, 141
Navigation137
Nav. announcements138
Network133
Personalisation49
Pin code136
Radio134, 140
Reset to factory settings133, 198
Restore factory settings140
Route options137
SmartLink137
Software update131
Software updates140
Sound131, 139
Sound system131
Subwoofer131
Surround131
System information131, 134, 140
Tank options138
Telephone136, 141
Text messages136
Time and date132, 139
Top speeds138
TV tuner135
Units132, 140
Update software134
User profile170
Vehicle198
Video DVD135
Voice control133
Volume127
WLAN133
Settings Call136
Setting the Clock
44
Setup131, 139
Show POIs on the map187
Side compartments in the luggage compart- ment
106
SIM card Change PIN code
166
Data connection175
PIN code166
Plug in166
Remove166
Sliding/tilting roof Activate operation
65
Activating operation of the sunblind66
Sunshade65
SmartGate connection using Wi-Fi direct
52
Connection via Wi-Fi51
introductory information51
Password/PIN code change52
Setting52
SmartLink Android Auto
177
Apple CarPlay178
Main menu176
MirrorLink®178
Set to137
SMS172
new172
Operation172
Received173
Snow chains279
Sockets 12-volt socket in the interior
96
12 volt socket in luggage compartment97
230 V97
Software update131
Software Update134
Software updates140
Sound131, 139
Sound system131
Spare wheel278
Removing / stowing283
Speed limitations191
Speed limiter231
Warning light38
Speed regulating system Warning light
38
Speed symbol278
Split screen Manoeuvre
191
Spoiler257
SSID133
Stabilisation system212
Stability Control (ESC)213
START-STOP201
Jump-starting288
Manually disable / enable system202
Operation201
Warning light41
START-STOP system201
Start engine Immobilizer
199
Jump-starting288
Starter button Lock / unlock the steering lock
199
Problems with the engine start201
Starting / stopping the engine200
Switch on/off ignition200
Starting the engine Jump-starting
287
Key200
Starter button200
Start route guidance190
324Index
Page 329 of 336
UnlockingCentral locking button55
in case of emergency292
Remote control54
Unlocking and locking53
Unlock steering lock199
Update navigation data181
Update the navigation data138
USB90, 150
Safe removal140
Used vehicles Acceptance and recycling
258
Useful equipment Clothes hook
93
Cup holders90
Glasses compartment92
Removable through-loading bag95
User account Configuration wizard
127
User profile136, 141
V
Variable loading floor
109
vCard185, 186
Vehicle - Settings198
Vehicle battery charging
275
Safety instructions273
Warning light39
Vehicle care Outside
261
Vehicle condition See Auto Check Control
44
Vehicle data sticker303
Vehicle data sticker and type plate Vehicle data sticker and type plate
303
Vehicle dimensions306, 307
Vehicle height306, 307
Vehicle identification number (VIN)303
Vehicle length306, 307
Vehicle systems198
Vehicle tool kit281
Vehicle width306, 307
Ventilation Seats
85
Vest280
Video DVD Compatible sources
156
Main menu155
Play back155
Select video source155
Supported file formats156
Video DVD menu155
Menu155
Video player155
VIN Vehicle identification number
303
Virtual pedal61
Visibility74
Visors75
Voice control128
Commands130
Correction of a voice command input130
Help130
Not recognising a voice command130
on / off129
Operation principle129
Settings133
Stop / restore command130
Voicemail168
Volume127
Volume setting127
W
Waiter Voice control
129
Warning display - low temperature42
Warning lights33
Warning symbols see Warning lights33
Warning triangle280
Warning when speeding47
Warranty5
Washing the vehicle260
Waste container91
Water in the fuel filter42
Waypoint mode194
Main menu194
Record waypoints195
Set waypoint manually195
Waypoint tour memory195, 196
Waypoint tour memory195, 196
Weather conditions256
Weights303, 304, 305
Wheel bolts Anti-theft wheel bolts
284
Caps283
Loosening and tightening284
Wheels276
Changing282
Full trim283
Load Index278
Snow chains279
Speed symbol278
Tyre age276
Tyre damage276
Tyre pressure277
Tyre storage276
Uni-directional tires276
Winter tyres278
Wi-Fi51
Wi-Fi direct52
Window operation
62
Window operation62
Windscreen Heating
198
327Index
Page 330 of 336
Windscreen - heating74
Windscreen heating198
Windscreen washer fluid Refill
270
Warning light41
Windscreen washing system76
Windscreen wipers and washers76
Activation76
Replacing the windscreen wiper blade295
Replacing the windscreen wiper blades294
Service position of the windscreen wiper arms 294
Winter operation
278
All season tyres278
Car battery274
Diesel fuel266
Snow chains279
Winter tyres278
Winter tyres278
Wiper and Washers Automatic rear window wipers
77
Wipers and washer Warning light for windscreen washer fluid level 41
Wipers and washers Activate
77
Refill fluid270
Wiping interval76
Wireless Internet Hotspot set to
133
Wizard for blind spot monitoring218
Driving situations and warnings220
Operation220
WLAN151, 174
Client174
Connect174
Device hotspot174
Search174
WLAN on / off174
WPS133
WLAN client set to
133
WLAN hotspot174
WPS133
X
XDS
214
Xenon headlight69
328Index