tail lamp SKODA SUPERB 2016 3.G / (B8/3V) Owner's Manual
[x] Cancel search | Manufacturer: SKODA, Model Year: 2016, Model line: SUPERB, Model: SKODA SUPERB 2016 3.G / (B8/3V)Pages: 336, PDF Size: 53.89 MB
Page 301 of 336

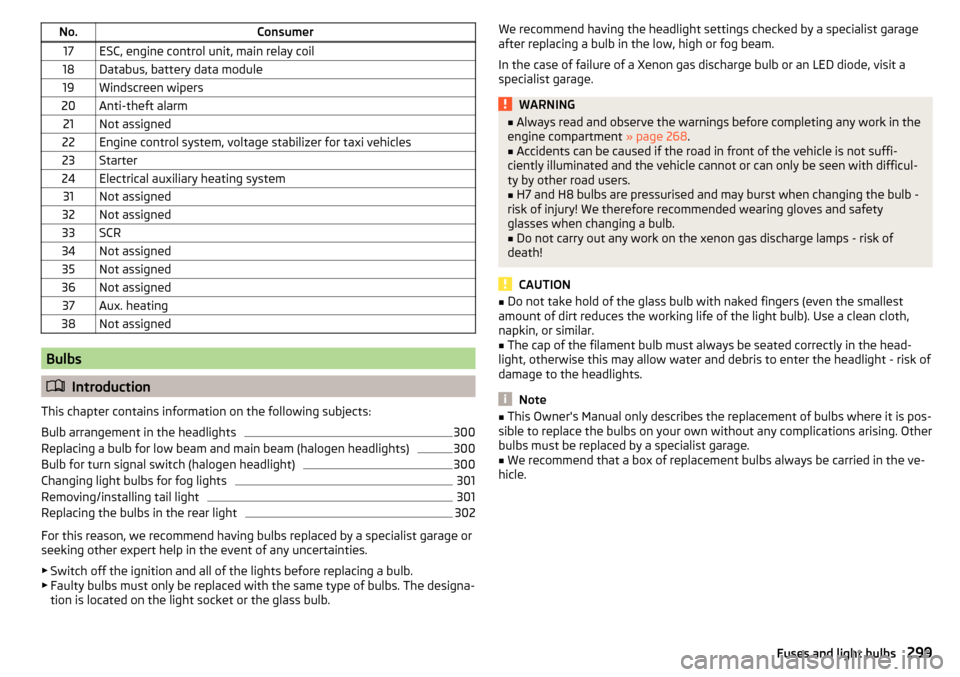
No.Consumer17ESC, engine control unit, main relay coil18Databus, battery data module19Windscreen wipers20Anti-theft alarm21Not assigned22Engine control system, voltage stabilizer for taxi vehicles23Starter24Electrical auxiliary heating system31Not assigned32Not assigned33SCR34Not assigned35Not assigned36Not assigned37Aux. heating38Not assigned
Bulbs
Introduction
This chapter contains information on the following subjects:
Bulb arrangement in the headlights
300
Replacing a bulb for low beam and main beam (halogen headlights)
300
Bulb for turn signal switch (halogen headlight)
300
Changing light bulbs for fog lights
301
Removing/installing tail light
301
Replacing the bulbs in the rear light
302
For this reason, we recommend having bulbs replaced by a specialist garage or
seeking other expert help in the event of any uncertainties.
▶ Switch off the ignition and all of the lights before replacing a bulb.
▶ Faulty bulbs must only be replaced with the same type of bulbs. The designa-
tion is located on the light socket or the glass bulb.
We recommend having the headlight settings checked by a specialist garage
after replacing a bulb in the low, high or fog beam.
In the case of failure of a Xenon gas discharge bulb or an LED diode, visit a
specialist garage.WARNING■ Always read and observe the warnings before completing any work in the
engine compartment » page 268.■
Accidents can be caused if the road in front of the vehicle is not suffi-
ciently illuminated and the vehicle cannot or can only be seen with difficul-
ty by other road users.
■
H7 and H8 bulbs are pressurised and may burst when changing the bulb -
risk of injury! We therefore recommended wearing gloves and safety
glasses when changing a bulb.
■
Do not carry out any work on the xenon gas discharge lamps - risk of
death!
CAUTION
■ Do not take hold of the glass bulb with naked fingers (even the smallest
amount of dirt reduces the working life of the light bulb). Use a clean cloth,
napkin, or similar.■
The cap of the filament bulb must always be seated correctly in the head-
light, otherwise this may allow water and debris to enter the headlight - risk of
damage to the headlights.
Note
■ This Owner's Manual only describes the replacement of bulbs where it is pos-
sible to replace the bulbs on your own without any complications arising. Other
bulbs must be replaced by a specialist garage.■
We recommend that a box of replacement bulbs always be carried in the ve-
hicle.
299Fuses and light bulbs
Page 303 of 336

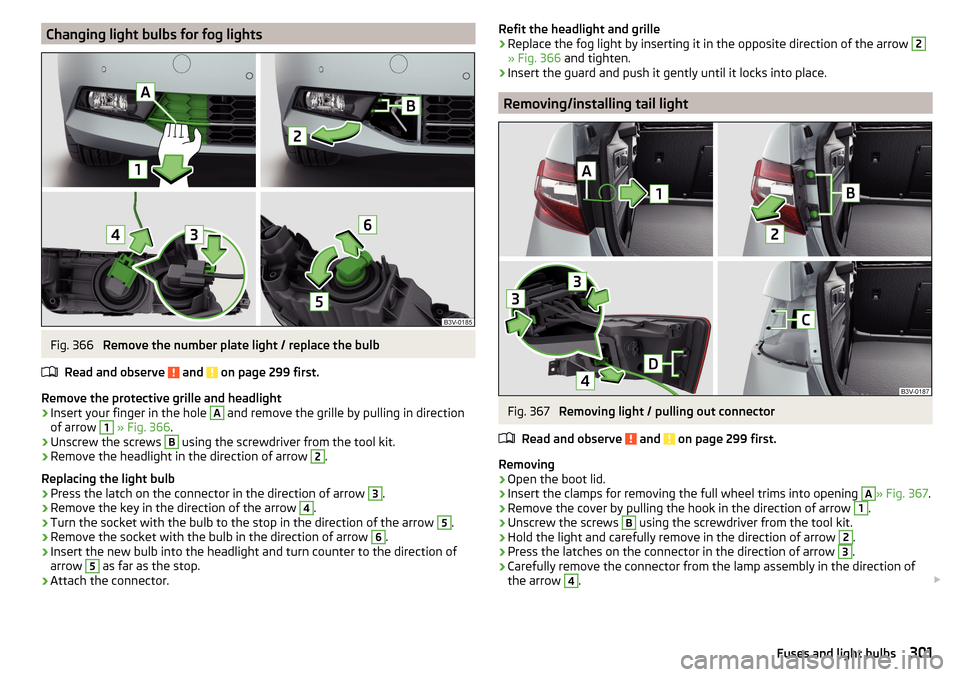
Changing light bulbs for fog lightsFig. 366
Remove the number plate light / replace the bulb
Read and observe
and on page 299 first.
Remove the protective grille and headlight
›
Insert your finger in the hole
A
and remove the grille by pulling in direction
of arrow
1
» Fig. 366 .
›
Unscrew the screws
B
using the screwdriver from the tool kit.
›
Remove the headlight in the direction of arrow
2
.
Replacing the light bulb
›
Press the latch on the connector in the direction of arrow
3
.
›
Remove the key in the direction of the arrow
4
.
›
Turn the socket with the bulb to the stop in the direction of the arrow
5
.
›
Remove the socket with the bulb in the direction of arrow
6
.
›
Insert the new bulb into the headlight and turn counter to the direction of
arrow
5
as far as the stop.
›
Attach the connector.
Refit the headlight and grille›Replace the fog light by inserting it in the opposite direction of the arrow 2
» Fig. 366 and tighten.
›
Insert the guard and push it gently until it locks into place.
Removing/installing tail light
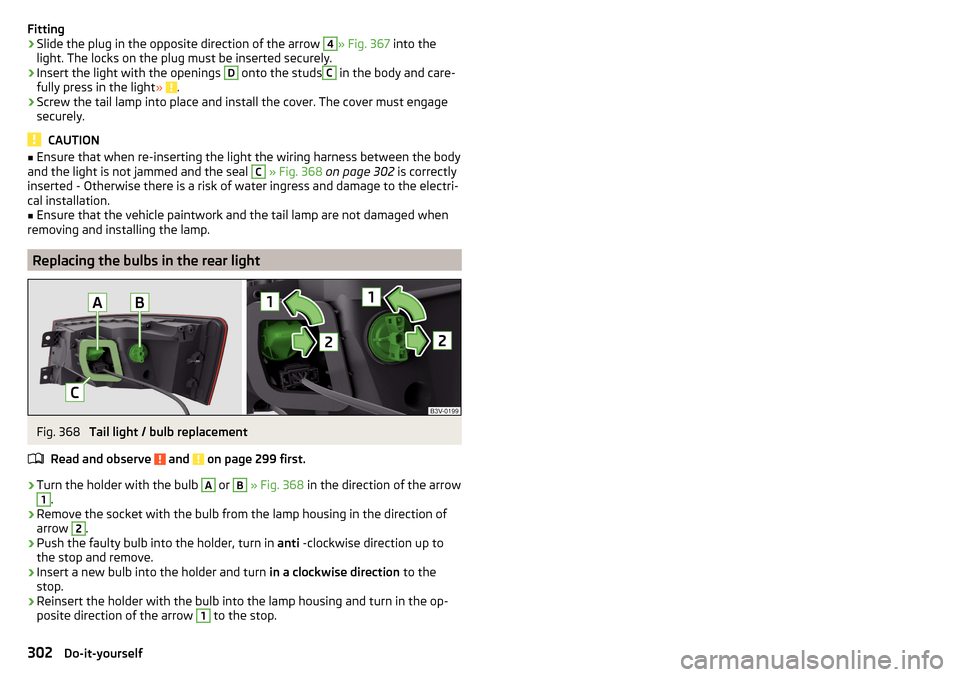
Fig. 367
Removing light / pulling out connector
Read and observe
and on page 299 first.
Removing
›
Open the boot lid.
›
Insert the clamps for removing the full wheel trims into opening
A
» Fig. 367 .
›
Remove the cover by pulling the hook in the direction of arrow
1
.
›
Unscrew the screws
B
using the screwdriver from the tool kit.
›
Hold the light and carefully remove in the direction of arrow
2
.
›
Press the latches on the connector in the direction of arrow
3
.
›
Carefully remove the connector from the lamp assembly in the direction of
the arrow
4
.
301Fuses and light bulbs
Page 304 of 336

Fitting›Slide the plug in the opposite direction of the arrow 4» Fig. 367 into the
light. The locks on the plug must be inserted securely.›
Insert the light with the openings
D
onto the studs
C
in the body and care-
fully press in the light » .
›
Screw the tail lamp into place and install the cover. The cover must engage
securely.
CAUTION
■ Ensure that when re-inserting the light the wiring harness between the body
and the light is not jammed and the seal C » Fig. 368 on page 302 is correctly
inserted - Otherwise there is a risk of water ingress and damage to the electri-
cal installation.■
Ensure that the vehicle paintwork and the tail lamp are not damaged when
removing and installing the lamp.
Replacing the bulbs in the rear light
Fig. 368
Tail light / bulb replacement
Read and observe
and on page 299 first.
›
Turn the holder with the bulb
A
or
B
» Fig. 368 in the direction of the arrow
1
.
›
Remove the socket with the bulb from the lamp housing in the direction of
arrow
2
.
›
Push the faulty bulb into the holder, turn in anti -clockwise direction up to
the stop and remove.
›
Insert a new bulb into the holder and turn in a clockwise direction to the
stop.
›
Reinsert the holder with the bulb into the lamp housing and turn in the op-
posite direction of the arrow
1
to the stop.
302Do-it-yourself