boot SKODA YETI 2010 1.G / 5L User Guide
[x] Cancel search | Manufacturer: SKODA, Model Year: 2010, Model line: YETI, Model: SKODA YETI 2010 1.G / 5LPages: 271, PDF Size: 14.71 MB
Page 47 of 271
Unlocking and locking
46
How is the alarm system activated?
The anti-theft alarm system is activated automatically when the vehi cle is locked with
the key on the driver's door or by using th e radio remote control. It is activated 30
seconds after locking the door.
How is the alarm system deactivated?
The anti-theft alarm system is deactivated if the vehicle is unlocked by only using the
radio remote control. The anti-theft alarm system is reactivated if the vehicle is not
opened within 30 seconds after transmitting the radio signal.
Once you unlock the vehicle by inserting the ke y into the driver door you then have to
insert the key into the ignition lock and switch the ignition on within 15 seconds after
opening the door in order to deactiva te the anti-theft alarm system. The alarm will be
triggered if you do not switch on the ignition within 15 seconds.
When is the alarm triggered?
The following security areas of the locked vehicle are monitored:
Bonnet,
Boot lid,
Doors,
Ignition lock,
Angle of the vehicle* page 46,
Vehicle interior* page 46,
A drop in voltage of the on-board power supply,
Socket of the factory-fitted towing device*.
An alarm is immediately triggered if either of the two battery terminals is disconnected
while the anti-theft alarm system is activated.
How is the alarm switched off?
You switch the alarm off if you unlock the vehi cle with the radio remote control or if you
switch the ignition on.Note
The working life of the alarm siren is 6 years. More detailed information is available
by a specialist garage.
Before leaving the car, check that all the doors, windows and the electric
sliding/tilting roof* are properly closed in order to ensure that the anti-theft alarm
system is fully operational.
Coding of the radio remote control and the receiver unit precludes the use of the
radio remote control from other vehicles.
Interior monitor* and Towing protection monitoring*
Switch off the interior monitor and towing protection monitoring– Switch off the ignition.
– Open the driver door.
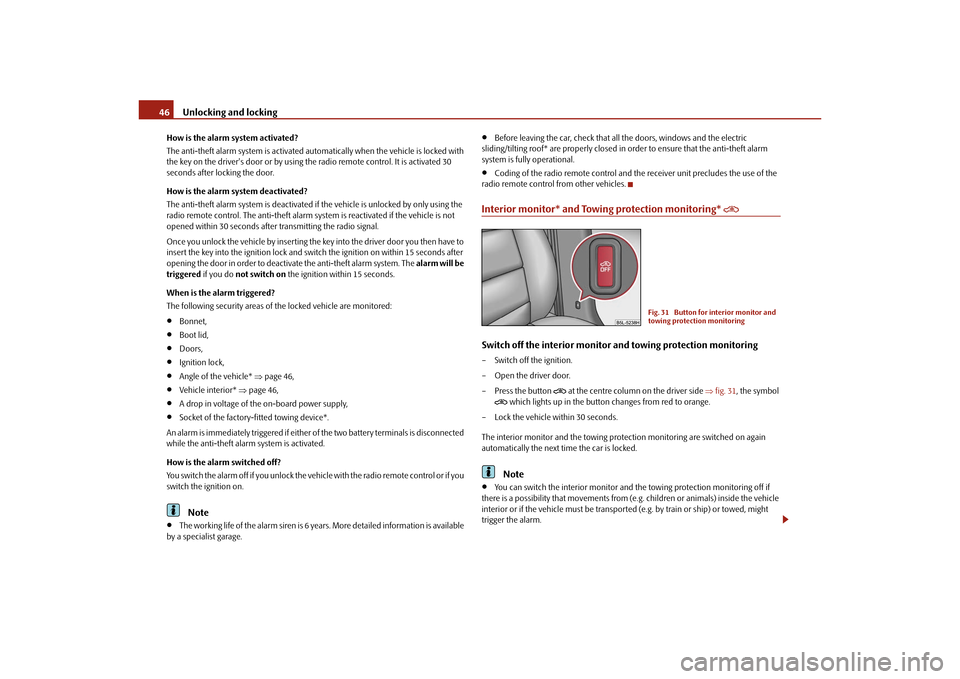
–Press the button
at the centre column on the driver side fig. 31 , the symbol
which lights up in the button changes from red to orange.
– Lock the vehicle within 30 seconds.
The interior monitor and the towing protec tion monitoring are switched on again
automatically the next ti me the car is locked.Note
You can switch the interior monitor and the towing protection monitoring off if
there is a possibility that movements from (e.g. children or animals) inside the vehicle
interior or if the vehicle must be transported (e.g. by train or ship) or towed, might
trigger the alarm.
Fig. 31 Button for interior monitor and
towing protection monitoring
s2ug.6.book Page 46 Friday, April 9, 2010 2:24 PM
Page 56 of 271
Lights and Visibility55
Using the system
Safety
Driving Tips
General Maintenance
Breakdown assistance
Technical Data
example rain or snow. For these conditions we recommend to switch on the low
beam
!
Note
Do not affix any stickers in front of the light sensor, so that you do not impair its
function or put it out of operation.
The same principles as for using the automa tic light control also apply to the light
which is switched on manually page 53.
Cornering lights*The cornering lights are used to illuminate the curves by means of the cone of light
swiveling together with the front headlight with Xenon lights*. This function is active
when the speed of the car increases to more than 10km/h.
The swiveling function of the headlights ca n be switched off / on via the menu point
Assistants in the main menu of the information display* page 24.
WARNING
If the cornering ligh ts are defective, the headlights are automatically lowered to
the emergency position, which prevents a possible dazzling of oncoming traffic.
Thus the illuminated length of the road is shortened. Drive carefully and have
the car inspected immediatel y by a specialist garage.Coming Home FunctionThe function makes it possible to switch on the lights in the darkness for a short time
after leaving the vehicle.Switching on Coming Home Function– The light switch is in the position automatic driving lamp control
and the low
beam illuminates.
– Switch off the ignition. – After opening the driver's door, the function Coming Home is switched on.
– Close all the doors and the boot lid and lo
ck the vehicle. After a short time, switch
all lights off.
Depending on equipment fitted the function Coming Home switches on the following
lights:
Parking lights,
Low beam,
Entry lighting in the exterior mirrors,
Licence plate light.
Coming Home Function
The lights go out 10 seconds after closing all the doors and the boot lid.
If a door or the boot lid re mains open, the lights go out 60 seconds after switching off
the ignition.
On vehicles fitted with automatic driving la mp control you can also switch the light
switch in the position
. The function Coming Home is controlled with the light
sensor in the mount of the interior rear mirror. If the light intensity is higher than the
set value of the light sensor, the Coming Home Function is not switched on after
switching off the ignition.
Note
If the Coming Home Function is switched on constantly, the battery will be heavily
discharged particularly in short-haul traffic.
The switching on of the described lights should only be undertaken in accordance
with the legal requirements.
You can change the illumination period for the Coming Home Function by means
of the information display*.
Leaving Home FunctionThis function makes it possible to switch on the lights when approaching the vehicle.
WARNING (continued)
s2ug.6.book Page 55 Friday, April 9, 2010 2:24 PM
Page 62 of 271
Lights and Visibility61
Using the system
Safety
Driving Tips
General Maintenance
Breakdown assistance
Technical Data
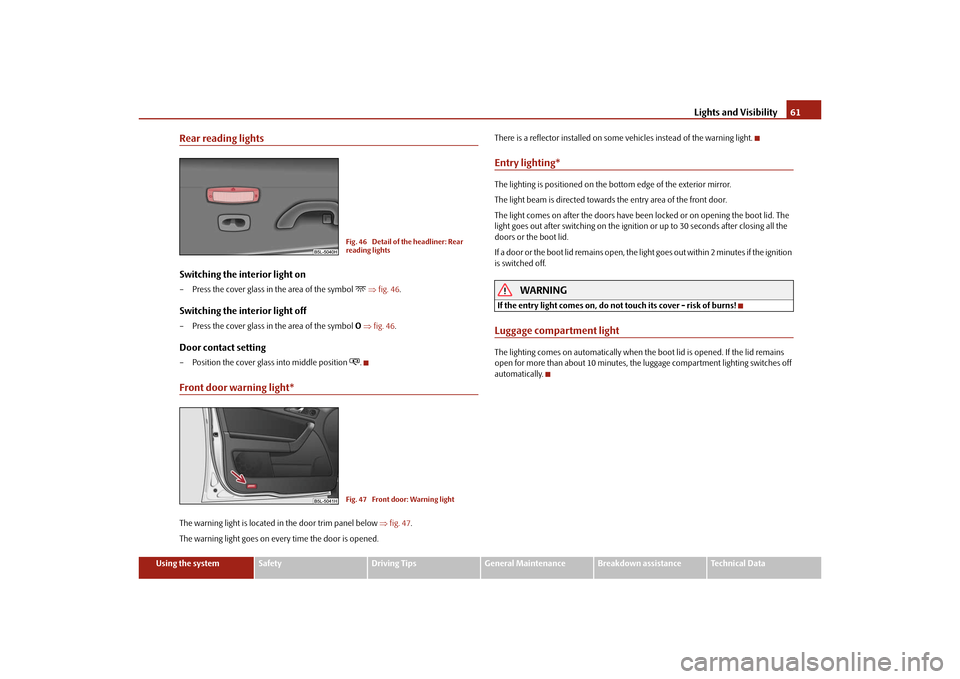
Rear reading lightsSwitching the interior light on– Press the cover glass in the area of the symbol
fig. 46 .
Switching the interior light off– Press the cover glass in the area of the symbol O fig. 46 .Door contact setting– Position the cover glass into middle position
.
Front door warning light*The warning light is located in the door trim panel below fig. 47 .
The warning light goes on every time the door is opened. There is a reflector installed on some vehicles instead of the warning light.
Entry lighting*The lighting is positioned on the bottom edge of the exterior mirror.
The light beam is directed towards
the entry area of the front door.
The light comes on after the doors have been locked or on opening the boot lid. The
light goes out after switching on the ignition or up to 30 seconds after closing all the
doors or the boot lid.
If a door or the boot lid remains open, the light goes out within 2 minutes if the ignition
is switched off.
WARNING
If the entry light comes on, do not touch its cover - risk of burns!Luggage compartment lightThe lighting comes on automatically when th e boot lid is opened. If the lid remains
open for more than about 10 minutes, the luggage compartment lighting switches off
automatically.
Fig. 46 Detail of the headliner: Rear
reading lightsFig. 47 Front door: Warning light
s2ug.6.book Page 61 Friday, April 9, 2010 2:24 PM
Page 65 of 271
Lights and Visibility
64
The windscreen wipers and the wash system only operate if the ignition is switched on
and the bonnet is closed
9).
The rear window wiper operates only if the boot lid is closed.
If the intermittent wipe is switched on, the intervals are also controlled depending on
speed.
The rain sensor* automatically regulates the break between the individual wiper
strokes depending on the intensity of the rain.
The rear window will be wiped again if the front window wipers are on when reverse
gear is selected.
The windscreen washer nozzles are heated* when the ignition is switched on.
Top up with wash liquid page 214.
Winter position
If the windscreen wipers are in rest positi on, they cannot be folded out from the wind-
screen. For this reason we recommend adjusting the windscreen wipers in winter so
that they can be folded out from the windscreen easily. You can set this rest position as
follows:
Switch on the windscreen wipers.
Switch off the ignition. The windscreen wipers remain in the position in which they
were when switching off the ignition.
You can also use the service position page 65 as a winter position.
WARNING
Properly maintained wind screen wiper blades are essential for clear visi-
bility and safe driving page 65.
Do not use the windscreen washer sy stem at low temperatures, without
heating the windscreen beforehand. Otherwise the window cleaner could
freeze on the windscreen and re strict the view to the front.
The rain sensor only operates as a su pport. The driver is not released from
the responsibility to set the function of the windscreen wipers manually
depending on the visibility conditions.Caution
In frosty weather, please firs t of all check whether the windscreen wiper blades are not
frozen to the windscreen before switching them on. Switching on windscreen wipers
when the blades are frozen to the windscreen may result in damage both to the blades
and the motor of the windscreen wipers!
Note
If the slower page 63, fig. 50 or the faster wiper setting is switched on and
the vehicle speed decreases to below 4 km/h, the lower wiper step is switched on
automatically. At a speed increase of more than 8 km/h the previous wiper setting is
established again.
If there is an obstacle on the windscre en, the wiper will try to push away the
obstacle. If the obstacle continues to bloc k the wiper, the wiper stops automatically
after 5 attempts to eliminate the obstacle, in order to avoid a damage to the wiper.
Remove the obstacle and and switch on the wiper again.
The content of the windscreen wiper reserv oir is 3 litres. On vehicles which are
equipped with a headlight cleani ng system*, the content of the reservoir is 5.5 litres.
On vehicles fitted with auxiliary heating, the content of the windscreen wiper reservoir
is 4.5 litres.
Automatic rear window wiper*If the windshield wiper lever is in the posi tion or , the rear window wiper carries
out a wiping process every 30 seconds or 10 seconds at a speed above 5 km/h.
When the rain sensor* is active (the lever is in the position ) the function is only
active if the front window wipers continue to operate (no break between each wiping
process).
9)On vehicles which do not have a contact switch for the bonnet, the windshield wiper and wash
system operates also when the bonnet is opened.
WARNING (continued)
A2
A3
A2
A3
A1
s2ug.6.book Page 64 Friday, April 9, 2010 2:24 PM
Page 79 of 271
Seats and Stowage
78
Do not place any footmats or other additional floor coverings in the area of
the pedals in order to ensure that all the pedals can be fully depressed and are
able to return unobstructed to their initial position - risk of accident!
There must be no objects on the floor which could roll under the pedals. You
would then no longer be able to apply the brakes, operate the clutch or acceler-
ator - risk of accident!
luggage compartmentLoading the luggage compartmentPlease observe the following in the interest of having good handling characteristics of
your vehicle:
– Distribute the items of luggage as evenly as possible.
– Place heavy objects as far forward as possible.
– Attach the items of luggage to the lashing eyes or the fixing net* page 79.
In the event of an accident, there is such a high kinetic energy which is produced by
small and light objects that they can cause se vere injuries. The magnitude of the kinetic
energy depends on the speed at which the vehi cle is travelling and on the weight of the
object. The speed at which the vehicle is travelling is in this case the more significant
factor.
Example: In the event of a frontal collision at a speed of 50 km/h, an unsecured object
with a weight of 4.5 kg produces an ener gy, which corresponds to 20 times its own
weight. This means that it results in a weight of approx. 90 kg. You can imagine the inju-
ries that can occur, if this “bullet” is fl ying through the interior compartment and hits
an occupant.
WARNING
Store the objects in the luggage compartment and attach them to the
lashing eyes, e.g. with the fixing nets.
Loose objects in the passenger compartment can be thrown forward during
a sudden manoeuvre or in case of an a ccident and can injure the occupants or
other oncoming traffic. This risk is still increased, if the objects which are flying
around are hit by a deployed airbag. In this case, the objects which are thrown
back can injure the occupants - hazard.
Please note that the handling properti es of your vehicle may be affected
when transporting heavy objects as a result of the displacement of the centre of
gravity. The speed and style of driv ing must be adjusted accordingly.
The items carried in the luggage compartment should be stowed in such a
way that no objects are able to slip forward if there are any sudden driving or
braking manoeuvres undertaken - risk of injury!
Never drive with the boot lid fully opened or slightly ajar otherwise exhaust
gases may get into the interior of the vehicle - risk of poisoning!
On no account exceed the permissible axle loads and the permissible gross
weight of the vehicle - risk of accident!
Never transport occupants in the luggage compartment!Note
Tyre pressure must be adjusted to the load page 216.Vehicles of category N1On vehicles of the category N1, which are not fitted with a protective grille, a lashing
set which complies with the standard EN 12195 (1 - 4) must be used for fastening the
load.
WARNING (continued)
WARNING (continued)
s2ug.6.book Page 78 Friday, April 9, 2010 2:24 PM
Page 82 of 271
Seats and Stowage81
Using the system
Safety
Driving Tips
General Maintenance
Breakdown assistance
Technical Data
– Pull the luggage compartment cover out of the holders to the rear or press on
the bottom side of the luggage compartment cover in the front area.
– Fold the slackened front part of the luggage compartment cover over the head restraints of the rear seats.
– Slightly tilt the luggage compartment cover and remove it to the rear.
– Install again by pushing the luggage compartment cover forwards into the holder and hanging the support straps on the boot lid.
You can stow the removed luggage compartment cover behind the rear seat backrest.
WARNING
No objects should be placed on the luggage compartment cover, the vehicle
occupants could be endangered if th ere is sudden braking or the vehicle
collides with something.
Caution
Please ensure that the heating elements of the rear window heater are not damaged
as a result of objects placed in this area.
Note
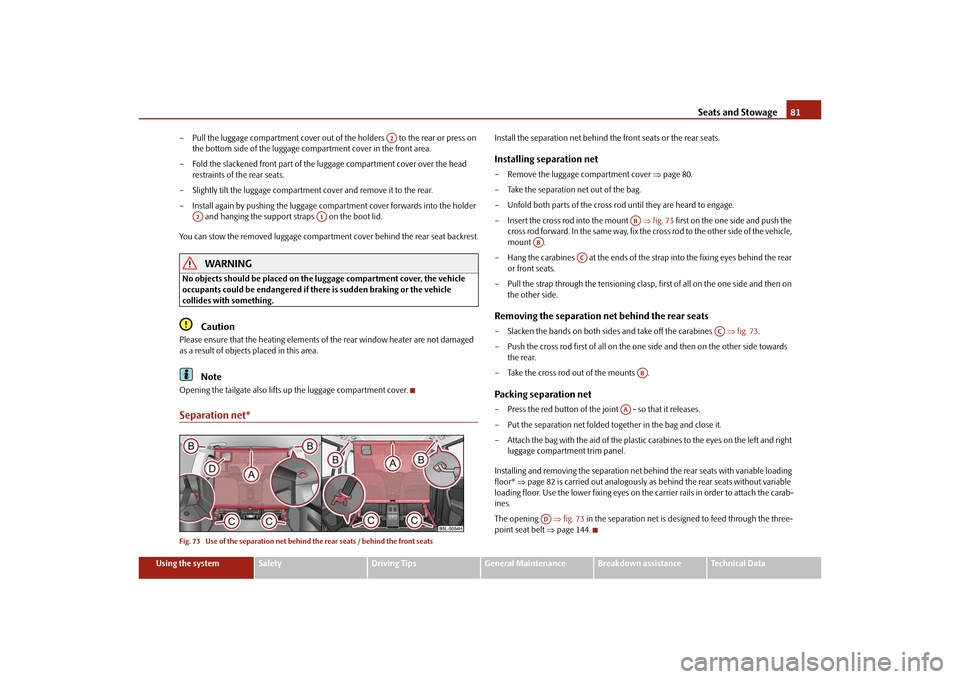
Opening the tailgate also lifts up the luggage compartment cover.Separation net*Fig. 73 Use of the separation net behind the rear seats / behind the front seats
Install the separation net behind the front seats or the rear seats.Installing separation net– Remove the luggage compartment cover page 80.
– Take the separation net out of the bag.
– Unfold both parts of the cross rod until they are heard to engage.
– Insert the cross rod into the mount fig. 73 first on the one side and push the
cross rod forward. In the same way, fix the cross rod to the other side of the vehicle,
mount .
– Hang the carabines at the ends of the strap into the fixing eyes behind the rear or front seats.
– Pull the strap through the tensioning clasp, first of all on the one side and then on the other side.Removing the separation net behind the rear seats– Slacken the bands on both side s and take off the carabines fig. 73 .
– Push the cross rod first of all on the one side and then on the other side towards the rear.
– Take the cross rod out of the mounts .Packing separation net– Press the red button of the joint - so that it releases.
– Put the separation net folded together in the bag and close it.
– Attach the bag with the aid of the plastic ca rabines to the eyes on the left and right
luggage compartment trim panel.
Installing and removing the separation net be hind the rear seats with variable loading
floor* page 82 is carried out analogously as behind the rear seats without variable
loading floor. Use the lower fixing eyes on th e carrier rails in order to attach the carab-
ines.
The opening fig. 73 in the separation net is designed to feed through the three-
point seat belt page 144.
A2
A2
A1
AB
AB
AC
AC
AB
AA
AD
s2ug.6.book Page 81 Friday, April 9, 2010 2:24 PM
Page 85 of 271
Seats and Stowage
84
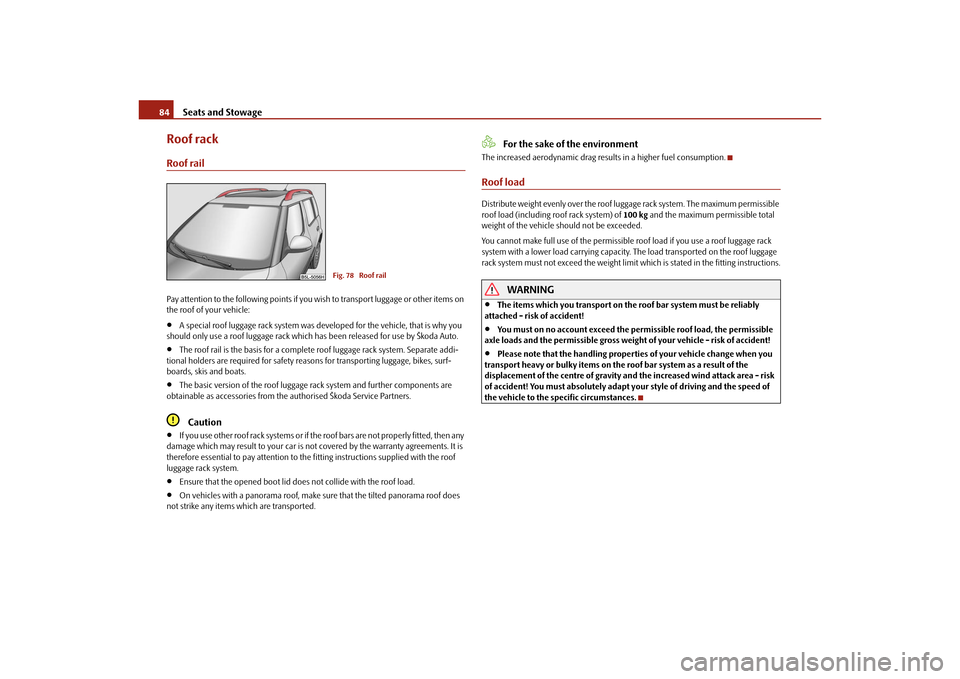
Roof rackRoof railPay attention to the following points if you wish to transport luggage or other items on
the roof of your vehicle:
A special roof luggage rack system was de veloped for the vehicle, that is why you
should only use a roof luggage rack which has been released for use by Škoda Auto.
The roof rail is the basis for a complete roof luggage rack system. Separate addi-
tional holders are required for safety reasons for transporting luggage, bikes, surf-
boards, skis and boats.
The basic version of the roof luggage ra ck system and further components are
obtainable as accessories from the authorised Škoda Service Partners.Caution
If you use other roof rack systems or if the roof bars are not properly fitted, then any
damage which may result to your car is no t covered by the warranty agreements. It is
therefore essential to pay attention to the fitting instructions supplied with the roof
luggage rack system.
Ensure that the opened boot lid does not collide with the roof load.
On vehicles with a panorama roof, make su re that the tilted panorama roof does
not strike any items which are transported.
For the sake of the environment
The increased aerodynamic drag resu lts in a higher fuel consumption.Roof loadDistribute weight evenly over the roof lu ggage rack system. The maximum permissible
roof load (including roof rack system) of 100 kg and the maximum permissible total
weight of the vehicle should not be exceeded.
You cannot make full use of th e permissible roof load if you use a roof luggage rack
system with a lower load carr ying capacity. The load transported on the roof luggage
rack system must not exceed the weight limit which is stated in the fitting instructions.
WARNING
The items which you transport on the roof bar system must be reliably
attached - risk of accident!
You must on no account exceed the pe rmissible roof load, the permissible
axle loads and the permissible gross weight of your vehicle - risk of accident!
Please note that the handling proper ties of your vehicle change when you
transport heavy or bulky items on the roof bar system as a result of the
displacement of the centre of gravity an d the increased wind attack area - risk
of accident! You must absolutely adapt your style of driving and the speed of
the vehicle to the specific circumstances.
Fig. 78 Roof rail
s2ug.6.book Page 84 Friday, April 9, 2010 2:24 PM
Page 95 of 271
Seats and Stowage
94
Removeable through-loading bag*The removeable through-loading bag is solely used for transporting
skis.Loading– Open a rear side door of the vehicle.
– Fold the backrest of the middle seat forwards page 74.
– Place the empty removeable through-load ing bag in the gap between the front and
rear seats in such a way that the end of the bag with the zip lies in the luggage
compartment.
– Open the boot lid.
– Push the skis into the removeable through-loading bag from the luggage compart- ment .
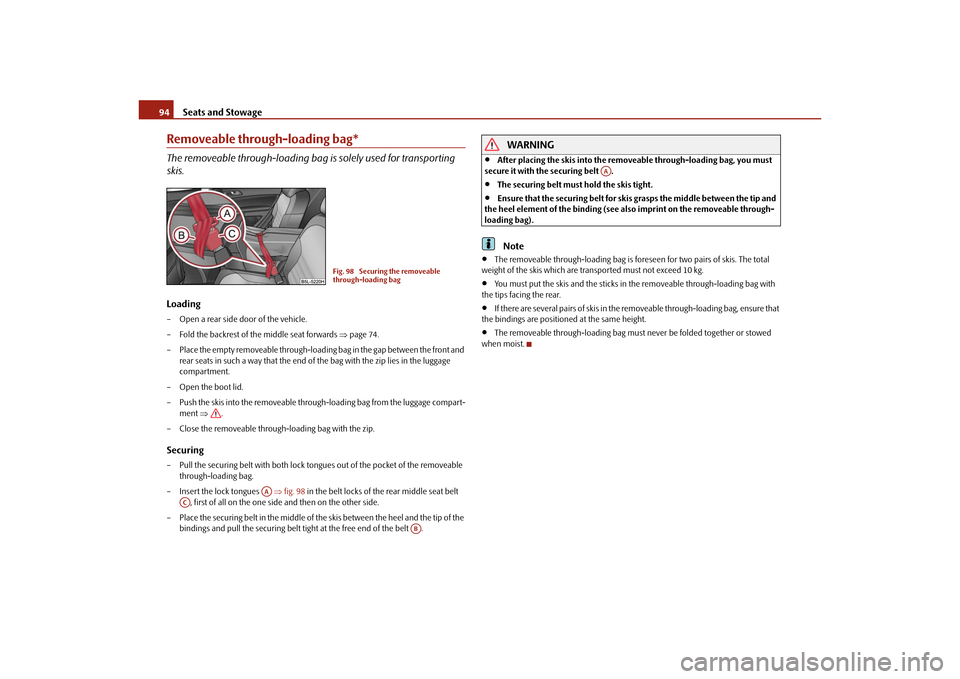
– Close the removeable through-loading bag with the zip.Securing– Pull the securing belt with both lock to ngues out of the pocket of the removeable
through-loading bag.
– Insert the lock tongues fig. 98 in the belt locks of the rear middle seat belt
, first of all on the one side and then on the other side.
– Place the securing belt in the middle of the skis between the heel and the tip of the
bindings and pull the secu ring belt tight at the free end of the belt .
WARNING
After placing the skis into the remove able through-loading bag, you must
secure it with the securing belt .
The securing belt must hold the skis tight.
Ensure that the securing belt for skis grasps the middle between the tip and
the heel element of the bi nding (see also imprint on the removeable through-
loading bag).Note
The removeable through-loading bag is foreseen for two pairs of skis. The total
weight of the skis which are transported must not exceed 10 kg.
You must put the skis and the sticks in the removeable through-loading bag with
the tips facing the rear.
If there are several pairs of skis in the removeable through-loading bag, ensure that
the bindings are positioned at the same height.
The removeable through-loading bag must never be folded together or stowed
when moist.
Fig. 98 Securing the removeable
through-loading bag
AA
AC
AB
AA
s2ug.6.book Page 94 Friday, April 9, 2010 2:24 PM
Page 183 of 271
Driving and the Environment
182
Embankment angle (front and rear)
Transition from the horizontal plane to an upward slope or from a downward slope
back to the plane. The angle indication determines the angle at which you can drive the
vehicle down the embankment, at a slow speed, without the bumper or the under-
body of the vehicle touching the ground.
Slope angle
The difference of altitude (upward slope) which is overcome on a stretch of road of 100
m, is indicated in percentage or degrees, i. e the gradiant at which the vehicle can climb
a hill on its own (among other things, depe nding on the road surface and the engine
power).
Ground clearance
The distance between the road surface and the deepest point of the vehicle under-
body.
Ramp angle
The angle indication determines the angle at which you can drive the vehicle over a
ramp, at a slow speed, without the underbody of the vehicle touching the ramp edge.
WARNING
When exceeding the maximum value given in the table page 245, “Angle (in
degree)”, this can result in serious inju ries and/or vehicle damage. All of the
data was determined on flat, firm and no n-slip road surfaces as well as under
dry weather conditions. There are no id eal off-road conditions. Therefore,
never completely go according to the maximum values, but always leave a
safety margin.Useful utensilsMany items can be very useful wh en driving off-road, for example:
compass and maps,
torch and spare batteries,
mobile phone or CB radio,
tow bar or tow rope with sufficient tear strength,
electrically driven tyre pump for connect ing to the 12-volt power outlet of the
vehicle,
a blanket and rubber boots,
snow chains,
a timber plank which is approximately 4 cm thick and about 1 metre long can be
used as a traction aid when the vehicle is stuck or as a base for the lifting jack,
additional tools and a folding yardstick or a measuring tape,
spare wheel and tyre repair kit,
shovel.
Safe off-road drivingAdopt a correct seated position and always fa sten the seat belt correctly. Make sure
that your front passenger and your passengers seated on the rear seats always fasten
their seat belts correctly.
When driving off-road, it is perhaps more useful to adopt a slightly different seated
position. Depending on the terrain, an incr eased force may be required to turn the
steering wheel because the force is transferred from the front wheels to the steering
wheel. You must be seated in such a way that you have good front visibility, especially
when driving uphill or downhill. You must never be seated in such a way that the
distance between your chest and the midd le of the airbag cover is less than 25 cm
page 148.
Under no circumstances must you drive off-ro ad with high heels, slippery or open
shoes. You should wear shoes which fit your feet well and allow you to get a feel for the
pedals.
WARNING
Observe the important guidelines page 179.Before driving off-road
Make sure the tyres are suitable for the pl anned off-road journey. Be fore you dri ve
through difficult terrain, equip yo ur vehicle with off-road tyres.
AA
AB
AC
AD
s2ug.6.book Page 182 Friday, April 9, 2010 2:24 PM
Page 197 of 271
Taking care of your vehicle and cleaning the vehicle
196
Do not use window leathers which you have us ed to polish the vehicle body to dry off
the windows. Residues of preservatives in the window leather can dirty the window
and reduce visibility.
Do not affix any stickers over the inside of the rear window to avoid damage to the
heating elements of the rear window heater .
We recommend using a preserva tive from Škoda genuine accessories offered by your
Škoda dealer.
Caution
Never remove snow or ice from the glass parts with warm or hot water - risk of forma-
tion of cracks in the glass!The headlight lensesPlease do not use any aggressi ve cleaning or chemical solvent products for cleaning
the front headlights - risk of damage to the plastic lenses. Please use soap and clean
warm water.
Caution
Never wipe the headlights dry and do not use any sharp objects for cleaning the plastic
lenses, this may result in damage to the protective paintwork and consequently in
formation of cracks on the headlight lenses, e.g through effect of chemical products.Door and window sealsThe rubber seals on the doors, boot lid, bonnet and windows remain supple and last
longer if you treat them from time to time with a rubber care product (e.g. with a spray
with silicone-free oil). You also avoid premature wear of the seals and prevent leakages
in this way. It is also easier to open the doors. Rubber seals which are well cared for also
do not stick together in cold winter weather.Locking cylinderWe recommend that you use the spray from Škoda original accessories with regreasing
and anticorrosive effect for de-icing locking cylinders.
Note
When washing your vehicle, ensure that as little water as possible gets into the locking
cylinders.WheelsSteel wheels
You should also thoroughly wash the wheels and wheel trims when giving your vehicle
its regular wash. This prevents any brake dust, dirt and road salt from sticking to the
wheel hubs. You can remove stubborn brake abrasion adhering to the wheels with an
industrial cleaner. Touch up any damage to the paintwork on the wheels before rust is
able to form.
Light alloy wheels
Regular care of light alloy wh eels is necessary in order to retain their decorative
appearance over long periods. It is particul arly important to remove regularly any road
salt and brake abrasion from light alloy wheels, otherwise the light metal will suffer.
Wash thoroughly and then treat the wheels with a protective product for light alloy
wheels which does not cont ain any acidic components. We recommend to apply a
hard wax layer onto the wheel hubs every three months. You must not use any prod-
ucts which cause abrasion when treating the wheel hubs. Any damage to the paint
layer on the wheel hubs must be touched up immediately.
We recommend using a preservative from Šk oda genuine accessories offered by your
Škoda dealer.
WARNING
One should remember when cleaning th e wheels that moisture, ice and road
salt may adversely affect braking ef ficiency - risk of an accident!
Note
Severe layers of dirt on the wheels can also result in wheel imbalance. This may show
itself in the form of a wheel vibration which is transmitted to the steering wheel which,
in certain circumstances, can cause premature wear of the steering. This means it is
necessary to remove the dirt.
s2ug.6.book Page 196 Friday, April 9, 2010 2:24 PM