warning lights SKODA YETI 2013 1.G / 5L Service Manual
[x] Cancel search | Manufacturer: SKODA, Model Year: 2013, Model line: YETI, Model: SKODA YETI 2013 1.G / 5LPages: 266, PDF Size: 26.71 MB
Page 139 of 266

Assist systems
Brake assist systems
Introduction
This chapter contains information on the following subjects:
Electronic Stability Control (ESC)
136
Antilock brake system (ABS)
137
Traction Control System (TCS)
137
Electronic Differential Lock (EDL)
137
Driver Steering Recommendation (DSR)
137
Hydraulic Brake Assist (HBA)
137
Hill Hold Control (HHC)
138WARNING■ A lack of fuel can cause irregular engine running or cause the engine to shut
down. The brake assist systems would then fail to function – risk of accident!■
Adjust the speed and driving style to the current visibility, weather, road and
traffic conditions. The increased safety provided by the brake assist systems
must not tempt you to take safety risks – risk of accident!
■
In the event of an ABS fault, visit a specialist garage immediately. Adjust
your style of driving according to the damage to the ABS, as you will not know
the exact extent of the damage or the extent to which this is limiting the
braking efficiency.
CAUTION
■ All four wheels must be fitted with the same tyres approved by the manufactur-
er to ensure the brake assist systems operate correctly.■
Changes to the vehicle (e.g. to the engine, brakes, chassis) can influence the
functionality of the brake assist systems » page 184, Service work, adjustments
and technical alterations .
■
If a fault occurs in the ABS system, the ESC, ASR and EDL will also not work. An
ABS fault is indicated by the warning light » page 19 .
Electronic Stability Control (ESC)Fig. 116
ESC system: TCS button
First read and observe the introductory information and safety warn-
ings on page 136.
The ESC system helps improve control of the vehicle in situations where it is be-
ing operated at its dynamic limits, such as a sudden change to the direction of
travel. The risk of skidding is reduced and your car thus offers greater driving sta-
bility depending on the conditions of the road surface.
The ESC system is automatically activated each time the ignition is switched on.The direction which the driver wishes to take is determined based on the steering angle and the speed of the vehicle and is constantly compared with the actual
behaviour of the vehicle. In the event of deviations, such as the car beginning to
skid, the ESC system will automatically brake the appropriate wheel.
During an intervention of the system, the indicator light
flashes in the instru-
ment cluster.
The following systems are integrated into the Electronic Stability Control (ESC).
› Antilock Brake System (ABS)
» page 137.
› Traction control (TCS)
» page 137.
› Electronic Differential Lock (EDL)
» page 137.
› Driver Steering Recommendation (DSR)
» page 137.
› Hydraulic Brake Assist (HBA)
» page 137.
› Hill Hold Control (HHC)
» page 138.
› Trailer stabilisation (TSA)
» page 158.
The ESC system cannot be deactivated. The
» Fig. 116 symbol button can only
be used to deactivate the ASR.
The warning light lights up in the instrument cluster when the TCR is deactiva-
ted.
136Driving
Page 140 of 266
Antilock brake system (ABS)First read and observe the introductory information and safety warn-
ings
on page 136.
ABS prevents the wheels locking when braking. Thus helping the driver to main- tain control of the vehicle.
The intervention of the ABS is noticeable from the pulsating movements of the
brake pedal which is accompanied by noises.
When the ABS system is active, do not brake periodically or reduce the pressure on the brake pedal.
Traction Control System (TCS)
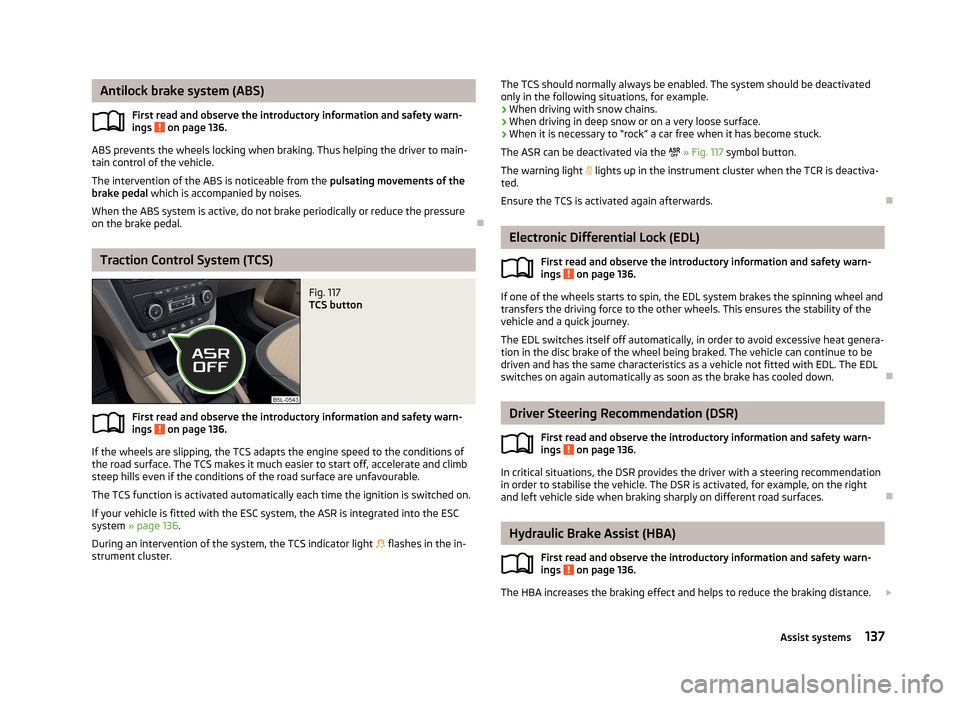
Fig. 117
TCS button
First read and observe the introductory information and safety warn- ings on page 136.
If the wheels are slipping, the TCS adapts the engine speed to the conditions ofthe road surface. The TCS makes it much easier to start off, accelerate and climb
steep hills even if the conditions of the road surface are unfavourable.
The TCS function is activated automatically each time the ignition is switched on.
If your vehicle is fitted with the ESC system, the ASR is integrated into the ESC
system » page 136 .
During an intervention of the system, the TCS indicator light flashes in the in-
strument cluster.
The TCS should normally always be enabled. The system should be deactivated
only in the following situations, for example.
› When driving with snow chains.
› When driving in deep snow or on a very loose surface.
› When it is necessary to “rock” a car free when it has become stuck.
The ASR can be deactivated via the
» Fig. 117 symbol button.
The warning light lights up in the instrument cluster when the TCR is deactiva-
ted.
Ensure the TCS is activated again afterwards.
Electronic Differential Lock (EDL)
First read and observe the introductory information and safety warn-
ings
on page 136.
If one of the wheels starts to spin, the EDL system brakes the spinning wheel and transfers the driving force to the other wheels. This ensures the stability of the
vehicle and a quick journey.
The EDL switches itself off automatically, in order to avoid excessive heat genera-
tion in the disc brake of the wheel being braked. The vehicle can continue to be
driven and has the same characteristics as a vehicle not fitted with EDL. The EDL switches on again automatically as soon as the brake has cooled down.
Driver Steering Recommendation (DSR)
First read and observe the introductory information and safety warn-ings
on page 136.
In critical situations, the DSR provides the driver with a steering recommendationin order to stabilise the vehicle. The DSR is activated, for example, on the right
and left vehicle side when braking sharply on different road surfaces.
Hydraulic Brake Assist (HBA)
First read and observe the introductory information and safety warn-ings
on page 136.
The HBA increases the braking effect and helps to reduce the braking distance.
137Assist systems
Page 142 of 266
The intervention of the wizard is cancelled when you press the pedal and re-
sumed after the pedal is released again.
The hill descent assistant is automatically engaged under the following condi-tions.
The OFF ROAD mode is switched on and the warning light lights up in the
instrument cluster.
The vehicle engine is running and either the 1st, 2nd or 3rd gear, reverse gear
or no gear is engaged and the selector lever is in position R, N, D, S or Tip- tronic.
The downhill gradient is at least 10 % (when driving over sleepers, the limit can briefly drop to 8 %).
Neither the accelerator nor the brake pedal is operated.
It is however a requirement that the vehicle has sufficient grip on the soil. The Downhill Drive Support cannot properly fulfil its function on slushy soil due to
physical reasons (e.g. ice or mud).
For vehicles with manual transmission, the speed is maintained as follows.
› 1st gear - approx. 8 1)
- 30 km/h
› 2nd gear - approx. 13 1)
- 30 km/h
› 3rd gear - approx. 22 1)
- 30 km/h
› Reverse gear - approx. 9 1)
- 30 km/h
› Neutral for driving forwards - as well as driving backwards - approx. 2 - 30 km/h
On vehicles with automatic transmission, the speed is maintained as follows.
› Position D, S, R or Tiptronic (for 1st, 2nd, 3rd gear - approx. 2 - 30 km/h
› Neutral for driving forwards - as well as reversing - approx. 2 - 30 km/h
Start-Off Assist
The assistant supports the driver when starting eg on a steep slope. When the
driver presses the accelerator, the maximum engine speed is electronically limited so that a gentle approach is possible.
The overspeed trip unit is automatically deactivated after terminating the start-
up procedure.
As part of the Assist System, the accelerator pedal is adapted in its characteristics for an easier start-off on slippery and loose soil.ABS OFF ROAD
The ABS OFF ROAD supports the driver when braking on an unpaved surface such
as gravel, snow, etc.
The system generated by a controlled locking of the wheels braked wheel before a “wedge” of piled material, which shortens the braking distance.
The system is only available, if the front wheels are in the straight-ahead posi-
tion.
The system operates at speeds of up to 50 km/h.
TCS OFF ROAD
The ASR OFF ROAD makes starting and driving on an unpaved surface easier as it partially allows wheel-spin.
EDL OFF ROAD
The EDS supports OFF ROAD vehicle traction when driving on a surface with dif- ferent grip under the drive wheels or when driving over bumps.
A spinning wheel or wheels are braked earlier and with more force than with the
intervention of the standard EDS system.
Note
■ During an active intervention of the Downhill Drive Support, the brake lights do
not light up.■
When disabled, ASR » Fig. 116 on page 136 the OFF ROAD mode works without
the support of the ASR OFF ROAD.
1)
The indicated values represent the average of the lower speed limits if a gear is engaged (depending
on the type of gearbox or engine).
139Assist systems
Page 146 of 266
The distance behind the vehicle is approximately 200 cm.
Detection range of the camera.
Area outside the detection range of the camera.
CAUTION
■ The orientation lines are immobile, and therefore the spacing of the bars behind
the vehicle will vary, depending on the vehicle load state and the road inclination.■
The orientation of strokes not for use at a distance estimation approach to the
above objects, such as a towing hitch and the rear of a truck, etc.
Switching on/off
First read and observe the introductory information and safety warn-
ings
on page 141.
Switching on
The system is activated automatically by engaging the reverse gear.
Switching off
The system is turned off when any of the following is present.
› The reverse gear is disengaged.
› The symbol key
is pressed.
› The speed of 15 km/h is exceeded.
› The ignition is switched off.
For cars without PDC (OPS), the system is turned off about 10 seconds after re- moving the reverse gear.
Note
In vehicles with front and rear parking aid sensors, parking assistance (OPS) is au-
tomatically displayed after disengaging the reverse gear.CDEPark assist
Introduction
This chapter contains information on the following subjects:
Finding a parking space
144
Parking
145
Manoeuvring out of a parallel parking space
146
Automatic brake assist
146
Information messages
146
The parking aid is part of the park assist system, therefore the information and
safety guidelines » page 140, Parking aid must be read and observed.
Park Assist (in the following referred to as the system) helps drivers park in suita- ble parallel and perpendicular parking places and also to manoeuvre out of paral-lel parking spaces.
The system only operates if the ignition is switched on. The displays, messages and system instructions are displayed in the MAXI DOTdisplay (in the display only below).
During the parking procedure the system only takes over the steering move- ments, the pedals continue to be operated by the driver.
When the system is activated, the warning light lights up
» Fig. 122 on
page 144 -
.
The traction control system (TCS) must always be switched on when parking.
Basis of the system function › The measurement and evaluation of the size of parking spaces when driving.
› The determination of the correct position of the vehicle for parking.
› The calculation of the line on which the vehicle drives backwards into the park-
ing space or forwards from the parking space.
› the automatic turning of the front wheels when parking in, or manoeuvring out
of the parking space.
143Assist systems
Page 152 of 266
Briefly push the rocker button B into the RES/+ position in order to resume the
stored speed after the clutch or brake pedal is released.
START-STOP
Introduction
This chapter contains information on the following subjects:
Starting/shutting down the engine
149
Operating conditions of the system
150
Manually activating/deactivating the system
150
Information messages
151
The START-STOP system helps you to save fuel while at the same time reducing
harmful exhaust emissions and CO 2 emissions.
The function is automatically activated each time the ignition is switched on. In the start-stop mode, the engine automatically switches to the vehicle's idle phase, e.g. when stopped at traffic lights. The engine restarts automatically
where necessary.
The system can work only if the following basic conditions are met. The driver's door is closed.
The driver has fastened the seat belt.
The bonnet is closed.The driving speed was higher than 4 km.h after the last stop.
No trailer is coupled.
WARNING■ The brake servo unit and power steering only operate if the engine is run-
ning.■
Never let the vehicle roll with the engine switched off.
CAUTION
Always deactivate the START-STOP system before driving through wa-
ter » page 134 .Note■
If the driver's seat belt is removed for more than approx. 30 seconds or the driv-
er's door is opened during stop mode on vehicles with manual transmission or au- tomatic transmission (when the selector lever in position P), the engine must be
started manually » page 120.■
After manually starting the engine on vehicles with manual transmission, auto-
matic engine shut down is not possible until the vehicle has travelled the re-
quired minimum distance for START-STOPP mode.
■
If, on vehicles with automatic transmission, the selector lever positions D, S or N
are selected after driving in reverse, the vehicle will first need to achieve a speed
of over 10 km/h before automatic engine shut down can take place again.
■
Changes to the outdoor temperature can have an effect on the internal temper-
ature of the vehicle battery even after several hours. If the vehicle remains out- doors for a long time in minus temperatures or in direct sunlight, it can take sev-
eral hours until the internal temperature of the vehicle battery reaches a suitable
temperature for proper operation of the START STOP system.
■
If the Climatronic is running in automatic mode, it is possible that under certain
conditions the engine may not switch off automatically.
Starting/shutting down the engine
First read and observe the introductory information and safety warn-ings
on page 149.
Vehicles with manual transmission
›
Stop the vehicle (where necessary, apply the handbrake).
›
Put the gear stick into Neutral.
›
Release the clutch pedal.
Automatic engine shut down (STOP phase) takes place. The warning symbol
appears in the instrument cluster display.
›
Depress the clutch pedal.
The automatic start procedure takes place again (START phase). The warning
symbol
goes out.
Vehicles with automatic transmission
›
Bring the vehicle to a stop and depress the brake pedal.
Automatic engine shut down takes place. The warning symbol
appears in the
instrument cluster display.
›
Release the brake pedal.
149Assist systems
Page 153 of 266
The automatic start procedure takes place again. The warning symbol goes
out.
Further information on automatic transmission Engine shut down takes place when the selector lever is in positions P, D , S and N
and in Tiptronic mode.
When the selector lever is in position P the engine remains shut down after you
release the brake pedal. Start the engine by pressing the gas pedal or by moving
the selector lever into a different mode and releasing the brake pedal.
If the selector lever is moved into position R during the STOP phase , the engine
will re-start.
No automatic engine shutdown takes place when the vehicle is moving at low
speed (e.g. during a traffic jam or when tuning) and remains stationary after pressing the brake pedal lightly. Automatic engine shutdown takes place if you
press the brake pedal down with more force.
Operating conditions of the system
First read and observe the introductory information and safety warn-ings
on page 149.
The START-STOP system is very complex. Some of the procedures are hard to check without servicing.
No engine shut down is carried out
Before each STOP phase, the system checks whether certain conditions have
been met. No engine shut down takes place in the following situations.
› The engine has not reached the minimum temperature for START STOP mode.
› The temperature inside the vehicle has not reached the desired temperature
set in the air-conditioning system/heating.
› The external temperature is very low/high.
› The intensive windscreen heater (Climatronic) or windscreen heater/ventilation
is switched on with the maximum air temperature setting (manual air condition-
ing system).
› The parking aid/Park Assist is switched on.
› The charge state of the vehicle battery is too low.
› The stationary vehicle is on a steep slope or a steep downhill section.
› The idling speed is too high.
› The steering angle is too large (manoeuvring).
› The selector lever position
R is selected (e.g. when parking).
The warning symbol appears in the instrument cluster display.
The automatic start procedure takes place again
During the STOP phase, the engine fires up without any active driver intervention, e.g. in the following situations.
› The vehicle begins to roll, e.g. on a slope.
› The difference between the temperature setting of the air-conditioning sys-
tem/heating and the temperature of the interior is too large.
› The intensive windscreen heater (Climatronic) or windscreen heater/ventilation
is switched on with the maximum air temperature setting (manual air condition-
ing system).
› The brake pedal was pressed several times (the pressure in the braking system
is too low).
› The charge state of the vehicle battery is too low.
› The current consumption is too high.
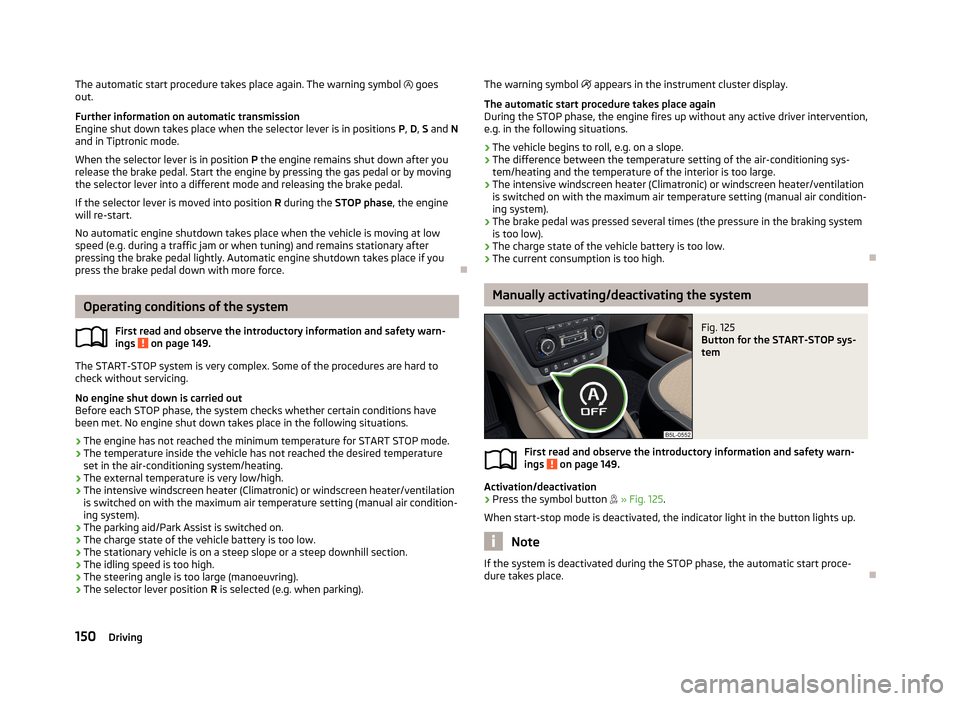
Manually activating/deactivating the system
Fig. 125
Button for the START-STOP sys-
tem
First read and observe the introductory information and safety warn-
ings on page 149.
Activation/deactivation
›
Press the symbol button
» Fig. 125 .
When start-stop mode is deactivated, the indicator light in the button lights up.
Note
If the system is deactivated during the STOP phase, the automatic start proce-
dure takes place.
150Driving
Page 160 of 266
The distribution of the weight is very poor if your vehicle is unladen and the trail-
er is laden. Maintain a particularly low speed if you cannot avoid driving with this
combination.
Tyre pressure
Correct the tyre inflation pressure on your vehicle for a “full load” » page 213,
Service life of tyres .
Towing capacity and trailer weight
The permissible trailer load must not be exceeded under any circumstan- ces » page 244 , Technical data .
The trailer loads specified apply only to altitudes up to 1,000 metres above mean sea level.
The engine output falls as altitude increases, as does the vehicle's climbing pow- er. Therefore, for every additional 1000 m in height (or part), the maximum per-
missible towed weight must be reduced by 10%.
The towed weight is made up of the actual weights of the loaded towing vehicle
and the loaded trailer.
The trailer and drawbar load information on the type plate of the towing device is merely a test value for the towing device. The vehicle-specific values are detailed in the vehicle documents.WARNING■ Do not exceed the maximum permissible axle and drawbar load and the
maximum permissible total or towed weight of the vehicle and the trailer –
risk of accident and serious injury.■
Slipping loads can significantly impair the stability and safety of the vehicle/
trailer combination – risk of accident and serious injury.
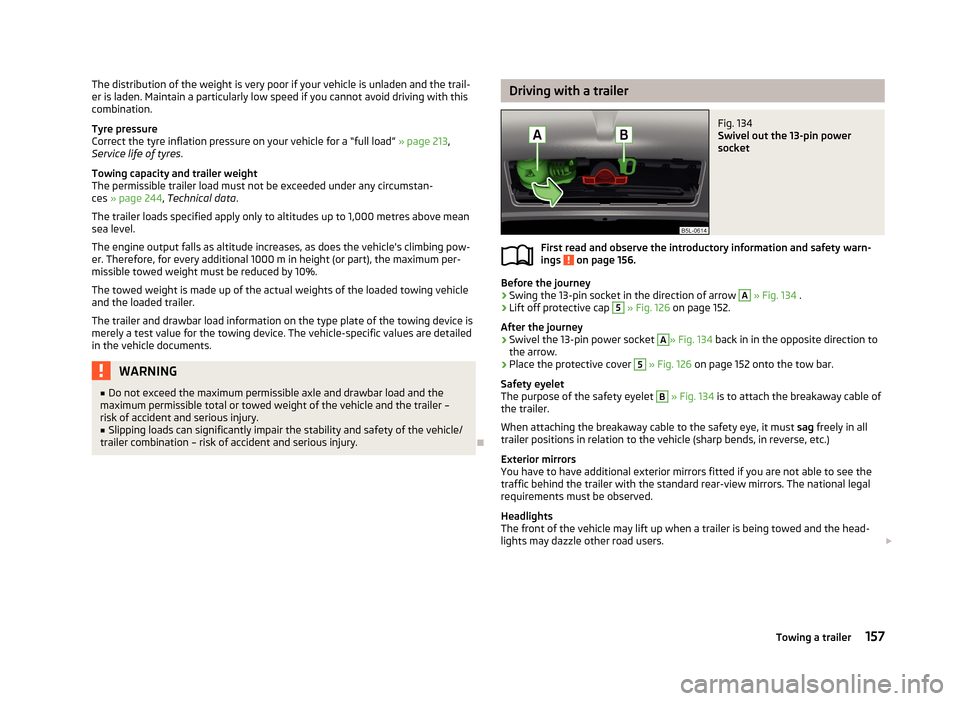
Driving with a trailerFig. 134
Swivel out the 13-pin power
socket
First read and observe the introductory information and safety warn-
ings on page 156.
Before the journey
›
Swing the 13-pin socket in the direction of arrow
A
» Fig. 134 .
›
Lift off protective cap
5
» Fig. 126 on page 152.
After the journey
›
Swivel the 13-pin power socket
A
» Fig. 134 back in in the opposite direction to
the arrow.
›
Place the protective cover
5
» Fig. 126 on page 152 onto the tow bar.
Safety eyelet
The purpose of the safety eyelet
B
» Fig. 134 is to attach the breakaway cable of
the trailer.
When attaching the breakaway cable to the safety eye, it must sag freely in all
trailer positions in relation to the vehicle (sharp bends, in reverse, etc.)
Exterior mirrors
You have to have additional exterior mirrors fitted if you are not able to see the
traffic behind the trailer with the standard rear-view mirrors. The national legal
requirements must be observed.
Headlights
The front of the vehicle may lift up when a trailer is being towed and the head-
lights may dazzle other road users.
157Towing a trailer
Page 161 of 266
Adjust the headlights using the headlight beam control » page 48, Headlight
beam control 1)
.
Driving speed
For safety reasons, do not drive faster than 80 km/h when towing a trailer.
Immediately reduce your speed as soon as even the slightest swaying of the trail-
er is detected. Never attempt to stop the trailer from “swaying” by accelerating.
Brakes
Apply the brakes in good time! If the trailer is fitted with a trailer brake, apply the
brakes gently at first, then brake firmly. This will avoid brake jolts resulting from
the trailer wheels locking.
On downhill sections shift down a gear in good time to also use the engine as a
brake.
Engine overheating
If the needle for the coolant temperature gauge moves into the right-hand area
or the red area of the scale, the speed must be reduced immediately.
Stop and switch off the engine if the indicator light
in the instrument cluster
starts to flash. Wait a few minutes and check the level of coolant » page 205,
Checking the coolant level .
The following guidelines must be observed » page 16,
Coolant .
The coolant temperature can be reduced by switching on the heating.WARNING■ Never use the safety eyelet for towing!■Adapt your speed to the conditions of the road surface and to the traffic sit-
uation.■
Improper or incorrectly connected electric cables can energise the trailer and
cause functional faults to the vehicle's entire electrical system as well as acci-
dents and severe injuries.
■
Work on the electrical system must only be carried out by specialist garages.
■
Never directly connect the trailer's electrical system with the electrical con-
nections for the tail lights or other current sources.
Note■ After coupling the trailer and connecting the power socket, check that the rear
lights on the trailer are working correctly.■
If there is an error in the trailer lighting, check the fuses in the fuse box in the
dash panel » page 236.
■
Contact between the breakaway cable and the safety eyelet can result in me-
chanical wear on the surface protection of the eyelet. Such wear does not impair
the functioning of the safety eyelet and does not constitute a fault. It is excluded from the warranty coverage.
■
If you tow a trailer frequently, you should also have your vehicle inspected be-
tween service intervals.
■
The handbrake on the towing vehicle must be applied when coupling and un-
coupling the trailer.
Trailer stabilisation (TSA)
First read and observe the introductory information and safety warn-
ings
on page 156.
The trailer stabilisation is an extension of the stabilisation control that works in
conjunction with the counter-steering assistance to reduce the amount the trail-
er "sways".
After turning on the ignition, the ESC indicator light
in the instrument cluster
lights up for about 2 seconds longer than the ABS indicator light.
Function requirements for trailer stabilisation. The trailer was shipped from the factory or purchased from the ŠKODA genu-
ine accessories range.
The ESC system is active (in the instrument cluster, the warning lights illumi-
nates
or
) » page 18 does not .
The trailer is electrically connected to the towing vehicle via the trailer sock-
et.
The speed is higher than approx. 60 km/h.
The trailer has a rigid drawbar.
1)
Applies to vehicles with bi-xenon headlights.
158Driving
Page 162 of 266
WARNINGThe increased safety offered by the trailer stabilisation must not tempt you to
take greater risks than otherwise.
CAUTION
■ The trailer stabilisation need not be able to correctly detect all of driving situa-
tions.■
Trailers that sway slightly may not always be detected by the trailer stabilisa-
tion and are thus not stabilised accordingly.
■
Release the pressure on the accelerator pedal if the system is being regulated.
■
Avoid abrupt and sudden driving/braking manoeuvres.
Note
The trailer stabilisation works for both braked and unbraked trailers.
Anti-theft alarm system
First read and observe the introductory information and safety warn-
ings
on page 156.
If the vehicle is locked, the alarm is activated when the electrical connection to
the trailer is interrupted.
Always switch off the anti-theft alarm system before a trailer is coupled or uncou- pled » page 39 .
Conditions for including a trailer in the anti-theft alarm system. The vehicle is factory-fitted with an anti-theft alarm system and towing de-
vice.
The trailer is electrically connected to the towing vehicle via the trailer sock-
et.
The electrical system of the vehicle and trailer is functional.
The vehicle is locked with the vehicle key and the anti-theft alarm system is
activated.
Note
For technical reasons, trailers with rear LED lights cannot be connected to the an-
ti-theft alarm system.
159Towing a trailer
Page 178 of 266
WARNINGThe airbag control unit operates using pressure sensors located in the front
doors. For this reason, no adjustments may be carried out to the doors or door
panels (e.g. installation of additional loudspeakers). Resulting damage can have a negative impact on the function of the airbag system. Any work on thefront doors and door panels must be carried out by a specialist garage. The
following instructions must be observed.■
Never drive with inner door panels removed.
■
Never drive if parts of the inner door panel have been removed and the re-
sulting openings have not been properly sealed.
■
Never drive if the loudspeakers in the doors have been removed, unless the
loudspeaker openings have been properly sealed.
■
Always make sure that the openings are covered or filled if additional loud-
speakers or other equipment parts have been installed in the inner door pan-
els.
■
Always have work carried out by a ŠKODA service partner or a professional
specialist garage.
Note
In vehicles with head airbags, the word AIRBAG can be seen on the B and C col-
umn cladding.
Deactivating airbags
Introduction
This chapter contains information on the following subjects:
Deactivating airbags
175
Deactivating the front passenger airbag
176
Deactivating airbags
First read and observe the introductory information given on page 175.
Deactivating an airbag should be considered in cases such as the ones below.› If using a rear-facing child seat on the front passenger seat (due to different le-
gal regulations, the airbag must be deactivated if using a forwards-facing child
seat in some countries) » page 177, Transporting children safely .
› If it is not possible to maintain a distance of at least 25 cm between the middle
of the steering wheel and chest, despite the driver's seat being correctly adjus-
ted.
› If special attachments are required in the area of the steering wheel because of
a physical disability.
› If different seats have been fitted (e.g. orthopaedic seats without side airbags).
The front passenger airbag can be switched off with the key-operated
switch » page 176 , Deactivating the front passenger airbag .
We recommend that you ask a ŠKODA service partner to deactivate any other air-
bags.
Monitoring the airbag system
The operational capability of the airbag system is monitored electronically, includ-
ing when one of the airbags is switched off.
Airbag deactivated using diagnostic equipment
› The
warning light lights up for approximately 4 seconds after the ignition is
switched on and then flashes again for approximately 12 seconds.
Front passenger airbag deactivated using the key switch in the storage com-
partment
› The
warning light lights up for approximately 4 seconds after the ignition is
switched on.
› The
warning light
3
» Fig. 148 on page 176 lights up after the ignition is
switched on.
Note
■ The national regulations for switching off airbags must be observed.■A ŠKODA service partner will be able to inform you which, if any, of your vehi-
cle's airbags can or must be deactivated.
175Airbag system