warning lights SKODA YETI 2013 1.G / 5L Workshop Manual
[x] Cancel search | Manufacturer: SKODA, Model Year: 2013, Model line: YETI, Model: SKODA YETI 2013 1.G / 5LPages: 266, PDF Size: 26.71 MB
Page 179 of 266
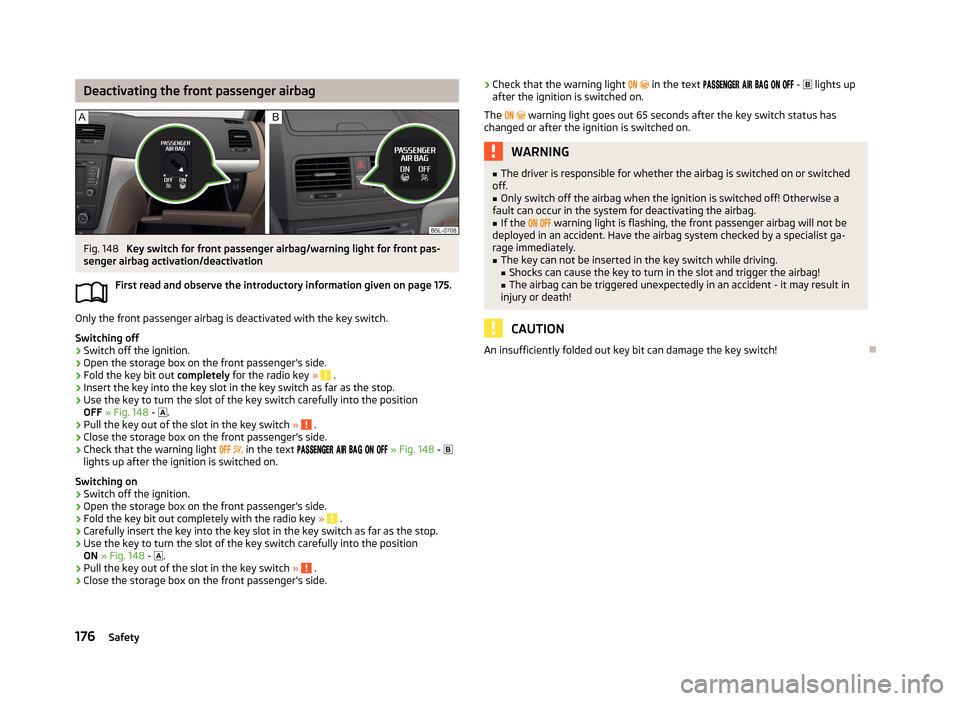
Deactivating the front passenger airbagFig. 148
Key switch for front passenger airbag/warning light for front pas-
senger airbag activation/deactivation
First read and observe the introductory information given on page 175.
Only the front passenger airbag is deactivated with the key switch.
Switching off
›
Switch off the ignition.
›
Open the storage box on the front passenger's side.
›
Fold the key bit out completely for the radio key » .
›
Insert the key into the key slot in the key switch as far as the stop.
›
Use the key to turn the slot of the key switch carefully into the position
OFF » Fig. 148 -
.
›
Pull the key out of the slot in the key switch » .
›
Close the storage box on the front passenger's side.
›
Check that the warning light
in the text
» Fig. 148 -
lights up after the ignition is switched on.
Switching on
›
Switch off the ignition.
›
Open the storage box on the front passenger's side.
›
Fold the key bit out completely with the radio key » .
›
Carefully insert the key into the key slot in the key switch as far as the stop.
›
Use the key to turn the slot of the key switch carefully into the position
ON » Fig. 148 -
.
›
Pull the key out of the slot in the key switch » .
›
Close the storage box on the front passenger's side.
›Check that the warning light
in the text - lights up
after the ignition is switched on.
The warning light goes out 65 seconds after the key switch status has
changed or after the ignition is switched on.WARNING■ The driver is responsible for whether the airbag is switched on or switched
off.■
Only switch off the airbag when the ignition is switched off! Otherwise a
fault can occur in the system for deactivating the airbag.
■
If the warning light is flashing, the front passenger airbag will not be
deployed in an accident. Have the airbag system checked by a specialist ga- rage immediately.
■
The key can not be inserted in the key switch while driving. ■ Shocks can cause the key to turn in the slot and trigger the airbag!
■ The airbag can be triggered unexpectedly in an accident - it may result in
injury or death!
CAUTION
An insufficiently folded out key bit can damage the key switch!
176Safety
Page 205 of 266
This contains the cleaning fluid for the windscreen or rear window and for the
headlight cleaning system.
The capacity of the reservoir is about 3 litres or about 5.5 litres on vehicles that
have a headlight cleaning system 1)
.
Clear water is not sufficient to intensively clean the windscreen and headlights. We recommend using clean water together with a screen cleaner from the range
of ŠKODA Original Accessories (with antifreeze in winter), which will remove any
stubborn dirt.
In Winter, the washing water should always be mixed with antifreeze even if the
vehicle has heated windscreen washer nozzles.
Under exceptional circumstances, methylated spirits can also be used if no screen
cleaner with antifreeze is available. The concentration of methylated spirits must
not be more than 15 %. The freeze protection at this concentration is sufficient
only to -5 °C.
CAUTION
■ Under no circumstances must radiator antifreeze or other additives be added to
the windscreen washer fluid.■
If the vehicle is fitted with a headlight cleaning system, only cleaning products
which do not attack the polycarbonate coating of the headlights must be added
to the windscreen washer fluid.
■
Do not remove the filter from the windscreen washer fluid reservoir when refill-
ing, as this may cause contamination of the liquid transportation system, leading
in turn to a windscreen washer system malfunction.
Engine oil
Introduction
This chapter contains information on the following subjects:
Specifications and capacity
203
Checking the oil level
203
Replenishing
204
Changing
204The engine has been factory-filled with a high-grade oil that can be use through-
out the year - except in extreme climate zones.
The engine oils are undergoing continuous further development. Thus the infor-
mation stated in this Owner's Manual is only correct at the time of publication.
ŠKODA Service Partners are informed about the latest changes by the manufac-
turer. We therefore recommend that the oil change be completed by a ŠKODA
Service Partner.
The specifications (VW standards) stated in the following can be indicated sepa-
rately or together with other specifications on the bottle.
The oil capacities include oil filter change. Check the oil level when filling; do not
over fill. The oil level must be between the markings » page 203.WARNING■
The engine compartment of your car is a hazardous area. The following
warning instructions must be followed at all times when working in the en-
gine compartment » page 199.■
Do not continue your journey if for some reason it is not possible to top
up the engine oil. Switch off the engine and seek assistance from a specialist
garage.
■
If the oil level is above level
A
» Fig. 160 on page 203, do not continue to
drive! Switch off the engine and seek assistance from a specialist garage.
CAUTION
Do not pour any additives into the engine oil – risk of serious damage to the en-
gine parts!
Note
■ Before a long drive we recommend that you purchase and carry with you engine
oil which complies with the specification for your vehicle.■
We recommend that you use oils from ŠKODA Original Accessories.
■
If oil comes into contact with your skin, the affected area must be washed thor-
oughly.
1)
In some countries, 5.5 ltr. applies for both variants.
202General Maintenance
Page 211 of 266
WARNING■It is prohibited to work with naked flames or lights.■It is prohibited to smoke or carry out any activities that produce sparks.■
Never use a damaged vehicle battery – risk of explosion!
■
Never charge a frozen or thawed vehicle battery – risk of explosion and
chemical burns!
■
Replace a frozen vehicle battery.
■
Never jump-start vehicle batteries with insufficient acid levels – risk of ex-
plosion and chemical burns.
WARNING■ When you charge a battery, hydrogen is released, and a highly explosive gas
mixture is also produced. An explosion can be caused through sparkling over during unclamping or loosening of the cable plug while the ignition is on.■
Creating a bridge between the poles on the battery (e.g. with a metal object
or cable) creates a short circuit - risk of melting the lead bars, and risk of ex-
plosion, battery fire and acid splashes.
■
Avoid creating sparks when working with cables and electrical devices.
Strong sparking represents a risk of injury.
■
Before carrying out any work on the electrical system, switch off the engine,
the ignition and all electrical components and disconnect the negative termi-
nal (-) on the battery.
CAUTION
Improper handling of the battery can lead to damage. We recommend having all
work on the vehicle battery carried out by a specialist garage.
CAUTION
■ The vehicle battery must only be disconnected if the ignition is switched off,
otherwise the vehicle's electrical system (electronic components) can be dam-
aged. When disconnecting the battery from the electrical system, first of all dis-
connect the negative terminal (-) of the battery, followed by the positive terminal
(+).■
When connecting the battery to the electrical system, first of all connect the
positive terminal (+) of the battery, followed by the negative terminal (-). Under no
circumstances must the battery cables be connected incorrectly – risk of a cable fire.
■ Ensure that battery acid does not come into contact with the bodywork – risk of
damage to the paintwork.■
Do not place the battery in direct daylight in order to protect the vehicle battery
housing from the effects of ultra-violet light.
■
If the vehicle has not been driven for more than 3 to 4 weeks, the battery will
discharge. This is because certain electrical components consume electricity (e. g.
control units) also in idle state. Prevent the battery from discharging by discon- necting the battery's negative terminal (-) or continuously charging the battery
with a very low charging current.
■
If the vehicle is frequently used for making short trips, the vehicle battery will
not have time to charge up sufficiently and may discharge.
For the sake of the environment
A vehicle battery that has been removed is a special type of hazardous waste.
These must be disposed of in accordance with national legal regulations.
Note
You should replace batteries older than 5 years.
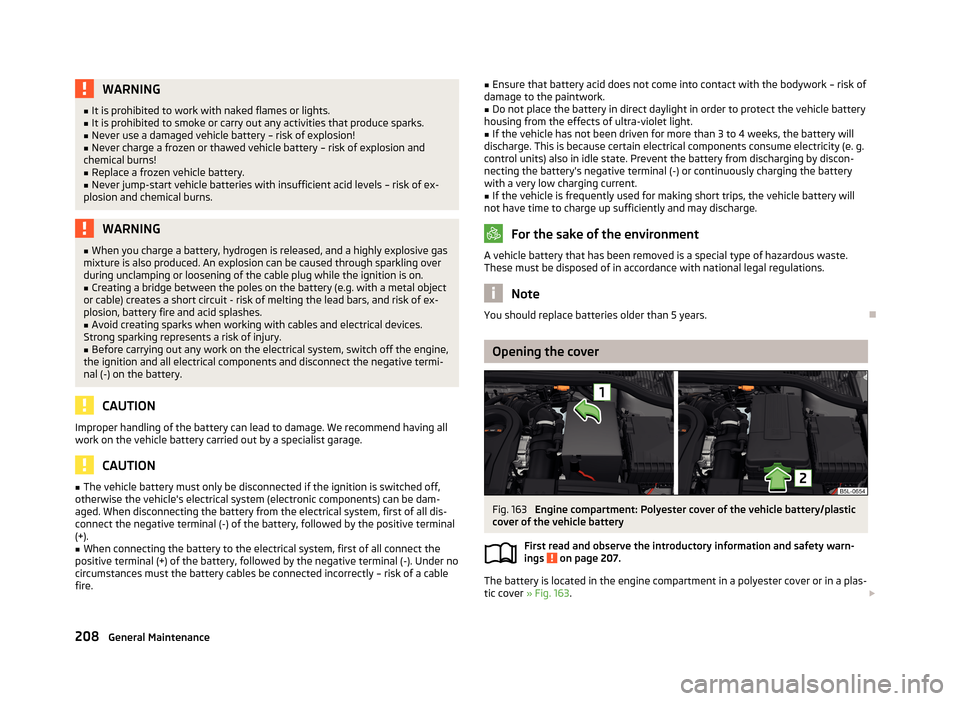
Opening the cover
Fig. 163
Engine compartment: Polyester cover of the vehicle battery/plastic
cover of the vehicle battery
First read and observe the introductory information and safety warn-ings
on page 207.
The battery is located in the engine compartment in a polyester cover or in a plas-
tic cover » Fig. 163 .
208General Maintenance
Page 213 of 266
It is necessary to disconnect both cables before charging the battery with high
amperages, known as “ rapid charging”.
The vent plugs of the vehicle battery should not be opened for charging.WARNING“Quick-charging” the vehicle battery is dangerous and requires a special
charger and specialist knowledge.
CAUTION
On vehicles with the START/STOP system, the pole terminal of the charger must
not be connected directly to the negative terminal of the vehicle battery, but only
to the engine earth » page 228, Jump-starting in vehicles with the START-STOP
system .
Note
We therefore recommend that vehicle batteries be rapid charged by a specialist
garage.
Replacing
First read and observe the introductory information and safety warn-
ings
on page 207.
The new vehicle battery must have the same capacity, voltage, current and the
same size as the original Battery. Suitable vehicle battery types can be purchased
from a specialist garage.
We recommend having the battery replaced by a specialist garage, where the
new vehicle battery will be installed properly and the original battery will be dis-
posed of in accordance with national regulations.
Disconnecting and reconnecting
First read and observe the introductory information and safety warn-
ings
on page 207.
On disconnecting and reconnecting the vehicle battery, the following functions
are initially deactivated or are no longer able to operate fault-free.
OperationOperating measureElectrical power window (operational faults)» page 44Panoramic sliding roof (operational faults)» page 234Enter the radio/navigation system code num-
ber» User manual of the radio
or » user manual of the naviga-
tion systemSetting the clock» page 13Data in the multifunction display are deleted.» page 25
Note
We recommend having the vehicle checked by a specialist garage in order to en-
sure full functionality of all electrical systems.
Automatic load deactivation
First read and observe the introductory information and safety warn-ings
on page 207.
The vehicle voltage control unit automatically prevents the battery from discharg-
ing when the battery is put under high levels of strain. This manifests itself by the
following.
› The idling speed is raised to allow the generator to deliver more electricity to
the electrical system.
› Where necessary, large convenience consumers such as seat heaters and rear
window heaters have their power limited or are shut off completely in the event
of an emergency.
CAUTION
■ Despite such intervention by the vehicle electric system management, the vehi-
cle battery may be drained. For example, when the ignition is switched on a long
time with the engine turned off or the side or parking lights are turned on during longer parking.■
Consumers that are supplied via a 12-V power socket can cause the vehicle bat-
tery to discharge when the ignition is switched off.
210General Maintenance
Page 218 of 266
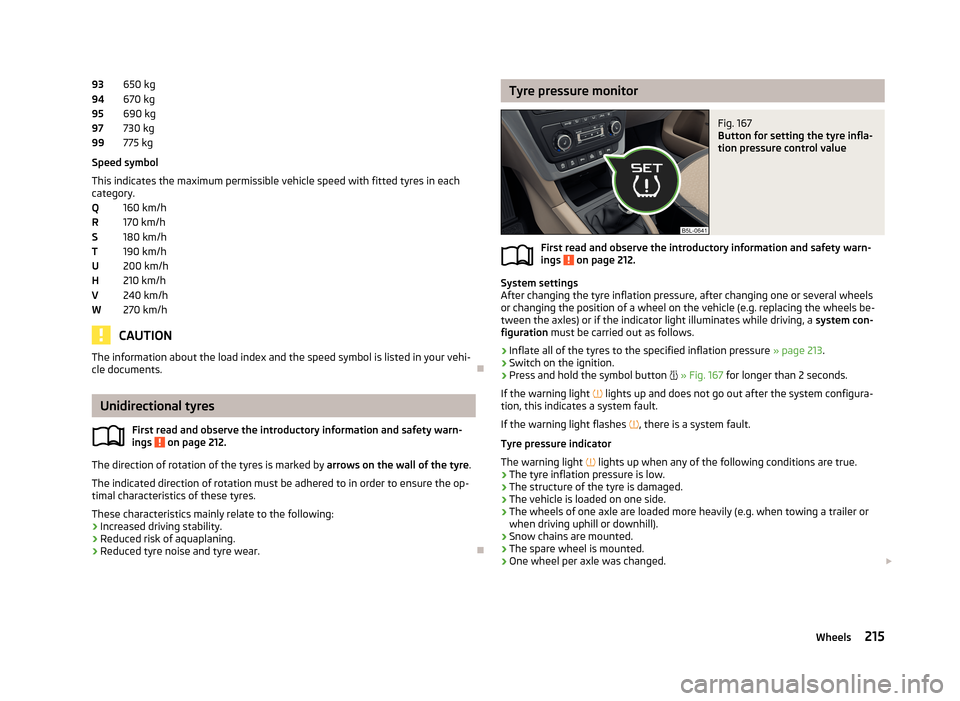
650 kg
670 kg
690 kg
730 kg
775 kg
Speed symbol
This indicates the maximum permissible vehicle speed with fitted tyres in each
category.
160 km/h
170 km/h
180 km/h
190 km/h
200 km/h
210 km/h
240 km/h
270 km/h
CAUTION
The information about the load index and the speed symbol is listed in your vehi-
cle documents.
Unidirectional tyres
First read and observe the introductory information and safety warn-
ings
on page 212.
The direction of rotation of the tyres is marked by arrows on the wall of the tyre.
The indicated direction of rotation must be adhered to in order to ensure the op- timal characteristics of these tyres.
These characteristics mainly relate to the following: › Increased driving stability.
› Reduced risk of aquaplaning.
› Reduced tyre noise and tyre wear.
9394959799QRSTUHVWTyre pressure monitorFig. 167
Button for setting the tyre infla-
tion pressure control value
First read and observe the introductory information and safety warn-
ings on page 212.
System settings
After changing the tyre inflation pressure, after changing one or several wheels
or changing the position of a wheel on the vehicle (e.g. replacing the wheels be-
tween the axles) or if the indicator light illuminates while driving, a system con-
figuration must be carried out as follows.
›
Inflate all of the tyres to the specified inflation pressure » page 213.
›
Switch on the ignition.
›
Press and hold the symbol button
» Fig. 167 for longer than 2 seconds.
If the warning light
lights up and does not go out after the system configura-
tion, this indicates a system fault.
If the warning light flashes
, there is a system fault.
Tyre pressure indicator
The warning light
lights up when any of the following conditions are true.
› The tyre inflation pressure is low.
› The structure of the tyre is damaged.
› The vehicle is loaded on one side.
› The wheels of one axle are loaded more heavily (e.g. when towing a trailer or
when driving uphill or downhill).
› Snow chains are mounted.
› The spare wheel is mounted.
› One wheel per axle was changed.
215Wheels
Page 242 of 266
Remove the protective grille for fog lights - sensor plug for parkingassistance241
Replacing the bulb for the fog lights
241
Replacing the bulb for the licence plate light
242
Rear light
242
Replacing bulbs in rear light
243
Some manual skills are required to change a bulb. For this reason, we recommend
having bulbs replaced by a specialist garage or seeking other expert help in the
event of any uncertainties.
› Switch off the ignition and all of the lights before replacing a bulb.
› Faulty bulbs must only be replaced with the same type of bulbs. The designa-
tion is located on the light socket or the glass bulb.
› A stowage compartment for replacement bulbs is located in a box under the
floor covering in the luggage compartment.
WARNING■ Always read and observe the warnings before completing any work in the
engine compartment » page 199.■
Accidents can be caused if the road in front of the vehicle is not sufficiently
illuminated and the vehicle cannot or can only be seen with difficulty by other
road users.
■
Bulbs H7 and H4 are pressurised and may burst when changed - there is a
risk of injury. We therefore recommended wearing gloves and safety glasses
when changing a bulb.
■
Gas discharge bulbs (xenon bulbs) operate with a high voltage, professional
knowledge is required – risk of death!
■
Switch off the respective vehicle light when changing the bulb.
CAUTION
Do not take hold of the glass bulb with naked fingers (even the smallest amount of dirt reduces the working life of the light bulb). Use a clean cloth, napkin, or sim-
ilar.Note■ This Owner's Manual only describes the replacement of bulbs where it is possi-
ble to replace the bulbs on your own without any complications arising. Other bulbs must be replaced by a specialist garage.■
We recommend that a box of replacement bulbs always be carried in the vehi-
cle. Replacement bulbs can be purchased from ŠKODAOriginal Accessories.
■
We recommend having the headlight settings checked by a specialist garage af-
ter replacing a bulb in the main beam, low beam or fog lights.
■
In case of failure of a xenon gas discharge lamp or an LED diode, visit a special-
ist garage.
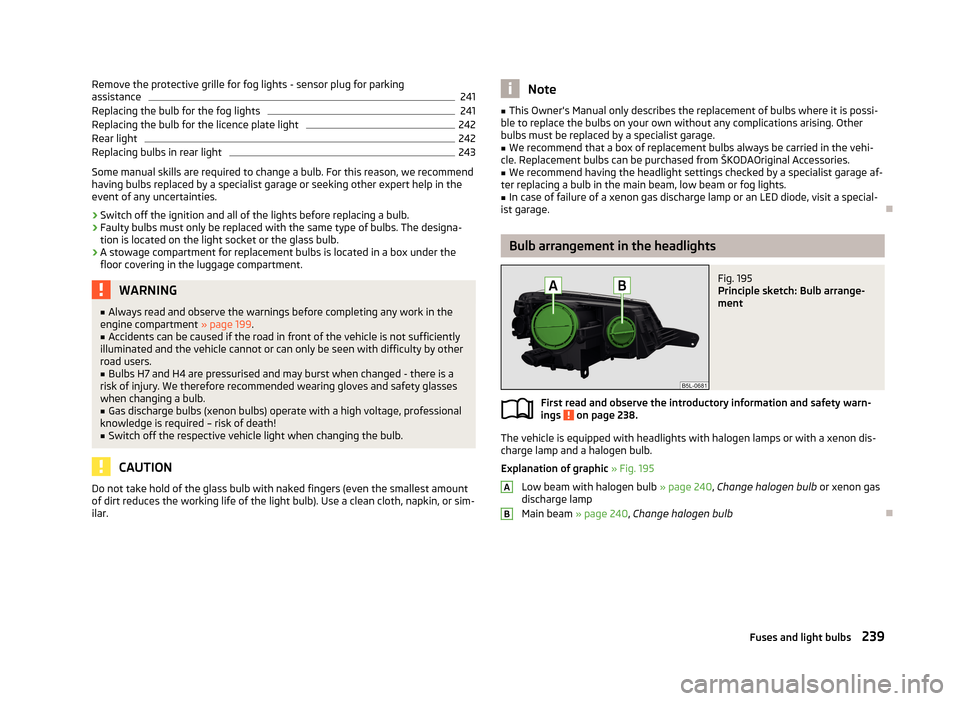
Bulb arrangement in the headlights
Fig. 195
Principle sketch: Bulb arrange-
ment
First read and observe the introductory information and safety warn-
ings on page 238.
The vehicle is equipped with headlights with halogen lamps or with a xenon dis-
charge lamp and a halogen bulb.
Explanation of graphic » Fig. 195
Low beam with halogen bulb » page 240, Change halogen bulb or xenon gas
discharge lamp
Main beam » page 240, Change halogen bulb
AB239Fuses and light bulbs
Page 254 of 266
Index
A
Abroad Driving abroad
135
Unleaded petrol135
ABS Operation
137
Warning light19
Accessories184
Adaptive headlights (AFS)50
Adjusting Belt height
167
Exterior mirrors59
Head restraints66
Interior mirror59
Seats62
Steering wheel117
Adjusting the headrests
67
Adjusting the seats161
Adjustment Headlight beam
47
Aerial188
See windows191
AFS50
Airbag169
Deactivating175
Deactivating the front passenger airbag176
Deployment169
Front airbag171
Head airbag174
Indicator light21
Knee airbag172
Modifications and damage to the airbag system 186
Side airbag
173
Airbag system169
Air conditioning Climatronic95
manual air conditioning94
Recirculation93
Air conditioning system Air outlets
92
Air outlets92
Alarm Switching off
39
Triggering39
Anti-theft alarm system Activating/deactivating
39
Trailer159
Antilock brake system (ABS)137
Armrest Front
65
Artificial leather194
Ashtray74
ASR warning light
18
Assistence systems OFF ROAD-mode
138
Assist systems136
ABS19, 137
ASR18
Cruise Control System147
DSR137
EDL137
ESC18, 136
HBA137
HHC138
Park assist143
Parking aid140
START-STOP149
TCS137
Auto Check Control13
Automatic driving lamp control49
Automatic gearbox Manual shifting of gears
127
Selector lever-emergency unlocking233
Starting-off and driving128
Tiptronic127
Automatic load deactivation210
Automatic transmission126
Kickdown128
Malfunction128
Selector lever lock127
Using the selector lever127
Auxiliary heating and ventilation System settings
98
auxiliary heating and ventilations Switching on and off directly
98
Auxiliary heating (auxiliary heating and ventila- tion)
97
Radio remote control99
B
Ball head Check fitting
155
Ball rod installing
154
Ready position153
removing155
Bar with sliding hook84
Battery In the remote control key
231
Belts164
Belt tensioners168
Bonnet Closing
200
Opening200
Boot Class N1 vehicles
88
see Boot lid41
Boot lid41
Automatic locking41
Warning light17
Brake information messages
15
warning light15
251Index
Page 255 of 266
Brake booster125
Brake fluid206
Changing207
Checking206
information messages15
Brakes Brake assist systems
136
Brake booster125
Brake fluid206
Handbrake125
Running in130
Braking Information on braking
124
Breakdown kit225
Break recommendation See Fatigue detection
151
bulb failurel warning light
19
bulbs warning light
19
Bulbs Changing
238
In the rear light242
Button in the driver's door Electric power windows
41
C
Car computer See multifunction display
25
Car park ticket holder71
Carrier90
Cavity protection192
CD changer115
Central locking32
Central locking button36
changing bulb for low beam and high beam
240
ChangingBrake fluid207
Bulbs238
Bulbs in the rear light242
Engine oil204
Wheels221
Changing a wheel Follow-up tasks
222
Preparation222
Removing and refitting a wheel222
Charging a vehicle battery209
Check Fit ball head properly
155
Checking Battery electrolyte level
209
Brake fluid206
Coolant205
Engine oil203
Oil level203
Windscreen washer fluid201
Children and safety177
Child safety Side airbag
179
Child safety lock37
Child safety seat Use of child safety seats
179
Child seat Classification
179
ISOFIX180
on the front passenger seat178
TOP TETHER181
Use of ISOFIX child seats180
Chrome parts refer to Taking care of your vehicle
190
Cigarette lighter74
Cleaning182
Alcantara194
Artificial leather194
cloths194
Covers of electrically heated seats194
Headlight lenses191
Natural leather193
Plastic parts190
Wheels192
Climatronic Operarting elements
95
Recirculation93
Clothes hook79
Cockpit 12-volt power outlet
75
Ashtray74
Cigarette lighter74
General view9
Lighting53
Practical equipment70
Storage compartments70
Comfort control window
43
COMING HOME51
Compartment for glasses77
Compartments70
Computer See multifunction display
25
Convenience operation sliding / tilting roof
46
convenience turn signal49
coolant warning light
16
warning reports16
Coolant204
Checking205
Replenishing206
Temperature gauge11
CORNER See Fog lights with CORNER function
51
Correct seated position161
Driver162
Front passenger162
Rear seats162
Correct seating position Instructions
162
252Index
Page 256 of 266
Counter for distance driven13
Cruise control system Activating/deactivating
148
Changing the stored speed148
Storing and maintaining speed148
Switching off temporarily148
Warning light22
Cruise Control System147
Cupholders73
D
DAY LIGHT see Daylight running lights
48
Daylight running lights48
De-icing the windscreen and rear window55
Deactivating an airbag175
Decorative films190
Delayed locking of the boot lid see Boot lid
41
Diesel refer to Fuel
198
diesel - particulate filter
20
Diesel fuel Operation in winter
198
Diesel particulate filter warning light
20
Digital Clock Time
13
Dipstick203
Disconnecting and reconnecting vehicle battery
210
Display12
Compass points25
Coolant temperature11
Correct gear changes24
Fuel supply12
Service intervals30
Display of the second speed13
Distance driven13
Door Child safety lock
37
Closing37
Emergency locking233
Emergency locking the driver's door232
Opening37
warning light door open16
Door open warning light
16
Driver Steering Recommendation (DSR)137
Driving Abroad
135
Emissions244
Fording water on roads134
Fuel consumption244
Maximum speed247
on unpaved roads135
driving away from paved roads135
Driving economically Economical gear changing
131
Driving with a trailer157
DSR137
DVD-preinstallation116
E
Economical driving
130
Ballast132
Driving at full throttle131
Idling131
Looking ahead130
Regular maintenance132
Saving energy133
Short distances132
Tyre inflation pressure132
EDL Operation
137
Electrical power windows43
Button in the driver's door41, 42
Button in the rear doors43
Operational faults44
Electronic Differential Lock (EDL)137
Electronic immobiliser119
Electronic Stability Control (ESC)136
emergency replace battery in the remote control
231
Emergency Activation of the sliding/tilting roof
234
Changing a wheel221
Hazard warning light system52
Jump-starting226, 227
Locking the door without a locking cylinder233
Locking the driver's door232
Selector lever-unlocking233
Sliding/tilting roof234
Start engine - KESSY123
Switching off the ignition –KESSY123
Towing the using the tow hitch230
Towing the vehicle228
Tyre repair224
Unlocking the driver's door232
Unlocking the tailgate233
emergency equipment reflective vest
219
Emergency equipment First aid kit
219
Jack220
Vehicle tool kit220
Warning triangle219
Emissions244
Engine Running in
129
Engine compartment199
Brake fluid206
Coolant205
Overview201
Vehicle battery207
engine oil information messages
17
warning light17
253Index
Page 257 of 266
Engine oil202
Capacity203
Changing204
Checking203
Replenishing204
Specifications203
Environment130
Environmental compatibility133
Environmentally friendly driving130
EPC Warning light
20
ESC Function
136
Warning light18
Exhaust inspection system Warning light
19
F
Fastening elements
82
Fatigue detection151
Function151
Information messages151
Films190
Fire extinguisher220
First aid kit219
Flexible storage compartment84
Floor covering in the luggage compartment
85
fog lights Remove protective grille - version 1
240
Remove protective grille - version 2240
Remove protective grille with plug - version 1241
remove protective grille with plug - version 2241
replacing bulb241
Fog lights51
Warning light22
Fog lights with CORNER function51
Folding seats back into the initial position
70
Folding down the seats67
Folding table at the center backrest
80
on front seat backrest80
Fold in passenger's mirror60
Footmats126
see footmats126
Force limit Power windows
43
Sliding/tilting roof45
Fording134
Front airbag171
Front door warning light54
Front interior light53
Front seats61
Fuel196
Diesel198
Fuel gauge12
refer to Fuel196
Refuelling196
Unleaded petrol197
Fuel consumption130
Fuel reserve Indicator light
20
Fuses Assignment
236
Colour coding236
Fuse assignment in the engine compartment238
Replacing236
G
Gearbox Information messages
13
Gear change Gear recommendation
24
Information on the selected gear24
Gear changing Gear stick
125
General view Cockpit9
Generator Indicator light
16
Glow plug system Warning light
19
gradeability see pitch angle
246
GSM103, 105
H
Handbrake
125
Warning light15
Hands-free system Voice control
110
Hazard warning light system52
HBA137
Head airbag174
Headlight cleaning system Headlight cleaning system
58
Headlights Bulb arrangement
239
Driving abroad135
Headlight cleaning system58
Head restraint66
Heater Windscreen and rear window
55
Heating Control elements
94
Exterior mirrors59
Recirculation93
Seats64
Heating and air-conditioning91
HHC138
Hill Hold Control (HHC)138
Hook83
Horn9
Hydraulic Brake Assist (HBA)137
254Index