oil dipstick SKODA YETI 2014 1.G / 5L Owner's Manual
[x] Cancel search | Manufacturer: SKODA, Model Year: 2014, Model line: YETI, Model: SKODA YETI 2014 1.G / 5LPages: 248, PDF Size: 29.49 MB
Page 185 of 248

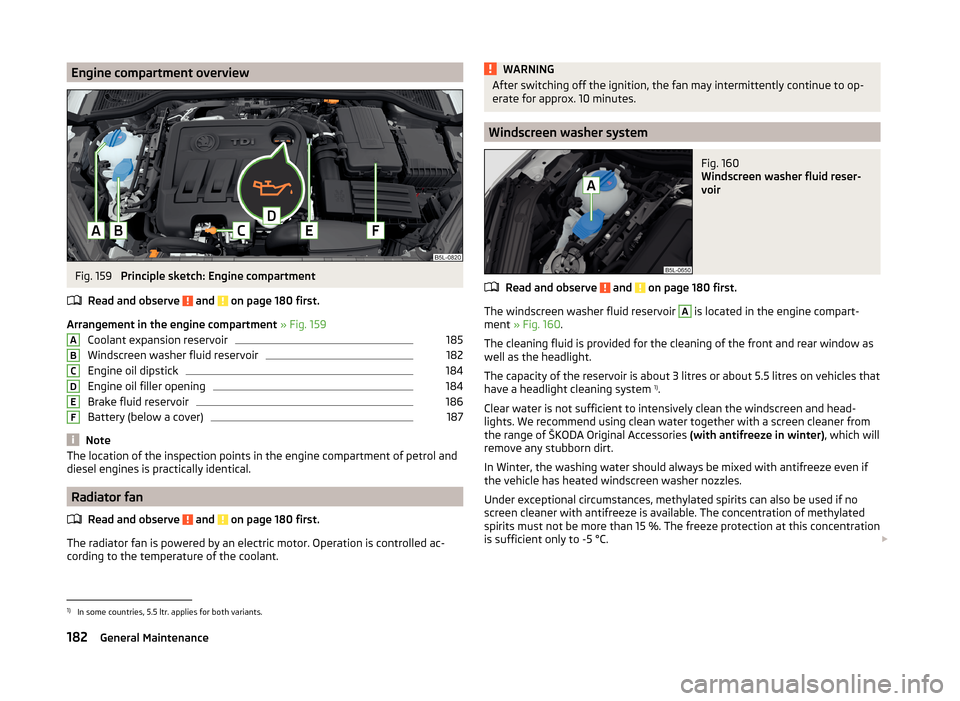
Engine compartment overviewFig. 159
Principle sketch: Engine compartment
Read and observe
and on page 180 first.
Arrangement in the engine compartment » Fig. 159
Coolant expansion reservoir
185
Windscreen washer fluid reservoir
182
Engine oil dipstick
184
Engine oil filler opening
184
Brake fluid reservoir
186
Battery (below a cover)
187
Note
The location of the inspection points in the engine compartment of petrol and
diesel engines is practically identical.
Radiator fan
Read and observe
and on page 180 first.
The radiator fan is powered by an electric motor. Operation is controlled ac-
cording to the temperature of the coolant.
ABCDEFWARNINGAfter switching off the ignition, the fan may intermittently continue to op-
erate for approx. 10 minutes.
Windscreen washer system
Fig. 160
Windscreen washer fluid reser-
voir
Read and observe and on page 180 first.
The windscreen washer fluid reservoir
A
is located in the engine compart-
ment » Fig. 160 .
The cleaning fluid is provided for the cleaning of the front and rear window as
well as the headlight.
The capacity of the reservoir is about 3 litres or about 5.5 litres on vehicles that
have a headlight cleaning system 1)
.
Clear water is not sufficient to intensively clean the windscreen and head-
lights. We recommend using clean water together with a screen cleaner from
the range of ŠKODA Original Accessories (with antifreeze in winter), which will
remove any stubborn dirt.
In Winter, the washing water should always be mixed with antifreeze even if
the vehicle has heated windscreen washer nozzles.
Under exceptional circumstances, methylated spirits can also be used if no
screen cleaner with antifreeze is available. The concentration of methylated
spirits must not be more than 15 %. The freeze protection at this concentration
is sufficient only to -5 °C.
1)
In some countries, 5.5 ltr. applies for both variants.
182General Maintenance
Page 187 of 248

CAUTION■If the above engine oils are not available, a different engine oil can be used in
an emergency. To prevent damage to the engine, a maximum of 0.5 litres only
of the following engine oils may be used: ■ For petrol engine models: ACEA A3/ACEA B4 or API SN, (API SM);
■ For diesel engine models: ACEA C3 or API CJ-4.
Checking the oil level
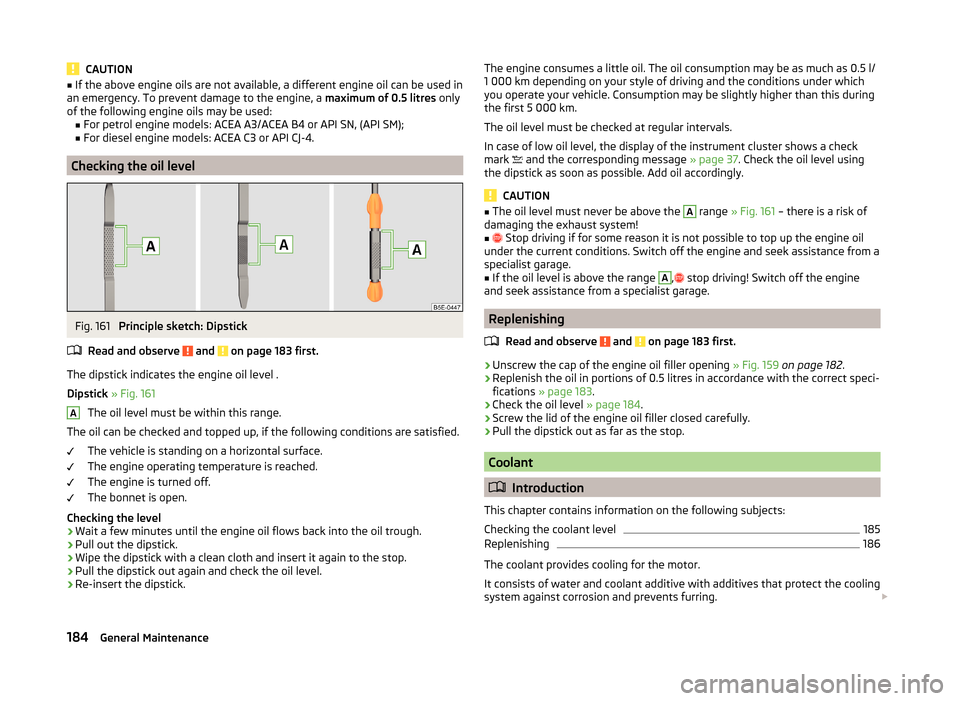
Fig. 161
Principle sketch: Dipstick
Read and observe
and on page 183 first.
The dipstick indicates the engine oil level .
Dipstick » Fig. 161
The oil level must be within this range.
The oil can be checked and topped up, if the following conditions are satisfied. The vehicle is standing on a horizontal surface.
The engine operating temperature is reached.
The engine is turned off.
The bonnet is open.
Checking the level
›
Wait a few minutes until the engine oil flows back into the oil trough.
›
Pull out the dipstick.
›
Wipe the dipstick with a clean cloth and insert it again to the stop.
›
Pull the dipstick out again and check the oil level.
›
Re-insert the dipstick.
AThe engine consumes a little oil. The oil consumption may be as much as 0.5 l/
1 000 km depending on your style of driving and the conditions under which
you operate your vehicle. Consumption may be slightly higher than this during
the first 5 000 km.
The oil level must be checked at regular intervals.
In case of low oil level, the display of the instrument cluster shows a check
mark
and the corresponding message » page 37. Check the oil level using
the dipstick as soon as possible. Add oil accordingly.
CAUTION
■ The oil level must never be above the A range » Fig. 161 – there is a risk of
damaging the exhaust system!■
Stop driving if for some reason it is not possible to top up the engine oil
under the current conditions. Switch off the engine and seek assistance from a
specialist garage.
■
If the oil level is above the range
A
,
stop driving! Switch off the engine
and seek assistance from a specialist garage.
Replenishing
Read and observe
and on page 183 first.
›
Unscrew the cap of the engine oil filler opening » Fig. 159 on page 182 .
›
Replenish the oil in portions of 0.5 litres in accordance with the correct speci-
fications » page 183 .
›
Check the oil level » page 184.
›
Screw the lid of the engine oil filler closed carefully.
›
Pull the dipstick out as far as the stop.
Coolant
Introduction
This chapter contains information on the following subjects:
Checking the coolant level
185
Replenishing
186
The coolant provides cooling for the motor.
It consists of water and coolant additive with additives that protect the cooling
system against corrosion and prevents furring.
184General Maintenance