towing SKODA YETI 2014 1.G / 5L Owner's Manual
[x] Cancel search | Manufacturer: SKODA, Model Year: 2014, Model line: YETI, Model: SKODA YETI 2014 1.G / 5LPages: 248, PDF Size: 29.49 MB
Page 6 of 248
Cleaning vehicle exterior170Interior care174
Inspecting and replenishing
177
Fuel
177
Engine compartment
180
Engine oil
183
Coolant
184
Brake fluid
186
Vehicle battery
187
Wheels
191
Tyres and wheel rims
191
Manufacturer-approved tyre variants
193
Winter operation
195
Do-it-yourself
Emergency equipment and self-help
197
Emergency equipment
197
Reserve and temporary spare
199
Changing a wheel
200
Puncture repair kit
203
Jump-starting
206
Towing the vehicle
207
Remote control and removable light
209
Emergency unlocking/locking
211
Replacing windscreen wiper blades
212
Fuses and light bulbs
214
Fuses
214
Replacing bulbs
217
Technical data
Technical data
222
Vehicle data
222
Index
3Table of Contents
Page 44 of 248
If the warning light flashes again after the engine has started, there is a
system error.
Seek help from a specialist garage.
The following reasons can explain the warning light
being illuminated.
› The vehicle is loaded on one side. Distribute loads as evenly as possible.
› The wheels of one axle are loaded more heavily (e.g. when towing a trailer or
when driving uphill or downhill).
› Snow chains are mounted.
› A wheel has been changed.
Save the tyre pressure values in the system » page 158.
CAUTION
Under certain circumstances (e.g. sporty style of driving, wintry or unpaved
roads) the warning light can be delayed or does not light up at all.
Note
If the vehicle's battery has been disconnected and reconnected, the warning
light comes on after switching on the ignition. If the indicator light does not
go out after moving a short distance, this means that there is an error in the
system. Seek help from a specialist garage.
Windscreen washer fluid level
Read and observe
on page 35 first.
If the windscreen washer fluid level is too low, the warning light
illumi-
nates .
The following message is shown in the MAXI DOT display.
Top up wash fluid!
Top up with liquid » page 182, Windscreen washer system .
Turn-signal system
Read and observe
on page 35 first.
Either the left
or right
warning light flashes depending on the position of
the turn signal lever.
If there is a fault in the turn signal system, the warning light flashes at twice
its normal rate. This does not apply when towing a trailer.
Switching off the hazard warning light system is switched on will cause all of
the turn signal lights as well as both warning lights to flash.
Fog lights
Read and observe
on page 35 first.
The warning light
illuminates when the fog lights are operating.
Cruise control system
Read and observe
on page 35 first.
The warning light
illuminates when the cruise control is active » page 154.
Brake pedal (automatic gearbox)
Read and observe
on page 35 first.
If the warning light
illuminates , operate the brake pedal.
OFF ROADmode
Read and observe
on page 35 first.
When the indicator light is
lit, then the conditions for the engagement of
OFF ROAD mode are met » page 144 .
When the indicator
flashes, it indicates the hill descent assistant is current-
ly engaged.
Further information » page 144, OFF ROAD-mode .
Main beam
Read and observe
on page 35 first.
The warning light
illuminates when the main beam or the headlight flasher
is operated.
41Instruments and Indicator Lights
Page 57 of 248
■After leaving the car there is no automatic locking.■The vehicle cannot be locked from the outside if the ignition has not been
turned off.
Safe securing system
Read and observe
and on page 51 first.
The door locks are blocked automatically if the vehicle is locked from the out-side. The vehicle cannot be opened from the inside any more.
This fact is pointed out by the following message on the display of the instru-
ment cluster after switching out the ignition.
Check SAFELOCK! Owner's manual!
CHECK DEADLOCK
Switching off
The safe lock can be switched off in one of the following ways.
›
By locking twice within 2 seconds.
›
By disabling the interior monitoring » page 56, Interior monitor and towing
protection .
If the vehicle is locked and the safe securing system is switched off, the door can be opened separately from the inside by a single pull on opening lever.
Switching on
The safelock switches on automatically the next time the vehicle is locked and
unlocked.
Switch-off display
The indicator light in the driver door flashes for about 2 seconds fast, goes out
and starts to flash at longer intervals after about 30 seconds.
Switch-on display
The indicator light flashes for around 2 seconds in quick succession, after-
wards it begins to flash evenly at longer intervals.
WARNINGIf the car is locked and the safe securing system activated, no people must
remain in the car as it will then not be possible to either unlock a door or
open a window from the inside. The locked doors make it more difficult for
rescuers to get into the vehicle in an emergency – risk to life!Individual settings
Read and observe
and on page 51 first.
The following central locking functions can be set via the MAXI DOT dis-
play » page 47 , Settings .
Opening a single door
The function allows you to unlock only the driver's door and the fuel filler flap. The other doors and the boot lid remain locked and are only unlocked after be-
ing opened again.
Unlocking a vehicle side door
This function enables you to unlock both doors on the driver's side and the
fuel filler flap. The other doors and the boot lid remain locked and are only un-
locked after being opened again.
Unlock all doors
The function allows you to unlock all doors, the boot lid and the fuel filler flap.
Automatic locking/unlocking
All doors are locked from a speed of around 15 km/h. The button in the handle
of the boot lid is deactivated.
If the ignition key is withdrawn, the car is then automatically unlocked again. It
is also possible to unlock the vehicle by pressing the central locking button .
Locking / unlocking the vehicle with the central locking button
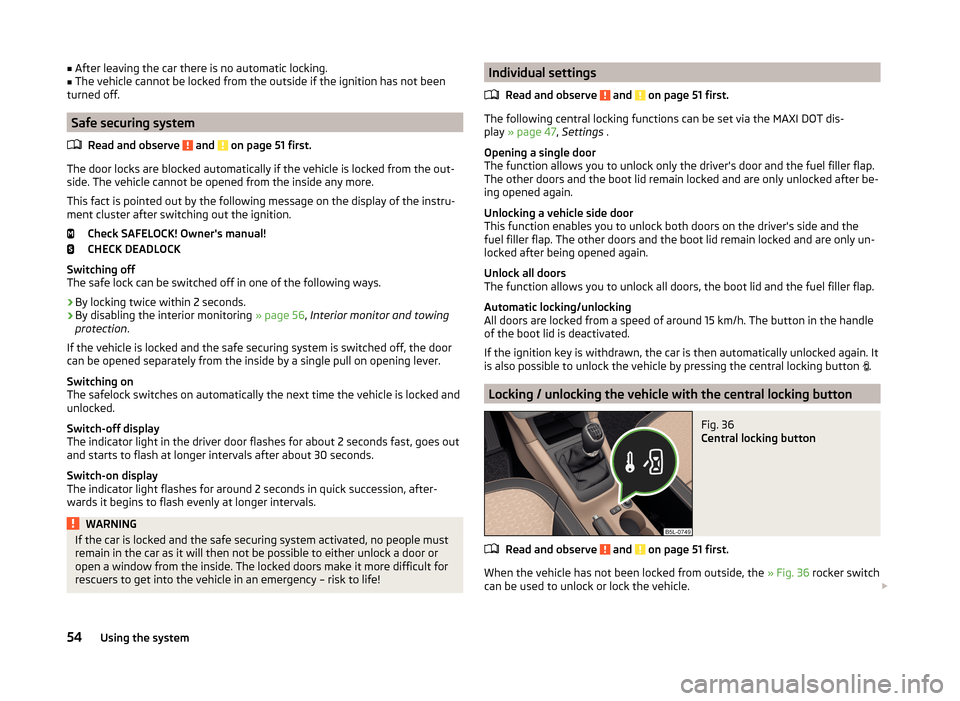
Fig. 36
Central locking button
Read and observe and on page 51 first.
When the vehicle has not been locked from outside, the
» Fig. 36 rocker switch
can be used to unlock or lock the vehicle.
54Using the system
Page 59 of 248
Anti-theft alarm system
Introduction
This chapter contains information on the following subjects:
Activating/deactivating
56
Interior monitor and towing protection
56
The anti-theft alarm system increases the level of protection against people
trying to break into the vehicle.
The alarm system triggers audible and visual signals if an attempt is made to
break into the vehicle (hereafter referred to only as alarm).
Triggering the alarm
The alarm is triggered when the following unauthorized actions are carried out
on the locked vehicle.
› Opening the bonnet.
› Opening the boot lid.
› Opening the doors.
› Manipulation of the ignition lock.
› Towing the vehicle
» page 56.
› Movement in the vehicle
» page 56.
› Sudden and significant voltage drop of the electrical system.
› Uncoupling the trailer
» page 163, Coupling / uncoupling trainer .
If the driver's door of a vehicle with a remote control is unlocked and opened by the lock cylinder, then the alarm is triggered.
Switching off the alarm
The alarm is turned off by pressing the button on the radio remote control
key or switching on the ignition.
CAUTION
Before leaving the vehicle, it must be checked that all of the windows, doors
and the sliding/tilting roof are locked in order to ensure the full functionality of
the anti-theft alarm system.
Note
The working life of the alarm siren is 5 years.Activating/deactivating
Read and observe
on page 56 first.
Activating
The anti-theft alarm system is activated automatically approximately 30 sec-
onds after the vehicle is locked.
If you unlock the vehicle and do not open a door or the boot lid within the next
30 seconds, the vehicle will lock again automatically and the safelock system
or anti-theft alarm system will be switched on. This function is intended to
prevent the car being unlocked unintentionally.
Deactivating
The anti-theft alarm system is deactivated automatically after the vehicle is
unlocked. If the vehicle is not opened within 30 seconds, the anti-theft alarm
system is automatically activated again.
The alarm system is also deactivated if you unlock the driver door using the
key within 45 seconds of locking the vehicle.
Note
You can switch the audible signalling of the activation of the warning system
on and off in the Maxi DOT display in the menu item ATA confirm » page 47 .
Interior monitor and towing protection
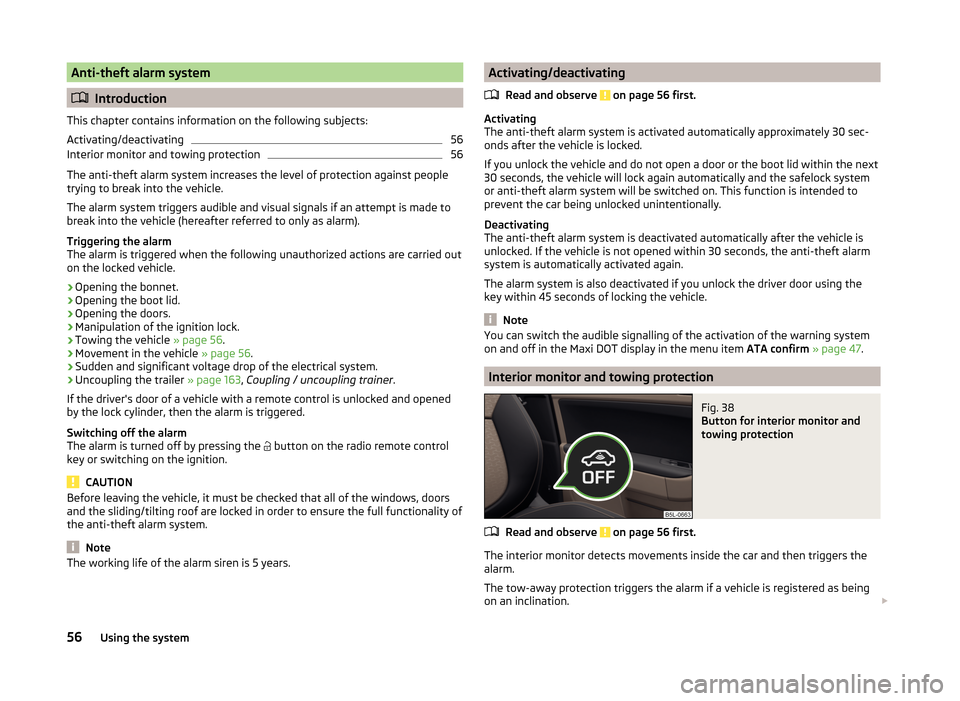
Fig. 38
Button for interior monitor and
towing protection
Read and observe on page 56 first.
The interior monitor detects movements inside the car and then triggers the alarm.
The tow-away protection triggers the alarm if a vehicle is registered as being
on an inclination.
56Using the system
Page 60 of 248

Activating
The interior monitor and the towing protection are activated automatically af-
ter the vehicle is locked.
Deactivate›
Switch off the ignition.
›
Open the driver door.
›
Press the symbol button
» Fig. 38 on the B column of the driver's side.
The illumination of the symbol
in the button changes from red to orange.
›
Lock the vehicle within 30 seconds.
Deactivate the interior monitor and the towing protection if there is a possibili-
ty of the alarm being triggered by movements (e.g. by children or animals)
within the vehicle interior or if the vehicle has to be transported (e.g. by train
or ship) or towed.
CAUTION
■ The opened glasses storage compartment reduces the effectiveness of the
interior monitor. To ensure the full functionality of the interior monitor, the
glasses storage compartment must always be closed before locking the vehi-
cle.■
The anti-theft alarm system is activated when the vehicle is locked even if
the safe securing system is deactivated. The interior monitor is however not
activated.
Luggage compartment lid
Introduction
This chapter contains information on the following subjects:
Opening/closing
57
Delayed locking of the boot lid
58WARNING■ Ensure that the lock is properly engaged after closing the boot lid. Other-
wise, the lid might open suddenly while the vehicle is moving, even if the
lid was locked – risk of accident!■
Never drive with the boot lid open or ajar, as otherwise exhaust gases
may get into the interior of the vehicle – risk of poisoning!
WARNING (Continued)■ Do not press on the rear window when closing the luggage compartment
lid, it could crack – risk of injury!■
Make sure that when closing the boot lid, no body parts are crushed -
there is danger of injury!
Note
The function of the button in the grip above the licence plate is deactivated
when starting off or at a speed of 5 km/hour or more for vehicles with central
locking. The function is restored after the vehicle stops and the door is
opened.
Opening/closing
Fig. 39
Opening / closing tailgate
Read and observe
on page 57 first.
After unlocking the vehicle, the boot lid can be opened with the button in the
handle above the number plate.
Opening / closing tailgate » Fig. 39
Unlocking the door
Open flap
Closing the flap (by pulling the handle)
12357Unlocking and opening
Page 71 of 248
The rear fog light is switched off in the reverse order.
The warning light
lights up in the instrument cluster when the rear fog light
is switched on » page 34.
Only the rear fog light on the trailer lights up if the vehicle has a factory-fitted
towing device or a towing device from ŠKODA original accessories and it is
driven with a trailer.
COMING HOME / LEAVING HOME
Read and observe
on page 63 first.
COMING HOME (hereinafter referred to only as a function) switches the light
automatically for a short time after leaving the vehicle.
LEAVING HOME (hereinafter referred to only as a function) switches the light
automatically for a short time when approaching the vehicle.
The daytime running lights are switched on automatically if the following
conditions are met.
The light switch is in position
» Fig. 47 on page 66 .
The visibility in the vehicle environment is reduced.
The ignition is switched off.
The parking aid is activated.
The function is switched on (the driver's door is opened / the car is un-
locked with the remote control).
The function switches on the following light, depending on the equipment
fitted.
› Parking lights
› Low beam
› Entry lighting in the exterior mirrors
› Licence plate light
Poorer visibility is evaluated by a motor mounted in the holder of the interior
mirror sensor.
COMING HOME
The light turns on automatically when you open the driver's door on (within 60
seconds of turning off the ignition).
The light turns off 10 seconds after closing all the doors and the boot lid or af-
ter the pre-set time has expired.
If a door or the boot lid remains open, the light goes out after 60 seconds.
LEAVING HOME
The light turns on automatically after the vehicle is unlocked with the remote
control.
The light turns off after 10 seconds or after a pre-set time or after the vehicle
is locked.
If no door is opened, the vehicle is locked automatically after 30 seconds.
Enabling / disabling and setting function
The functions and settings of the illumination time can be activated/deactiva-
ted via the MAXI DOT display in the menu items Coming Home or Leaving
Home » page 47 .
CAUTION
■
Do not attach any stickers or similar objects in front of the light sensor on
the windscreen to avoid impairing the function or its reliability.■
If this function is activated constantly, the battery will be heavily discharged
particularly in short-haul traffic.
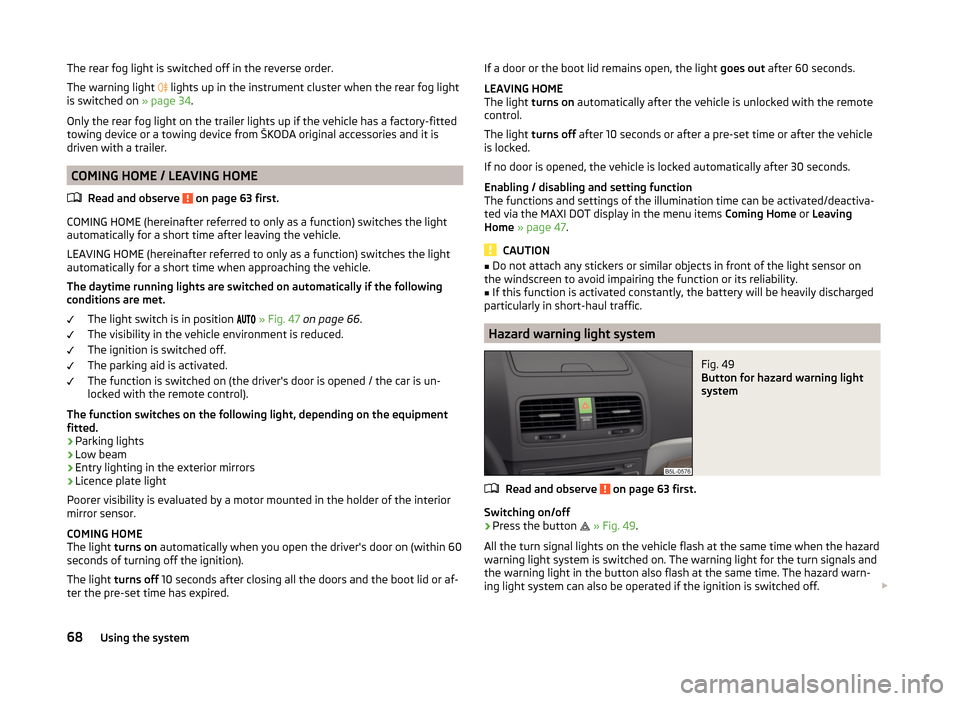
Hazard warning light system
Fig. 49
Button for hazard warning light
system
Read and observe on page 63 first.
Switching on/off
›
Press the button
» Fig. 49 .
All the turn signal lights on the vehicle flash at the same time when the hazard
warning light system is switched on. The warning light for the turn signals and
the warning light in the button also flash at the same time. The hazard warn-
ing light system can also be operated if the ignition is switched off.
68Using the system
Page 98 of 248
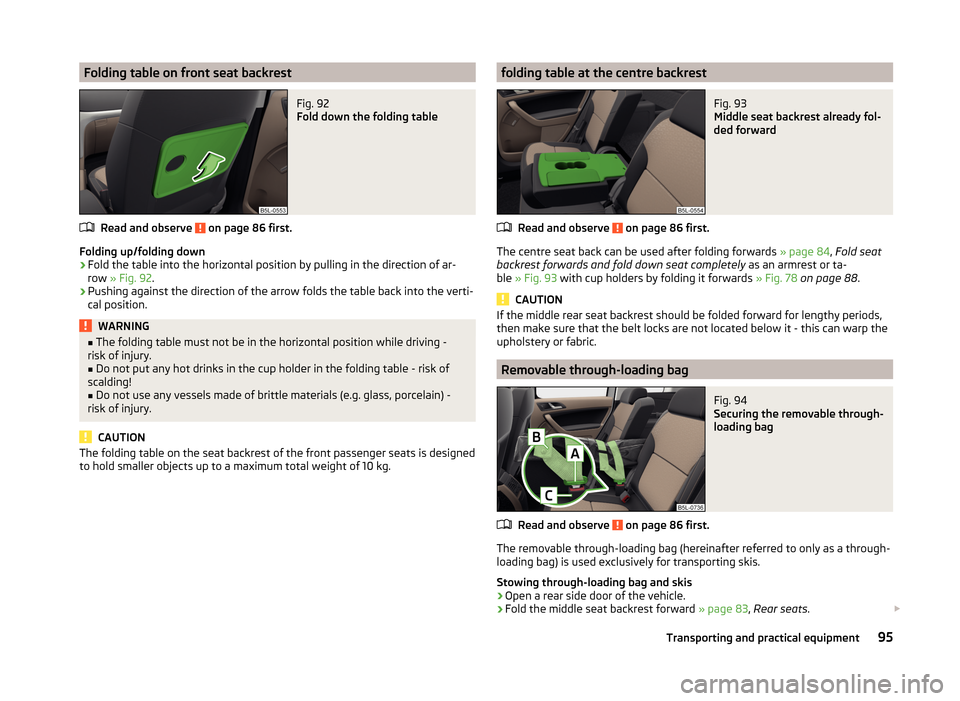
Folding table on front seat backrestFig. 92
Fold down the folding table
Read and observe on page 86 first.
Folding up/folding down
›
Fold the table into the horizontal position by pulling in the direction of ar-
row » Fig. 92 .
›
Pushing against the direction of the arrow folds the table back into the verti-
cal position.
WARNING■ The folding table must not be in the horizontal position while driving -
risk of injury.■
Do not put any hot drinks in the cup holder in the folding table - risk of
scalding!
■
Do not use any vessels made of brittle materials (e.g. glass, porcelain) -
risk of injury.
CAUTION
The folding table on the seat backrest of the front passenger seats is designed
to hold smaller objects up to a maximum total weight of 10 kg.folding table at the centre backrestFig. 93
Middle seat backrest already fol-
ded forward
Read and observe on page 86 first.
The centre seat back can be used after folding forwards » page 84, Fold seat
backrest forwards and fold down seat completely as an armrest or ta-
ble » Fig. 93 with cup holders by folding it forwards » Fig. 78 on page 88 .
CAUTION
If the middle rear seat backrest should be folded forward for lengthy periods,
then make sure that the belt locks are not located below it - this can warp the
upholstery or fabric.
Removable through-loading bag
Fig. 94
Securing the removable through-
loading bag
Read and observe on page 86 first.
The removable through-loading bag (hereinafter referred to only as a through- loading bag) is used exclusively for transporting skis.
Stowing through-loading bag and skis
›
Open a rear side door of the vehicle.
›
Fold the middle seat backrest forward » page 83, Rear seats .
95Transporting and practical equipment
Page 103 of 248
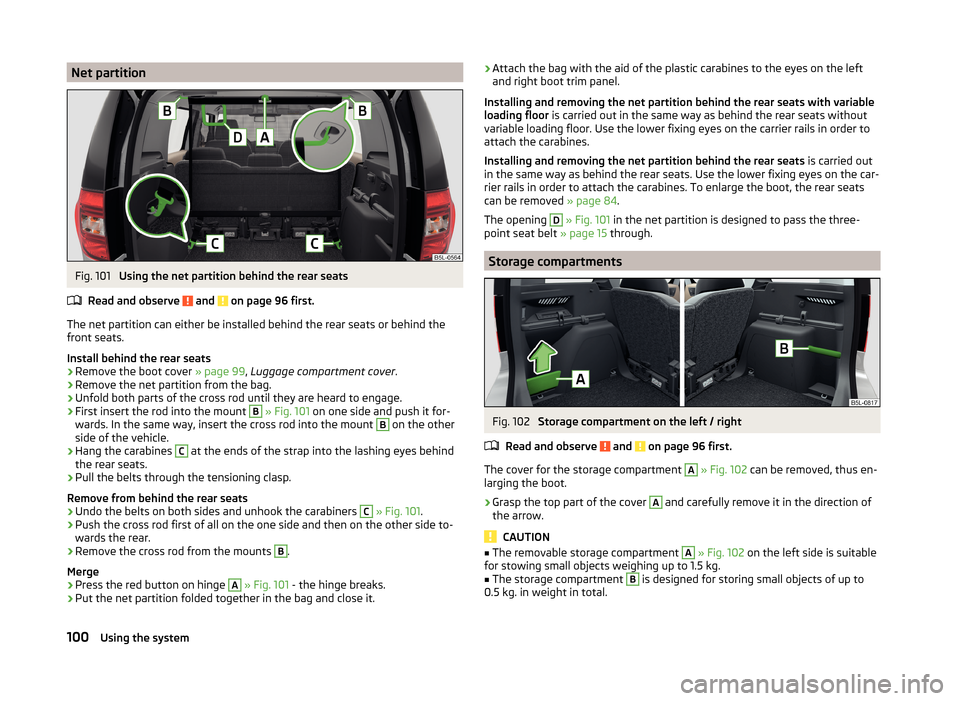
Net partitionFig. 101
Using the net partition behind the rear seats
Read and observe
and on page 96 first.
The net partition can either be installed behind the rear seats or behind the front seats.
Install behind the rear seats
›
Remove the boot cover » page 99, Luggage compartment cover .
›
Remove the net partition from the bag.
›
Unfold both parts of the cross rod until they are heard to engage.
›
First insert the rod into the mount
B
» Fig. 101 on one side and push it for-
wards. In the same way, insert the cross rod into the mount
B
on the other
side of the vehicle.
›
Hang the carabines
C
at the ends of the strap into the lashing eyes behind
the rear seats.
›
Pull the belts through the tensioning clasp.
Remove from behind the rear seats
›
Undo the belts on both sides and unhook the carabiners
C
» Fig. 101 .
›
Push the cross rod first of all on the one side and then on the other side to-
wards the rear.
›
Remove the cross rod from the mounts
B
.
Merge
›
Press the red button on hinge
A
» Fig. 101 - the hinge breaks.
›
Put the net partition folded together in the bag and close it.
›Attach the bag with the aid of the plastic carabines to the eyes on the left
and right boot trim panel.
Installing and removing the net partition behind the rear seats with variable
loading floor is carried out in the same way as behind the rear seats without
variable loading floor. Use the lower fixing eyes on the carrier rails in order to
attach the carabines.
Installing and removing the net partition behind the rear seats is carried out
in the same way as behind the rear seats. Use the lower fixing eyes on the car-
rier rails in order to attach the carabines. To enlarge the boot, the rear seats
can be removed » page 84.
The opening D
» Fig. 101 in the net partition is designed to pass the three-
point seat belt » page 15 through.
Storage compartments
Fig. 102
Storage compartment on the left / right
Read and observe
and on page 96 first.
The cover for the storage compartment
A
» Fig. 102 can be removed, thus en-
larging the boot.
›
Grasp the top part of the cover
A
and carefully remove it in the direction of
the arrow.
CAUTION
■ The removable storage compartment A » Fig. 102 on the left side is suitable
for stowing small objects weighing up to 1.5 kg.■
The storage compartment
B
is designed for storing small objects of up to
0.5 kg. in weight in total.
100Using the system
Page 147 of 248
EDL switches off automatically to avoid excessive heat generation on the
brake of the wheel being braked. The vehicle can continue to be driven and
has the same characteristics as a vehicle not fitted with EDL. Once the brakes
have cooled down, there is an automatic re-activation of EDL.
Driver Steering Recommendation (DSR)
Read and observe
on page 142 first.
In critical situations, the DSR provides the driver with a steering recommenda-
tion in order to stabilise the vehicle. The DSR is activated, for example, on the
right and left vehicle side when braking sharply on different road surfaces.
Hydraulic Brake Assist (HBA)
Read and observe
on page 142 first.
The HBA increases the braking effect and helps to reduce the braking dis-
tance.
The HBA is activated by very quick operation of the brake pedal. In order to
achieve the shortest possible braking distance, the brake pedal must be ap-
plied firmly until the vehicle has come to a standstill.
The HBA function is automatically deactivated when the brake pedal is re-
leased.
Hill Hold Control (HHC)
Read and observe
on page 142 first.
When driving on slopes, HHC allows you to move your foot from the brake ped-
al to the accelerator pedal without having to use the handbrake.
The system holds the brake pressure produced by the activation of the brake pedal for approx. 2 seconds after the brake pedal is released.
The brake pressure drops gradually the more you operate the accelerator ped-
al. If the vehicle does not start off within 2 seconds, it starts to roll back.
The HHC is active from a 5% slope if the driver's door is closed. HHC is only ev- er active on slopes when in forward or reverse start off.
Trailer stabilisation (TSA)
Read and observe
on page 142 first.
The TSA helps the combination stable in situations where the trailer sways
and then the whole trailer combination.
TSA brakes the individual wheels of the towing vehicle in order to damp the
rocking motion of the entire vehicle combination.
The following conditions are required for the correct TSA function. The trailer was shipped from the factory or purchased from the ŠKODA
genuine accessories.
The trailer is electrically connected to the towing vehicle via the trailer
socket.
The parking aid is activated.
The speed is higher than approx. 60 km/h.
The activated TSA is shown by the fact that after switching on the ignition, the
indicator light in the instrument cluster lights up for about 2 seconds longer
than the indicator light .
Further information » page 165, Towing a trailer .
OFF ROAD-mode
Introduction
This chapter contains information on the following subjects:
Operation
145
Hill Descent Assistant
145
TCSOFF ROAD
146
EDS OFF ROAD
146
ABS OFF ROAD
146
Start-Off Assistant
146
The OFF ROAD mode includes several features that help to overcome difficult
navigable routes when travelling on non-paved roads.
But even with OFF ROAD mode activated, your vehicle is never a true SUV.
144Driving
Page 151 of 248
Approximate range of sensors (in cm)Area » Fig. 136Version 1
(4 sensors)Version 2
(8 sensors)Version 3
(12 sensors)A-120120B-6060C160160160D606060E--60
Audible signals
The interval between the acoustic signals becomes shorter as the clearance is
reduced. A continuous tone sounds from a distance of approx. 30 cm - danger
area. From this moment on do not continue driving!
Towing a trailer
On vehicles equipped with a factory-fitted towing device, only system areas
A
and
B
» Fig. 136 are active when towing a trailer.
Note
■
If with Version 3 vehicles not all fields around the vehicle are active after ac-
tivation the vehicle should be moved forwards or backwards.■
The signal tones for front obstacle recognition are factory-set to be higher
than for rear obstacle recognition.
■
The sound of the park-assist can be adjusted via the MAXI DOT display in the
Assistants menu option » page 47.
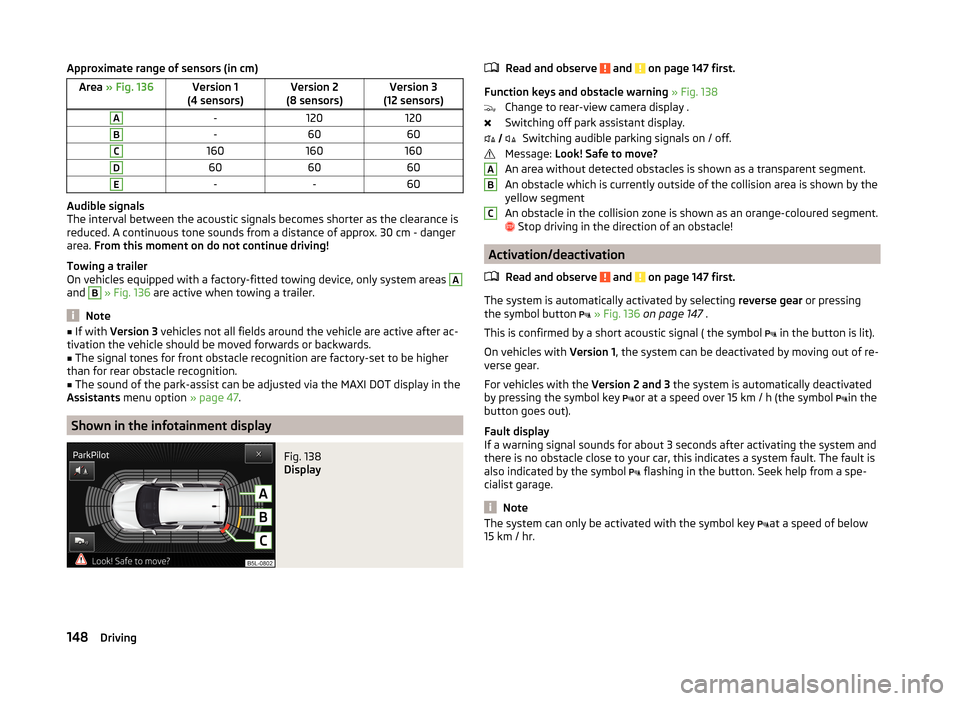
Shown in the infotainment display
Fig. 138
Display
Read and observe and on page 147 first.
Function keys and obstacle warning » Fig. 138
Change to rear-view camera display .
Switching off park assistant display. Switching audible parking signals on / off.
Message: Look! Safe to move?
An area without detected obstacles is shown as a transparent segment.
An obstacle which is currently outside of the collision area is shown by the
yellow segment
An obstacle in the collision zone is shown as an orange-coloured segment.
Stop driving in the direction of an obstacle!
Activation/deactivation
Read and observe
and on page 147 first.
The system is automatically activated by selecting reverse gear or pressing
the symbol button
» Fig. 136 on page 147 .
This is confirmed by a short acoustic signal ( the symbol in the button is lit).
On vehicles with Version 1, the system can be deactivated by moving out of re-
verse gear.
For vehicles with the Version 2 and 3 the system is automatically deactivated
by pressing the symbol key or at a speed over 15 km / h (the symbol
in the
button goes out).
Fault display
If a warning signal sounds for about 3 seconds after activating the system and
there is no obstacle close to your car, this indicates a system fault. The fault is
also indicated by the symbol flashing in the button. Seek help from a spe-
cialist garage.
Note
The system can only be activated with the symbol key at a speed of below
15 km / hr. ABC148Driving