airbag off SKODA YETI 2015 1.G / 5L User Guide
[x] Cancel search | Manufacturer: SKODA, Model Year: 2015, Model line: YETI, Model: SKODA YETI 2015 1.G / 5LPages: 232, PDF Size: 30.84 MB
Page 34 of 232
AdBlue (DEF) refill! Range: ...ADBLUE RANGE …
The range in the display indicates the distance that can be driven with the re-
maining AdBlue ®
left in the tank.
Refill AdBlue ®
» page 164 .
AdBlue (DEF) refill! No engine start in …ADBLUE NO START IN …
The range in the display indicates the distance to travel, after which no engine
restart is possible, as long as no AdBlue ®
is added.
Refill AdBlue ®
» page 164 .
AdBlue (DEF) refill! No engine start possible.ADBLUE NO RESTART
It is no longer possible to start the engine.
Refill AdBlue ®
» page 164 .
WARNINGIf you have to stop for technical reasons, then park the vehicle at a safe
distance from the traffic, switch off the engine and switch on the hazard
warning light system » page 68. Place the warning triangle at the prescri-
bed distance.
Note
■ If the MAXI DOT display shows warning messages, these messages must be
confirmed in order to access the main menu » page 41, Operation .■
As long as the operational faults are not rectified, the warning lights are al-
ways indicated again. After they are displayed for the first time, the warning
lights continue to be indicated without any extra messages for the driver.
Warning lights
Introduction
This chapter contains information on the following subjects:
Handbrake
33
Brake system
33
Seat belt warning light
33 Alternator33 Door open33
Coolant
33
Boot lid
34
Power steering/steering lock (KESSY system)
34
34
Traction Control System (ASR)
35
Electronic Stability Control (ESC)
35
Traction control (TCS) is deactivated
35
Antilock brake system (ABS)
36
Rear fog light
36
Lamp failure
36
Xenon headlights (AFS)
36
Exhaust inspection system
36
Glow plug system (diesel engine)
36
Engine performance check (petrol engine)
37
Diesel particulate filter (diesel engine)
37
Fuel reserve
37
Airbag system
37
Tyre pressure
38
Windscreen washer fluid level
38
Turn signal system
38
Fog lights
39
Cruise control system
39
Brake pedal (automatic gearbox)
39
OFF ROADmode
39
Main beam
39
The warning lights indicate certain functions or faults.
Some warning lights can be accompanied by acoustic signals and messages in
the display of the instrument cluster.
After switching on the ignition, some warning lights light up briefly as a func-
tion test.
If the tested systems are OK, the corresponding warning lights go out a few
seconds after switching on the ignition or after starting the engine.
32Using the system
Page 39 of 232
Engine performance check (petrol engine)Read and observe
on page 33 first.
illuminates – there is a fault in the engine management system. The system
allows operation emergency mode - there may be a noticeable reduction in en-
gine performance.
Seek help from a specialist garage.
Diesel particulate filter (diesel engine)
Read and observe
on page 33 first.
The diesel particulate filter separates the soot particles from the exhaust. The
soot particles collect in the diesel particulate filter where they are burnt on a
regular basis.
Illuminates – the filter is clogged with soot.
To clean the filter, and where traffic conditions permit »
, drive as follows for
at least 15 minutes or until the indicator light goes out.
4th or 5th gear engaged (automatic gearbox: position S).
Vehicle speed at least 70 km/h.
Engine speed between 1800-2500 rpm.
If the filter is properly cleaned, the warning light extinguishes.
If the filter is not properly cleaned, the warning light does not go out and
the warning light begins to flash.
Diesel Particulate Filter: Owner´s manual!
The system allows the vehicle to run in emergency mode. After switching the
ignition off and on again the indicator light, the warning light also illumi-
nates.
Seek help from a specialist garage.
WARNING■ Always adjust the speed and driving style to the actual weather, road, ter-
rain and traffic conditions.■
The diesel particulate filter reaches very high temperatures - there is a
fire hazard and serious injury could be caused. Therefore, never stop the
vehicle at places where the underside of your vehicle can come into contact
with flammable materials such as dry grass, undergrowth, leaves, spilled
fuel or such like.
CAUTION
■ As long as the warning light illuminates, one must take into account an
increased fuel consumption and a power reduction of the engine.■
Using diesel fuel with an increased sulphur content can considerably reduce
the life of the diesel particle filter. A ŠKODA partner will be able to tell you
which countries use diesel fuel with a high sulphur content.
Note
■ To assist the combustion process of the soot particles in the filter, we recom-
mend that regularly driving short distances be avoided.■
If the engine is turned off during the filter cleaning process or shortly after-
wards, the cooling fan may turn on automatically for a few minutes.
Fuel reserve
Read and observe
on page 33 first.
illuminates – the fuel level in the fuel tank is at the reserve level (approxi-
mately 9 litres).
An audible signal sounds as a warning.
Please refuel. Range: ... km
Note
The text in the display goes out only after refuelling and driving a short dis-
tance.
Airbag system
Read and observe
on page 33 first.
System fault
illuminates - there is a fault in the airbag system.
37Instruments and Indicator Lights
Page 40 of 232
Error: airbag
Seek help from a specialist garage.
The front passenger airbag has been disabled with the key switch
Illuminates for around 4 seconds after the ignition has been switched on.
under the letters
in the middle of the dash panel illumi-
nates after switching on the ignition » page 20.
One of the airbags or a belt tensioner has been disabled by the diagnostic
tool
illuminates for approximately 4 seconds after the ignition is switched on
and then flashes for approximately 12 seconds.
Airbag / belt tensioner deactivated.WARNINGWhen a fault in the airbag system occurs, there is a risk of the system not
being triggered in the event of an accident. Therefore, this must be
checked immediately by a specialized company.
Tyre pressure
Read and observe
on page 33 first.
Change of tyre pressure values
illuminates – there was a pressure change in one of the tyres.
An audible signal sounds as a warning.
›
Immediately reduce speed and avoid sudden steering and braking manoeu-
vres.
›
Stop the vehicle, turn the ignition off and check the tyres and their inflation
pressures » page 176 .
›
Correct the tyre pressure if necessary or replace the affected wheel
» page 182 or use the repair kit » page 186.
›
Save the tyre pressure values in the system » page 141.
System fault
flashes for approximately 1 minute and remains lit – there may be a fault in
the tyre pressure monitoring system.
›
Stop the vehicle, turn the ignition off and start the engine again.
If the warning light flashes again after the engine has started, there is a
system error.
Seek help from a specialist garage.
Disconnecting the vehicle battery
If the vehicle's battery has been disconnected and reconnected, the indicator
light
comes on after switching on the ignition.
The warning light should go out after driving a short distance.
If, after a short drive, the indicator light does not go out, there is a system er-
ror.
Seek help from a specialist garage.
Other incidents
The following reasons can explain the warning light being illuminated.
▶ The vehicle is loaded on one side. Distribute loads as evenly as possible.
▶ The wheels of one axle are loaded more heavily (e.g. when towing a trailer or
when driving uphill or downhill).
▶ Snow chains are mounted.
▶ A wheel has been changed.
CAUTION
Under certain circumstances (e.g. sporty style of driving, wintry or unpaved
roads) the warning light can be delayed or does not light up at all.
Windscreen washer fluid level
Read and observe
on page 33 first.
illuminates – the windscreen washer fluid level is too low.
Top up wash fluid!›
Fill up the windscreen washer fluid.
Turn signal system
Read and observe
on page 33 first.
flashes – the left turn signal is turned on.
flashes – the right turn signal is turned on.
If there is a fault in the turn signal system, the warning light flashes at twice
its normal rate. This does not apply when towing a trailer.
When the hazard warning light system is switched on, this will cause all of the
turn signal lights as well as both warning lights to flash.
38Using the system
Page 52 of 232
More information on available applications, a list of compatible communication
devices and on SmartGate, can be found on the ŠKODA website » Fig. 33.
http://www.skoda-auto.comWARNING■ The general binding country-specific regulations for operating communi-
cation devices in the vehicle must be observed.■
Never leave a communication device in the deployment area of an airbag,
on a seat, on the dash panel or any another area, from which it can be
thrown during a sudden braking manoeuvre, an accident or a collision - risk
of injury!
■
Never connect or disconnect a communication device while driving - risk
of accident!
CAUTION
■ To increase the access security to the transmitted vehicle data, once the
ŠKODA application has been started, you are requested to change the pass-
word/PIN code if the default password/PIN code has not yet been changed
» page 51 , Password/PIN code change . It is not possible to start the ŠKODA
application without changing it.■
ŠKODA accepts no responsibility for any problems caused by incompatibility
or improper functioning of the communication devices.
Note
The ŠKODA applications, support communications devices with the Android
operating system version 4.x.x and later and iOS 7.x.x and higher.
Connection to SmartGate using Wi-Fi
Read and observe
and on page 50 first.
Connecting to an Android communication device
›
Switch on the ignition.
›
Switch on the Wi-Fi on the communication device to be connected.
›
Start the SmartGate application using the communication device to be con-
nected.
›
Then follow the instructions in the manual, which are included in the
SmartGate application.
With SmartGate, a maximum of four communication devices can be connected
simultaneously using Wi-Fi, with as many launched ŠKODA applications as re-
quired.
Connecting to an iOS communication device›
Switch on the ignition.
›
Switch on the Wi-Fi on the communication device to be connected.
›
Allow the communication device to be connected to search for available Wi-
Fi networks (see the Owner's Manual for the communication device to be
connected).
›
In the menu of the detected networks select “SmartGate_...” 1)
or “DIRECT
SmartGate_...” 1)
.
›
Enter the password » page 51.
With SmartGate, a maximum of four communication devices can be connected
simultaneously using Wi-Fi. In these communication devices, up to four ŠKODA
applications can be started simultaneously.
Disconnection
The connection can be switched off in one of the following ways.
›
Switch off the ignition for longer than 5 seconds (for vehicles with a starter
button, switch off the engine and open the driver's door).
›
End the connection in the SmartGate application.
›
Switch off the Wi-Fi on the connected communication device.
Automatic connection
If the communication device once had a connection with SmartGate, then the
connection is automatically restored under the following conditions.
The ignition is switched on.
The Wi-Fi on the communication device to be connected is switched on.
The communication device to be connected stores the password required
for the connection check.
Connection to SmartGate using Wi-Fi Direct
Read and observe
and on page 50 first.
This type of connection is intended for communication devices running theAndroid operating system.
1)
The last 6 characters of the VIN vehicle identification number of your vehicle are displayed at position
....
50Using the system
Page 70 of 232
The function LEAVING HOME ensures that the vehicle's environment is illumi-
nated after unlocking the vehicle with the radio remote control unit.
The function switches the light on only if there is poorer visibility and the light
switch is in the position
.
Enabling / disabling and setting function
The functions and settings of the illumination time can be activated / deactiva-
ted via the MAXI DOT display in the menu items Coming Home
or
Leaving Home
» page 47 .
CAUTION
■
Poorer visibility is evaluated by a motor mounted below the windscreen in
the holder of the interior mirror sensor. Do not attach any stickers or similar
objects in front of the light sensor on the windscreen in order to avoid impair-
ing the function or its reliability.■
If this option is always enabled, then the battery is heavily loaded.
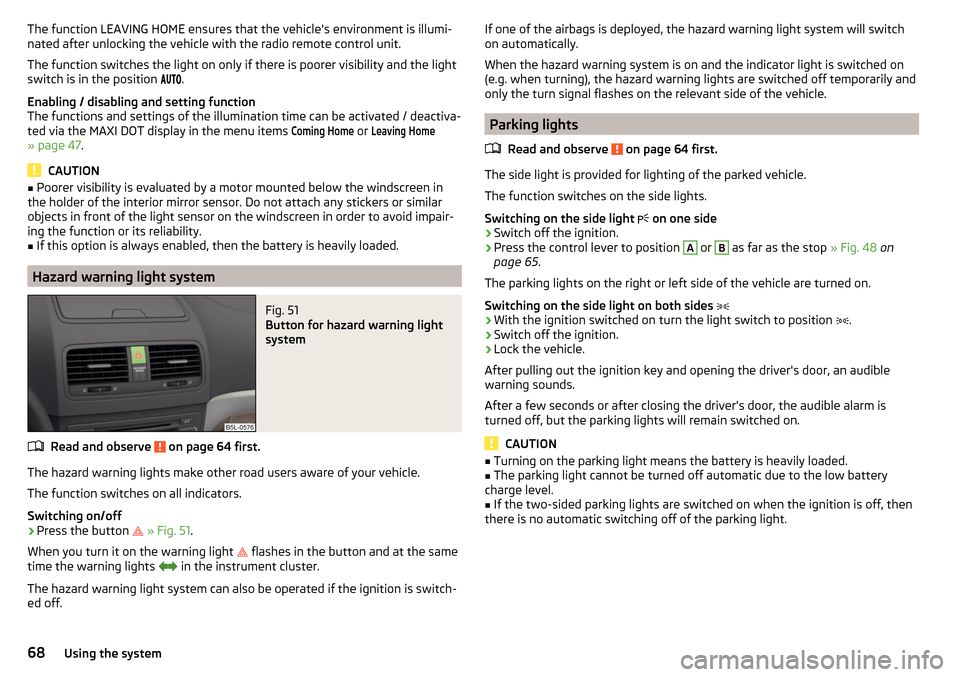
Hazard warning light system
Fig. 51
Button for hazard warning light
system
Read and observe on page 64 first.
The hazard warning lights make other road users aware of your vehicle.
The function switches on all indicators.
Switching on/off
›
Press the button
» Fig. 51 .
When you turn it on the warning light
flashes in the button and at the same
time the warning lights
in the instrument cluster.
The hazard warning light system can also be operated if the ignition is switch-
ed off.
If one of the airbags is deployed, the hazard warning light system will switch
on automatically.
When the hazard warning system is on and the indicator light is switched on
(e.g. when turning), the hazard warning lights are switched off temporarily and
only the turn signal flashes on the relevant side of the vehicle.
Parking lights
Read and observe
on page 64 first.
The side light is provided for lighting of the parked vehicle.
The function switches on the side lights.
Switching on the side light on one side
›
Switch off the ignition.
›
Press the control lever to position
A
or
B
as far as the stop
» Fig. 48 on
page 65 .
The parking lights on the right or left side of the vehicle are turned on.
Switching on the side light on both sides
›
With the ignition switched on turn the light switch to position .
›
Switch off the ignition.
›
Lock the vehicle.
After pulling out the ignition key and opening the driver's door, an audible
warning sounds.
After a few seconds or after closing the driver's door, the audible alarm is
turned off, but the parking lights will remain switched on.
CAUTION
■ Turning on the parking light means the battery is heavily loaded.■The parking light cannot be turned off automatic due to the low battery
charge level.■
If the two-sided parking lights are switched on when the ignition is off, then
there is no automatic switching off of the parking light.
68Using the system
Page 73 of 232
Note■If the on-board voltage decreases, the heating switches off automatically
» page 175 , Automatic load deactivation .■
If the light is flashing inside the button the heater is off due to low battery.
■
The position and shape of the switch may vary according to the equipment
fitted.
Sun visors in the front
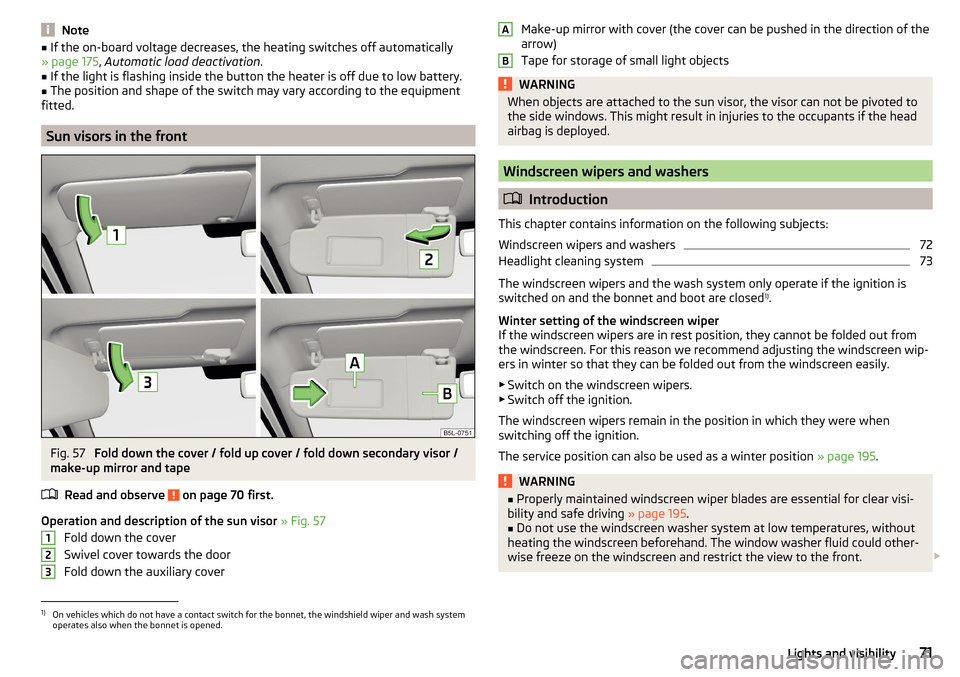
Fig. 57
Fold down the cover / fold up cover / fold down secondary visor /
make-up mirror and tape
Read and observe
on page 70 first.
Operation and description of the sun visor » Fig. 57
Fold down the cover
Swivel cover towards the door
Fold down the auxiliary cover
123Make-up mirror with cover (the cover can be pushed in the direction of the
arrow)
Tape for storage of small light objectsWARNINGWhen objects are attached to the sun visor, the visor can not be pivoted to
the side windows. This might result in injuries to the occupants if the head
airbag is deployed.
Windscreen wipers and washers
Introduction
This chapter contains information on the following subjects:
Windscreen wipers and washers
72
Headlight cleaning system
73
The windscreen wipers and the wash system only operate if the ignition is
switched on and the bonnet and boot are closed 1)
.
Winter setting of the windscreen wiper
If the windscreen wipers are in rest position, they cannot be folded out from
the windscreen. For this reason we recommend adjusting the windscreen wip-
ers in winter so that they can be folded out from the windscreen easily.
▶ Switch on the windscreen wipers.
▶ Switch off the ignition.
The windscreen wipers remain in the position in which they were when
switching off the ignition.
The service position can also be used as a winter position » page 195.
WARNING■
Properly maintained windscreen wiper blades are essential for clear visi-
bility and safe driving » page 195.■
Do not use the windscreen washer system at low temperatures, without
heating the windscreen beforehand. The window washer fluid could other-
wise freeze on the windscreen and restrict the view to the front.
AB1)
On vehicles which do not have a contact switch for the bonnet, the windshield wiper and wash system
operates also when the bonnet is opened.
71Lights and visibility
Page 81 of 232
›Fold down the rear armrest.
Move›
Move the cover into the desired position in the direction of the arrow
B
» Fig. 65 .
Note
Push the armrest cover all the way back to the stop before applying the hand-
brake.
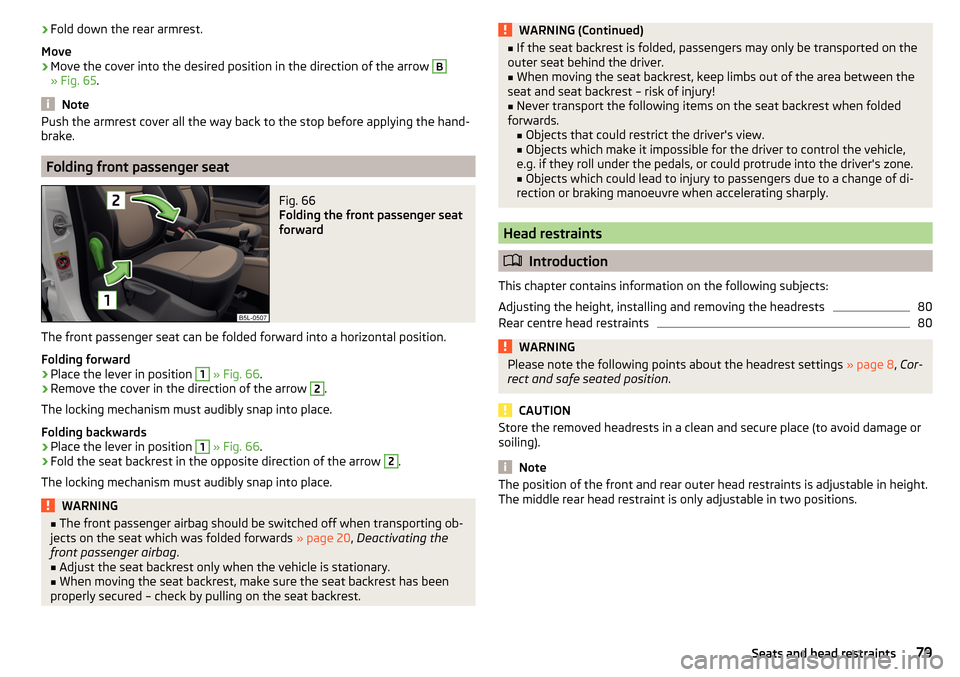
Folding front passenger seat
Fig. 66
Folding the front passenger seat
forward
The front passenger seat can be folded forward into a horizontal position.
Folding forward
›
Place the lever in position
1
» Fig. 66 .
›
Remove the cover in the direction of the arrow
2
.
The locking mechanism must audibly snap into place.
Folding backwards
›
Place the lever in position
1
» Fig. 66 .
›
Fold the seat backrest in the opposite direction of the arrow
2
.
The locking mechanism must audibly snap into place.
WARNING■ The front passenger airbag should be switched off when transporting ob-
jects on the seat which was folded forwards » page 20, Deactivating the
front passenger airbag .■
Adjust the seat backrest only when the vehicle is stationary.
■
When moving the seat backrest, make sure the seat backrest has been
properly secured – check by pulling on the seat backrest.
WARNING (Continued)■ If the seat backrest is folded, passengers may only be transported on the
outer seat behind the driver.■
When moving the seat backrest, keep limbs out of the area between the
seat and seat backrest – risk of injury!
■
Never transport the following items on the seat backrest when folded
forwards. ■Objects that could restrict the driver's view.
■ Objects which make it impossible for the driver to control the vehicle,
e.g. if they roll under the pedals, or could protrude into the driver's zone. ■ Objects which could lead to injury to passengers due to a change of di-
rection or braking manoeuvre when accelerating sharply.
Head restraints
Introduction
This chapter contains information on the following subjects:
Adjusting the height, installing and removing the headrests
80
Rear centre head restraints
80WARNINGPlease note the following points about the headrest settings » page 8, Cor-
rect and safe seated position .
CAUTION
Store the removed headrests in a clean and secure place (to avoid damage or
soiling).
Note
The position of the front and rear outer head restraints is adjustable in height.
The middle rear head restraint is only adjustable in two positions.79Seats and head restraints
Page 153 of 232
ŠKODA Service Partners are liable for any defects of ŠKODA Genuine Accesso-
ries for a period of 2 years after installation or delivery in accordance with the
materials defect liability, unless agreed otherwise in the purchase agreement
or any other agreements. You should keep the approved warranty certificate
and the invoices for these accessories for this period of time, so that the com-
mencement of the term can be verified.
ŠKODA Service Partners also stock a range of suitable car care products and all
parts that are subject to natural wear-and-tear, such as tyres, batteries, bulbs
and wiper blades.
Note
The accessories authorized by the company ŠKODA AUTO a.s. will be offered
by the ŠKODA Partners in all countries where the company ŠKODA AUTO a.s.
has a sales and after-sales service network. This will usually be in the form of a
printed catalogue of ŠKODA Genuine Accessories, in the form of separate prin-
ted brochures or in the form of ŠKODA Genuine Accessories on the ŠKODA
Partner websites.
Spoiler
Read and observe
on page 149 first.
If your new vehicle is fitted with a spoiler on the front bumper in combination
with the spoiler on the luggage compartment lid, the following instructions
must be adhered to. ▶ For safety reasons, the vehicle must only be fitted with a spoiler on the front
bumper in combination with the associated spoiler on the luggage compart-
ment lid.
▶ This kind of spoiler cannot be left on the front bumper either on its own, in
combination with another spoiler not on the luggage compartment lid or in
combination with an unsuitable spoiler on the luggage compartment lid.
▶ We recommend that you consult the ŠKODA Service Partner for any repairs
to or replacement, addition or removal of spoilers.
WARNING■ If work on your vehicle's spoilers is not carried out properly, this can lead
to operational faults - risk of accident and serious injuries.■
If a front spoiler, full wheel trim, etc. is mounted retrospectively, it must
be ensured that the air supply to the front wheel brakes is not reduced.
The front brakes may overheat which can have a negative impact on the
functioning of the braking system – risk of accident!
Component protection
Read and observe
on page 149 first.
Some electronic vehicle components (such as the instrument cluster) are fac-
tory-equipped with component protection.
Component protection has been developed as a protection mechanism for the
following situations. ▶ Impairment of factory- or garage-fitted electronic components after installa-
tion in another vehicle (for example, after a theft).
▶ Impairment of electronic components used outside the vehicle.
▶ The possibility of a legitimate installation or change of electronic compo-
nents for repairs at a specialist garage.
The activated component protection can be realized by functional limitations
of the specific electronic component. Seek help from a specialist garage.
Airbags
Read and observe
on page 149 first.
WARNING■Modifications, repairs and technical alterations that have been carried out
unprofessionally can cause damage and operational faults, and can also se-
riously impair the effectiveness of the airbag system – risk of accident and
fatal injury!■
A change to the vehicle's wheel suspension, including the use of non-ap-
proved wheels and tire combinations, can alter the functioning of the air-
bag system - risk of accident and fatal injury!
WARNINGInformation on the use of the airbag system■Never install any airbag parts into the vehicle that have been removed
from old cars or have been recycled.■
Never install damaged airbag parts in the vehicle. The airbags may then
not be deployed properly or even at all in the event of an accident.
151Care and maintenance
Page 200 of 232
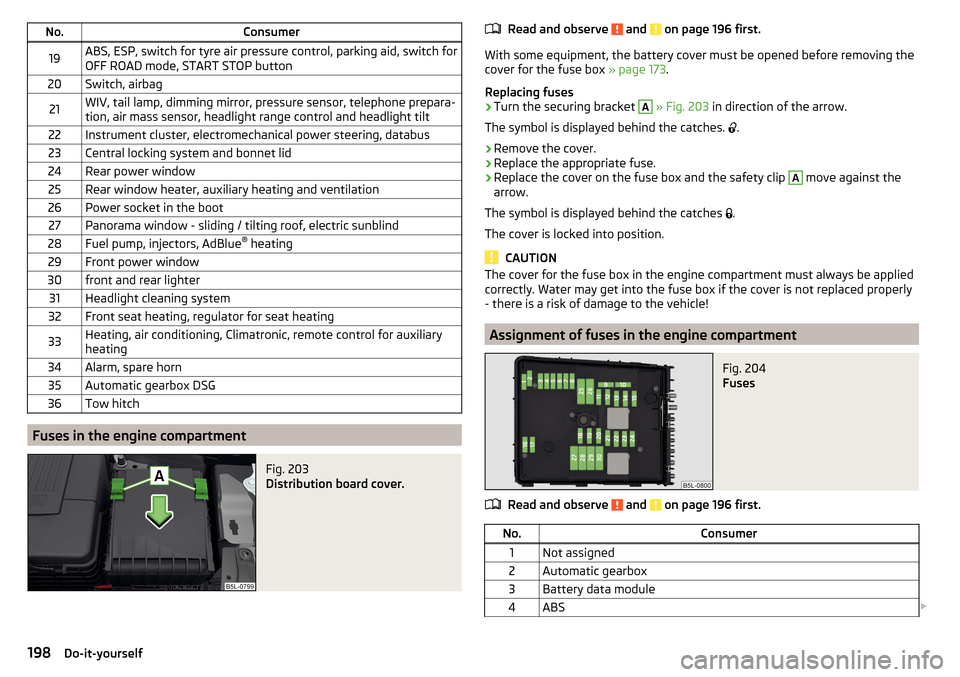
No.Consumer19ABS, ESP, switch for tyre air pressure control, parking aid, switch for
OFF ROAD mode, START STOP button20Switch, airbag21WIV, tail lamp, dimming mirror, pressure sensor, telephone prepara-
tion, air mass sensor, headlight range control and headlight tilt22Instrument cluster, electromechanical power steering, databus23Central locking system and bonnet lid24Rear power window25Rear window heater, auxiliary heating and ventilation26Power socket in the boot27Panorama window - sliding / tilting roof, electric sunblind28Fuel pump, injectors, AdBlue ®
heating29Front power window30front and rear lighter31Headlight cleaning system32Front seat heating, regulator for seat heating33Heating, air conditioning, Climatronic, remote control for auxiliary
heating34Alarm, spare horn35Automatic gearbox DSG36Tow hitch
Fuses in the engine compartment
Fig. 203
Distribution board cover.
Read and observe and on page 196 first.
With some equipment, the battery cover must be opened before removing the
cover for the fuse box » page 173.
Replacing fuses
›
Turn the securing bracket
A
» Fig. 203 in direction of the arrow.
The symbol is displayed behind the catches.
.
›
Remove the cover.
›
Replace the appropriate fuse.
›
Replace the cover on the fuse box and the safety clip
A
move against the
arrow.
The symbol is displayed behind the catches .
The cover is locked into position.
CAUTION
The cover for the fuse box in the engine compartment must always be applied
correctly. Water may get into the fuse box if the cover is not replaced properly
- there is a risk of damage to the vehicle!
Assignment of fuses in the engine compartment
Fig. 204
Fuses
Read and observe and on page 196 first.
No.Consumer1Not assigned2Automatic gearbox3Battery data module4ABS 198Do-it-yourself
Page 215 of 232
Index
A
abroad lead-free petrol
161
Abroad Headlights
69
ABS Operation
127
Warning light36
Acceptance and recycling of used vehicles152
Accessories149
Adaptive headlight see xenon headlight
66
AdBlue163, 164
refilling163
replenish164
adjusting auxiliary heating and ventilation
110
Adjusting Exterior mirrors
74
Head restraints79
Steering wheel9
Adjusting the seats8
adjustment Front seat
75
Adjustment Headlight beam
64
Seats76
AFS Display messages
36
Warning light36
AHL see xenon headlight
66
Air-conditioning system Air outlet vents
108
Airbag15
Deactivating19
Deactivating the front passenger airbag20
Deployment15
Front airbag16
Head airbag19
Knee airbag17
Modifications and damage to the airbag system 151
Side airbag
18
Warning light37
Airbag system15
Air conditioning104
Air distribution control107
Climatronic106
Manual air conditioning105
Air distribution control107
Air outlet vents108
Alarm Enable/disable
56
Switch off56
Trailer148
Triggering56
Alcantara cleaning
158
Alternator Warning light
33
Anodized parts Refer to vehicle maintenance
155
Anti-lock braking system (ABS)127
Anti-theft alarm system Enable/disable
56
Trailer148
Anti-theft wheel bolts184
Armrest Front
78
artificial leather158
Ashtray87
ASR warning light
35
Assistance systems OFF ROAD-mode
129
Assist systems127
ABS36
ASR35
ESC35
Auto Check Control31
Automatic driving lamp control66
Automatic gearbox Manual shifting of gears
123
Selector lever-emergency unlocking195
Selector lever lock123
Starting-off and driving124
Tiptronic123
Using the selector lever122
Automatic gearbox modes122
Automatic load deactivation175
automatic transmission selector lever lock defect
123
Automatic transmission122
Kickdown124
Selector lever lock123
AUX94
Auxiliary heating and ventilation Switching on and off directly
110
System settings110
Auxiliary heating (auxiliary heating and ventila- tion)
109
Auxiliary heating (aux. heating and ventilation) Radio remote control
111
Avoiding damage to your vehicle125
B
Ball head Check fitting
144
Ready position142, 143
Ball rod installing
143
removing144
Bar with sliding hook98
213Index