engine SKODA YETI 2015 1.G / 5L Workshop Manual
[x] Cancel search | Manufacturer: SKODA, Model Year: 2015, Model line: YETI, Model: SKODA YETI 2015 1.G / 5LPages: 232, PDF Size: 30.84 MB
Page 143 of 232
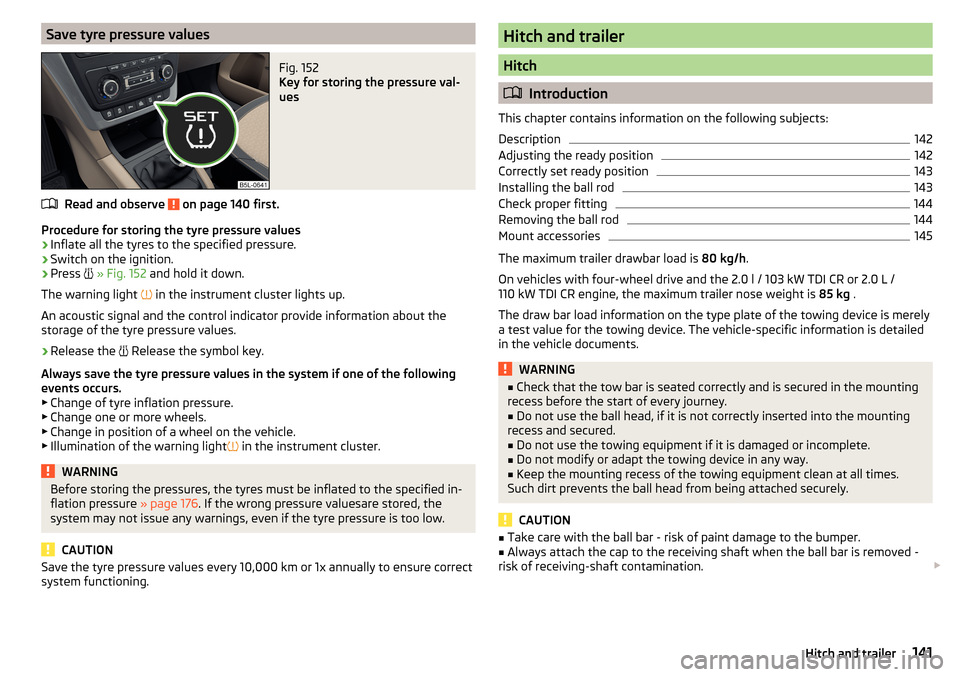
Save tyre pressure valuesFig. 152
Key for storing the pressure val-
ues
Read and observe on page 140 first.
Procedure for storing the tyre pressure values
›
Inflate all the tyres to the specified pressure.
›
Switch on the ignition.
›
Press
» Fig. 152 and hold it down.
The warning light in the instrument cluster lights up.
An acoustic signal and the control indicator provide information about the
storage of the tyre pressure values.
›
Release the Release the symbol key.
Always save the tyre pressure values in the system if one of the following
events occurs.
▶ Change of tyre inflation pressure.
▶ Change one or more wheels.
▶ Change in position of a wheel on the vehicle.
▶ Illumination of the warning light in the instrument cluster.
WARNINGBefore storing the pressures, the tyres must be inflated to the specified in-
flation pressure » page 176. If the wrong pressure valuesare stored, the
system may not issue any warnings, even if the tyre pressure is too low.
CAUTION
Save the tyre pressure values every 10,000 km or 1x annually to ensure correct
system functioning.Hitch and trailer
Hitch
Introduction
This chapter contains information on the following subjects:
Description
142
Adjusting the ready position
142
Correctly set ready position
143
Installing the ball rod
143
Check proper fitting
144
Removing the ball rod
144
Mount accessories
145
The maximum trailer drawbar load is 80 kg/h.
On vehicles with four-wheel drive and the 2.0 l / 103 kW TDI CR or 2.0 L /
110 kW TDI CR engine, the maximum trailer nose weight is 85 kg .
The draw bar load information on the type plate of the towing device is merely
a test value for the towing device. The vehicle-specific information is detailed
in the vehicle documents.
WARNING■ Check that the tow bar is seated correctly and is secured in the mounting
recess before the start of every journey.■
Do not use the ball head, if it is not correctly inserted into the mounting
recess and secured.
■
Do not use the towing equipment if it is damaged or incomplete.
■
Do not modify or adapt the towing device in any way.
■
Keep the mounting recess of the towing equipment clean at all times.
Such dirt prevents the ball head from being attached securely.
CAUTION
■ Take care with the ball bar - risk of paint damage to the bumper.■Always attach the cap to the receiving shaft when the ball bar is removed -
risk of receiving-shaft contamination. 141Hitch and trailer
Page 148 of 232
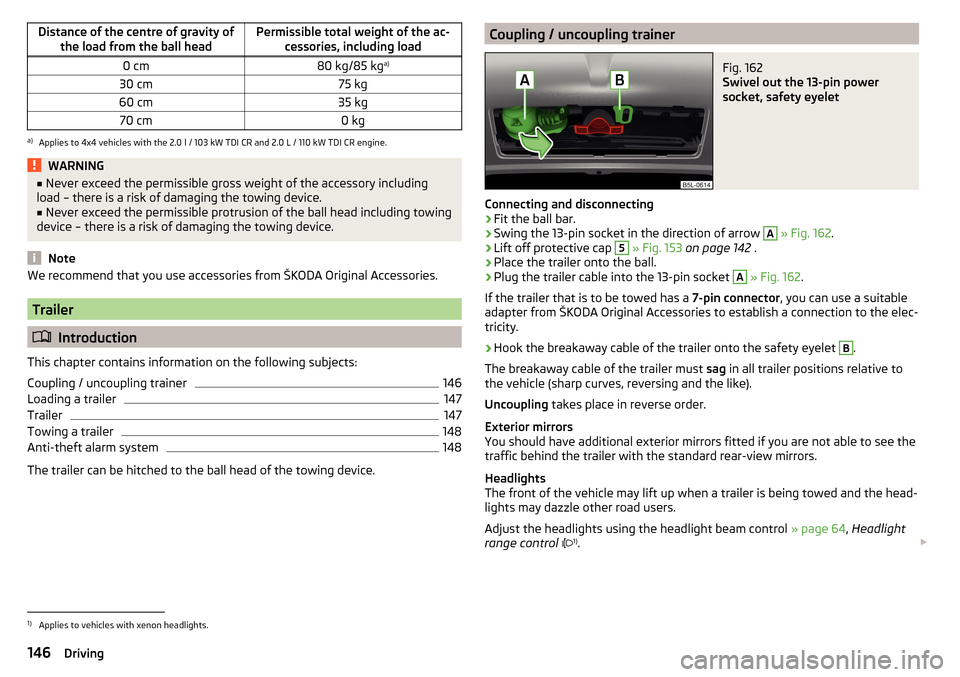
Distance of the centre of gravity ofthe load from the ball headPermissible total weight of the ac- cessories, including load0 cm80 kg/85 kg a)30 cm75 kg60 cm35 kg70 cm0 kga)
Applies to 4x4 vehicles with the 2.0 l / 103 kW TDI CR and 2.0 L / 110 kW TDI CR engine.
WARNING■
Never exceed the permissible gross weight of the accessory including
load – there is a risk of damaging the towing device.■
Never exceed the permissible protrusion of the ball head including towing
device – there is a risk of damaging the towing device.
Note
We recommend that you use accessories from ŠKODA Original Accessories.
Trailer
Introduction
This chapter contains information on the following subjects:
Coupling / uncoupling trainer
146
Loading a trailer
147
Trailer
147
Towing a trailer
148
Anti-theft alarm system
148
The trailer can be hitched to the ball head of the towing device.
Coupling / uncoupling trainerFig. 162
Swivel out the 13-pin power
socket, safety eyelet
Connecting and disconnecting
›
Fit the ball bar.
›
Swing the 13-pin socket in the direction of arrow
A
» Fig. 162 .
›
Lift off protective cap
5
» Fig. 153 on page 142 .
›
Place the trailer onto the ball.
›
Plug the trailer cable into the 13-pin socket
A
» Fig. 162 .
If the trailer that is to be towed has a 7-pin connector, you can use a suitable
adapter from ŠKODA Original Accessories to establish a connection to the elec-
tricity.
›
Hook the breakaway cable of the trailer onto the safety eyelet
B
.
The breakaway cable of the trailer must sag in all trailer positions relative to
the vehicle (sharp curves, reversing and the like).
Uncoupling takes place in reverse order.
Exterior mirrors
You should have additional exterior mirrors fitted if you are not able to see the
traffic behind the trailer with the standard rear-view mirrors.
Headlights
The front of the vehicle may lift up when a trailer is being towed and the head-
lights may dazzle other road users.
Adjust the headlights using the headlight beam control » page 64, Headlight
range control 1)
.
1)
Applies to vehicles with xenon headlights.
146Driving
Page 149 of 232
WARNING■Improperly connected trailer electrical installations may cause accidents
or serious injury due to electric shock.■
Work on the electrical system must only be carried out by specialist ga-
rages.
■
Never directly connect the trailer's electrical system with the electrical
connections for the tail lights or other current sources.
■
After coupling the trailer and connecting up the power socket, check the
rear lights on the trailer to ensure they are working.
■
Never use the safety eyelet for towing!
CAUTION
Improperly connected trailer electrical installations may cause malfunction of
the entire vehicle electronics.
Loading a trailer
Distribution of the cargo
Distribute the cargo in the trailer in such a way that heavy items are located as
close to the trailer axle as possible. Secure the items from slipping.
The distribution of the weight is very poor if your vehicle is unladen and the
trailer is laden. Maintain a particularly low speed if you cannot avoid driving
with this combination.
Tyre pressure
Correct the tyre inflation pressure on your vehicle for a “full load” » page 176.WARNINGSliding cargo can significantly adversely affect stability and driving safety -
risk of accident!
Trailer
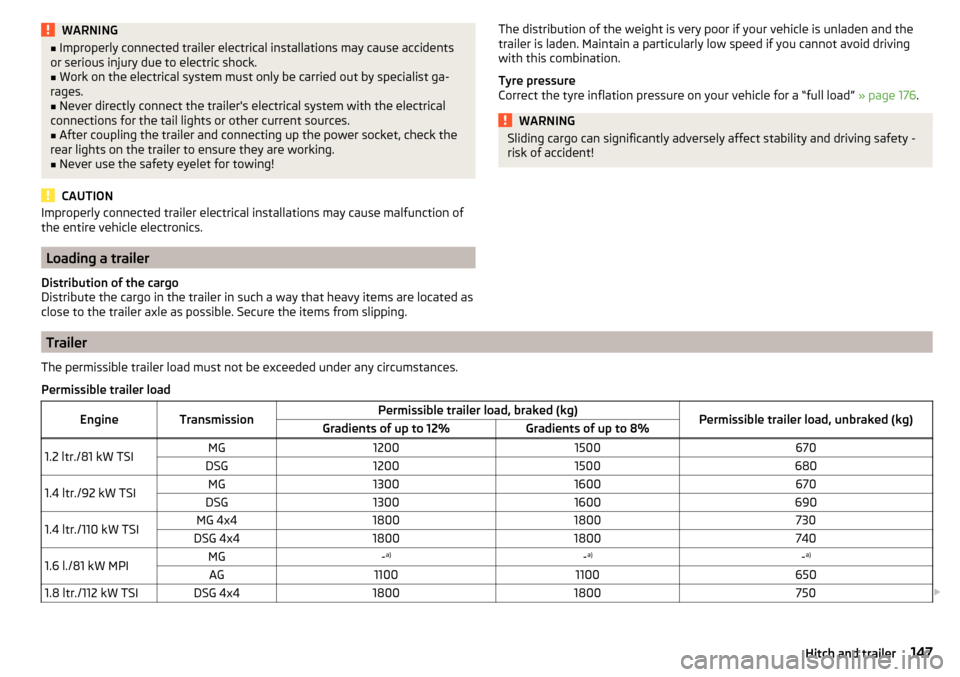
The permissible trailer load must not be exceeded under any circumstances.Permissible trailer loadEngineTransmissionPermissible trailer load, braked (kg)Permissible trailer load, unbraked (kg)Gradients of up to 12%Gradients of up to 8%1.2 ltr./81 kW TSIMG12001500670DSG120015006801.4 ltr./92 kW TSIMG13001600670DSG130016006901.4 ltr./110 kW TSIMG 4x418001800730DSG 4x4180018007401.6 l./81 kW MPIMG- a)-a)-a)AG110011006501.8 ltr./112 kW TSIDSG 4x418001800750
147Hitch and trailer
Page 150 of 232
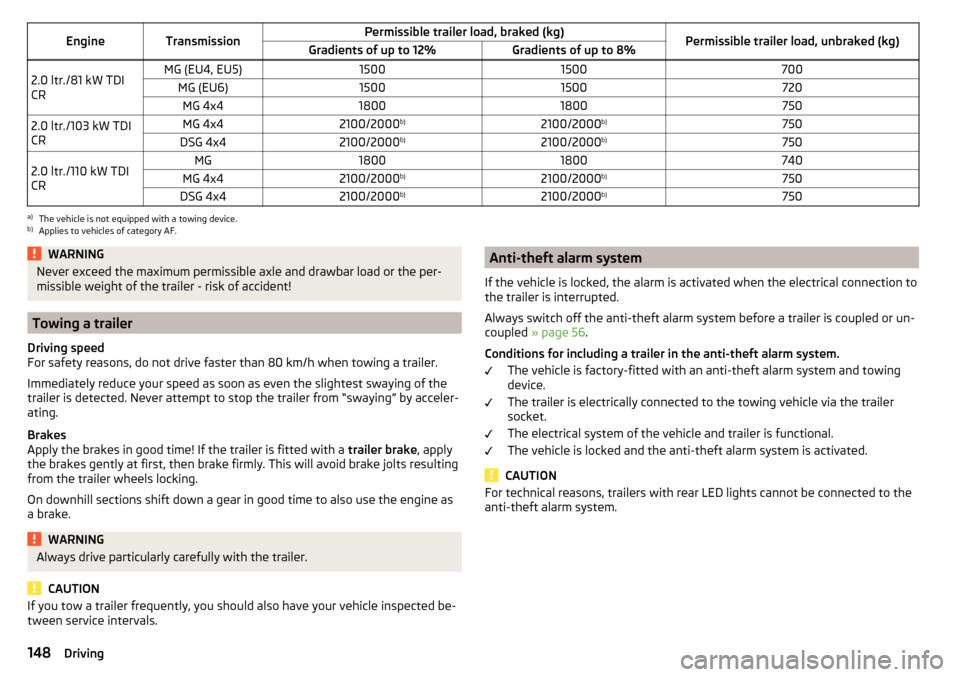
EngineTransmissionPermissible trailer load, braked (kg)Permissible trailer load, unbraked (kg)Gradients of up to 12%Gradients of up to 8%2.0 ltr./81 kW TDI
CRMG (EU4, EU5)15001500700MG (EU6)15001500720MG 4x4180018007502.0 ltr./103 kW TDI
CRMG 4x42100/2000 b)2100/2000b)750DSG 4x42100/2000b)2100/2000 b)7502.0 ltr./110 kW TDI
CRMG18001800740MG 4x42100/2000 b)2100/2000b)750DSG 4x42100/2000 b)2100/2000b)750a)
The vehicle is not equipped with a towing device.
b)
Applies to vehicles of category AF.
WARNINGNever exceed the maximum permissible axle and drawbar load or the per-
missible weight of the trailer - risk of accident!
Towing a trailer
Driving speed
For safety reasons, do not drive faster than 80 km/h when towing a trailer.
Immediately reduce your speed as soon as even the slightest swaying of the
trailer is detected. Never attempt to stop the trailer from “swaying” by acceler-
ating.
Brakes
Apply the brakes in good time! If the trailer is fitted with a trailer brake, apply
the brakes gently at first, then brake firmly. This will avoid brake jolts resulting
from the trailer wheels locking.
On downhill sections shift down a gear in good time to also use the engine as
a brake.
WARNINGAlways drive particularly carefully with the trailer.
CAUTION
If you tow a trailer frequently, you should also have your vehicle inspected be-
tween service intervals.Anti-theft alarm system
If the vehicle is locked, the alarm is activated when the electrical connection to
the trailer is interrupted.
Always switch off the anti-theft alarm system before a trailer is coupled or un-
coupled » page 56 .
Conditions for including a trailer in the anti-theft alarm system. The vehicle is factory-fitted with an anti-theft alarm system and towing
device.
The trailer is electrically connected to the towing vehicle via the trailer
socket.
The electrical system of the vehicle and trailer is functional.
The vehicle is locked and the anti-theft alarm system is activated.
CAUTION
For technical reasons, trailers with rear LED lights cannot be connected to the
anti-theft alarm system.148Driving
Page 159 of 232
Towing hitch and mounting recessRead and observe
and on page 154 first.
Close the mounting recess with the cover to prevent any dirt from getting in.
If dirt is present, clean the inner surfaces of the mounting recess and treat
with a suitable preservative.
Always check the ball head before hitching a trailer. Apply a suitable grease if
necessary.
Use the protective cover when stowing away the tow bar, in order to stop the
boot from getting dirty.
CAUTION
Apply grease to the inner part of the mounting recess. Make sure you do not
remove any grease.
Under-body protection
Read and observe
and on page 154 first.
The underside of your vehicle is already permanently protected by the factory
against chemical and mechanical influences.
It is not possible to guarantee that the protective coating will not suffer any
damage as the vehicle is driven.
We recommend having the protective coating underneath the vehicle and the
chassis checked — preferably before the beginning of winter and at the end of
winter.
WARNINGNever use additional underbody protection or anti-corrosion agents for ex-
haust pipes, catalytic converters, diesel particle filters or heat shields.
When the engine reaches its operating temperature, these substances may ignite - risk of fire!Wiper blades
Read and observe
and on page 154 first.
Clean the wiper blades regularly with a glass cleaner. The wiper blades shouldbe cleaned with a sponge or cloth if they are heavily soiled by insect residues,
for example.
The wiper blades can become soiled with wax residues after washing in auto-
matic vehicle wash systems for example.
Interior care
Introduction
This chapter contains information on the following subjects:
Natural leather
158
Artificial leather, materials and Alcantara ®
158
Seat covers
159
Safety belts
159
We recommend using vehicle care products from ŠKODA Original Accessories.
These are available from ŠKODA Partners. The usage instructions on the pack-
age must be observed.
WARNING■ Vehicle care products may be harmful to your health if not used according
to the instructions.■
Always keep the vehicle care products safe from people who are not com-
pletely independent, e.g. children - there is a danger of poisoning!
■
Air fresheners and scents can be hazardous to heath when the tempera-
ture inside the vehicle is high.
CAUTION
■ Be sure to check clothing for colour fastness to avoid any damage or visible
stains on the material (leather), panels and textiles.■
Remove fresh stains such as those from ball-point pens, ink, lipstick, shoe
polish, etc., from the material (leather), panels and textiles as quickly as possi-
ble.
■
Do not attach scents or air fresheners to the dash panel – there is a risk of
damage to the dash panel.
157Care and maintenance
Page 162 of 232
Inspecting and replenishing
Fuel
Introduction
This chapter contains information on the following subjects:
Petrol and diesel refuelling
160
Lead-free petrol
161
Diesel fuel
162
The correct fuel grades for your vehicle are specified on the inside of the fuel
filler flap » Fig. 163 on page 160 .
WARNING■
The operating instructions of the refuelling system must always be fol-
lowed.■
Do not smoke when refuelling and do not use a mobile phone.
■
Fuel vapours are explosive - can be fatal!
CAUTION
■ Never drive until the fuel tank is completely empty! The irregular supply of
fuel can cause misfiring, which can result in damage to parts of the engine and
the exhaust system.■
Immediately remove any fuel that has spilled onto the vehicle's paintwork –
risk of paint damage.
■
If the vehicle was not purchased in the country where it was intended to be
operated, you should check whether the fuel specified by the manufacturer is
offered in the country where the vehicle will be operated. You should also per-
haps check whether the manufacturer has recommended a different fuel for
operation of the vehicle in the corresponding country. If no prescribed fuel is
available, then you must check whether it is permitted by the manufacturer to
operate the vehicle with another fuel type.
Petrol and diesel refuellingFig. 163
Open fuel filler flap / unscrew tank cap / place the tank cap on
the fuel filler flap
Read and observe
and on page 160 first.
Refuelling can be done if the following conditions are met. The vehicle is unlocked.
The engine and the ignition are switched off.
The auxiliary heating and ventilation is switched off » page 110.
Vehicles with lockable fuel filler flap
›
Press on the fuel filler flap in the direction of the arrow
1
accordingly
» Fig. 163 .
›
Open the cover in the direction of the arrow
2
.
›
Unscrew the tank cap in the direction of the arrow
3
.
›
Remove the tank cap and place on top of the fuel filler flap in direction of ar-
row
4
.
›
Insert the pump nozzle into the fuel filler tube as far as it will go.
The fuel tank is full just as soon as the pump nozzle switches off for the first
time »
.
›
Remove the pump nozzle from the fuel filler neck and put it back in the
pump.
›
Place the filler cap onto the fuel filler neck and turn it in the opposite direc-
tion to the arrow until it securely engages
3
.
›
Close the fuel filler flap until it clicks into place.
Check that the fuel filler flap is closed properly.
160General Maintenance
Page 163 of 232
Vehicles without lockable fuel filler flap›Press on the fuel filler flap in the direction of the arrow 1 accordingly
» Fig. 163 .›
Open the cover in the direction of the arrow
2
.
›
Hold the filler cap and unlock by turning the key in the direction of the arrow
3
.
›
Unscrew the tank cap in the direction of the arrow
3
.
›
Remove the tank cap and place on top of the fuel filler flap in direction of ar-
row
4
.
›
Insert the pump nozzle into the fuel filler tube as far as it will go.
The fuel tank is full just as soon as the pump nozzle switches off for the first
time »
.
›
Remove the pump nozzle from the fuel filler neck and put it back in the
pump.
›
Screw in the tank cap in the opposite direction of the arrow
3
until it audibly
clicks into place.
›
Hold the filler cap and lock it by turning in the opposite direction of the arrow
3
. Remove the key.
›
Close the fuel filler flap until it clicks into place.
Check that the fuel filler flap is closed properly.
WARNINGInstructions for filling the reserve canister■Never fill the reserve can inside the vehicle.■
Never place the reserve can on the vehicle.
■
Always place the reserve can on the floor.
■
We do not recommend carrying any fuel canisters in your vehicle for safe-
ty reasons. in the event of an accident, these canisters can become dam-
aged and fuel may escape – risk of fire!
CAUTION
■ The fuel tank is full just as soon as the pump nozzle switches off for the first
time, provided the nozzle has been operated properly. Not continue refuelling.■
Be careful when filling diesel fuel from the spare canister and then do this
slowly and cautiously – danger of contaminating the body.
NoteThe fuel capacity for vehicles with front wheel drive is about 55 litres, and for
vehicles with four-wheel drive about 60 litres, with about 9 litres as reserve.
Lead-free petrol
The correct fuel grades for your vehicle are specified on the inside of the fuel
filler flap.
Read and observe
and on page 160 first.
The vehicle can only be operated with unleaded petrol in compliance with the
EN 228 1)
standard.
All petrol engines can be operated using petrol that contains at most 10% bio-
ethanol (E10).
Unleaded petrol 95/91 or 92 or 93 RON/ROZ
We recommend using unleaded fuel with an octane rating of 95 RON. Unlea-
ded petrol with the octane ratings 91, 92 or 93 RON can also be used, but may
result in a slight loss in performance and slightly increased fuel consumption.
Unleaded petrol min. 95 RON / ROZ
Use unleaded fuel with the octane rating 95 RON or higher.
In an emergency petrol with the octane ratings 91, 92 and/or 93 RON can also
be used, but may result in a slight loss in performance and slightly increased
fuel consumption and exhaust emissions. Continue driving at medium engine
speeds and minimum engine load »
.
Refuel using petrol of the prescribed octane number as soon as possible.
Unleaded petrol 98/(95) RON / ROZ
We recommend using unleaded fuel with an octane rating of 98 RON or higher.
Unleaded petrol 95 RON can also be used but this results in a slight loss in per-
formance and slightly increased fuel consumption.
In an emergency petrol with the octane ratings 91, 92 and/or 93 RON can also
be used, but may result in a slight loss in performance and slightly increased
fuel consumption and exhaust emissions. Continue driving at medium engine
speeds and minimum engine load »
.
Refuel using petrol of the prescribed octane number as soon as possible.
1)
In Germany also DIN 51626-1 or E10 for unleaded petrol with octane number 91 or 95 or DIN 51626-2 or E5
for unleaded petrol with octane number 95 and 98.
161Inspecting and replenishing
Page 164 of 232
Fuel additives
Unleaded petrol in accordance with the EN 228 standard 1)
meets all the condi-
tions for a smooth-running engine. We therefore recommend that no fuel ad-
ditives are used. This can result in considerable damage to parts of the engine
or the exhaust system.
CAUTION
■ Even one filling of the tank with petrol that does not meet the standards can
lead to serious damage to parts of the exhaust system!■
If a fuel other than unleaded fuel which complies to the above mentioned
standards (e.g. leaded petrol) is put in the tank by mistake, do not start the en-
gine or switch on the ignition. Extensive damage to engine parts can occur.
CAUTION
■ If petrol with a lower octane number than the one prescribed is used do not
drive with a high engine speed. A high engine load can severely damage en-
gine components.■
Even in the event of an emergency, petrol of a lower octane number than 91
RON must not be used, otherwise the engine can be severely damaged.
CAUTION
In no case may fuel additives with metal components be used, especially not
with manganese or iron content. There is a risk of causing severe damage to
parts of the engine or exhaust system.
CAUTION
Fuels with metal components, such as LRP (lead replacement petrol) must
not be used. There is a risk of causing severe damage to parts of the engine
or exhaust system.Note■ Unleaded petrol that has a higher octane number than that required by the
engine can be used without limitations.■
On vehicles with prescribed unleaded petrol 95/91, 92 or 93 RON, the use of
petrol with a higher octane number than 95 RON does not result in a noticea-
ble power increase or a lower fuel consumption.
■
On vehicles using prescribed unleaded petrol of min. 95 RON, the use of pet-
rol with a higher octane number than 95 RON can increase the power and re-
duce fuel consumption.
Diesel fuel
The correct fuel grades for your vehicle are specified on the inside of the fuel
filler flap.
Read and observe
and on page 160 first.
The vehicle can only be operated with diesel fuel that meets the EN 5902)
standard.
All diesel engines can be operated using diesel fuel with at most 7% biodiesel
(B7) 3)
.
On the Indian market, your vehicle will only be able to run on diesel fuel com-
pliant with standard IS 1460/Bharat IV. If diesel fuel which complies with this
standard is not available, you can refuel with diesel fuel according to standard
IS 1460/Bharat III in case of emergency.
Operation in winter - Winter-grade diesel fuel
In the cold season, only use “winter-grade diesel fuel” which will still operate
properly even at a temperature of -20 °C.
It is often the case in countries with different climatic conditions that diesel
fuels available have a different temperature characteristic. ŠKODA Partners
and filling stations in the relevant country will be able to provide you with in-
formation regarding the diesel fuels available.
1)
In Germany also DIN 51626-1 or E10 for unleaded petrol with octane number 91 or 95 or DIN 51626-2 or E5
for unleaded petrol with octane number 95 and 98.
2)
In Germany also DIN 51628, in Austria ÖNORM C 1590, in Russia GOST R 52368-2005 / EN 590:2004.
3)
In Germany according to the DIN 52638 standard, in Austria ÖNORM C 1590, in France EN 590.
162General Maintenance
Page 165 of 232
Preheating fuel
The vehicle is fitted with a fuel filter preheating system. This secures opera-
tion of a vehicle using diesel fuel down to an environmental temperature of
-25 °C.
Diesel fuel additives
The diesel fuel in accordance with the prescribed standards meets all the con-
ditions for a smooth running engine. We therefore recommend that no diesel
fuel additives are used. This can result in considerable damage to parts of the
engine or the exhaust system.
CAUTION
■ Just filling the tank once with diesel fuel that does not comply with the
standard, can cause severe damage to parts of the engine, the fuel and ex-
haust system.■
If a different fuel other than diesel fuel, which complies to the above men-
tioned standards (e.g. petrol) is put into the tank, do not start the engine or
switch on the ignition! Extensive damage to engine parts can occur.
■
Water which has collected in the fuel filter can cause engine faults.
CAUTION
■ The vehicle cannot be operated with biofuel RME, therefore this fuel must
not be refuelled and driven. The use of biofuel RME can cause considerable
damage to parts of the engine or fuel system.■
Do not mix any fuel additives, so-called “flow improvers” (petrol and similar
agents) into the diesel. This can result in considerable damage to parts of the
engine or the exhaust system.
AdBlue ®
and its refilling
Introduction
This chapter contains information on the following subjects:
Tank and level check
164
AdBlue ®
replenish
164
In order to reduce pollutant emissions from vehicles with diesel engines and
the SCR catalyst, a urea - AdBlue ®
solution is injected into the exhaust system.
For vehicles with the AdBlue ®
injection system there is a note on the inside of
the fuel filler flap referring to the location of the AdBlue ®
filler neck and the
AdBlue ®
minimum replenishment amount, that is required by a low AdBlue ®
level.
AdBlue ®
standard
Only use AdBlue ®
that corresponds to the standard ISO 22241-1.
AdBlue ®
consumption
The AdBlue ®
consumption amounts to around 1.2-1.6 l/1000 km.
The AdBlue ®
consumption depends on driving style, the operating tempera-
ture of the system and on the weather conditions.
For information on storing AdBlue ®
▶ Keep AdBlue ®
only in original sealed containers and in a safe place.
▶ Keep the container out of the reach of children.
▶ Do not expose the containers to direct sunlight or temperatures above 30° C.
Instructions for cleaning ▶ If any painted vehicle parts, clothing and carpets are splashed with AdBlue ®
wash the affected area with a damp cloth and plenty of cold water.
▶ Remove any dried AdBlue ®
with warm water and a sponge.WARNING■ AdBlue ®
is an irritating and corrosive solution that can injure the skin,
eyes and respiratory system!■
If AdBlue ®
comes into contact with skin or eyes, wash the affected area
immediately for at least. 15 minutes with water and seek medical attention
immediately.
■
If AdBlue ®
is swallowed rinse your mouth with water for at least 15 mi-
nutes and consult a doctor immediately.
CAUTION
■ Never carry containers with AdBlue ®
permanently in the vehicle - there is a
risk of damage to the vehicle interior.■
Never add water or other additives AdBlue ®
.
163Inspecting and replenishing
Page 166 of 232
Note■The AdBlue ®
solution freezes at a temperature of -11 °C and below. The sys-
tem has a heater to ensure the operability at low temperatures.■
We recommend purchasing AdBlue ®
refill bottles from the ŠKODA original
parts.
■
AdBlue ®
is a registered trademark of the VDA. AdBlue ®
is also known as AUS
32 (Aqueous Urea Solution) or DEF (Diesel Exhaust Fluid).
Tank and level check
Read and observe
and on page 163 first.
Tank
AdBlue ®
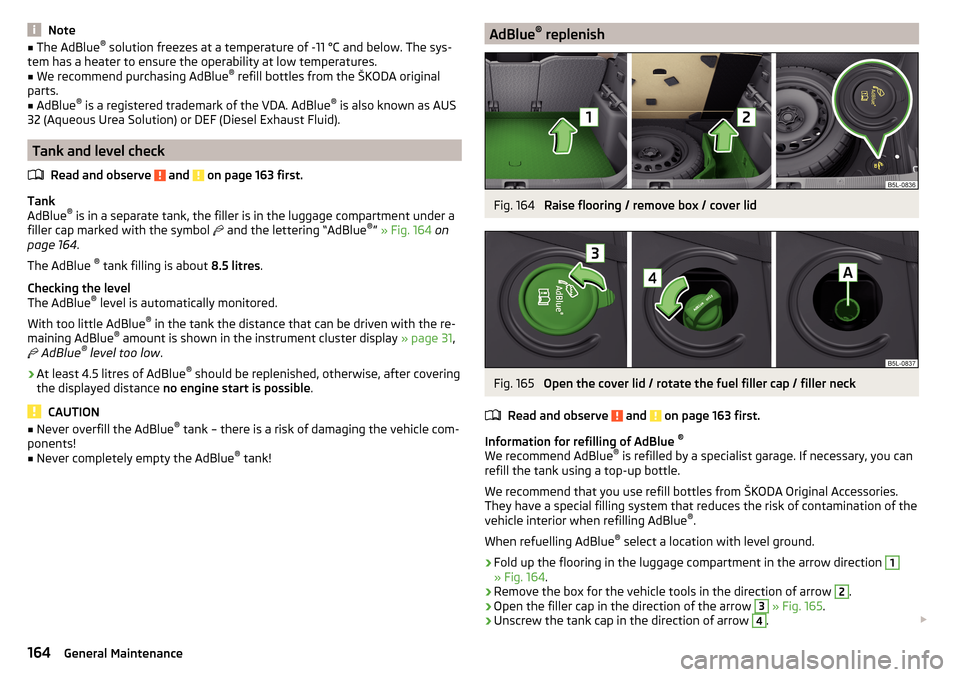
is in a separate tank, the filler is in the luggage compartment under a
filler cap marked with the symbol and the lettering “AdBlue ®
” » Fig. 164 on
page 164 .
The AdBlue ®
tank filling is about 8.5 litres.
Checking the level
The AdBlue ®
level is automatically monitored.
With too little AdBlue ®
in the tank the distance that can be driven with the re-
maining AdBlue ®
amount is shown in the instrument cluster display » page 31,
AdBlue ®
level too low .
›
At least 4.5 litres of AdBlue ®
should be replenished, otherwise, after covering
the displayed distance no engine start is possible .
CAUTION
■
Never overfill the AdBlue ®
tank – there is a risk of damaging the vehicle com-
ponents!■
Never completely empty the AdBlue ®
tank!
AdBlue ®
replenishFig. 164
Raise flooring / remove box / cover lid
Fig. 165
Open the cover lid / rotate the fuel filler cap / filler neck
Read and observe
and on page 163 first.
Information for refilling of AdBlue ®
We recommend AdBlue ®
is refilled by a specialist garage. If necessary, you can
refill the tank using a top-up bottle.
We recommend that you use refill bottles from ŠKODA Original Accessories.
They have a special filling system that reduces the risk of contamination of the
vehicle interior when refilling AdBlue ®
.
When refuelling AdBlue ®
select a location with level ground.
›
Fold up the flooring in the luggage compartment in the arrow direction
1
» Fig. 164 .
›
Remove the box for the vehicle tools in the direction of arrow
2
.
›
Open the filler cap in the direction of the arrow
3
» Fig. 165 .
›
Unscrew the tank cap in the direction of arrow
4
.
164General Maintenance