Interior sensor SKODA YETI 2015 1.G / 5L Owner's Manual
[x] Cancel search | Manufacturer: SKODA, Model Year: 2015, Model line: YETI, Model: SKODA YETI 2015 1.G / 5LPages: 232, PDF Size: 30.84 MB
Page 68 of 232
The headlight flasher can be operated even if the ignition is switched off.
The turn signal light switches itself off automatically when driving around a
curve or after making a turn.
“Convenience turn signal”
When the control lever is lightly pressed to the pressure point A
or
B
then
the respective turn-signal lamp flashes three times.
The “Lane ch. flash” can be activated / deactivated via the Maxi DOT display in
the
Lane ch. flash
» page 47 , Menu item
Settings
menu item.
WARNINGOnly turn on the main beam or the headlight flasher if other road users will
not be dazzled.
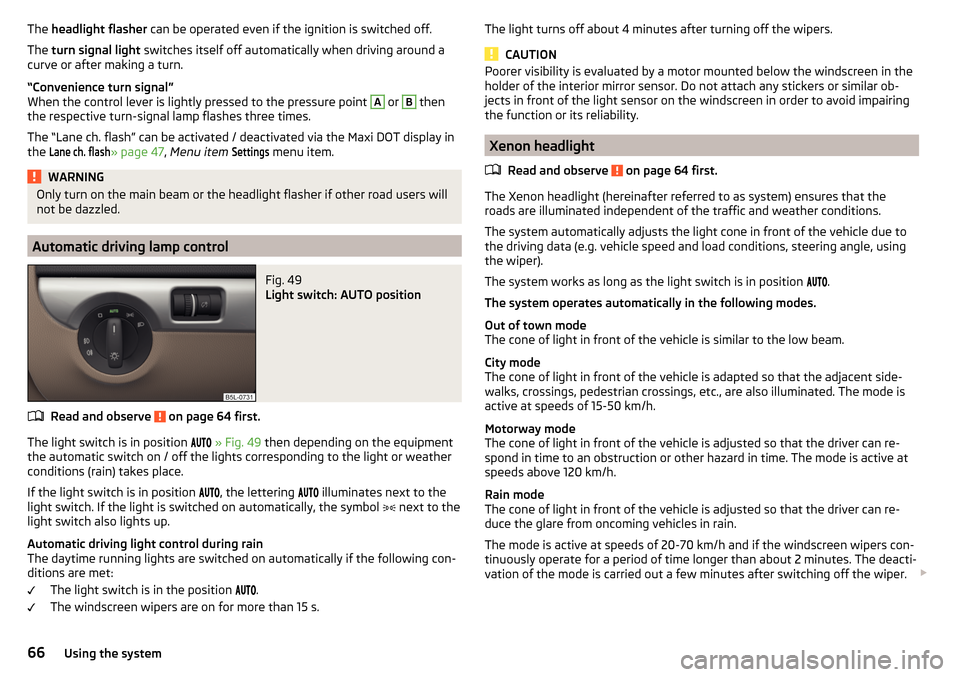
Automatic driving lamp control
Fig. 49
Light switch: AUTO position
Read and observe on page 64 first.
The light switch is in position
» Fig. 49 then depending on the equipment
the automatic switch on / off the lights corresponding to the light or weather
conditions (rain) takes place.
If the light switch is in position
, the lettering
illuminates next to the
light switch. If the light is switched on automatically, the symbol
next to the
light switch also lights up.
Automatic driving light control during rain
The daytime running lights are switched on automatically if the following con-
ditions are met:
The light switch is in the position
.
The windscreen wipers are on for more than 15 s.
The light turns off about 4 minutes after turning off the wipers.
CAUTION
Poorer visibility is evaluated by a motor mounted below the windscreen in the
holder of the interior mirror sensor. Do not attach any stickers or similar ob-
jects in front of the light sensor on the windscreen in order to avoid impairing
the function or its reliability.
Xenon headlight
Read and observe
on page 64 first.
The Xenon headlight (hereinafter referred to as system) ensures that the
roads are illuminated independent of the traffic and weather conditions.
The system automatically adjusts the light cone in front of the vehicle due to
the driving data (e.g. vehicle speed and load conditions, steering angle, using
the wiper).
The system works as long as the light switch is in position .
The system operates automatically in the following modes.
Out of town mode
The cone of light in front of the vehicle is similar to the low beam.
City mode
The cone of light in front of the vehicle is adapted so that the adjacent side-
walks, crossings, pedestrian crossings, etc., are also illuminated. The mode is
active at speeds of 15-50 km/h.
Motorway mode
The cone of light in front of the vehicle is adjusted so that the driver can re-
spond in time to an obstruction or other hazard in time. The mode is active at
speeds above 120 km/h.
Rain mode
The cone of light in front of the vehicle is adjusted so that the driver can re-
duce the glare from oncoming vehicles in rain.
The mode is active at speeds of 20-70 km/h and if the windscreen wipers con-
tinuously operate for a period of time longer than about 2 minutes. The deacti-
vation of the mode is carried out a few minutes after switching off the wiper.
66Using the system
Page 70 of 232
The function LEAVING HOME ensures that the vehicle's environment is illumi-
nated after unlocking the vehicle with the radio remote control unit.
The function switches the light on only if there is poorer visibility and the light
switch is in the position
.
Enabling / disabling and setting function
The functions and settings of the illumination time can be activated / deactiva-
ted via the MAXI DOT display in the menu items Coming Home
or
Leaving Home
» page 47 .
CAUTION
■
Poorer visibility is evaluated by a motor mounted below the windscreen in
the holder of the interior mirror sensor. Do not attach any stickers or similar
objects in front of the light sensor on the windscreen in order to avoid impair-
ing the function or its reliability.■
If this option is always enabled, then the battery is heavily loaded.
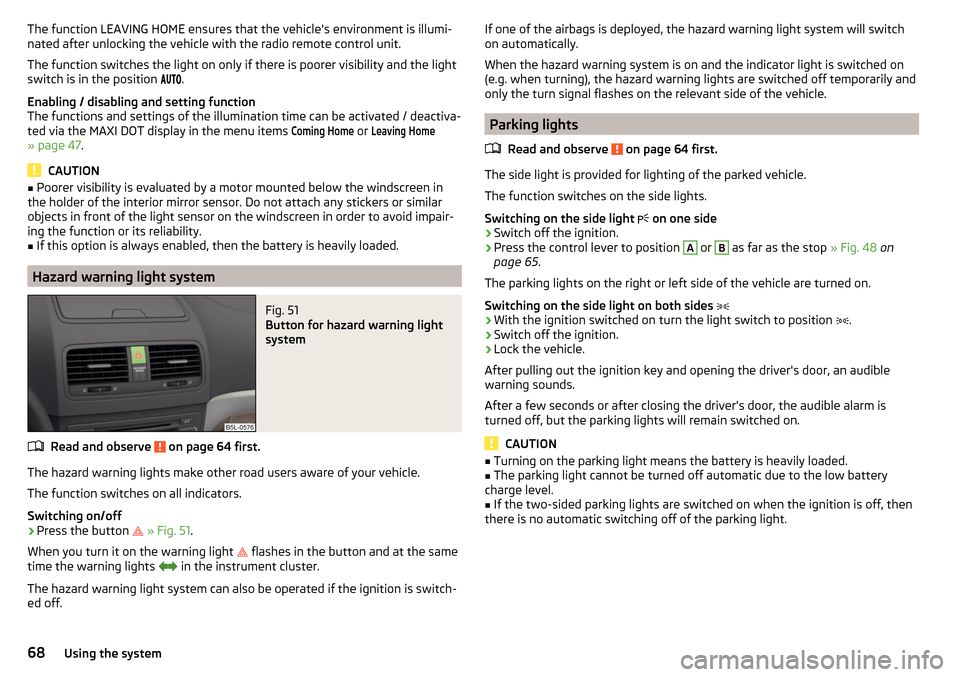
Hazard warning light system
Fig. 51
Button for hazard warning light
system
Read and observe on page 64 first.
The hazard warning lights make other road users aware of your vehicle.
The function switches on all indicators.
Switching on/off
›
Press the button
» Fig. 51 .
When you turn it on the warning light
flashes in the button and at the same
time the warning lights
in the instrument cluster.
The hazard warning light system can also be operated if the ignition is switch-
ed off.
If one of the airbags is deployed, the hazard warning light system will switch
on automatically.
When the hazard warning system is on and the indicator light is switched on
(e.g. when turning), the hazard warning lights are switched off temporarily and
only the turn signal flashes on the relevant side of the vehicle.
Parking lights
Read and observe
on page 64 first.
The side light is provided for lighting of the parked vehicle.
The function switches on the side lights.
Switching on the side light on one side
›
Switch off the ignition.
›
Press the control lever to position
A
or
B
as far as the stop
» Fig. 48 on
page 65 .
The parking lights on the right or left side of the vehicle are turned on.
Switching on the side light on both sides
›
With the ignition switched on turn the light switch to position .
›
Switch off the ignition.
›
Lock the vehicle.
After pulling out the ignition key and opening the driver's door, an audible
warning sounds.
After a few seconds or after closing the driver's door, the audible alarm is
turned off, but the parking lights will remain switched on.
CAUTION
■ Turning on the parking light means the battery is heavily loaded.■The parking light cannot be turned off automatic due to the low battery
charge level.■
If the two-sided parking lights are switched on when the ignition is off, then
there is no automatic switching off of the parking light.
68Using the system
Page 76 of 232
The mirror dimming is controlled by the light incident on the sensors on the
front and back of the mirror.
When the interior lights are switched on or the reverse gear is engaged, the
mirror moves back into the basic position (not dimmed).
Do not attach external devices (e.g. navigation systems) on to the windscreen or in the vicinity of the interior mirror »
.
WARNING■
The illuminated display of an external navigation device can lead to op-
erational faults to the automatic dimming interior mirror – risk of accident.■
Automatic mirror dimming only operates correctly if the light striking the
sensor is not affected by other objects.
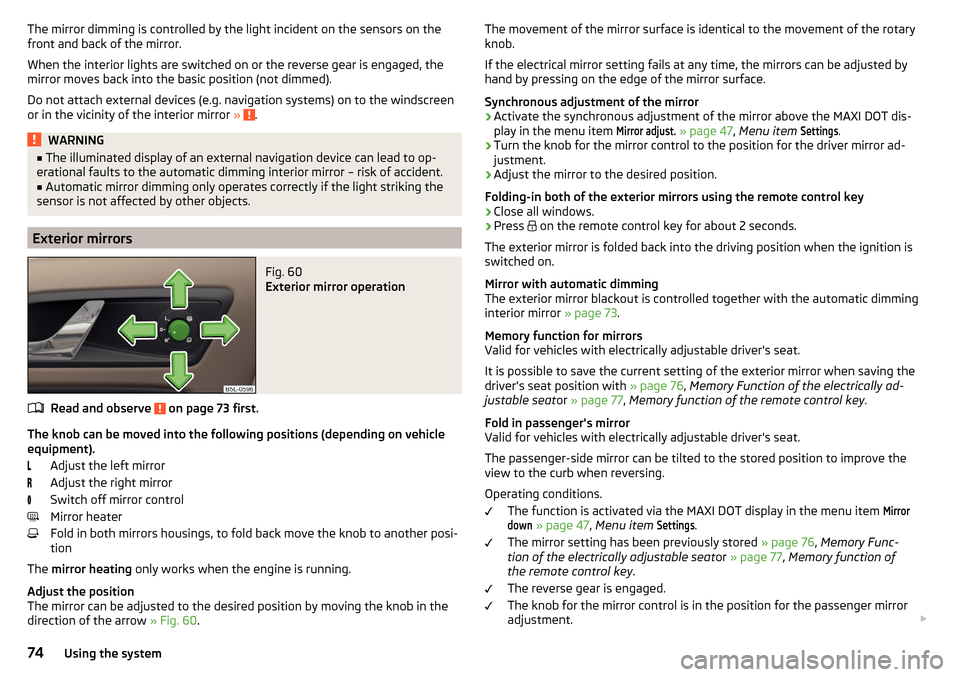
Exterior mirrors
Fig. 60
Exterior mirror operation
Read and observe on page 73 first.
The knob can be moved into the following positions (depending on vehicle
equipment).
Adjust the left mirror
Adjust the right mirror
Switch off mirror control
Mirror heater
Fold in both mirrors housings, to fold back move the knob to another posi-
tion
The mirror heating only works when the engine is running.
Adjust the position
The mirror can be adjusted to the desired position by moving the knob in the direction of the arrow » Fig. 60.
The movement of the mirror surface is identical to the movement of the rotary
knob.
If the electrical mirror setting fails at any time, the mirrors can be adjusted by
hand by pressing on the edge of the mirror surface.
Synchronous adjustment of the mirror›
Activate the synchronous adjustment of the mirror above the MAXI DOT dis- play in the menu item
Mirror adjust.
» page 47 , Menu item
Settings
.
›
Turn the knob for the mirror control to the position for the driver mirror ad-
justment.
›
Adjust the mirror to the desired position.
Folding-in both of the exterior mirrors using the remote control key
›
Close all windows.
›
Press on the remote control key for about 2 seconds.
The exterior mirror is folded back into the driving position when the ignition is
switched on.
Mirror with automatic dimming
The exterior mirror blackout is controlled together with the automatic dimming
interior mirror » page 73.
Memory function for mirrors
Valid for vehicles with electrically adjustable driver's seat.
It is possible to save the current setting of the exterior mirror when saving the
driver's seat position with » page 76, Memory Function of the electrically ad-
justable seat or » page 77 , Memory function of the remote control key .
Fold in passenger's mirror
Valid for vehicles with electrically adjustable driver's seat.
The passenger-side mirror can be tilted to the stored position to improve the
view to the curb when reversing.
Operating conditions. The function is activated via the MAXI DOT display in the menu item
Mirrordown
» page 47 , Menu item
Settings
.
The mirror setting has been previously stored » page 76, Memory Func-
tion of the electrically adjustable seat or » page 77 , Memory function of
the remote control key .
The reverse gear is engaged.
The knob for the mirror control is in the position for the passenger mirror
adjustment.
74Using the system
Page 108 of 232
The warning light in the button » Fig. 123 illuminates after activation, even
if not all of the conditions for the function of the cooling system have been
met. By lighting up of the indicator light in the button, the operational readi-
ness of the cooling system is signalled.
Note
During operation of the manual air conditioning, an increase in engine idle
speed may occur under certain circumstances in order to ensure sufficient
heating comfort.
Climatronic (automatic air conditioning)
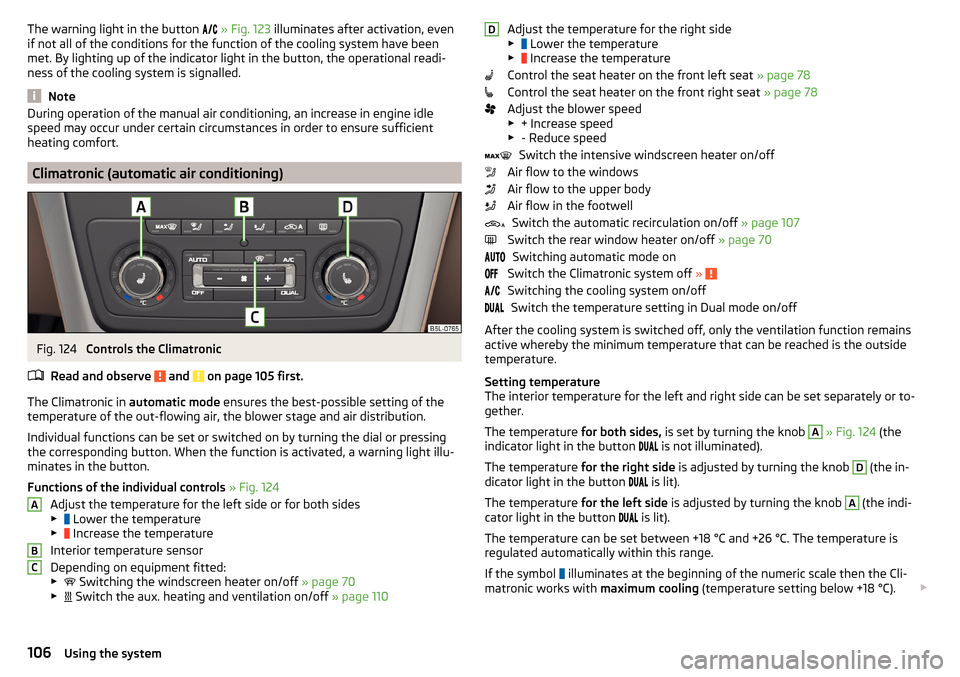
Fig. 124
Controls the Climatronic
Read and observe
and on page 105 first.
The Climatronic in automatic mode ensures the best-possible setting of the
temperature of the out-flowing air, the blower stage and air distribution.
Individual functions can be set or switched on by turning the dial or pressing
the corresponding button. When the function is activated, a warning light illu-
minates in the button.
Functions of the individual controls » Fig. 124
Adjust the temperature for the left side or for both sides
▶ Lower the temperature
▶ Increase the temperature
Interior temperature sensor
Depending on equipment fitted:
▶ Switching the windscreen heater on/off
» page 70
▶ Switch the aux. heating and ventilation on/off
» page 110
ABCAdjust the temperature for the right side
▶ Lower the temperature
▶ Increase the temperature
Control the seat heater on the front left seat » page 78
Control the seat heater on the front right seat » page 78
Adjust the blower speed ▶ + Increase speed
▶ - Reduce speed
Switch the intensive windscreen heater on/off
Air flow to the windows
Air flow to the upper body
Air flow in the footwell Switch the automatic recirculation on/off » page 107
Switch the rear window heater on/off » page 70
Switching automatic mode on
Switch the Climatronic system off »
Switching the cooling system on/off
Switch the temperature setting in Dual mode on/off
After the cooling system is switched off, only the ventilation function remains
active whereby the minimum temperature that can be reached is the outside
temperature.
Setting temperature
The interior temperature for the left and right side can be set separately or to-
gether.
The temperature for both sides, is set by turning the knob
A
» Fig. 124 (the
indicator light in the button is not illuminated).
The temperature for the right side is adjusted by turning the knob
D
(the in-
dicator light in the button is lit).
The temperature for the left side is adjusted by turning the knob
A
(the indi-
cator light in the button is lit).
The temperature can be set between +18 °C and +26 °C. The temperature is
regulated automatically within this range.
If the symbol illuminates at the beginning of the numeric scale then the Cli-
matronic works with maximum cooling (temperature setting below +18 °C).
D106Using the system
Page 109 of 232
If the symbol illuminates at the end of the numeric scale then the Climatronic
works with maximum heating (temperature setting above +26 °C).
There is no automatic temperature control in the two end positions.
Controlling blower
The Climatronic system controls the blower stages automatically in line with the interior temperature. However, the blower stages can be manually adap-
ted to suit your particular needs.
If the blower speed is reduced to a minimum, Climatronic is switched off.
The set blower speed is displayed above the symbol button
when the re-
spective number of indicator lights come on.WARNING■ Do not switch off the Climatronic system for longer than necessary.■Switch on the Climatronic system as soon as the windows mist up.
CAUTION
Do not cover the interior temperature sensor B » Fig. 124 as this could impair
the functioning of the Climatronic.
Note
■ If the windscreen mists up, press the symbol button . Press the button
once the windscreen has demisted.■
During operation of the Climatronic, an increase in engine idle speed can oc-
cur under certain circumstances in order to ensure adequate heating comfort.
Climatronic - automatic operation
Read and observe
and on page 105 first.
The automatic mode is used in order to maintain a constant temperature andto demist the windows in the interior of the car.
If the warning light in the top right corner of the button lights up, the Cli-
matronic operates in “HIGH”-mode.
Upon pressing the button again, the Climatronic switches to “LOW”-mode
and the indicator light in the top left corner lights up. The Climatronic uses on-
ly in this mode the lower blower speed. However taking into account the noise
level, this is more comfortable, yet be aware that the effectiveness of the air
conditioning system is reduced particularly if the vehicle is fully occupied.
By pressing the button again, it is changed to “HIGH”-mode.
Automatic mode can be switched off by pressing one of the buttons for the air
distribution or by increasing/decreasing the blower speed. The temperature
regulation is continued.
Note
Climatronic is set to the “HIGH” mode at the factory.
Air distribution control
Read and observe
and on page 105 first.
The recirculation mode prevents contaminated outside air getting into the in-
terior of the vehicle.
In recirculated air mode air is sucked out of the interior of the vehicle and then
fed back into the interior.
Heating and manual air conditioning system
›
To turn the recirculation mode on or off, press the Symbol key
.
The air recirculation mode is automatically turned off by turning the air distri-
bution control
C
to position
» Fig. 122 on page 105 or » Fig. 123 on
page 105 .
Recirculated air mode can be switched on again from this position by repeat-
edly pressing the symbol button .
Climatronic (automatic air conditioning)
›
To turn the recirculation mode on, press the Symbol key
repeatedly until
the indicator light is lit on the left side of the button.
›
To activate the automatic recirculation mode, press the Symbol key
re-
peatedly until the indicator light is lit on the right side of the button.
Climatronic has an air quality sensor for the detection of the pollutant concen-
tration in the sucked-in air.
If a considerable increase in concentration of pollutants is recognised by the
air quality sensor, recirculated air mode will temporarily be switched on.
If the concentration of pollutants decreases to the normal level, the air distri-
bution control is automatically switched off so that fresh air can be guided into
the vehicle interior.
107Heating and ventilation
Page 199 of 232
CAUTION■“Never repair” fuses, and do not replace them with fuses of a higher amper-
age – risk of fire! This may also cause damage at another part of the electrical
system.■
If a newly inserted fuse blows again after a short time, have the electrical
system checked as quickly as possible by a specialist garage.
■
A blown fuses is recognisable by the molten metal strip. Replace the faulty
fuse with a new one of the same amperage.
Note
■
We recommend always carrying replacement fuses in the vehicle. A box of
replacement fuses and bulbs can be purchased from ŠKODA Original Accesso-
ries.■
There can be several power consuming devices for one fuse.
■
Multiple fuses may exist for a single power consuming device.
Fuses in the dash panel
Fig. 201
Distribution board cover.
Read and observe and on page 196 first.
The fuses are located on the left side of the dash panel behind a cover.
Replacing fuses
›
Insert a screwdriver into the opening in the cover in the direction of the ar-
row » Fig. 201 .
›
Remove the cover of the fuse box and remove.
›
Remove the plastic clip from the holder in the fuse box cover in the dash
panel.
›
Place the clip on the respective fuse and pull this fuse out.
›
Insert a new fuse.
›
Replace the bracket at the original position.
›
Re-insert the cover of the fuse box .
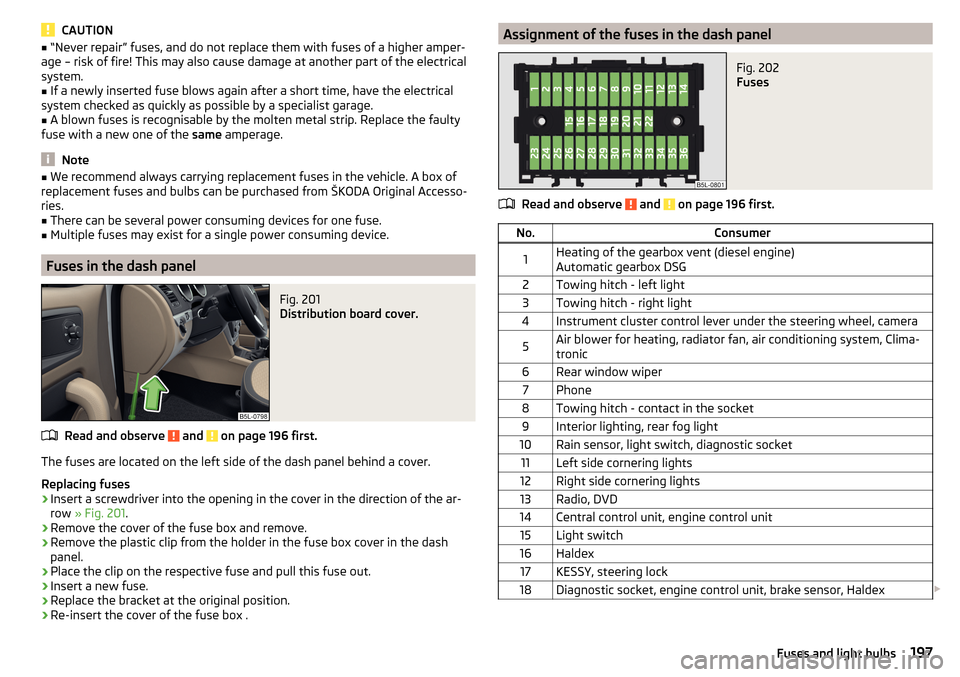
Assignment of the fuses in the dash panelFig. 202
Fuses
Read and observe and on page 196 first.
No.Consumer1Heating of the gearbox vent (diesel engine)
Automatic gearbox DSG2Towing hitch - left light3Towing hitch - right light4Instrument cluster control lever under the steering wheel, camera5Air blower for heating, radiator fan, air conditioning system, Clima-
tronic6Rear window wiper7Phone8Towing hitch - contact in the socket9Interior lighting, rear fog light10Rain sensor, light switch, diagnostic socket11Left side cornering lights12Right side cornering lights13Radio, DVD14Central control unit, engine control unit15Light switch16Haldex17KESSY, steering lock18Diagnostic socket, engine control unit, brake sensor, Haldex 197Fuses and light bulbs