window SKODA YETI 2017 Owner´s Manual
[x] Cancel search | Manufacturer: SKODA, Model Year: 2017, Model line: YETI, Model: SKODA YETI 2017Pages: 200, PDF Size: 28.93 MB
Page 4 of 200
Table of Contents
materials defect liability and ŠKODA warranty
for new cars4
On-board literature
6
Notes
7
Structure of the Owner's Manual and further
information
8
Abbreviations
Safety
Passive Safety
10
General information
10
Correct and safe seated position
10
Seat belts
13
Using seat belts
13
Inertia reels and belt tensioners
15
Airbag system
16
Description of the airbag system
16
Airbag deactivation
19
Transporting children safely
21
Child seat
21
Fastening systems
24
Using the system
Cockpit
27
Overview
26
Instruments and Indicator Lights
28
Instrument cluster
28
Warning lights
31
Information system
38
Driver information system
38
Operation of the information system
40Multifunction display (MFD)41MAXI DOT display42
Service interval display
44
SmartGate
45
Unlocking and opening
47
Unlocking and locking
47
Anti-theft alarm system
51
Luggage compartment lid
52
Window operation
53
Panorama sliding/tilting roof
56
Lights and visibility
58
Lights
58
Interior lighting
62
Visibility
63
Windscreen wipers and washers
64
Rear view mirror
66
Seats and head restraints
68
Front seats
68
Rear seats
71
Headrests
73
Front seat heating
74
Useful features
75
Interior fittings
75
Tablet holder
84
Transport of cargo
86
Luggage Storage and Transport
86
Variable loading floor in the luggage
compartment (Estate)
91
Transportation on the roof rack
93
Heating and ventilation
93
Heating, manual air conditioning system,
Climatronic
93
Auxiliary heating (auxiliary heating and
ventilation)
97Driving
Starting-off and Driving100
Starting and stopping the engine
100
START-STOPsystem
102
Brakes and parking
103
Manual gear changing and pedals
105
Automatic transmission
106
Running in and economical driving
108
Avoiding damage to your vehicle
109
Assist systems
110
General information
110
Braking and stabilisation systems
110
OFF ROAD Mode
112
Parking aid (ParkPilot)
114
Reversing camera
116
Park Assist
118
Cruise Control System
121
Fatigue detection
122
Tyre pressure monitoring
123
Towing device and trailer
124
Hitch
124
Using the towing device
128
General Maintenance
Care and maintenance
131
Service work, adjustments and technical
alterations
131
Service intervals
133
Cleaning and care
135
Inspecting and replenishing
139
Fuel
139
AdBlue ®
And its refilling
141
Engine compartment
142
Engine oil
144
Coolant
1462Table of Contents
Page 10 of 200
Structure of the Owner's Manual and further
information
Structure of the Owner's Manual
The Owner's Manual is hierarchically divided into the following areas.
■ Section (e.g. Operating instructions) - the title of the section is shown down
in the left-hand corner
■ Main chapter (e.g. Checking and refilling) - the title of the main chapter is
shown down in the right-hand corner ■ Chapter (e.g. Engine oil)
■ Introductory information
- Module overview within the chapter, in-
troductory information about the chapter content and, where appropri-
ate, information relevant to the whole chapter
■ Module (e.g. Checking and refilling)
Information search
When searching for information in the Owner´s Manual, we recommend using
the Index at the end of the Owner's Manual.
Direction indications
All direction indications such as “left”, “right”, “front”, “rear” relate to the for- ward direction of travel of the vehicle.
Units
The volume, weight, speed and length data are given in metric units, unless
otherwise indicated.
Display
In this Owner's Manual, the MAXI DOT display is used as the display in the in-
strument cluster unless otherwise stated.
Help in an emergency
In case of breakdown, the breakdown service contact information required can
be found in the following places.
▶ Contact details for the ŠKODA Partner (e.g. window sticker)
▶ Infotainment (Phone - breakdown service / information service menu)
▶ ŠKODA mobile application
▶ ŠKODA web pages8Structure of the Owner's Manual and further information
Page 12 of 200
Safety
Passive Safety
General information
Introduction
This chapter contains information on the following subjects:
Before setting off
10
Driving safety
10
In this section of the instructions you will find important information on the
subject of passive safety. We have combined everything here which you
should be familiar with, for example, regarding seat belts, airbags, safety of children and anything similar.
Other important safety information can also be found in the subsequent sec-
tions of this Owner's Manual. The Owner's Manual should therefore always be
kept in the vehicle.
Before setting off
For your own safety and the safety of the people travelling with you, please
pay attention to the following points before setting off.
▶ Check the lights and turn signal lights are functioning correctly.
▶ Check the wiper function and the wiper blades for wear. Check the wind-
screen washer fluid level.
▶ Ensure that all of the windows offer good visibility to the outside.
▶ Adjust the rear-view mirror so that vision to the rear is guaranteed. Ensure
that the mirrors are not covered.
▶ Check the tyre inflation pressure.
▶ Check the engine oil, brake fluid and coolant level.
▶ Secure all items of luggage.
▶ Do not exceed the permissible axle loads and permissible gross weight of the
vehicle.
▶ Close all doors as well as the bonnet and boot lid.
▶ Ensure that no objects can obstruct the pedals.
▶
Protect children using a suitable child seat » page 21, Transporting children
safely .
▶ Adopt the correct seated position. Tell your passengers to assume the cor-
rect seated position » page 10, Correct and safe seated position .
Driving safety
For safety in traffic, the following precautions must be observed. ▶ Do not become distracted from concentrating on the traffic situation, (e.g. by
your passengers or mobile phone calls).
▶ Never drive when your driving ability is impaired, (e.g. due to medication, al-
cohol, drugs or similar).
▶ Keep to the traffic regulations and the permissible speed limit.
▶ Always adjust the driving speed to the road, traffic and weather conditions.
▶ Take regular breaks on long journeys (at least every two hours).
Correct and safe seated position
Introduction
This chapter contains information on the following subjects:
The correct seating position for the driver
11
Adjusting the steering wheel position
11
Correct seating position for the front passenger
12
Correct seating position for the passengers in the rear seats
12
Always assume the correct seated position before setting off and do not
change this position while driving. Also advise your passengers to adopt the
correct seated position and not to change this position while the car is moving.
The following list contains instructions for the Passenger which, if not ob-
served, may cause serious injuries or death. ▶ Do not lean against the dash panel.
▶ Do not put your feet on the dash panel.
The following list contains instructions for all Passengers which, if not ob-
served, may cause serious injuries or death.
▶ Do not sit only on the front part of the seat.
▶ Do not sit facing to one side.
▶ Do not lean out of the window.
▶ Do not put your limbs out of the window.
▶ Do not put your feet on the seat cushion.
10Safety
Page 14 of 200
›Adjust the steering wheel to the desired position. The steering wheel can be
adjusted in direction of arrow 2.›
Pull the holder in arrow direction
3
until the stop.
WARNING■ Never adjust the steering wheel when the vehicle is moving only when
the vehicle is stationary!■
The safety lever must always be locked so that the steering wheel cannot
accidentally change position – There is a risk of an accident!
Correct seating position for the front passenger
Read and observe
on page 11 first.
For passenger safety and to reduce the risk of injury in an accident, the follow-ing instructions must be observed.
Position the front passenger seat back as far as possible. The front pas-
senger must maintain a distance of at least 25 cm to the dash panel so
that the airbag offers the greatest possible safety if it is deployed.
Adjust the headrests so that the top edge of the headrest is at the same
level as the upper part of your head » Fig. 2 on page 11 -
C
(not for seats
with integrated headrests).
Correctly fasten the seat belt » page 13.
WARNING■
A distance of least 25 cm to the dashboard should be maintained, other-
wise the airbag system will not be able to protect you - There is a risk to
life!■
Always keep your feet in the footwell when the car is being driven – nev-
er place your feet on the instrument panel, out of the window or on the
surface of the seats! You will be exposed to increased risk of injury if it be-
comes necessary to apply the brake or in the event of an accident. If an air-
bag is deployed, you could suffer fatal injuries by adopting an incorrect
seated position!
Correct seating position for the passengers in the rear seats
Read and observe
on page 11 first.
For the safety of the passengers in the rear seats, and to reduce the risk of
injury in an accident, the following instructions must be observed.
Adjust the headrests so that the top edge of the headrest is at the same
level as the upper part of the head » Fig. 2 on page 11 -
C
.
Correctly fasten the seat belt » page 13, Using seat belts .
12Safety
Page 21 of 200
WARNINGInformation about for side and head airbags■No objects (e.g. sun visors turned towards the windows) should be loca-
ted in the deployment area of the side and head airbags. No accessories
(e.g. cup holders etc.) should be fitted to the doors - There is a risk of an
injury!■
Hang only light clothing on the hooks in the vehicle, do not leave any
heavy or sharp objects in the pockets. Do not use hangers to hang up the
clothes.
■
The airbag system operates using pressure sensors located in the front
doors. For this reason, no adjustments may be carried out to the doors or
door panels (e.g. installation of additional loudspeakers). Additional infor-
mation » page 132 .
■
No excessive force, e.g. through blows, kicks etc. should be applied to the
seat backrests - there is a risk of damage to the side airbags. The side air-
bags would not be deployed in such a case!
■
Any seat or protective covers which you fit to the driver or front passen-
ger seats must only be of a type expressly authorised by ŠKODA AUTO. In
view of the fact that the airbag inflates out of the backrest of the seat, use
of non-approved seat or protective covers would considerably impair the
protective function of the side airbag.
■
Any damage to the original seat covers or stitching at the installation
points for the side airbags should be immediately repaired by a specialist
company.
WARNINGInformation on the use of the airbag system■Any work on the airbag system, including the installation and removal of
system components due to other repair work (e.g. removal of the steering
wheel), must only be carried out by a specialist garage. Additional informa-
tion » page 132 .■
No changes of any sort should be made to parts of the airbag system, the
front bumper or the bodywork.
■
Do not manipulate individual parts of the airbag system, as this might re-
sult in the airbag being deployed.
Airbag deactivation
Introduction
This chapter contains information on the following subjects:
Deactivating airbags
19
Deactivating the front passenger airbag
20
Deactivating airbags
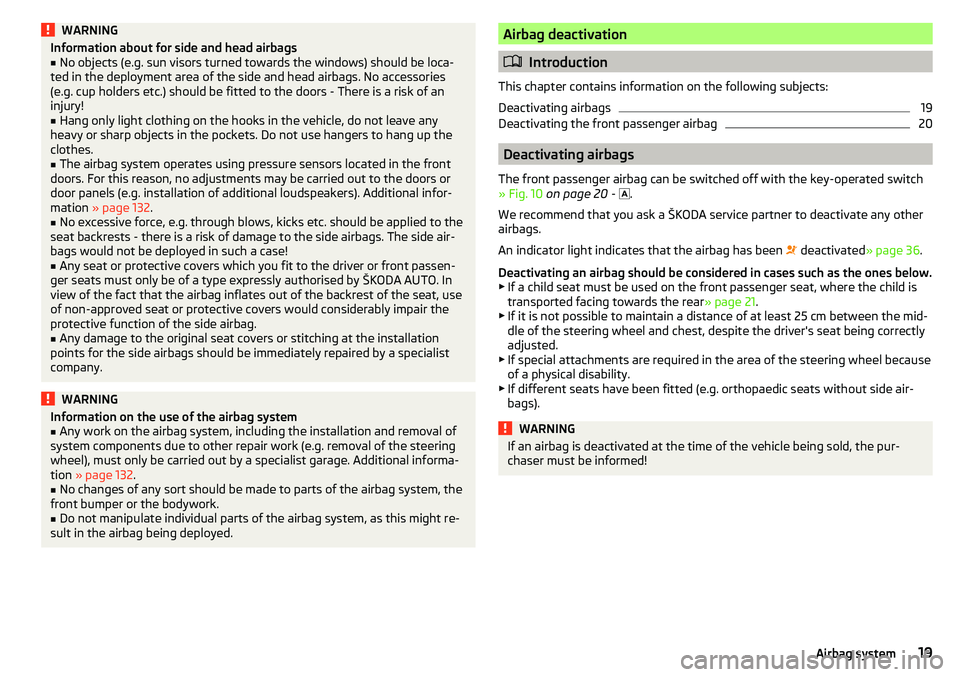
The front passenger airbag can be switched off with the key-operated switch
» Fig. 10 on page 20 -
.
We recommend that you ask a ŠKODA service partner to deactivate any other
airbags.
An indicator light indicates that the airbag has been deactivated
» page 36.
Deactivating an airbag should be considered in cases such as the ones below. ▶ If a child seat must be used on the front passenger seat, where the child is
transported facing towards the rear » page 21.
▶ If it is not possible to maintain a distance of at least 25 cm between the mid-
dle of the steering wheel and chest, despite the driver's seat being correctly
adjusted.
▶ If special attachments are required in the area of the steering wheel because
of a physical disability.
▶ If different seats have been fitted (e.g. orthopaedic seats without side air-
bags).
WARNINGIf an airbag is deactivated at the time of the vehicle being sold, the pur-
chaser must be informed!19Airbag system
Page 29 of 200
Using the system
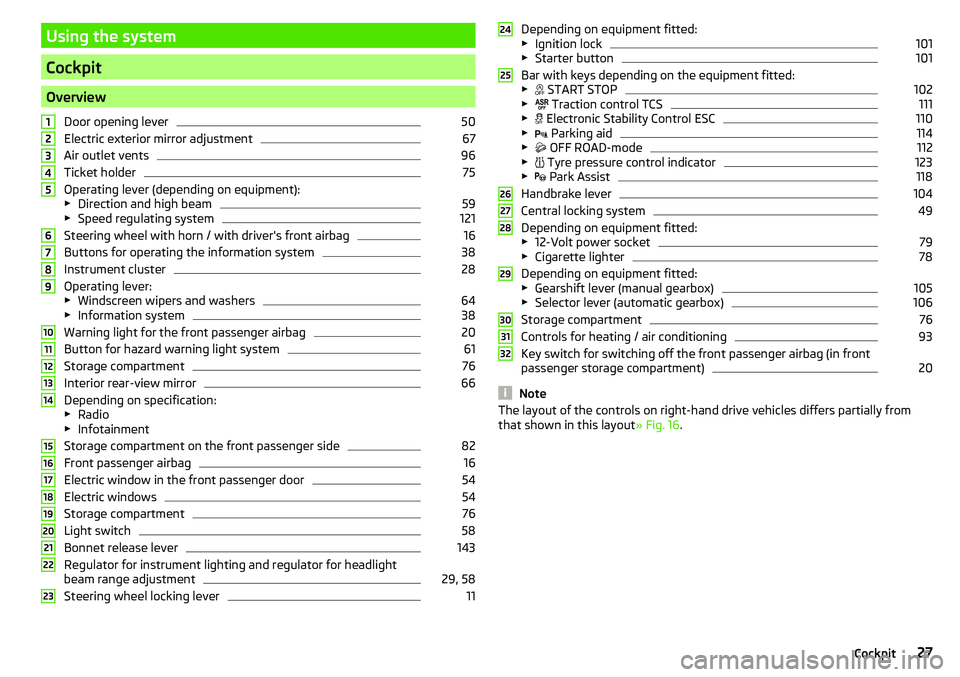
Cockpit
OverviewDoor opening lever
50
Electric exterior mirror adjustment
67
Air outlet vents
96
Ticket holder
75
Operating lever (depending on equipment):
▶ Direction and high beam
59
▶Speed regulating system
121
Steering wheel with horn / with driver's front airbag
16
Buttons for operating the information system
38
Instrument cluster
28
Operating lever:
▶ Windscreen wipers and washers
64
▶Information system
38
Warning light for the front passenger airbag
20
Button for hazard warning light system
61
Storage compartment
76
Interior rear-view mirror
66
Depending on specification:
▶ Radio
▶ Infotainment
Storage compartment on the front passenger side
82
Front passenger airbag
16
Electric window in the front passenger door
54
Electric windows
54
Storage compartment
76
Light switch
58
Bonnet release lever
143
Regulator for instrument lighting and regulator for headlight
beam range adjustment
29, 58
Steering wheel locking lever
111234567891011121314151617181920212223Depending on equipment fitted:
▶ Ignition lock101
▶Starter button
101
Bar with keys depending on the equipment fitted:
▶ START STOP
102
▶
Traction control TCS
111
▶
Electronic Stability Control ESC
110
▶
Parking aid
114
▶
OFF ROAD-mode
112
▶
Tyre pressure control indicator
123
▶
Park Assist
118
Handbrake lever
104
Central locking system
49
Depending on equipment fitted:
▶ 12-Volt power socket
79
▶Cigarette lighter
78
Depending on equipment fitted:
▶ Gearshift lever (manual gearbox)
105
▶Selector lever (automatic gearbox)
106
Storage compartment
76
Controls for heating / air conditioning
93
Key switch for switching off the front passenger airbag (in front
passenger storage compartment)
20
Note
The layout of the controls on right-hand drive vehicles differs partially from
that shown in this layout » Fig. 16.24252627282930313227Cockpit
Page 45 of 200

Menu itemAudio
The following information is displayed in the
Audio
menu item.
Radio
▶ Currently playing station (name/frequency).
▶ The selected frequency range (e.g. FM) optionally with the number of the sta-
tion button (e.g. FM 3), if the station is stored in the memory list.
▶ List of available stations (if more than 5 stations can be received).
▶ TP traffic announcements.
Media
▶ Name of the track being played, if necessary, further information regarding
title (e.g. artist, album name), if this information is stored as a so called ID3
tag on the audio source.
Menu item
Phone
The call list with the following symbols is displayed in the
Telephone
menu item.
Incoming call
Outgoing call
Missed call
Symbols in the display Charge status of the telephone battery 1)
Signal strength 1)
A telephone is connected to the unit
Missed calls (if there are several missed calls, the number of calls is shown
next to the symbol)
Menu item
Assistants
In the
Assistants
menu item, the fatigue detection can be enabled/disabled
» page 122 .
Menu item
Settings
There is an option to change certain settings using the display. The following
information can be selected (depending on the equipment installed in the ve-
hicle).
Language Setting the language for the texts shown on the display.MFD data
Switching on/off certain information of the multifunction display.
Comfort
-Turn on / off or adjust the following functions.
ATA confirmSwitch on/off the audible signal indicating activation
of the anti-theft alarm system » page 51, Anti-theft
alarm system .Central lockingSwitch on/off the central locking and automatic lock-
ing function » page 50, Individual settings .Window op.Setting the comfort controls for the driver window or
for all windows » page 55, Window convenience op-
eration .Mirror downActivate/deactivate the function for lowering the mir-
ror on the front passenger side when in reverse
gear » page 67 , Tilting the mirror area of the front
passenger mirror (vehicles with electrically adjustable
driver's seat) .Mirror adjust.Activation / deactivation of the synchronous exterior
mirror function settings » page 67, Setting the mir-
ror surfaces synchronously .Factory setting.Resetting the Comfort menu to the factory setting.Lights & Vision
- Turn on / off or adjust the following functions.
Coming HomeActivate/deactivate and adjust the light duration of
the COMING HOME function » page 61.Leaving HomeSwitch on/off and adjust the light duration of the
LEAVING HOME function » page 61.Dayt. r. lightActivate/deactivate the daylight driving
light » page 59 , Daylight running lights (DAY LIGHT) .Rear wiperActivate/deactivate the function of the automatic
rear window wiping » page 65, Automatic rear wip-
er .Lane ch. flashActivate/deactivate the Comfort Indicating func-
tion » page 59 , Comfort signalling . 1)
This function is only supported by some mobile phones.
43Information system
Page 52 of 200

SafeLockRead and observe
and on page 48 first.
SafeLock prevents opening the doors from inside as well as window operation.
This makes an attempted break-in to the vehicle more difficult.
Activating
SafeLock is activated when the vehicle is locked from the outside.
This function is pointed out by the following message on the display of the in-
strument cluster after the ignition is switched off.
Check SAFELOCK! Log book!CHECK DEADLOCK
Activation display
When SafeLock is activated, the warning light in the driver's door flashes for 2
seconds in rapid succession, then starts to flash at longer intervals.
Deactivating
▶ By locking twice within 2 seconds.
▶ or: by deactivating the interior monitor and the towing protection
» page 52 .
The warning light in the driver door flashes rapidly for about 2 seconds, then
goes out and starts to flash at longer intervals after about 30 seconds.
If the vehicle is locked and the safe securing system is switched off, the door
can be opened separately from the inside by a single pull on opening lever.
The Safelock system switches back on when the vehicle is locked.
WARNINGIf the car is locked and the safe securing system activated, no people must
remain in the car as it will then not be possible to either unlock a door or
open a window from the inside. The locked doors make it more difficult for
rescuers to get into the vehicle in an emergency – risk to life!
Individual settings
Read and observe
and on page 48 first.
The following central locking functions can be individually set via the MAXI
DOT display » page 43, Menu item
Settings
.
All doors
The function allows you to unlock all doors, the boot lid and the fuel filler flap.
Single door
The function allows you to unlock only the driver's door and the fuel filler flap
with the radio remote control. KESSY allows the unlocking of a single door
which is in the vicinity of the key, as well as the fuel filler flap. The other doors
and the boot lid are only unlocked once the door handle is unlocked or
touched.
Doors on a vehicle side
This function enables you to unlock both doors on the driver's side and the
fuel filler flap with the radio remote control unit. KESSY allows the unlocking of
both doors which are in the vicinity of the key, as well as the fuel filler flap. The
other doors and the boot lid are only unlocked once the door handle is un-
locked or touched.
Automatic locking/unlocking
This function enables the locking of all doors and the boot lid from a speed of
15 km / h. Opening the doors and the boot lid from the outside is not possible.
The renewed unlocking of the doors and the boot lid is carried out when the
ignition key is removed or when the door is opened from inside (depending on
the individual setting for the central locking system).
Opening/closing a door
Fig. 33
Door handle/door opening lever:
Read and observe
and on page 48 first.
›
To open from the outside , unlock the vehicle and pull the door handle
A
in
the direction of arrow » Fig. 33.
50Using the system
Page 54 of 200
CAUTIONBefore leaving the vehicle, it must be checked that all of the windows, doors
and the sliding/tilting roof are locked in order to ensure the full functionality of
the anti-theft alarm system.
Note
The alarm system has its own power source, whose service life is 5 years.
Alarm trigger
Read and observe
on page 52 first.
The alarm is triggered when one of the following unauthorised actions is acti-
vated on the vehicle with an activated warning system. ▶ Opening the bonnet.
▶ Opening the boot lid.
▶ Opening the doors.
▶ Manipulation of the ignition lock.
▶ Towing the vehicle.
▶ Movement in the vehicle.
▶ Sudden and significant voltage drop of the electrical system.
▶ Uncoupling the trailer.
An alarm is triggered also when the driver's door is unlocked and opened by
the lock cylinder.
The alarm is switched off by pressing the
button on the key or switching on
the ignition.
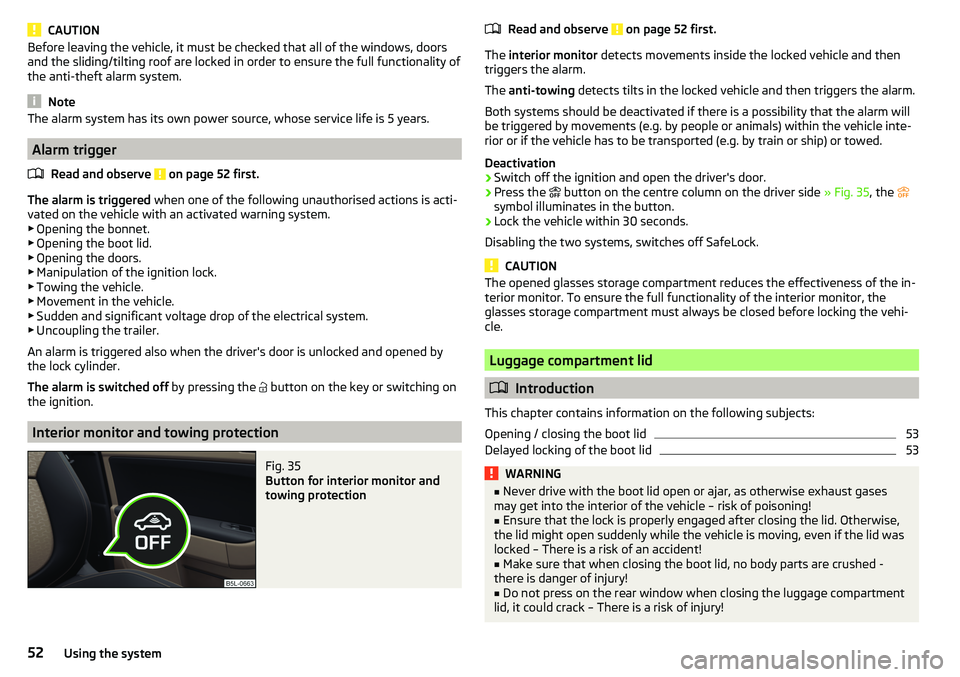
Interior monitor and towing protection
Fig. 35
Button for interior monitor and
towing protection
Read and observe on page 52 first.
The interior monitor detects movements inside the locked vehicle and then
triggers the alarm.
The anti-towing detects tilts in the locked vehicle and then triggers the alarm.
Both systems should be deactivated if there is a possibility that the alarm will
be triggered by movements (e.g. by people or animals) within the vehicle inte-
rior or if the vehicle has to be transported (e.g. by train or ship) or towed.
Deactivation
›
Switch off the ignition and open the driver's door.
›
Press the button on the centre column on the driver side
» Fig. 35, the
symbol illuminates in the button.
›
Lock the vehicle within 30 seconds.
Disabling the two systems, switches off SafeLock.
CAUTION
The opened glasses storage compartment reduces the effectiveness of the in-
terior monitor. To ensure the full functionality of the interior monitor, the
glasses storage compartment must always be closed before locking the vehi-
cle.
Luggage compartment lid
Introduction
This chapter contains information on the following subjects:
Opening / closing the boot lid
53
Delayed locking of the boot lid
53WARNING■ Never drive with the boot lid open or ajar, as otherwise exhaust gases
may get into the interior of the vehicle – risk of poisoning!■
Ensure that the lock is properly engaged after closing the lid. Otherwise,
the lid might open suddenly while the vehicle is moving, even if the lid was
locked – There is a risk of an accident!
■
Make sure that when closing the boot lid, no body parts are crushed -
there is danger of injury!
■
Do not press on the rear window when closing the luggage compartment
lid, it could crack – There is a risk of injury!
52Using the system
Page 55 of 200

Opening / closing the boot lidFig. 36
Opening / closing tailgate
Read and observe
on page 52 first.
›
To open the lid, press
--
--
» Fig. 36 button A in the direction of arrow 1.
›
Raise the lid in the direction of the arrow
2
.
›
To close , grab the mount
B
and pull in the direction of arrow
3
.
Note
Button A » Fig. 36 is disabled when starting off or driving at a speed of over 5
km/h. The button is reactivated when the vehicle has stopped and a door is
opened.
Delayed locking of the boot lid
Read and observe
on page 52 first.
If the boot lid is unlocked with the button on the key, then the boot lid is
automatically locked after closing.
The period after which the boot lid is locked automatically can be extended by
a specialist garage.
CAUTION
There is a risk of unwanted entry into the vehicle before the boot lid is locked
automatically.Window operation
Introduction
This chapter contains information on the following subjects:
Mechanical windows
54
Electric window
54
Opening the windows in the front passenger door and in the rear doors
54
Force limiter
55
Window convenience operation
55
Operational faults
55
The windows can be operated mechanically by the winder attached to the re-
spective door panel.
The windows can be operated electrically from the following locations; all win-
dows from the driver's seat and also via the buttons for the windows in the
passenger door or the rear doors.
WARNING■ Always close the window carefully and in a controlled manner. Otherwise
these could cause severe crushing injuries.■
The system is fitted with a force limiter » page 55. If there is an obsta-
cle, the closing process is stopped and the window goes down by several
centimetres. However, the windows should be closed carefully – risk of in-
jury.
CAUTION
■ Keep the windows clean (free of ice and similar) to ensure the correct func-
tionality of the electric windows.■
Always close the electric windows before disconnecting the battery.
Note
If the windows are opened, dust as well as other dirt can get into the vehicle
and in addition the wind noise is more at certain speeds.53Unlocking and opening