SMART FORTWO 2016 Owners Manual
Manufacturer: SMART, Model Year: 2016, Model line: FORTWO, Model: SMART FORTWO 2016Pages: 214, PDF Size: 4.93 MB
Page 181 of 214
RAfter fitting new tires, run them in at mod-
erate speeds for the first 60 miles (100 km),
as they only reach their full performance
after this distance.
RDo not drive with tires which have too little
tread depth, as this significantly reduces
the traction on wet roads (hydroplaning).
RReplace the tires after six years at the lat-
est, regardless of wear.
Winter operation
General notes
Have your vehicle winterproofed at a quali-
fied specialist workshop at the onset of win-
ter.
Observe the notes in the "Changing a wheel"
section (
Ypage 196).
Driving with summer tires
At temperatures below 45 ‡(+7 †), summer
tires lose elasticity and therefore traction
and braking power. Change the tires on your
vehicle to M+S tires. Using summer tires at
very cold temperatures could cause tears to
form, thereby damaging the tires perma-
nently. smart cannot accept responsibility
for this type of damage.
GWARNING
Damaged tires can cause tire inflation
pressure loss. As a result, you could lose
control of your vehicle. There is a risk of
accident.
Check the tires regularly for signs of dam- age and replace any damaged tires imme-
diately.
M+S tires
GWARNING
M+S tires with a tire tread depth of less
than 00CFin (4 mm) are not suitable for use in
winter and do not provide sufficient trac-
tion. There is a risk of an accident.
M+S tires with a tread depth of less than 00CF
in (4 mm) must be replaced immediately.
At temperatures below 45 ‡(+7 †) use winter
tires marked with M+S.
Only winter tires bearing the 004Dsnowflake
symbol in addition to the M+S marking pro-
vide the best possible grip in wintry road
conditions. Only these tires will allow driv-
ing safety systems such as ABS and ESP
®to
function optimally in winter. These tires
have been developed specifically for driving
in snow.
Use M+S tires of the same make and tread on
all wheels to maintain safe handling charac- teristics.
Always observe the maximum permissible
speed specified for the M+S tires you have
mounted. Therefore, only use tire types and
sizes approved for smart. Observe the tire
load rating and speed rating required for
smart.
Tires with a specified direction of rotation
have additional benefits, e.g. if there is a
risk of aquaplaning. These advantages can
only be gained if the tires are fitted corre-
sponding to the direction of rotation.
An arrow on the sidewall of the tire indicates
its correct direction of rotation.
When you have mounted the M+S tires:
XCheck the tire pressures (Ypage 180).
XVehicles for USA: restart the tire pressure
monitor (Ypage 185).
Snow chains
GWARNING
If snow chains are installed to the front
wheels, they may drag against the vehicle
body or chassis components. This could
cause damage to the vehicle or the tires.
There is a risk of an accident.
To avoid hazardous situations:
Rnever install snow chains to the front
wheels
Ralways install snow chains in pairs to the rear wheels.
Winter operation179
>> Wheels and tires.
Z
Page 182 of 214
!Vehicles with steel wheels:if you mount
snow chains on steel wheels, you may dam-
age the hub caps. Remove the hub caps from
the relevant wheels before mounting the
snow chains.
smart recommends that you only use snow
chains that have been specially approved for
smart. For more information, please contact
the smart center or a qualified specialist
workshop.
Bear in mind that snow chains are designed
for a certain wheel size. If you mount tires
that are larger or smaller than the original
tires, you will require new snow chains of the
correct size.
If you intend to mount snow chains, please
bear the following points in mind:
RSnow chains may not be mounted on all
wheel/tire combinations. Permissible
wheel-tire combinations (
Ypage 200).
ROnly use snow chains when driving on roads
completely covered by snow. Remove the
snow chains as soon as possible when you
come to a road that is not snow-covered.
RLocal regulations may restrict the use of
snow chains. Observe the appropriate reg-
ulations if you wish to mount snow chains.
Rdo not exceed the maximum permissible
speed of 30 mph (50 km/h).
Tire pressure
Tire pressure specifications
GWARNING
Underinflated or overinflated tires pose
the following risks:
Rthe tires may burst, especially as the
load and vehicle speed increase.
Rthe tires may wear excessively and/or
unevenly, which may greatly impair tire
traction.
Rthe driving characteristics, as well as
steering and braking, may be greatly
impaired.
There is a risk of an accident.
Follow recommended tire inflation pres-
sures and check the pressure of all the tires including the spare wheel:
Rmonthly, at least
Rif the load changes
Rbefore beginning a long journey
Runder different operating conditions,
e.g. off-road driving
If necessary, correct the tire pressure.
The specifications on the sample Tire and
Loading Information placard and tire pres-
sure tables are examples. Tire pressure spec-
ifications are vehicle-specific and may
deviate from the data shown here. The tire
pressure specifications that are valid for
your vehicle can be found on the Tire and
Loading Information placard and tire pres-
sure table on the vehicle.
The recommended tire pressures for the tires
mounted at the factory can be found on the
labels described here.
Further information on tire pressures can be
obtained at a qualified specialist workshop.
0043Recommended tire pressures
The Tire and Loading Information placard is
on the B-pillar on the driver's side
(
Ypage 185).
The Tire and Loading Information placard
contains the recommended tire pressures for
cold tires. The recommended tire pressures
are valid for the maximum permissible load
and up to the maximum permissible vehicle
speed.
The tire pressure table is on the inside of the
fuel filler flap.
180Tire pressure
>> Wheels and tires.
Page 183 of 214
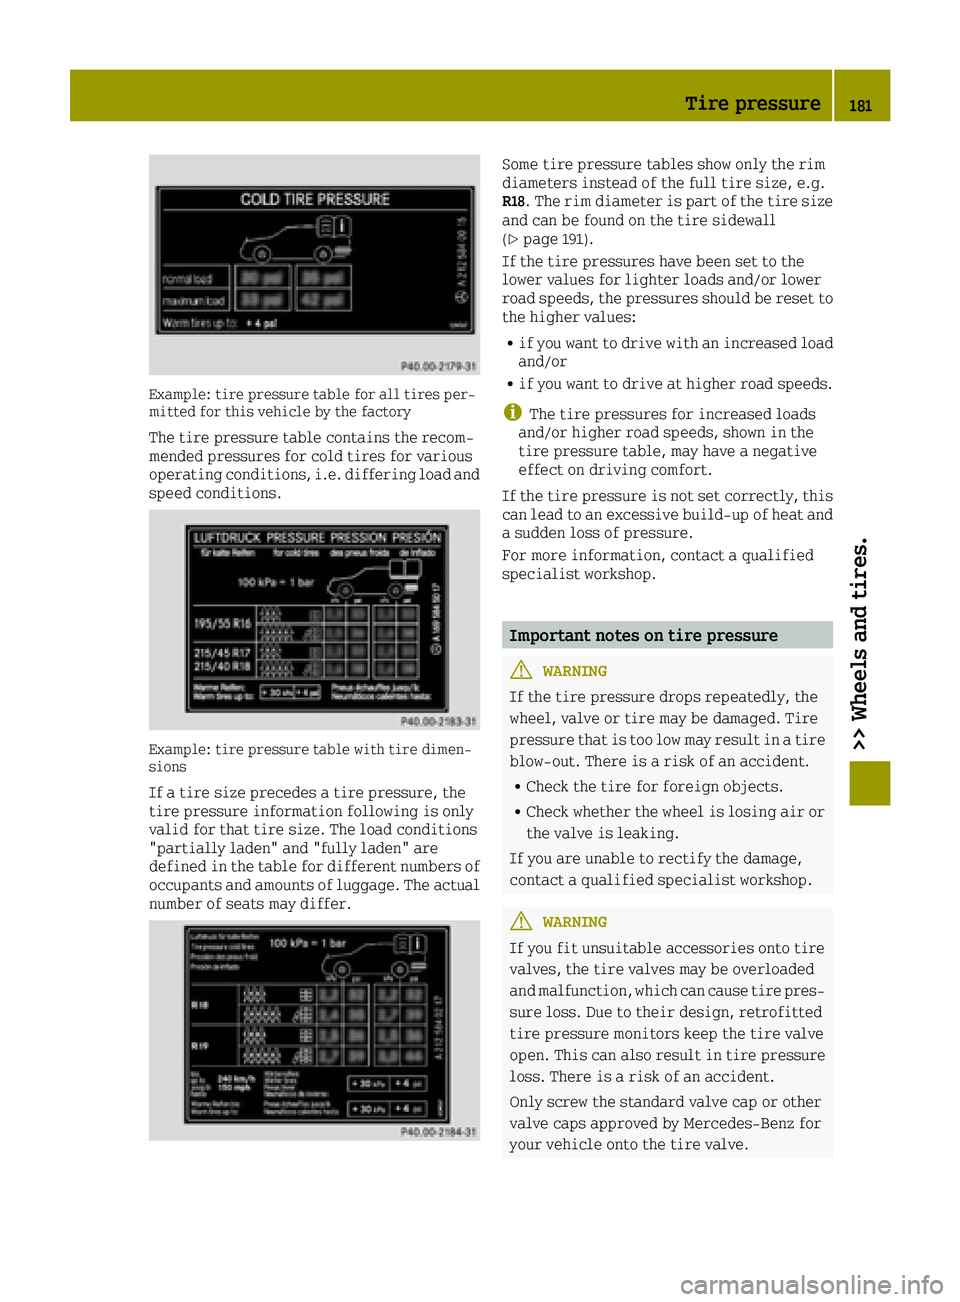
Example: tire pressure table for all tires per-
mitted for this vehicle by the factory
The tire pressure table contains the recom-
mended pressures for cold tires for various
operating conditions, i.e. differing load and
speed conditions.
Example: tire pressure table with tire dimen-
sions
If a tire size precedes a tire pressure, the
tire pressure information following is only
valid for that tire size. The load conditions
"partially laden" and "fully laden" are
defined in the table for different numbers of
occupants and amounts of luggage. The actual
number of seats may differ.
Some tire pressure tables show only the rim
diameters instead of the full tire size, e.g.
R18. The rim diameter is part of the tire size
and can be found on the tire sidewall
(
Ypage 191).
If the tire pressures have been set to the
lower values for lighter loads and/or lower
road speeds, the pressures should be reset to
the higher values:
Rif you want to drive with an increased load
and/or
Rif you want to drive at higher road speeds.
iThe tire pressures for increased loads
and/or higher road speeds, shown in the
tire pressure table, may have a negative
effect on driving comfort.
If the tire pressure is not set correctly, this
can lead to an excessive build-up of heat and
a sudden loss of pressure.
For more information, contact a qualified
specialist workshop.
Important notes on tire pressure
GWARNING
If the tire pressure drops repeatedly, the
wheel, valve or tire may be damaged. Tire
pressure that is too low may result in a tire
blow-out. There is a risk of an accident.
RCheck the tire for foreign objects.
RCheck whether the wheel is losing air or
the valve is leaking.
If you are unable to rectify the damage,
contact a qualified specialist workshop.
GWARNING
If you fit unsuitable accessories onto tire
valves, the tire valves may be overloaded
and malfunction, which can cause tire pres-
sure loss. Due to their design, retrofitted
tire pressure monitors keep the tire valve
open. This can also result in tire pressure
loss. There is a risk of an accident.
Only screw the standard valve cap or other
valve caps approved by Mercedes-Benz for
your vehicle onto the tire valve.
Tire pressure181
>> Wheels and tires.
Z
Page 184 of 214
Use a suitable pressure gauge to check the
tire pressure. The outer appearance of a tire
does not permit any reliable conclusion
about the tire pressure. On vehicles equip-
ped with the electronic tire pressure moni-
tor, the tire pressure can be checked in the
on-board computer.
The tire temperature and pressure increase
when the vehicle is in motion. This is
dependent on the driving speed and the load.
Therefore, you should only correct tire pres-
sures when the tires are cold.
The tires are cold:
Rif the vehicle has been parked with the
tires out of direct sunlight for at least
three hours and
Rif the vehicle has not been driven further
than 1 mile (1.6 km)
The tire temperature changes depending on
the outside temperature, the vehicle speed
and the tire load. If the tire temperature
changes by 18 ‡(10 †), the tire pressure
changes by approximately 10 kPa (0.1 bar/
1.5 psi). Take this into account when checking
the pressure of warm tires. Only correct the
tire pressure if it is too low for the current
operating conditions. If you check the tire
pressure when the tires are warm, the result-
ing value will be higher than if the tires were
cold. This is normal. Do not reduce the tire
pressure to the value specified for cold
tires. The tire pressure would otherwise be
too low.
Observe the recommended tire pressures for
cold tires:
Ron the Tire and Loading Information plac-
ard on the B-pillar on the driver's side
Rin the tire pressure table in the fuel filler
flap (Ypage 98).
Underinflated or overinflated tires
GWARNING
Tires with pressure that is too low can
overheat and burst as a consequence. In
addition, they also suffer from excessive
and/or irregular wear, which can severely
impair the braking properties and the
driving characteristics. There is a risk of an accident.
Avoid tire pressures that are too low in all
the tires, including the spare wheel.
Underinflated tires
Underinflated tires may:
Roverheat, leading to tire defects
Radversely affect handling
Rwear excessively and/or unevenly
Rhave an adverse effect on fuel consumption
GWARNING
Tires with excessively high pressure can
burst because they are damaged more easily by road debris, potholes etc. In addition,
they also suffer from irregular wear, which
can severely impair the braking properties
and the driving characteristics. There is a
risk of an accident.
Avoid tire pressures that are too high in all
the tires, including the spare wheel.
Overinflated tires
Overinflated tires may:
Rincrease the braking distance
Radversely affect handling
Rwear excessively and/or unevenly
Rhave an adverse effect on ride comfort
Rbe more susceptible to damage
Maximum tire pressures
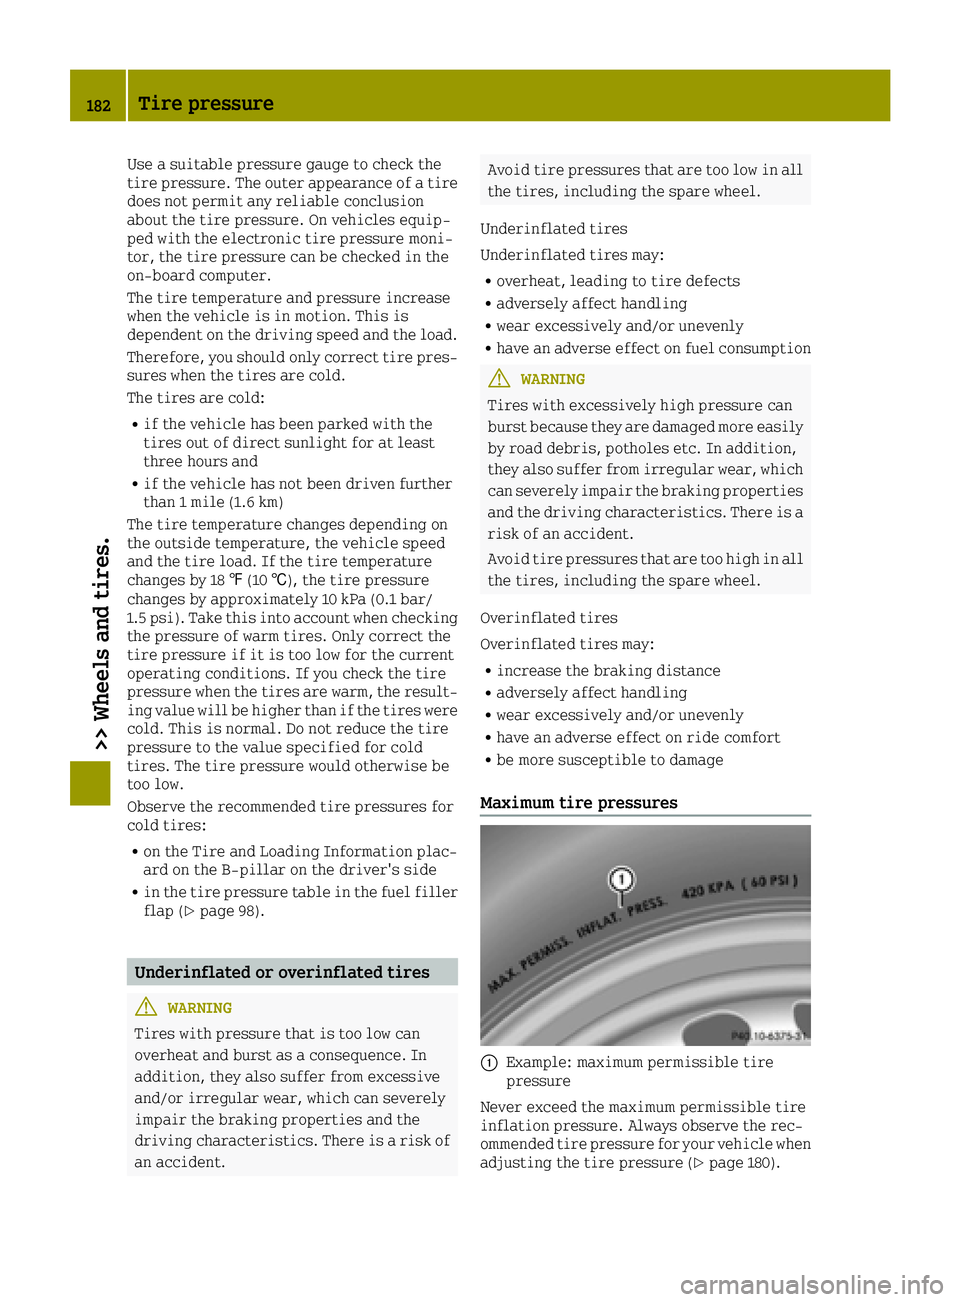
0043Example: maximum permissible tire
pressure
Never exceed the maximum permissible tire
inflation pressure. Always observe the rec-
ommended tire pressure for your vehicle when
adjusting the tire pressure (
Ypage 180).
182Tire pressure
>> Wheels and tires.
Page 185 of 214
iThe actual values for tires are vehicle-
specific and may deviate from the values in
the illustration.
Checking the tire pressures
Important safety notes
Observe the notes on tire pressure
(Ypage 180).
Information on air pressure for the tires on
your vehicle can be found:
Ron the vehicle's Tire and Loading Informa- tion placard on the B-pillar
Rin the tire pressure table in the fuel filler
flap (Ypage 98)
Rin the "Tire pressure" section
Checking tire pressures manually
To determine and set the correct tire pres-
sure, proceed as follows:
XRemove the valve cap of the tire that is to bechecked.
XPress the tire pressure gauge securely onto
the valve.
XRead the tire pressure and compare it with
the recommended value on the Tire and
Loading Information placard (
Ypage 180).
XIf the tire pressure is too low increase the
tire pressure to the recommended value.
XIf the tire pressure is too high, release
air. To do this, press down the metal pin in
the valve using the tip of a pen, for exam-
ple. Then check the tire pressure again
using the tire pressure checker.
XScrew the valve cap onto the valve.
XRepeat these steps for the other tires.
Tire pressure monitor
General notes
iThis function is only available in the
USA.
If a tire pressure monitor is installed, the
vehicle's wheels have sensors that monitor
the tire pressures in all four tires. The tire
pressure monitor warns you if the pressure
drops in one or more of the tires. The tire pressure monitor only functions if the cor-
responding sensors are fitted to all wheels.
Important safety notes
GWARNING
Each tire, including the spare (if provi-
ded), should be checked at least once every
two weeks when cold and inflated to the
pressure recommended by the vehicle man- ufacturer on the Tire and Loading Informa-
tion placard on the driver's door B-pillar
or the tire pressure label on the inside of
the fuel filler flap. If your vehicle has
tires of a different size than the size indi-
cated on the Tire and Loading Information
placard or, if available, the tire pressure
label, you should determine the proper tire
pressure for those tires.
As an added safety feature, your vehicle has been equipped with a tire pressure moni-
toring system (TPMS) that illuminates a low
tire pressure telltale when one or more of
your tires are significantly underinflated.
Accordingly, when the low tire pressure
telltale lights up, you should stop and
check your tires as soon as possible, and
inflate them to the proper pressure. Driv-
ing on a significantly underinflated tire
causes the tire to overheat and can lead to
tire failure.
Underinflation also reduces fuel effi-
ciency and tire tread life, and may affect
the vehicle's handling and stopping abil-
ity. Please note that the TPMS is not a sub-
stitute for proper tire maintenance, and it
is the driver's responsibility to maintain
correct tire pressure, even if underinfla-
tion has not reached the level to trigger
illumination of the TPMS low tire pressure
telltale.
Your vehicle has also been equipped with a
TPMS malfunction indicator to indicate
when the system is not operating properly.
The TPMS malfunction indicator is com-
bined with the low tire pressure telltale.
When the system detects a malfunction, the
Tire pressure183
>> Wheels and tires.
Z
Page 186 of 214
warning lamp will flash for approximately
a minute and then remain continuously
illuminated. This sequence will be repea-
ted every time the vehicle is started as long
as the malfunction exists. When the mal-
function indicator is illuminated, the sys-
tem may not be able to detect or signal low
tire pressure as intended.
TPMS malfunctions may occur for a variety
of reasons, including the installation of
incompatible replacement or alternate
tires or wheels on the vehicle that prevent
the TPMS from functioning properly. Always
check the TPMS malfunction telltale after
replacing one or more tires or wheels on
your vehicle to ensure that the replacement
or alternate Tires and wheels allow the
TPMS to continue to function properly.
It is the driver's responsibility to set the
tire pressure to that recommended for cold
tires which is suitable for the operating sit-
uation (
Ypage 180). Note that the correct tire
pressure for the current operating situation
must first be taught-in to the tire pressure
monitor. If there is a substantial loss of
pressure, the warning threshold for the warn-
ing message is aligned to the reference val-
ues taught-in. Restart the tire pressure mon-
itor after adjusting to the cold tire pressure.
The current pressures are saved as new ref-
erence values. As a result, a warning message
will appear if the tire pressure drops sig-
nificantly.
The tire pressure monitor does not warn you of
an incorrectly set tire pressure. Observe the notes on the recommended tire pressure
(
Ypage 180).
The tire pressure monitor is not able to warn
you of a sudden loss of pressure, e.g. if the
tire is penetrated by a foreign object. In the
event of a sudden loss of pressure, bring the
vehicle to a halt by braking carefully. Avoid
abrupt steering maneuvers. The tire pressure monitor has a yellow warn-
ing lamp in the instrument cluster for indi-
cating a pressure loss or malfunction.
Whether the warning lamp flashes or lights up
indicates whether a tire pressure is too low
or the tire pressure monitor is malfunction-
ing:
RIf the warning lamp is lit continuously, the
tire pressure on one or more tires is sig-
nificantly too low. The tire pressure mon-
itor is not malfunctioning.
RIf the warning lamp flashes for around a
minute and then remains lit constantly, the
tire pressure monitor is malfunctioning.
iA message appears in the display in addi-
tion to the warning lamp.
Observe the information on display mes-
sages (
Ypage 126).
If the tire pressure monitor is malfunction-
ing, it may take up to ten minutes for the tire
pressure warning lamp to inform you of the
malfunction. The malfunction will be indi-
cated first by the tire pressure warning lamp
flashing for approximately one minute and
then remaining lit. When the malfunction has
been rectified, the tire pressure warning
lamp goes out after a few minutes of driving.
The operation of the tire pressure monitor
can be affected by interference from radio
transmitting equipment (e.g. radio head-
phones, two-way radios) that may be being
operated in or near the vehicle.
Tire pressure monitor warning messages
If the tire pressure monitor detects a pres-
sure loss in one or more tires, a warning mes-
sage is shown in the display. The yellow warn-
ing light in the tire pressure monitor lights
up. For certain display messages a warning
tone also sounds.
RIf the Correct Tire Pressuremessage
appears in the display, the tire pressure in
at least one tire is too low. Correct the tire
pressure at the next opportunity.
RIf the Tire Pressure Warning TireFailuremessage appears in the display,
the tire pressure in one or more tires has
dropped suddenly and the tires must be
checked.
Observe the instructions and safety notes for the display messages in the "Tires" section
184Tire pressure
>> Wheels and tires.
Page 187 of 214
(Ypage 126) and the indicator and warning
lamps in the instrument cluster in the "Tires" section (
Ypage 139).
Restarting the tire pressure monitor
When you restart the tire pressure monitor,
all existing warning messages are deleted
and the warning lamps go out. The monitor
uses the currently set tire pressures as the
reference values for monitoring. In most
cases, the tire pressure monitor will auto-
matically detect the new reference values
after you have changed the tire pressure.
However, you can also define reference values
manually as described here. The tire pres-
sure monitor then monitors the new tire pres-
sure values.
XSet the tire pressure to the value recom-
mended for the corresponding driving sit-
uation on the Tire and Loading Information
placard on the B-pillar on the driver's side
(
Ypage 180).
Additional tire pressure values for dif-
ferent loads can also be found on the tire
pressure table on the inside of the fuel
filler flap (
Ypage 180).
XMake sure that the tire pressure is correct on all four wheels.
On-board computer with a color display
XTo restart the tire pressure monitor: press
the 0063 or0064 button on the steering
wheel to select the Settings
menu and
press 0076on the steering wheel to con-
firm.
XPress the 0063or0064 button to select the
TirePressureMonitorsubmenu and con-
firm with 0076.
The Tire Pressure Monitor Use Cur‐
rentPressuresAsNewReferenceVal‐ues?message appears in the display.
If you wish to confirm the restart:
XPress the 0063or0064 button to select yesand press the0076button to confirm.
The Tire Pressure Monitor Restarted
message appears in the display.
XPress 0076to confirm.
After a short while, the message is also
hidden without pressing the 0076button.
After driving for a few minutes, the system
checks whether the current tire pressures are within the specified range. The new
tire pressures are then accepted as refer-
ence values and monitored.
iIf the
Tire Pressure Monitor Restar‐tedmessage does not appear after approx-
imately 5 seconds, the restart was not suc-
cessful. If this occurs, repeat the restart.
If you wish to cancel the restart:
XPress the 0063or0064 button to select noand press the0076button to confirm.
The tire pressure values stored at the last
restart will continue to be monitored.
Radio type approval for the tire pressure
monitor
CountryRadio type approval number
USAFCC ID: MRXMW2433A
FCC ID: MRXGG4
FCC ID: MRXMC34MA4
CanadaIC: 2546A-MW2433A
IC: 2546A-GG4
IC: 2546A-MC34MA4
Loading the vehicle
Instruction labels for tires and loads
GWARNING
Overloaded tires can overheat, causing a
blowout. Overloaded tires can also impair
the steering and driving characteristics
and lead to brake failure. There is a risk of
accident.
Observe the load rating of the tires. The
load rating must be at least half of the GAWR
of your vehicle. Never overload the tires by exceeding the maximum load.
Two instruction labels on your vehicle show
the maximum possible load.
(1) The Tire and Loading Information plac- ard is on the B-pillar on the driver's
side. The Tire and Loading Information
placard shows the maximum permissible
number of occupants and the maximum
permissible vehicle load. It also con-
Loading the vehicle185
>> Wheels and tires.
Z
Page 188 of 214
tains details of the tire sizes and corre-
sponding pressures for tires mounted at
the factory.
(2) The vehicle identification plate is on the B-pillar on the driver's side. The
vehicle identification plate informs you
of the gross vehicle weight rating. It is
made up of the vehicle weight, all vehicle
occupants, the fuel and the cargo. You can
also find information about the maximum
gross axle weight rating on the front and
rear axle.
The maximum gross axle weight rating is
the maximum weight that can be carried
by one axle (front or rear axle). Never
exceed the maximum load or the maximum gross axle weight rating for the front or
rear axle.
0043B-pillar, driver's side
Maximum permissible gross vehicle
weight rating
XSpecification for maximum gross vehicle
weight 0043is listed in the Tire and Loading
Information placard: "The combined
weight of occupants and cargo should never
exceed XXX kilograms or XXX lbs." The gross weight of all vehicle occupants,
load and luggage must not exceed the speci-
fied value.
iThe specifications shown on the Tire and
Loading Information placard in the illus-
tration are examples. The maximum per-
missible gross vehicle weight rating is
vehicle-specific and may differ from that
in the illustration. You can find the valid
maximum permissible gross vehicle weight
rating for your vehicle on the Tire and
Loading Information placard.
Number of seats
Maximum number of seats 0043indicates the
maximum number of occupants allowed to
travel in the vehicle. This information can be
found on the Tire and Loading Information
placard.
iThe specifications shown on the Tire and
Loading Information placard in the illus-
tration are examples. The number of seats
is vehicle-specific and can differ from the
details shown. The number of seats in your
vehicle can be found on the Tire and Load-
ing Information placard.
Determining the correct load limit
Step-by-step instructions
The following steps have been developed as
required of all manufacturers under Title 49,
Code of U.S. Federal Regulations, Part 575
pursuant to the "National Traffic and Motor
Vehicle Safety Act of 1966".
XStep 1: Locate the statement "The combined
weight of occupants and cargo should never
186Loading the vehicle
>> Wheels and tires.
Page 189 of 214
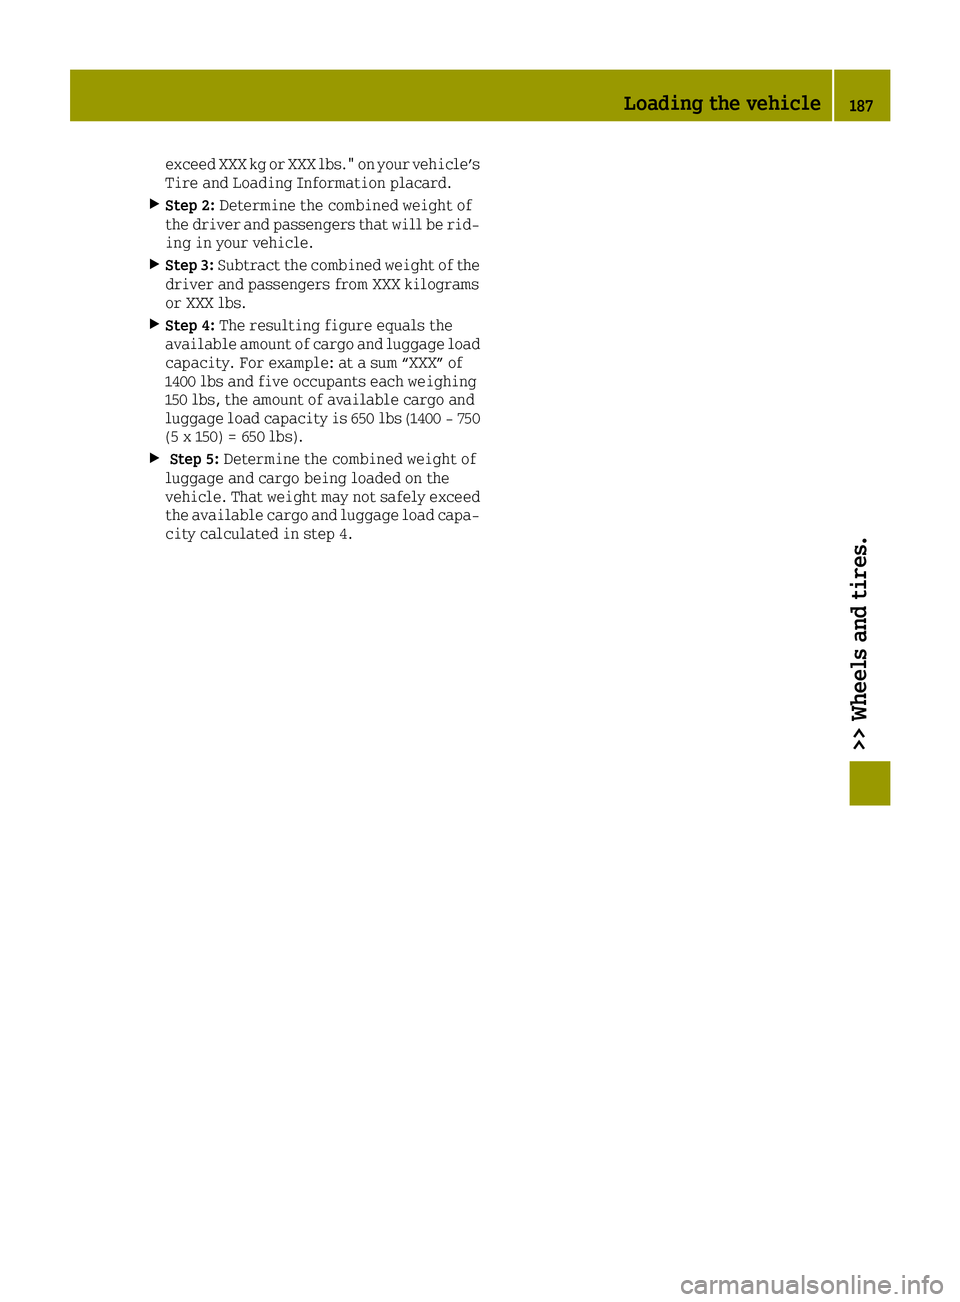
exceed XXX kg or XXX lbs." on your vehicle’s
Tire and Loading Information placard.
XStep 2:Determine the combined weight of
the driver and passengers that will be rid-
ing in your vehicle.
XStep 3: Subtract the combined weight of the
driver and passengers from XXX kilograms
or XXX lbs.
XStep 4: The resulting figure equals the
available amount of cargo and luggage load capacity. For example: at a sum “XXX” of
1400 lbs and five occupants each weighing
150 lbs, the amount of available cargo and
luggage load capacity is 650 lbs (1400 - 750
(5 x 150) = 650 lbs).
XStep 5: Determine the combined weight of
luggage and cargo being loaded on the
vehicle. That weight may not safely exceed
the available cargo and luggage load capa-
city calculated in step 4.
Loading the vehicle187
>> Wheels and tires.
Z
Page 190 of 214
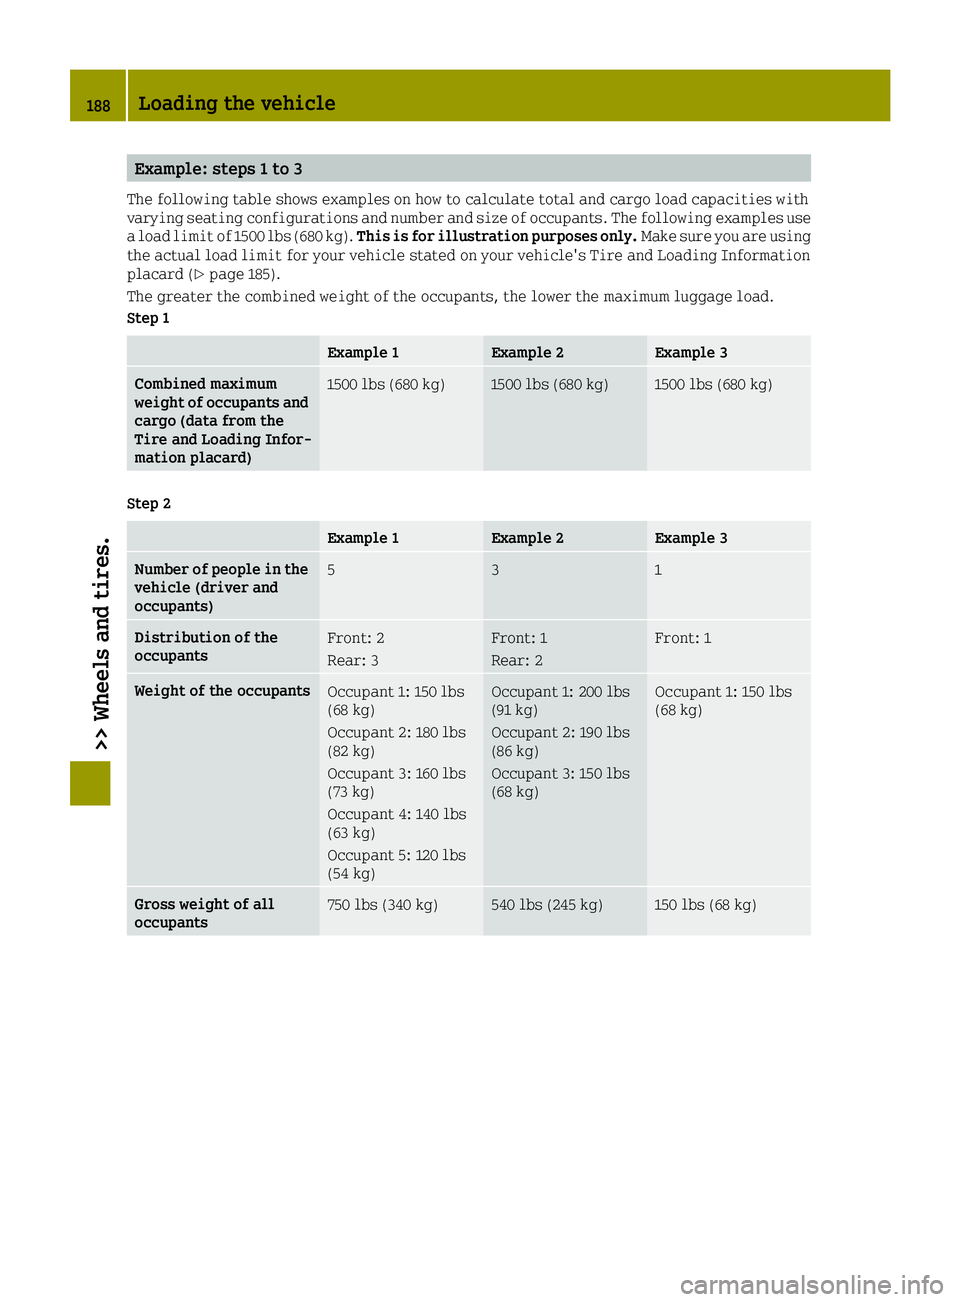
Example: steps 1 to 3
The following table shows examples on how to calculate total and cargo load capacities with
varying seating configurations and number and size of occupants. The following examples use
a load limit of 1500 lbs (680 kg).This is for illustration purposes only. Make sure you are using
the actual load limit for your vehicle stated on your vehicle's Tire and Loading Information
placard (
Ypage 185).
The greater the combined weight of the occupants, the lower the maximum luggage load.
Step 1
Example 1Example 2Example 3
Combined maximum
weight of occupants and
cargo (data from the
Tire and Loading Infor-
mation placard)1500 lbs (680 kg)1500 lbs (680 kg)1500 lbs (680 kg)
Step 2
Example 1Example 2Example 3
Number of people in the
vehicle (driver and
occupants)531
Distribution of the
occupantsFront: 2
Rear: 3Front: 1
Rear: 2Front: 1
Weight of the occupantsOccupant 1: 150 lbs
(68 kg)
Occupant 2: 180 lbs
(82 kg)
Occupant 3: 160 lbs
(73 kg)
Occupant 4: 140 lbs
(63 kg)
Occupant 5: 120 lbs
(54 kg)Occupant 1: 200 lbs
(91 kg)
Occupant 2: 190 lbs
(86 kg)
Occupant 3: 150 lbs
(68 kg)Occupant 1: 150 lbs
(68 kg)
Gross weight of all
occupants750 lbs (340 kg)540 lbs (245 kg)150 lbs (68 kg)
188Loading the vehicle
>> Wheels and tires.