wipers SMART FORTWO COUPE 2012 Owners Manual
[x] Cancel search | Manufacturer: SMART, Model Year: 2012, Model line: FORTWO COUPE, Model: SMART FORTWO COUPE 2012Pages: 228, PDF Size: 12.76 MB
Page 9 of 228
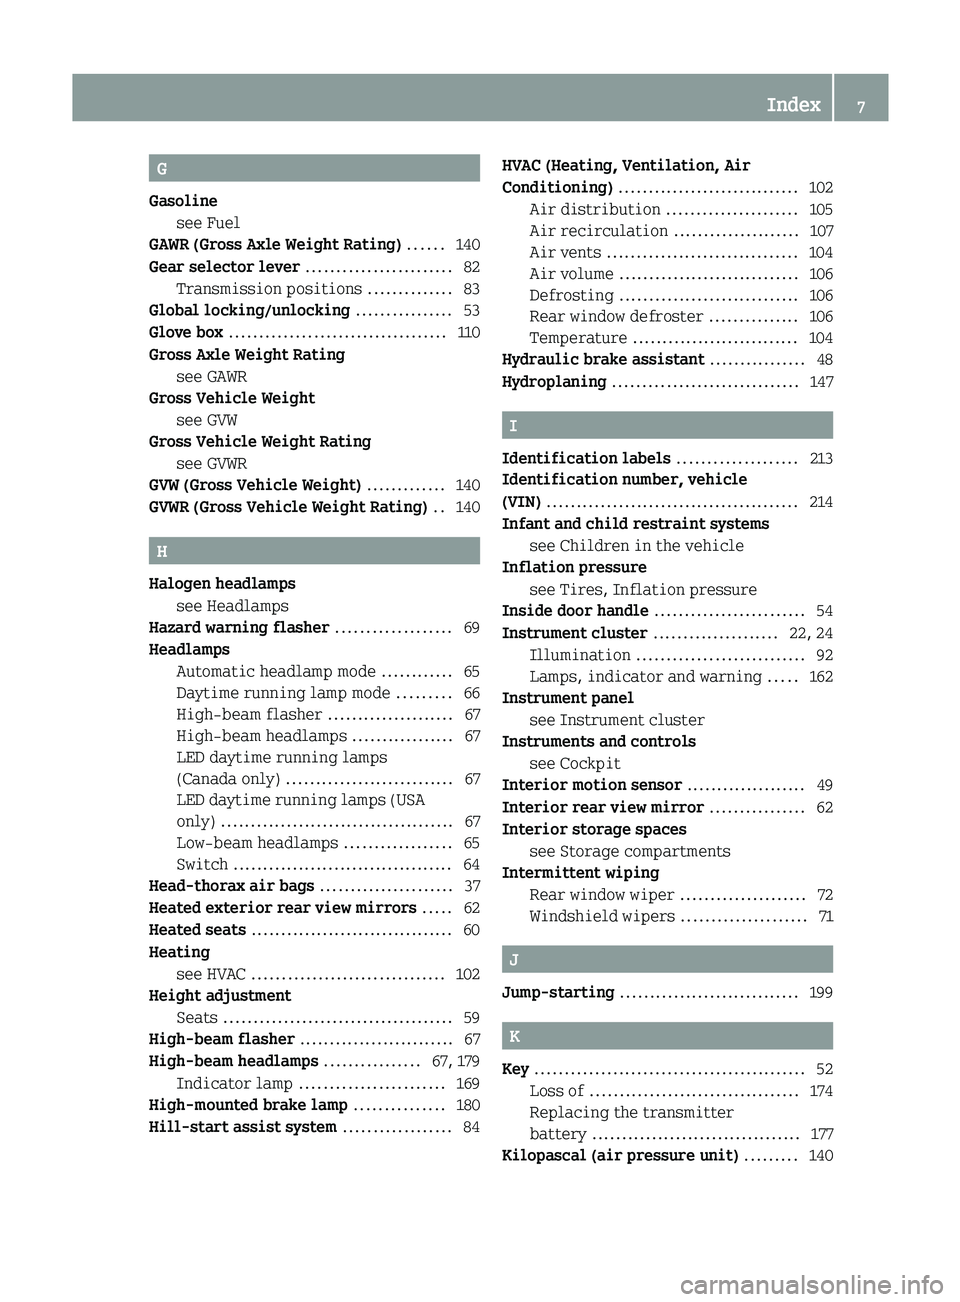
G
Gasoline see Fuel
GAWR (Gross Axle Weight Rating) ...... 140
Gear selector lever ........................ 82
Transmission positions .............. 83
Global locking/unlocking ................53
Glove box .................................... 110
Gross Axle Weight Rating see GAWR
Gross Vehicle Weight
see GVW
Gross Vehicle Weight Rating
see GVWR
GVW (Gross Vehicle Weight) .............140
GVWR (Gross Vehicle Weight Rating) ..140 H
Halogen headlamps see Headlamps
Hazard warning flasher ................... 69
Headlamps Automatic headlamp mode ............65
Daytime running lamp mode .........66
High-beam flasher ..................... 67
High-beam headlamps ................. 67
LED daytime running lamps
(Canada only) ............................ 67
LED daytime running lamps (USA
only) ....................................... 67
Low-beam headlamps .................. 65
Switch ..................................... 64
Head-thorax air bags ......................37
Heated exterior rear view mirrors .....62
Heated seats .................................. 60
Heating see HVAC ................................ 102
Height adjustment
Seats ...................................... 59
High-beam flasher .......................... 67
High-beam headlamps ................67, 179
Indicator lamp ........................ 169
High-mounted brake lamp ...............180
Hill-start assist system ..................84HVAC (Heating, Ventilation, Air
Conditioning) ..............................
102
Air distribution ...................... 105
Air recirculation .....................107
Air vents ................................ 104
Air volume .............................. 106
Defrosting .............................. 106
Rear window defroster ............... 106
Temperature ............................
104
Hydraulic brake assistant ................48
Hydroplaning ............................... 147 I
Identification labels ....................213
Identification number, vehicle
(VIN) .......................................... 214
Infant and child restraint systems see Children in the vehicle
Inflation pressure
see Tires, Inflation pressure
Inside door handle ......................... 54
Instrument cluster .....................22, 24
Illumination ............................ 92
Lamps, indicator and warning ..... 162
Instrument panel
see Instrument cluster
Instruments and controls
see Cockpit
Interior motion sensor .................... 49
Interior rear view mirror ................62
Interior storage spaces see Storage compartments
Intermittent wiping
Rear window wiper ..................... 72
Windshield wipers ..................... 71 J
Jump-starting .............................. 199 K
Key ............................................. 52
Loss of ................................... 174
Replacing the transmitter
battery ................................... 177
Kilopascal (air pressure unit) .........140 Index
7
Page 14 of 228
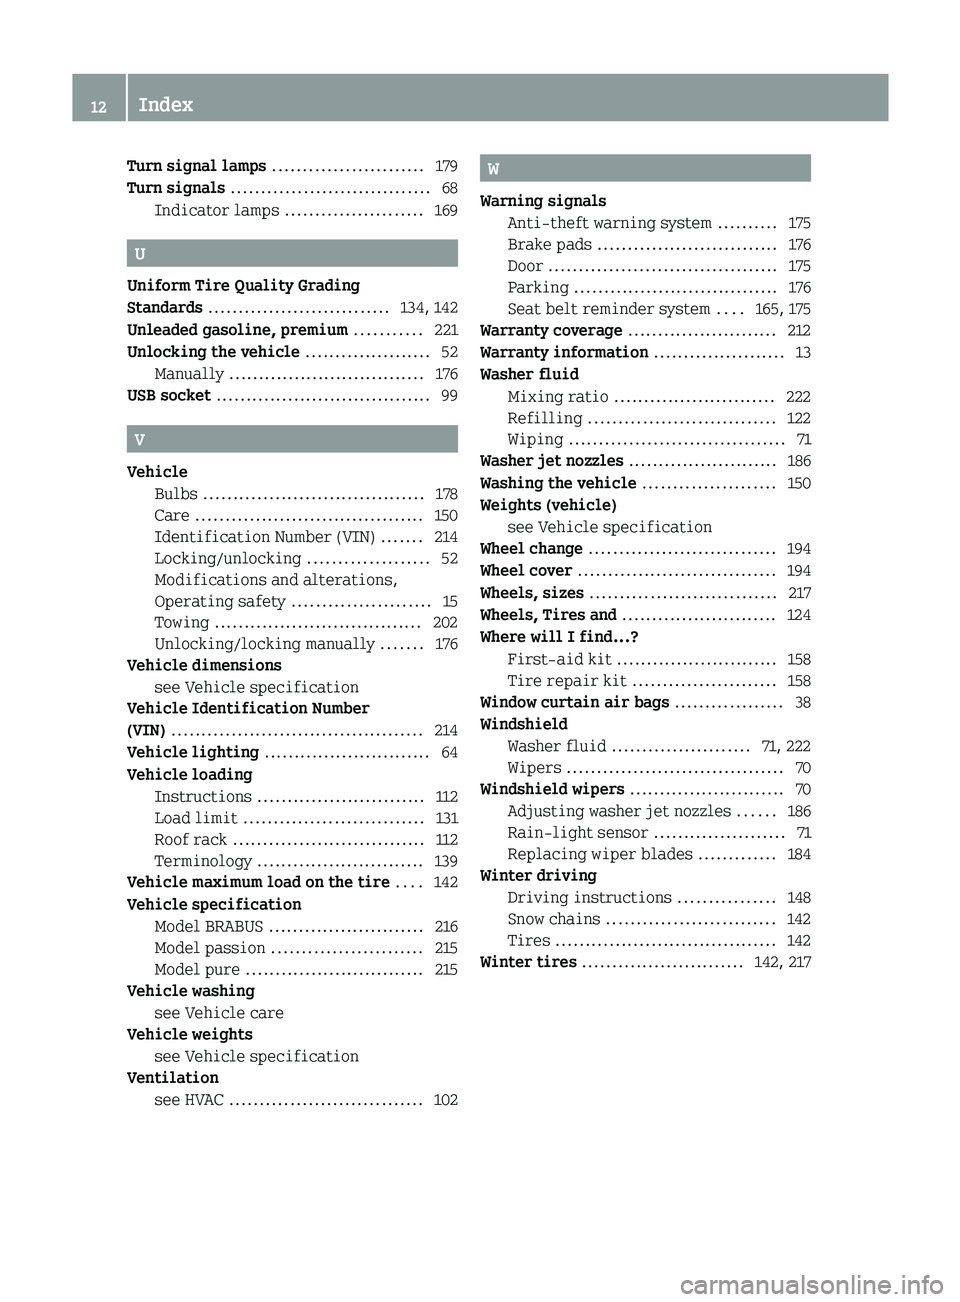
Turn signal lamps
......................... 179
Turn signals ................................. 68
Indicator lamps ....................... 169U
Uniform Tire Quality Grading
Standards .............................. 134, 142
Unleaded gasoline, premium ........... 221
Unlocking the vehicle ..................... 52
Manually .................................
176
USB socket .................................... 99V
Vehicle Bulbs ..................................... 178
Care ...................................... 150
Identification Number (VIN) .......214
Locking/unlocking
....................52
Modifications and alterations,
Operating safety ....................... 15
Towing ................................... 202
Unlocking/locking manually ....... 176
Vehicle dimensions
see Vehicle specification
Vehicle Identification Number
(VIN) .......................................... 214
Vehicle lighting ............................ 64
Vehicle loading Instructions ............................ 112
Load limit .............................. 131
Roof rack ................................ 112
Terminology ............................ 139
Vehicle maximum load on the tire ....142
Vehicle specification Model BRABUS .......................... 216
Model passion ......................... 215
Model pure .............................. 215
Vehicle washing
see Vehicle care
Vehicle weights
see Vehicle specification
Ventilation
see HVAC ................................ 102 W
Warning signals Anti-theft warning system .......... 175
Brake pads .............................. 176
Door ...................................... 175
Parking .................................. 176
Seat belt reminder system
....165, 175
Warranty coverage ......................... 212
Warranty information ......................13
Washer fluid Mixing ratio ........................... 222
Refilling ............................... 122
Wiping .................................... 71
Washer jet nozzles ......................... 186
Washing the vehicle ......................150
Weights (vehicle) see Vehicle specification
Wheel change ............................... 194
Wheel cover ................................. 194
Wheels, sizes ............................... 217
Wheels, Tires and .......................... 124
Where will I find...? First-aid kit ........................... 158
Tire repair kit ........................ 158
Window curtain air bags ..................38
Windshield Washer fluid ....................... 71, 222
Wipers .................................... 70
Windshield wipers .......................... 70
Adjusting washer jet nozzles ...... 186
Rain-light sensor ...................... 71
Replacing wiper blades ............. 184
Winter driving
Driving instructions ................148
Snow chains ............................ 142
Tires ..................................... 142
Winter tires ........................... 142, 21712
Index
Page 22 of 228
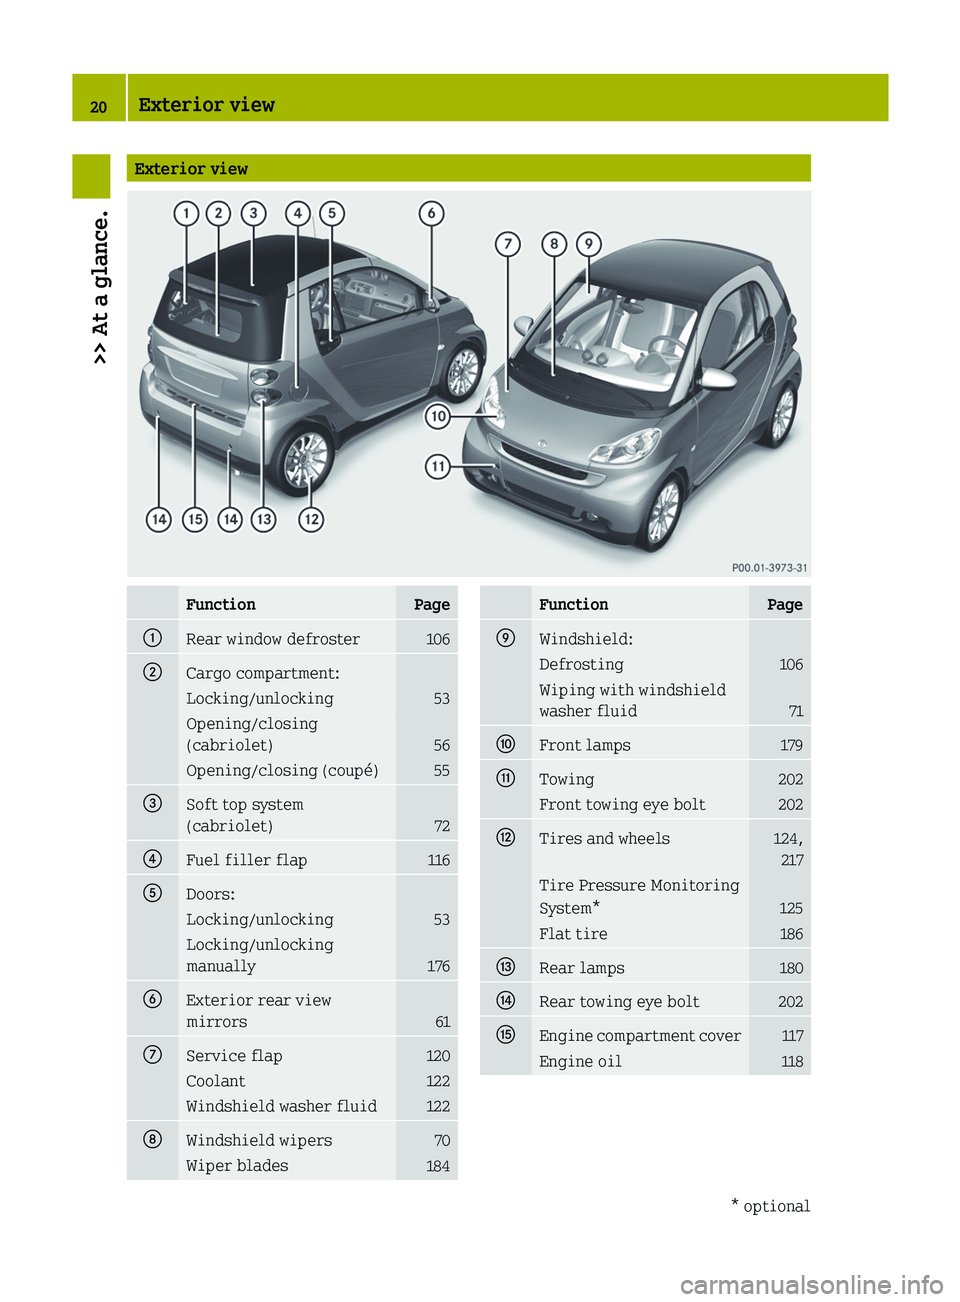
Exterior view
Function Page
:
Rear window defroster 106
;
Cargo compartment:
Locking/unlocking 53
Opening/closing
(cabriolet)
56
Opening/closing (coupé) 55
=
Soft top system
(cabriolet)
72
?
Fuel filler flap 116
A
Doors:
Locking/unlocking 53
Locking/unlocking
manually
176
B
Exterior rear view
mirrors
61
C
Service flap 120
Coolant 122
Windshield washer fluid 122
D
Windshield wipers 70
Wiper blades
184 Function Page
E
Windshield:
Defrosting 106
Wiping with windshield
washer fluid
71
F
Front lamps 179
G
Towing 202
Front towing eye bolt 202
H
Tires and wheels 124,
217 Tire Pressure Monitoring
System*
125
Flat tire 186
I
Rear lamps 180
J
Rear towing eye bolt 202
K
Engine compartment cover 117
Engine oil 11820
Exterior view>> At a glance.
* optional
Page 53 of 228
>> Controls.Opening and closing
.......................... 52
Starter switch positions .....................57
Seats .............................................. 58
Mirrors ........................................... 61
Seat belts ........................................ 62
Lighting ......................................... 64
Windshield wipers ............................ 70
Soft top system (cabriolet only)
............ 72
Side windows .................................... 77
Driving and parking .......................... 78
Transmission ................................... 82
Instrument cluster ............................. 86
Control system* ................................ 93
Audio system* .................................. 98
Driving systems ............................... 100
HVAC (Heating, Ventilation, Air Con-
ditioning) ...................................... 102
Loading and storing ......................... 107
Useful features ................................ 113
Page 72 of 228
Continuous operation
X
Set the rocker switch to position ?.
The interior lamp is permanently
switched on.
! When leaving the vehicle, make sure the
interior lamp is not set to continuous
operation and none of the doors is left
open for a long period of time.
Doing otherwise could result in a
discharged battery.
Ambient lighting* The ambient lighting illuminates the
vehicle
interior with 6 LEDs when the low-
beam headlamps are switched on. The LEDs
can be dimmed.
The LEDS are located
R in the overhead control panel
R in the door pockets, driver’s and
passenger side
R in the storage trays to the left and right
of the steering wheel
R in the storage compartment, passenger
side
In addition to the ambient lighting, the
footwells on the driver’s and passenger
side are also illuminated by separate
lamps.
i When you open a door, the interior
lighting comes on and the brightness of
lamps in the footwells increases. X
Make sure the key is in starter switch
position 1.
X Switch on the low-beam headlamps.
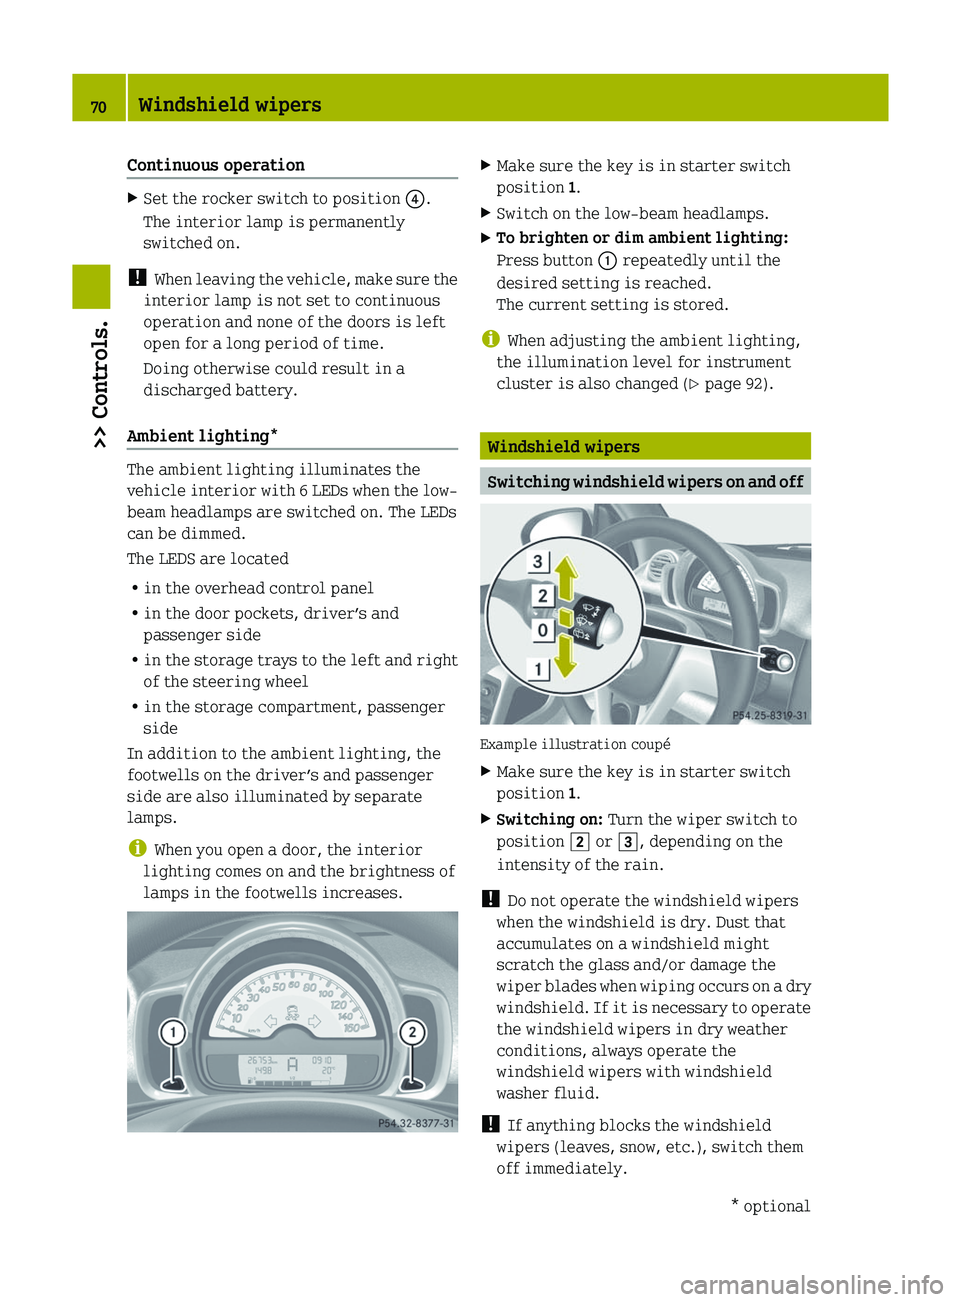
X To brighten or dim ambient lighting:
Press button : repeatedly until the
desired setting is reached.
The current setting is stored.
i When adjusting the ambient lighting,
the illumination level for instrument
cluster is also changed (Y page 92). Windshield wipers
Switching windshield wipers on and off
Example illustration coupé
X
Make sure the key is in starter switch
position 1.
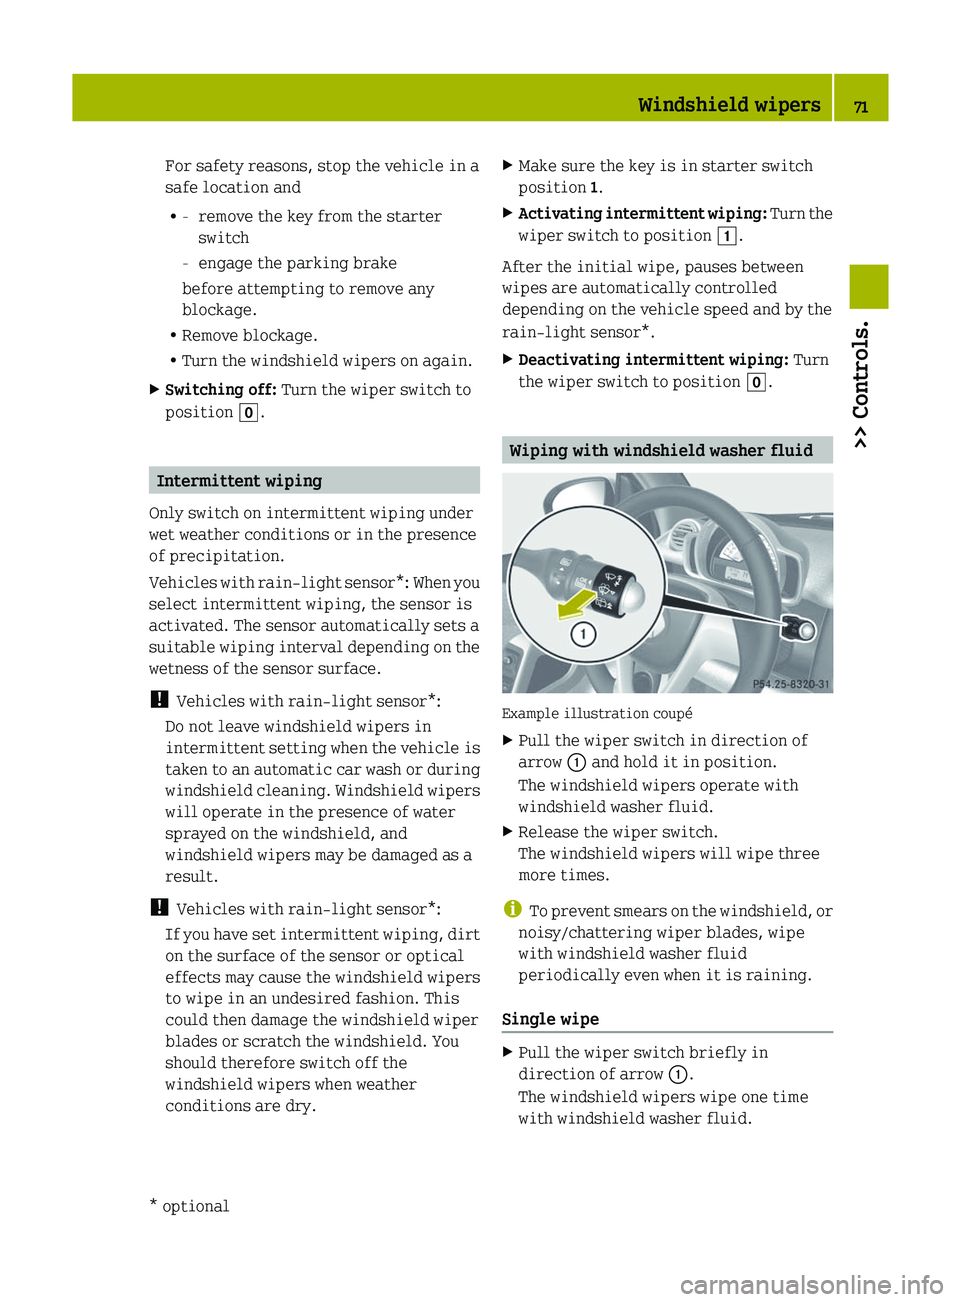
X Switching on: Turn the wiper switch to
position 2 or 3, depending on the
intensity of the rain.
! Do not operate the windshield wipers
when the windshield is dry. Dust that
accumulates on a windshield might
scratch the glass and/or damage the
wiper
blades when wiping occurs on a dry
windshield. If it is necessary to operate
the windshield wipers in dry weather
conditions, always operate the
windshield wipers with windshield
washer fluid.
! If anything blocks the windshield
wipers (leaves, snow, etc.), switch them
off immediately. 70
Windshield wipers
>> Controls.
* optional
Page 73 of 228
For safety reasons, stop the vehicle in a
safe location and
R
-
remove the key from the starter
switch
- engage the parking brake
before attempting to remove any
blockage.
R Remove blockage.
R Turn the windshield wipers on again.
X Switching off: Turn the wiper switch to
position g. Intermittent wiping
Only switch on intermittent wiping under
wet weather conditions or in the presence
of precipitation.
Vehicles
with rain-light sensor*: When you
select intermittent wiping, the sensor is
activated. The sensor automatically sets a
suitable wiping interval depending on the
wetness of the sensor surface.
! Vehicles with rain-light sensor*:
Do not leave windshield wipers in
intermittent setting when the vehicle is
taken to an automatic car wash or during
windshield cleaning. Windshield wipers
will operate in the presence of water
sprayed on the windshield, and
windshield wipers may be damaged as a
result.
! Vehicles with rain-light sensor*:
If you have set intermittent wiping, dirt
on the surface of the sensor or optical
effects may cause the windshield wipers
to wipe in an undesired fashion. This
could then damage the windshield wiper
blades or scratch the windshield. You
should therefore switch off the
windshield wipers when weather
conditions are dry. X
Make sure the key is in starter switch
position 1.
X Activating intermittent wiping:
Turn the
wiper switch to position 1.
After the initial wipe, pauses between
wipes are automatically controlled
depending on the vehicle speed and by the
rain-light sensor*.
X Deactivating intermittent wiping: Turn
the wiper switch to position g. Wiping with windshield washer fluid
Example illustration coupé
X
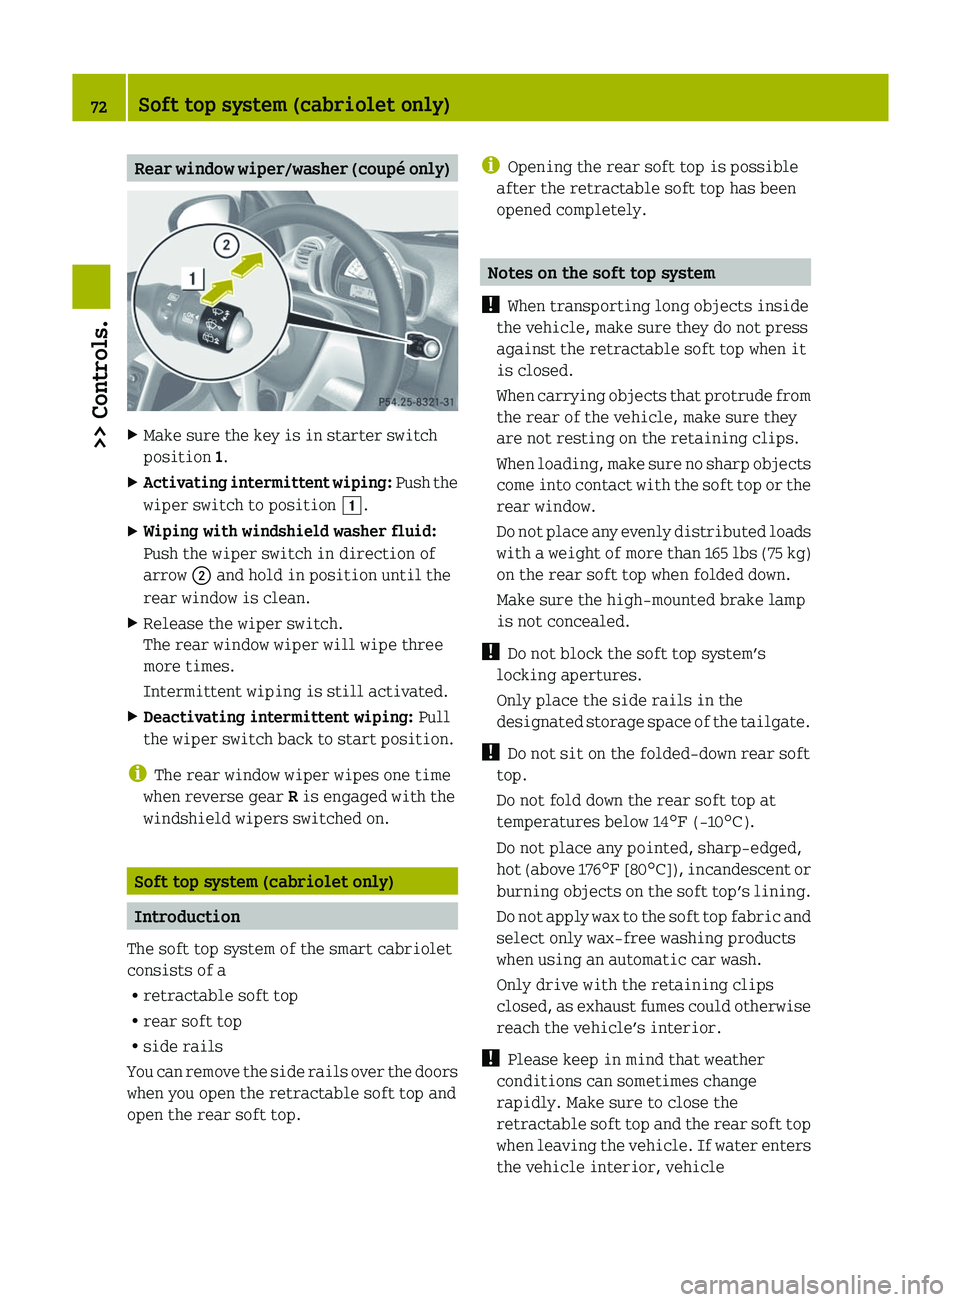
Pull the wiper switch in direction of
arrow : and hold it in position.
The windshield wipers operate with
windshield washer fluid.
X Release the wiper switch.
The windshield wipers will wipe three
more times.
i To
prevent smears on the windshield, or
noisy/chattering wiper blades, wipe
with windshield washer fluid
periodically even when it is raining.
Single wipe X
Pull the wiper switch briefly in
direction of arrow :.
The windshield wipers wipe one time
with windshield washer fluid. Windshield wipers
71
>> Controls.
* optional Z
Page 74 of 228
Rear window wiper/washer (coupé only)
X
Make sure the key is in starter switch
position 1.
X Activating intermittent wiping: Push the
wiper switch to position 1.
X Wiping with windshield washer fluid:
Push the wiper switch in direction of
arrow ; and hold in position until the
rear window is clean.
X Release the wiper switch.
The rear window wiper will wipe three
more times.
Intermittent wiping is still activated.
X Deactivating intermittent wiping: Pull
the wiper switch back to start position.
i The rear window wiper wipes one time
when reverse gear R is engaged with the
windshield wipers switched on. Soft top system (cabriolet only)
Introduction
The soft top system of the smart cabriolet
consists of a
R retractable soft top
R rear soft top
R side rails
You
can remove the side rails over the doors
when you open the retractable soft top and
open the rear soft top. i
Opening the rear soft top is possible
after the retractable soft top has been
opened completely. Notes on the soft top system
! When transporting long objects inside
the vehicle, make sure they do not press
against the retractable soft top when it
is closed.
When
carrying objects that protrude from
the rear of the vehicle, make sure they
are not resting on the retaining clips.
When loading, make sure no sharp objects
come into contact with the soft top or the
rear window.
Do not place any evenly distributed loads
with a weight of more than 165 lbs (75 kg)
on the rear soft top when folded down.
Make sure the high-mounted brake lamp
is not concealed.
! Do not block the soft top system’s
locking apertures.
Only place the side rails in the
designated storage space of the tailgate.
! Do not sit on the folded-down rear soft
top.
Do not fold down the rear soft top at
temperatures below 14 ¦ (-10¥).
Do not place any pointed, sharp-edged,
hot (above 176 ¦ [80¥]), incandescent or
burning objects on the soft top’s lining.
Do not apply wax to the soft top fabric and
select only wax-free washing products
when using an automatic car wash.
Only drive with the retaining clips
closed, as exhaust fumes could otherwise
reach the vehicle’s interior.
! Please keep in mind that weather
conditions can sometimes change
rapidly. Make sure to close the
retractable soft top and the rear soft top
when leaving the vehicle. If water enters
the vehicle interior, vehicle 72
Soft top system (cabriolet only)
>> Controls.
Page 122 of 228
X
Check the engine oil level once more.
X Add engine oil once more if necessary.
Be careful not to spill any oil when adding
to avoid environmental damage caused by
oil entering the ground and water.
! Excess engine oil must be siphoned or
drained
off. It could cause damage to the
engine or emission control system not
covered by the smart Limited Warranty.
X Screw filler cap : back on the filler
neck.
X Close the engine compartment cover
(Y page 117). Front compartment
Service flap
Remove the service flap to check the
coolant
level, windshield washer reservoir
level, and brake fluid level.
Insert the service flap on the front of the
vehicle so that it does not get damaged or
dirty.
i The service flap has a strap on the rear
side that ties it to the vehicle body. G
WARNING
Always turn the key to starter switch
position 0 and remove the key from the
starter switch before opening the service
flap.
If the windshield wipers should
inadvertently be switched on, you could be
seriously injured by the wiper washer
drive, which is located just below the
service flap. G
WARNING
Make sure the service flap is locked while
driving. Otherwise, the service flap could
become detached and pose a hazard to you
or others. G
WARNING
To help prevent personal injury, stay clear
of moving parts when the service flap is
open.
The radiator fan may continue to run for
approximately 30 seconds or may even
restart after the engine has been turned
off. Stay clear of fan blades.
! Check the fill levels at regular
intervals.
! Carefully remove ice, snow, and any
other deposits from the air intake
grilles above the service flap to ensure
air intake at all times.
X Park the vehicle on level ground.
X Turn off the engine.
X Engage the parking brake.
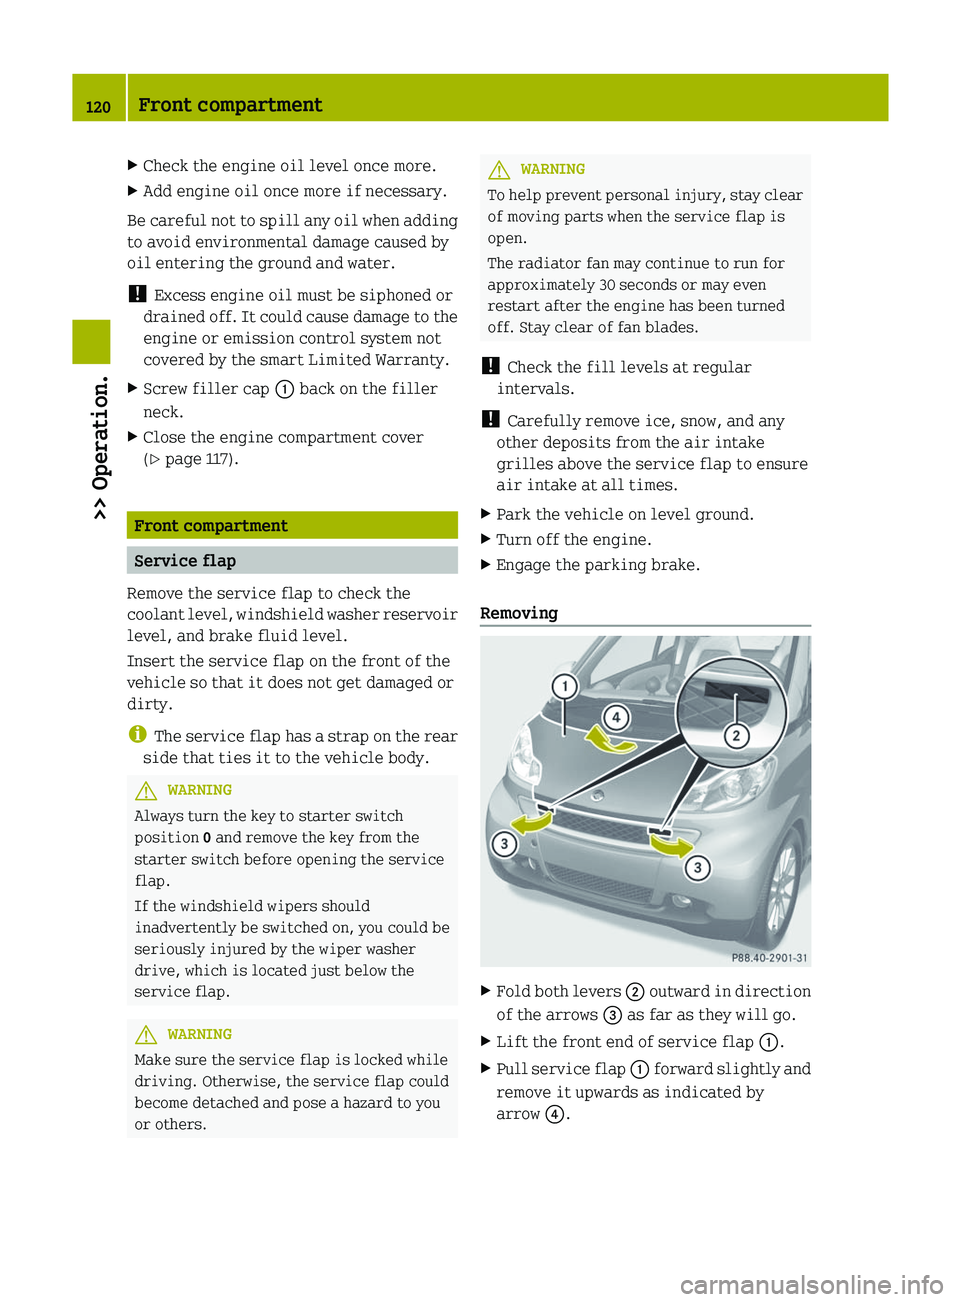
Removing X
Fold both levers ;
outward in direction
of the arrows = as far as they will go.
X Lift the front end of service flap :.
X Pull service flap :
forward slightly and
remove it upwards as indicated by
arrow ?. 120
Front compartment
>> Operation.
Page 186 of 228
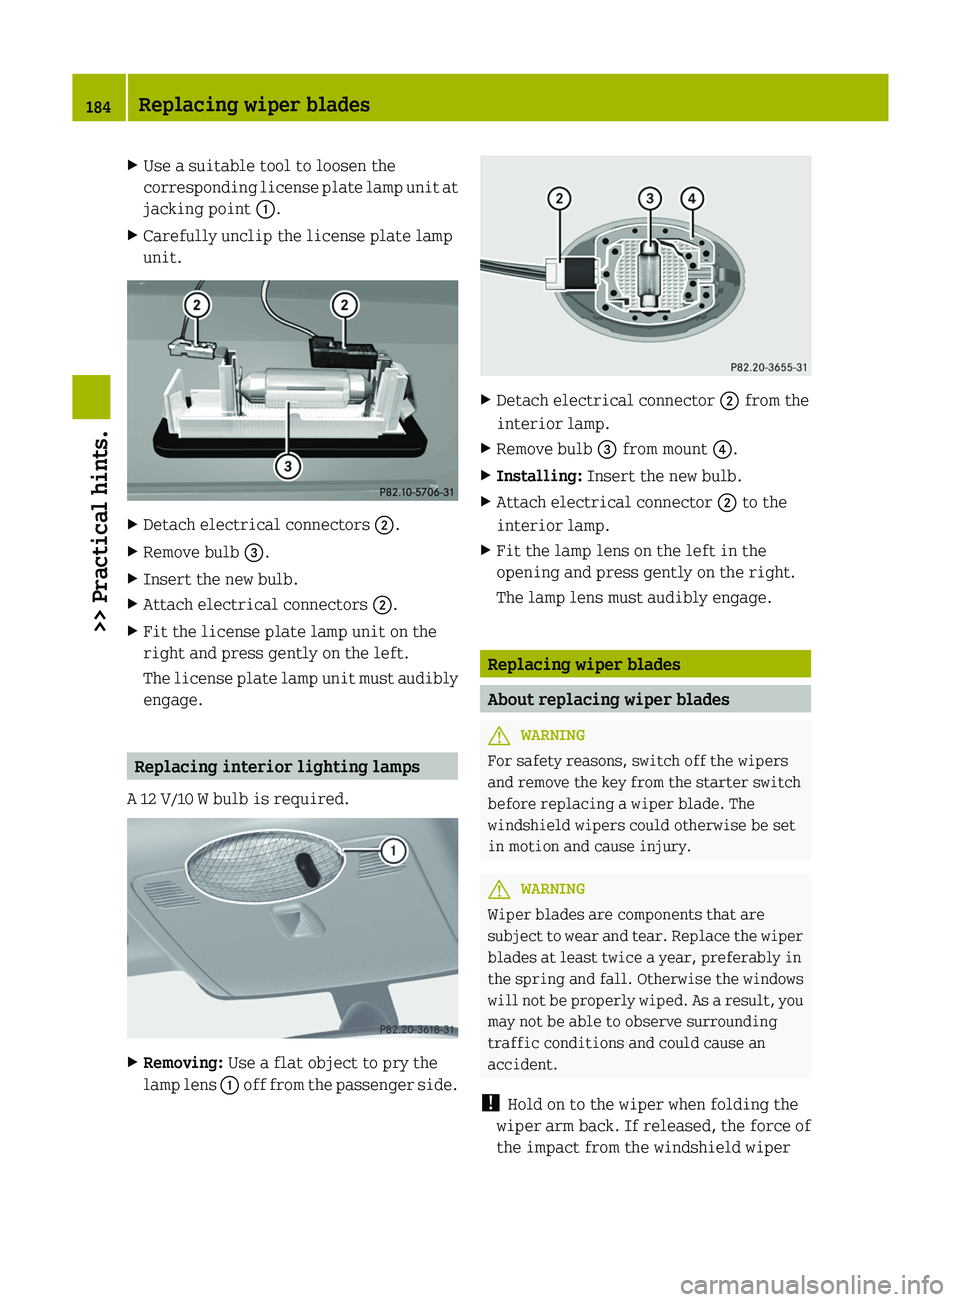
X
Use a suitable tool to loosen the
corresponding
license plate lamp unit at
jacking point :.
X Carefully unclip the license plate lamp
unit. X
Detach electrical connectors ;.
X Remove bulb =.
X Insert the new bulb.
X Attach electrical connectors ;.
X Fit the license plate lamp unit on the
right and press gently on the left.
The
license plate lamp unit must audibly
engage. Replacing interior lighting lamps
A 12 V/10 W bulb is required. X
Removing: Use a flat object to pry the
lamp
lens : off from the passenger side. X
Detach electrical connector ; from the
interior lamp.
X Remove bulb = from mount ?.
X Installing: Insert the new bulb.
X Attach electrical connector ; to the
interior lamp.
X Fit the lamp lens on the left in the
opening and press gently on the right.
The lamp lens must audibly engage. Replacing wiper blades
About replacing wiper blades
G
WARNING
For safety reasons, switch off the wipers
and remove the key from the starter switch
before replacing a wiper blade. The
windshield wipers could otherwise be set
in motion and cause injury. G
WARNING
Wiper blades are components that are
subject
to wear and tear. Replace the wiper
blades at least twice a year, preferably in
the spring and fall. Otherwise the windows
will not be properly wiped. As a result, you
may not be able to observe surrounding
traffic conditions and could cause an
accident.
! Hold on to the wiper when folding the
wiper arm back. If released, the force of
the impact from the windshield wiper 184
Replacing wiper blades
>> Practical hints.
Page 210 of 228
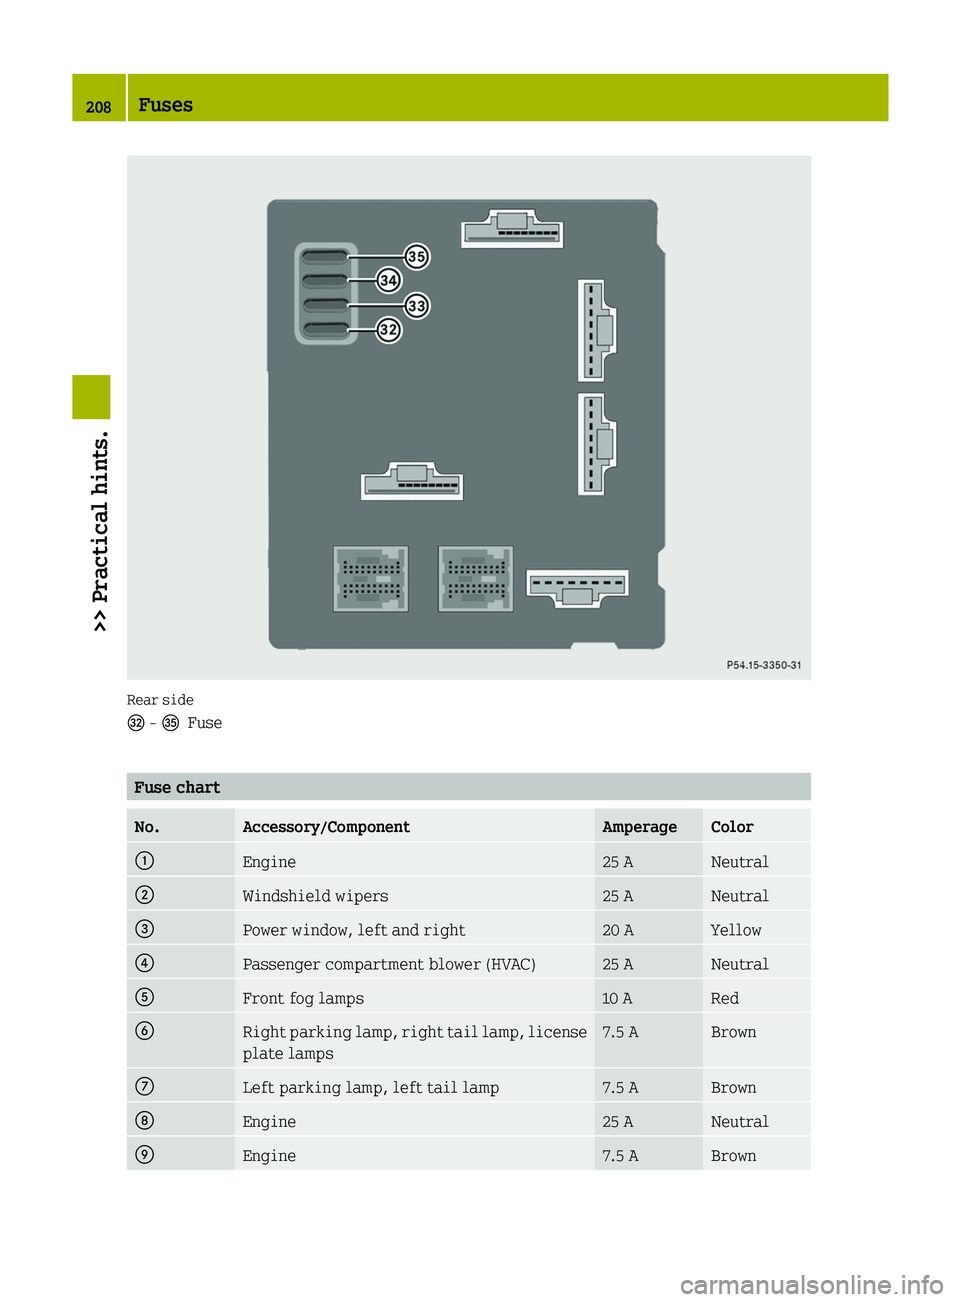
Rear side
^ - ©
Fuse Fuse chart
No. Accessory/Component Amperage Color
:
Engine 25 A Neutral
;
Windshield wipers 25 A Neutral
=
Power window, left and right 20 A Yellow
?
Passenger compartment blower (HVAC) 25 A Neutral
A
Front fog lamps 10 A Red
B
Right parking lamp, right tail lamp, license
plate lamps 7.5 A Brown
C
Left parking lamp, left tail lamp 7.5 A Brown
D
Engine 25 A Neutral
E
Engine 7.5 A Brown208
Fuses>> Practical hints.