horn SSANGYONG MUSSO 2003 Service Manual
[x] Cancel search | Manufacturer: SSANGYONG, Model Year: 2003, Model line: MUSSO, Model: SSANGYONG MUSSO 2003Pages: 1574, PDF Size: 26.41 MB
Page 12 of 1574

0B-12 GENERAL INFORMATIONOWNER INSPECTIONS AND SERVICES
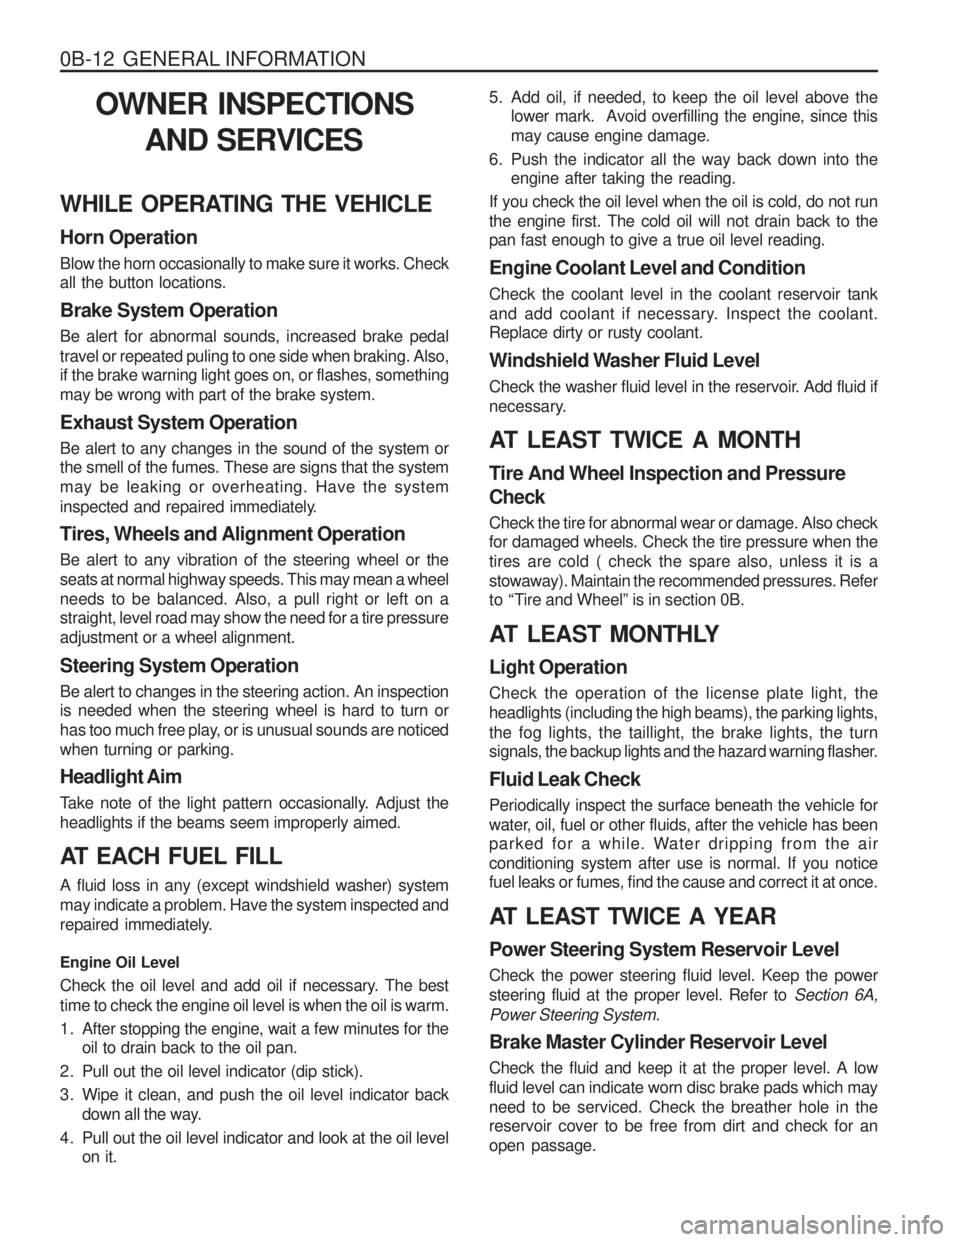
WHILE OPERATING THE VEHICLE Horn Operation Blow the horn occasionally to make sure it works. Check all the button locations. Brake System Operation Be alert for abnormal sounds, increased brake pedal travel or repeated puling to one side when braking. Also, if the brake warning light goes on, or flashes, something may be wrong with part of the brake system. Exhaust System Operation Be alert to any changes in the sound of the system or the smell of the fumes. These are signs that the system may be leaking or overheating. Have the system
inspected and repaired immediately. Tires, Wheels and Alignment Operation Be alert to any vibration of the steering wheel or the seats at normal highway speeds. This may mean a wheelneeds to be balanced. Also, a pull right or left on a straight, level road may show the need for a tire pressure adjustment or a wheel alignment. Steering System Operation Be alert to changes in the steering action. An inspection is needed when the steering wheel is hard to turn or
has too much free play, or is unusual sounds are noticedwhen turning or parking. Headlight Aim
Take note of the light pattern occasionally. Adjust the headlights if the beams seem improperly aimed.
AT EACH FUEL FILL A fluid loss in any (except windshield washer) system may indicate a problem. Have the system inspected and
repaired immediately. Engine Oil Level
Check the oil level and add oil if necessary. The best time to check the engine oil level is when the oil is warm.
1. After stopping the engine, wait a few minutes for the oil to drain back to the oil pan.
2. Pull out the oil level indicator (dip stick).
3. Wipe it clean, and push the oil level indicator back down all the way.
4. Pull out the oil level indicator and look at the oil level on it. 5. Add oil, if needed, to keep the oil level above the
lower mark. Avoid overfilling the engine, since this may cause engine damage.
6. Push the indicator all the way back down into the engine after taking the reading.
If you check the oil level when the oil is cold, do not runthe engine first. The cold oil will not drain back to the pan fast enough to give a true oil level reading. Engine Coolant Level and Condition Check the coolant level in the coolant reservoir tank
and add coolant if necessary. Inspect the coolant. Replace dirty or rusty coolant.
Windshield Washer Fluid Level
Check the washer fluid level in the reservoir. Add fluid if
necessary.
AT LEAST TWICE A MONTH Tire And Wheel Inspection and Pressure Check Check the tire for abnormal wear or damage. Also check for damaged wheels. Check the tire pressure when the tires are cold ( check the spare also, unless it is astowaway). Maintain the recommended pressures. Refer
to “Tire and Wheel” is in section 0B.
AT LEAST MONTHLY Light Operation Check the operation of the license plate light, the headlights (including the high beams), the parking lights,the fog lights, the taillight, the brake lights, the turn
signals, the backup lights and the hazard warning flasher. Fluid Leak Check Periodically inspect the surface beneath the vehicle for
water, oil, fuel or other fluids, after the vehicle has been
parked for a while. Water dripping from the air conditioning system after use is normal. If you notice fuel leaks or fumes, find the cause and correct it at once.
AT LEAST TWICE A YEAR Power Steering System Reservoir Level Check the power steering fluid level. Keep the power steering fluid at the proper level. Refer to Section 6A,
Power Steering System. Brake Master Cylinder Reservoir Level Check the fluid and keep it at the proper level. A low fluid level can indicate worn disc brake pads which mayneed to be serviced. Check the breather hole in the reservoir cover to be free from dirt and check for an open passage.
Page 1153 of 1574

6E-2 STEERING WHEEL AND COLUMNMAINTENANCE AND REPAIR
ON-VEHICLE SERVICE
STEERING COLUMN
1 Horn Pad
2 Nut ....................................................... 50-80 Nm
3 Washer
4 Steering Wheel
5 Combination Switch Assembly
6 Combination Switch Lower Cover
7 Combination Switch Upper Cover
8 Bolt
9 Bolt
10 Bolt
11 Crash Pad Panel
12 Bolt ...................................................... 30-40 Nm
13 Spring Washer
14 Steering Column Shaft
15 Bolt ........................................................ 9-14 Nm
16 Bolt ...................................................... 13-40 Nm
17 Column & Shaft Assembly
Page 1154 of 1574

STEERING WHEEL AND COLUMN 6E-3
Removal & Installation Procedure
1. Remove the horn pad from the steering wheel anddisconnect the connectors .
2. Place an alignment marks on the column shaft end and fixing nut and then remove the fixing nut. Installation Notice
3. Remove the steering wheel.
4. Remove the combination switch upper cover .
Tightening Torque 50 - 80 Nm
5. Release the crash pad panel. Notice Remove the hood release wire and the other switch connectors.
Page 1186 of 1574

8B-6 SUPPLEMENTAL RESTRAINT SYSTEM(SRS) AIR BAG MODULE
Air bag module is installed in the pad of steering wheel center and inflator is consisted of igniter, explosives, gas generating material and bag. When crashed, the air bag control unit sends current to the air bag module through squib line and this current ignites as ignition energy (6mJ) momentarily igniting explosives and bag will be inflated by nitrogen gas protecting driver at the same and then deflates.1 Air bag Module
2 Module Housing
3 Bag
4 Module Bracket
5 Retainer Ring
6 Inflator
7 Horn Switch
8 Backing Plate
Page 1199 of 1574

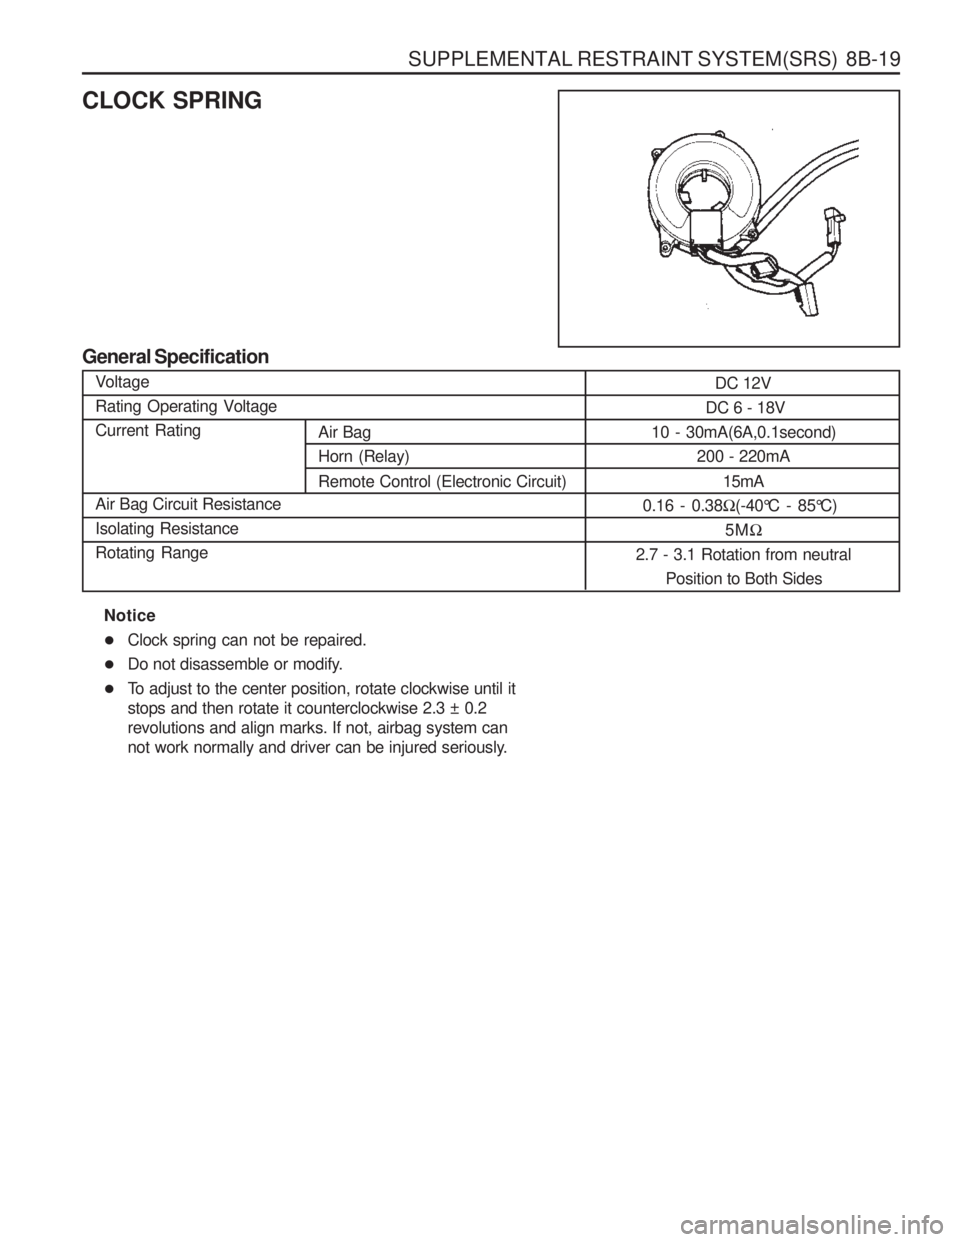
SUPPLEMENTAL RESTRAINT SYSTEM(SRS) 8B-19
Air Bag Horn (Relay) Remote Control (Electronic Circuit)
CLOCK SPRING
General SpecificationVoltage
Rating Operating VoltageCurrent Rating Air Bag Circuit Resistance Isolating ResistanceRotating Range DC 12V
DC 6 - 18V
10 - 30mA(6A,0.1second)
200 - 220mA
15mA
0.16 - 0.38 �(-40°C - 85°C)
5M �
2.7 - 3.1 Rotation from neutral Position to Both Sides
Notice
�Clock spring can not be repaired.
� Do not disassemble or modify.
� To adjust to the center position, rotate clockwise until it stops and then rotate it counterclockwise 2.3 ± 0.2revolutions and align marks. If not, airbag system can
not work normally and driver can be injured seriously.
Page 1208 of 1574

9A-6 BODY WIRING SYSTEM Engine Room Fuse (EF) and Relay Box1 Fuse (15A) : ABS, ABD
2 Fuse (20A) : Sun Roof
3 Fuse (10A) : Air Bag
4 Fuse (15A) : Audio, Clock, Out Side Mirror
5 Fuse (30A) : Cigarette lighter, Power Socket
6 Fuse (30A) : Heater
7 Fuse (15A) : Door Lock
8 Fuse (30A) : Rear Heated
9 Fuse (10A) : Audio, Buzzer, Chime, Clock
10 Fuse (30A) : Power Window
11 Fuse (10A) : Immobilizer
12 Fuse (20A) : T/C
13 Fuse (15A) : Interior Lamp
14 Fuse (15A) : Hazard Lamp
15 Fuse (15A) : Stop Lamp
16 Fuse (15A) : Turn signal Lamp, Head Lamp
17 Fuse (10A) : Back up Lamp
18 Fuse (15A) : Cluster, STICS
19 Fuse (15A) : A/T, Diagnosis
20 Fuse (15A) : Over Voltage Protection Relay (Gasolin Only)
21 Fuse (15A) : Seat Heater
22 Fuse (15A) : ECS
23 Fuse (15A) : Front Wiper & Washer
24 Fuse (10A) : Rear Wiper & Washer, A/C
25 Relay : Front Wiper 26 Relay : ABS Warning Lamp
27 Relay : Flasher Unit
28 Relay : Fuel Pump (Gasoline Only)
29 Relay : Shift Lock (A/T)
30 Relay : Clutch Interlock & Neutral
31 Relay : Sun Roof
32 Relay : A/T ‘B’ Interlock (MB A/T)
33 Relay : Power Window
34 Relay : Rear Fog Lamp
35 Relay : ECS
36 Relay : Compressor (Diesel E/G)
Condenser Fan (Gasoline E/G)
37 Relay : Condenser Fan
38 Relay : Air Conditioner
39 Fuse (10A) : Tail Lamp
40 Fuse (15A) : Head Lamp(LH)
41 Fuse (15A) : Head Lamp(RH)
42 Fuse (15A) : Front Fog Lamp
43 Fuse (10A) : Horn
44 Fuse (10A) : Compressor
45 Relay : Resistor with Diode (Gasoline E/G)
46 Relay : Front fog Lamp
47 Relay : Condenser Fan
48 Relay : Tail Lamp
49 Relay : Horn
Page 1213 of 1574

BODY WIRING SYSTEM 9A-11
ENGINE ROOM1 Engine Room Relay Box
1.1 Main Wiring Connector
1.2 Main Wiring Connector
1.3 Main Wiring Connector ........................................Gasoline E/G
1.4 Joint
1.5 Compressor, Condenser Fan Relay .....................Diesel E/G
1.6 Condenser Fan Relay 2
1.7 Air Conditioner Relay
1.8 Resistor with Diode .............................................. Gasoline E/G
1.9 Front Fog Lamp Relay
1.10 Condenser Fan Relay 1
1.11 Tail Lamp Relay
1.12 Horn Relay
2 Octane Selector ................................................... Gasoline E/G with HFM
3 Preheating Unit .................................................... Diesel E/G
4 Preheating Timer Unit .......................................... Diesel E/G
5 ECS Main Wiring Connector ................................ ECS
6 Brake Leveling Fluid Sensor
7 ABD Main Wiring Connector ................................ABD 5.0
7 - 1 ABS Main Wiring Connector ................................ABD 5.0
8 ABD main Wiring Connector ................................ABD 5.0
9 Engine Temperature Sensor ................................Diesel E/G
10 ABS 5.0 ECU ....................................................... ABS 5.0
10-1 ABD 5.0 Modulator ............................................... ABD 5.0
11 Front Washer Motor ............................................. Diesel E/G
12 Head Lamp Relay
13 Compressor ......................................................... Air Conditioner
14 Wheel Speed Sensor ........................................... ABS 5.0 or ABD 5.0
Page 1214 of 1574

9A-12 BODY WIRING SYSTEM
15 LH Damper........................................................... ECS
16 Ground 1
17 Ground 2
18 Locking Hub Solenoid
19 Condenser Fan Relay .........................................Gasoline E/G
20 LH Position Lamp
21 LH Head Lamp
22 LH Head Lamp Leveling Device ...........................Leveling Device
23 Thermo Switch 2 .................................................. Gasoline E/G with HFM
24 Thermo Switch 3 .................................................. Gasoline E/G with HFM & Air Conditioner
25 LH Front Fog Lamp
26 LH Horn ............................................................... Black Out Driving Lamp (Domestic)
27 Condenser Fan Motor .........................................Diesel E/G
28 Black Out Driving Lamp .......................................Black Out Driving Lamp (Domestic)
29 LH Horn ............................................................... Leveling Device
30 LH Condenser Fan Motor ....................................Gasoline E/G with Air Conditioner
31 Thermo Switch 1 .................................................. Diesel E/G or Gasoline E/G with HFM
32 Resistor ............................................................... Gasoline E/G with Air Conditioner
33 Thermo Switch 4 .................................................. Gasoline E/G with HFM & Air Conditioner
34 Ambient Censor ................................................... Air Conditioner
35 RH Condenser Fan Motor ....................................Gasoline E/G
36 RH Horn
37 RH Front Fog Lamp
38 RH Position Lamp
39 RH Head Lamlp
40 RH Head Lamp Leveling Device ..........................Leveling Device
41 Wheeling Sensor ................................................. ECS
42 Wheel Speed Sensor (FR) ..................................ABS 5.0, 5.3 or ABD 5.0, 5.3
43 RH Damper .......................................................... ECS
44 Alternator Extension Connector ...........................Gasoline E/G
45 Alternator ............................................................. Gasoline E/G
46 Alternator Extension Joint box ..............................Diesel E/G
47 Alternator Extension Connector ...........................Diesel E/G
48 Ground 3
49 Fusible Link Box ................................................... Gasoline E/G
49-1 Fusible Link Box ................................................... Diesel E/G
50 Receiver Dryer ..................................................... Gasoline E/G with Air Conditioner
50-1 Receiver Dryer ..................................................... Diesel E/G with Air Conditioner
51 Hood Switch ......................................................... Diesel E/G with Black Out Driving Lamp
52 Front Washer Motor ............................................. Gasoline E/G
53 Main Wiring Connector
Page 1241 of 1574

SECTION 9C
HORNS
Caution: Disconnect the negative battery cable before removing or installing any electrical unit or when a tool or equipment could easily come in contact with exposed electrical terminals. Disconnecting this cable will help prevent personal injury and damage to the vehicle. The ignition must also be in LOCK unless otherwisenoted.TABLE OF CONTENTS
Schematic and Routing Diagrams . . . . . . . . 9C-2 Horn . . . . . . . . . . . . . . . . . . . . . . . . . . . . . . . .
9C-2
Page 1242 of 1574

9C-2 HORN
HORN
SCHEMATIC AND ROUTING DIAGRAMS