SUBARU ASCENT 2020 Quick Guide
Manufacturer: SUBARU, Model Year: 2020, Model line: ASCENT, Model: SUBARU ASCENT 2020Pages: 52, PDF Size: 14.04 MB
Page 31 of 52
DRIVING THE VEHICLE
Automatic Transmission Shift Mode
The Continuously Variable Transmission (CVT) is
electronically controlled and provides two different
driving modes: normal and manual.
Normal Mode
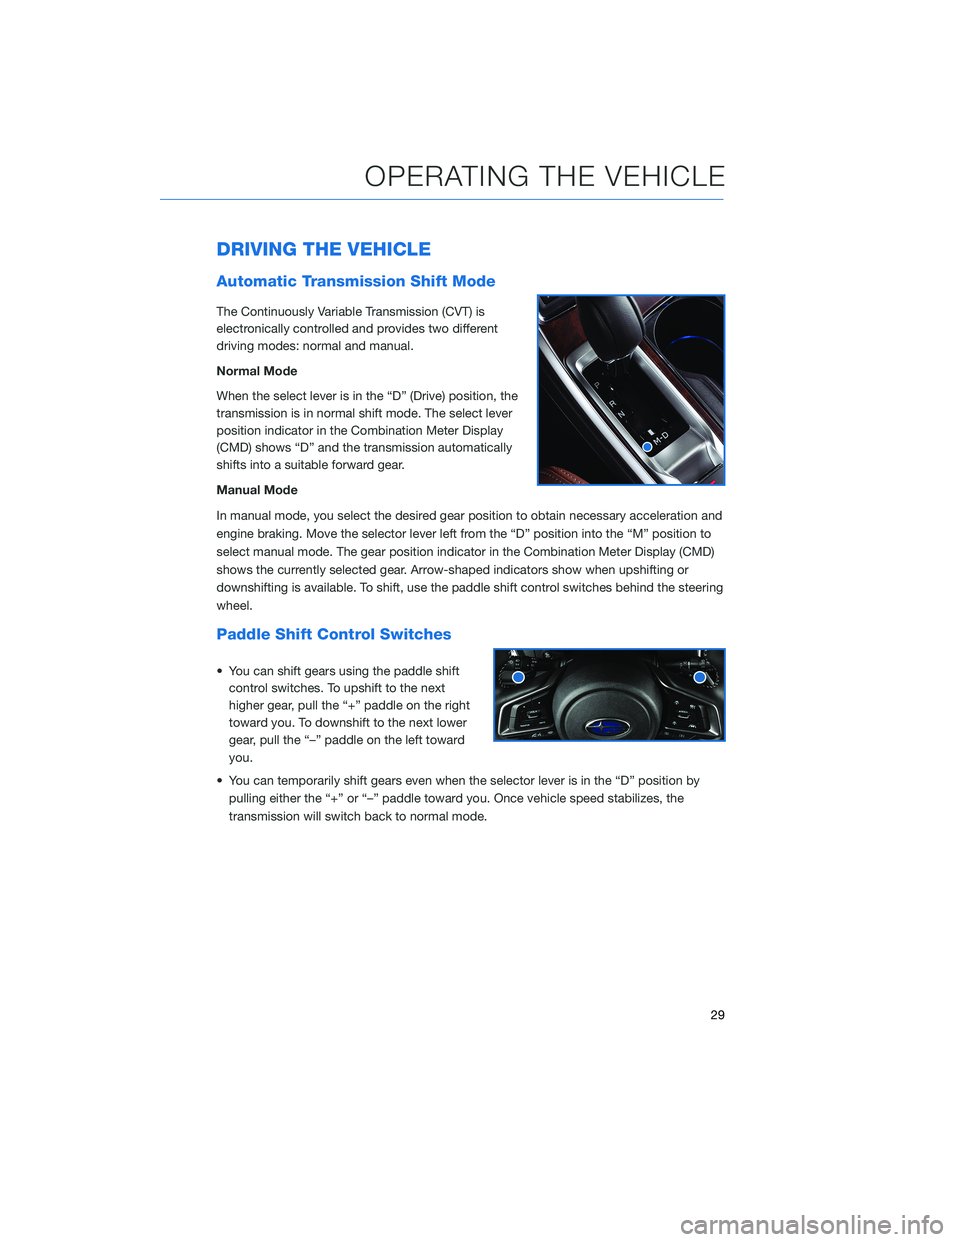
When the select lever is in the “D” (Drive) position, the
transmission is in normal shift mode. The select lever
position indicator in the Combination Meter Display
(CMD) shows “D” and the transmission automatically
shifts into a suitable forward gear.
Manual Mode
In manual mode, you select the desired gear position to obtain necessary acceleration and
engine braking. Move the selector lever left from the “D” position into the “M” position to
select manual mode. The gear position indicator in the Combination Meter Display (CMD)
shows the currently selected gear. Arrow-shaped indicators show when upshifting or
downshifting is available. To shift, use the paddle shift control switches behind the steering
wheel.
Paddle Shift Control Switches
• You can shift gears using the paddle shift
control switches. To upshift to the next
higher gear, pull the “+” paddle on the right
toward you. To downshift to the next lower
gear, pull the “–” paddle on the left toward
you.
• You can temporarily shift gears even when the selector lever is in the “D” position by
pulling either the “+” or “–” paddle toward you. Once vehicle speed stabilizes, the
transmission will switch back to normal mode.
OPERATING THE VEHICLE
29
Page 32 of 52
X-MODE®
X-MODE is the integrated control system of the
engine, All-Wheel Drive (AWD) system and Vehicle
Dynamics Control (VDC) systems. It helps to maximize
traction in slippery conditions such as mud or snow. In
certain situations, such as deep mud or snow, it may
help to turn VDC off to allow for more wheel spin.
X-MODE functions with the select lever in the “D” or
“R” position.
Press the X-MODE button with the vehicle speed less
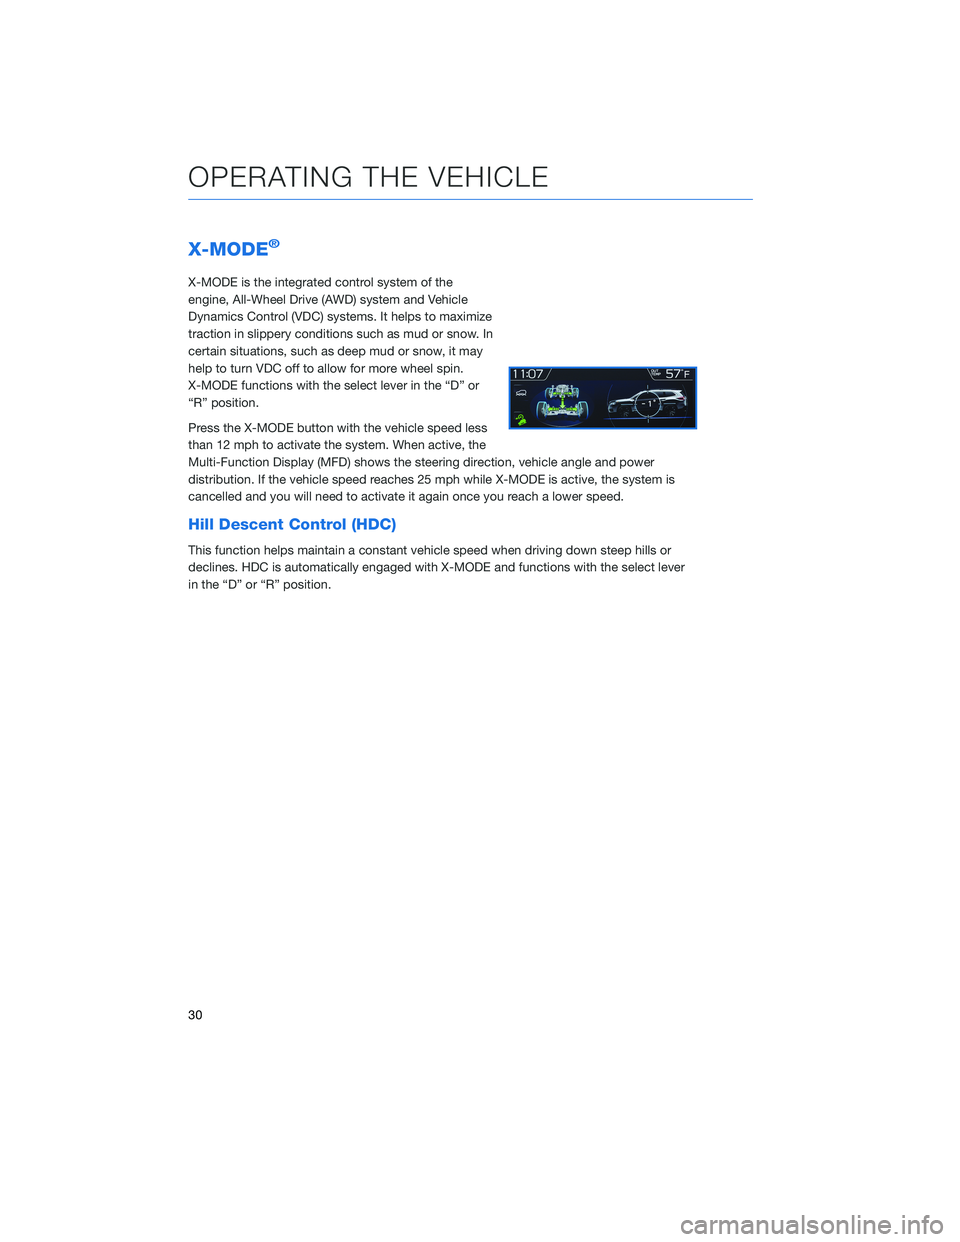
than 12 mph to activate the system. When active, the
Multi-Function Display (MFD) shows the steering direction, vehicle angle and power
distribution. If the vehicle speed reaches 25 mph while X-MODE is active, the system is
cancelled and you will need to activate it again once you reach a lower speed.
Hill Descent Control (HDC)
This function helps maintain a constant vehicle speed when driving down steep hills or
declines. HDC is automatically engaged with X-MODE and functions with the select lever
in the “D” or “R” position.
OPERATING THE VEHICLE
30
Page 33 of 52
ELECTRONIC PARKING BRAKE (EPB)
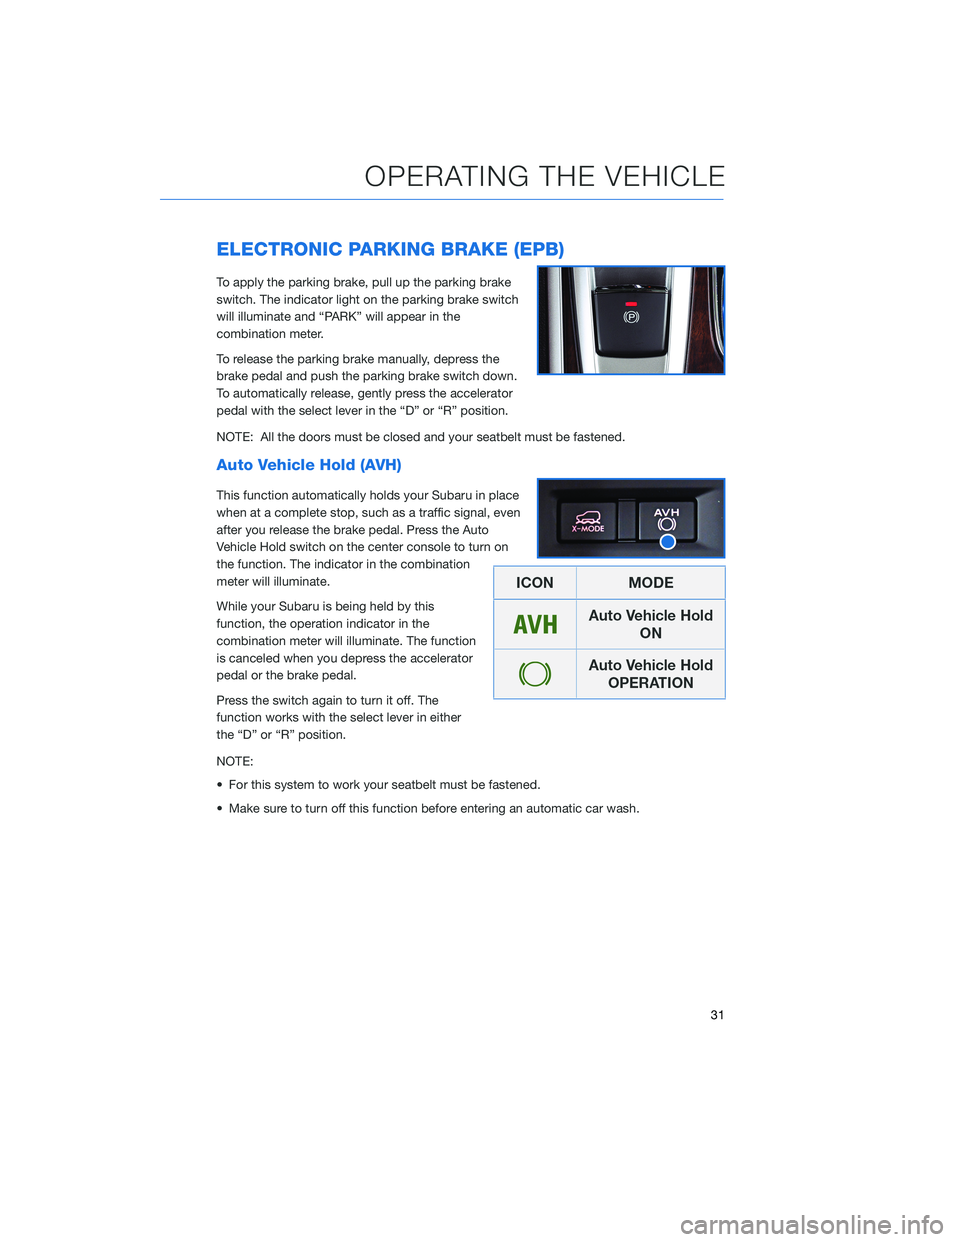
To apply the parking brake, pull up the parking brake
switch. The indicator light on the parking brake switch
will illuminate and “PARK” will appear in the
combination meter.
To release the parking brake manually, depress the
brake pedal and push the parking brake switch down.
To automatically release, gently press the accelerator
pedal with the select lever in the “D” or “R” position.
NOTE: All the doors must be closed and your seatbelt must be fastened.
Auto Vehicle Hold (AVH)
This function automatically holds your Subaru in place
when at a complete stop, such as a traffic signal, even
after you release the brake pedal. Press the Auto
Vehicle Hold switch on the center console to turn on
the function. The indicator in the combination
meter will illuminate.
While your Subaru is being held by this
function, the operation indicator in the
combination meter will illuminate. The function
is canceled when you depress the accelerator
pedal or the brake pedal.
Press the switch again to turn it off. The
function works with the select lever in either
the “D” or “R” position.
NOTE:
• For this system to work your seatbelt must be fastened.
• Make sure to turn off this function before entering an automatic car wash.
OPERATING THE VEHICLE
31
Page 34 of 52
TURNING OFF THE VEHICLE
Without Push-button Ignition
To stop the engine:
1. Stop your Subaru completely.
2. Move the select lever to the “P” position or set the parking brake for manual
transmission models.
3. Turn the ignition switch to “OFF”.
NOTE: The windows will remain active for about 45 seconds and the SUBARU
STARLINK
®Multimedia System will remain on for about three minutes or until a door is
opened, whichever occurs first.
With Push-button Ignition Switch(if equipped)
To stop the engine:
1. Stop your Subaru completely.
2. Move the select lever to the “P” position.
3. Press the ignition switch.
NOTE: The windows will remain active for about 45 seconds and the SUBARU
STARLINK
®Multimedia System will remain on for about three minutes or until a door is
opened, whichever occurs first.
OPERATING THE VEHICLE
32
Page 35 of 52
FUEL FILLER LID
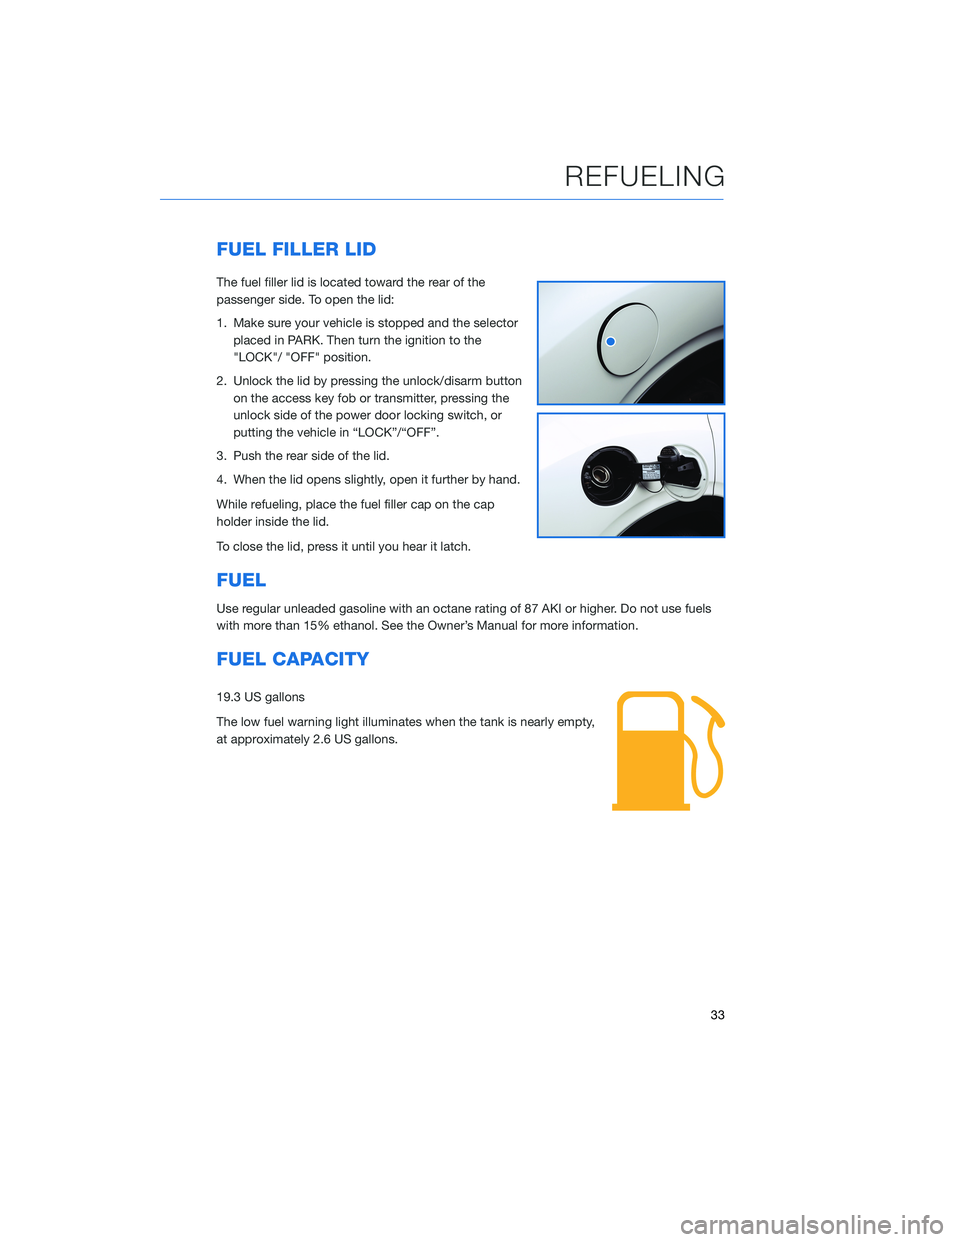
The fuel filler lid is located toward the rear of the
passenger side. To open the lid:
1. Make sure your vehicle is stopped and the selector
placed in PARK. Then turn the ignition to the
"LOCK"/ "OFF" position.
2. Unlock the lid by pressing the unlock/disarm button
on the access key fob or transmitter, pressing the
unlock side of the power door locking switch, or
putting the vehicle in “LOCK”/“OFF”.
3. Push the rear side of the lid.
4. When the lid opens slightly, open it further by hand.
While refueling, place the fuel filler cap on the cap
holder inside the lid.
To close the lid, press it until you hear it latch.
FUEL
Use regular unleaded gasoline with an octane rating of 87 AKI or higher. Do not use fuels
with more than 15% ethanol. See the Owner’s Manual for more information.
FUEL CAPACITY
19.3 US gallons
The low fuel warning light illuminates when the tank is nearly empty,
at approximately 2.6 US gallons.
REFUELING
33
Page 36 of 52
ACCESSING THE THIRD-ROW
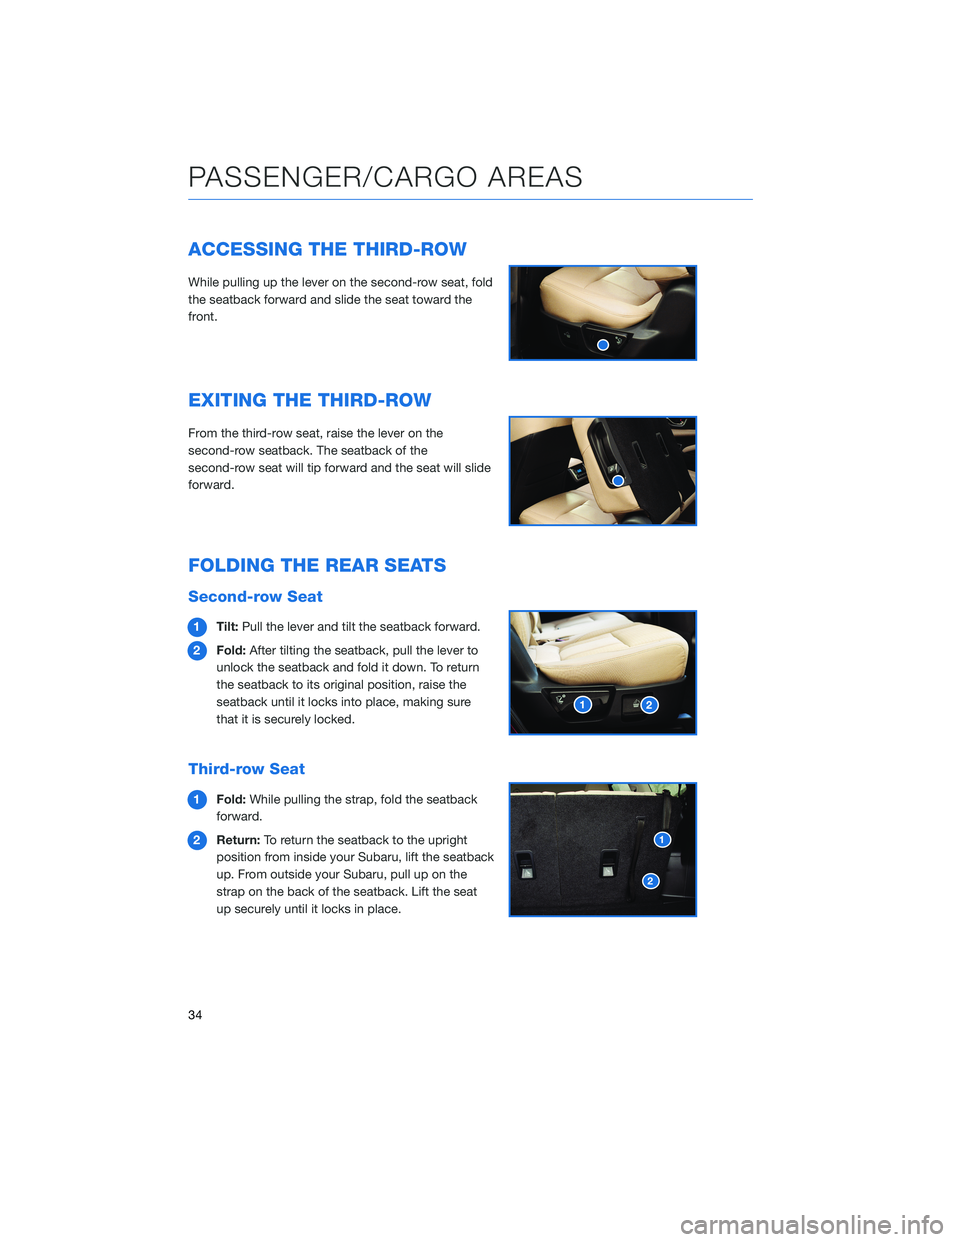
While pulling up the lever on the second-row seat, fold
the seatback forward and slide the seat toward the
front.
EXITING THE THIRD-ROW
From the third-row seat, raise the lever on the
second-row seatback. The seatback of the
second-row seat will tip forward and the seat will slide
forward.
FOLDING THE REAR SEATS
Second-row Seat
1Tilt:Pull the lever and tilt the seatback forward.
2Fold:After tilting the seatback, pull the lever to
unlock the seatback and fold it down. To return
the seatback to its original position, raise the
seatback until it locks into place, making sure
that it is securely locked.
Third-row Seat
1Fold:While pulling the strap, fold the seatback
forward.
2Return:To return the seatback to the upright
position from inside your Subaru, lift the seatback
up. From outside your Subaru, pull up on the
strap on the back of the seatback. Lift the seat
up securely until it locks in place.
PASSENGER/CARGO AREAS
34
Page 37 of 52
CHILD SAFETY LOCKS
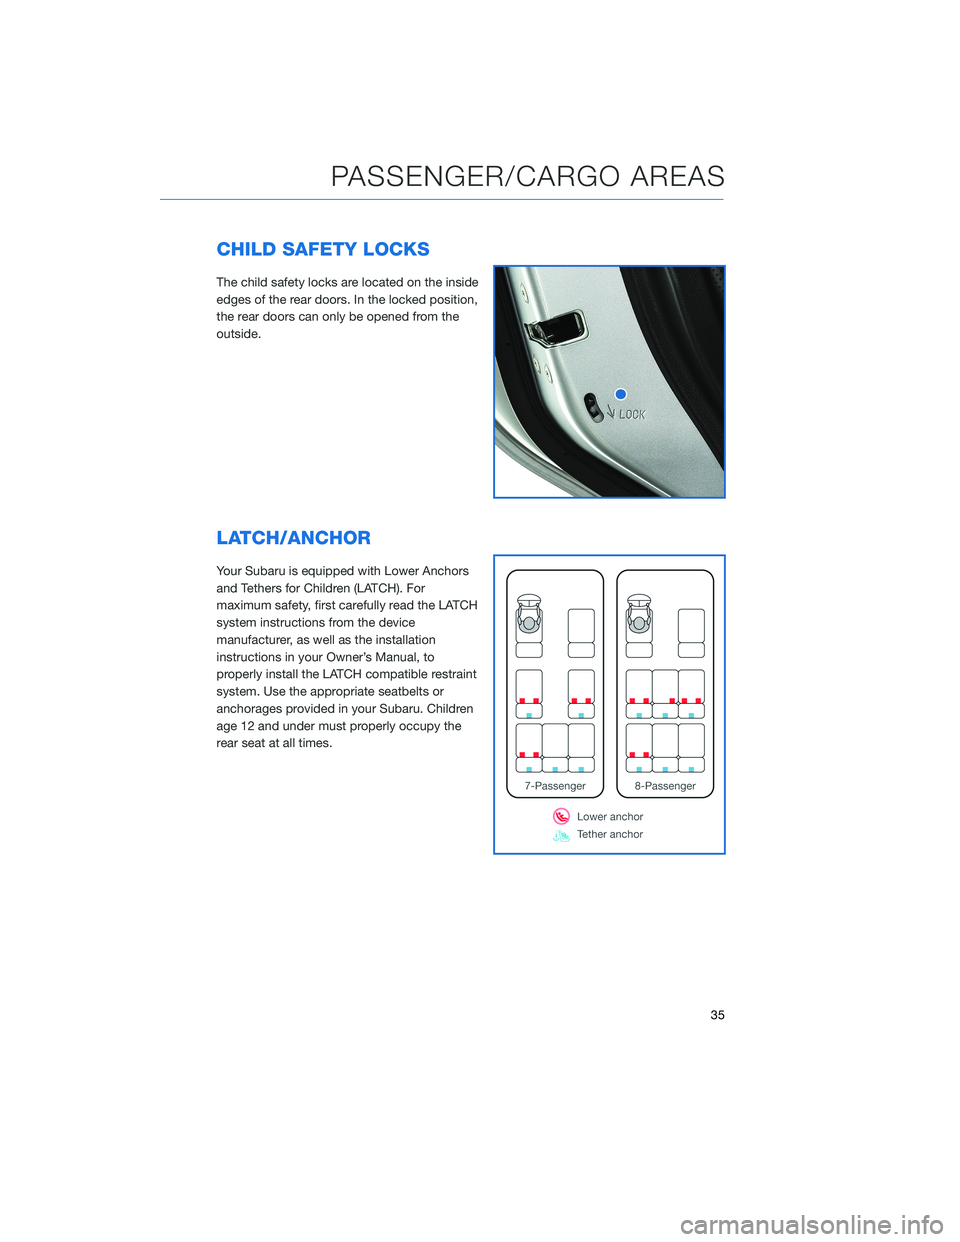
The child safety locks are located on the inside
edges of the rear doors. In the locked position,
the rear doors can only be opened from the
outside.
LATCH/ANCHOR
Your Subaru is equipped with Lower Anchors
and Tethers for Children (LATCH). For
maximum safety, first carefully read the LATCH
system instructions from the device
manufacturer, as well as the installation
instructions in your Owner’s Manual, to
properly install the LATCH compatible restraint
system. Use the appropriate seatbelts or
anchorages provided in your Subaru. Children
age 12 and under must properly occupy the
rear seat at all times.
PASSENGER/CARGO AREAS
35
Page 38 of 52

REAR SEAT REMINDER
The Rear Seat Reminder system assists you in
preventing a child or pet from being left in your
Subaru. The system monitors the opening and
closing of the rear side door. It does not
physically sense the presence of a child or pet.
The system turns on if your Subaru is started
within 30 minutes of a rear side door opening
or closing. It also turns on if a rear side door is
opened and closed when your Subaru is
running and stationary. The system remains on
if your Subaru is turned off and back on again
within 30 minutes and the rear side doors
remained closed.
When you turn your Subaru off, the system warns you audibly and with a “Reminder, Look
in Rear Seat” message in the Combination Meter Display (CMD).
The system operates only one time with each ignition cycle and opening and closing of a
rear side door. You can turn the Rear Seat Reminder off in the Combination Meter Display
(CMD).
POWER REAR GATE (PRG)(if equipped)
Power Rear Gate Button
Briefly press and release the button on the instrument
panel to automatically open or close the rear gate. Two
chirps will sound and the hazard warning flashers will
flash twice. If you briefly press the button while it is
closing, it will open. If you briefly press the button
while it is opening, it will pause. Press the button again
to close the rear gate. If you attempt to open the Power Rear Gate with the doors locked,
three rapid beeps will sound.
The operation is the same using the Power Rear Gate Button on the access key fob or
transmitter.
NOTE: This button only functions to open the PRG when the doors are unlocked. If the
doors are locked, you will hear three rapid beeps from the vehicle.
PASSENGER/CARGO AREAS
36
Page 39 of 52

From the Rear of the Vehicle
To open the rear gate, unlock your Subaru or have
your access key fob with you. Then, briefly press the
button on the underside trim near the license plate.
The rear gate will automatically open. If you briefly
press the button while the gate is opening, it will
pause. Press the button again to close the rear gate.
To close the rear gate, briefly press the Power Rear
Gate Button on the inside edge of the rear gate. If you
press the button again, the rear gate will open.
Power Rear Gate Lock
With the rear gate open, press the lock button on the
inside edge of the rear gate. All doors, the rear gate
and the fuel lid will lock, and the rear gate will close.
Memory Height
You can set where the rear gate stops when it opens.
To set the height:
1. Make sure the ignition is in the “LOCK”/”OFF”
position.
2. Open the rear gate using the Power Rear Gate
function.
3. Stop the rear gate when it reaches the desired
height by pressing the PRG button on the rear gate,
instrument panel, or key fob.
4. Press the memory switch in the instrument panel to
select the “ON” status (switch indented).
5. With the rear gate at the desired height, press and hold the Power Rear Gate Button on
the inside edge of the rear gate. A chirp will sound and the hazard warning flashers will
flash three times to confirm the height is set.
When the memory switch is in the “ON” status, the rear gate will stop at the set memory
height when you use any of the Power Rear Gate switches.
PASSENGER/CARGO AREAS
37
Page 40 of 52
CARGO COVER
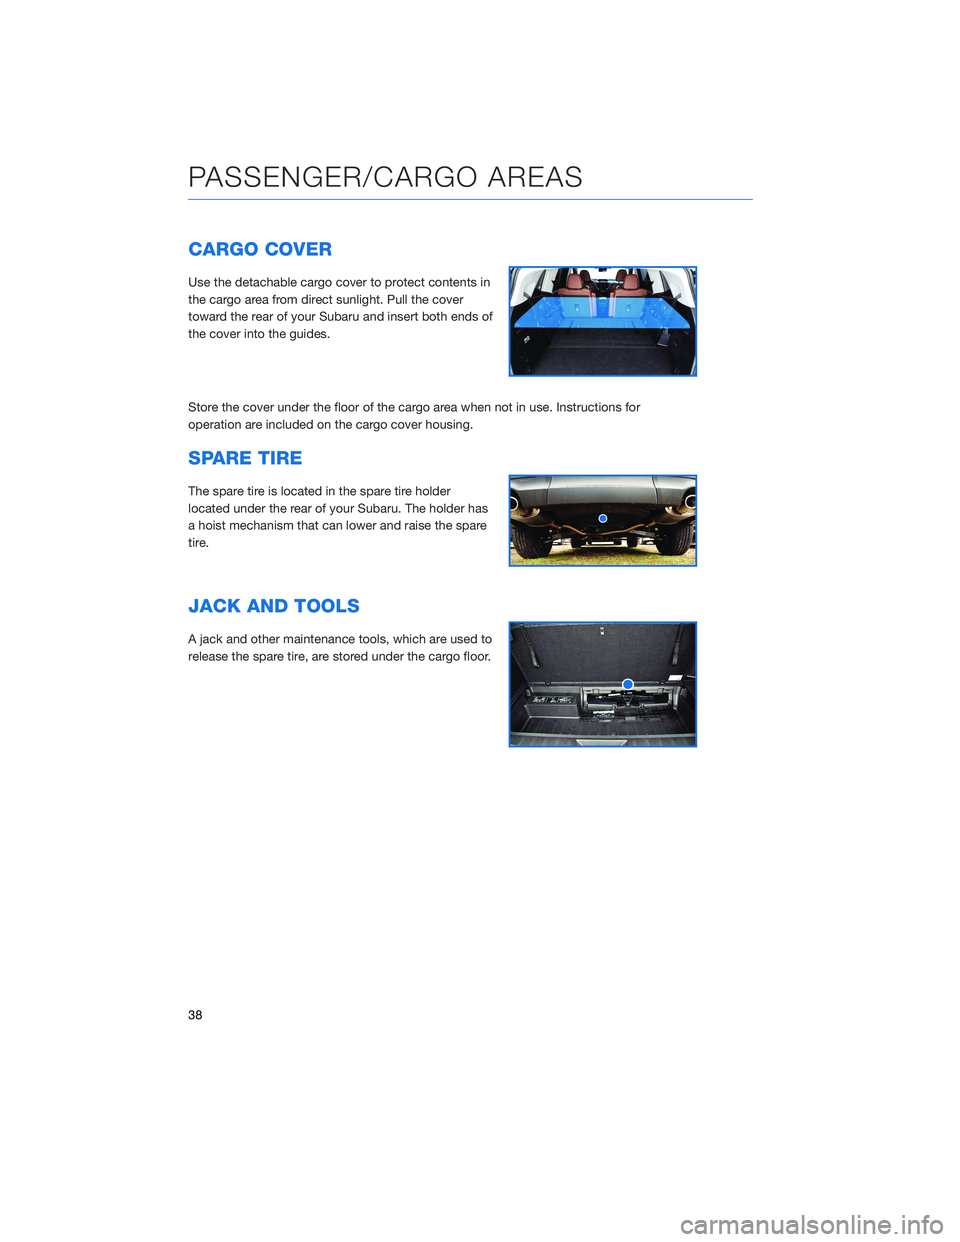
Use the detachable cargo cover to protect contents in
the cargo area from direct sunlight. Pull the cover
toward the rear of your Subaru and insert both ends of
the cover into the guides.
Store the cover under the floor of the cargo area when not in use. Instructions for
operation are included on the cargo cover housing.
SPARE TIRE
The spare tire is located in the spare tire holder
located under the rear of your Subaru. The holder has
a hoist mechanism that can lower and raise the spare
tire.
JACK AND TOOLS
A jack and other maintenance tools, which are used to
release the spare tire, are stored under the cargo floor.
PASSENGER/CARGO AREAS
38