SUBARU BRZ 2013 1.G Owners Manual
BRZ 2013 1.G
SUBARU
SUBARU
https://www.carmanualsonline.info/img/17/7178/w960_7178-0.png
SUBARU BRZ 2013 1.G Owners Manual
Trending: clock reset, clock setting, wheel bolts, coolant, jump start terminals, radio, check engine
Page 261 of 484
261
3-5. Other interior features
3
Interior features
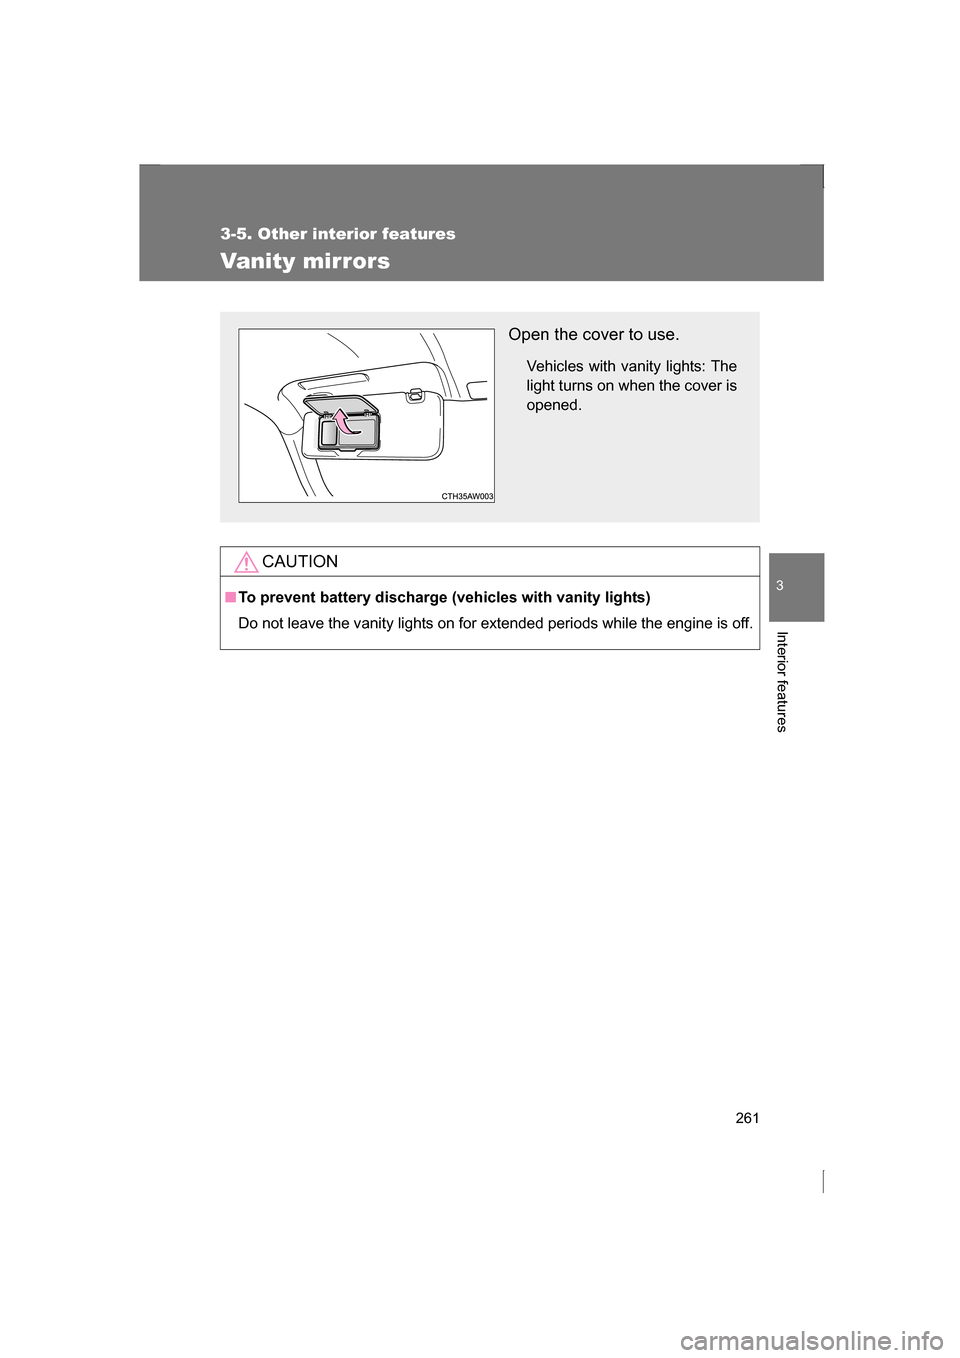
Vanity mirrors
CAUTION
■To prevent battery discharge (vehicles with vanity lights)
Do not leave the vanity lights on for extended periods while the engine is off.
Open the cover to use.Vehicles with vanity lights: The
light turns on when the cover isopened.
Page 262 of 484
262
3-5. Other interior features
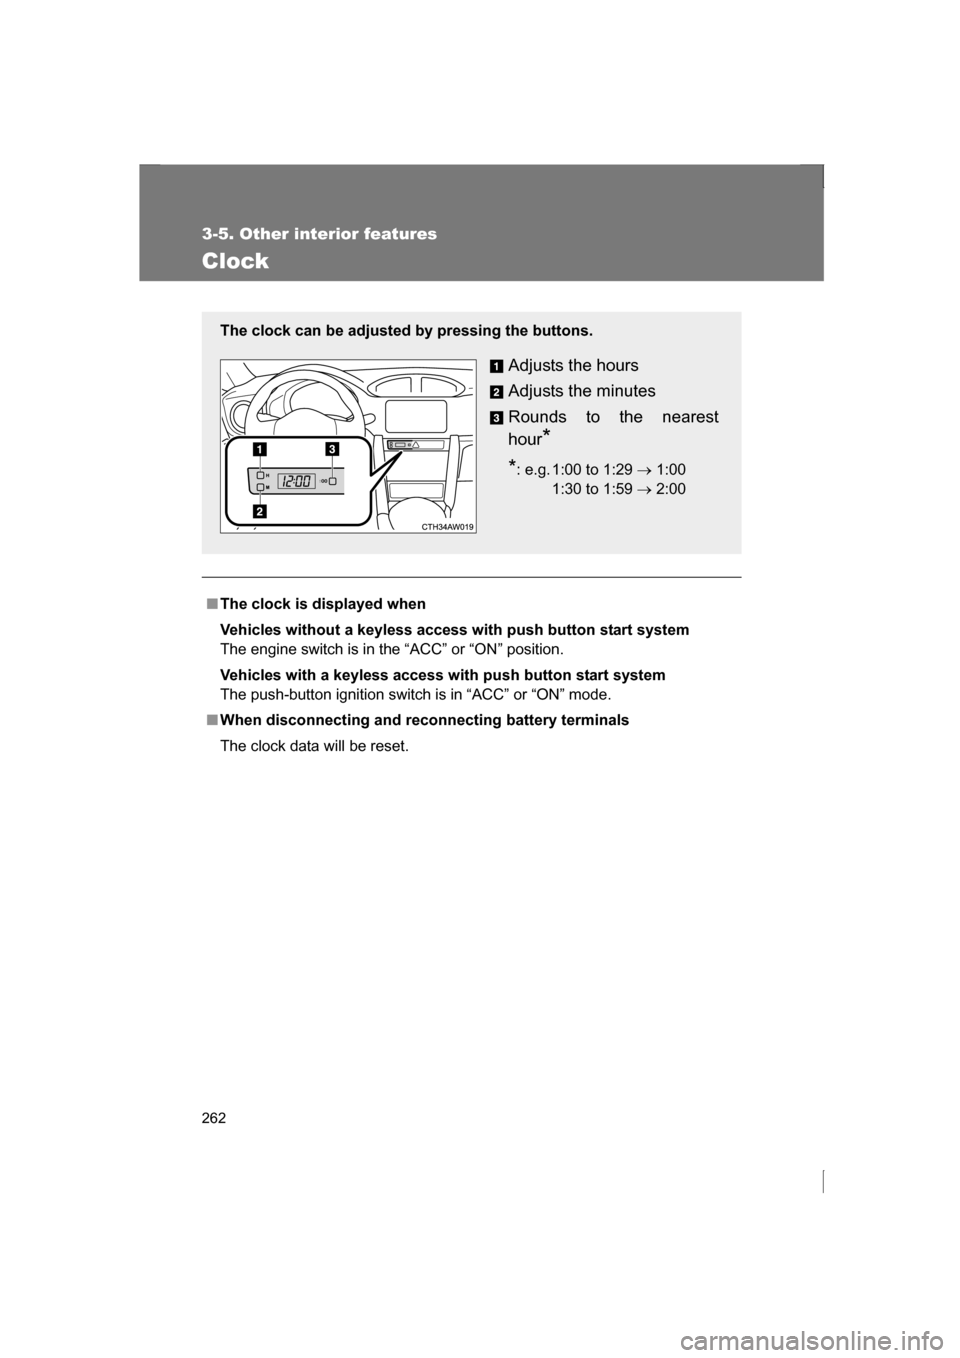
Clock
■The clock is displayed when
Vehicles without a keyless access with push button start system
The engine switch is in the “ACC” or “ON” position.
Vehicles with a keyless access with push button start system
The push-button ignition switch is in “ACC” or “ON” mode.
■When disconnecting and reconnecting battery terminals
The clock data will be reset.
The clock can be adjusted by pressing the buttons.
Adjusts the hours
Adjusts the minutes
Rounds to the nearest
hour*
* : e.g. 1:00 to 1:29 → 1:00
1:30 to 1:59 → 2:00
00
Page 263 of 484
263
3-5. Other interior features
3
Interior features
Outside temperature display
■The outside temperature is displayed when
Vehicles without a keyless access with push button start system
The engine switch is in the “ON” position.
Vehicles with a keyless access with push button start system
The push-button ignition switch is in “ON” mode.
■Display
In the following situations, the correct outside temperature may not be dis-
played, or the display may take longer than normal to change:
●When the vehicle is stopped, or moving at low speeds (less than 12 mph
[20 km/h])
●When the outside temperature has changed suddenly (at the entrance/
exit of a garage, tunnel, etc.)
■When “- -” is displayed more than 1 minute or the outside temperature
is not displayed
The system may be malfunctioning. Take your vehicle to your SUBARU
dealer.
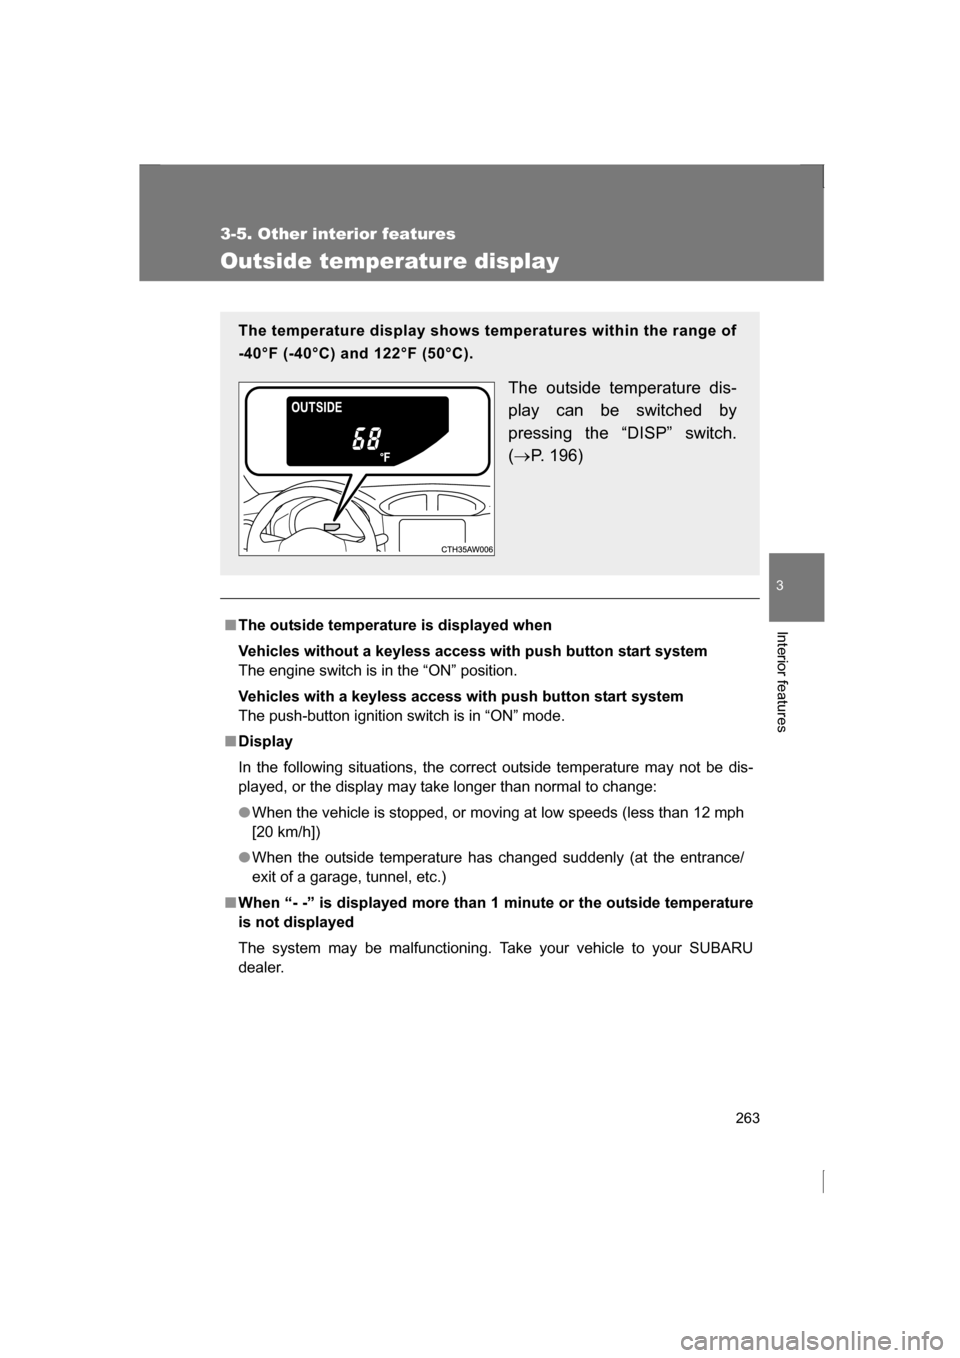
The temperature display shows temperatures within the range of
-40°F (-40°C) and 122°F (50°C).
The outside temperature dis-
play can be switched by
pressing the “DISP” switch. (→ P. 196)
Page 264 of 484
264
3-5. Other interior features
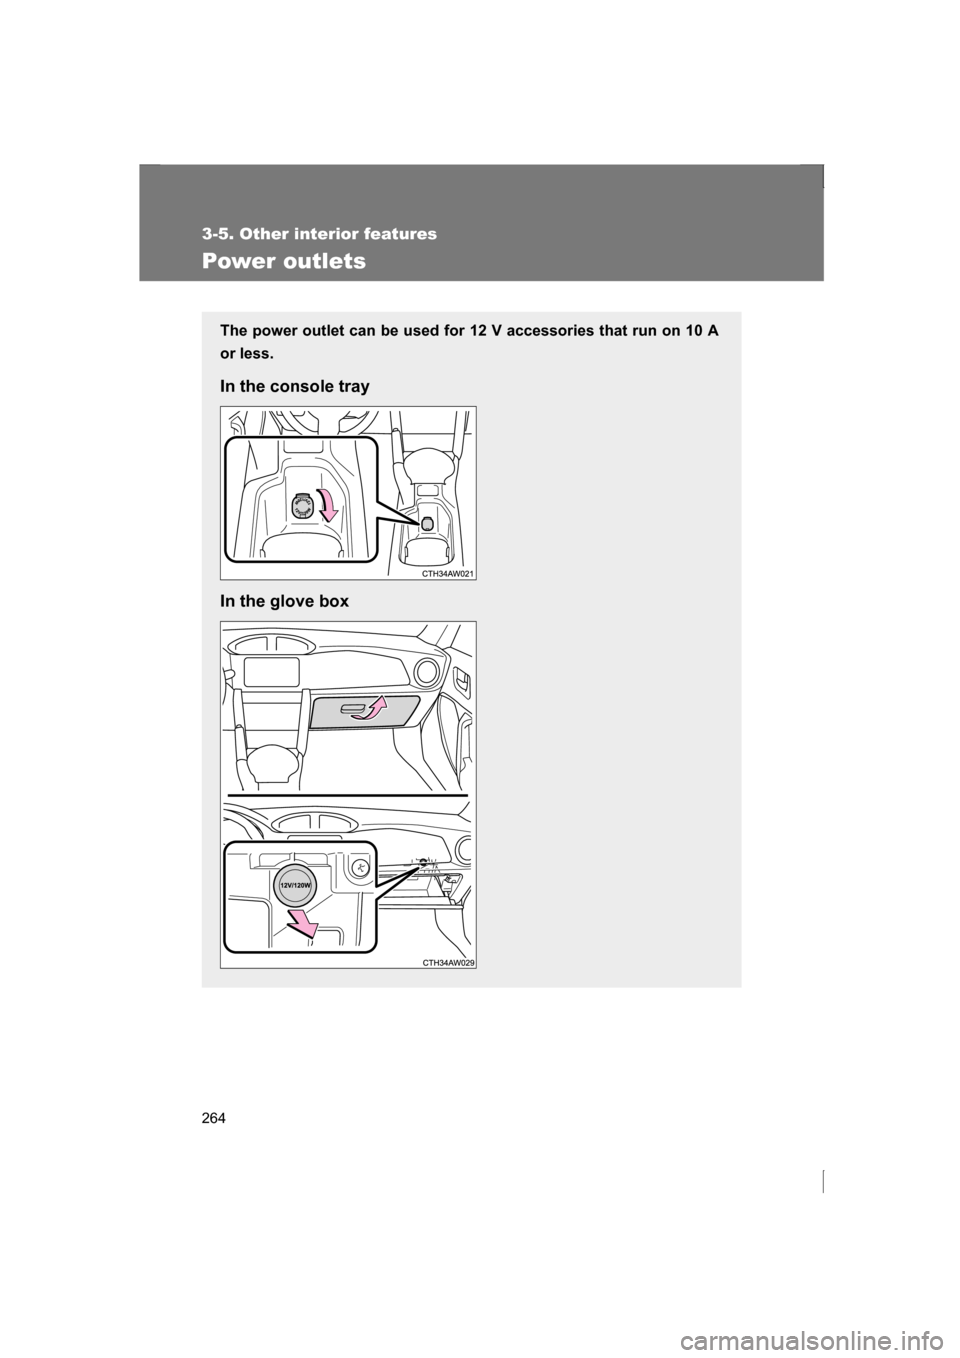
Power outlets
The power outlet can be used for 12 V accessories that run on 10 A
or less.
In the console tray
In the glove box
Page 265 of 484
265
3-5. Other interior features
3
Interior features
■The power outlet can be used when
Vehicles without a keyless access with push button start system
The engine switch is in the “ACC” or “ON” position.
Vehicles with a keyless access with push button start system
The push-button ignition switch is in “ACC” or “ON” mode.
CAUTION
■To avoid damaging the power outlet
Close the power outlet lid when the power outlet is not in use.
Foreign objects or liquids that enter the power outlet may cause a short cir-
cuit.
■To prevent the fuse from being blown
Do not use an accessory that uses more than 12 V 10 A.
■To prevent battery discharge
Do not use the power outlet longer than necessary when the engine is not
running.
Page 266 of 484
266
3-5. Other interior features
Seat heaters∗
■The seat heaters can be used when
The push-button ignition switch is in “ON” mode.
■When not in use
Turn the seat heater off. The indicator light goes off.
∗
: If equipped
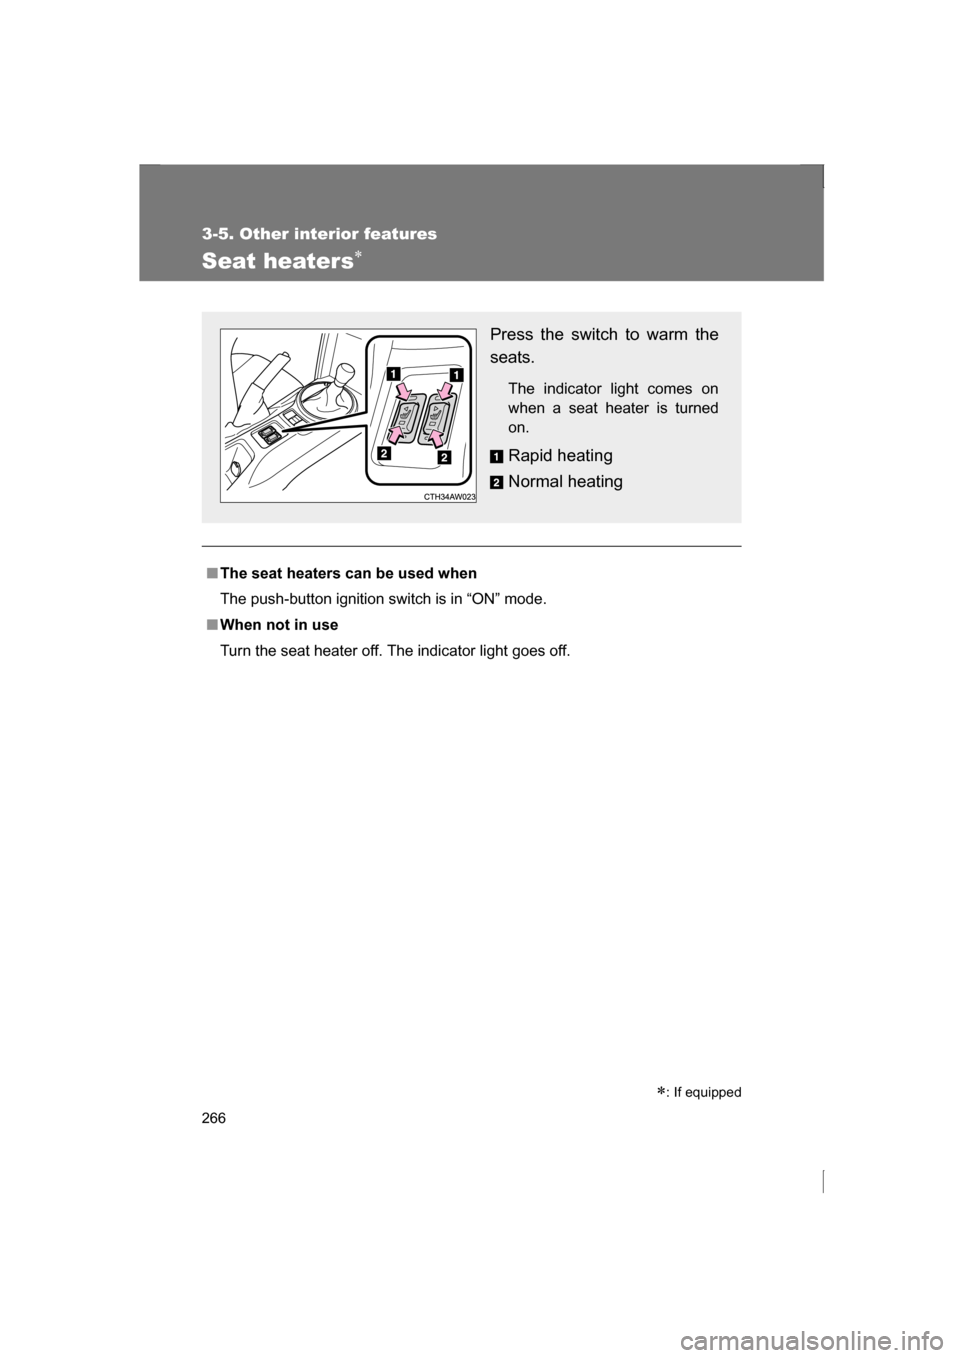
Press the switch to warm the
seats.
The indicator light comes on
when a seat heater is turnedon.
Rapid heating
Normal heating
Page 267 of 484
267
3-5. Other interior features
3
Interior features
WARNING
■Burns
●Use caution when seating the following persons in a seat with the seat
heater on to avoid the possibility of burns:
Page 268 of 484
268
3-5. Other interior features
Floor mat∗
∗
: If equipped
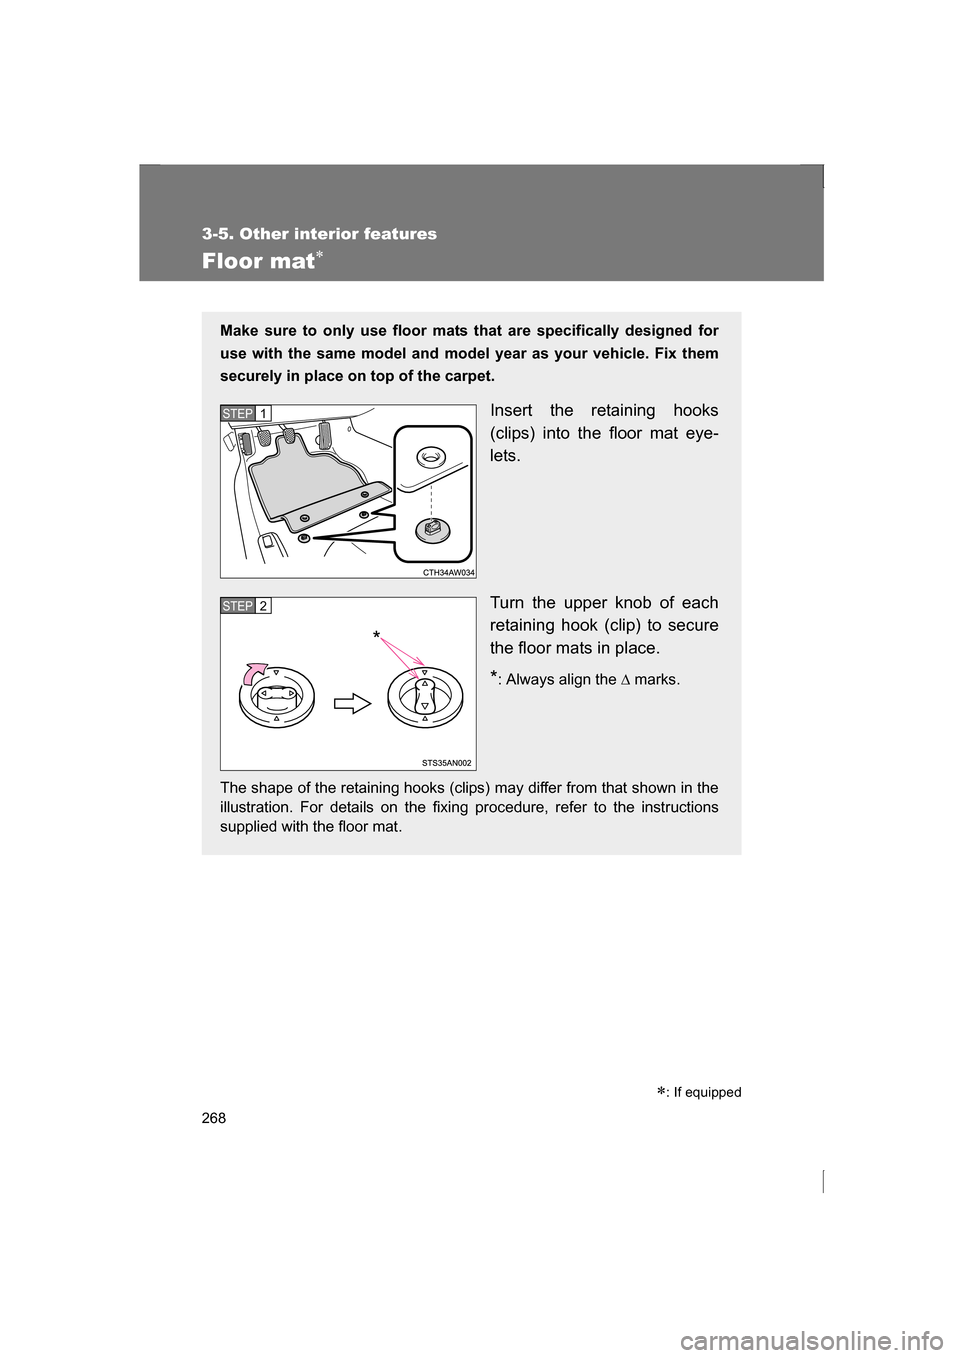
Make sure to only use floor mats
that are specifically designed for
use with the same model and model year as your vehicle. Fix them
securely in place on top of the carpet.
Insert the retaining hooks
(clips) into the floor mat eye-
lets.
Turn the upper knob of each
retaining hook (clip) to secure
the floor mats in place. *: Always align the ∆ marks.
The shape of the retaining hooks (clips) may differ from that shown in the
illustration. For details on the fixing procedure, refer to the instructions
supplied with the floor mat.
STEP 1
STEP 2
*
Page 269 of 484
269
3-5. Other interior features
3
Interior features
WARNING
Observe the following precautions.
Failure to do so may cause the driver's floor mat to slip, possibly interfering
with the pedals while driving. An unexpectedly high speed may result or it may
become difficult to stop the vehicle, leading to a serious accident.
■When installing the driver's floor mat
●Do not use floor mats designed for ot her models or different model year
vehicles, even if they are SUBARU Genuine floor mats.
●Only use floor mats designed for the driver's seat.
●Always install the floor mat securely using the retaining hooks (clips) pro-
vided.
●Do not use two or more floor mats on top of each other.
●Do not place the floor mat bottom-side up or upside-down.
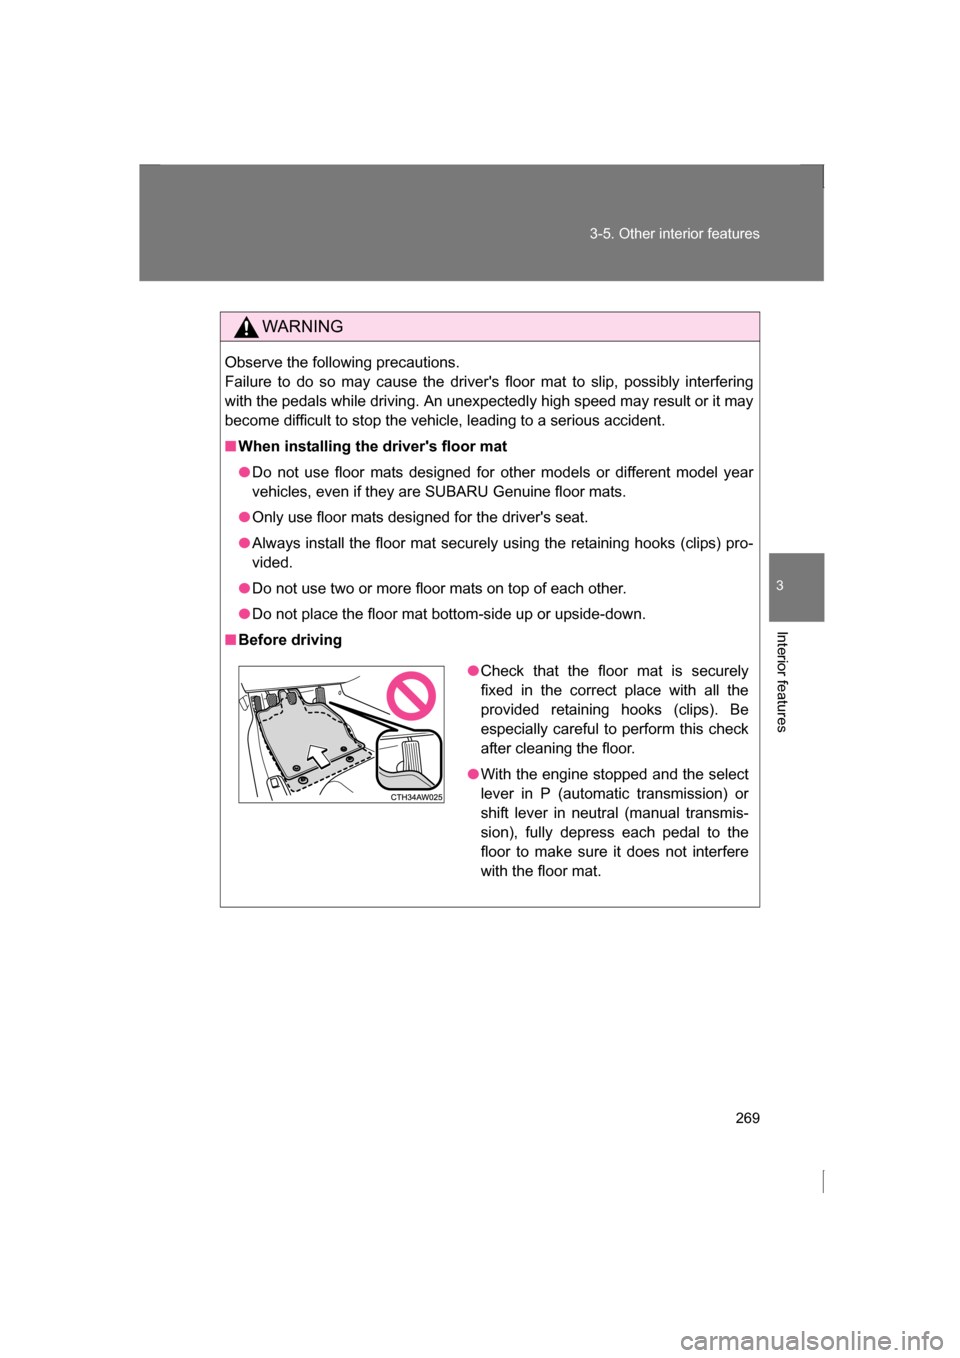
■Before driving
●Check that the floor mat is securely
fixed in the correct place with all the
provided retaining hooks (clips). Be
especially careful to perform this check
after cleaning the floor.
●With the engine stopped and the select
lever in P (automatic transmission) or
shift lever in neutral (manual transmis-
sion), fully depress each pedal to the
floor to make sure it does not interfere
with the floor mat.
Page 270 of 484
270
3-5. Other interior features
Trending: alarm, height adjustment, transmission oil, oil dipstick, check engine light, snow chains, buttons
