SUBARU FORESTER 2005 SG / 2.G Owners Manual
Manufacturer: SUBARU, Model Year: 2005, Model line: FORESTER, Model: SUBARU FORESTER 2005 SG / 2.GPages: 477, PDF Size: 5.34 MB
Page 321 of 477
8-20
Driving tips
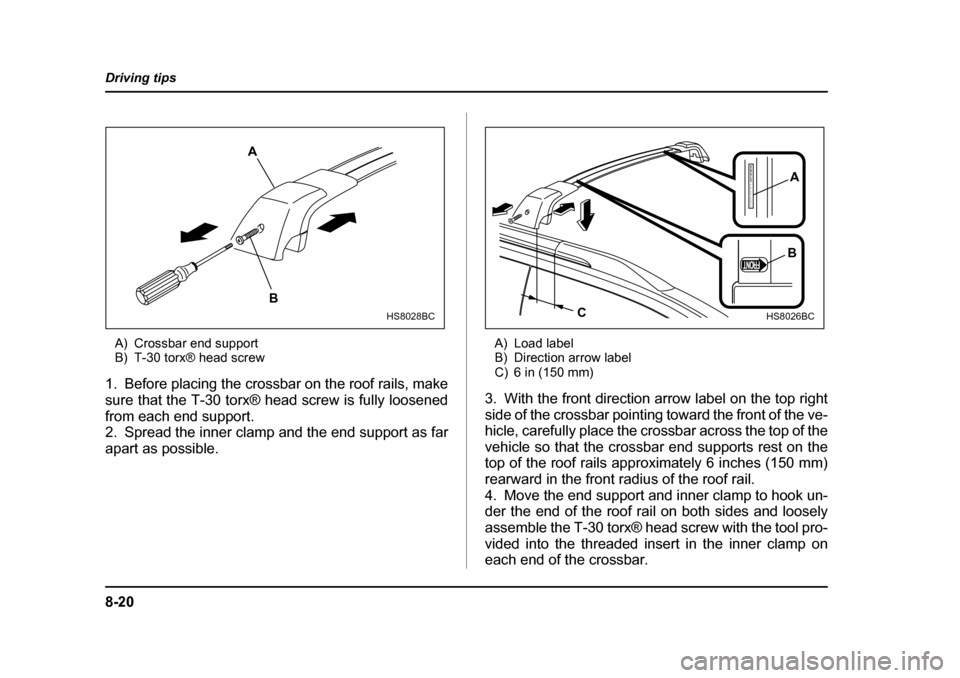
A) Crossbar end support
B) T-30 torx® head screw
1. Before placing the crossbar on the roof rails, make
sure that the T-30 torx® head screw is fully loosened
from each end support.
2. Spread the inner clamp and the end support as far
apart as possible. A) Load label
B) Direction arrow label
C) 6 in (150 mm)
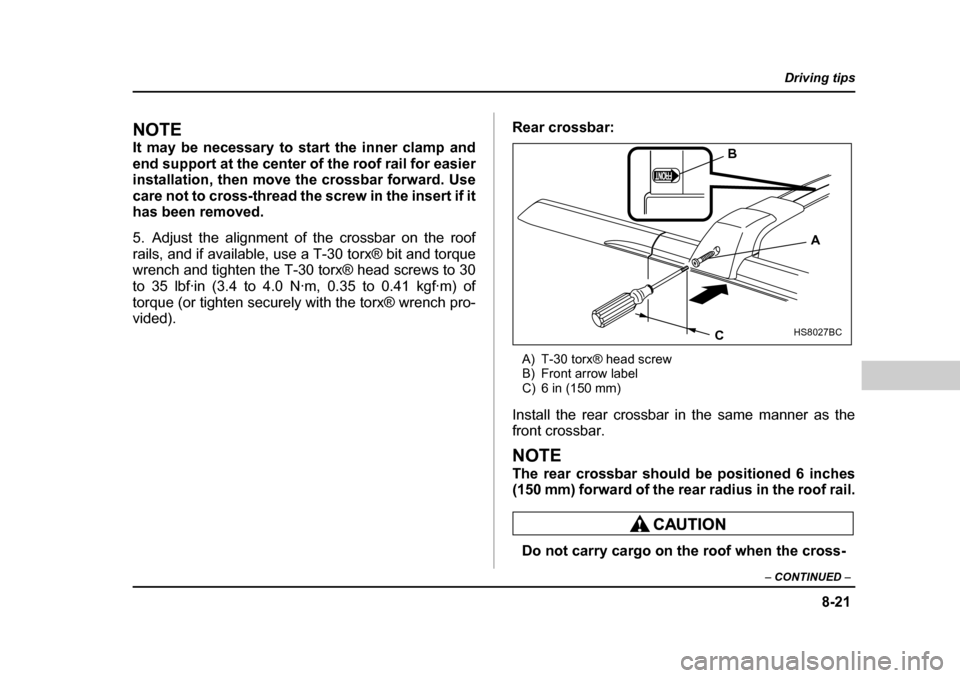
3. With the front direction arrow label on the top right
side of the crossbar pointing toward the front of the ve-
hicle, carefully place the crossbar across the top of the
vehicle so that the crossbar end supports rest on the
top of the roof rails approximately 6 inches (150 mm)
rearward in the front radius of the roof rail.
4. Move the end support and inner clamp to hook un-
der the end of the roof rail on both sides and loosely
assemble the T-30 torx® head screw with the tool pro-
vided into the threaded insert in the inner clamp on
each end of the crossbar.
A
B
HS8028BC
FRONTONT
MAXIMUM LOAD 100 LBS. EVENLY DISTRIBUTED
A
B
C
HS8026BC
Page 322 of 477
8-21
Driving tips
– CONTINUED –
NOTE
It may be necessary to start the inner clamp and
end support at the center of the roof rail for easier
installation, then move the crossbar forward. Use
care not to cross-thread the screw in the insert if it
has been removed.
5. Adjust the alignment of the crossbar on the roof
rails, and if available, use a T-30 torx® bit and torque
wrench and tighten the T-30 torx® head screws to 30
to 35 lbf·in (3.4 to 4.0 N·m, 0.35 to 0.41 kgf·m) of
torque (or tighten securely with the torx® wrench pro-
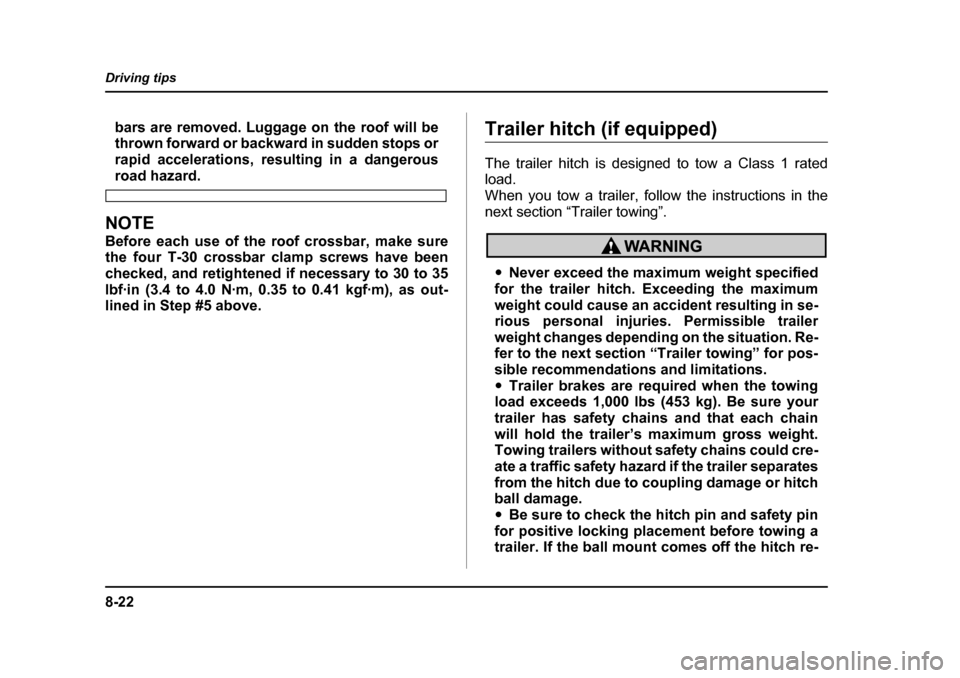
vided). Rear crossbar:
A) T-30 torx® head screw
B) Front arrow label
C) 6 in (150 mm)
Install the rear crossbar in the same manner as the front crossbar.
NOTE
The rear crossbar should be positioned 6 inches
(150 mm) forward of the rear radius in the roof rail.
Do not carry cargo on the roof when the cross-
FRFRONTONT
A
B
C
HS8027BC
Page 323 of 477
8-22
Driving tips
bars are removed. Luggage on the roof will be
thrown forward or backward in sudden stops or
rapid accelerations, resulting in a dangerous
road hazard.
NOTE
Before each use of the roof crossbar, make sure
the four T-30 crossbar clamp screws have been
checked, and retightened if necessary to 30 to 35
lbf·in (3.4 to 4.0 N·m, 0.35 to 0.41 kgf·m), as out-
lined in Step #5 above.
Trailer hitch (if equipped)
The trailer hitch is designed to tow a Class 1 rated
load.
When you tow a trailer, follow the instructions in the
next section “Trailer towing”.
�y
Never exceed the maximum weight specified
for the trailer hitch. Exceeding the maximum
weight could cause an accident resulting in se-
rious personal injuries. Permissible trailer
weight changes depending on the situation. Re-
fer to the next section “Trailer towing” for pos-
sible recommendations and limitations.�y Trailer brakes are required when the towing
load exceeds 1,000 lbs (453 kg). Be sure your
trailer has safety chains and that each chain
will hold the trailer’s maximum gross weight.
Towing trailers without safety chains could cre-
ate a traffic safety hazard if the trailer separates
from the hitch due to coupling damage or hitch
ball damage. �y Be sure to check the hitch pin and safety pin
for positive locking placement before towing a
trailer. If the ball mount comes off the hitch re-
Page 324 of 477
8-23
Driving tips
– CONTINUED –
ceiver, the trailer could get loose and create a
traffic safety hazard.�yUse only the ball mount supplied with this
hitch. Use the hitch only as a weight carrying
hitch. Do not use with any type of weight dis-
tributing hitch.
�„ Connecting a trailer
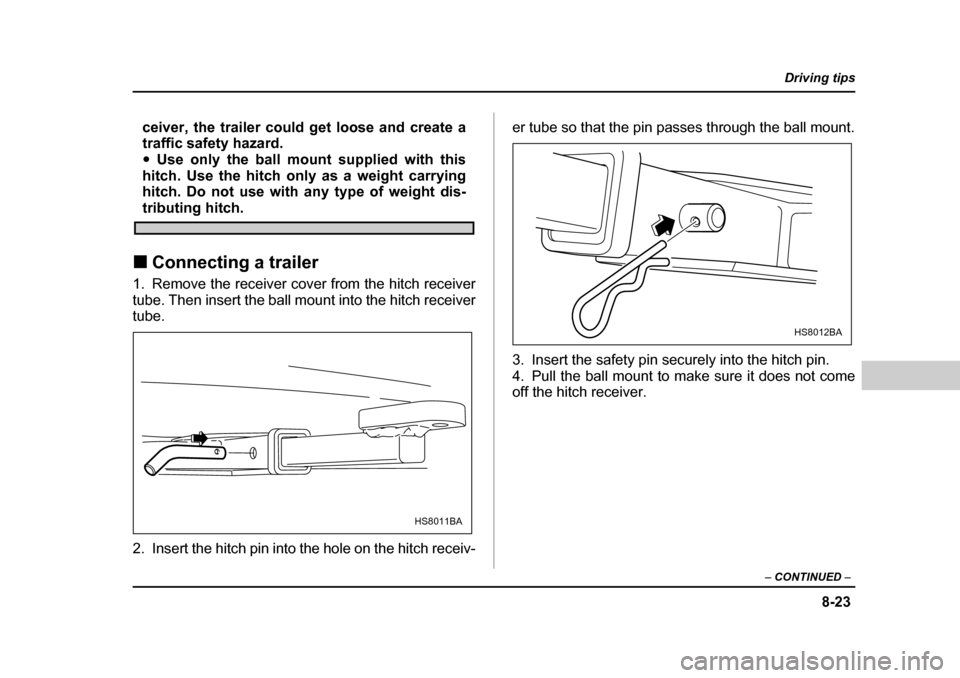
1. Remove the receiver cover from the hitch receiver
tube. Then insert the ball mount into the hitch receiver tube.
2. Insert the hitch pin into the hole on the hitch receiv- er tube so that the pin passes through the ball mount.
3. Insert the safety pin securely into the hitch pin.
4. Pull the ball mount to make sure it does not come
off the hitch receiver.
HS8011BA
HS8012BA
Page 325 of 477
8-24
Driving tips
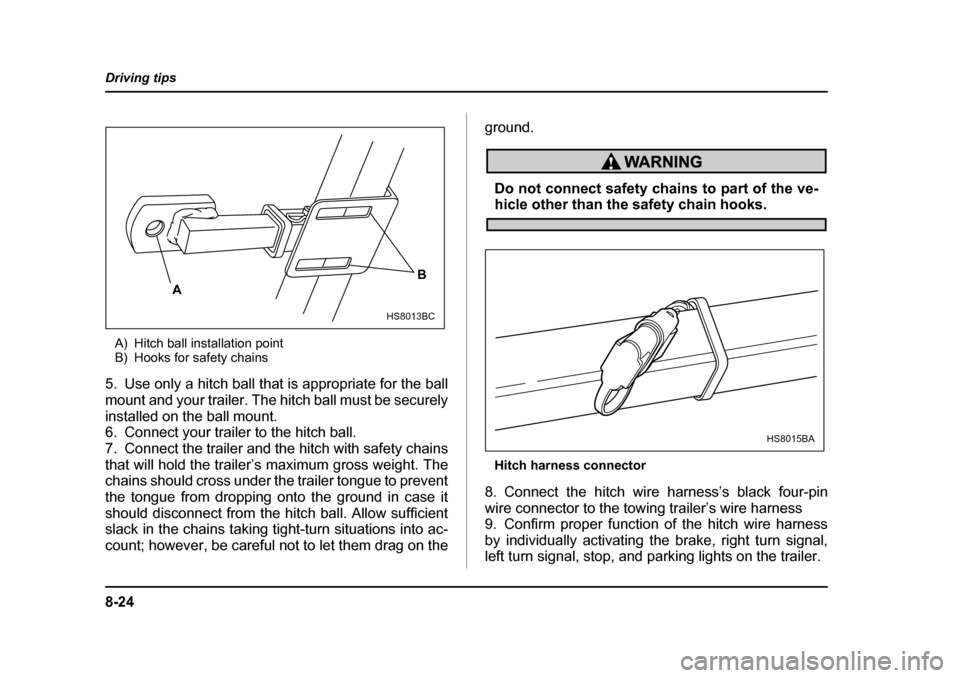
A) Hitch ball installation point
B) Hooks for safety chains
5. Use only a hitch ball that is appropriate for the ball
mount and your trailer. The hitch ball must be securely
installed on the ball mount.
6. Connect your trailer to the hitch ball.
7. Connect the trailer and the hitch with safety chains
that will hold the trailer’s maximum gross weight. The
chains should cross under the trailer tongue to prevent
the tongue from dropping onto the ground in case it
should disconnect from the hitch ball. Allow sufficient
slack in the chains taking tight-turn situations into ac-
count; however, be careful not to let them drag on the ground.
Do not connect safety chains to part of the ve-hicle other than the safety chain hooks.
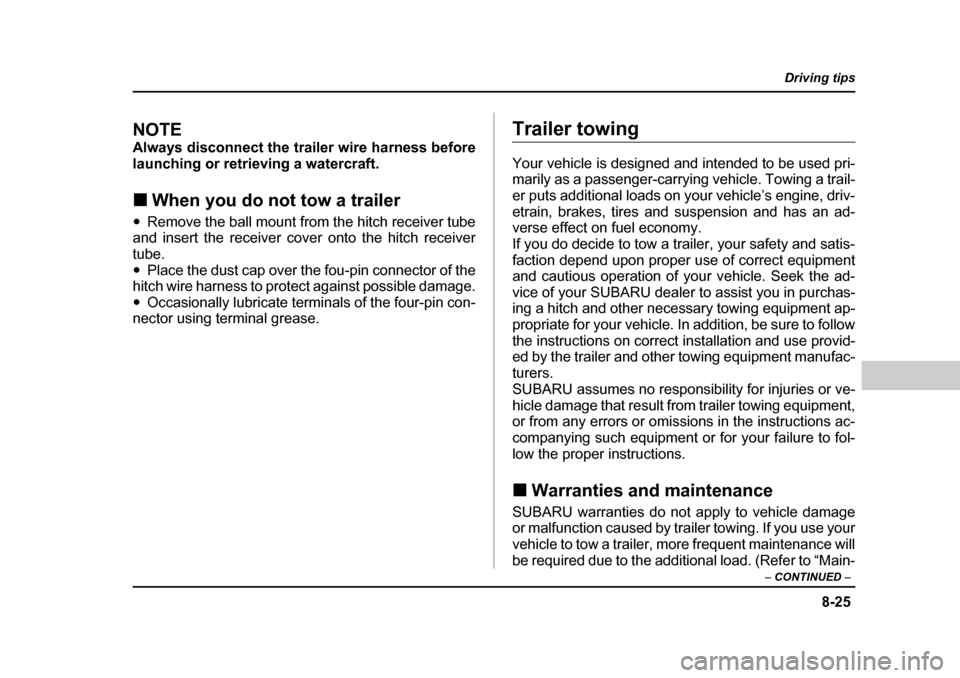
Hitch harness connector
8. Connect the hitch wire harness’s black four-pin
wire connector to the towing trailer’s wire harness
9. Confirm proper function of the hitch wire harness
by individually activating the brake, right turn signal,
left turn signal, stop, and parking lights on the trailer.
A B
HS8013BC
HS8015BA
Page 326 of 477
8-25
Driving tips
– CONTINUED –
NOTE
Always disconnect the trailer wire harness before
launching or retrieving a watercraft. �„When you do not tow a trailer
�y Remove the ball mount from the hitch receiver tube
and insert the receiver cover onto the hitch receiver tube. �y Place the dust cap over the fou-pin connector of the
hitch wire harness to protect against possible damage. �y Occasionally lubricate terminals of the four-pin con-
nector using terminal grease.Trailer towing
Your vehicle is designed and intended to be used pri-
marily as a passenger-carrying vehicle. Towing a trail-
er puts additional loads on your vehicle’s engine, driv-
etrain, brakes, tires and suspension and has an ad-
verse effect on fuel economy.
If you do decide to tow a trailer, your safety and satis-
faction depend upon proper use of correct equipment
and cautious operation of your vehicle. Seek the ad-
vice of your SUBARU dealer to assist you in purchas-
ing a hitch and other necessary towing equipment ap-
propriate for your vehicle. In addition, be sure to follow
the instructions on correct installation and use provid-
ed by the trailer and other towing equipment manufac- turers.
SUBARU assumes no responsibility for injuries or ve-
hicle damage that result from trailer towing equipment,
or from any errors or omissions in the instructions ac-
companying such equipment or for your failure to fol-
low the proper instructions. �„ Warranties and maintenance
SUBARU warranties do not apply to vehicle damage
or malfunction caused by trailer towing. If you use your
vehicle to tow a trailer, more frequent maintenance will
be required due to the additional load. (Refer to “Main-
Page 327 of 477
8-26
Driving tips
tenance schedule under severe driving conditions” in
the “Warranty and Maintenance Booklet”.)
Under no circumstances should a trailer be towed with
a new vehicle or a vehicle with any new powertrain
component (engine, transmission, differential, wheel
bearings, etc.) for the first 1,000 miles (1,600 km) of
driving. �„
Maximum load limits
Never exceed the maximum load limits ex-
plained below. Exceeding the maximum load
limits could cause personal injury and/or vehi-
cle damage.
�yAdequate size trailer brakes are required
when the trailer and its cargo exceed 1,000 lbs
(453 kg) total weight. �y Before towing a trailer, check the trailer total
weight, GVW, GAWs and tongue load. Make
sure the load and its distribution in your vehicle
and trailer are acceptable.
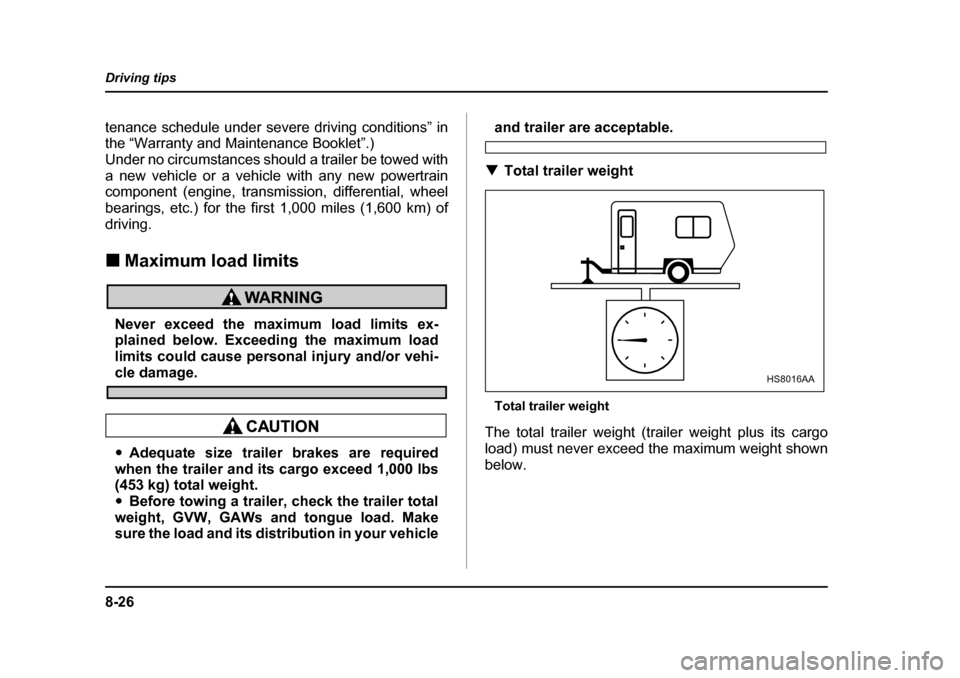
�T Total trailer weight
Total trailer weight
The total trailer weight (trailer weight plus its cargo
load) must never exceed the maximum weight shown
below.
HS8016AA
Page 328 of 477
8-27
Driving tips
– CONTINUED –
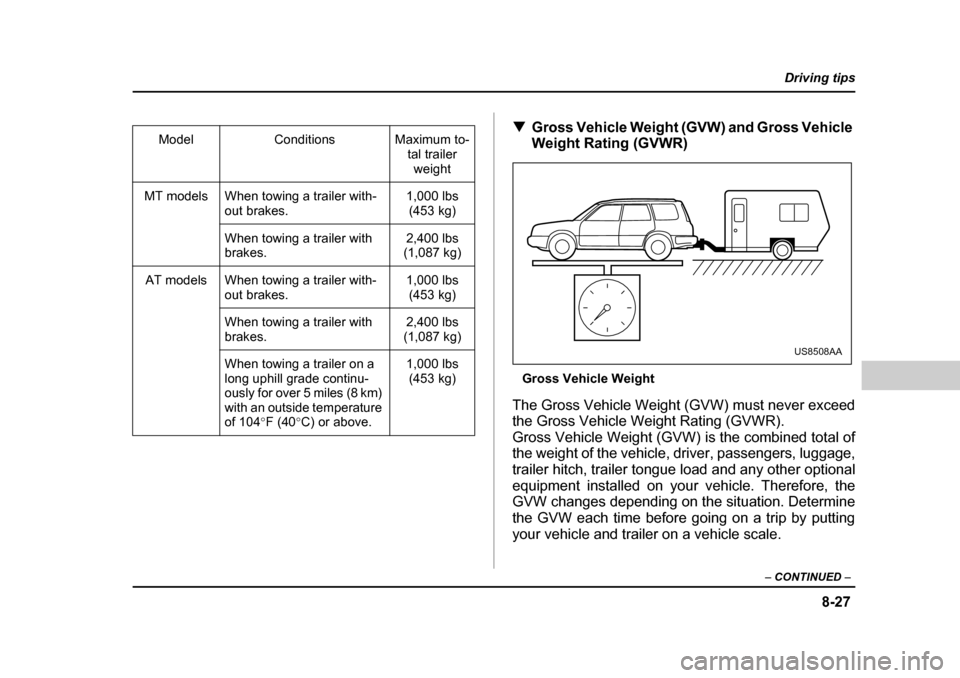
�TGross Vehicle Weight (GVW) and Gross Vehicle
Weight Rating (GVWR)
Gross Vehicle Weight
The Gross Vehicle Weight (GVW) must never exceed
the Gross Vehicle Weight Rating (GVWR).
Gross Vehicle Weight (GVW) is the combined total of
the weight of the vehicle, driver, passengers, luggage,
trailer hitch, trailer tongue load and any other optional
equipment installed on your vehicle. Therefore, the
GVW changes depending on the situation. Determine
the GVW each time before going on a trip by putting
your vehicle and trailer on a vehicle scale.
Model Conditions Maximum to-
tal trailer weight
MT models When towing a trailer with- out brakes. 1,000 lbs
(453 kg)
When towing a trailer with
brakes. 2,400 lbs
(1,087 kg)
AT models When towing a trailer with- out brakes. 1,000 lbs
(453 kg)
When towing a trailer with
brakes. 2,400 lbs
(1,087 kg)
When towing a trailer on a
long uphill grade continu-
ously for over 5 miles (8 km)
with an outside temperature
of 104 °F (40 °C) or above. 1,000 lbs
(453 kg)
US8508AA
Page 329 of 477
8-28
Driving tips
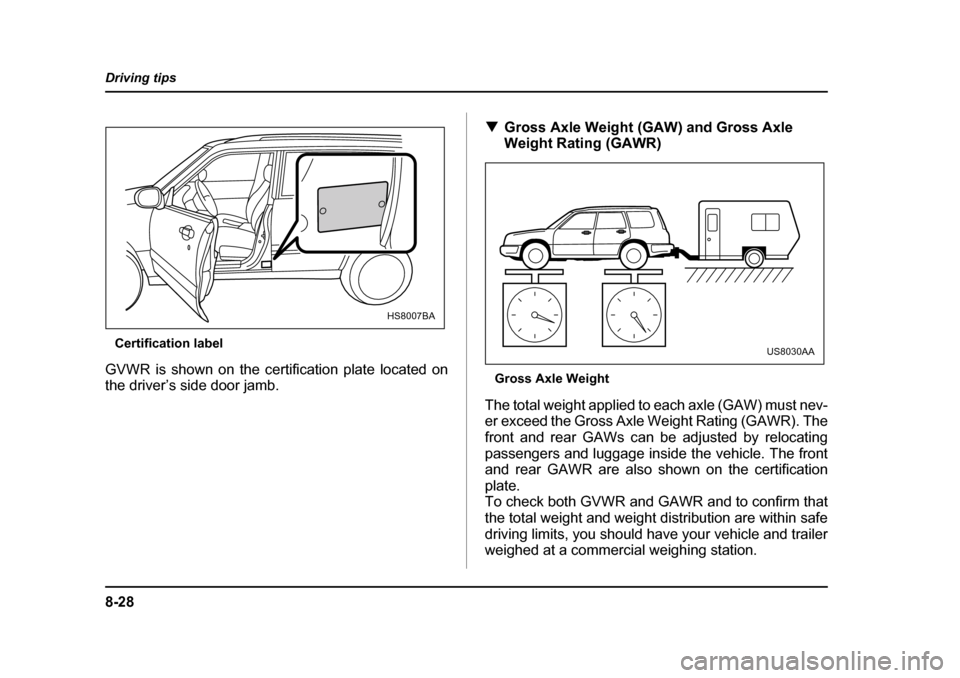
Certification label
GVWR is shown on the certification plate located on
the driver’s side door jamb. �T
Gross Axle Weight (GAW) and Gross Axle
Weight Rating (GAWR)
Gross Axle Weight
The total weight applied to each axle (GAW) must nev-
er exceed the Gross Axle Weight Rating (GAWR). The
front and rear GAWs can be adjusted by relocating
passengers and luggage inside the vehicle. The front
and rear GAWR are also shown on the certification
plate.
To check both GVWR and GAWR and to confirm that
the total weight and weight distribution are within safe
driving limits, you should have your vehicle and trailer
weighed at a commercial weighing station.
HS8007BA
US8030AA
Page 330 of 477
8-29
Driving tips
– CONTINUED –
Be sure that all cargo is firmly secured to prevent a
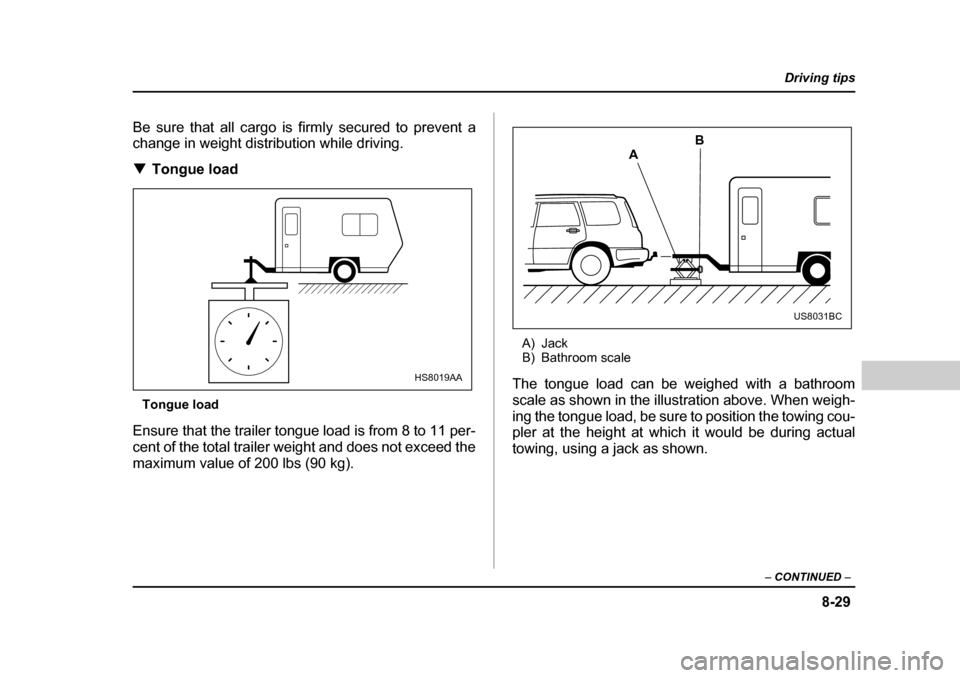
change in weight distribution while driving. �TTongue load
Tongue load
Ensure that the trailer tongue load is from 8 to 11 per-
cent of the total trailer weight and does not exceed the
maximum value of 200 lbs (90 kg). A) Jack
B) Bathroom scale
The tongue load can be weighed with a bathroom
scale as shown in the illustration above. When weigh-
ing the tongue load, be sure to position the towing cou-
pler at the height at which it would be during actual
towing, using a jack as shown.
HS8019AA
A B
US8031BC