airbag off SUBARU FORESTER 2011 SH / 3.G User Guide
[x] Cancel search | Manufacturer: SUBARU, Model Year: 2011, Model line: FORESTER, Model: SUBARU FORESTER 2011 SH / 3.GPages: 446, PDF Size: 15.93 MB
Page 67 of 446

1-42Seat, seatbelt and SRS airbags
lift the front passenger ’s seat cushion
using his/her feet. . Do not place any article under the front
passenger ’s seat, or squeeze any article
from behind and under the seat. This may
lift the seat cushion. . Do not squeeze any article between
the front passenger ’s seat and side trim/
pillar, door or center console box. This
may lift the seat cushion. ! If the passenger ’s frontal airbag OFF
indicator illuminates and the ON
indicator turns off even when the
front passenger ’s seat is occupied
by an adult
This can be caused by the adult incor-
rectly sitting in the front passenger ’s seat.
Turn the ignition switch to the “LOCK ”
position. Ask the front passenger to set
the seatback to the upright position, sit up
straight in the center of the seat cushion,
correctly fasten the seatbelt, position his/
her legs out forward, and adjust the seat to
the rearmost position. Turn the ignition
switch to the “ON ”position. If the OFF
indicator remains illuminated while the ON
indicator remains off, take the followingactions. . Turn the ignition switch to the “LOCK ”
position.. Ensure that there are no articles, books, shoes, or other objects trapped
under the seat, at the rear of the seat, or
on the side of the seat. .
Ensure that the backward-forward po-
sition and seatback of front passenger ’s
seat are locked into place securely by
moving the seat back and forth. . Next, turn the ignition switch to the
“ ON ”position and wait 6 seconds to allow
the system to complete self-checking.
Following the system check, both indica-
tors turn off for 2 seconds. Now, the ON
indicator should illuminate while the OFF
indicator remains off.
If the OFF indicator still remains illumi-
nated while the ON indicator remains off,
ask the occupant to move to the rear seat
and immediately contact your SUBARU
dealer for an inspection. ! Effect vehicle modifications made
for persons with disabilities may
have on SUBARU advanced frontal
airbag system operation (U.S. only)
Changing or moving any parts of the front
seats, rear seat, seatbelts, front bumper,
front side frame, radiator panel, instrument
panel, combination meter, steering wheel,
steering column, tire, suspension or floor
panel can affect the operation of the
SUBARU advanced airbag system. If
you have any questions, you may contact the following SUBARU distributors.
Subaru of America, Inc.
Customer Dealer Services Department
P.O. Box 6000
Cherry Hill, NJ 08034-6000
1-800-SUBARU3 (1-800-782-2783)
Servco Subaru Inc., dba Subaru Hawaii
2850 Pukoloa Street, Suite 202, Honolulu,
HI 96819 808-839-2273
’s Corporation dba Prestige Automo-
bile
491, East Marine Drive, Route 1 Dededo, Guam 671-633-2698
Trebol Motors
P.O. Box 11204, San Juan, Puerto Rico 00910 787-793-2828
There are currently no SUBARU distribu-
tors in any other U.S. territories. If you are
in such an area, please contact the
SUBARU distributor or dealer from which
Page 71 of 446
1-46Seat, seatbelt and SRS airbags
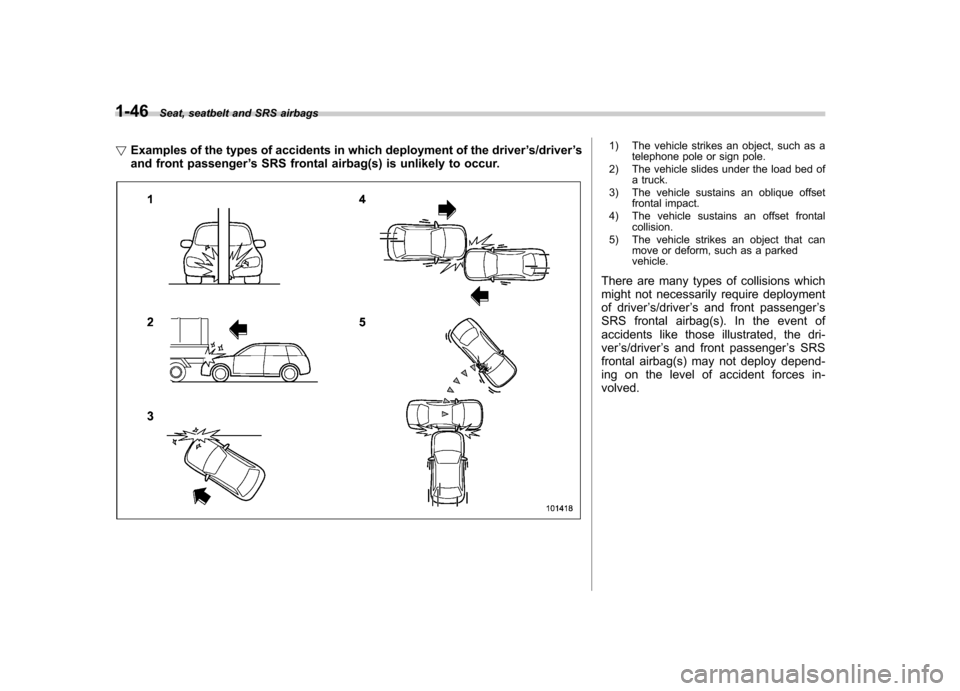
! Examples of the types of accidents in which deployment of the driver ’s/driver ’s
and front passenger ’s SRS frontal airbag(s) is unlikely to occur.
1) The vehicle strikes an object, such as a
telephone pole or sign pole.
2) The vehicle slides under the load bed of a truck.
3) The vehicle sustains an oblique offset frontal impact.
4) The vehicle sustains an offset frontal collision.
5) The vehicle strikes an object that can move or deform, such as a parked vehicle.
There are many types of collisions which
might not necessarily require deployment
of driver ’s/driver ’s and front passenger ’s
SRS frontal airbag(s). In the event of
accidents like those illustrated, the dri-ver ’s/driver ’s and front passenger ’s SRS
frontal airbag(s) may not deploy depend-
ing on the level of accident forces in-volved.
Page 82 of 446
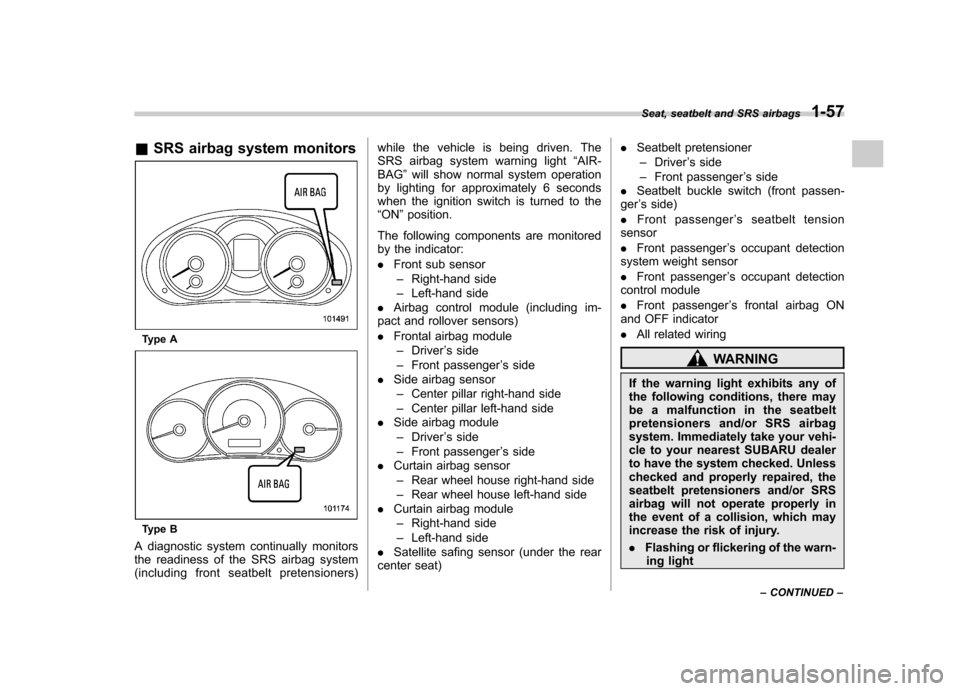
&SRS airbag system monitors
Type A
Type B
A diagnostic system continually monitors
the readiness of the SRS airbag system
(including front seatbelt pretensioners) while the vehicle is being driven. The
SRS airbag system warning light
“AIR-
BAG ”will show normal system operation
by lighting for approximately 6 seconds
when the ignition switch is turned to the“ ON ”position.
The following components are monitored
by the indicator: . Front sub sensor
– Right-hand side
– Left-hand side
. Airbag control module (including im-
pact and rollover sensors). Frontal airbag module
– Driver ’s side
– Front passenger ’s side
. Side airbag sensor
– Center pillar right-hand side
– Center pillar left-hand side
. Side airbag module
– Driver ’s side
– Front passenger ’s side
. Curtain airbag sensor
– Rear wheel house right-hand side
– Rear wheel house left-hand side
. Curtain airbag module
– Right-hand side
– Left-hand side
. Satellite safing sensor (under the rear
center seat) .
Seatbelt pretensioner
– Driver ’s side
– Front passenger ’s side
. Seatbelt buckle switch (front passen-
ger ’s side)
. Front passenger ’s seatbelt tension
sensor. Front passenger ’s occupant detection
system weight sensor. Front passenger ’s occupant detection
control module. Front passenger ’s frontal airbag ON
and OFF indicator. All related wiring
WARNING
If the warning light exhibits any of
the following conditions, there may
be a malfunction in the seatbelt
pretensioners and/or SRS airbag
system. Immediately take your vehi-
cle to your nearest SUBARU dealer
to have the system checked. Unless
checked and properly repaired, the
seatbelt pretensioners and/or SRS
airbag will not operate properly in
the event of a collision, which may
increase the risk of injury. . Flashing or flickering of the warn-
ing light
Seat, seatbelt and SRS airbags
1-57
– CONTINUED –
Page 112 of 446

Ignition switch..................................................... 3-3
LOCK .................................................................. 3-3
Acc..................................................................... 3-4
ON...................................................................... 3-4
START ................................................................ 3-4
Key reminder chime ............................................ 3-5
Ignition switch light ............................................. 3-5
Hazard warning flasher ....................................... 3-5
Meters and gauges. ............................................. 3-6
Combination meter illumination ........................... 3-6
Canceling the function for meter/gauge needle movement upon turning on the ignition switch ............................................................... 3-6
Meter needles/gauge illumination setting (models with type A combination meter) ......................... 3-7
Speedometer ....................................................... 3-8
Odometer/Trip meter ............................................ 3-8
Tachometer ........................................................ 3-10
Fuel gauge ......................................................... 3-10
Temperature gauge (models with type A combination meter) .......................................... 3-11
ECO gauge (models with type A combination meter) .............................................................. 3-12
Warning and indicator lights ............................. 3-12
Seatbelt warning light and chime ........................ 3-13
SRS airbag system warning light ........................ 3-15
Front passenger ’s frontal airbag ON and OFF
indicators ......................................................... 3-15
CHECK ENGINE warning light/Malfunction indicator lamp .................................................. 3-16 Coolant temperature low indicator light (if
equipped)/Coolant temperature high warning
light (if equipped). ............................................ 3-16
Charge warning light .......................................... 3-17
Oil pressure warning light .................................. 3-17
AT OIL TEMP warning light (AT models) .............. 3-18
Low tire pressure warning light (U.S.-spec. models) ........................................................... 3-18
ABS warning light .............................................. 3-19
Brake system warning light ................................ 3-20
Low fuel warning light ....................................... 3-21
Hill start assist warning light (MT models) ..... ..... 3-21
Door open warning light .................................... 3-21
All-Wheel Drive warning light (AT models) ..... ..... 3-21
Automatic headlight beam leveler warning light (models with HID headlights).. .......................... 3-22
Vehicle Dynamics Control warning light/Vehicle Dynamics Control operation indicator light .. ..... 3-22
Vehicle Dynamics Control OFF indicator light ..... 3-23
Security indicator light ....................................... 3-23
SPORT mode indicator light (AT models) ............ 3-24
Select lever and gear position indicator (AT models) ........................................................... 3-24
Turn signal indicator lights ................................. 3-25
High beam indicator light ................................... 3-25
Cruise control indicator light .............................. 3-25
Cruise control set indicator light ........................ 3-25
Front fog light indicator light (if equipped) ..... ..... 3-25
Headlight indicator light ..................................... 3-25
Clock .................................................................. 3-25Instruments and controls
3
Page 123 of 446

3-12Instruments and controls
&ECO gauge (models with type
A combination meter)
The unit displayed varies depending on
the model.
The ECO gauge shows the difference
between the average rate of fuel con-
sumption since the trip meter was last
reset and the current rate of fuel con-sumption.
The ECO gauge indicates the current fuel
efficiency as shown in the following chart.
Displayed unit Needle pointing
“ + ” side “-” side
MPG Better Poorer
l/100km Poorer BetterNOTE .
The ECO gauge shows only an
approximate indication of fuel effi-
ciency.. After resetting the trip meter, the
average rate of fuel consumption is not
shown until driving 0.6 mile (1 km).
Until that time, the ECO gauge does notoperate. Warning and indicator lights
Several of the warning and indicator lights
illuminate momentarily and then turn off
when the ignition switch is initially turned
to the
“ON ”position. This permits check-
ing the operation of the bulbs.
Apply the parking brake and turn the
ignition switch to the “ON ”position. For
the system check, the following lights
illuminate and turn off after several sec-
onds or after the engine has started.
: Seatbelt warning light (The seatbelt warning light turns off
only when the driver fastens the seatbelt.)
: Front passenger ’s seatbelt warning
light
(The seatbelt warning light turns off
only when the front seat passenger
fastens the seatbelt.)
: SRS airbag system warning light
ON /
: Front passenger ’s frontal airbag
ON indicator light
/: Front passenger ’s frontal airbag
OFF indicator light
: CHECK ENGINE warning light/Mal- function indicator lamp
Page 126 of 446
tion. &SRS airbag system
warning light
WARNING
If the warning light exhibits any of
the following conditions, there may
be a malfunction in the seatbelt
pretensioners and/or SRS airbag
system. Immediately take your vehi-
cle to your nearest SUBARU dealer
to have the system checked. Unless
checked and properly repaired, the
seatbelt pretensioners and/or SRS
airbag will not operate properly in
the event of a collision, which may
increase the risk of injury. . Flashing or flickering of the warn-
ing light
. No illumination of the warning
light when the ignition switch is
first turned to the “ON ”position
. Continuous illumination of the
warning light
. Illumination of the warning light
while driving &
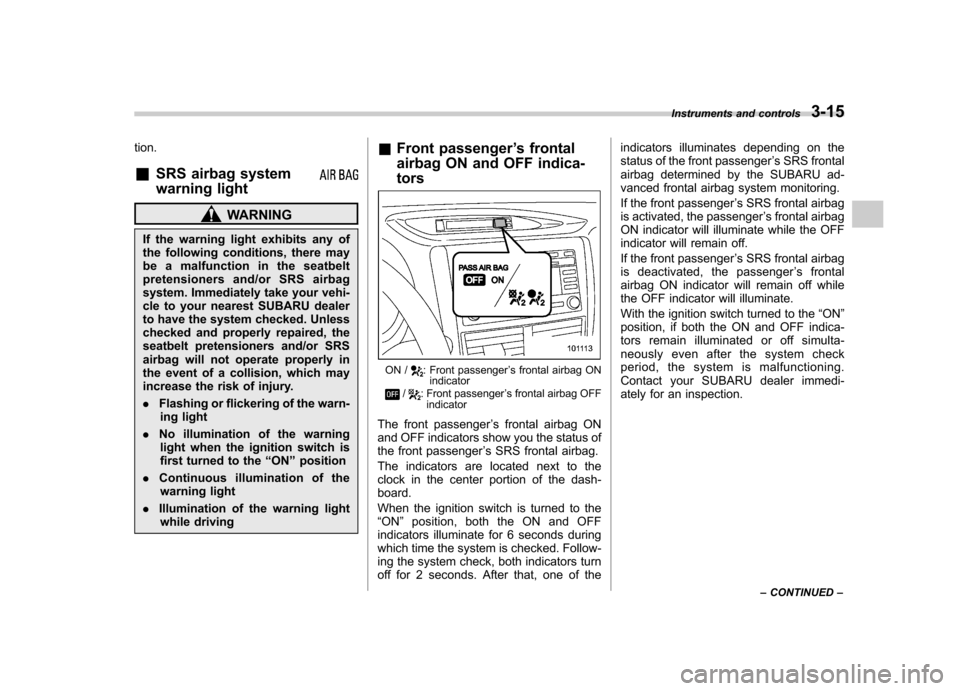
Front passenger ’s frontal
airbag ON and OFF indica- tors
ON /: Front passenger ’s frontal airbag ON
indicator
/: Front passenger ’s frontal airbag OFF
indicator
The front passenger ’s frontal airbag ON
and OFF indicators show you the status of
the front passenger ’s SRS frontal airbag.
The indicators are located next to the
clock in the center portion of the dash-board.
When the ignition switch is turned to the “ ON ”position, both the ON and OFF
indicators illuminate for 6 seconds during
which time the system is checked. Follow-
ing the system check, both indicators turn
off for 2 seconds. After that, one of the indicators illuminates depending on the
status of the front passenger
’s SRS frontal
airbag determined by the SUBARU ad-
vanced frontal airbag system monitoring.
If the front passenger ’s SRS frontal airbag
is activated, the passenger ’s frontal airbag
ON indicator will illuminate while the OFF
indicator will remain off.
If the front passenger ’s SRS frontal airbag
is deactivated, the passenger ’s frontal
airbag ON indicator will remain off while
the OFF indicator will illuminate.
With the ignition switch turned to the “ON ”
position, if both the ON and OFF indica-
tors remain illuminated or off simulta-
neously even after the system check
period, the system is malfunctioning.
Contact your SUBARU dealer immedi-
ately for an inspection. Instruments and controls
3-15
– CONTINUED –
Page 336 of 446
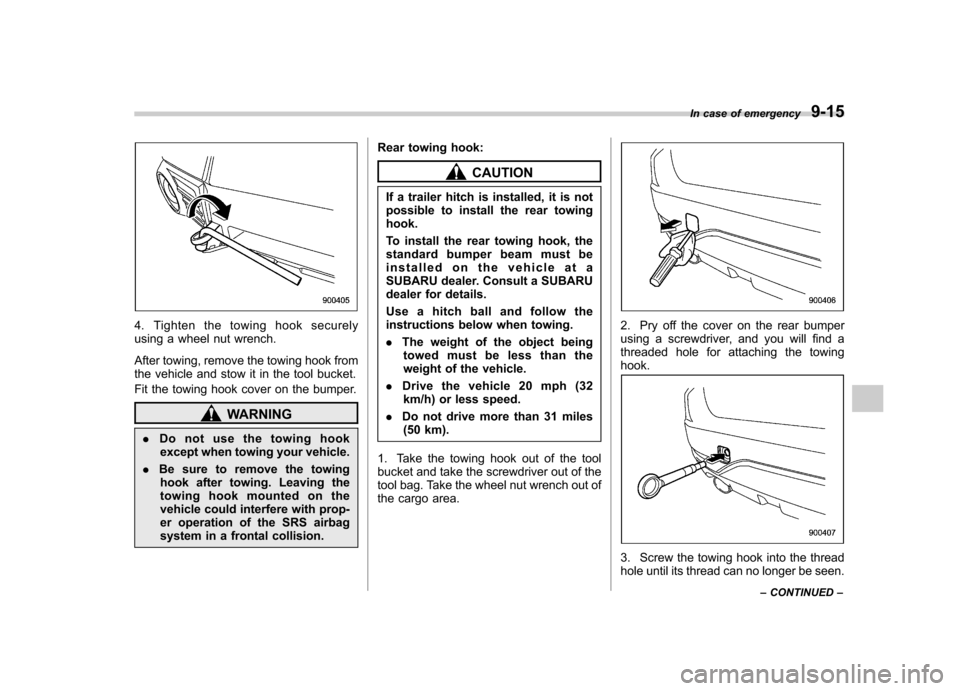
4. Tighten the towing hook securely
using a wheel nut wrench.
After towing, remove the towing hook from
the vehicle and stow it in the tool bucket.
Fit the towing hook cover on the bumper.
WARNING
. Do not use the towing hook
except when towing your vehicle.
. Be sure to remove the towing
hook after towing. Leaving the
towing hook mounted on the
vehicle could interfere with prop-
er operation of the SRS airbag
system in a frontal collision. Rear towing hook:
CAUTION
If a trailer hitch is installed, it is not
possible to install the rear towinghook.
To install the rear towing hook, the
standard bumper beam must be
installed on the vehicle at a
SUBARU dealer. Consult a SUBARU
dealer for details.
Use a hitch ball and follow the
instructions below when towing. . The weight of the object being
towed must be less than the
weight of the vehicle.
. Drive the vehicle 20 mph (32
km/h) or less speed.
. Do not drive more than 31 miles
(50 km).
1. Take the towing hook out of the tool
bucket and take the screwdriver out of the
tool bag. Take the wheel nut wrench out of
the cargo area.
2. Pry off the cover on the rear bumper
using a screwdriver, and you will find a
threaded hole for attaching the towinghook.
3. Screw the towing hook into the thread
hole until its thread can no longer be seen. In case of emergency
9-15
– CONTINUED –
Page 351 of 446
11-4Maintenance and service
guard against getting oil or fluids
in your eyes. If something does
get in your eyes, thoroughly
wash them out with clean water.
. Do not tamper with the wiring of
the SRS airbag system or seat-
belt pretensioner system, or at-
tempt to take its connectors
apart, as that may activate the
system or it can render it inop-
erative. NEVER use a circuit
tester for this wiring. If your
SRS airbag or seatbelt preten-
sioner needs service, consult
your nearest SUBARU dealer. &
Before checking or servicing
in the engine compartment
WARNING
. Always stop the engine and set
the parking brake firmly to pre-
vent the vehicle from moving.
. Always let the engine cool down.
Engine parts become very hot
when the engine is running and
remain hot for some time after
the engine is stopped.
. Do not spill engine oil, engine
coolant, brake fluid or any other
fluid on hot engine components.
This may cause a fire.
. Always remove the key from the
ignition switch. When the ignition
switch is in the “ON ”position,
thecoolingfanmayoperate
suddenly even when the engine
is stopped.
. Before performing any servicing
on a vehicle equipped with a
remote engine start system (a
dealer option) temporarily place
that system in the service mode
to prevent it from unexpectedly
starting the engine. &
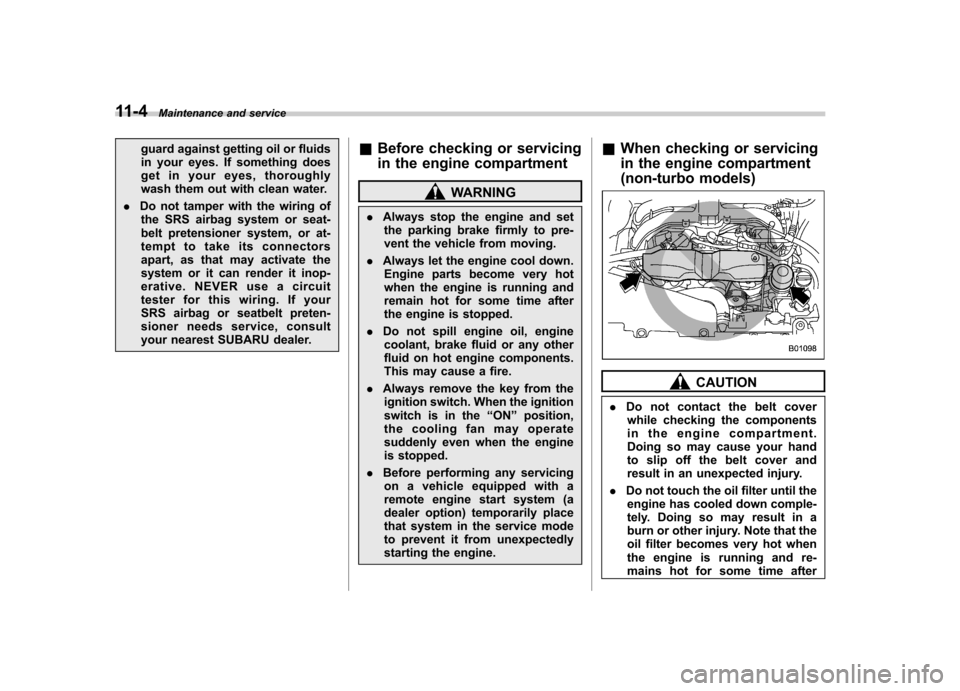
When checking or servicing
in the engine compartment
(non-turbo models)
CAUTION
. Do not contact the belt cover
while checking the components
in the engine compartment.
Doing so may cause your hand
to slip off the belt cover and
result in an unexpected injury.
. Do not touch the oil filter until the
engine has cooled down comple-
tely. Doing so may result in a
burn or other injury. Note that the
oil filter becomes very hot when
the engine is running and re-
mains hot for some time after