CD player SUBARU IMPREZA 2004 2.G Owners Manual
[x] Cancel search | Manufacturer: SUBARU, Model Year: 2004, Model line: IMPREZA, Model: SUBARU IMPREZA 2004 2.GPages: 491, PDF Size: 5.93 MB
Page 214 of 491

5-1
5
Audio
A nte nna system .. ... ... ... .. ... ... ... ... .. ... ... ... ... .. ... 5-2
P rin ted anten na ........................ .................... ..... 5-2
FM rece ptio n ....... ..................... .................... ..... 5-2
I n stallat ion of access ories ..... ... .. ... ... ... ... .. ... 5-3
A udio set ... ... ... .. ... ... ... ... .. ... ... ... ... .. ... ... ... ... .. ... 5-3
Ty pe A a udio set .. .................... .................... ..... 5-3
Ty pe B a udio set .. .................... .................... ..... 5-4
In -d ash 6 CD a uto cha nger 1 (O ptio nal a udio
u n it – if eq uipp ed) ................. .................... ..... 5-4
T ype A au dio set (if eq uip ped) .... ... ... ... ... .. ... 5-5
Radio o p erati on ....................... .................... ..... 5-5
Co mpact disc player operat ion .................. ..... 5-10
CD c han ger co ntrol (If opti o nal in -d ash CD
cha nger is c onn ecte d) .......... .................... ..... 5-1 2
Type B audio set (if equipped) ..................... 5-16 Radio operation ................................................ 5-16
Cassette player operation ................................ 5-22
Built in CD changer operation ......................... 5-26
In-dash 6 CD auto changer 1 (if equipped) . 5-31 Loading and unloading compact discs .......... 5-31
Precautions to observe when handling a compact disc (CD) .................................. 5-34
Page 216 of 491
5-3
Audio
– CONTINUED –
Installation of accessories
Always consult your SUBARU dealer before installing
a citizen band radio or other transmitting device in
your vehicle. Such devices may cause the electronic
control system to malfunction if they are incorrectly in-
stalled or if they are not suited for the vehicle.Audio set
Your SUBARU may be equipped with one of the fol-
lowing audio sets. See the pages indicated in this sec-
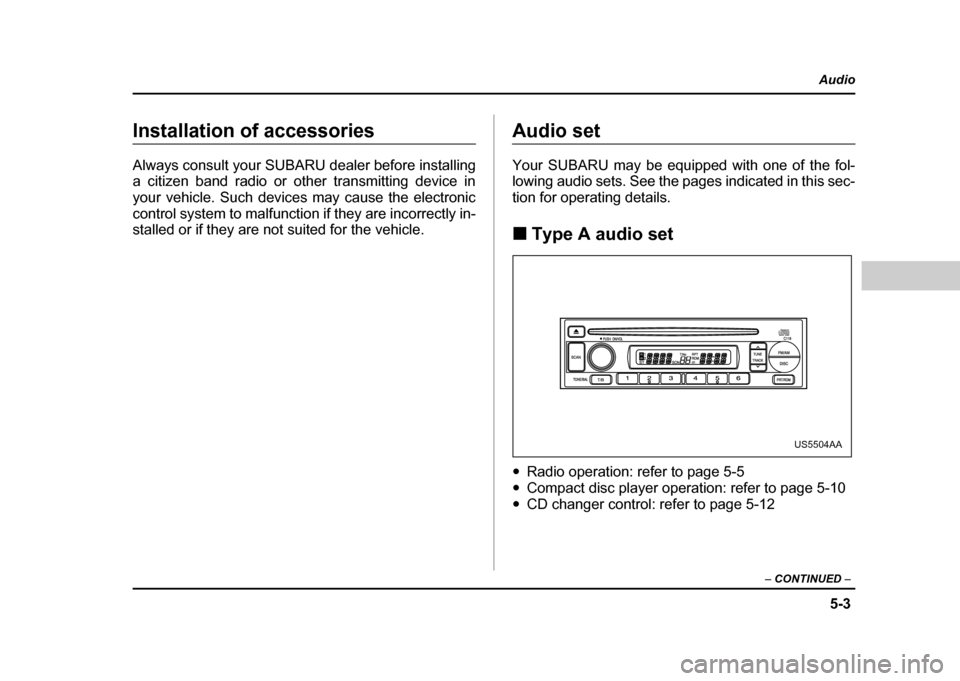
tion for operating details. !Type A audio set
" Radio operation: refer to page 5-5
" Compact disc player operation: refer to page 5-10
" CD changer control: refer to page 5-12
US5504AA
Page 217 of 491
5-4
Audio
!
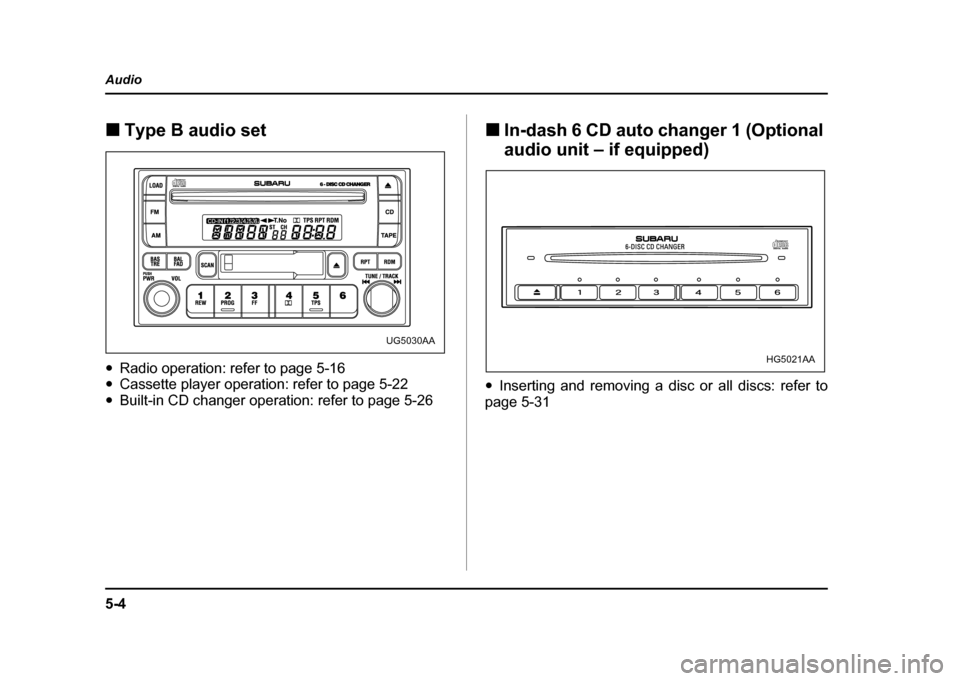
Type B audio set
" Radio operation: refer to page 5-16
" Cassette player operation: refer to page 5-22
" Built-in CD changer operation: refer to page 5-26 !
In-dash 6 CD auto changer 1 (Optional
audio unit – if equipped)
" Inserting and removing a disc or all discs: refer to
page 5-31
UG5030AA
HG5021AA
Page 223 of 491
5-10
Audio !
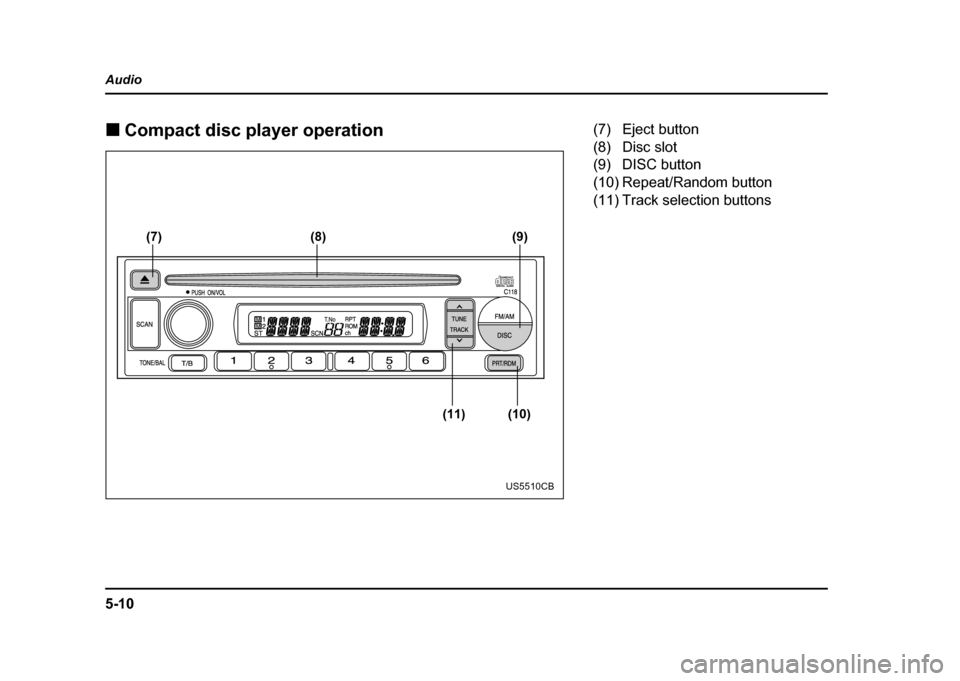
Compact disc player operation
(7) (8)
(11) (10)(9)
US5510CB
(7) Eject button
(8) Disc slot
(9) DISC button
(10) Repeat/Random button
(11) Track selection buttons
Page 224 of 491
5-11
Audio
– CONTINUED –
!To play back a compact disc
" When CD is not in the player
Hold a disc with a finger in the center hole while grip-
ping the edge of the disc, then insert it in to the slot
(with the label side up) and the player will automatical-
ly pull the disc into position.
A single CD (8 cm/3 inch CD) may also be used with-
out any adapter.
NOTE " Make sure to always insert a disc with the label
side up. If a disc is inserted with the label side
down, it might be ejected or the player might shut off." After the last song finishes, the player will auto-
matically return to track 1 (the first song on the
disc). " When CD is in the player
Press the “DISC” button (9). The display will show
“CD” and the player will start playback.
NOTE
After the last song finishes, playback will automat-
ically return to track 1 (the first song on the disc). !
To select a song from its beginning
" Forward direction
Briefly press the “ ” button (11) to skip to the begin-
ning of the next track. Each time the button is pressed,
the indicated track number will increase. " Backward direction
Briefly press the “ ” button (11) to skip to the begin-
ning of the current track. Each time the button is
pressed, the indicated truck number will decrease. ! Fast forwarding and fast reverse
" Fast forwarding
Press the “ ” button (11) continuously for more than
1 second to fast forward the disc.
Release the button to stop fast forwarding. " Fast reverse
Press the “ ” button (11) continuously for more than
1 second to fast reverse the disc.
Release the button to stop fast reverse. ! Repeat playback
Press the “RPT/RDM” button (10) and release it in less
than 2 seconds while a song is playing to play the song
repeatedly. The “RPT” indicator will come on and the
song will be played continuously. To cancel the repeat
Page 225 of 491
5-12
Audio
mode, press the button again. Then the “RPT” indica-
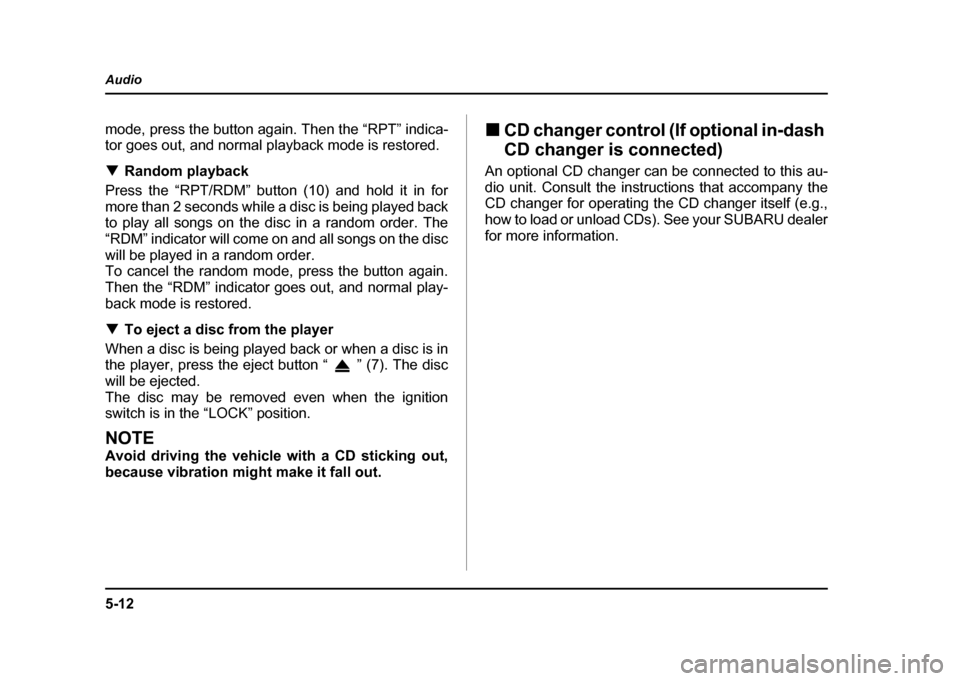
tor goes out, and normal playback mode is restored. !
Random playback
Press the “RPT/RDM” button (10) and hold it in for
more than 2 seconds while a disc is being played back
to play all songs on the disc in a random order. The
“RDM” indicator will come on and all songs on the disc
will be played in a random order.
To cancel the random mode, press the button again.
Then the “RDM” indicator goes out, and normal play-
back mode is restored. ! To eject a disc from the player
When a disc is being played back or when a disc is in
the player, press the eject button “ ” (7). The disc
will be ejected.
The disc may be removed even when the ignition
switch is in the “LOCK” position.
NOTE
Avoid driving the vehicle with a CD sticking out,
because vibration might make it fall out. !
CD changer control (If optional in-dash
CD changer is connected)
An optional CD changer can be connected to this au-
dio unit. Consult the instructions that accompany the
CD changer for operating the CD changer itself (e.g.,
how to load or unload CDs). See your SUBARU dealerfor more information.
Page 227 of 491
5-14
Audio
!
To start playback
When the “CD” button (13) is pressed, the CD changer
will start playback. The display shows the current disc
number, track number and the elapsed time during
playback.
NOTE " If a disc is in the player, the “DISC” button is
used to change from CD player operation to DISC
changer operation. Each time the “DISC” button is
pressed, the operating mode will change alter-
nately. " At the end of the disc, the player automatically
continues with the next disc. " After playback on the last disc finishes, play-
back will automatically return to the first disc. " If you have loaded fewer than 6 discs, any miss-
ing disc is automatically skipped. ! Selection of a desired disc
You can select a desired disc from among the discs
contained in the CD changer only by pressing the cor-
responding number on one of the disc select buttons.
If you are to listen to the 5th disc in the CD changer,
press the “5” button of the disc select buttons. All other
discs in the CD changer can also be selected in a sim-
ilar way.
NOTE " No disc change takes place if the button corre-
sponding to the storage tray in which no disc is
loaded is pressed." If the disc select button corresponding to the
disc now in playback is pressed again, the disc
will be replayed from its beginning. ! To select a song from its beginning
" Forward direction
Briefly press the “ ” button (12) to skip to the begin-
ning of the next track. Each time the button is pressed,
the indicated track number will increase. " Backward direction
Briefly press the “ ” button (12) to skip to the begin-
ning of the current track. Each time the button is
pressed, the indicated track number will decrease. ! Fast forwarding and fast reverse
" Fast forwarding
Press the “ ” button (12) continuously for more than
1 second to fast forward the disc.
Release the button to stop fast forwarding.
If you continue fast forwarding to the end of the disc,
the CD changer will automatically stop fast forwarding
and start playback beginning with the first track on the
Page 235 of 491
5-22
Audio !
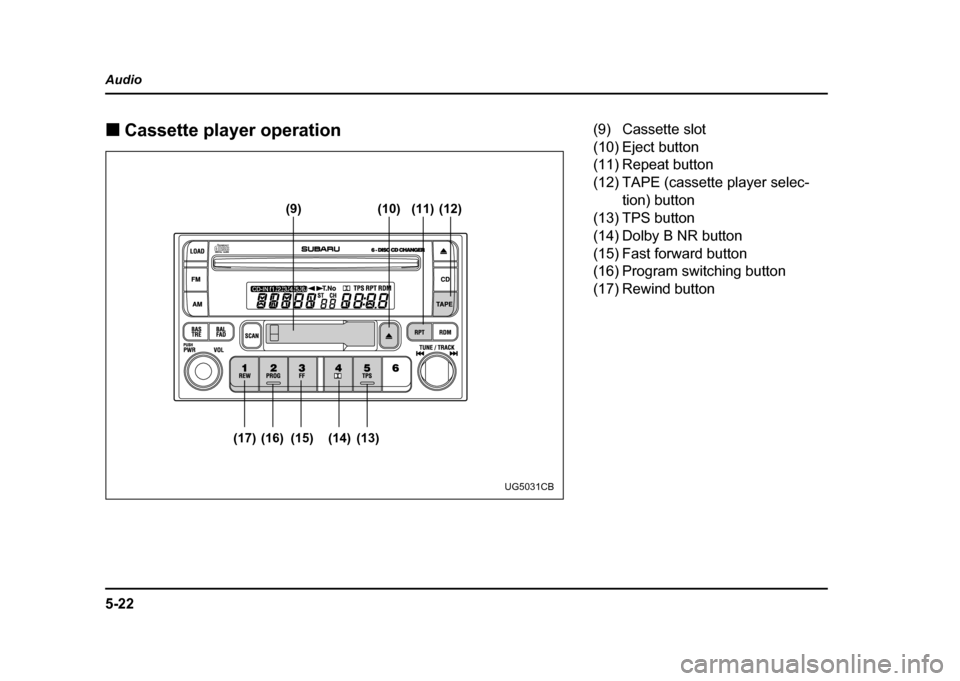
Cassette player operation
(9) (10)
(17) (16) (15) (14) (13) (11) (12)
UG5031CB
(9) Cassette slot
(10) Eject button
(11) Repeat button
(12) TAPE (cassette player selec-
tion) button
(13) TPS button
(14) Dolby B NR button
(15) Fast forward button
(16) Program switching button
(17) Rewind button
Page 236 of 491
5-23
Audio
– CONTINUED –
NOTE "Only use good quality cassettes (cassettes
longer than C-90 are not recommended). " Put cassettes back in their boxes immediately
after use to protect them from dust and dirt and to
prevent the tape from unwinding. " Never expose cassettes to heat, direct sunlight
or moisture. " Clean the tape head (once or twice a month) us-
ing a wet-type cleaning cassette .
! To play back a cassette tape
" When cassette tape is not in the player
When a cassette is partially inserted, it is automatically
drawn in and starts tape playback. " When cassette tape is in the player
When the “TAPE” button (12) is pressed, the display
will show “PLAY” and the player will start playback. ! Tape travel indicators
These indicate the direction the cassette tape is mov-
ing.
: indicates that the top side of the cassette is being
played back.
: indicates that the bottom side of the cassette is be-
ing played back. !
Program switching button (PROG)
When the program switching button “PROG” (16) is
pressed during playback, the tape travel indicators will
switch and the player will begin playing back the oppo-
site side of the tape. The same mechanism is auto-
matically activated when the end of the tape is
reached. This allows the opposite side of the tape to
play, providing continuous playback. ! Fast-forward button (FF)
To fast-forward the tape, press the “FF” button (15).
The display will show “FF”. To stop fast-forwarding,
press the “FF” or “TAPE” (12) button. ! Rewind button (REW)
To rewind the tape, press the “REW” button (17). The
display will indicate “REW”. To stop rewinding, press
the “REW” or “TAPE” (12) button. ! Eject button ( )
When “ ” button (10) is pressed, play back stops
and the cassette tape is ejected.
The ejection function also operates when the ignition
switch is in the “LOCK” position. Always make certain
that you remove the cassette tape.
Page 237 of 491
5-24
Audio
!
Tape program sensor button (TPS)
" Blank skip
When the “TPS” button (13) is pressed, the “TPS” in-
dicator will come on and the player will automatically
skip any blank portion of 15 second or more and play
the next program, even if it is on the other side. To
cancel blank skip mode, press the “TPS” button again. " Blank search
Press “TPS” button (13) during playback to return to
the beginning of the current selection or to skip to the
beginning of the next selection. To use this function,
press the “TPS” button to turn on the “TPS” indicator.
If the fast-forward button “FF” (15) is then pressed, the
player advances the tape to the beginning of the next
selection and starts playing it. If the rewind button
“REW” (17) is pressed instead, the player rewinds the
tape to the beginning of the current selection and
starts replaying it. The “TPS” function may not operate
properly under the following conditions: " When the recording level is low.
" When there are long pauses in the middle of a se-
lection." When the tape contains verbal material such as
conversations. " When the blanks between selections are shorter
than five seconds. "
When there are no blanks between selections (live
concerts, etc.). ! Repeat button (RPT)
Push the “RPT” button (11) to repeat the piece of mu-
sic being listened to. To use this function, push the
“RPT” button while the piece you want to hear again is
being played. “RPT” will be indicated on the display.
When the selection ends, the cassette player automat-
ically rewinds to the beginning of the piece and the se-
lection begins again. To cancel the repeat function,
push the “RPT” button again. Until the repeat function
is cancelled, the same piece of music will be repeated
indefinitely. The “RPT” function may not operate prop-
erly under the following conditions:" When the recording level is low.
" When there are long pauses in the middle of a se-
lection." When the tape contains verbal material such as
conversations." When the blanks between selections are shorter
than five seconds. " When there are no blanks between selections (live
concerts, etc). ! Dolby B NR button ( )
Press “ ” button (14) when playing tapes recorded
using the Dolby NR system*. The “ ” indicator will