SUBARU IMPREZA WRX 2004 2.G Owners Manual
Manufacturer: SUBARU, Model Year: 2004, Model line: IMPREZA WRX, Model: SUBARU IMPREZA WRX 2004 2.GPages: 491, PDF Size: 5.93 MB
Page 301 of 491

7-32
Starting and operating
speed reaches about 8 mph (12 km/h). "
The warning light comes on during driving, but
it goes out immediately and remains off. Electronic Brake Force Distribution
(EBD) system
The EBD system maximizes the effectiveness of the
brakes by allowing the rear brakes to supply a greater
proportion of the braking force. It functions by adjust-
ing the distribution of braking force to the rear wheels
in accordance with the vehicle’s loading condition and
speed.
The EBD system is an integral part of the ABS system
and uses some of the ABS system’s components to
perform its function of optimizing the distribution of
braking force. If any of the ABS components used by
the EBD function fails, the EBD system also stops
working.
When the EBD system is operating, you may hear a
chattering noise or feel a slight vibration in the brake
pedal. This is normal and does not indicate a malfunc-tion.
Page 302 of 491
7-33
Starting and operating
– CONTINUED –
!Steps to take if EBD system fails
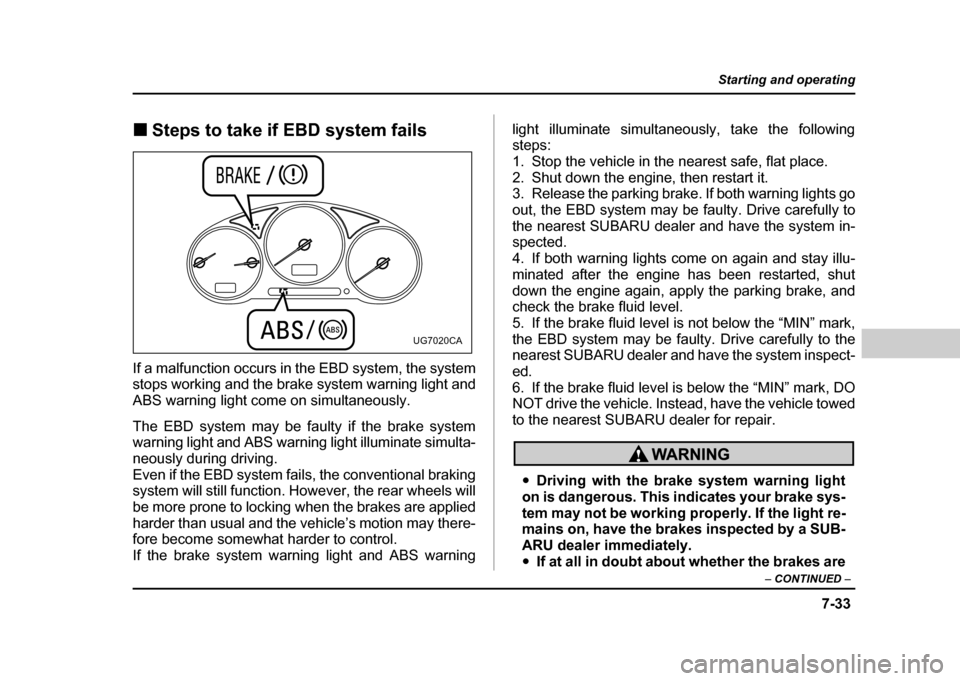
If a malfunction occurs in the EBD system, the system
stops working and the brake system warning light and
ABS warning light come on simultaneously.
The EBD system may be faulty if the brake system
warning light and ABS warning light illuminate simulta-
neously during driving.
Even if the EBD system fails, the conventional braking
system will still function. However, the rear wheels will
be more prone to locking when the brakes are applied
harder than usual and the vehicle’s motion may there-
fore become somewhat harder to control. If the brake system warning light and ABS warning light illuminate simultaneously, take the following steps:
1. Stop the vehicle in the nearest safe, flat place.
2. Shut down the engine, then restart it.
3. Release the parking brake. If both warning lights go
out, the EBD system may be faulty. Drive carefully to
the nearest SUBARU dealer and have the system in- spected.
4. If both warning lights come on again and stay illu-
minated after the engine has been restarted, shut
down the engine again, apply the parking brake, and
check the brake fluid level.
5. If the brake fluid level is not below the “MIN” mark,
the EBD system may be faulty. Drive carefully to the
nearest SUBARU dealer and have the system inspect- ed.
6. If the brake fluid level is below the “MIN” mark, DO
NOT drive the vehicle. Instead, have the vehicle towed
to the nearest SUBARU dealer for repair.
"
Driving with the brake system warning light
on is dangerous. This indicates your brake sys-
tem may not be working properly. If the light re-
mains on, have the brakes inspected by a SUB-
ARU dealer immediately." If at all in doubt about whether the brakes are
UG7020CA
Page 303 of 491
7-34
Starting and operating
operating properly, do not drive the vehicle.
Have your vehicle towed to the nearest SUBA-
RU dealer for repair.
Parking your vehicle !
Parking brake
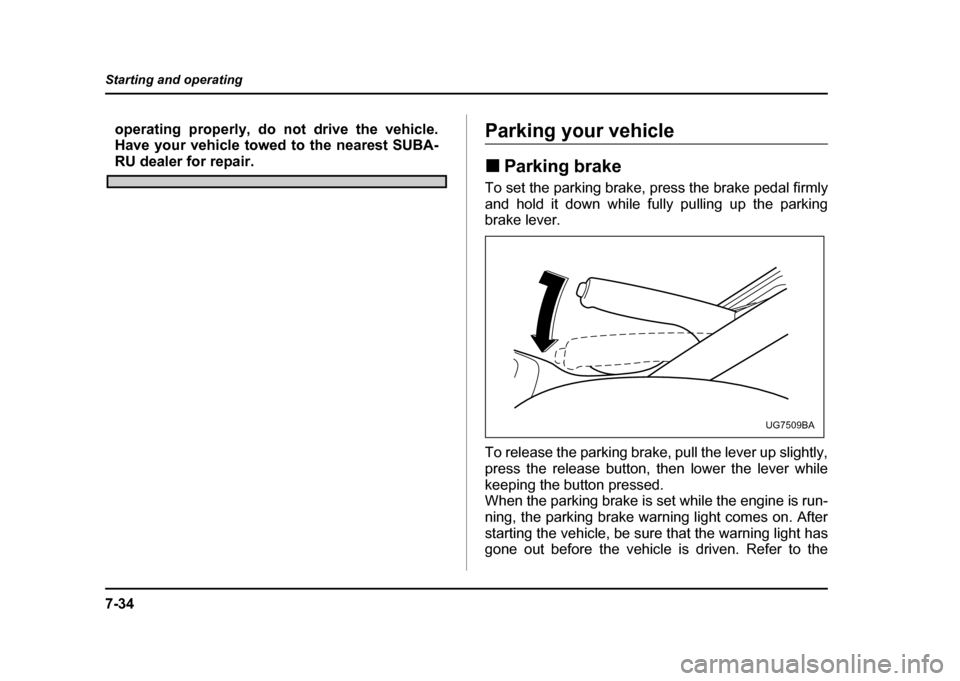
To set the parking brake, press the brake pedal firmly
and hold it down while fully pulling up the parking
brake lever.
To release the parking brake, pull the lever up slightly,
press the release button, then lower the lever while
keeping the button pressed.
When the parking brake is set while the engine is run-
ning, the parking brake warning light comes on. After
starting the vehicle, be sure that the warning light has
gone out before the vehicle is driven. Refer to the
UG7509BA
Page 304 of 491
7-35
Starting and operating
– CONTINUED –
“Warning and indicator lights” section (chapter 3).
Never drive while the parking brake is set be-
cause this will cause unnecessary wear on the
brake linings. Before starting to drive, always
make sure that the parking brake has been fully
released.
! Parking tips
When parking your vehicle, always set the parking
brake firmly and put the shift lever in the “1” (1st) for an
upgrade or “R” (Reverse) for a downgrade for manual
transmission vehicles, or in the “P” (Park) position for
automatic transmission vehicles. Always set the park-
ing brake firmly when parking your vehicle. Never rely
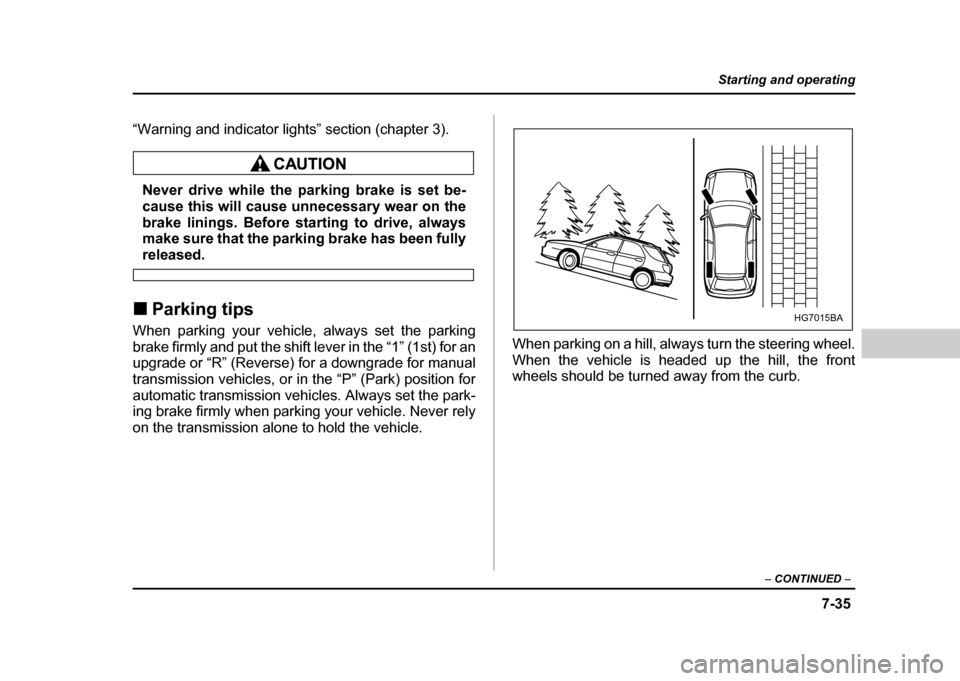
on the transmission alone to hold the vehicle. When parking on a hill, always turn the steering wheel.
When the vehicle is headed up the hill, the front
wheels should be turned away from the curb.
HG7015BA
Page 305 of 491
7-36
Starting and operating
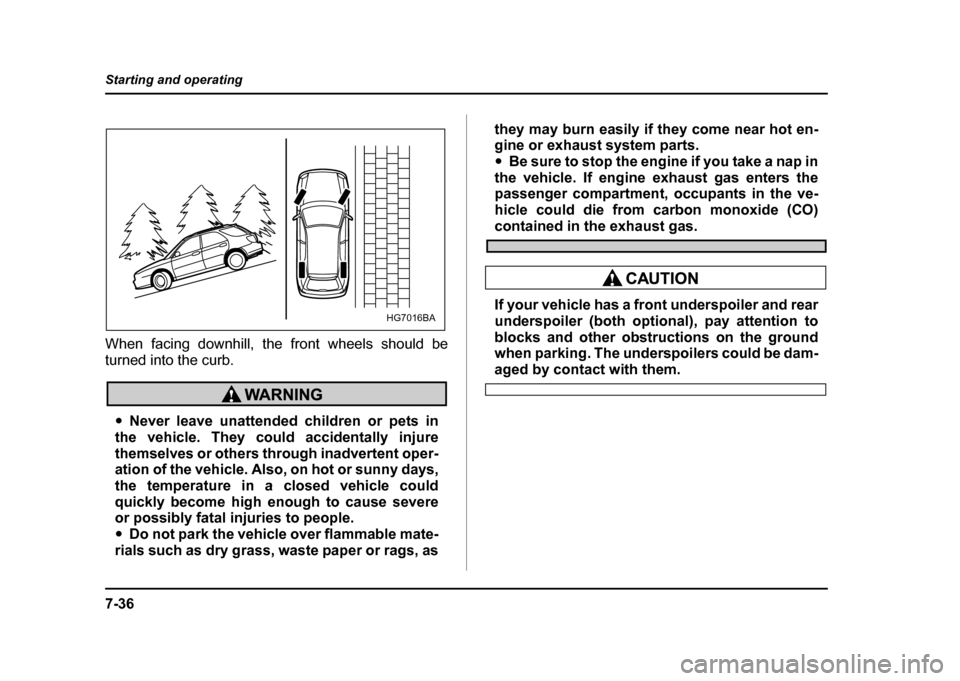
When facing downhill, the front wheels should be
turned into the curb.
"
Never leave unattended children or pets in
the vehicle. They could accidentally injure
themselves or others through inadvertent oper-
ation of the vehicle. Also, on hot or sunny days,
the temperature in a closed vehicle could
quickly become high enough to cause severe
or possibly fatal injuries to people. " Do not park the vehicle over flammable mate-
rials such as dry grass, waste paper or rags, as they may burn easily if they come near hot en-
gine or exhaust system parts. "
Be sure to stop the engine if you take a nap in
the vehicle. If engine exhaust gas enters the
passenger compartment, occupants in the ve-
hicle could die from carbon monoxide (CO)
contained in the exhaust gas.
If your vehicle has a front underspoiler and rear
underspoiler (both optional), pay attention to
blocks and other obstructions on the ground
when parking. The underspoilers could be dam-
aged by contact with them.
HG7016BA
Page 306 of 491
7-37
Starting and operating
– CONTINUED –
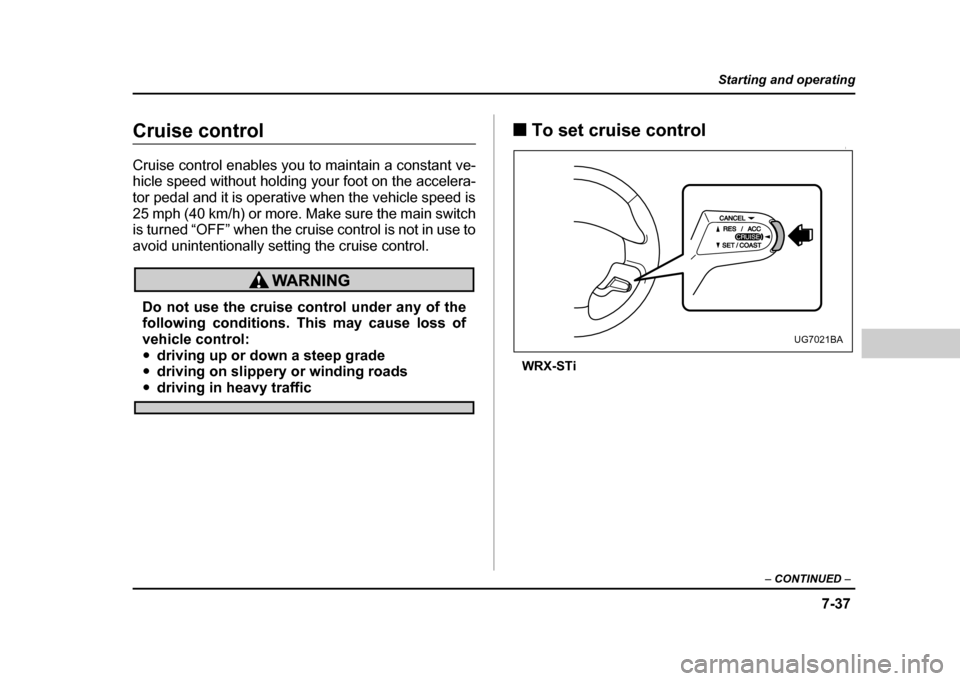
Cruise control
Cruise control enables you to maintain a constant ve-
hicle speed without holding your foot on the accelera-
tor pedal and it is operative when the vehicle speed is
25 mph (40 km/h) or more. Make sure the main switch
is turned “OFF” when the cruise control is not in use to
avoid unintentionally setting the cruise control.
Do not use the cruise control under any of the
following conditions. This may cause loss of
vehicle control:"driving up or down a steep grade
" driving on slippery or winding roads
"driving in heavy traffic !
To set cruise control
0
WRX-STi
UG7021BA
Page 307 of 491
7-38
Starting and operating
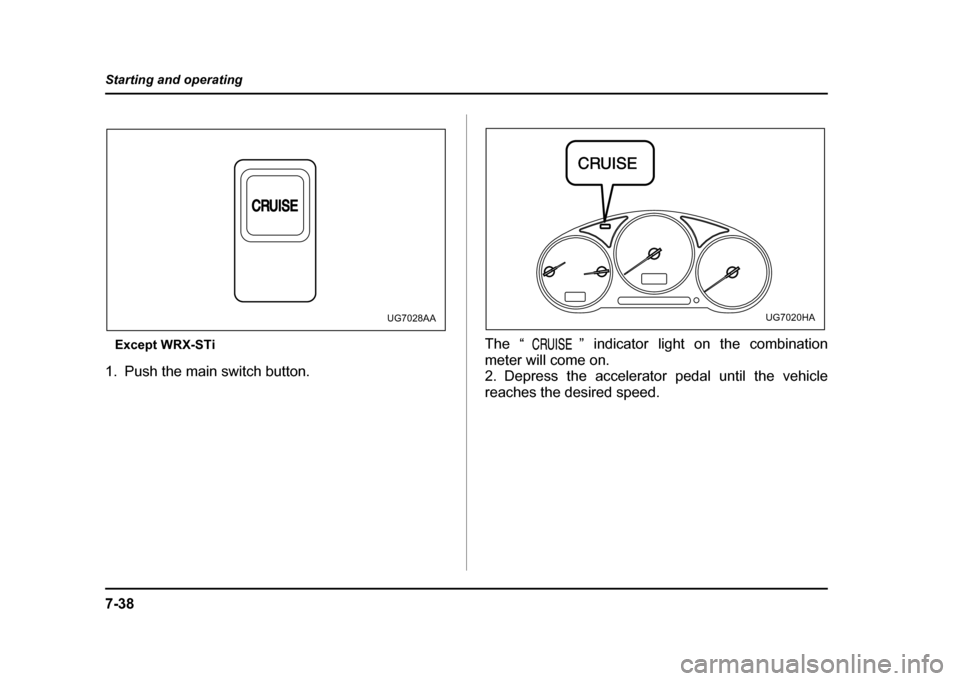
Except WRX-STi
1. Push the main switch button. The “ ” indicator light on the combination
meter will come on.
2. Depress the accelerator pedal until the vehicle
reaches the desired speed.
UG7028AAUG7020HA
Page 308 of 491
7-39
Starting and operating
– CONTINUED –
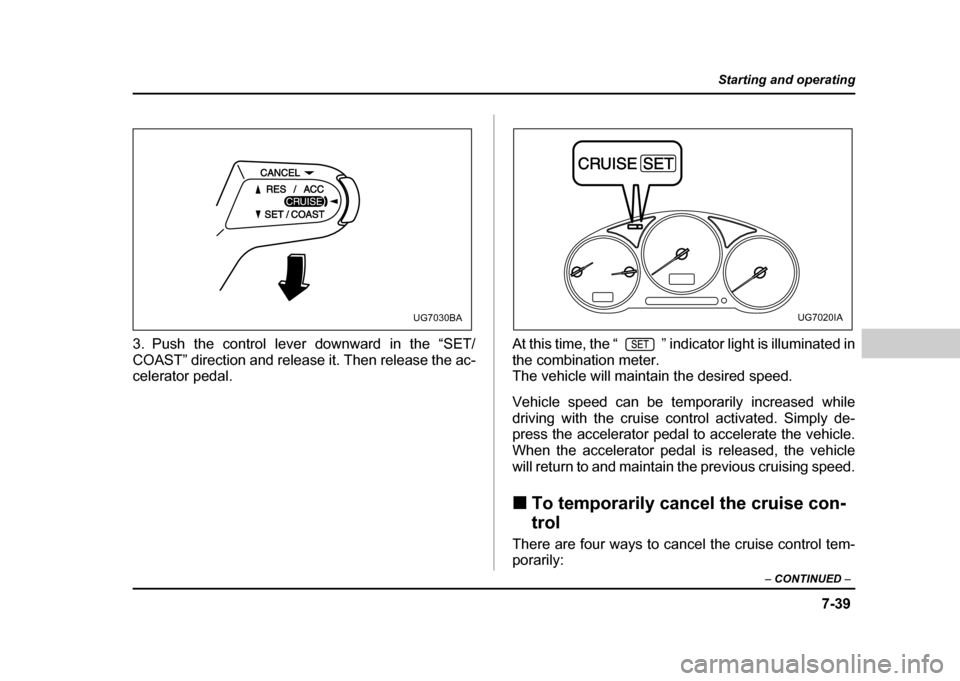
3. Push the control lever downward in the “SET/
COAST” direction and release it. Then release the ac-
celerator pedal. At this time, the “ ” indicator light is illuminated in
the combination meter.
The vehicle will maintain the desired speed.
Vehicle speed can be temporarily increased while
driving with the cruise control activated. Simply de-
press the accelerator pedal to accelerate the vehicle.
When the accelerator pedal is released, the vehicle
will return to and maintain the previous cruising speed. !
To temporarily cancel the cruise con- trol
There are four ways to cancel the cruise control tem-
porarily:
UG7030BAUG7020IA
Page 309 of 491
7-40
Starting and operating
"
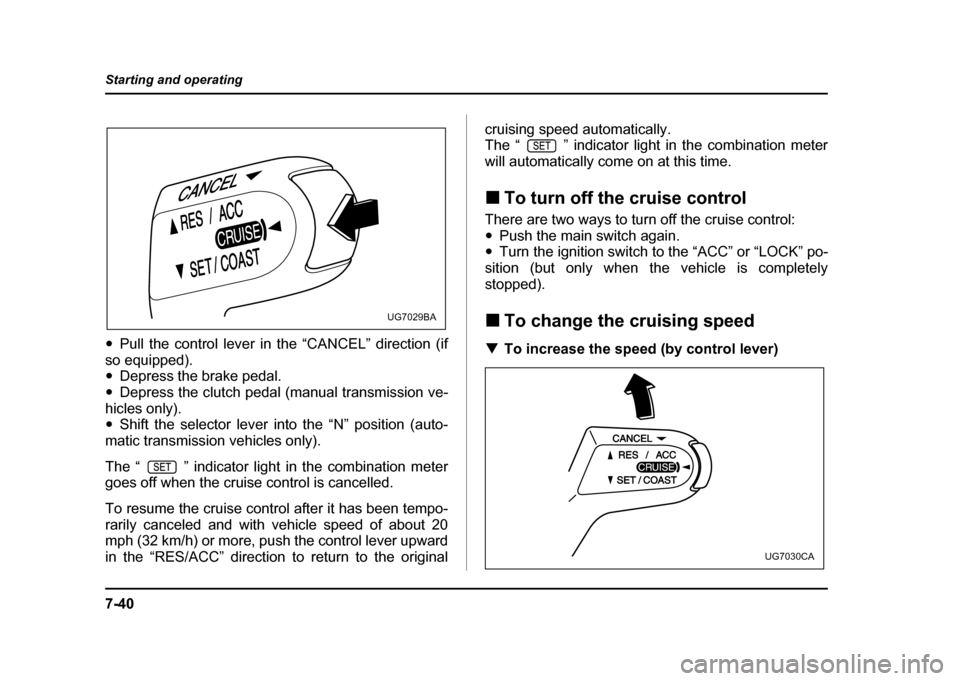
Pull the control lever in the “CANCEL” direction (if
so equipped). " Depress the brake pedal.
" Depress the clutch pedal (manual transmission ve-
hicles only)." Shift the selector lever into the “N” position (auto-
matic transmission vehicles only).
The “ ” indicator light in the combination meter
goes off when the cruise control is cancelled.
To resume the cruise control after it has been tempo-
rarily canceled and with vehicle speed of about 20
mph (32 km/h) or more, push the control lever upward
in the “RES/ACC” direction to return to the original cruising speed automatically.
The “ ” indicator light in the combination meter
will automatically come on at this time. !
To turn off the cruise control
There are two ways to turn off the cruise control: " Push the main switch again.
" Turn the ignition switch to the “ACC” or “LOCK” po-
sition (but only when the vehicle is completely
stopped). ! To change the cruising speed
! To increase the speed (by control lever)
UG7029BA
UG7030CA
Page 310 of 491
7-41
Starting and operating
– CONTINUED –
Push the control lever upward in the “RES/ACC” direc-
tion and hold it until the vehicle reaches the desired
speed. Then, release the control lever. The vehicle
speed at that moment will be memorized and treated
as the new set speed.
When the difference between the actual vehicle speed
and the set speed is less than 4 mph (6.8 km/h), the
set speed can be increased 1 mph (1.6 km/h) each
time by pressing the control lever upward in the “RES/
ACC” direction quickly within 0.5 second. !To increase the speed (by accelerator pedal)
1. Depress the accelerator pedal to accelerate the ve-
hicle to the desired speed.
2. Push the control lever downward in the “SET/
COAST” direction once. Now the desired speed is set
and the vehicle will keep running at that speed without
depressing the accelerator pedal.
NOTE
If the difference between the actual vehicle speed
when the control lever is pushed downward and
the speed last time you set it is less than 4 mph
(6.8 km/h), the vehicle speed will be lowered by 1
mph (1.6 km/h). This occurs because the cruise
control system unit regards this lever operation as
that intended to decrease the vehicle speed. !
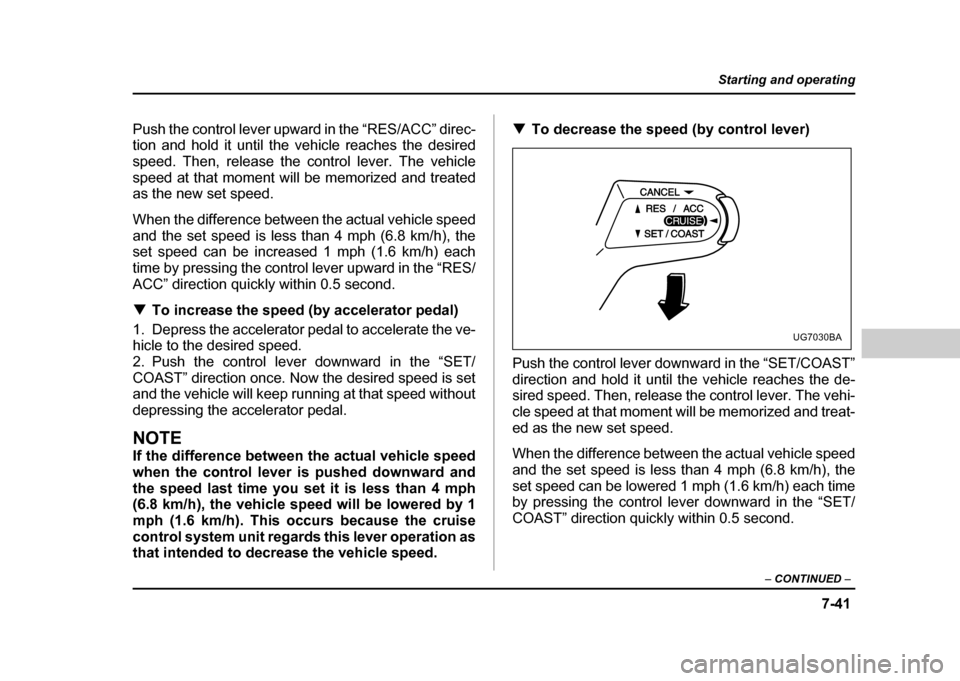
To decrease the speed (by control lever)
Push the control lever downward in the “SET/COAST”
direction and hold it until the vehicle reaches the de-
sired speed. Then, release the control lever. The vehi-
cle speed at that moment will be memorized and treat-
ed as the new set speed.
When the difference between the actual vehicle speed
and the set speed is less than 4 mph (6.8 km/h), the
set speed can be lowered 1 mph (1.6 km/h) each time
by pressing the control lever downward in the “SET/
COAST” direction quickly within 0.5 second.
UG7030BA