SUBARU IMPREZA WRX 2004 2.G Owners Manual
Manufacturer: SUBARU, Model Year: 2004, Model line: IMPREZA WRX, Model: SUBARU IMPREZA WRX 2004 2.GPages: 491, PDF Size: 5.93 MB
Page 281 of 491
7-12
Starting and operating
Manual transmission – 6 speed (WRX-
STi)
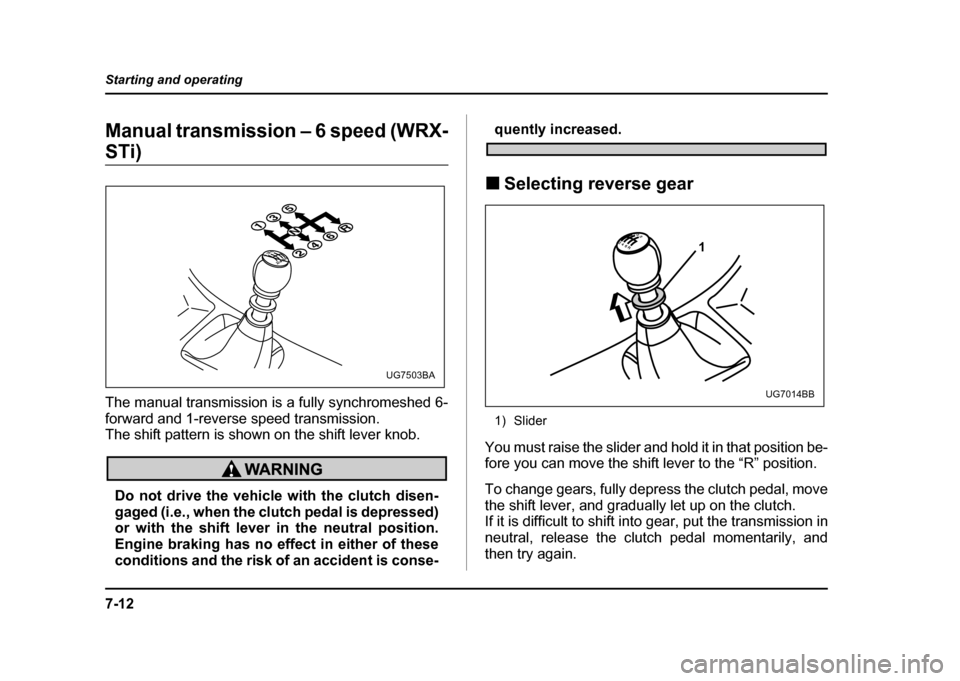
The manual transmission is a fully synchromeshed 6-
forward and 1-reverse speed transmission.
The shift pattern is shown on the shift lever knob.
Do not drive the vehicle with the clutch disen-
gaged (i.e., when the clutch pedal is depressed)
or with the shift lever in the neutral position.
Engine braking has no effect in either of these
conditions and the risk of an accident is conse-
quently increased.
! Selecting reverse gear
1) Slider
You must raise the slider and hold it in that position be-
fore you can move the shift lever to the “R” position.
To change gears, fully depress the clutch pedal, move
the shift lever, and gradually let up on the clutch.
If it is difficult to shift into gear, put the transmission in
neutral, release the clutch pedal momentarily, and
then try again.
N3
4
1
2
5
6R
UG7503BA
1
UG7014BB
Page 282 of 491
7-13
Starting and operating
– CONTINUED –
Shift into reverse ONLY when the vehicle has
completely stopped. It may cause damage to
the transmission to try shifting into reverse
when the vehicle is moving.
! Shifting speeds
! Recommended shifting speeds
The best compromise between fuel economy and ve-
hicle performance during normal driving is ensured by
shifting up at the speeds listed in the following table. !
Maximum allowable speeds
The following tables show the maximum speeds that
are possible with each different gear. The tachome-
ter’s needle will enter the red area if these speeds are
exceeded.
With the exception of cases where sudden accelera-
tion is required, the vehicle should not be driven with
the tachometer’s needle inside the red area. Failure to
observe this precaution can lead to excessive engine
wear and poor fuel economy.
When shifting down a gear, ensure that the ve-
hicle is not travelling at a speed exceeding the
Maximum Allowable Speed for the gear which
is about to be selected. Failure to observe this
precaution can lead to engine over-revving and
Shift up mph (km/h)
1st to 2nd 15 (24)
2nd to 3rd 25 (40)
3rd to 4th 40 (64)4th to 5th 45 (72)
5th to 6th 50 (80)
Gear mph (km/h)
1st 35 (57)
2nd 55 (88) 3rd 73 (118)4th 96 (154)
Page 283 of 491
7-14
Starting and operating
this in turn can result in engine damage.
In addition, sudden application of engine
brakes when the vehicle is travelling on a slip-
pery surface can lead to wheel locking; as a
consequence, control of the vehicle may be lost
and the risk of an accident increased.
NOTE
Never exceed posted speed limits. !
Driving tips
Do not drive with your foot resting on the clutch pedal
and do not use the clutch to hold your vehicle at a
standstill on an upgrade. Either of those actions may
cause clutch damage.
Do not drive with your hand resting on the shift lever.
This may cause wear on the transmission compo-
nents.
When it is necessary to reduce vehicle speed due to
slow traffic, turning corners, or driving up steep hills,
downshift to a lower gear before the engine starts to
labor.
On steep downgrades, downshift the transmission to
5th, 4th, 3rd or 2nd gear as necessary; this helps to
maintain a safe speed and to extend brake pad life. In this way, the engine provides a braking effect. Re-
member, if you “ride” (over use) the brakes while de-
scending a hill, they may overheat and not work prop-
erly.
The engine may, on rare occasions, knock when the
vehicle rapidly accelerates or rapidly pulls away from
a standstill. This phenomenon is not an indication of a
problem in your vehicle.
Page 284 of 491
7-15
Starting and operating
– CONTINUED –
Manual transmission – 5 speed (ex-
cept WRX-STi)
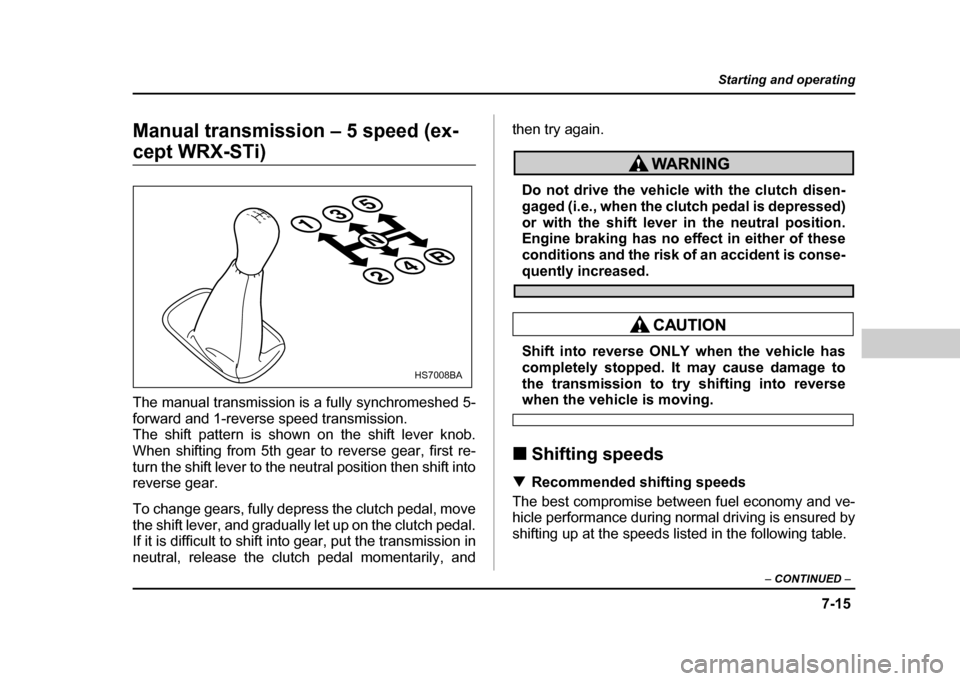
The manual transmission is a fully synchromeshed 5-
forward and 1-reverse speed transmission.
The shift pattern is shown on the shift lever knob.
When shifting from 5th gear to reverse gear, first re-
turn the shift lever to the neutral position then shift into
reverse gear.
To change gears, fully depress the clutch pedal, move
the shift lever, and gradually let up on the clutch pedal.
If it is difficult to shift into gear, put the transmission in
neutral, release the clutch pedal momentarily, and then try again.
Do not drive the vehicle with the clutch disen-
gaged (i.e., when the clutch pedal is depressed)
or with the shift lever in the neutral position.
Engine braking has no effect in either of these
conditions and the risk of an accident is conse-
quently increased.
Shift into reverse ONLY when the vehicle has
completely stopped. It may cause damage to
the transmission to try shifting into reverse
when the vehicle is moving.
! Shifting speeds
! Recommended shifting speeds
The best compromise between fuel economy and ve-
hicle performance during normal driving is ensured by
shifting up at the speeds listed in the following table.
135
24R
N
13524R
HS7008BA
Page 285 of 491
7-16
Starting and operating
!
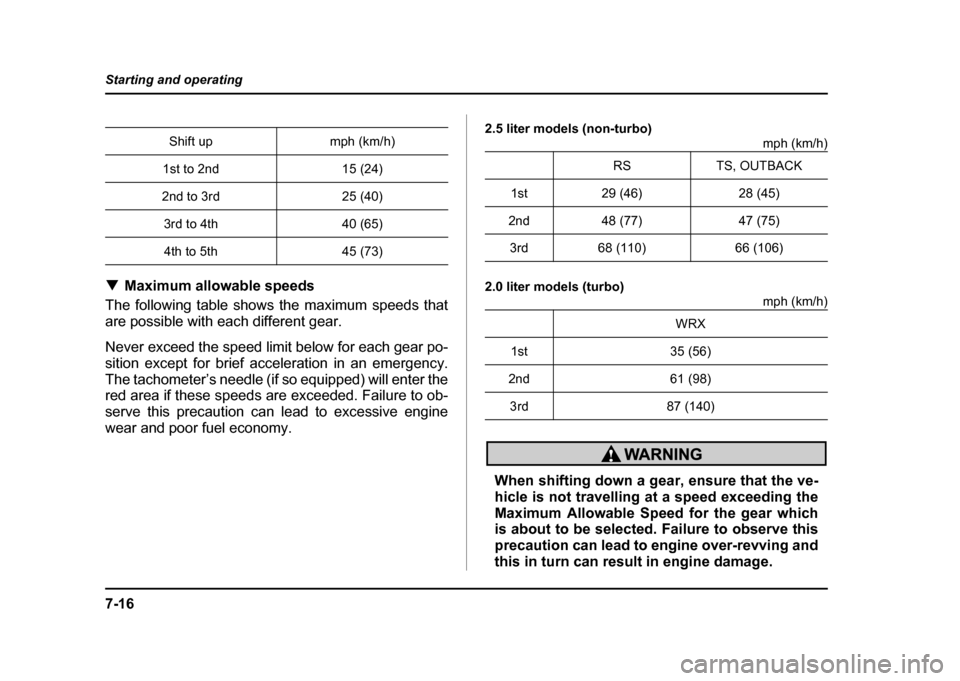
Maximum allowable speeds
The following table shows the maximum speeds that
are possible with each different gear.
Never exceed the speed limit below for each gear po-
sition except for brief acceleration in an emergency.
The tachometer’s needle (if so equipped) will enter the
red area if these speeds are exceeded. Failure to ob-
serve this precaution can lead to excessive engine
wear and poor fuel economy. 2.5 liter models (non-turbo)
mph (km/h)
2.0 liter models (turbo) mph (km/h)
When shifting down a gear, ensure that the ve-
hicle is not travelling at a speed exceeding the
Maximum Allowable Speed for the gear which
is about to be selected. Failure to observe this
precaution can lead to engine over-revving and
this in turn can result in engine damage.
Shift up mph (km/h)
1st to 2nd 15 (24)
2nd to 3rd 25 (40) 3rd to 4th 40 (65)4th to 5th 45 (73)
RS TS, OUTBACK
1st 29 (46) 28 (45)
2nd 48 (77) 47 (75) 3rd 68 (110) 66 (106)
WRX
1st 35 (56)
2nd 61 (98) 3rd 87 (140)
Page 286 of 491

7-17
Starting and operating
– CONTINUED –
In addition, sudden application of engine
brakes when the vehicle is travelling on a slip-
pery surface can lead to wheel locking; as a
consequence, control of the vehicle may be lost
and the risk of an accident increased.
! Driving tips
Do not drive with your foot resting on the clutch pedal
and do not use the clutch to hold your vehicle at a
standstill on an upgrade. Either of those actions may
cause clutch damage.
Do not drive with your hand resting on the shift lever.
This may cause wear on the transmission compo-
nents.
When it is necessary to reduce vehicle speed due to
slow traffic, turning corners, or driving up steep hills,
downshift to a lower gear before the engine starts to
labor.
On steep downgrades, downshift the transmission to
4th, 3rd or 2nd gear as necessary; this helps to main-
tain a safe speed and to extend brake pad life.
In this way, the engine provides a braking effect. Re-
member, if you “ride” (over use) the brakes while de-
scending a hill, they may overheat and not work prop- erly.
The engine may, on rare occasions, knock when the
vehicle rapidly accelerates or rapidly pulls away from
a standstill. This phenomenon is not an indication of a
problem in your vehicle.
Page 287 of 491
7-18
Starting and operating
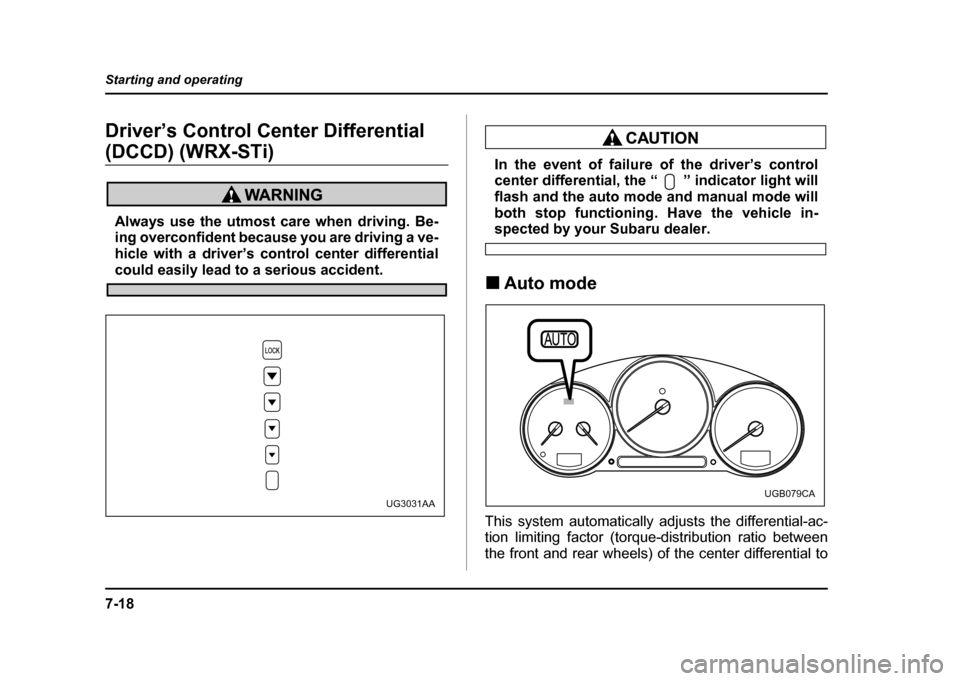
Driver’s Control Center Differential
(DCCD) (WRX-STi)
Always use the utmost care when driving. Be-
ing overconfident because you are driving a ve-
hicle with a driver’s control center differential
could easily lead to a serious accident.
In the event of failure of the driver’s control
center differential, the “ ” indicator light will
flash and the auto mode and manual mode will
both stop functioning. Have the vehicle in-
spected by your Subaru dealer.
! Auto mode
This system automatically adjusts the differential-ac-
tion limiting factor (torque-distribution ratio between
the front and rear wheels) of the center differential to
UG3031AAUGB079CA
Page 288 of 491
7-19
Starting and operating
– CONTINUED –
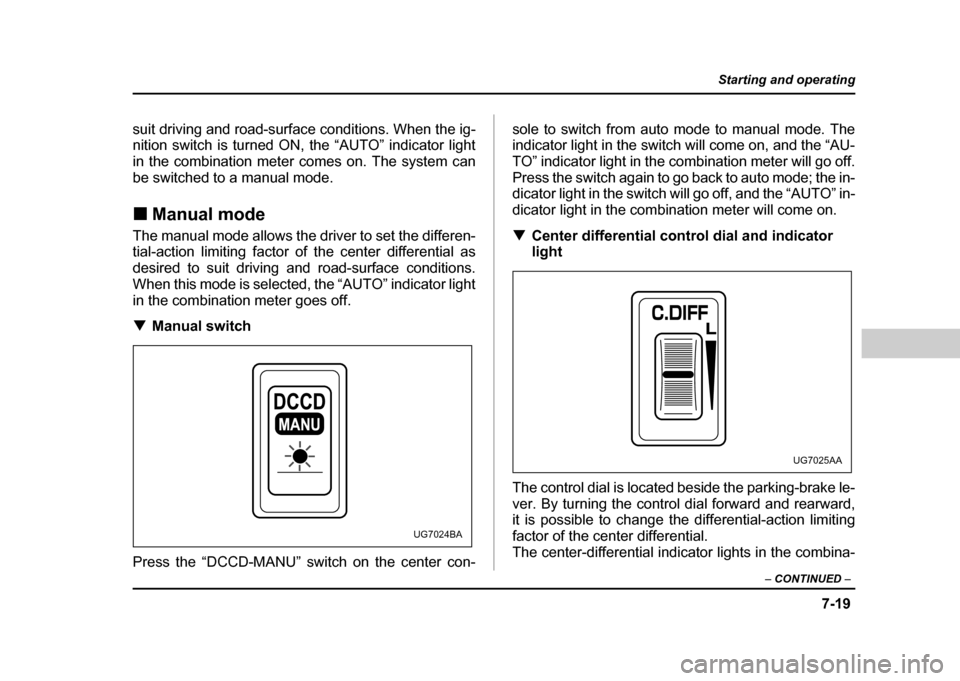
suit driving and road-surface conditions. When the ig-
nition switch is turned ON, the “AUTO” indicator light
in the combination meter comes on. The system can
be switched to a manual mode. !Manual mode
The manual mode allows the driver to set the differen-
tial-action limiting factor of the center differential as
desired to suit driving and road-surface conditions.
When this mode is selected, the “AUTO” indicator light
in the combination meter goes off. ! Manual switch
Press the “DCCD-MANU” switch on the center con- sole to switch from auto mode to manual mode. The
indicator light in the switch will come on, and the “AU-
TO” indicator light in the combination meter will go off.
Press the switch again to go back to auto mode; the in-
dicator light in the switch will go off, and the “AUTO” in-
dicator light in the combination meter will come on. !
Center differential control dial and indicator
light
The control dial is located beside the parking-brake le-
ver. By turning the control dial forward and rearward,
it is possible to change the differential-action limiting
factor of the center differential.
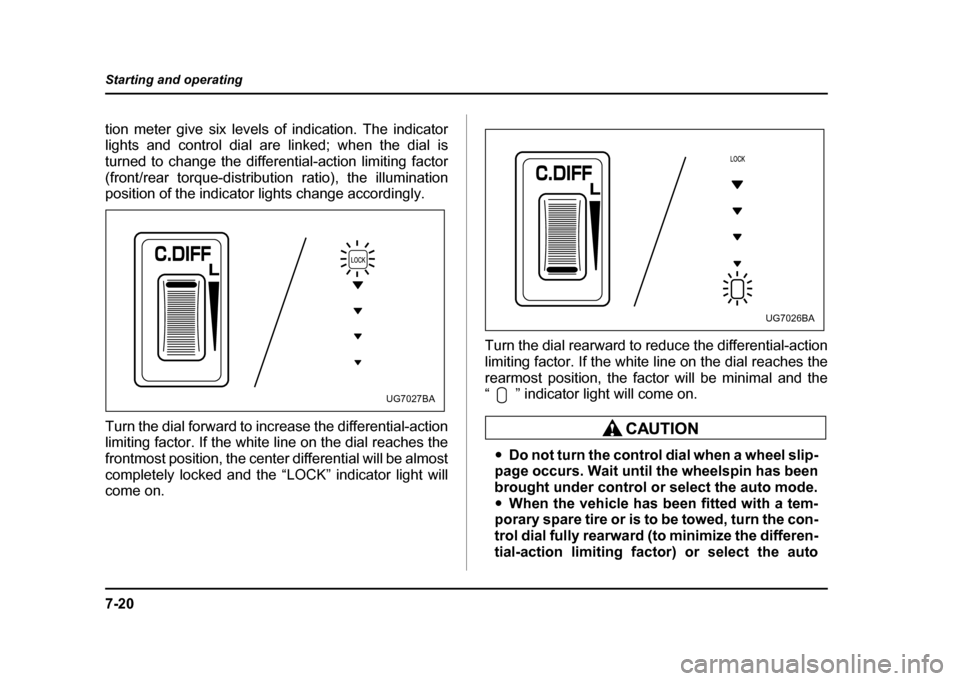
The center-differential indicator lights in the combina-
MANU
UG7024BA
UG7025AA
Page 289 of 491
7-20
Starting and operating
tion meter give six levels of indication. The indicator
lights and control dial are linked; when the dial is
turned to change the differential-action limiting factor
(front/rear torque-distribution ratio), the illumination
position of the indicator lights change accordingly.
Turn the dial forward to increase the differential-action
limiting factor. If the white line on the dial reaches the
frontmost position, the center differential will be almost
completely locked and the “LOCK” indicator light will come on.
Turn the dial rearward to reduce the differential-action
limiting factor. If the white line on the dial reaches the
rearmost position, the factor will be minimal and the
“ ” indicator light will come on.
"
Do not turn the control dial when a wheel slip-
page occurs. Wait until the wheelspin has been
brought under control or select the auto mode." When the vehicle has been fitted with a tem-
porary spare tire or is to be towed, turn the con-
trol dial fully rearward (to minimize the differen-
tial-action limiting factor) or select the auto
UG7027BA
UG7026BA
Page 290 of 491
7-21
Starting and operating
– CONTINUED –
mode.
NOTE "If the differential-limiting factor is large during
cornering maneuvers, a small speed difference
between the front and rear wheels may cause tight
corner braking (a phenomenon accompanied by
vibration and noise). This phenomenon does not
indicate a problem. It will disappear if the differen-
tial-action limiting factor is reduced. " Use the center-differential indicator light only as
a rough indication of the differential-action limit-
ing factor. ! Temporary release
When the driver stop the vehicle and pulls the parking-
brake lever after manually setting the differential-ac-
tion limiting factor, the factor is temporarily minimized.
The indicator in the combination meter continues to
show the driver’s selected differential-action limiting
factor. When the driver releases the parking-brake le-
ver, the factor set by the driver is restored.
Automatic transmission
The automatic transmission is electronically controlled
with 4-forward speeds and 1-reverse speed.
NOTE
Immediately after a disconnected battery is recon-
nected or ATF (automatic transmission fluid) is re-
placed, you may feel that the automatic transmis-
sion operation is somewhat unusual.
This results from erasure or invalidation of data
the on-board computer has collected and stored in
memory to allow the transmission to shift at the
most appropriate times for the current condition
of your vehicle. Optimized shifting will be restored
as the vehicle continues to be driven for a while.
Do not shift from the “P” or “N” position into
the “D”, “3”, “2”, “1” or “R” position while de-
pressing the accelerator pedal. This may cause
the vehicle to jump forward or backward.
" Shift into the “P” or “R” position only after