warning SUBARU IMPREZA WRX 2004 2.G Service Manual
[x] Cancel search | Manufacturer: SUBARU, Model Year: 2004, Model line: IMPREZA WRX, Model: SUBARU IMPREZA WRX 2004 2.GPages: 491, PDF Size: 5.93 MB
Page 302 of 491
7-33
Starting and operating
– CONTINUED –
!Steps to take if EBD system fails
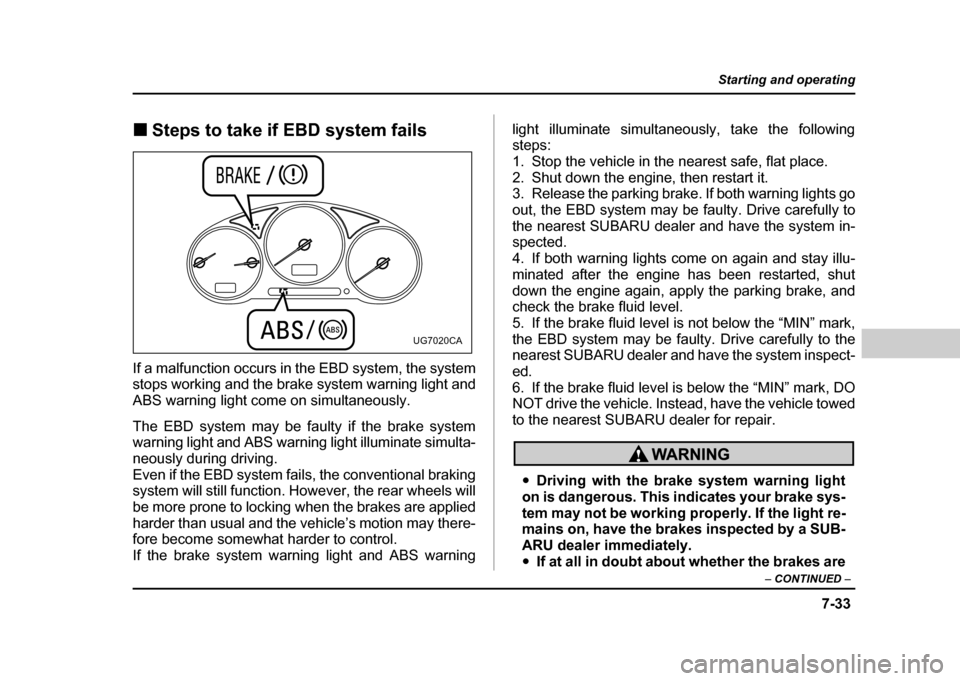
If a malfunction occurs in the EBD system, the system
stops working and the brake system warning light and
ABS warning light come on simultaneously.
The EBD system may be faulty if the brake system
warning light and ABS warning light illuminate simulta-
neously during driving.
Even if the EBD system fails, the conventional braking
system will still function. However, the rear wheels will
be more prone to locking when the brakes are applied
harder than usual and the vehicle’s motion may there-
fore become somewhat harder to control. If the brake system warning light and ABS warning light illuminate simultaneously, take the following steps:
1. Stop the vehicle in the nearest safe, flat place.
2. Shut down the engine, then restart it.
3. Release the parking brake. If both warning lights go
out, the EBD system may be faulty. Drive carefully to
the nearest SUBARU dealer and have the system in- spected.
4. If both warning lights come on again and stay illu-
minated after the engine has been restarted, shut
down the engine again, apply the parking brake, and
check the brake fluid level.
5. If the brake fluid level is not below the “MIN” mark,
the EBD system may be faulty. Drive carefully to the
nearest SUBARU dealer and have the system inspect- ed.
6. If the brake fluid level is below the “MIN” mark, DO
NOT drive the vehicle. Instead, have the vehicle towed
to the nearest SUBARU dealer for repair.
"
Driving with the brake system warning light
on is dangerous. This indicates your brake sys-
tem may not be working properly. If the light re-
mains on, have the brakes inspected by a SUB-
ARU dealer immediately." If at all in doubt about whether the brakes are
UG7020CA
Page 303 of 491
7-34
Starting and operating
operating properly, do not drive the vehicle.
Have your vehicle towed to the nearest SUBA-
RU dealer for repair.
Parking your vehicle !
Parking brake
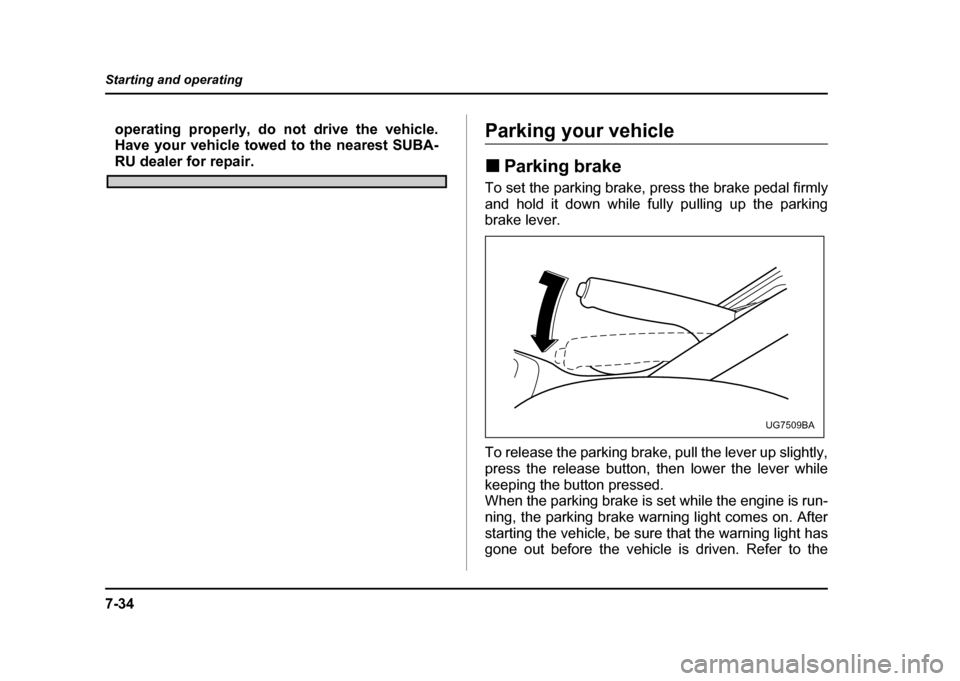
To set the parking brake, press the brake pedal firmly
and hold it down while fully pulling up the parking
brake lever.
To release the parking brake, pull the lever up slightly,
press the release button, then lower the lever while
keeping the button pressed.
When the parking brake is set while the engine is run-
ning, the parking brake warning light comes on. After
starting the vehicle, be sure that the warning light has
gone out before the vehicle is driven. Refer to the
UG7509BA
Page 304 of 491
7-35
Starting and operating
– CONTINUED –
“Warning and indicator lights” section (chapter 3).
Never drive while the parking brake is set be-
cause this will cause unnecessary wear on the
brake linings. Before starting to drive, always
make sure that the parking brake has been fully
released.
! Parking tips
When parking your vehicle, always set the parking
brake firmly and put the shift lever in the “1” (1st) for an
upgrade or “R” (Reverse) for a downgrade for manual
transmission vehicles, or in the “P” (Park) position for
automatic transmission vehicles. Always set the park-
ing brake firmly when parking your vehicle. Never rely
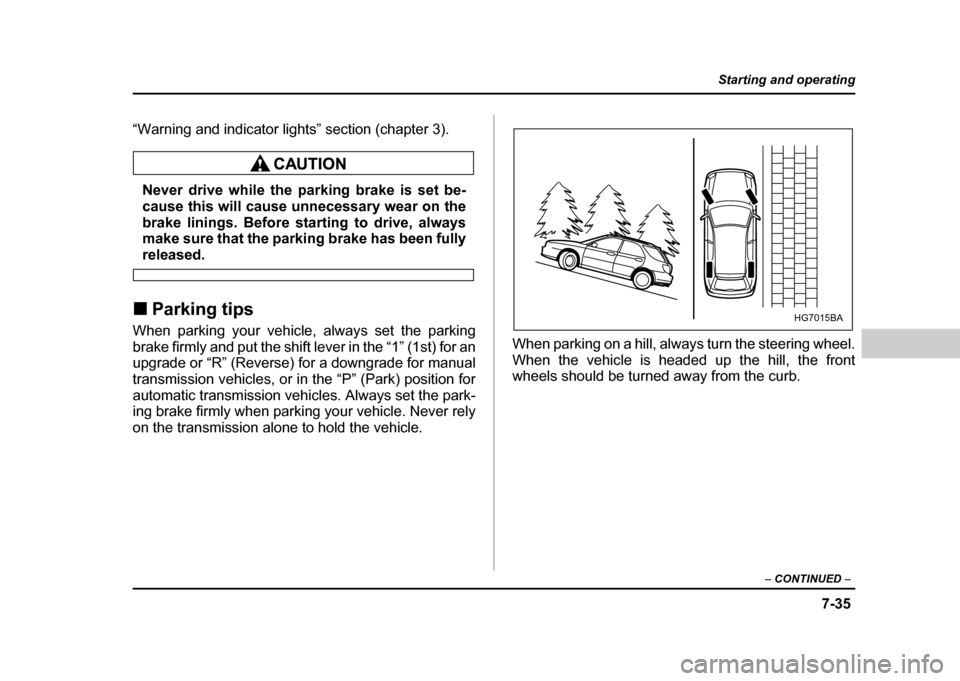
on the transmission alone to hold the vehicle. When parking on a hill, always turn the steering wheel.
When the vehicle is headed up the hill, the front
wheels should be turned away from the curb.
HG7015BA
Page 325 of 491
8-14
Driving tips
!
Wiper operation when snowing
Before driving in cold weather, make sure the wiper
blades are not frozen to the windshield or rear window.
If the wiper blades are frozen to the windshield or rear
window, use the defroster with the airflow control dial
in the “ ” position and the temperature control dial
set for maximum warmth until the wiper blades are
completely thawed out. If your vehicle is equipped with
a wiper deicer, it is helpful to thaw the windshield wiper
blades. To thaw out the rear wiper blade, use the rear
window defogger.
When driving in snow, if frozen snow starts to stick on
the surface of the windshield despite wiper operation,
use the defroster with the airflow control dial in “ ”
and the temperature control dial set for maximum
warmth. After the windshield gets warmed enough to
melt the frozen snow on it, wash it away using the
windshield washer.
Snow stuck on the wiper arm prevents the wiper from
working effectively. If snow is stuck on the wiper arm,
pull off the road to a safe place, then remove it. If you
stop the car at road side, use the hazard warning
flasher to alert other drivers.
We recommend use of non-freezing type wiper blades
(winter blades) during the seasons you could have snow and sub-zero temperatures. Blades of this type
give superior wiping performance in snowy conditions.
Be sure to use blades that are suitable for your vehi-cle. !
Corrosion protection
Refer to the “Corrosion protection” section (chapter
10). ! Snow tires
! All models except WRX-STi
"When replacing original tires with winter
(snow) tires, make sure you use only the same
size, construction and load range as the origi-
nal tires listed on the tire placard. Using other
sizes and construction may affect speedome-
ter/odometer calibration and clearance be-
tween the body and tires. It also may be danger-
ous and lead to loss of vehicle control. " You must install four winter tires that are of
the same size, construction, brand, and load
range. Mixing other sizes or constructions may
result in severe mechanical damage to the drive
Page 350 of 491
8-39
Driving tips
– CONTINUED –
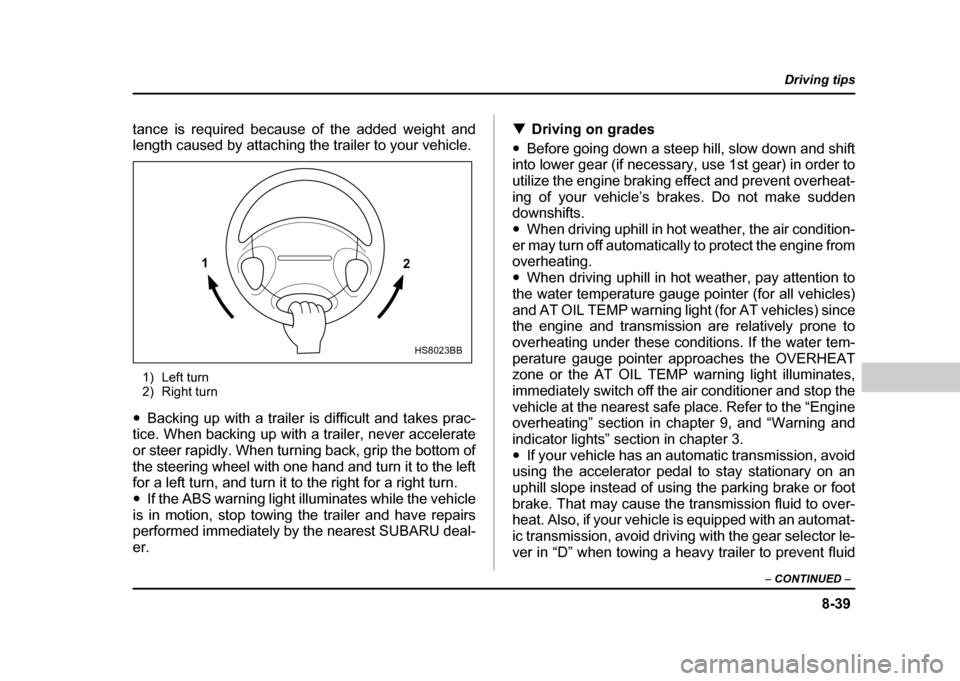
tance is required because of the added weight and
length caused by attaching the trailer to your vehicle.
1) Left turn
2) Right turn
" Backing up with a trailer is difficult and takes prac-
tice. When backing up with a trailer, never accelerate
or steer rapidly. When turning back, grip the bottom of
the steering wheel with one hand and turn it to the left
for a left turn, and turn it to the right for a right turn." If the ABS warning light illuminates while the vehicle
is in motion, stop towing the trailer and have repairs
performed immediately by the nearest SUBARU deal-er. !
Driving on grades
" Before going down a steep hill, slow down and shift
into lower gear (if necessary, use 1st gear) in order to
utilize the engine braking effect and prevent overheat-
ing of your vehicle’s brakes. Do not make sudden
downshifts. " When driving uphill in hot weather, the air condition-
er may turn off automatically to protect the engine from
overheating. " When driving uphill in hot weather, pay attention to
the water temperature gauge pointer (for all vehicles)
and AT OIL TEMP warning light (for AT vehicles) since
the engine and transmission are relatively prone to
overheating under these conditions. If the water tem-
perature gauge pointer approaches the OVERHEAT
zone or the AT OIL TEMP warning light illuminates,
immediately switch off the air conditioner and stop the
vehicle at the nearest safe place. Refer to the “Engine
overheating” section in chapter 9, and “Warning and
indicator lights” section in chapter 3." If your vehicle has an automatic transmission, avoid
using the accelerator pedal to stay stationary on an
uphill slope instead of using the parking brake or foot
brake. That may cause the transmission fluid to over-
heat. Also, if your vehicle is equipped with an automat-
ic transmission, avoid driving with the gear selector le-
ver in “D” when towing a heavy trailer to prevent fluid
1 2
HS8023BB
Page 353 of 491
9-2
In case of emergency
In case of emergencyIf you park your vehicle in case of an
emergency
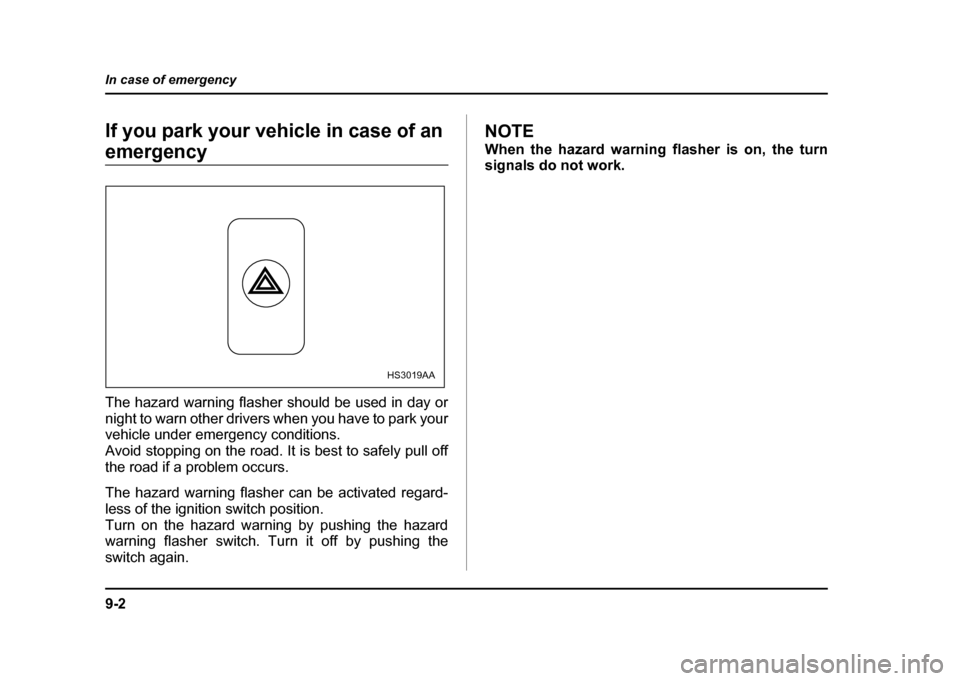
The hazard warning flasher should be used in day or
night to warn other drivers when you have to park your
vehicle under emergency conditions.
Avoid stopping on the road. It is best to safely pull off
the road if a problem occurs.
The hazard warning flasher can be activated regard-
less of the ignition switch position.
Turn on the hazard warning by pushing the hazard
warning flasher switch. Turn it off by pushing the
switch again.
NOTE
When the hazard warning flasher is on, the turn
signals do not work.
HS3019AA
Page 355 of 491
9-4
In case of emergency
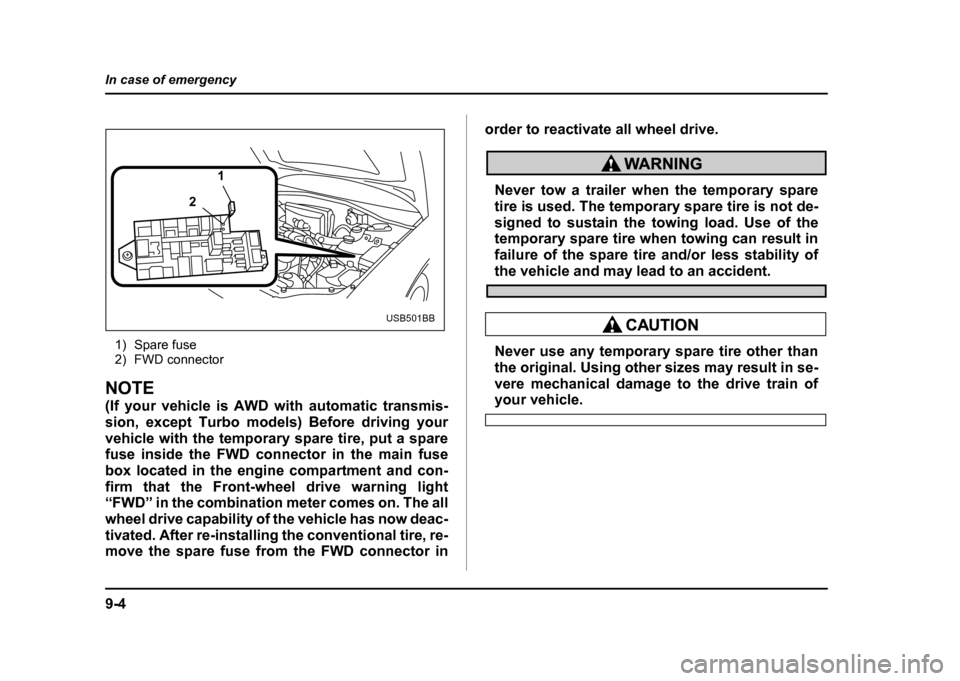
1) Spare fuse
2) FWD connector
NOTE
(If your vehicle is AWD with automatic transmis-
sion, except Turbo models) Before driving your
vehicle with the temporary spare tire, put a sparefuse inside the FWD connector in the main fuse
box located in the engine compartment and con-
firm that the Front-wheel drive warning light
“FWD” in the combination meter comes on. The all
wheel drive capability of the vehicle has now deac-
tivated. After re-installing the conventional tire, re-
move the spare fuse from the FWD connector in
order to reactivate all wheel drive.
Never tow a trailer when the temporary spare
tire is used. The temporary spare tire is not de-
signed to sustain the towing load. Use of the
temporary spare tire when towing can result in
failure of the spare tire and/or less stability of
the vehicle and may lead to an accident.
Never use any temporary spare tire other than
the original. Using other sizes may result in se-
vere mechanical damage to the drive train of
your vehicle.
1
2
USB501BB
Page 356 of 491
9-5
In case of emergency
– CONTINUED –
Flat tires
If you have a flat tire while driving, never brake sud-
denly; keep driving straight ahead while gradually re-
ducing speed. Then slowly pull off the road to a safe
place. !Changing a flat tire
"Do not jack up the vehicle on an incline or a
loose road surface. The jack can come out of
the jacking point or sink into the ground and
this can result in a severe accident. " Use only the jack provided with your vehicle.
The jack supplied with the vehicle is designed
only for changing a tire. Never get under the ve-
hicle while supporting the vehicle with thisjack. " Always turn the engine off before raising the
flat tire off the ground using the jack. Never
swing or push the vehicle supported with the
jack. The jack can come out of the jacking point
due to a jolt and this can result in a severe acci-
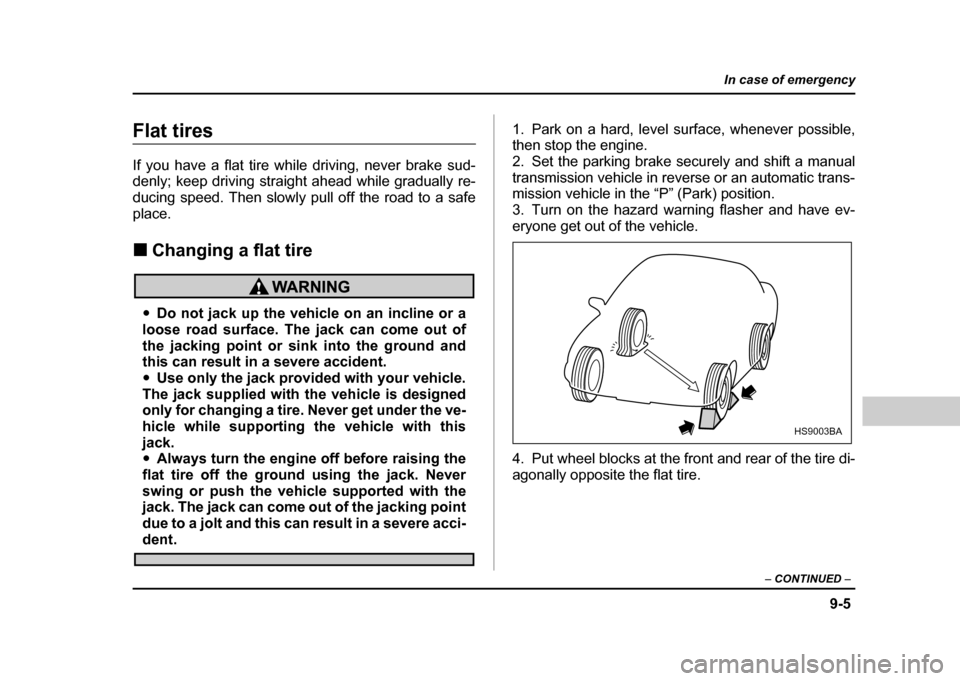
dent. 1. Park on a hard, level surface, whenever possible,
then stop the engine.
2. Set the parking brake securely and shift a manual
transmission vehicle in reverse or an automatic trans-
mission vehicle in the “P” (Park) position.
3. Turn on the hazard warning flasher and have ev-
eryone get out of the vehicle.
4. Put wheel blocks at the front and rear of the tire di-
agonally opposite the flat tire.
HS9003BA
Page 438 of 491
11 -5 3
Maintenance and service
– CONTINUED –
Aluminum wheels (If equipped)
Aluminum wheels can be scratched and damaged
easily. Handle them carefully to maintain their appear-
ance, performance, and safety. "When any of the wheels is removed and replaced
for tire rotation or to change a flat, always check the
tightness of the wheel nuts after driving approximately
600 miles (1,000 km). If any nut is loose, tighten it to
the specified torque. " Never apply oil to the threaded parts, wheel nuts, or
tapered surface of the wheel. " Never let the wheel rub against sharp protrusions or
curbs." Be sure to fit tire chains on uniformly and completely
around the tire, otherwise the chains may scratch the
wheel. " When wheel nuts, balance weights, or the center
cap is replaced, be sure to replace them with genuine
SUBARU parts designed for aluminum wheels.Intercooler water spray
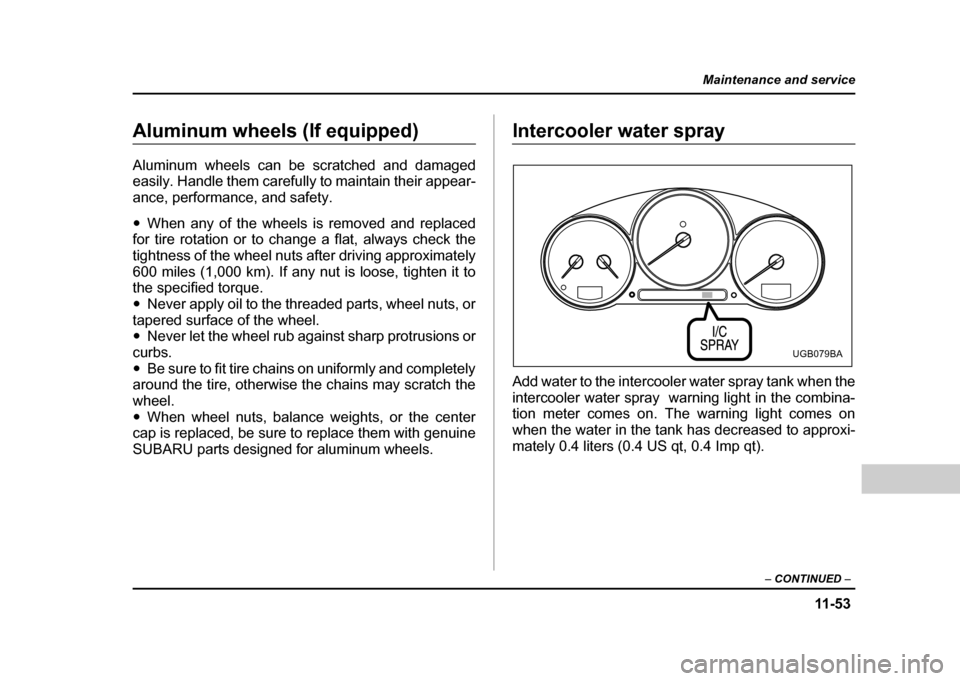
Add water to the intercooler water spray tank when the
intercooler water spray warning light in the combina-
tion meter comes on. The warning light comes on
when the water in the tank has decreased to approxi-
mately 0.4 liters (0.4 US qt, 0.4 Imp qt).
UGB079BA
Page 473 of 491
12-8
Specifications
!
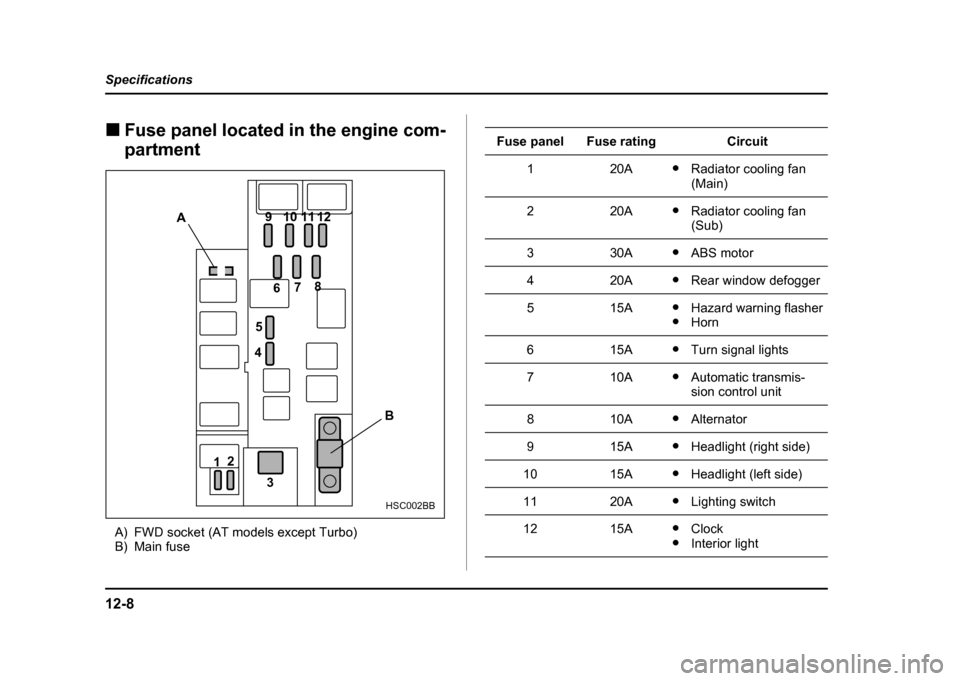
Fuse panel located in the engine com-
partment
A) FWD socket (AT models except Turbo)
B) Main fuse
A 12
3 B
4
5 6
78
91011
12
HSC002BB
Fuse panelFuse ratingCircuit
120A"
Radiator cooling fan
(Main)
220A"Radiator cooling fan
(Sub)
330A"ABS motor
420A"Rear window defogger
515A"Hazard warning flasher
" Horn
615A"Turn signal lights
710A"Automatic transmis- sion control unit
810A"Alternator
915A"Headlight (right side)
1015A"Headlight (left side)
1120A"Lighting switch
1215A"Clock
" Interior light