ECO mode SUBARU IMPREZA WRX 2004 2.G Owners Manual
[x] Cancel search | Manufacturer: SUBARU, Model Year: 2004, Model line: IMPREZA WRX, Model: SUBARU IMPREZA WRX 2004 2.GPages: 491, PDF Size: 5.93 MB
Page 42 of 491
1-15
Seat, seatbelt and SRS airbags
– CONTINUED –
!Automatic/Emergency Locking Retrac- tor (A/ELR)
Each passenger’s seatbelt has an Automatic/Emer-
gency Locking Retractor (A/ELR). The Automatic/
Emergency Locking Retractor normally functions as
an Emergency Locking Retractor (ELR). The A/ELR
has an additional locking mode “Automatic Locking
Retractor (ALR) mode” intended to secure a child re-
straint system. When the seatbelt is once drawn out
completely and is then retracted even slightly, the re-
tractor locks the seatbelt in that position and the seat-
belt cannot be extended. As the belt is rewinding,
clicks will be heard which indicate the retractor func-
tions as an ALR. When the seatbelt is retracted fully,
the ALR mode is released.
When securing a child restraint system on the rear
seats by the use of the seatbelt, the seatbelt must be
changed over to the Automatic Locking Retractor (ALR) mode.
When the child restraint system is removed, make
sure that the seatbelt retracts fully and the retractor re-
turned to the Emergency Locking Retractor (ELR)
mode.
For instructions on how to convert the retractor to the
ALR mode and restore it to the ELR mode, see the
“Child restraint systems” section in this chapter. !
Seatbelt warning light and chime
Your vehicle is equipped with a seatbelt warning de-
vice at the driver’s seat, as required by current safety
standards.
This device causes the seatbelt warning light on the
instrument panel to light up for about six seconds
when the ignition switch is turned to “ON” to remind the
driver to wear the seatbelt. If the driver’s seatbelt is not
fastened, a warning chime sounds at the same time. ! Fastening the seatbelt
"Never use a belt that is twisted or reversed. In
an accident, this can increase the risk or sever-
ity of injury. " Keep the lap belt as low as possible on your
hips. In a collision, this spreads the force of the
lap belt over stronger hip bones instead of
across the weaker abdomen. " Seatbelts provide maximum restraint when
the occupant sits well back and upright in the
seat. To reduce the risk of sliding under the
seatbelt in a collision, the front seatbacks
should be always used in the upright position
while the vehicle is running. If the front seat-
Page 111 of 491
2-8
Keys and doors
wagon).
An electronic chirp will sound one time and the turn
signal lights will flash one time.
If any of the doors (or the rear gate) is not fully closed,
an electronic chirp will sound five times and the turn
signal lights will flash five times to alert you that the
doors (or the rear gate) are not properly closed. When
you close the door, it will automatically lock.
NOTE
If the “LOCK/ALARM” button is pressed for two
seconds or longer, the panic alarm will sound.
When locking the doors in normal circumstances,press the “LOCK/ALARM” button for less than two
seconds. For details on the panic alarm, refer to
“Sounding a panic alarm”. !
Unlocking the doors
Briefly press the “UNLOCK/DISARM” button (for less
than two seconds) to unlock the driver’s door. An elec-
tronic chirp will sound two times and the turn signal
lights will flash two times. To unlock all other doors
(and rear gate on the wagon), briefly press the “UN-
LOCK/DISARM” button a second time within 5 sec-
onds.
NOTE
If the interval between the first and second press-
es of the “UNLOCK/DISARM” button (for unlock-
ing of all of the doors and the rear gate) is extreme-
ly short, the system may not respond. ! Illuminated entry
The interior (dome) light and ignition switch light (for
turbo models) will illuminate when the “UNLOCK/DIS-
ARM” button is pressed. These lights stay illuminated
for approximately 30 seconds if any of the doors (or
the rear gate on the wagon) is not opened.
If the “LOCK/ARM” button is pressed before 30 sec-
onds have elapsed, these lights will go out. Also, these
lights will go out if the key is inserted in the ignition switch. The interior light must be set to the middle po-
sition in order for this function to operate.
! Vehicle finder function
Use this function to find your vehicle parked among
many vehicles in a large parking lot. Provided you are
within 30 feet (10 meters) of the vehicle, pressing the
“LOCK/ARM” button three times in a five-second peri-
od will cause your vehicle’s horn to sound one time
and its turn signal lights to flash three times.
Page 115 of 491
2-12
Keys and doors
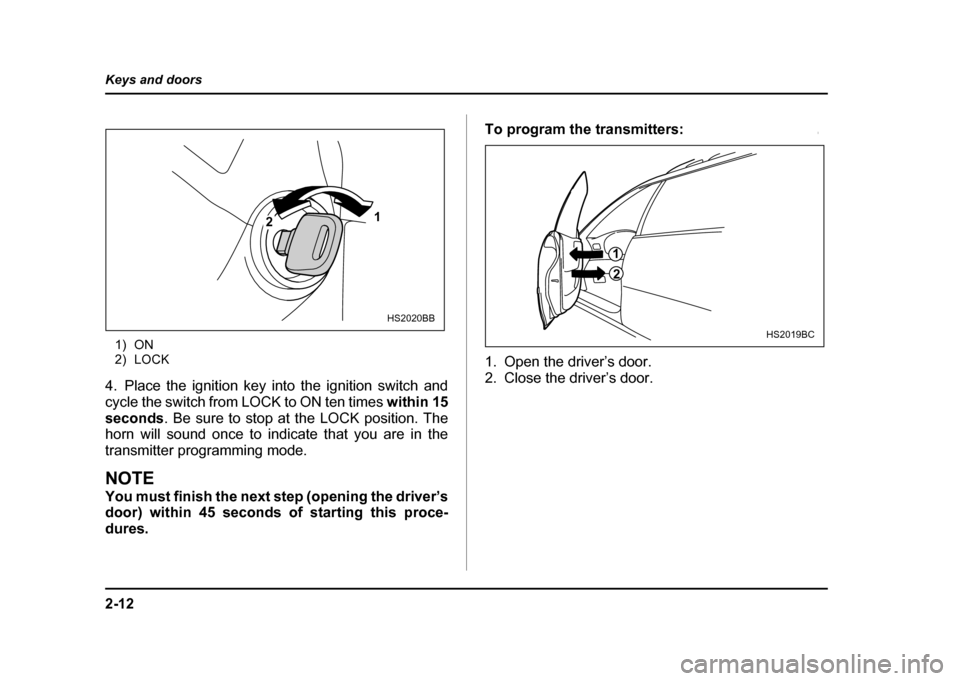
1) ON
2) LOCK
4. Place the ignition key into the ignition switch and
cycle the switch from LOCK to ON ten times within 15
seconds . Be sure to stop at the LOCK position. The
horn will sound once to indicate that you are in the
transmitter programming mode.
NOTE
You must finish the next step (opening the driver’s
door) within 45 seconds of starting this proce-
dures. To program the transmitters:
0
1. Open the driver’s door.
2. Close the driver’s door.
1
2
HS2020BB
1
2
HS2019BC
Page 118 of 491
2-15
Keys and doors
– CONTINUED –
breaking glass or forced entry). Note that there are two
alarm levels for shock: warning and alarm. In warning
mode, the alarm detects lower level vibrations and
triggers 2 warning chirps on the horn and two flashes
on the lights as a deterrent to would be vandals. In
alarm mode, higher levels of shock are detected and
the system will go into full alarm. "Ignition switch being turned on while in armed state.
NOTE
With the valet mode selected, the security system
does not operate when the remote transmitter is
used for locking and unlocking. The security sys-
tem indicator light in the combination meter flash-
es twice per second to show that the valet mode is
selected. For details, refer to “Valet mode” in this
section. ! Arming the system
! To arm the system using remote transmitter
1. Close all windows.
2. Remove the key from the ignition switch.
3. Open the doors and get out of the vehicle.
4. Make sure that the engine hood (and the trunk lid)
are locked.
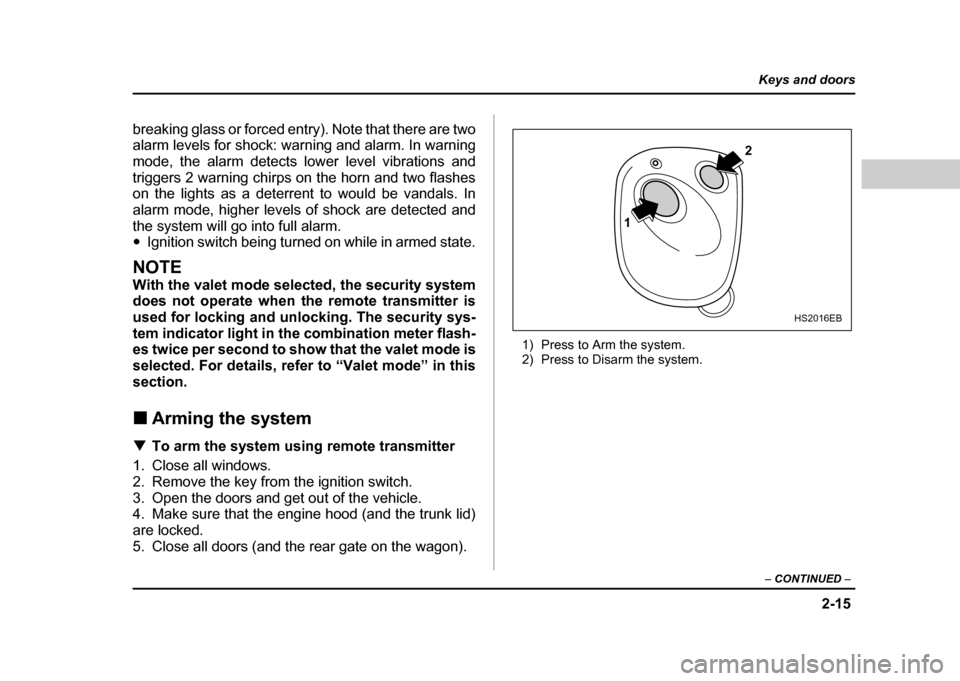
5. Close all doors (and the rear gate on the wagon). 1) Press to Arm the system.
2) Press to Disarm the system.
1
2
HS2016EB
Page 120 of 491

2-17
Keys and doors
– CONTINUED –
7. Close the door. An electronic chirp will sound one
time, the turn signal lights will flash one time and the
indicator light will start flashing slowly (approximately
once every two seconds) to inform you that the system
has armed.
NOTE
The system can be armed even if the engine hood
and/or the windows are opened. Always make
sure that they are fully closed before arming the
system. !Disarming the system
Briefly press the “UNLOCK/DISARM” button (for less
than two seconds) on the remote transmitter. The driv-
er’s door will unlock, an electronic chirp will sound two
times, the turn signal lights will flash two times and the
indicator light will go off.
To unlock all other doors (and the rear gate on the
wagon), briefly press the “UNLOCK/DISARM” button a
second time. ! Emergency disarming
If you cannot disarm the system using the transmitter
(i.e. the transmitter is lost, broken or the transmitter
battery is too weak), you can disarm the system with-
out using the transmitter. To disarm the system:
1. Unlock the door with the key and then open the
door.
2. The alarm will sound.
3. Insert the key into the ignition switch and cycle it
from the “LOCK” to the “ON” position three (3) times
within 5 seconds
.
! Valet mode
When you choose the valet mode, the security system
does not operate. In valet mode, the remote transmit-
ter is used only for locking and unlocking the doors
(and rear gate on the wagon) and panic activation.
To enter the valet mode, open the driver’s door and
keep the “UNLOCK/DISARM” button depressed for
more than two seconds . The security system status
indicator light will continue to flash two times per sec-
ond indicating that the system is in the valet mode.
To exit valet mode, open the driver’s door and keep
the “UNLOCK/DISARM” button pressed for more
than two seconds . The indicator will stop flashing.
NOTE
If the remote transmitter is used to lock or unlock
the doors while the valet mode is selected, the
turn signal lights do not flash but an electronic
Page 123 of 491
2-20
Keys and doors
In passive mode, the system will automatically
activate the alarm but WILL NOT automatically
lock the doors. In order to lock the doors you
must either lock them as indicated in step 4
above or with the key once they have been
closed. Failure to lock the doors manually will
result in a higher security risk.
! Disarming the system
To disarm the system, briefly press the “UNLOCK/
DISARM” button on the transmitter. " Tripped sensor identification
If an electronic chirp sounds four times and the turn
signal lights flash four times when you disarm the sys-
tem, this indicates that the alarm was triggered. The
number of times the indicator light flashes indicates
what sensor caused the alarm condition.
To enter identification mode:
1. Open the driver’s door and leave it open.
2. Turn the ignition switch to the “ON” position twotimes. (“LOCK” → “ON” → “LOCK” → “ON” →
“LOCK”)
3. The indicator light will start flashing. The indicator light provides the following indications.
Flashing one time:
Any door, the rear gate or the
trunk lid has been opened.
Flashing three times: The impact sensor in the sys-
tem’s unit has been activated. This may indicate that
your vehicle has been shocked or tampered with by
some outside force and/or unauthorized person.
Flashing four times: The ignition switch has been
turned on or the battery has been disconnected.
NOTE
The battery must be reconnected before the indi-
cator light will flash.
To exit this mode, close the door and turn the ignition
switch to the “ON” position.
Page 148 of 491
3-11
Instruments and controls
– CONTINUED –
the ambient temperature and driving conditions.
We recommend that you drive moderately until the
pointer of the temperature gauge reaches near the
middle of the range. Engine operation is optimum with
the engine coolant at this temperature range and high
revving operation when the engine is not warmed up
enough should be avoided.
If the pointer exceeds the normal operating
range, safely stop the vehicle as soon as possi-
ble.
See the “In case of emergency” in chapter 9. !
Ambient temperature gauge
A) U.S. spec. models
B) Canada spec. models
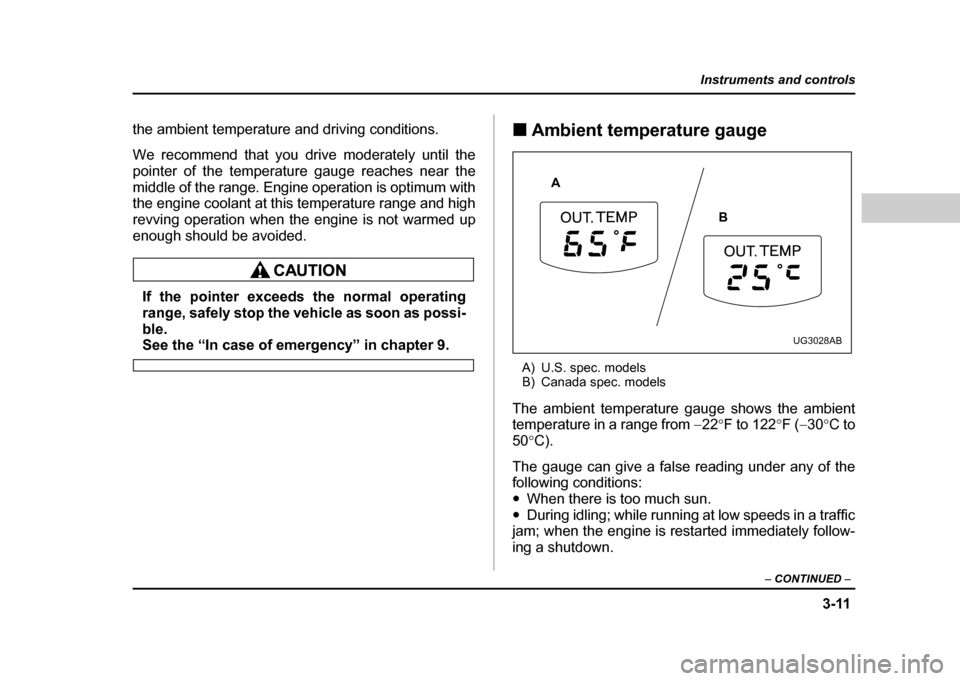
The ambient temperature gauge shows the ambient
temperature in a range from −22 °F to 122 °F ( −30 °C to
50 °C).
The gauge can give a false reading under any of the
following conditions:" When there is too much sun.
" During idling; while running at low speeds in a traffic
jam; when the engine is restarted immediately follow-
ing a shutdown.
A
B
UG3028AB
Page 150 of 491
3-13
Instruments and controls
– CONTINUED –
speed enters the tachometer’s red zone. !Setting the alarm-level engine speed
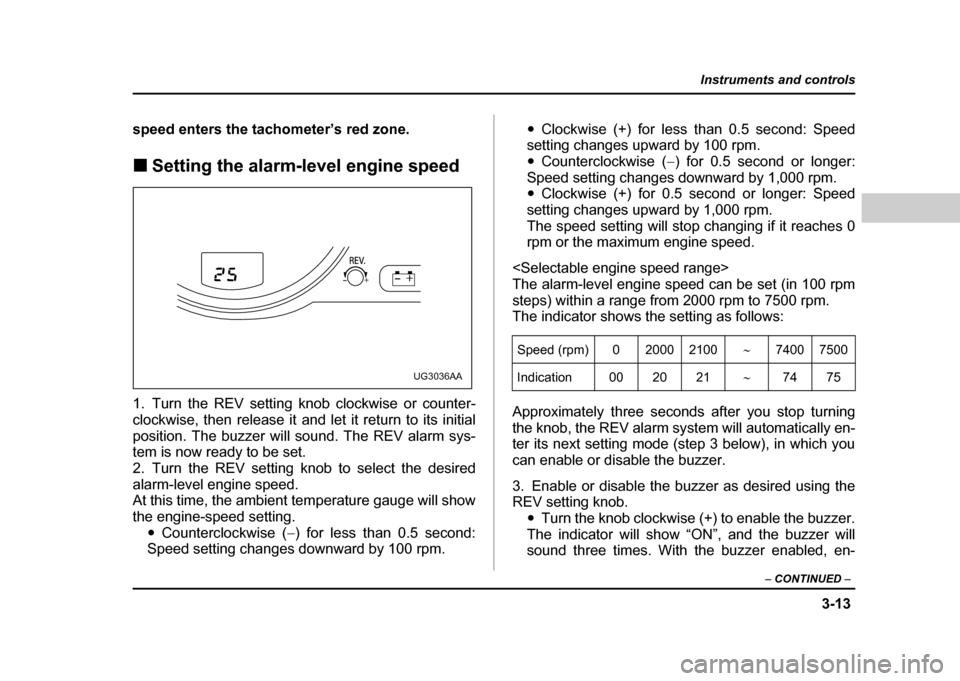
1. Turn the REV setting knob clockwise or counter-
clockwise, then release it and let it return to its initial
position. The buzzer will sound. The REV alarm sys-
tem is now ready to be set.
2. Turn the REV setting knob to select the desired
alarm-level engine speed.
At this time, the ambient temperature gauge will show
the engine-speed setting. "Counterclockwise ( −) for less than 0.5 second:
Speed setting changes downward by 100 rpm. "
Clockwise (+) for less than 0.5 second: Speed
setting changes upward by 100 rpm." Counterclockwise ( −) for 0.5 second or longer:
Speed setting changes downward by 1,000 rpm. " Clockwise (+) for 0.5 second or longer: Speed
setting changes upward by 1,000 rpm.
The speed setting will stop changing if it reaches 0
rpm or the maximum engine speed.
The alarm-level engine speed can be set (in 100 rpm
steps) within a range from 2000 rpm to 7500 rpm.
The indicator shows the setting as follows:
Approximately three seconds after you stop turning
the knob, the REV alarm system will automatically en-
ter its next setting mode (step 3 below), in which you
can enable or disable the buzzer.
3. Enable or disable the buzzer as desired using the REV setting knob. "Turn the knob clockwise (+) to enable the buzzer.
The indicator will show “ON”, and the buzzer will
sound three times. With the buzzer enabled, en-
UG3036AA
Speed (rpm) 0 2000 2100 ∼7400 7500
Indication 00 20 21 ∼74 75
Page 151 of 491

3-14
Instruments and controls
gine-speed warnings are given by both the REV in-
dicator light and the buzzer. "
Turn the knob counterclockwise ( −) to disable the
buzzer. The indicator will show “– –”, and the buzzer
will not sound. With the buzzer disabled, engine-
speed warnings are given only by the REV indicator
light.
Approximately three seconds after you stop turning
the knob, the buzzer will sound once to indicate the
end of the setting procedure. The indicator will return
to showing the ambient temperature.
Also, the tachometer needle will return to approxi- mately “0”.
NOTE " The REV alarm system does not operate while
settings are being entered. " The speed-setting mode terminates if 0 rpm is
selected." The speed-setting mode is canceled if the igni-
tion switch is turned to OFF or the vehicle starts
moving before the setting procedure is finished. " Speed setting is impossible when the vehicle is
moving. " The set engine speed may differ from the engine
speed shown by the tachometer. Use the engine
speed shown by the tachometer as a rough guide. !
Deactivating the REV alarm system
To deactivate the REV alarm system’s REV indicator
light and buzzer functions, set the alarm-level engine
speed to 0 (zero) rpm.
Page 155 of 491
3-18
Instruments and controls
We recommend that you drive moderately until the
pointer of the temperature gauge reaches near the
middle of the range. Engine operation is optimum with
the engine coolant at this temperature range and high
revving operation when the engine is not warmed up
enough should be avoided.
If the pointer exceeds the normal operating
range, safely stop the vehicle as soon as possi-
ble.
See “In case of emergency” in chapter 9.
!
Ambient temperature gauge (if
equipped)
A) U.S. spec. models
B) Canada spec. models
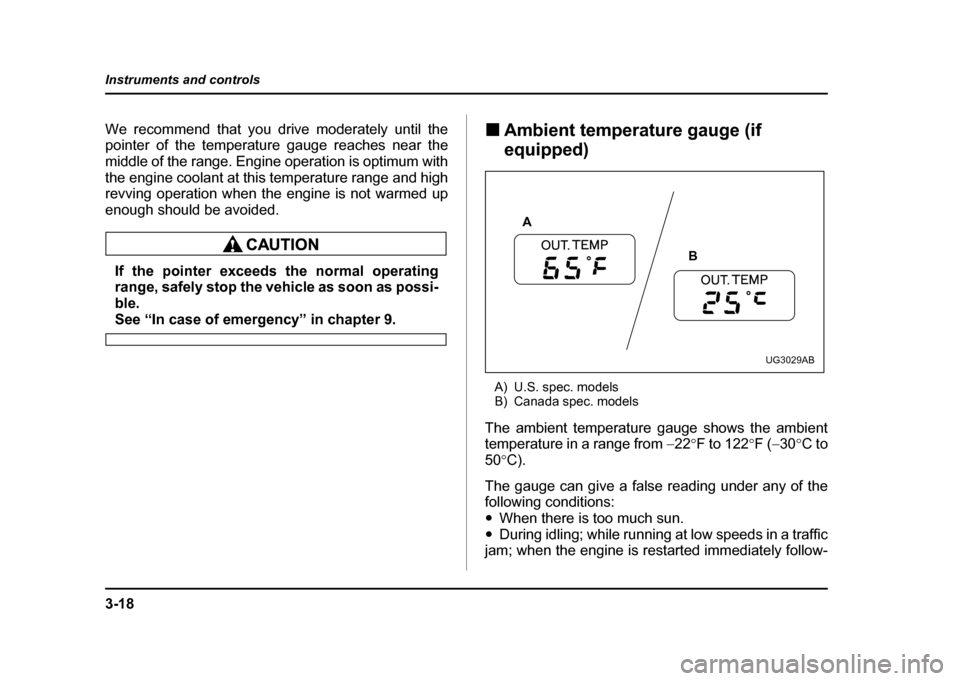
The ambient temperature gauge shows the ambient
temperature in a range from −22 °F to 122 °F ( −30 °C to
50 °C).
The gauge can give a false reading under any of the
following conditions:" When there is too much sun.
" During idling; while running at low speeds in a traffic
jam; when the engine is restarted immediately follow-
A
B
UG3029AB