display SUBARU IMPREZA WRX 2013 4.G Owners Manual
[x] Cancel search | Manufacturer: SUBARU, Model Year: 2013, Model line: IMPREZA WRX, Model: SUBARU IMPREZA WRX 2013 4.GPages: 414, PDF Size: 14.23 MB
Page 100 of 414

Alarm system
The alarm system helps to protect your
vehicle and valuables from theft. The horn
sounds and the turn signal lights flash if
someone attempts to break into yourvehicle.
The system can be armed and disarmed
with the remote transmitter.
The system does not operate when the
key is inserted into the ignition switch.
Your vehicle’s alarm system has been set
for activation at the time of shipment from
the factory. You can set the system for
deactivation yourself or have it done by
your SUBARU dealer. & System operation
The alarm system will sound the following
alarms when triggered. . The vehicle ’s horn will sound for 30
seconds.. The turn signal lights will flash for 30
seconds.
If any of the doors or the rear gate/trunk lid
remains open after the 30-second period,
the horn will continue to sound for a
maximum of 3 minutes. If the door or the
rear gate/trunk lid is closed while the horn
is sounding, the horn will stop sounding with a delay of up to 30 seconds.
The alarm is triggered by: .
Opening any of the doors, the rear gate
or trunk lid. Physical impact to the vehicle, such as
forced entry (only models with shock
sensors (dealer option))
NOTE
The alarm system can be set to trigger
the illumination of the following interiorlights. . Dome light (illuminates only when
the dome light switch is in the “DOOR ”
position) . Map lights (models with moonroof)
The notifications regarding the dome
light and the map lights are deactivated
as the factory setting. A SUBARU
dealer can activate the system. Contact
your SUBARU dealer for details. & Activating and deactivating
the alarm system
To change the setting of your vehicle ’s
alarm system for activation or deactiva-
tion, do the following.
1. Disarm the alarm system. Refer to “ Disarming the system ”F 2-17.
2. Sit in the driver ’s seat and shut all doors (and the rear gate if your vehicle is a5-door).
3. Turn the ignition switch to the
“ON ”
position.
4. Hold down the REAR (UNLOCK) side
of the driver ’s power door locking switch,
open the driver ’s door within the following
1 second, and wait 10 seconds without
releasing the switch. The setting will then
be changed as follows.
If the system was previously activated:
The odometer/trip meter screen displays “ AL oF ”and the horn sounds twice,
indicating that the system is now deacti- vated.
If the system was previously deacti- vated:
The odometer/trip meter screen displays “ AL on ”and the horn sounds once,
indicating that the system is now acti-vated.
NOTE
You may have the above setting
change done by your SUBARU dealer. Keys and doors
2-15
– CONTINUED –
Page 117 of 414

Instruments and controlsInformation display ............................................ 3-26
Outside temperature indicator ............................ 3-27
Current fuel consumption (if equipped) ............... 3-28
Average fuel consumption .................................. 3-28
Turn off display of fuel consumption indicator .......................................................... 3-28
Light control switch ........................................... 3-29
Headlights. ......................................................... 3-29
High/low beam change (dimmer) ......................... 3-30
Headlight flasher ................................................ 3-30
Daytime running light system ............................. 3-30
Turn signal lever ................................................ 3-31
Illumination brightness control ......................... 3-31
Headlight beam leveler (if equipped) ................ 3-32Front fog light switch (if equipped)
.................. 3-34
Wiper and washer .............................................. 3-34
Windshield wiper and washer switches .............. 3-36
Rear window wiper and washer switch –
5-door ............................................................. 3-37
Mirrors ................................................................ 3-38
Inside mirror ...................................................... 3-38
Auto-dimming mirror/compass (if equipped) ....... 3-38
Auto-dimming mirror/compass with HomeLink
®(if equipped) .................................................... 3-39
Outside mirrors ................................................. 3-45
Defogger and deicer .......................................... 3-46
Tilt/telescopic steering wheel ........................... 3-48
Horn .................................................................... 3-49
Page 120 of 414
following conditions. .when the ignition switch is turned to the
“ ON ”position
. when all doors and the rear gate (5-
door) are locked using the remote keyless
entry transmitter Hazard warning flasher
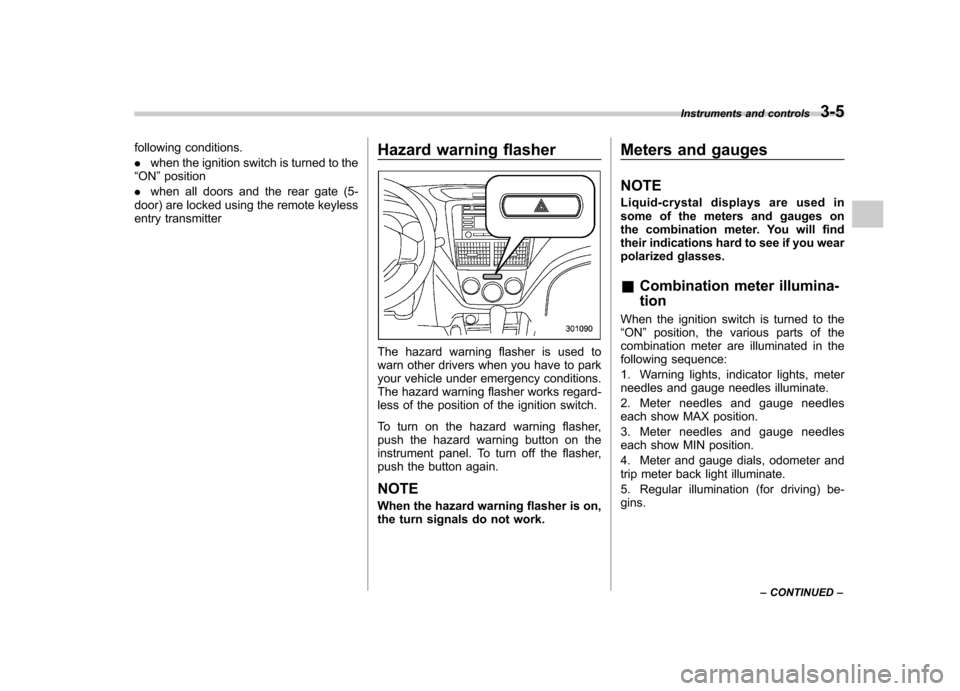
The hazard warning flasher is used to
warn other drivers when you have to park
your vehicle under emergency conditions.
The hazard warning flasher works regard-
less of the position of the ignition switch.
To turn on the hazard warning flasher,
push the hazard warning button on the
instrument panel. To turn off the flasher,
push the button again. NOTE
When the hazard warning flasher is on,
the turn signals do not work.Meters and gauges NOTE
Liquid-crystal displays are used in
some of the meters and gauges on
the combination meter. You will find
their indications hard to see if you wear
polarized glasses. &
Combination meter illumina- tion
When the ignition switch is turned to the “ ON ”position, the various parts of the
combination meter are illuminated in the
following sequence:
1. Warning lights, indicator lights, meter
needles and gauge needles illuminate.
2. Meter needles and gauge needles
each show MAX position.
3. Meter needles and gauge needles
each show MIN position.
4. Meter and gauge dials, odometer and
trip meter back light illuminate.
5. Regular illumination (for driving) be- gins. Instruments and controls
3-5
– CONTINUED –
Page 121 of 414

3-6Instruments and controls
& Canceling the function for
meter/gauge needle move-
ment upon turning on the
ignition switch
It is possible to activate or deactivate the
movement of the meter needles and
gauge needles that takes place when the
ignition switch is turned to the “ON ”
position.
Turn the ignition switch to the “LOCK ”or
“ Acc ”position.
Press the trip knob to show “
”or “”
on the odometer and trip meter display.
The display can be switched as shown in
the following illustration by pressing the
trip knob.
*1: STI only
*2: “” or “”,and “”or “”
cannot be displayed when the ignition
switch is in the “ON ”position.
*
3: Except STI
To change the current setting, press the
trip knob for at least 2 seconds.
: Activated
: Deactivated
NOTE . Your vehicle ’s initial movement
setting of the meter/gauge needles
has been set for activation “
”at the
time of shipment from the factory. .
It is not possible to cancel the initial
movement setting of the meter/gauge
needles when the ignition switch is inthe “ON ”position. Cancel the setting
when the ignition switch is in the“ LOCK ”or “Acc ”position.
& Meter/Gauge needle illumi-
nation setting (except STI)
When the setting is activated or deacti-
vated, the meter needles and gauge
needles illuminate and turn off as follows. Activated:
When the driver ’s door is opened while
the ignition switch is in the “LOCK ”
position, the needles illuminate and turn
off after approximately 20 seconds. The
illumination of the needles gradually turns
off after the ignition switch is turned fromthe “ON ”position to the “LOCK ”position.
Deactivated:
The needles do not illuminate when thedriver ’s door is opened while the ignition
switch is in the “LOCK ”position. The
illumination of the needles turns off im-
mediately after the ignition switch is turned
from the “ON ”position to the “LOCK ”
position.
Page 122 of 414
NOTE .Even during the illumination after
the driver ’s door is opened, if the
ignition switch is turned to the “ON ”
position, the combination meter will
illuminate as usual.. If the doors are locked by the remote
keyless entry system during the illumi-
nation after the driver ’s door is opened,
the illumination will be turned off.. Even while the illumination gradu-
ally turns off after the ignition switch is
turned to the “LOCK ”position, if the
ignition switch is turned to the “ON ”
position, the combination meter illumi-
nate as usual.
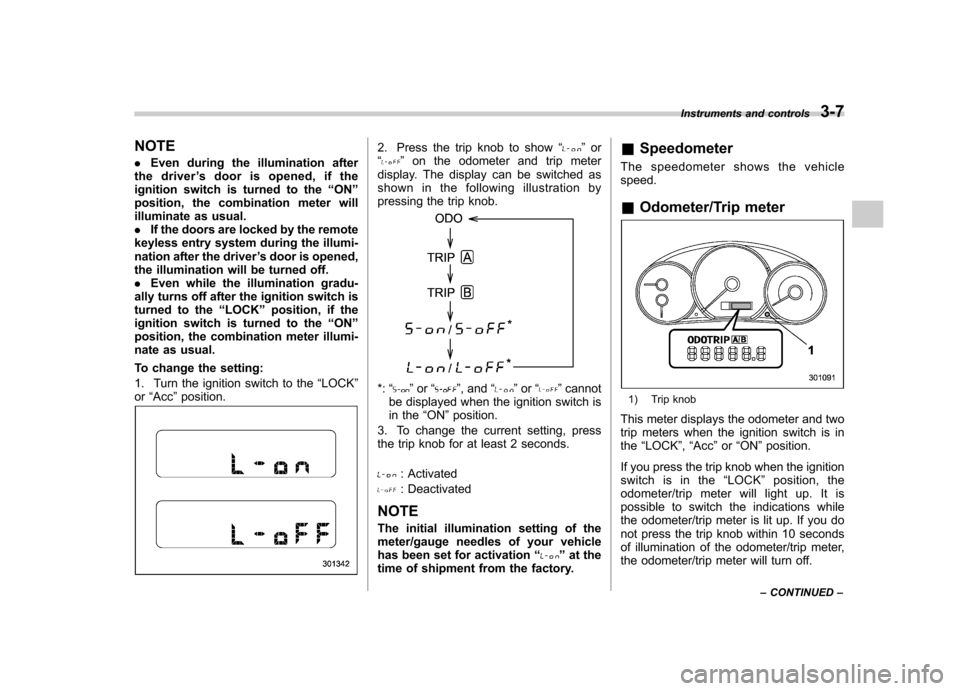
To change the setting:
1. Turn the ignition switch to the “LOCK ”
or “Acc ”position.2. Press the trip knob to show “”or
“” on the odometer and trip meter
display. The display can be switched as
shown in the following illustration by
pressing the trip knob.
*: “”or “”, and “”or “”cannot
be displayed when the ignition switch is
in the “ON ”position.
3. To change the current setting, press
the trip knob for at least 2 seconds.
: Activated
: Deactivated
NOTE
The initial illumination setting of the
meter/gauge needles of your vehicle
has been set for activation “
”at the
time of shipment from the factory. &
Speedometer
The speedometer shows the vehicle speed. & Odometer/Trip meter
1) Trip knob
This meter displays the odometer and two
trip meters when the ignition switch is inthe “LOCK ”, “Acc ”or “ON ”position.
If you press the trip knob when the ignition
switch is in the “LOCK ”position, the
odometer/trip meter will light up. It is
possible to switch the indications while
the odometer/trip meter is lit up. If you do
not press the trip knob within 10 seconds
of illumination of the odometer/trip meter,
the odometer/trip meter will turn off. Instruments and controls
3-7
– CONTINUED –
Page 123 of 414

3-8Instruments and controls
The display can be switched as shown in
the following illustration by pressing the
trip knob.
*1: STI only
*2: “” or “”,and “”or “”
cannot be displayed when the ignition
switch is in the “ON ”position.
*
3: Except STI !
Odometer
The odometer shows the total distance
that the vehicle has been driven. !
Double trip meterThe trip meter shows the distance that the
vehicle has been driven since you last set
it to zero.
To set the trip meter to zero, select the A
trip or B trip meter by pushing the knob
and keep the knob pushed for more than 2seconds.
CAUTION
To ensure safety, do not attempt to
change the function of the indicator
during driving, as an accident couldresult.
Page 141 of 414
3-26Instruments and controls
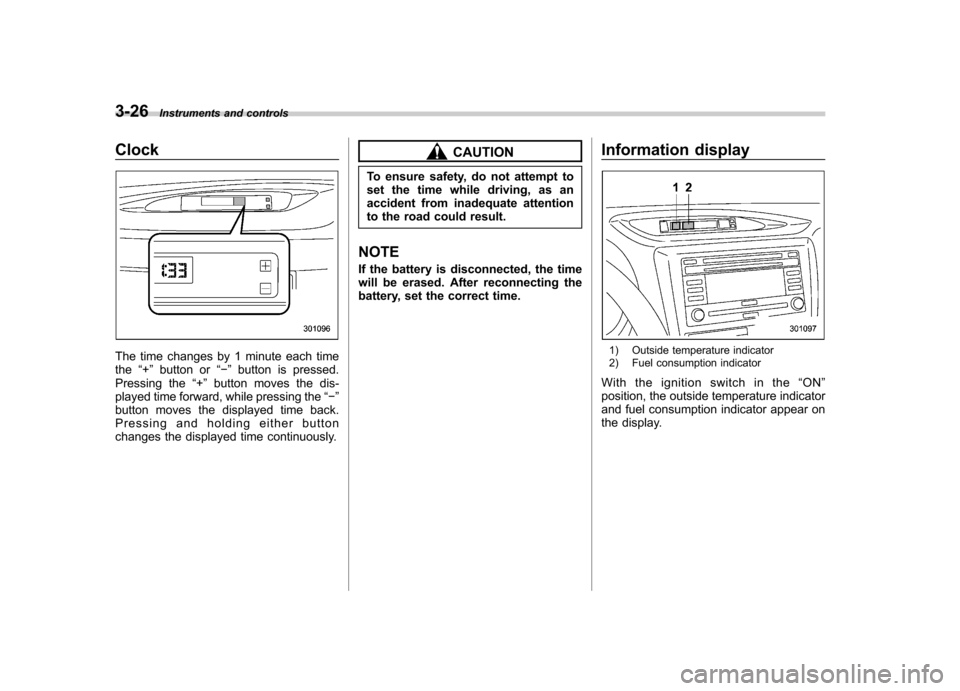
Clock
The time changes by 1 minute each time the“+ ” button or “� ” button is pressed.
Pressing the “+ ” button moves the dis-
played time forward, while pressing the “� ”
button moves the displayed time back.
Pressing and holding either button
changes the displayed time continuously.
CAUTION
To ensure safety, do not attempt to
set the time while driving, as an
accident from inadequate attention
to the road could result.
NOTE
If the battery is disconnected, the time
will be erased. After reconnecting the
battery, set the correct time. Information display
1) Outside temperature indicator
2) Fuel consumption indicator
With the ignition switch in the “ON ”
position, the outside temperature indicator
and fuel consumption indicator appear on
the display.
Page 142 of 414
The fuel consumption indicator is linked
with the odometer/trip meter display on the
combination meter, according to the fol-
lowing chart.Odometer/Trip meter Fuel consumption indicator
A trip meter Average fuel consumption corresponding to the A trip meter
B trip meter Average fuel consumption corresponding to the B trip meter
Odometer U.S-spec. models:
Not indicated
Other models: Current fuel consumption &
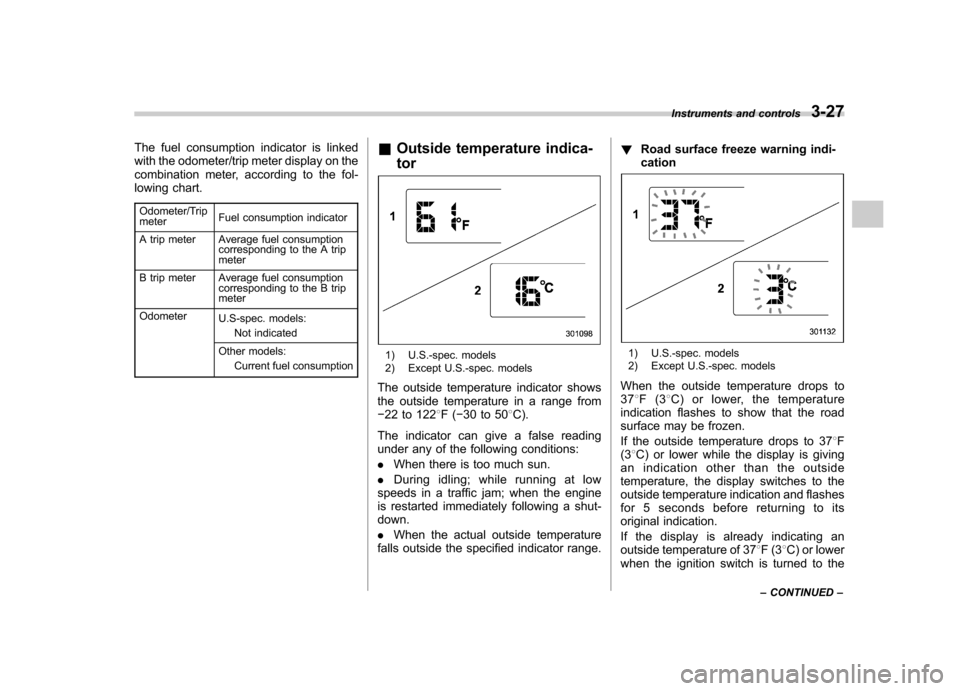
Outside temperature indica- tor
1) U.S.-spec. models
2) Except U.S.-spec. models
The outside temperature indicator shows
the outside temperature in a range from� 22 to 122 8F( �30 to 50 8C).
The indicator can give a false reading
under any of the following conditions: . When there is too much sun.
. During idling; while running at low
speeds in a traffic jam; when the engine
is restarted immediately following a shut- down. . When the actual outside temperature
falls outside the specified indicator range. !
Road surface freeze warning indi- cation1) U.S.-spec. models
2) Except U.S.-spec. models
When the outside temperature drops to 37 8F(3 8C) or lower, the temperature
indication flashes to show that the road
surface may be frozen.
If the outside temperature drops to 37 8F
(3 8C) or lower while the display is giving
an indication other than the outside
temperature, the display switches to the
outside temperature indication and flashes
for 5 seconds before returning to its
original indication.
If the display is already indicating an
outside temperature of 37 8F(3 8C) or lower
when the ignition switch is turned to the Instruments and controls
3-27
– CONTINUED –
Page 143 of 414

3-28Instruments and controls
“ ON ”position, the indication does not
flash. NOTE
The outside temperature indication
may differ from the actual outside
temperature. The road surface freeze
warning indication should be treated
only as a guide. Be sure to check the
condition of the road surface beforedriving. & Current fuel consumption (if equipped)
This display shows the rate of fuel con-
sumption at the present moment. &
Average fuel consumption
1) U.S.-spec. models
2) Except U.S.-spec. models
This display shows the average rate of
fuel consumption since the trip meter was
last reset.
When either of the trip meter displays is
reset, the corresponding average fuel
consumption value is also reset. NOTE . The indicated values vary in accor-
dance with changes in the vehicle ’s
running conditions. Also, the indicated
values may differ slightly from the
actual values and should thus be
treated only as a guide.. After either trip meter display is
reset, the average fuel consumption corresponding to that trip meter dis-
play is not shown until the vehicle has
subsequently covered a distance of 1
mile (or 1 km). &
Turn off display of fuel con-
sumption indicator
The display of the fuel consumption
indicator can be turned off.
To turn off the display of the indicator, turn
the ignition switch to the “LOCK ”position
and press the “+ ” button adjacent to the
information display for approximately 5
seconds. Then, the information display
and the clock display will blink for 3
seconds to notify that the display of the
fuel consumption has been turned off.
To restore the indicator, once again pressthe “+ ” button for approximately 5 sec-
onds. NOTE . The initial display setting of the fuel
consumption indicator of your vehicle
has been set to operational at the time
of shipment from the factory. . The average fuel consumption is
calculated even while the indicator is
not displayed.. Even if you turn off the fuel con-
sumption indicator, the fuel consump-
tion indicator will automatically turn on
Page 146 of 414
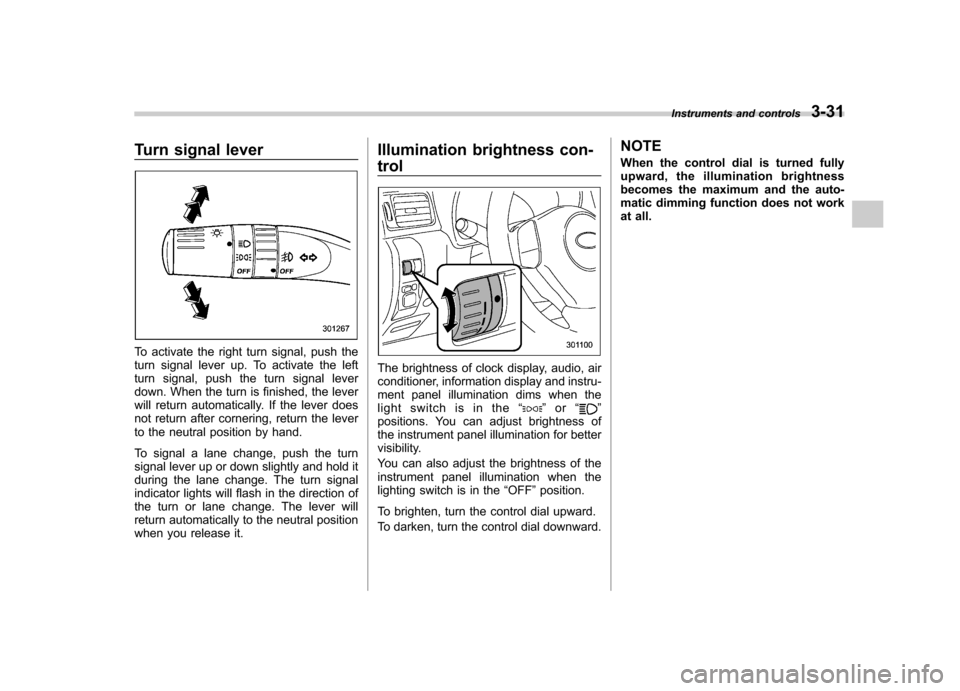
Turn signal lever
To activate the right turn signal, push the
turn signal lever up. To activate the left
turn signal, push the turn signal lever
down. When the turn is finished, the lever
will return automatically. If the lever does
not return after cornering, return the lever
to the neutral position by hand.
To signal a lane change, push the turn
signal lever up or down slightly and hold it
during the lane change. The turn signal
indicator lights will flash in the direction of
the turn or lane change. The lever will
return automatically to the neutral position
when you release it.Illumination brightness con- trol
The brightness of clock display, audio, air
conditioner, information display and instru-
ment panel illumination dims when the
light switch is in the
“
”or “”
positions. You can adjust brightness of
the instrument panel illumination for better
visibility.
You can also adjust the brightness of the
instrument panel illumination when the
lighting switch is in the “OFF ”position.
To brighten, turn the control dial upward.
To darken, turn the control dial downward. NOTE
When the control dial is turned fully
upward, the illumination brightness
becomes the maximum and the auto-
matic dimming function does not work
at all.
Instruments and controls
3-31