tow SUBARU IMPREZA WRX STI 2012 Owner's Guide
[x] Cancel search | Manufacturer: SUBARU, Model Year: 2012, Model line: IMPREZA WRX STI, Model: SUBARU IMPREZA WRX STI 2012Pages: 463, PDF Size: 7.69 MB
Page 356 of 463
Black plate (318,1)
北米Model "A1130BE-A" EDITED: 2011/ 6/ 7
9-12
In case of emergency
Engine overheating
WARNING
Never attempt to remove the radia-
tor cap until the engine has been
shut off and has fully cooled down.
When the engine is hot, the coolant
is under pressure. Removing the
cap while the engine is still hot
could release a spray of boiling hot
coolant, which could burn you very
seriously.
If the engine overheats, safely pull off the
road and stop the vehicle in a safe place.& If steam is coming from the
engine compartmentTurn off the engine and get everyone
away from the vehicle until it cools down.&If no steam is coming from
the engine compartment
NOTEFor details about how to check the
coolant level or how to add coolant,
refer to “Engine coolant ”F 11-12.
1. Keep the engine running at idling
speed. 2. Open the hood to ventilate the engine
compartment. Refer to
“Engine hood ”
F 11-5.
Confirm that the cooling fan is turning. If
the fan is not turning, immediately turn off
the engine and contact your authorized
dealer for repair.
3. After the engine coolant temperature
has dropped, turn off the engine.
If temperature gauge stays in the over-
heated zone, turn off the engine. Refer to
“Temperature gauge ”F 3-10.
4. After the engine has fully cooled down,
check the coolant level in the reserve
tank.
If the coolant level is below the “LOW”
mark, add coolant up to the “FULL”mark.
5. If there is no coolant in the reserve
tank, add coolant to the reserve tank.
Then remove the radiator cap and fill the
radiator with coolant.
If you remove the radiator cap from a hot
radiator, first wrap a thick cloth around the
radiator cap, then turn the cap counter-
clockwise slowly without pressing down
until it stops. Release the pressure from
the radiator. After the pressure has been
fully released, remove the cap by pressing
down and turning it.
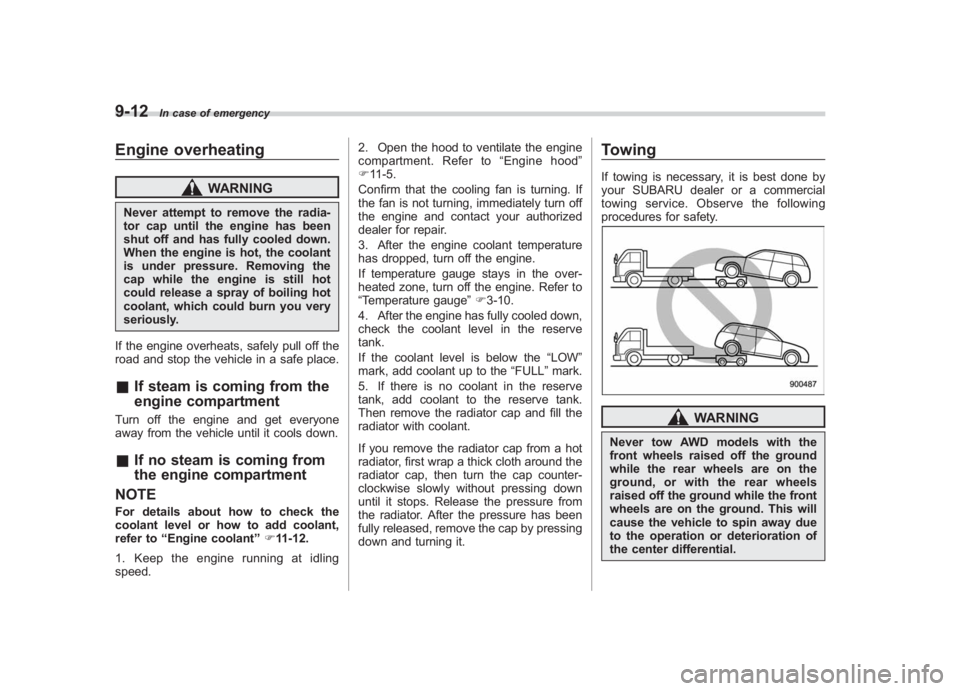
TowingIf towing is necessary, it is best done by
your SUBARU dealer or a commercial
towing service. Observe the following
procedures for safety.
WARNING
Never tow AWD models with the
front wheels raised off the ground
while the rear wheels are on the
ground, or with the rear wheels
raised off the ground while the front
wheels are on the ground. This will
cause the vehicle to spin away due
to the operation or deterioration of
the center differential.
Page 357 of 463
Black plate (319,1)
北米Model "A1130BE-A" EDITED: 2011/ 6/ 7
& Towing and tie-down hooksThe towing hooks should be used only in
an emergency (e.g., to free a stuck vehicle
from mud, sand or snow).
CAUTION
. Use only the specified towing
hook and tie-down hook. Never
use suspension parts or other
parts of the body for towing or
tie-down purposes.
. To prevent deformation to the
front bumper and the towing
hook, do not apply excessive
lateral load to the towing hook.
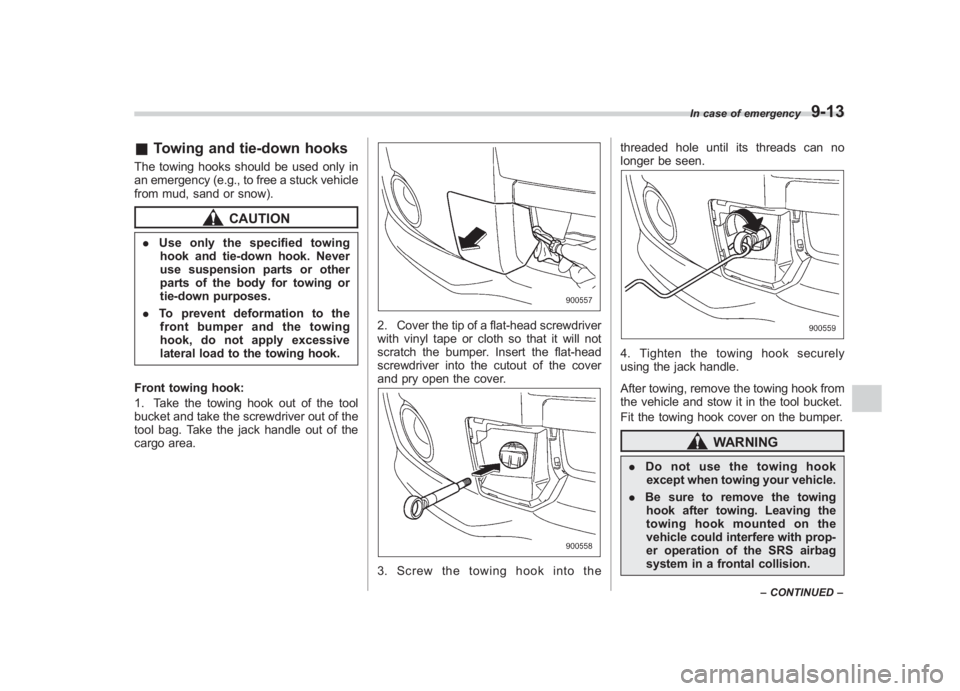
Front towing hook:
1. Take the towing hook out of the tool
bucket and take the screwdriver out of the
tool bag. Take the jack handle out of the
cargo area.
2. Cover the tip of a flat-head screwdriver
with vinyl tape or cloth so that it will not
scratch the bumper. Insert the flat-head
screwdriver into the cutout of the cover
and pry open the cover.3. Screw the towing hook into the threaded hole until its threads can no
longer be seen.
4. Tighten the towing hook securely
using the jack handle.
After towing, remove the towing hook from
the vehicle and stow it in the tool bucket.
Fit the towing hook cover on the bumper.
WARNING
.
Do not use the towing hook
except when towing your vehicle.
. Be sure to remove the towing
hook after towing. Leaving the
towing hook mounted on the
vehicle could interfere with prop-
er operation of the SRS airbag
system in a frontal collision.
In case of emergency
9-13
– CONTINUED –
9
Page 358 of 463
Black plate (320,1)
北米Model "A1130BE-A" EDITED: 2011/ 6/ 7
9-14
In case of emergency
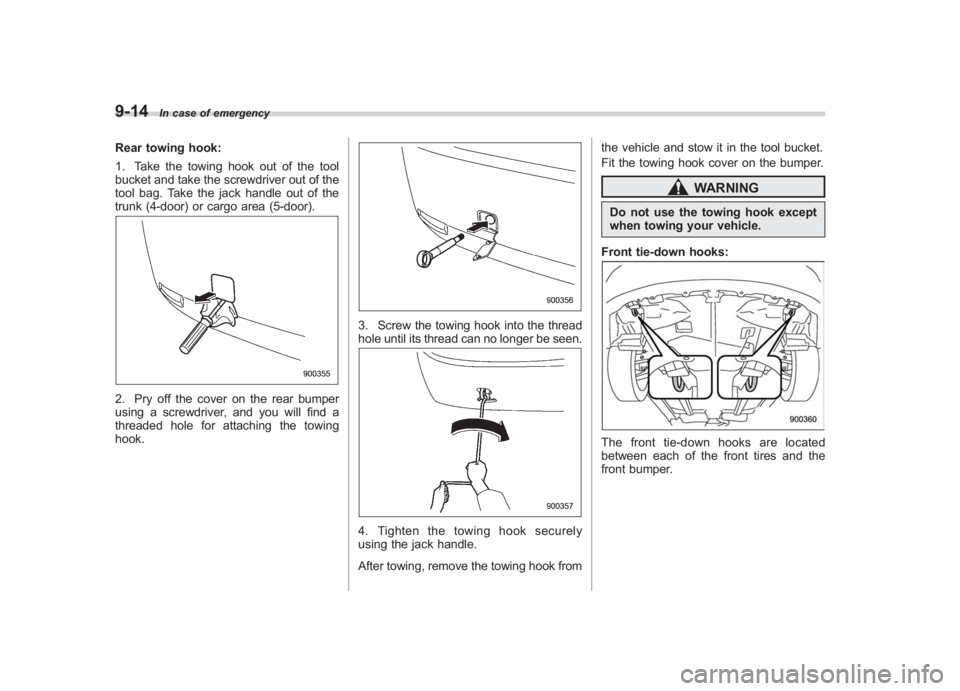
Rear towing hook:
1. Take the towing hook out of the tool
bucket and take the screwdriver out of the
tool bag. Take the jack handle out of the
trunk (4-door) or cargo area (5-door).2. Pry off the cover on the rear bumper
using a screwdriver, and you will find a
threaded hole for attaching the towing
hook.
3. Screw the towing hook into the thread
hole until its thread can no longer be seen.4. Tighten the towing hook securely
using the jack handle.
After towing, remove the towing hook from the vehicle and stow it in the tool bucket.
Fit the towing hook cover on the bumper.
WARNING
Do not use the towing hook except
when towing your vehicle.
Front tie-down hooks:The front tie-down hooks are located
between each of the front tires and the
front bumper.
Page 359 of 463
Black plate (321,1)
北米Model "A1130BE-A" EDITED: 2011/ 6/ 7
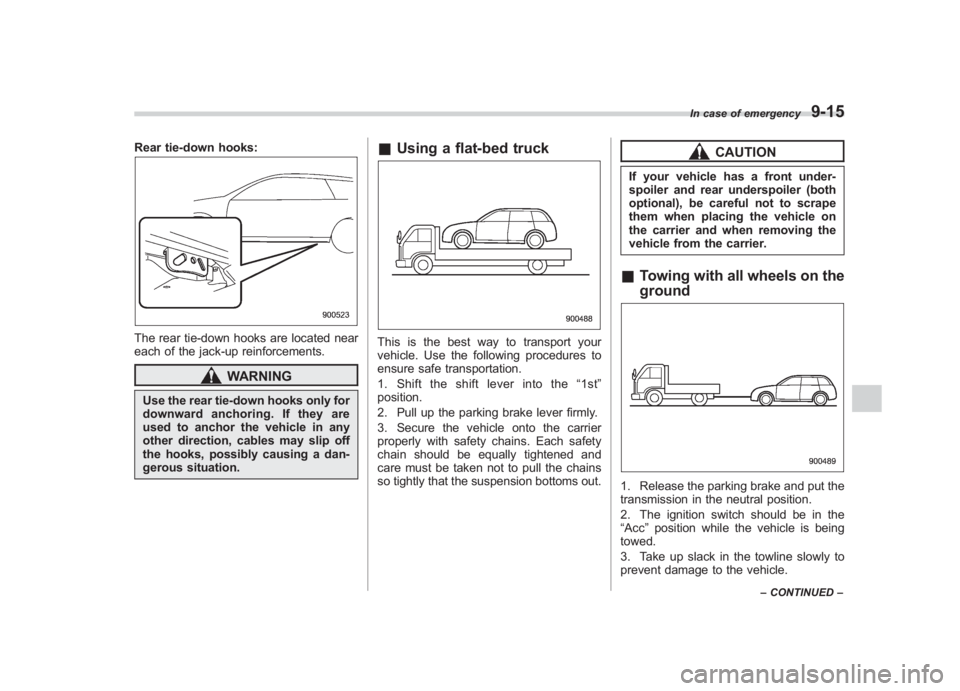
Rear tie-down hooks:The rear tie-down hooks are located near
each of the jack-up reinforcements.
WARNING
Use the rear tie-down hooks only for
downward anchoring. If they are
used to anchor the vehicle in any
other direction, cables may slip off
the hooks, possibly causing a dan-
gerous situation.
& Using a flat-bed truckThis is the best way to transport your
vehicle. Use the following procedures to
ensure safe transportation.
1. Shifttheshiftleverintothe “1st ”
position.
2. Pull up the parking brake lever firmly.
3. Secure the vehicle onto the carrier
properly with safety chains. Each safety
chain should be equally tightened and
care must be taken not to pull the chains
so tightly that the suspension bottoms out.
CAUTION
If your vehicle has a front under-
spoiler and rear underspoiler (both
optional), be careful not to scrape
them when placing the vehicle on
the carrier and when removing the
vehicle from the carrier.& Towing with all wheels on the
ground1. Release the parking brake and put the
transmission in the neutral position.
2. The ignition switch should be in the
“Acc ”position while the vehicle is being
towed.
3. Take up slack in the towline slowly to
prevent damage to the vehicle.
In case of emergency
9-15
– CONTINUED –
9
Page 360 of 463
Black plate (322,1)
北米Model "A1130BE-A" EDITED: 2011/ 6/ 7
9-16
In case of emergency
WARNING
. Never turn the ignition switch to
the “LOCK ”position while the
vehicle is being towed because
the steering wheel and the direc-
tion of the wheels will be locked.
. Remember that the brake booster
and power steering do not func-
tion when the engine is not
running. Because the engine is
turned off, it will take greater
effort to operate the brake pedal
and steering wheel.
CAUTION
. If transmission failure occurs,
transport your vehicle on a flat-
bed truck.
. Do not run the engine while being
towed using this method. Trans-
mission damage could result if
the vehicle is towed with the
engine running.
Rear gate –if the rear gate
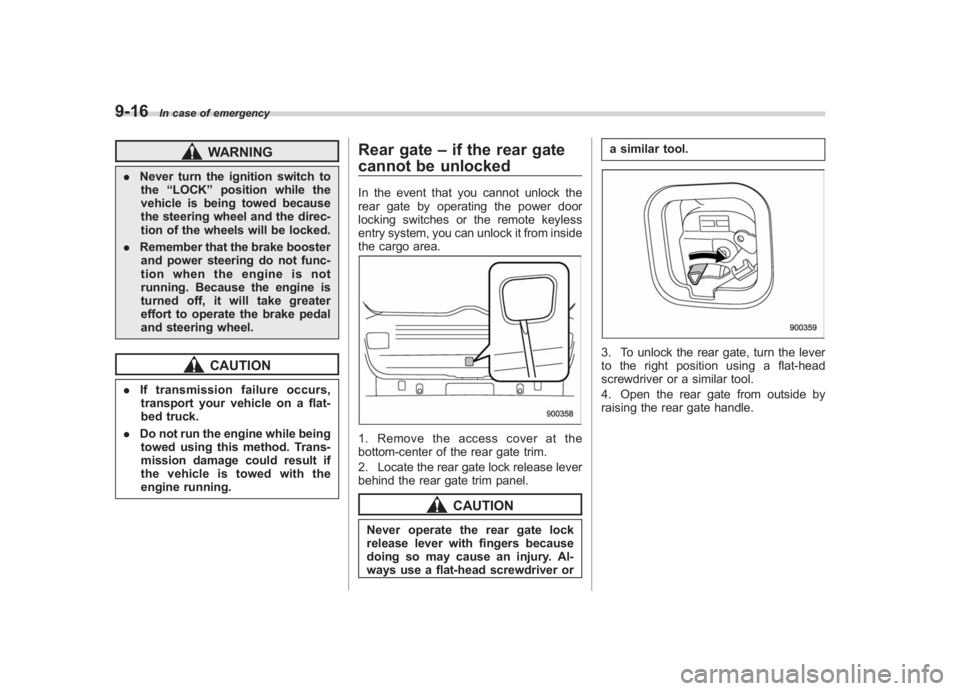
cannot be unlockedIn the event that you cannot unlock the
rear gate by operating the power door
locking switches or the remote keyless
entry system, you can unlock it from inside
the cargo area.1. Remove the access cover at the
bottom-center of the rear gate trim.
2. Locate the rear gate lock release lever
behind the rear gate trim panel.
CAUTION
Never operate the rear gate lock
release lever with fingers because
doing so may cause an injury. Al-
ways use a flat-head screwdriver or a similar tool.
3. To unlock the rear gate, turn the lever
to the right position using a flat-head
screwdriver or a similar tool.
4. Open the rear gate from outside by
raising the rear gate handle.
Page 373 of 463
Black plate (335,1)
北米Model "A1130BE-A" EDITED: 2011/ 6/ 7
& When checking or servicing
in the engine compartment
while the engine is running
WARNING
A running engine can be dangerous.
Keep your fingers, hands, clothing,
hair and tools away from the cooling
fan, belts and any other moving
engine parts. Removing rings,
watches and ties is advisable.
Engine hood
WARNING
Always check that the hood is
properly locked before you start
driving. If it is not, it might fly open
while the vehicle is moving and
block your view, which may cause
an accident and serious bodily in-
jury.
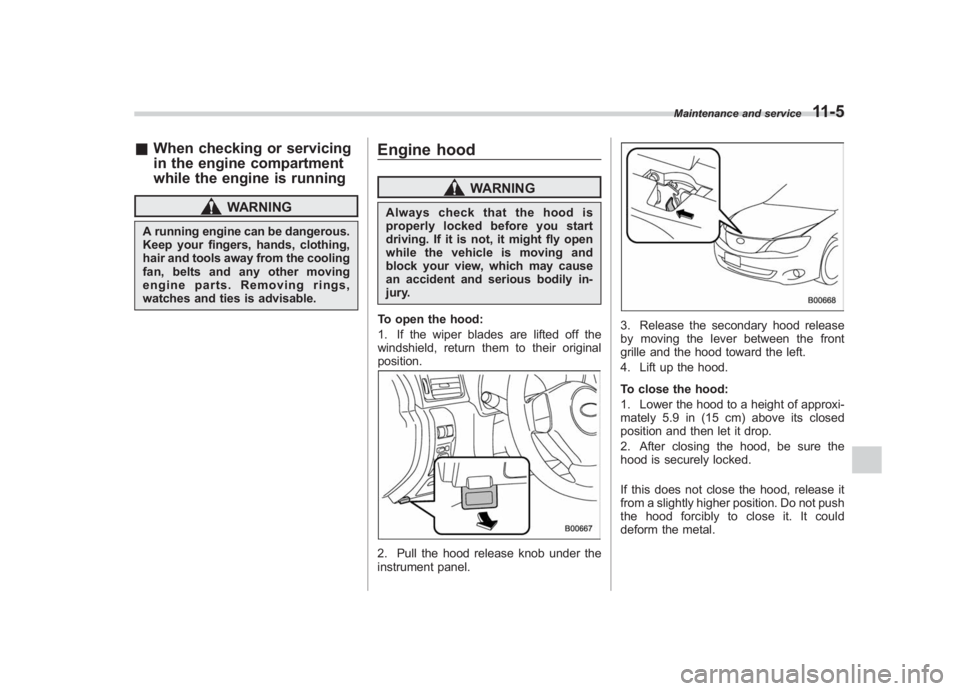
To open the hood:
1. If the wiper blades are lifted off the
windshield, return them to their original
position.2. Pull the hood release knob under the
instrument panel.
3. Release the secondary hood release
by moving the lever between the front
grille and the hood toward the left.
4. Lift up the hood.
To close the hood:
1. Lower the hood to a height of approxi-
mately 5.9 in (15 cm) above its closed
position and then let it drop.
2. After closing the hood, be sure the
hood is securely locked.
If this does not close the hood, release it
from a slightly higher position. Do not push
thehoodforciblytocloseit.Itcould
deform the metal.
Maintenance and service
11-5
11
Page 403 of 463
Black plate (365,1)
北米Model "A1130BE-A" EDITED: 2011/ 6/ 7
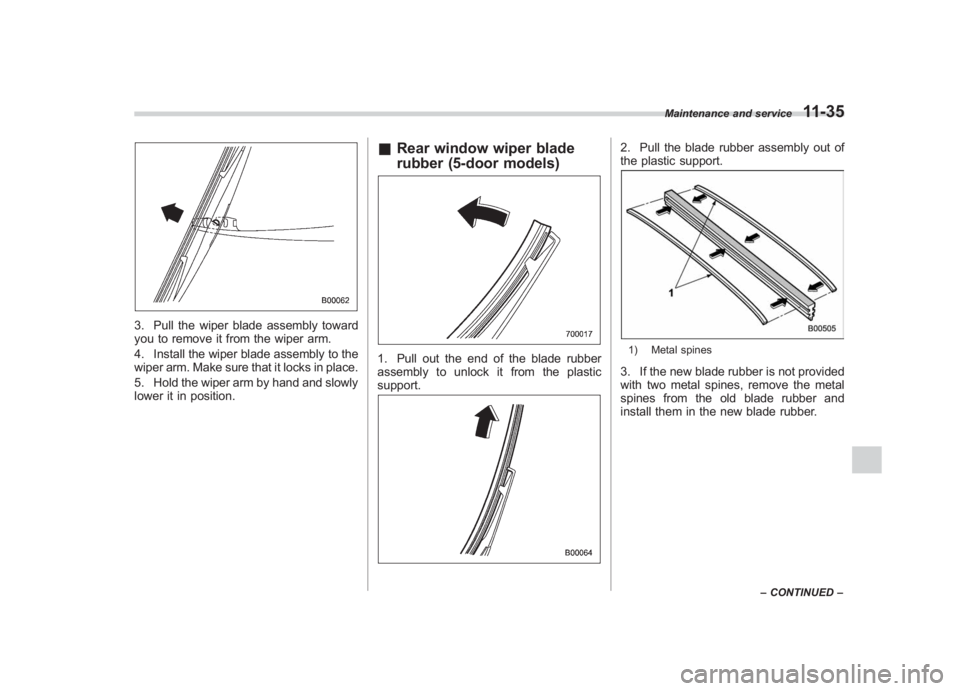
3. Pull the wiper blade assembly toward
you to remove it from the wiper arm.
4. Install the wiper blade assembly to the
wiper arm. Make sure that it locks in place.
5. Hold the wiper arm by hand and slowly
lower it in position.
& Rear window wiper blade
rubber (5-door models)1. Pull out the end of the blade rubber
assembly to unlock it from the plastic
support.
2. Pull the blade rubber assembly out of
the plastic support.1) Metal spines3. If the new blade rubber is not provided
with two metal spines, remove the metal
spines from the old blade rubber and
install them in the new blade rubber.
Maintenance and service
11-35
–CONTINUED –
11
Page 444 of 463
Black plate (406,1)
北米Model "A1130BE-A" EDITED: 2011/ 6/ 7
13-10
Consumer information and Reporting safety defects
& Tire care –maintenance and
safety practices.
Check on a daily basis that the
tires are free from serious damage,
nails, and stones. At the same time,
check the tires for abnormal wear.
.
Inspect the tire tread regularly
and replace the tires before their
tread wear indicators become visi-
ble. When a tire ’streadwear
indicator becomes visible, the tire
is worn beyond the acceptable limit
and must be replaced immediately.
With a tire in this condition, driving
at even low speeds in wet weather
can cause the vehicle to hydro-
plane. Possible resulting loss of
vehiclecontrolcanleadtoan
accident.
.
To maximize the life of each tire
and ensure that the tires wear
uniformly, it is best to rotate the
tires every 7,500 miles (12,000 km).
For information about the tire rota-
tion order, refer to “Tire rotation ”
F 11-29
.Replace any damaged or
unevenly worn tires at the time of rotation. After tire rotation, adjust
the tire pressures and make sure
the wheel nuts are correctly tigh-
tened. For information about the
tightening torque and tightening
sequence for the wheel nuts, refer
to
“Flat tires” F9-5
.
& Vehicle load limit –how to
determineThe load capacity of your vehicle is
determined by weight, not by avail-
able cargo space. The load limit of
your vehicle is shown on the
vehicle placard attached to the
driver ’s side B-pillar. Locate the
statement “The combined weight
of occupants and cargo should
never exceed XXX kg or XXX lbs ”
on your vehicle ’s placard.
Thevehicleplacardalsoshows
seating capacity of your vehicle.
The total load capacity includes the
total weight of driver and all pas-
sengers and their belongings, any
cargo, any optional equipment such
as a trailer hitch, roof rack or bike carrier, etc., and the tongue load of
a trailer. Therefore cargo capacity
can be calculated by the following
method.
Cargo capacity = Load limit
(total
weight of occupants + total weight
of optional equipment + tongue
load of a trailer (if applicable))
For information about vehicle load-
ing, refer to “Loading your vehicle ”
F 8-10
.
NOTEYour vehicle is neither designed
nor intended to be used for
trailer towing. Therefore, never
tow a trailer with your vehicle.
Page 446 of 463
Black plate (408,1)
北米Model "A1130BE-A" EDITED: 2011/ 6/ 7
13-12
Consumer information and Reporting safety defects
2.
Calculate the available load ca-
pacity.
3.
The total weight now exceeds
the capacity weight by 92 lbs (42
kg), so the cargo weight must be
reduced by 92 lbs (42 kg) or more.
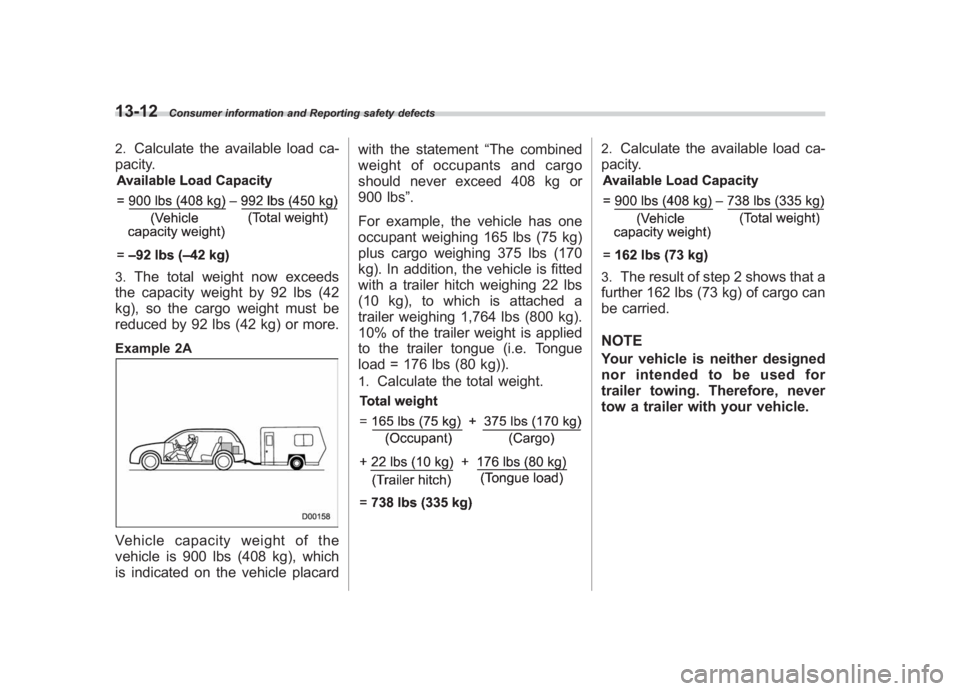
Example 2AVehicle capacity weight of the
vehicle is 900 lbs (408 kg), which
is indicated on the vehicle placard with the statement
“The combined
weight of occupants and cargo
should never exceed 408 kg or
900 lbs ”.
For example, the vehicle has one
occupant weighing 165 lbs (75 kg)
plus cargo weighing 375 lbs (170
kg). In addition, the vehicle is fitted
with a trailer hitch weighing 22 lbs
(10 kg), to which is attached a
trailer weighing 1,764 lbs (800 kg).
10% of the trailer weight is applied
to the trailer tongue (i.e. Tongue
load = 176 lbs (80 kg)).
1.
Calculate the total weight.
2.
Calculate the available load ca-
pacity.
3.
The result of step 2 shows that a
further 162 lbs (73 kg) of cargo can
be carried.
NOTEYour vehicle is neither designed
nor intended to be used for
trailer towing. Therefore, never
tow a trailer with your vehicle.
Page 447 of 463
Black plate (409,1)
北米Model "A1130BE-A" EDITED: 2011/ 6/ 7
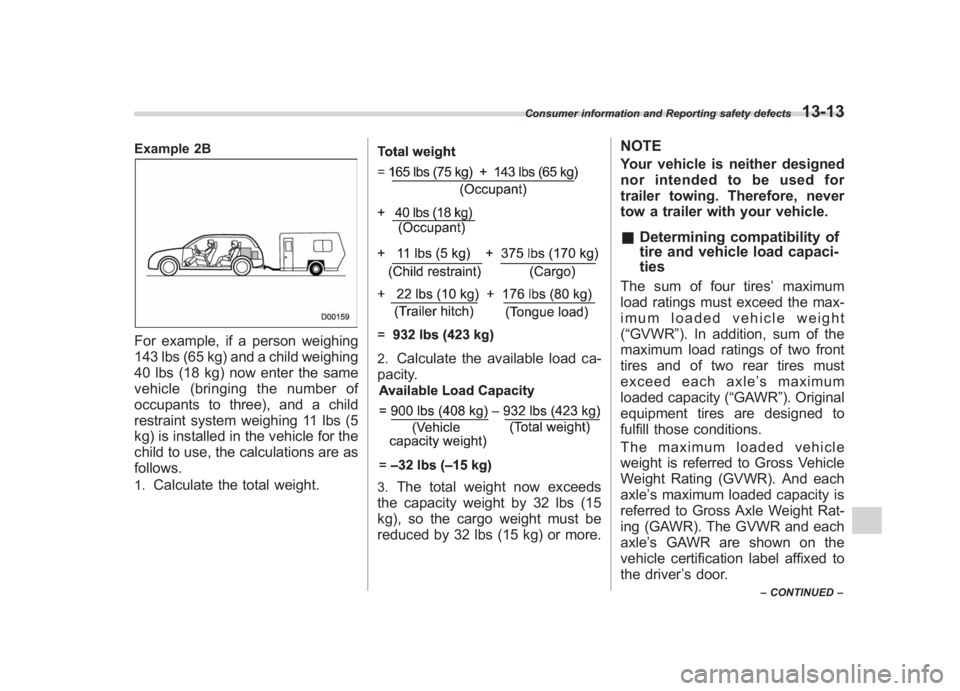
Example 2BFor example, if a person weighing
143 lbs (65 kg) and a child weighing
40 lbs (18 kg) now enter the same
vehicle (bringing the number of
occupants to three), and a child
restraint system weighing 11 lbs (5
kg) is installed in the vehicle for the
child to use, the calculations are as
follows.1.
Calculate the total weight.
2.
Calculate the available load ca-
pacity.
3.
The total weight now exceeds
the capacity weight by 32 lbs (15
kg), so the cargo weight must be
reduced by 32 lbs (15 kg) or more.
NOTEYour vehicle is neither designed
nor intended to be used for
trailer towing. Therefore, never
tow a trailer with your vehicle.& Determining compatibility of
tire and vehicle load capaci-
tiesThe sum of four tires ’maximum
load ratings must exceed the max-
imum loaded vehicle weight
( “GVWR ”). In addition, sum of the
maximum load ratings of two front
tires and of two rear tires must
exceed each axle ’smaximum
loaded capacity ( “GAWR ”). Original
equipment tires are designed to
fulfill those conditions.
The maximum loaded vehicle
weight is referred to Gross Vehicle
Weight Rating (GVWR). And each
axle ’s maximum loaded capacity is
referred to Gross Axle Weight Rat-
ing (GAWR). The GVWR and each
axle ’s GAWR are shown on the
vehicle certification label affixed to
the driver ’s door.
Consumer information and Reporting safety defects
13-13
– CONTINUED –
13