read SUBARU LEGACY 1999 Service Owner's Guide
[x] Cancel search | Manufacturer: SUBARU, Model Year: 1999, Model line: LEGACY, Model: SUBARU LEGACY 1999Pages: 1456, PDF Size: 59.93 MB
Page 553 of 1456
range (above the center between upper and lower
marks). When the transmission is hot, the level
should be above the center of upper and lower
marks, and when it is cold, the level should be
found below the center of these two marks.
CAUTION:
IUse care not to exceed the upper limit level.
IATF level varies with temperature. Remem-
ber that the addition of fluid to the upper limit
mark when the transmission is cold will result
in the overfilling of fluid.
4) Fluid temperature rising speed
IBy idling the engine
Time for temperature rise to 60ÉC (140ÉF) with
atmospheric temperature of 0ÉC (32ÉF): More than
25 minutes
Time for temperature rise to 30ÉC (86ÉF) with
atmospheric temperature of 0ÉC (32ÉF): Approx. 8
minutes
IBy running the vehicle
Time for temperature rise to 60ÉC (140ÉF) with
atmospheric temperature of 0ÉC (32ÉF): More than
10 minutes
5) Method for checking fluid level upon delivery or
at periodic inspection
Check fluid level after a warm-up run of approx. 10
minutes. During the warm-up period, the automatic
transmission functions can also be checked.
2. DIFFERENTIAL GEAR OIL LEVEL
1) Ensure the vehicle is in safe condition.
NOTE:
Do not check the oil level nor add oil to the case
with the front end of the vehicle jacked-up; this will
result in an incorrect reading of the oil level.
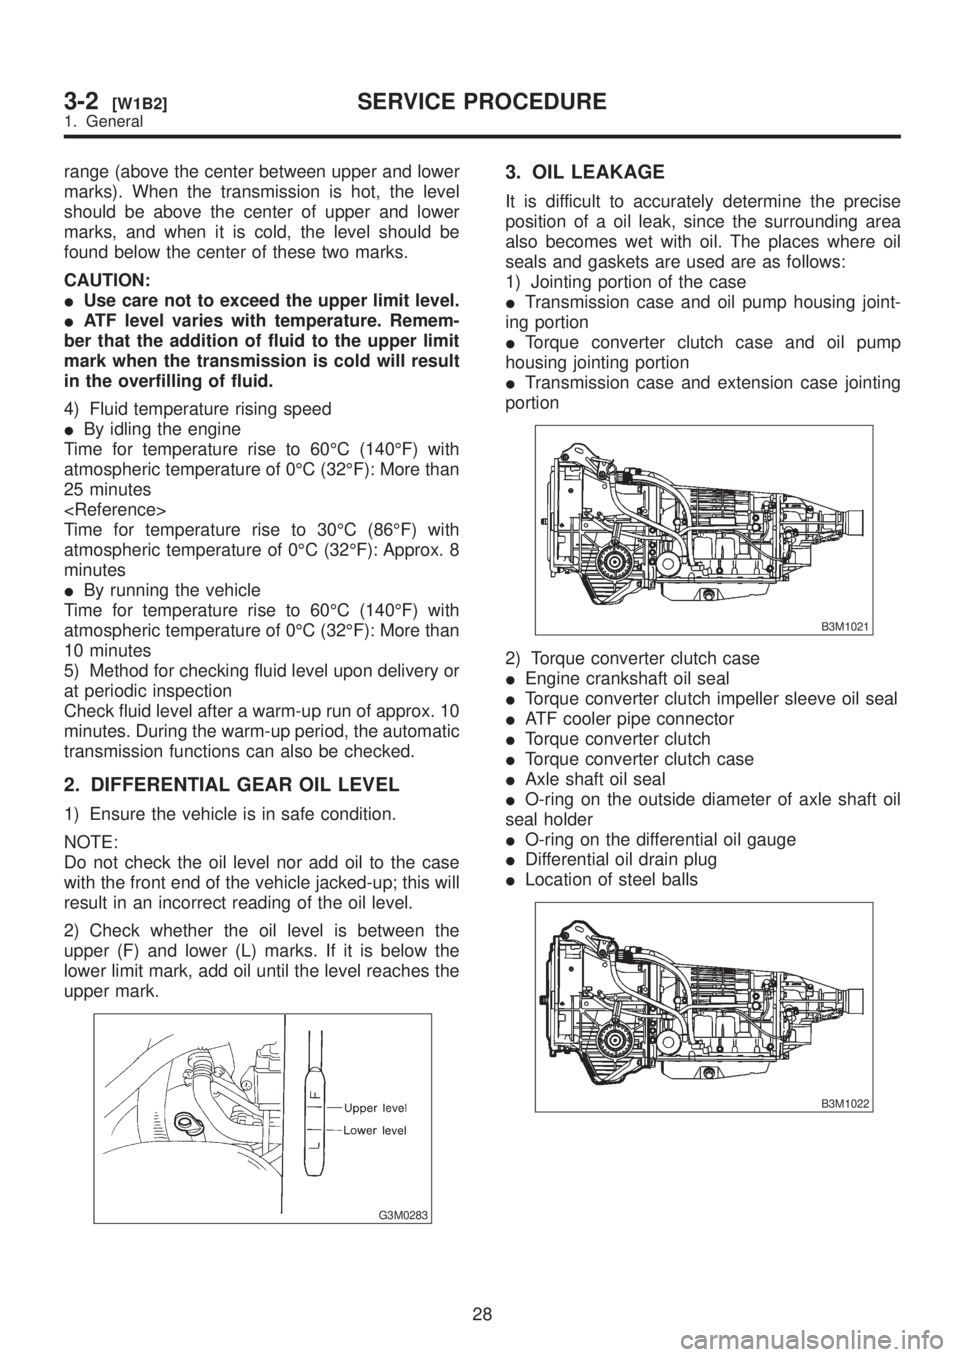
2) Check whether the oil level is between the
upper (F) and lower (L) marks. If it is below the
lower limit mark, add oil until the level reaches the
upper mark.
G3M0283
3. OIL LEAKAGE
It is difficult to accurately determine the precise
position of a oil leak, since the surrounding area
also becomes wet with oil. The places where oil
seals and gaskets are used are as follows:
1) Jointing portion of the case
ITransmission case and oil pump housing joint-
ing portion
ITorque converter clutch case and oil pump
housing jointing portion
ITransmission case and extension case jointing
portion
B3M1021
2) Torque converter clutch case
IEngine crankshaft oil seal
ITorque converter clutch impeller sleeve oil seal
IATF cooler pipe connector
ITorque converter clutch
ITorque converter clutch case
IAxle shaft oil seal
IO-ring on the outside diameter of axle shaft oil
seal holder
IO-ring on the differential oil gauge
IDifferential oil drain plug
ILocation of steel balls
B3M1022
28
3-2[W1B2]SERVICE PROCEDURE
1. General
Page 570 of 1456
stall speed range on the tachometer scale.
3) Place the wheel chocks at the front and rear of
all wheels and engage the parking brake.
4) Move the manual linkage to ensure it operates
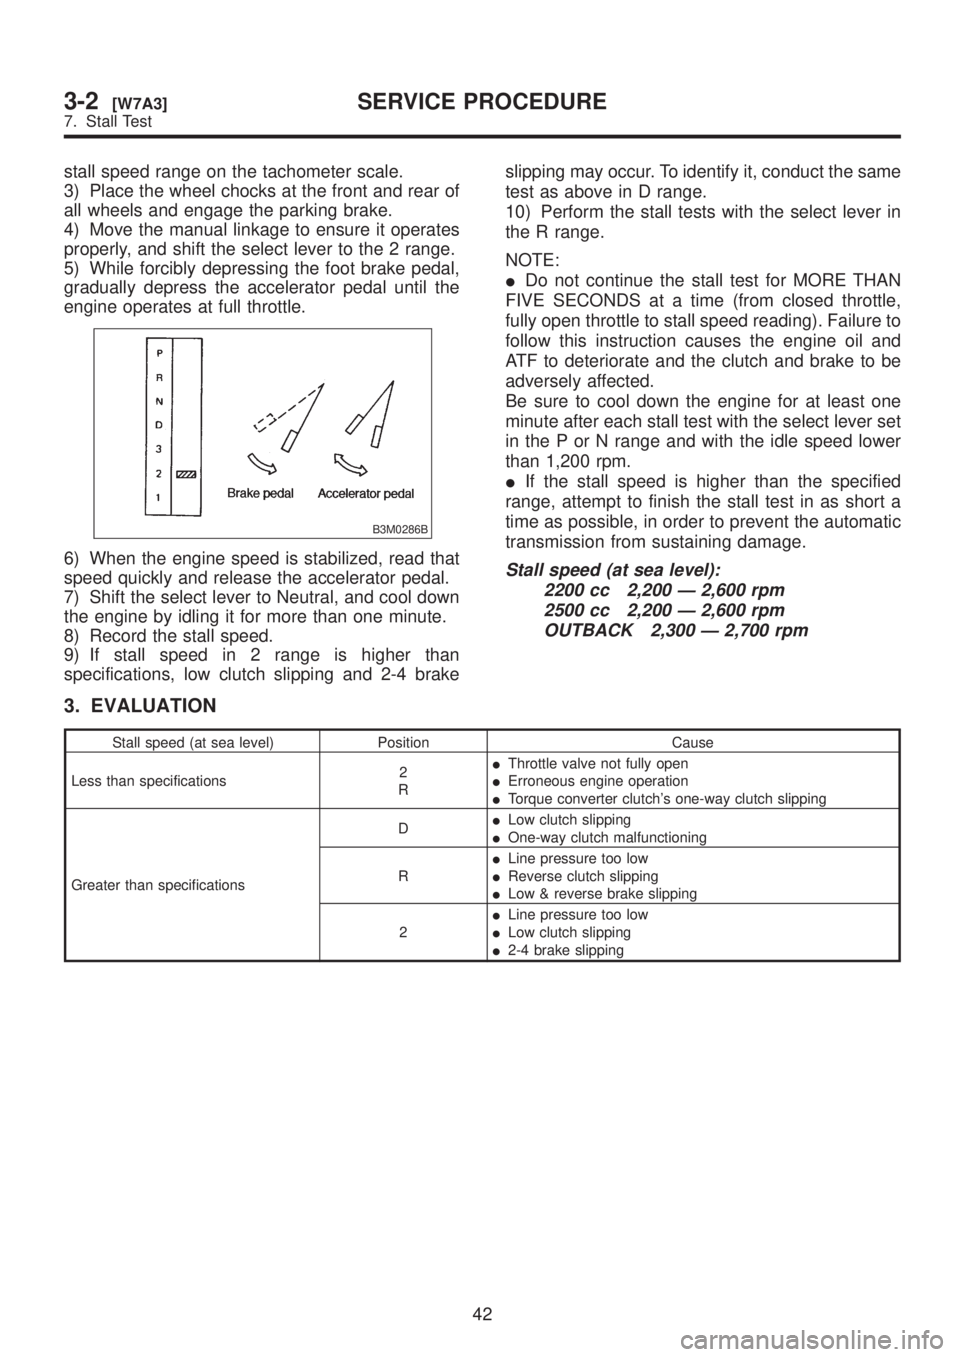
properly, and shift the select lever to the 2 range.
5) While forcibly depressing the foot brake pedal,
gradually depress the accelerator pedal until the
engine operates at full throttle.
B3M0286B
6) When the engine speed is stabilized, read that
speed quickly and release the accelerator pedal.
7) Shift the select lever to Neutral, and cool down
the engine by idling it for more than one minute.
8) Record the stall speed.
9) If stall speed in 2 range is higher than
specifications, low clutch slipping and 2-4 brakeslipping may occur. To identify it, conduct the same
test as above in D range.
10) Perform the stall tests with the select lever in
the R range.
NOTE:
IDo not continue the stall test for MORE THAN
FIVE SECONDS at a time (from closed throttle,
fully open throttle to stall speed reading). Failure to
follow this instruction causes the engine oil and
ATF to deteriorate and the clutch and brake to be
adversely affected.
Be sure to cool down the engine for at least one
minute after each stall test with the select lever set
in the P or N range and with the idle speed lower
than 1,200 rpm.
IIf the stall speed is higher than the specified
range, attempt to finish the stall test in as short a
time as possible, in order to prevent the automatic
transmission from sustaining damage.Stall speed (at sea level):
2200 cc 2,200 Ð 2,600 rpm
2500 cc 2,200 Ð 2,600 rpm
OUTBACK 2,300 Ð 2,700 rpm
3. EVALUATION
Stall speed (at sea level) Position Cause
Less than specifications2
RIThrottle valve not fully open
IErroneous engine operation
ITorque converter clutch's one-way clutch slipping
Greater than specificationsDILow clutch slipping
IOne-way clutch malfunctioning
RILine pressure too low
IReverse clutch slipping
ILow & reverse brake slipping
2ILine pressure too low
ILow clutch slipping
I2-4 brake slipping
42
3-2[W7A3]SERVICE PROCEDURE
7. Stall Test
Page 584 of 1456
C: ASSEMBLY OF OVERALL
TRANSMISSION
1. TORQUE CONVERTER CLUTCH CASE
SECTION
1) Check the appearance of each component and
clean.
CAUTION:
Make sure each part is free of harmful cuts,
damage and other faults.
2) Force-fit the oil seal to the torque converter
clutch case with ST.
ST 398437700 DRIFT
G3M0379
3) Install the differential assembly to the case,
paying special attention not to damage the speed-
ometer gears (drive and driven) and the inside of
the case (particularly, the differential side retainer
contact surface).
G3M0380
4) Install the circlip to the axle shaft, insert the
shaft into the differential assembly, and tap it into
position with a plastic hammer.
CAUTION:
IIf no play is felt, check whether the shaft is
fully inserted. If shaft insertion is correct,
replace the axle shaft.
IBe sure to use a new circlip.
Thrust play:
0.3 Ð 0.5 mm (0.012 Ð 0.020 in)
5) Wrap vinyl tape around the splined portion of
the axle shaft.
G3M0368
6) Install the oil seal and outer race (taper roller
bearing) to the differential side retainer. Then
screw in the retainer and the O-ring after coating
the threads with oil.
CAUTION:
IPay attention not to damage the oil seal lips.
IDo not confuse the RH and LH oil seals.
IKeep the O-ring removed from the retainer.
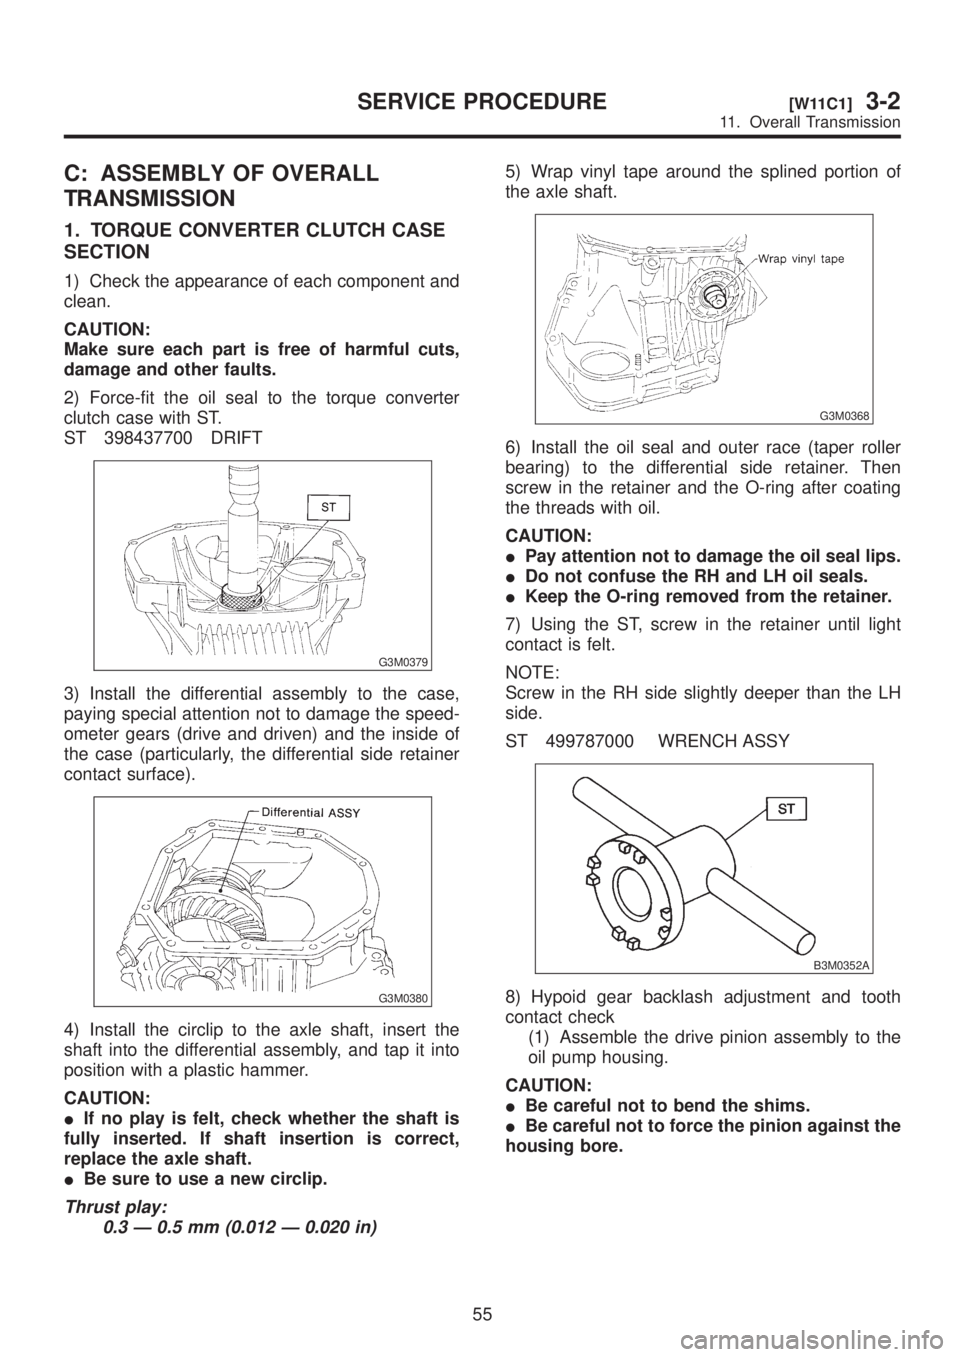
7) Using the ST, screw in the retainer until light
contact is felt.
NOTE:
Screw in the RH side slightly deeper than the LH
side.
ST 499787000 WRENCH ASSY
B3M0352A
8) Hypoid gear backlash adjustment and tooth
contact check
(1) Assemble the drive pinion assembly to the
oil pump housing.
CAUTION:
IBe careful not to bend the shims.
IBe careful not to force the pinion against the
housing bore.
55
[W11C1]3-2SERVICE PROCEDURE
11. Overall Transmission
Page 586 of 1456
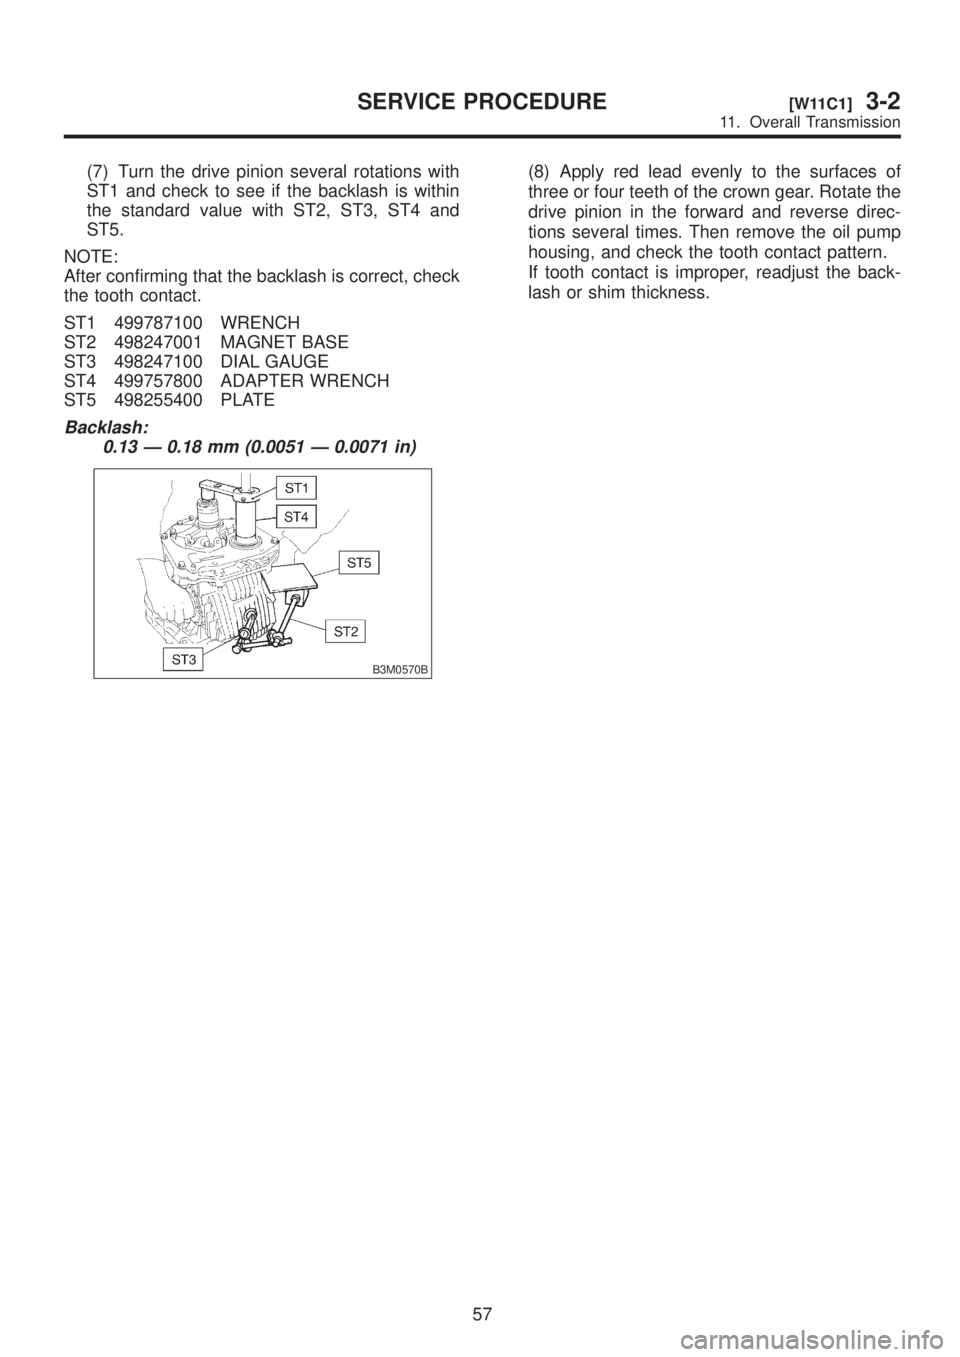
(7) Turn the drive pinion several rotations with
ST1 and check to see if the backlash is within
the standard value with ST2, ST3, ST4 and
ST5.
NOTE:
After confirming that the backlash is correct, check
the tooth contact.
ST1 499787100 WRENCH
ST2 498247001 MAGNET BASE
ST3 498247100 DIAL GAUGE
ST4 499757800 ADAPTER WRENCH
ST5 498255400 PLATE
Backlash:
0.13 Ð 0.18 mm (0.0051 Ð 0.0071 in)
B3M0570B
(8) Apply red lead evenly to the surfaces of
three or four teeth of the crown gear. Rotate the
drive pinion in the forward and reverse direc-
tions several times. Then remove the oil pump
housing, and check the tooth contact pattern.
If tooth contact is improper, readjust the back-
lash or shim thickness.
57
[W11C1]3-2SERVICE PROCEDURE
11. Overall Transmission
Page 648 of 1456
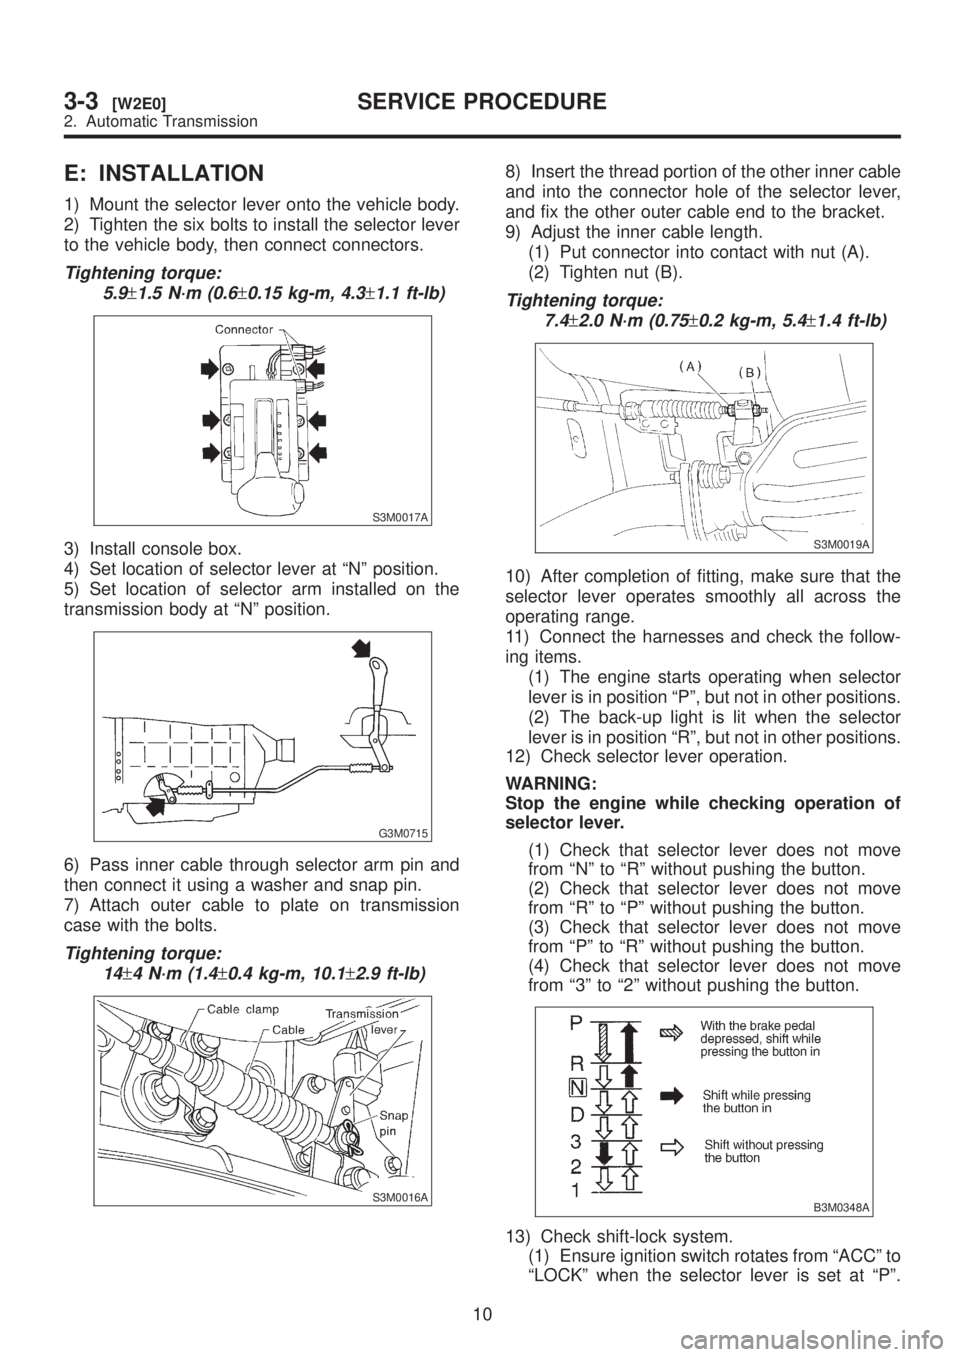
E: INSTALLATION
1) Mount the selector lever onto the vehicle body.
2) Tighten the six bolts to install the selector lever
to the vehicle body, then connect connectors.
Tightening torque:
5.9
±1.5 N´m (0.6±0.15 kg-m, 4.3±1.1 ft-lb)
S3M0017A
3) Install console box.
4) Set location of selector lever at ªNº position.
5) Set location of selector arm installed on the
transmission body at ªNº position.
G3M0715
6) Pass inner cable through selector arm pin and
then connect it using a washer and snap pin.
7) Attach outer cable to plate on transmission
case with the bolts.
Tightening torque:
14
±4 N´m (1.4±0.4 kg-m, 10.1±2.9 ft-lb)
S3M0016A
8) Insert the thread portion of the other inner cable
and into the connector hole of the selector lever,
and fix the other outer cable end to the bracket.
9) Adjust the inner cable length.
(1) Put connector into contact with nut (A).
(2) Tighten nut (B).
Tightening torque:
7.4
±2.0 N´m (0.75±0.2 kg-m, 5.4±1.4 ft-lb)
S3M0019A
10) After completion of fitting, make sure that the
selector lever operates smoothly all across the
operating range.
11) Connect the harnesses and check the follow-
ing items.
(1) The engine starts operating when selector
lever is in position ªPº, but not in other positions.
(2) The back-up light is lit when the selector
lever is in position ªRº, but not in other positions.
12) Check selector lever operation.
WARNING:
Stop the engine while checking operation of
selector lever.
(1) Check that selector lever does not move
from ªNº to ªRº without pushing the button.
(2) Check that selector lever does not move
from ªRº to ªPº without pushing the button.
(3) Check that selector lever does not move
from ªPº to ªRº without pushing the button.
(4) Check that selector lever does not move
from ª3º to ª2º without pushing the button.
B3M0348A
13) Check shift-lock system.
(1) Ensure ignition switch rotates from ªACCº to
ªLOCKº when the selector lever is set at ªPº.
10
3-3[W2E0]SERVICE PROCEDURE
2. Automatic Transmission
Page 683 of 1456
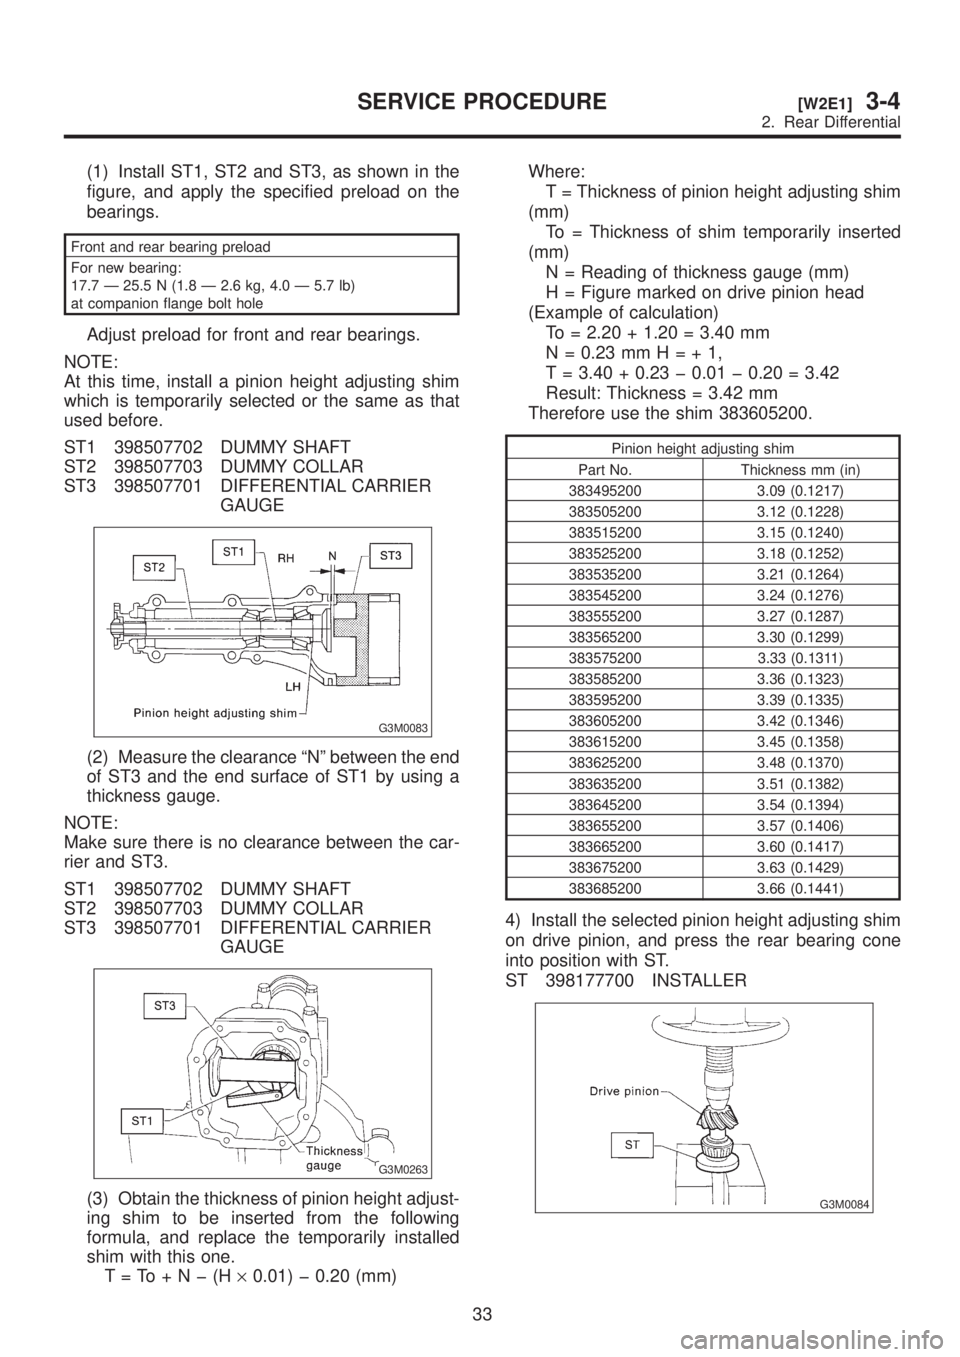
(1) Install ST1, ST2 and ST3, as shown in the
figure, and apply the specified preload on the
bearings.
Front and rear bearing preload
For new bearing:
17.7 Ð 25.5 N (1.8 Ð 2.6 kg, 4.0 Ð 5.7 lb)
at companion flange bolt hole
Adjust preload for front and rear bearings.
NOTE:
At this time, install a pinion height adjusting shim
which is temporarily selected or the same as that
used before.
ST1 398507702 DUMMY SHAFT
ST2 398507703 DUMMY COLLAR
ST3 398507701 DIFFERENTIAL CARRIER
GAUGE
G3M0083
(2) Measure the clearance ªNº between the end
of ST3 and the end surface of ST1 by using a
thickness gauge.
NOTE:
Make sure there is no clearance between the car-
rier and ST3.
ST1 398507702 DUMMY SHAFT
ST2 398507703 DUMMY COLLAR
ST3 398507701 DIFFERENTIAL CARRIER
GAUGE
G3M0263
(3) Obtain the thickness of pinion height adjust-
ing shim to be inserted from the following
formula, and replace the temporarily installed
shim with this one.
T=To+Nþ(H´0.01) þ 0.20 (mm)Where:
T = Thickness of pinion height adjusting shim
(mm)
To = Thickness of shim temporarily inserted
(mm)
N = Reading of thickness gauge (mm)
H = Figure marked on drive pinion head
(Example of calculation)
To = 2.20 + 1.20 = 3.40 mm
N = 0.23 mmH=+1,
T = 3.40 + 0.23 þ 0.01 þ 0.20 = 3.42
Result: Thickness = 3.42 mm
Therefore use the shim 383605200.
Pinion height adjusting shim
Part No. Thickness mm (in)
383495200 3.09 (0.1217)
383505200 3.12 (0.1228)
383515200 3.15 (0.1240)
383525200 3.18 (0.1252)
383535200 3.21 (0.1264)
383545200 3.24 (0.1276)
383555200 3.27 (0.1287)
383565200 3.30 (0.1299)
383575200 3.33 (0.1311)
383585200 3.36 (0.1323)
383595200 3.39 (0.1335)
383605200 3.42 (0.1346)
383615200 3.45 (0.1358)
383625200 3.48 (0.1370)
383635200 3.51 (0.1382)
383645200 3.54 (0.1394)
383655200 3.57 (0.1406)
383665200 3.60 (0.1417)
383675200 3.63 (0.1429)
383685200 3.66 (0.1441)
4) Install the selected pinion height adjusting shim
on drive pinion, and press the rear bearing cone
into position with ST.
ST 398177700 INSTALLER
G3M0084
33
[W2E1]3-4SERVICE PROCEDURE
2. Rear Differential
Page 685 of 1456
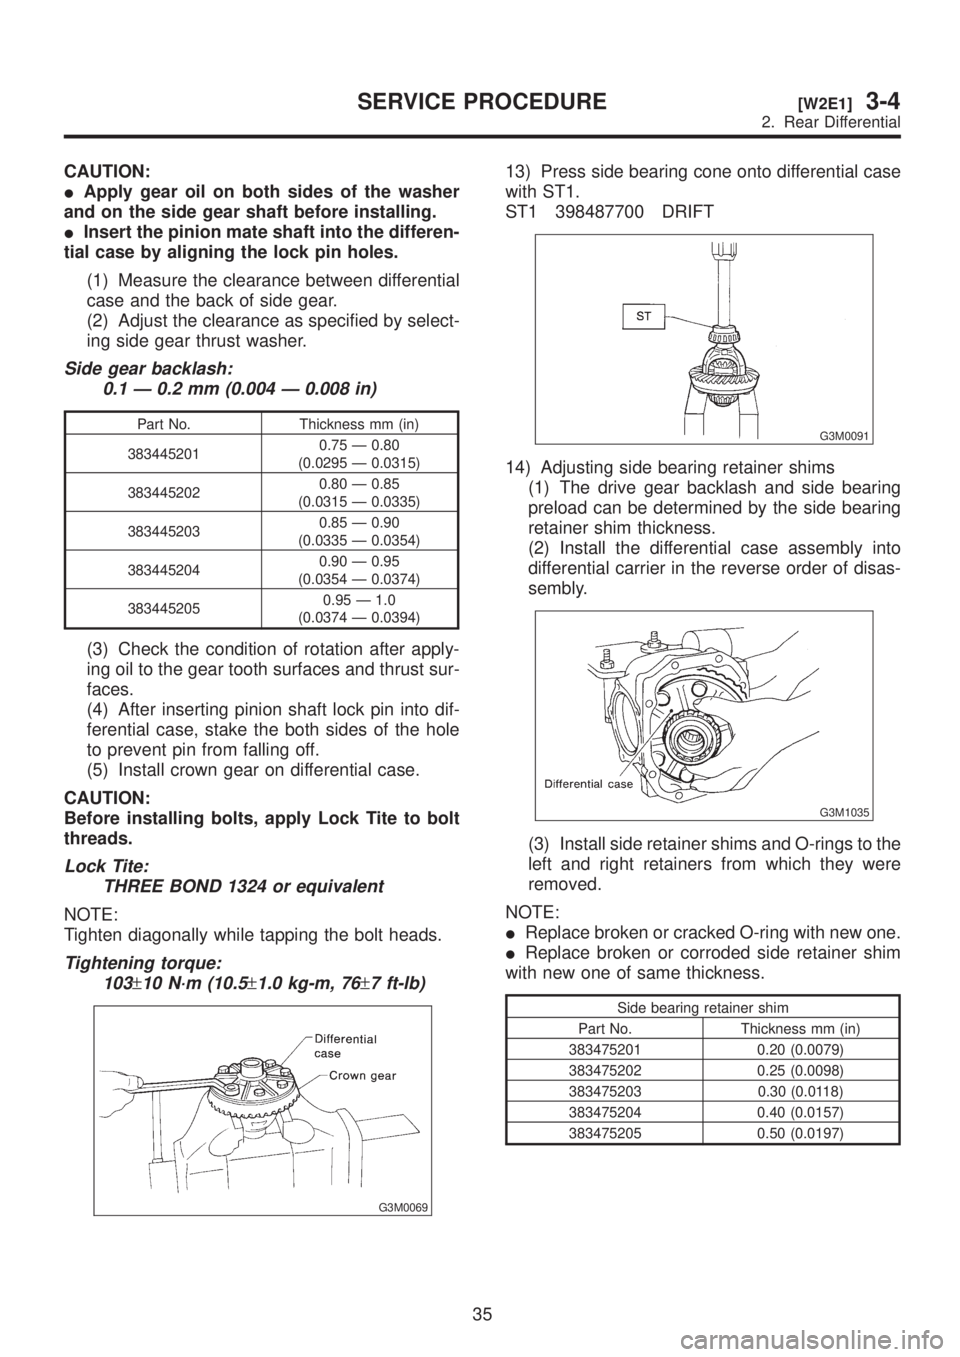
CAUTION:
IApply gear oil on both sides of the washer
and on the side gear shaft before installing.
IInsert the pinion mate shaft into the differen-
tial case by aligning the lock pin holes.
(1) Measure the clearance between differential
case and the back of side gear.
(2) Adjust the clearance as specified by select-
ing side gear thrust washer.
Side gear backlash:
0.1 Ð 0.2 mm (0.004 Ð 0.008 in)
Part No. Thickness mm (in)
3834452010.75 Ð 0.80
(0.0295 Ð 0.0315)
3834452020.80 Ð 0.85
(0.0315 Ð 0.0335)
3834452030.85 Ð 0.90
(0.0335 Ð 0.0354)
3834452040.90 Ð 0.95
(0.0354 Ð 0.0374)
3834452050.95 Ð 1.0
(0.0374 Ð 0.0394)
(3) Check the condition of rotation after apply-
ing oil to the gear tooth surfaces and thrust sur-
faces.
(4) After inserting pinion shaft lock pin into dif-
ferential case, stake the both sides of the hole
to prevent pin from falling off.
(5) Install crown gear on differential case.
CAUTION:
Before installing bolts, apply Lock Tite to bolt
threads.
Lock Tite:
THREE BOND 1324 or equivalent
NOTE:
Tighten diagonally while tapping the bolt heads.
Tightening torque:
103
±10 N´m (10.5±1.0 kg-m, 76±7 ft-lb)
G3M0069
13) Press side bearing cone onto differential case
with ST1.
ST1 398487700 DRIFT
G3M0091
14) Adjusting side bearing retainer shims
(1) The drive gear backlash and side bearing
preload can be determined by the side bearing
retainer shim thickness.
(2) Install the differential case assembly into
differential carrier in the reverse order of disas-
sembly.
G3M1035
(3) Install side retainer shims and O-rings to the
left and right retainers from which they were
removed.
NOTE:
IReplace broken or cracked O-ring with new one.
IReplace broken or corroded side retainer shim
with new one of same thickness.
Side bearing retainer shim
Part No. Thickness mm (in)
383475201 0.20 (0.0079)
383475202 0.25 (0.0098)
383475203 0.30 (0.0118)
383475204 0.40 (0.0157)
383475205 0.50 (0.0197)
35
[W2E1]3-4SERVICE PROCEDURE
2. Rear Differential
Page 686 of 1456
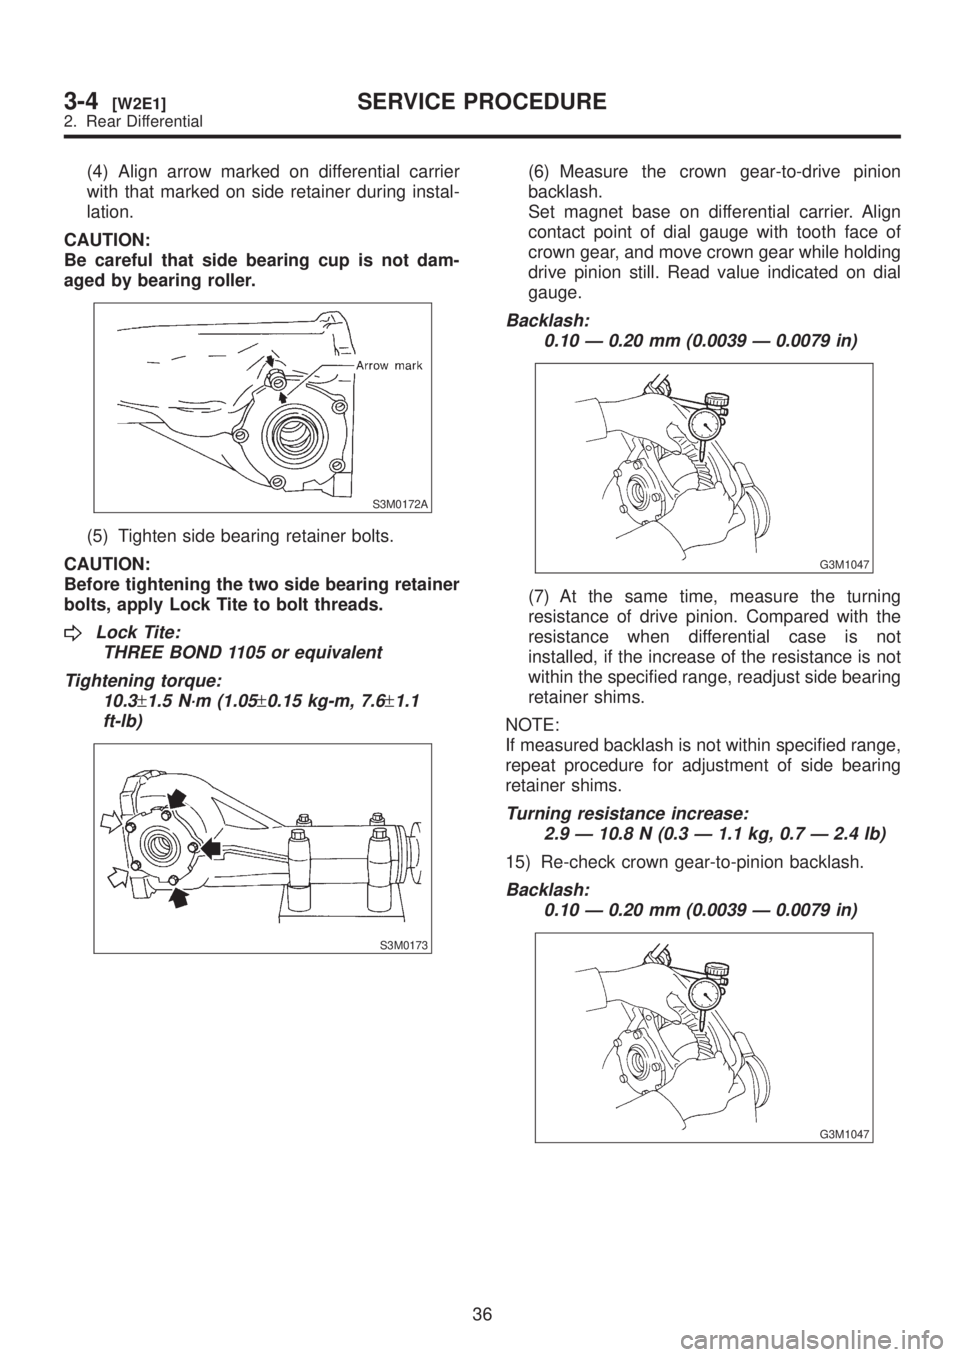
(4) Align arrow marked on differential carrier
with that marked on side retainer during instal-
lation.
CAUTION:
Be careful that side bearing cup is not dam-
aged by bearing roller.
S3M0172A
(5) Tighten side bearing retainer bolts.
CAUTION:
Before tightening the two side bearing retainer
bolts, apply Lock Tite to bolt threads.
Lock Tite:
THREE BOND 1105 or equivalent
Tightening torque:
10.3
±1.5 N´m (1.05±0.15 kg-m, 7.6±1.1
ft-lb)
S3M0173
(6) Measure the crown gear-to-drive pinion
backlash.
Set magnet base on differential carrier. Align
contact point of dial gauge with tooth face of
crown gear, and move crown gear while holding
drive pinion still. Read value indicated on dial
gauge.
Backlash:
0.10 Ð 0.20 mm (0.0039 Ð 0.0079 in)
G3M1047
(7) At the same time, measure the turning
resistance of drive pinion. Compared with the
resistance when differential case is not
installed, if the increase of the resistance is not
within the specified range, readjust side bearing
retainer shims.
NOTE:
If measured backlash is not within specified range,
repeat procedure for adjustment of side bearing
retainer shims.
Turning resistance increase:
2.9 Ð 10.8 N (0.3 Ð 1.1 kg, 0.7 Ð 2.4 lb)
15) Re-check crown gear-to-pinion backlash.
Backlash:
0.10 Ð 0.20 mm (0.0039 Ð 0.0079 in)
G3M1047
36
3-4[W2E1]SERVICE PROCEDURE
2. Rear Differential
Page 687 of 1456
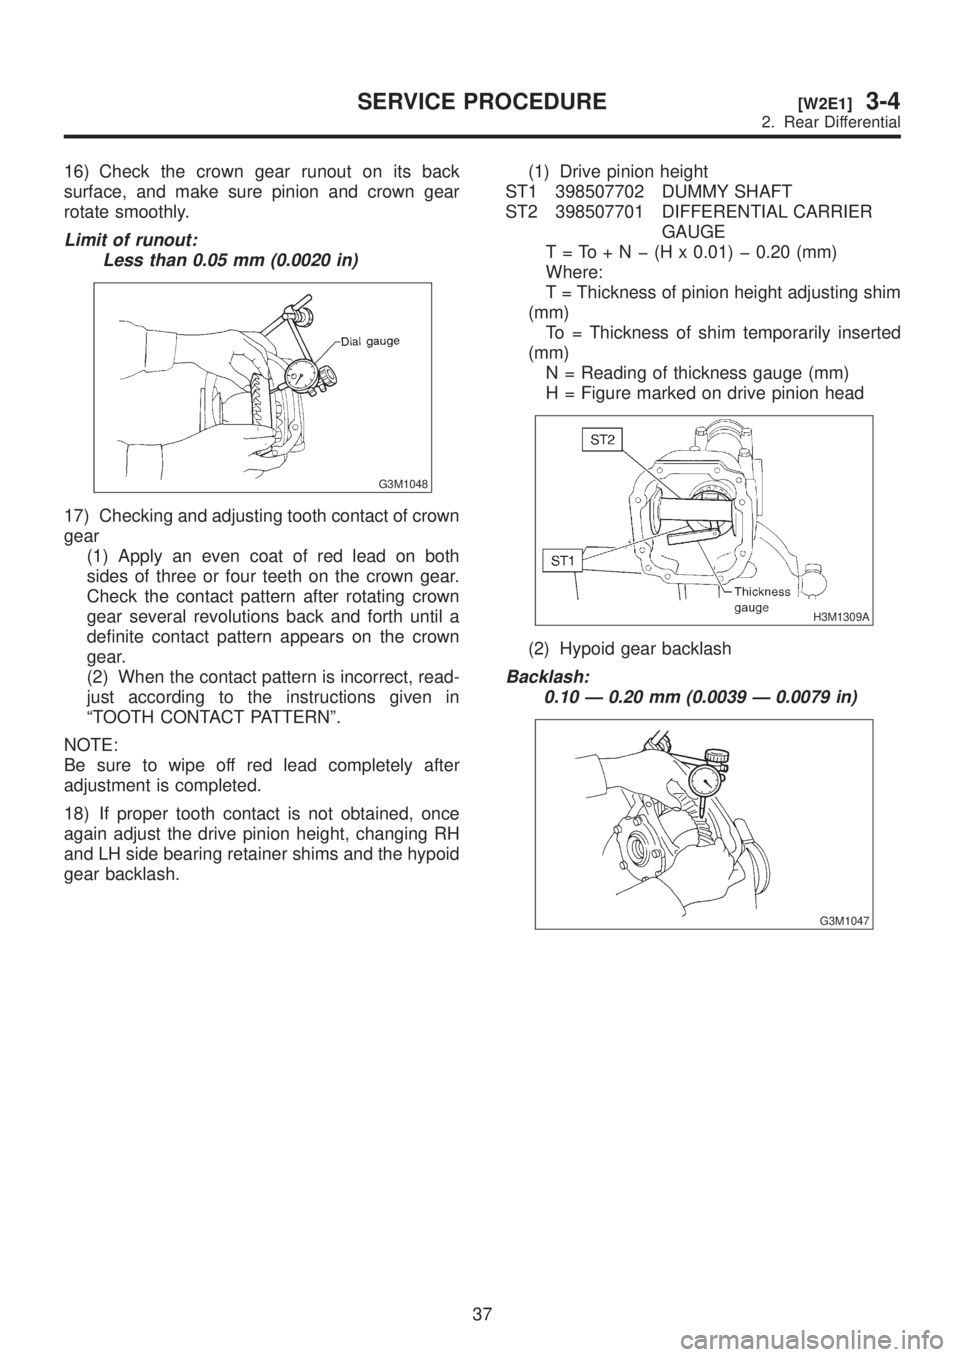
16) Check the crown gear runout on its back
surface, and make sure pinion and crown gear
rotate smoothly.
Limit of runout:
Less than 0.05 mm (0.0020 in)
G3M1048
17) Checking and adjusting tooth contact of crown
gear
(1) Apply an even coat of red lead on both
sides of three or four teeth on the crown gear.
Check the contact pattern after rotating crown
gear several revolutions back and forth until a
definite contact pattern appears on the crown
gear.
(2) When the contact pattern is incorrect, read-
just according to the instructions given in
ªTOOTH CONTACT PATTERNº.
NOTE:
Be sure to wipe off red lead completely after
adjustment is completed.
18) If proper tooth contact is not obtained, once
again adjust the drive pinion height, changing RH
and LH side bearing retainer shims and the hypoid
gear backlash.(1) Drive pinion height
ST1 398507702 DUMMY SHAFT
ST2 398507701 DIFFERENTIAL CARRIER
GAUGE
T=To+Nþ(Hx0.01) þ 0.20 (mm)
Where:
T = Thickness of pinion height adjusting shim
(mm)
To = Thickness of shim temporarily inserted
(mm)
N = Reading of thickness gauge (mm)
H = Figure marked on drive pinion head
H3M1309A
(2) Hypoid gear backlash
Backlash:
0.10 Ð 0.20 mm (0.0039 Ð 0.0079 in)
G3M1047
37
[W2E1]3-4SERVICE PROCEDURE
2. Rear Differential
Page 691 of 1456
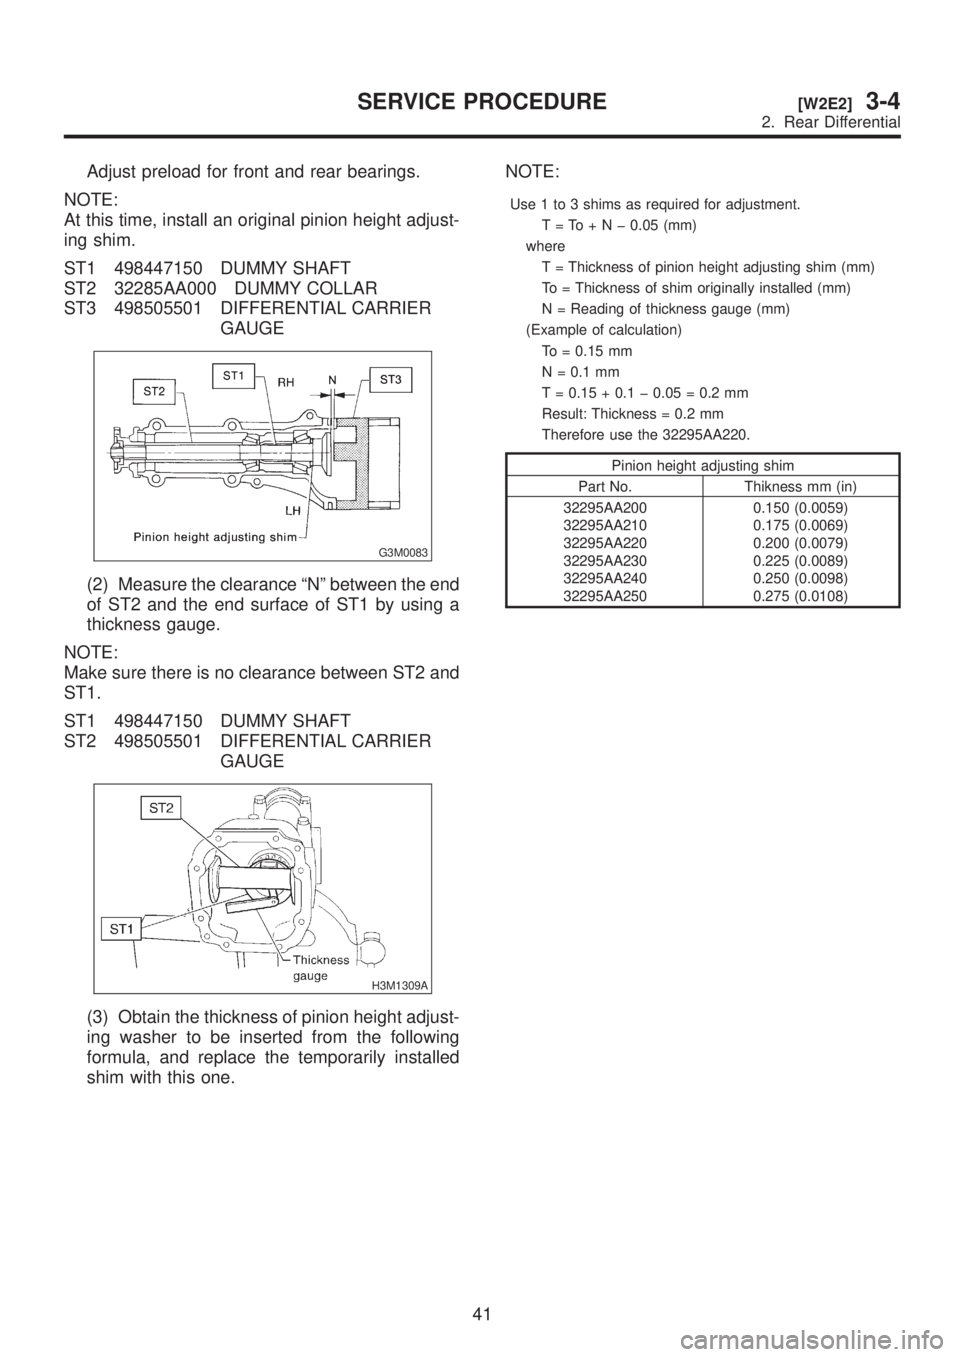
Adjust preload for front and rear bearings.
NOTE:
At this time, install an original pinion height adjust-
ing shim.
ST1 498447150 DUMMY SHAFT
ST2 32285AA000 DUMMY COLLAR
ST3 498505501 DIFFERENTIAL CARRIER
GAUGE
G3M0083
(2) Measure the clearance ªNº between the end
of ST2 and the end surface of ST1 by using a
thickness gauge.
NOTE:
Make sure there is no clearance between ST2 and
ST1.
ST1 498447150 DUMMY SHAFT
ST2 498505501 DIFFERENTIAL CARRIER
GAUGE
H3M1309A
(3) Obtain the thickness of pinion height adjust-
ing washer to be inserted from the following
formula, and replace the temporarily installed
shim with this one.NOTE:
Use 1 to 3 shims as required for adjustment.
T=To+Nþ0.05 (mm)
where
T = Thickness of pinion height adjusting shim (mm)
To = Thickness of shim originally installed (mm)
N = Reading of thickness gauge (mm)
(Example of calculation)
To = 0.15 mm
N = 0.1 mm
T = 0.15 + 0.1 þ 0.05 = 0.2 mm
Result: Thickness = 0.2 mm
Therefore use the 32295AA220.
Pinion height adjusting shim
Part No. Thikness mm (in)
32295AA200
32295AA210
32295AA220
32295AA230
32295AA240
32295AA2500.150 (0.0059)
0.175 (0.0069)
0.200 (0.0079)
0.225 (0.0089)
0.250 (0.0098)
0.275 (0.0108)
41
[W2E2]3-4SERVICE PROCEDURE
2. Rear Differential