display SUBARU LEGACY 2010 5.G Navigation Manual
[x] Cancel search | Manufacturer: SUBARU, Model Year: 2010, Model line: LEGACY, Model: SUBARU LEGACY 2010 5.GPages: 90, PDF Size: 28.14 MB
Page 63 of 90
Navigation 77
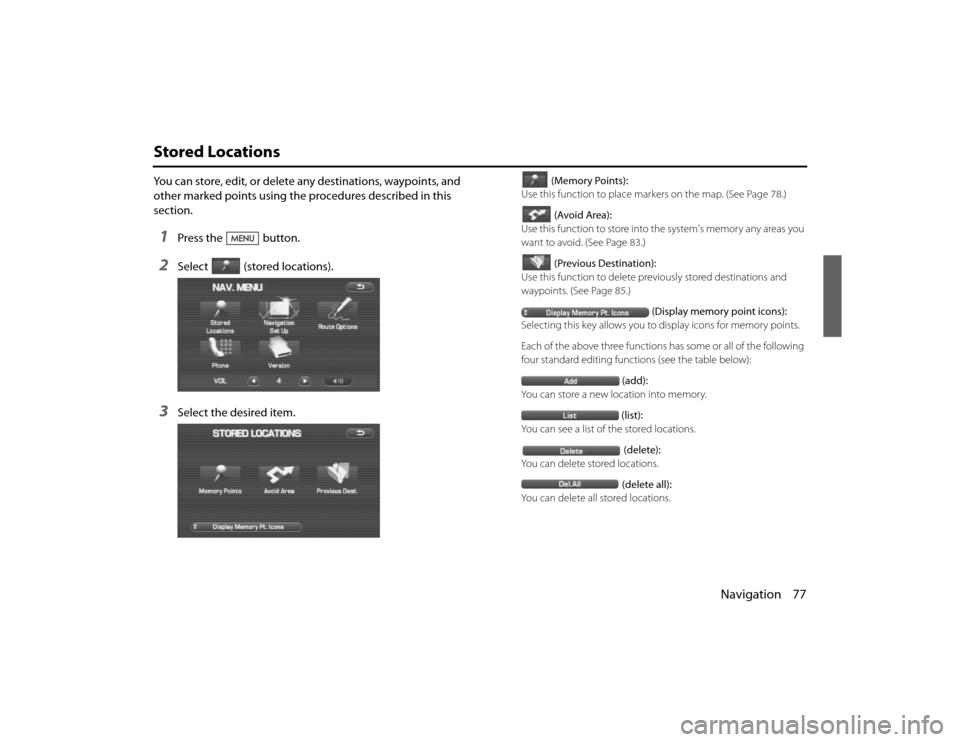
Stored LocationsYou can store, edit, or delete any destinations, waypoints, and
other marked points using the procedures described in this
section.1
Press the button.
2
Select (stored locations).
3
Select the desired item.
(Memory Points):
Use this function to place markers on the map. (See Page 78.)
(Avoid Area):
Use this function to store into the system's memory any areas you
want to avoid. (See Page 83.)
(Previous Destination):
Use this function to delete prev iously stored destinations and
waypoints. (See Page 85.)
(Display memory point icons):
Selecting this key allows you to display icons for memory points.
Each of the above three functions has some or all of the following
four standard editing functions (see the table below): (add):
You can store a new location into memory.
(list):
You can see a list of the stored locations.
(delete):
You can delete stored locations.
(delete all):
You can delete all stored locations.
Legacy_B2462BE-A.book Page 77 Wednesday, April 22, 2009 5:32 PM
Page 64 of 90
78 NavigationStored Locations
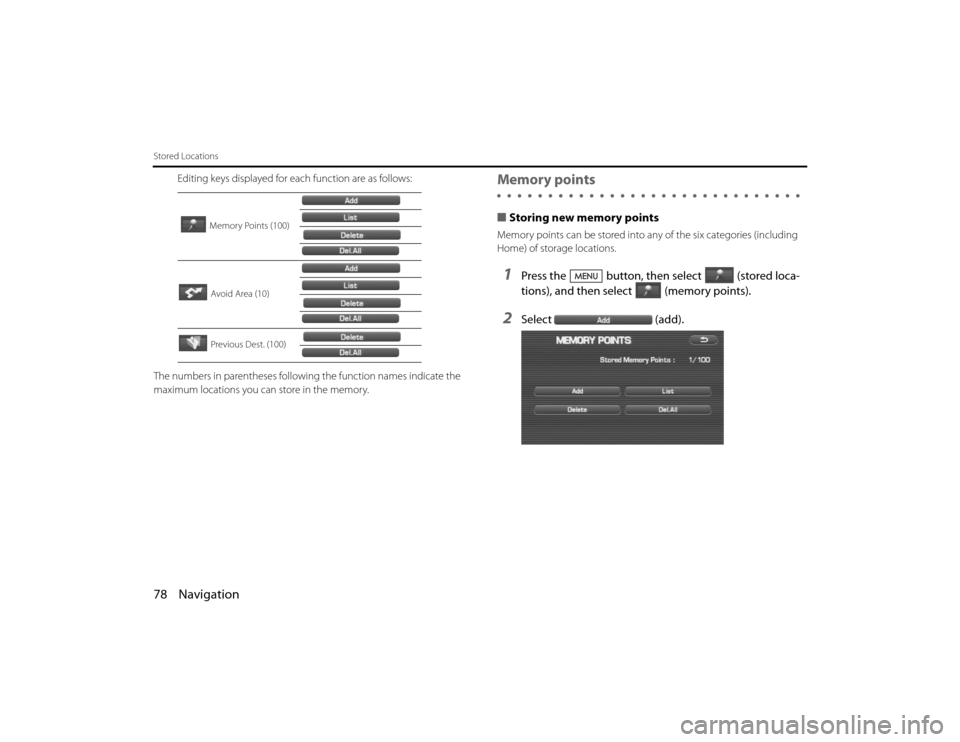
Editing keys displayed for each function are as follows:
The numbers in parentheses following the function names indicate the
maximum locations you can store in the memory.
Memory points■ Storing new memory pointsMemory points can be stored into any of the six categories (including
Home) of storage locations.1
Press the button, then select (stored loca-
tions), and then select (memory points).
2
Select (add).
Memory Points (100)
Avoid Area (10)
Previous Dest. (100)
Legacy_B2462BE-A.book Page 78 Wednesday, April 22, 2009 5:32 PM
Page 65 of 90
Navigation 79
Stored Locations
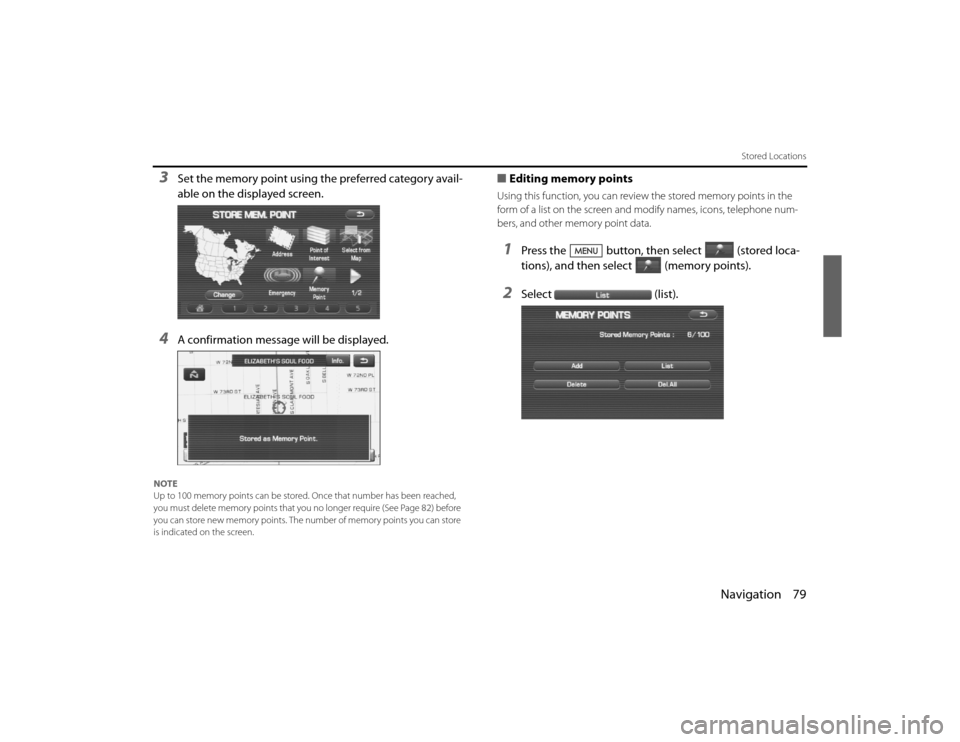
3
Set the memory point using the preferred category avail-
able on the displayed screen.
4
A confirmation message will be displayed.
NOTE
Up to 100 memory points can be stored. Once that number has been reached,
you must delete memory points that you no longer require (See P age 82) before
you can store new memory points. The number of memory poin ts you can store
is indicated on the screen.
■ Editing memory pointsUsing this function, you can review the stored memory points in th e
form of a list on the screen and modify names, icons, telephone num-
bers, and other memory point data.1
Press the button, then select (stored loca-
tions), and then select (memory points).
2
Select (list).
Legacy_B2462BE-A.book Page 79 Wednesday, April 22, 2009 5:32 PM
Page 68 of 90
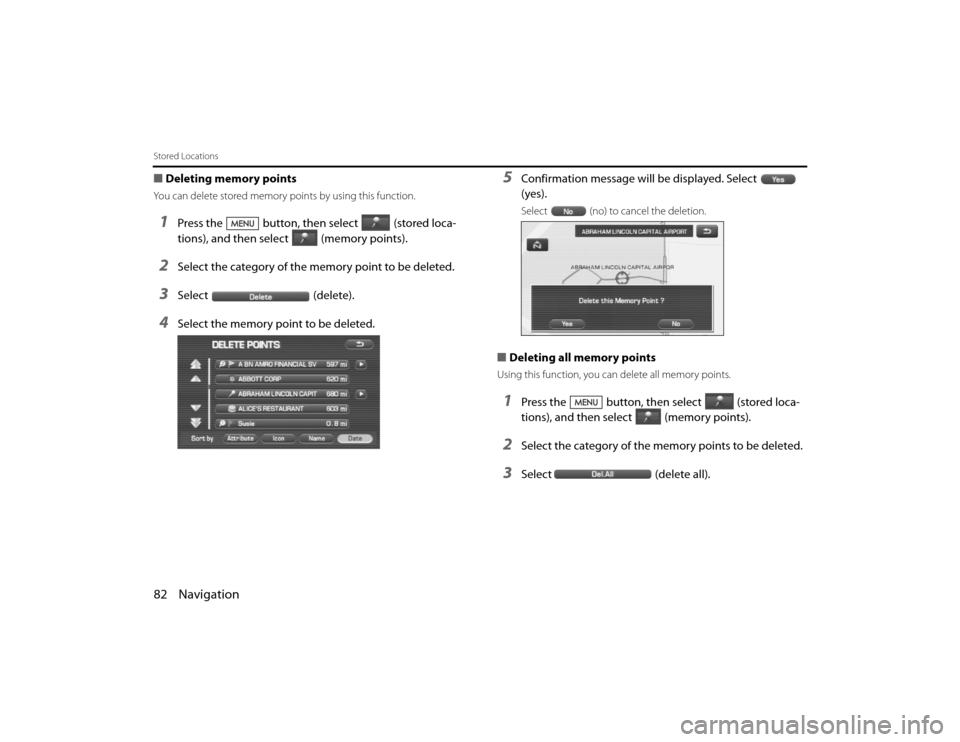
82 NavigationStored Locations■Deleting memory pointsYou can delete stored memory points by using this function.1
Press the button, then select (stored loca-
tions), and then select (memory points).
2
Select the category of the memory point to be deleted.
3
Select (delete).
4
Select the memory point to be deleted.
5
Confirmation message will be displayed. Select
(yes).Select (no) to cancel the deletion.
■Deleting all memory pointsUsing this function, you can delete all memory points.1
Press the button, then select (stored loca-
tions), and then select (memory points).
2
Select the category of the me mory points to be deleted.
3
Select(delete all).
Legacy_B2462BE-A.book Page 82 Wednesday, April 22, 2009 5:32 PM
Page 69 of 90
Navigation 83
Stored Locations
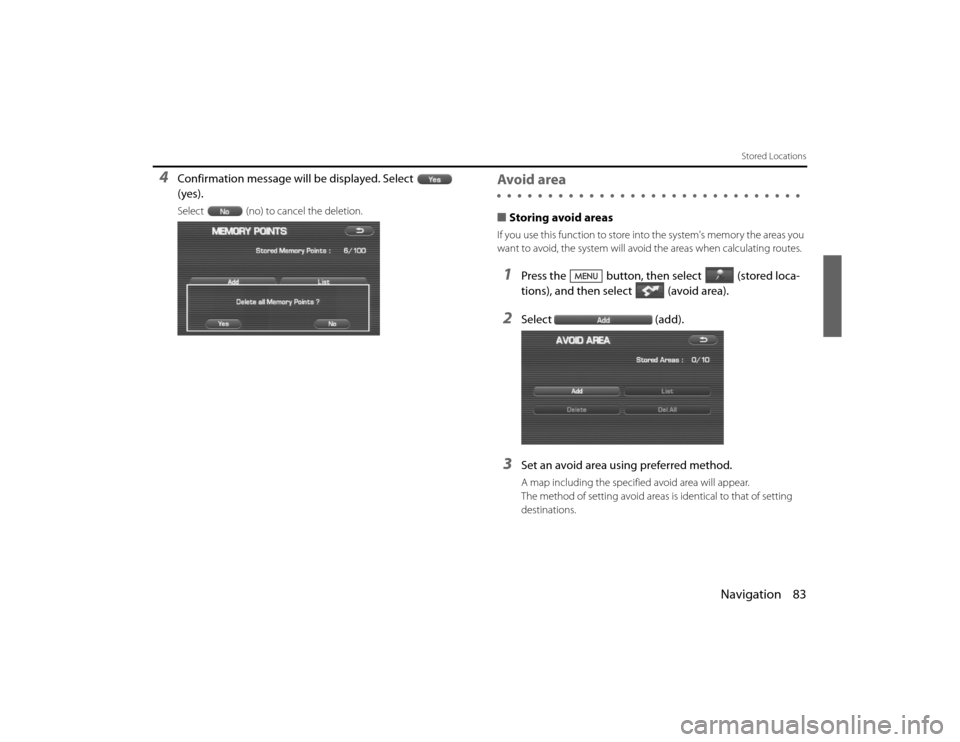
4
Confirmation message will be displayed. Select
(yes).Select (no) to cancel the deletion.
Avoid area■Storing avoid areasIf you use this function to store in to the system's memory the areas you
want to avoid, the system will avoi d the areas when calculating routes.1
Press the button, then select (stored loca-
tions), and then select (avoid area).
2
Select(add).
3
Set an avoid area using preferred method.A map including the specified avoid area will appear.
The method of setting avoid areas is identical to that of setting
destinations.
Legacy_B2462BE-A.book Page 83 Wednesday, April 22, 2009 5:32 PM
Page 71 of 90
Navigation 85
Stored Locations
Previous destination (deleting stored locations) Use this function to delete previously set destinations.1
Press the button, then select (stored loca-
tions), and then select (previous destinations).
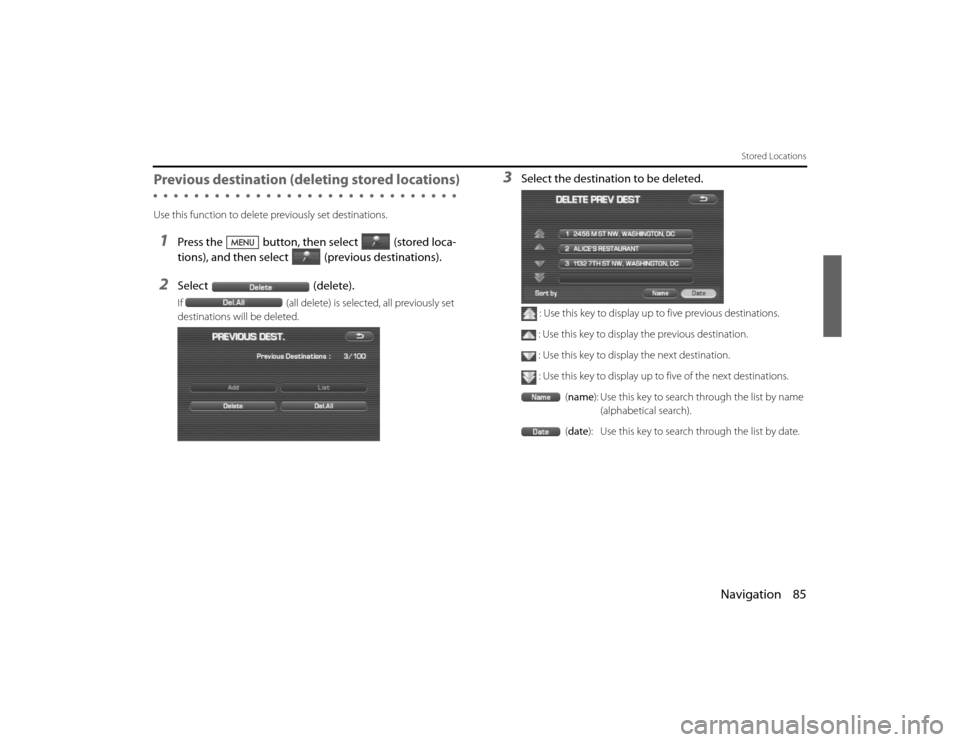
2
Select(delete).If(all delete) is selected, all previously set
destinations will be deleted.
3
Select the destination to be deleted.
: Use this key to display up to five previous destinations.
: Use this key to display the previous destination. : Use this key to display the next destination.
: Use this key to display up to five of the next destinations. (name): Use this key to search through the list by name
(alphabetical search).
( date ): Use this key to search through the list by date.
Legacy_B2462BE-A.book Page 85 Wednesday, April 22, 2009 5:32 PM
Page 72 of 90
86 NavigationStored Locations4
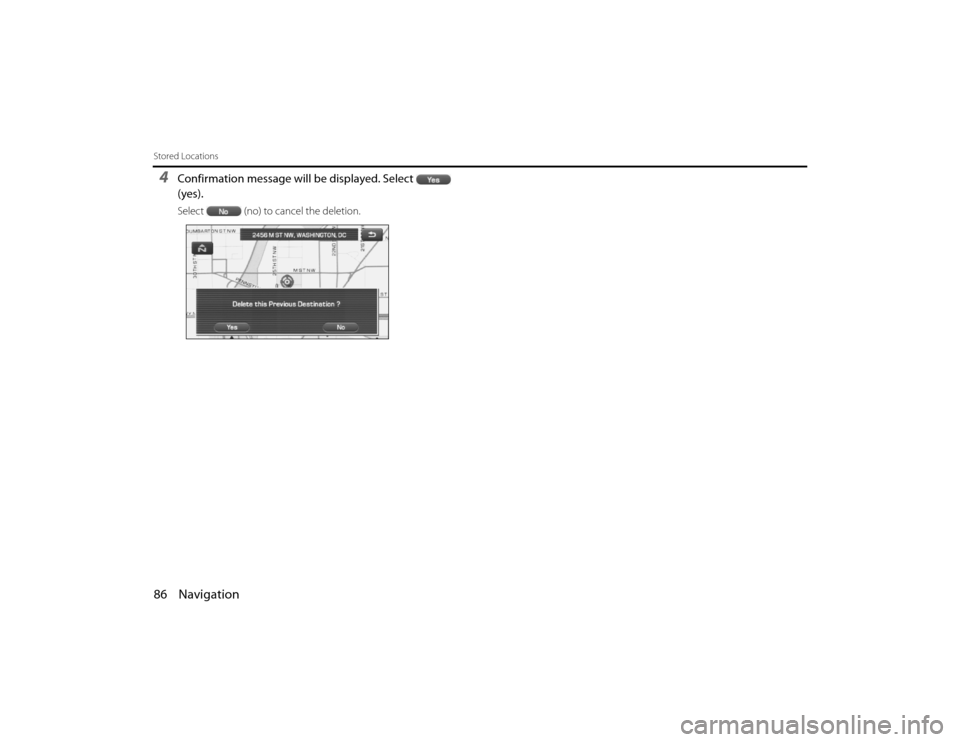
Confirmation message will be displayed. Select
(yes).Select (no) to cancel the deletion.
Legacy_B2462BE-A.book Page 86 Wednesday, April 22, 2009 5:32 PM
Page 73 of 90
Navigation 87
Other FunctionsDisplaying POIs on a mapUsing this function, you can display POIs on the current map screen.1
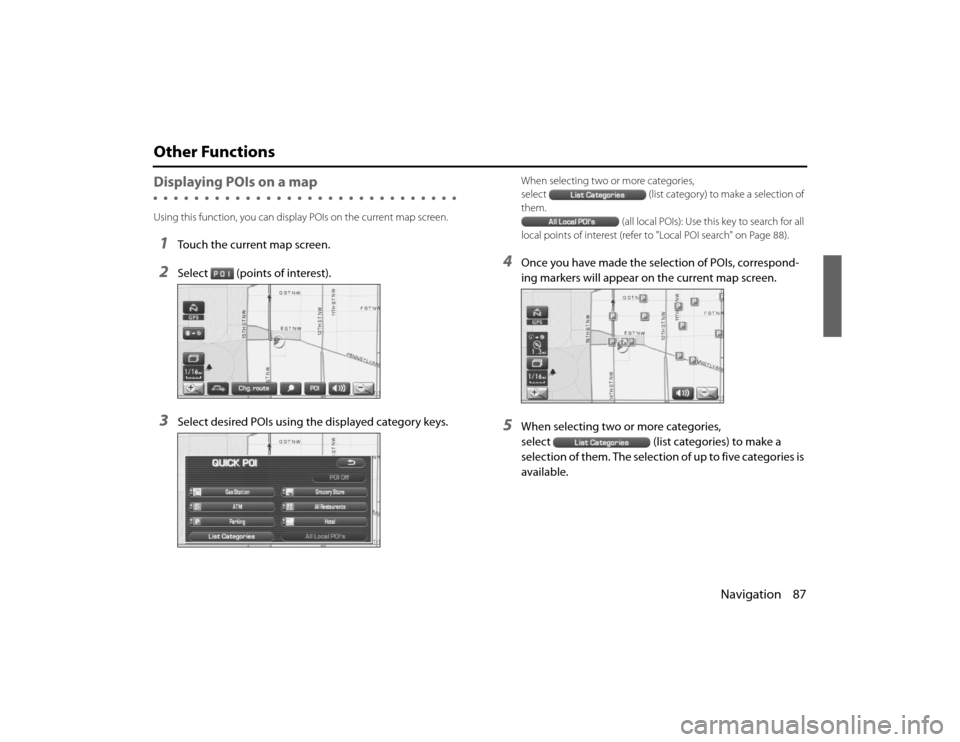
Touch the current map screen.
2
Select (points of interest).
3
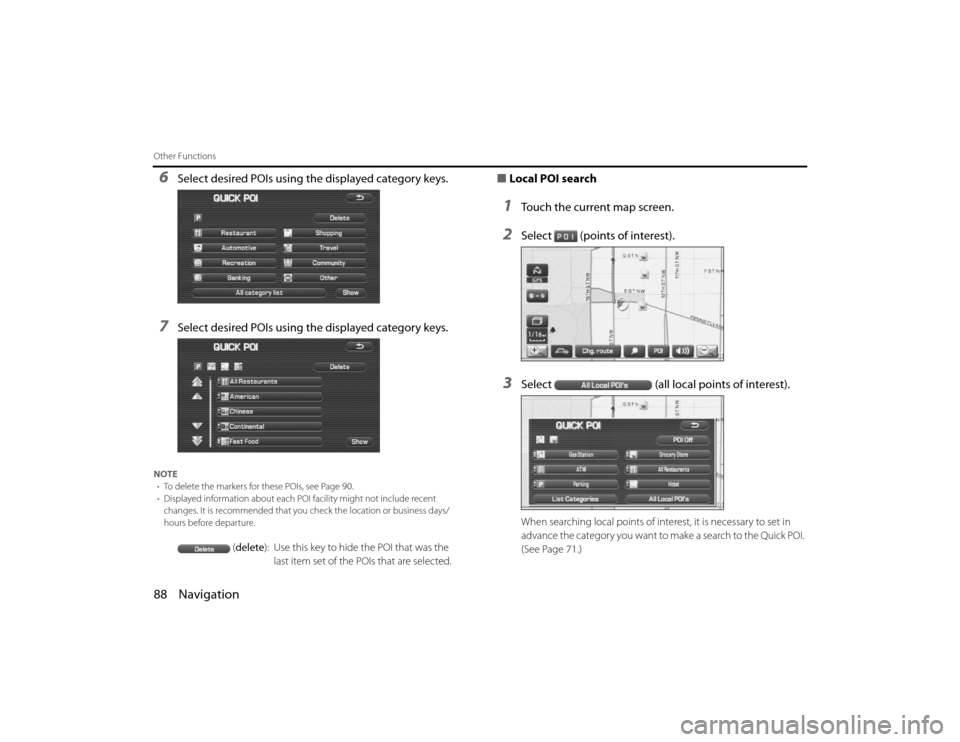
Select desired POIs using the displayed category keys.
When selecting two or more categories,
select(list category) to make a selection of
them.
(all local POIs): Use this key to search for all
local points of interest (refer to "Local POI search" on Page 88).
4
Once you have made the selection of POIs, correspond-
ing markers will appear on the current map screen.
5
When selecting two or more categories,
select (list categories) to make a
selec tion of them. The selection of up to five categories is
available.
Legacy_B2462BE-A.book Page 87 Wednesday, April 22, 2009 5:32 PM
Page 74 of 90
88 NavigationOther Functions6
Select desired POIs using the displayed category keys.
7
Select desired POIs using the displayed category keys.
NOTE• To delete the markers for these POIs, see Page 90.
• Displayed information about each POI facility might not inc lude recent
changes. It is recommended that you check the location or business days/
hours before departure.
( delete ): Use this key to hide the POI that was the
last item set of the POIs that are selected.
■ Local POI search1
Touch the current map screen.
2
Select (points of interest).
3
Select (all local points of interest).When searching local points of interest, it is necessary to set in
advance the category you want to make a search to the Quick POI.
(See Page 71.)
Legacy_B2462BE-A.book Page 88 Wednesday, April 22, 2009 5:32 PM
Page 75 of 90
Navigation 89
Other Functions
4
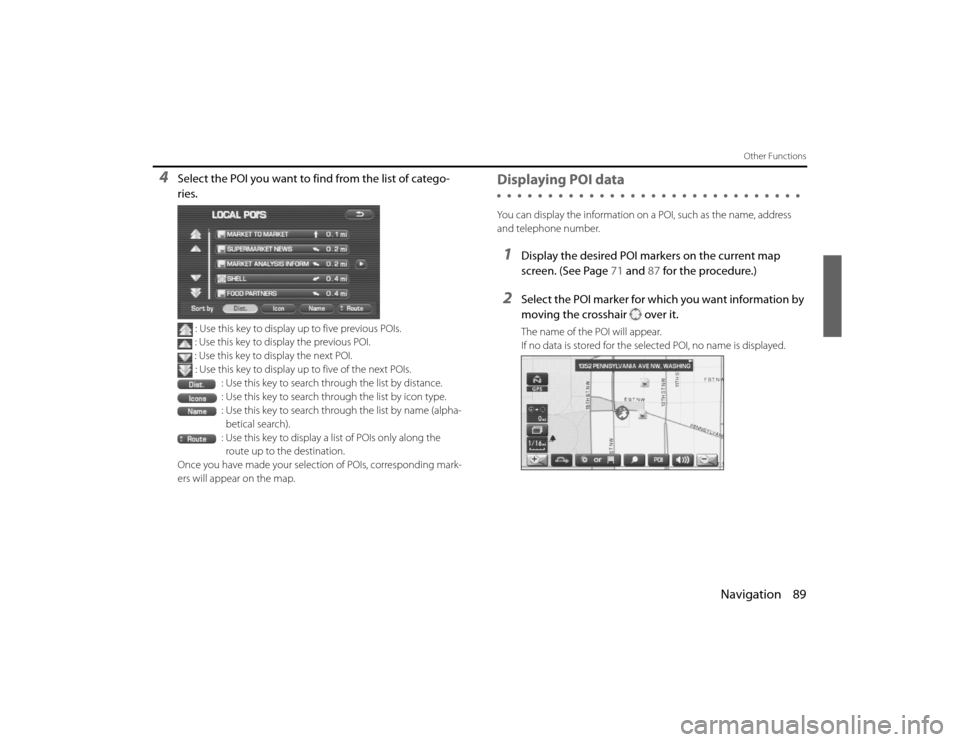
Select the POI you want to find from the list of catego-
ries.
: Use this key to display up to five previous POIs.
: Use this key to display the previous POI.
: Use this key to display the next POI. : Use this key to display up to five of the next POIs.
: Use this key to search through the list by distance.
: Use this key to search through the list by icon type.
: Use this key to search through the list by name (alpha-betical search).
: Use this key to display a list of POIs only along the route up to the destination.
Once you have made your selection of POIs, corresponding mark-
ers will appear on the map.
Displaying POI dataYou can display the information on a POI, such as the name, address
and telephone number.1
Display the desired POI markers on the current map
screen. (See Page 71 and 87 for the procedure.)
2
Select the POI marker for which you want information by
moving the crosshair over it.The name of the POI will appear.
If no data is stored for the selected POI, no name is displayed.
Legacy_B2462BE-A.book Page 89 Wednesday, April 22, 2009 5:32 PM