ECO mode SUBARU LEGACY 2010 5.G Owner's Guide
[x] Cancel search | Manufacturer: SUBARU, Model Year: 2010, Model line: LEGACY, Model: SUBARU LEGACY 2010 5.GPages: 448, PDF Size: 7.36 MB
Page 144 of 448
3-26Instruments and controls
Pressing the trip knob toggles the indica-
tion between the average fuel consump-
tion corresponding to the A trip meter
indication and the average fuel consump-
tion corresponding to the B trip meterindication.
When either of the trip meter indications is
reset, the corresponding average fuel
consumption value is also reset. NOTE . The indicated values vary in accor-
dance with changes in the vehicle ’s
running conditions. Also, the indicated
values may differ slightly from the
actual values and should thus be
treated only as a guide.. When either trip meter indication is
reset, the average fuel consumption
corresponding to that trip meter indica-
tion is not shown until the vehicle has
subsequently covered a distance of 1
mile (or 1 km). &
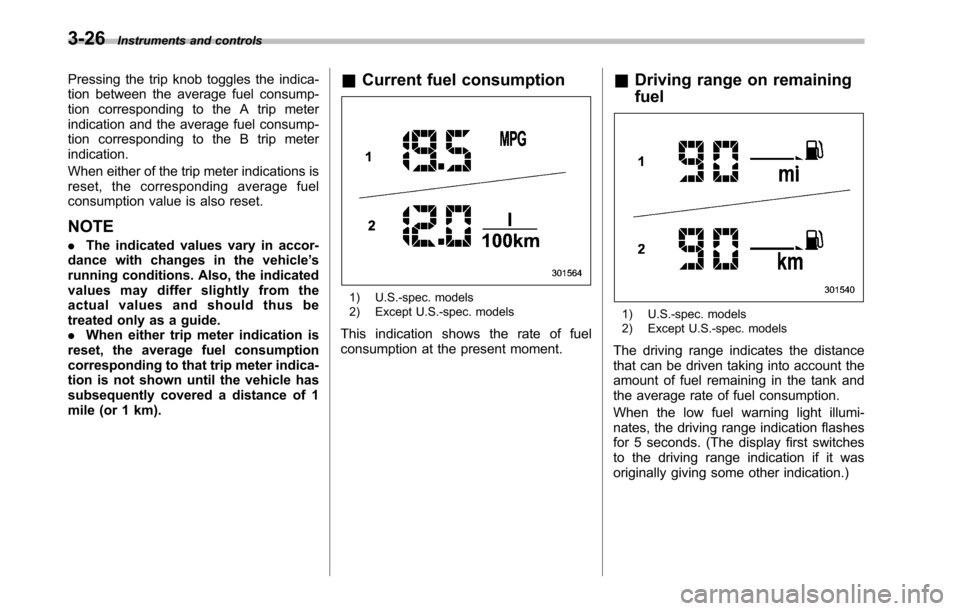
Current fuel consumption
1) U.S.-spec. models
2) Except U.S.-spec. models
This indication shows the rate of fuel
consumption at the present moment. &
Driving range on remaining fuel
1) U.S.-spec. models
2) Except U.S.-spec. models
The driving range indicates the distance
that can be driven taking into account the
amount of fuel remaining in the tank and
the average rate of fuel consumption.
When the low fuel warning light illumi-
nates, the driving range indication flashes
for 5 seconds. (The display first switches
to the driving range indication if it was
originally giving some other indication.)
Page 145 of 448
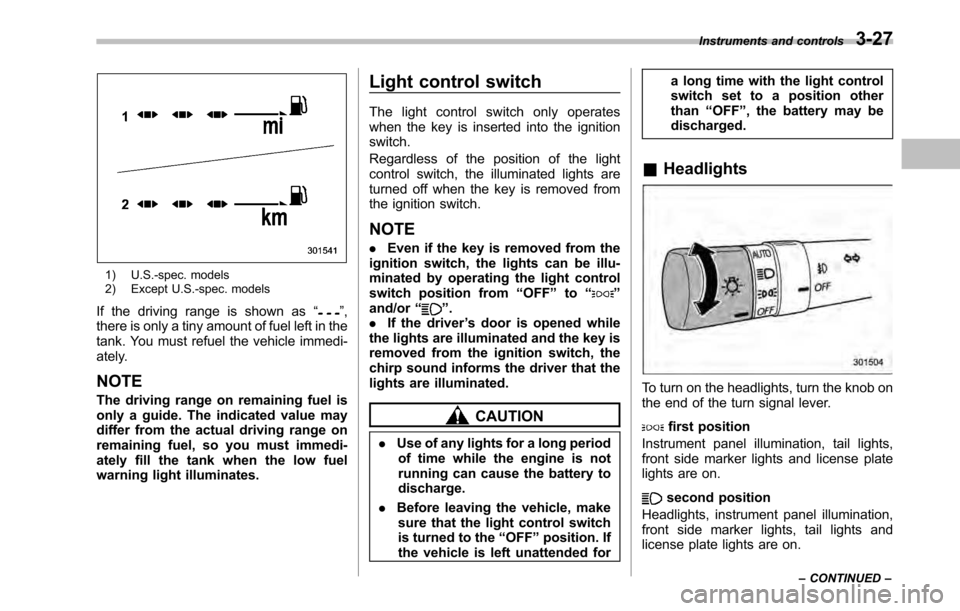
1) U.S.-spec. models
2) Except U.S.-spec. models
If the driving range is shown as “
”,
there is only a tiny amount of fuel left in the
tank. You must refuel the vehicle immedi-
ately.
NOTE
The driving range on remaining fuel is
only a guide. The indicated value may
differ from the actual driving range on
remaining fuel, so you must immedi-
ately fill the tank when the low fuel
warning light illuminates. Light control switch
The light control switch only operates
when the key is inserted into the ignitionswitch.
Regardless of the position of the light
control switch, the illuminated lights are
turned off when the key is removed from
the ignition switch. NOTE .
Even if the key is removed from the
ignition switch, the lights can be illu-
minated by operating the light control
switch position from “OFF ”to “
”
and/or “”.
. If the driver ’s door is opened while
the lights are illuminated and the key is
removed from the ignition switch, the
chirp sound informs the driver that the
lights are illuminated.
CAUTION
. Use of any lights for a long period
of time while the engine is not
running can cause the battery todischarge.
. Before leaving the vehicle, make
sure that the light control switch
is turned to the “OFF ”position. If
the vehicle is left unattended for a long time with the light control
switch set to a position otherthan
“OFF ”, the battery may be
discharged.
& Headlights
To turn on the headlights, turn the knob on
the end of the turn signal lever.
first position
Instrument panel illumination, tail lights,
front side marker lights and license plate
lights are on.
second position
Headlights, instrument panel illumination,
front side marker lights, tail lights and
license plate lights are on. Instruments and controls
3-27
– CONTINUED –
Page 155 of 448
button, the compass display is toggled on
or off. When the compass is on, an
illuminated compass reading will appear
in the lower part of the mirror.
Even with the mirror in anti-glare mode,
the mirror surface turns bright if the
transmission is shifted into reverse. This
is to ensure good rearward visibility duringreversing. !Photosensors
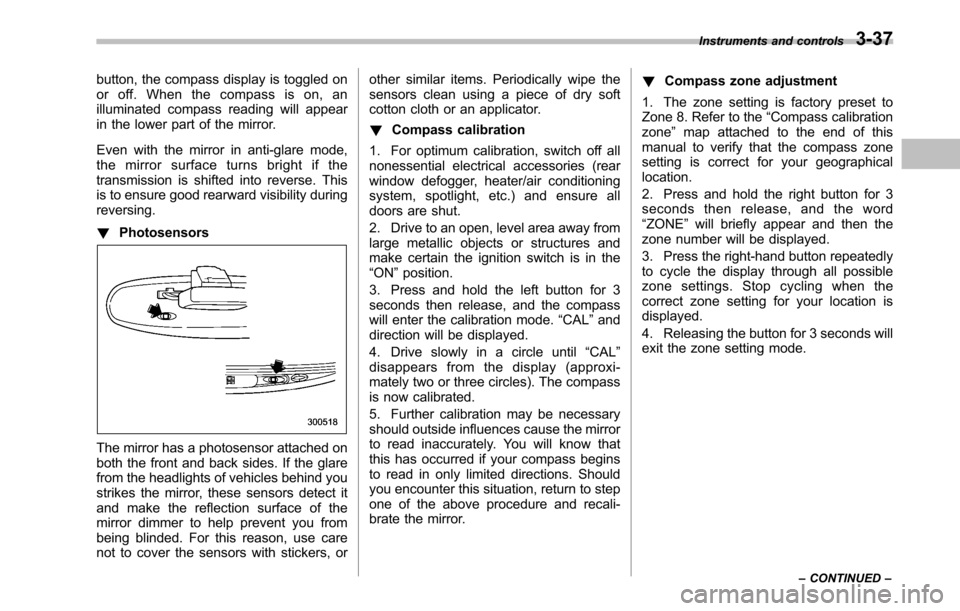
The mirror has a photosensor attached on
both the front and back sides. If the glare
from the headlights of vehicles behind you
strikes the mirror, these sensors detect it
and make the reflection surface of the
mirror dimmer to help prevent you from
being blinded. For this reason, use care
not to cover the sensors with stickers, or other similar items. Periodically wipe the
sensors clean using a piece of dry soft
cotton cloth or an applicator. !
Compass calibration
1. For optimum calibration, switch off all
nonessential electrical accessories (rear
window defogger, heater/air conditioning
system, spotlight, etc.) and ensure all
doors are shut.
2. Drive to an open, level area away from
large metallic objects or structures and
make certain the ignition switch is in the“ ON ”position.
3. Press and hold the left button for 3
seconds then release, and the compass
will enter the calibration mode. “CAL ”and
direction will be displayed.
4. Drive slowly in a circle until “CAL ”
disappears from the display (approxi-
mately two or three circles). The compass
is now calibrated.
5. Further calibration may be necessary
should outside influences cause the mirror
to read inaccurately. You will know that
this has occurred if your compass begins
to read in only limited directions. Should
you encounter this situation, return to step
one of the above procedure and recali-
brate the mirror. !
Compass zone adjustment
1. The zone setting is factory preset to
Zone 8. Refer to the “Compass calibration
zone ”map attached to the end of this
manual to verify that the compass zone
setting is correct for your geographical location.
2. Press and hold the right button for 3
seconds then release, and the word“ ZONE ”will briefly appear and then the
zone number will be displayed.
3. Press the right-hand button repeatedly
to cycle the display through all possible
zone settings. Stop cycling when the
correct zone setting for your location isdisplayed.
4. Releasing the button for 3 seconds will
exit the zone setting mode. Instruments and controls
3-37
– CONTINUED –
Page 169 of 448
button. To decrease the temperature
setting, press the“”side of the tempera-
ture control button.
Each temperature setting is shown on the
display. When the “LO ”is shown, the
system provides maximum cooling perfor-
mance. When the “HI ” is shown, the
system provides maximum heating perfor-mance. ! DUAL mode
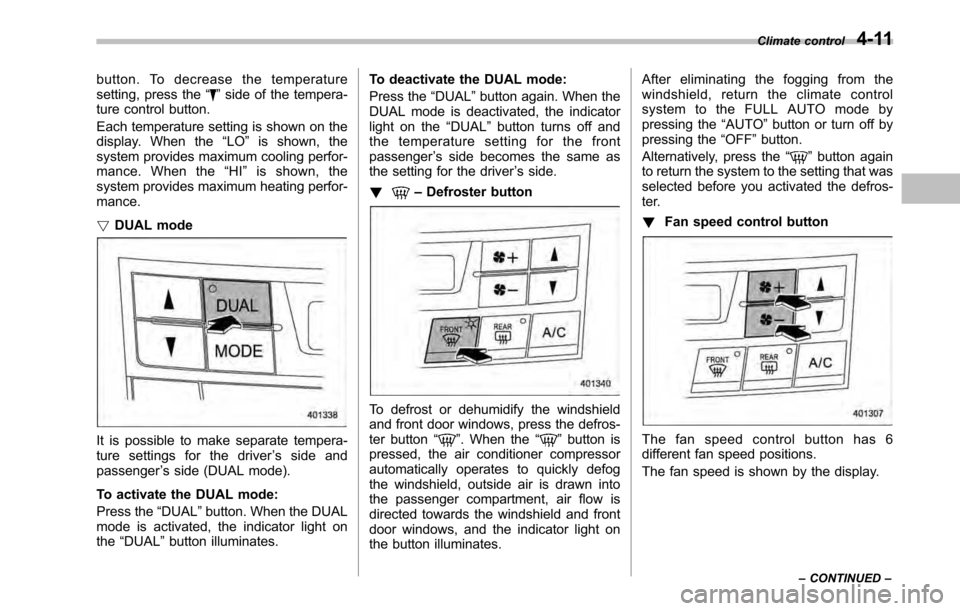
It is possible to make separate tempera-
ture settings for the driver ’s side and
passenger ’s side (DUAL mode).
To activate the DUAL mode:
Press the “DUAL ”button. When the DUAL
mode is activated, the indicator light on the “DUAL ”button illuminates. To deactivate the DUAL mode:
Press the
“DUAL ”button again. When the
DUAL mode is deactivated, the indicator
light on the “DUAL ”button turns off and
the temperature setting for the frontpassenger ’s side becomes the same as
the setting for the driver ’s side.
!
– Defroster button
To defrost or dehumidify the windshield
and front door windows, press the defros-
ter button “
”. When the “”button is
pressed, the air conditioner compressor
automatically operates to quickly defog
the windshield, outside air is drawn into
the passenger compartment, air flow is
directed towards the windshield and front
door windows, and the indicator light on
the button illuminates. After eliminating the fogging from the
windshield, return the climate control
systemtotheFULLAUTOmodeby
pressing the
“AUTO ”button or turn off by
pressing the “OFF ”button.
Alternatively, press the “
”button again
to return the system to the setting that was
selected before you activated the defros-
ter. ! Fan speed control button
The fan speed control button has 6
different fan speed positions.
The fan speed is shown by the display. Climate control
4-11
– CONTINUED –
Page 183 of 448

Power and sound controls &Power switch and volume control
The dial is used for both power (ON/OFF)
and volume control. The radio is turned
ON and OFF by pressing the dial, and the
volume is controlled by turning the dial. &
Sound control
! Tone and balance control
Each brief press of the “TUNE/TRACK/
CH ”dial changes the control modes in the
following sequence.
Choose the desired level for each mode
by turning the “TUNE/TRACK/CH ”dial.
The control function returns to the tune/
track/channel control mode after approxi-
mately 5 seconds. !
Other sound setting controls (type
A audio)
Each brief press of the “MENU ”button
changes the control modes in the follow-
ing sequence.
Choose the desired settings for each
mode by turning the “TUNE/TRACK/CH ”
dial.
The control function returns to the tune/
track/channel control mode after approxi-
mately 5 seconds. Audio
5-7
– CONTINUED –
Page 187 of 448

!Seek tuning (SEEK)
If you press the “”or “”side of the
“ SEEK ”button briefly, the radio will auto-
matically search for a receivable station
and stop at the first one it finds. This
function may not be available, however,
when radio signals are weak. In such a
situation, perform manual tuning to select
the desired station. !
Scan tuning (SCAN)If you press the “SCAN ”button, the radio
will switch to the scan mode. In this mode,
the radio scans through the radio band
until a station is found. The radio will stop
at the station for 5 seconds while display-
ing the frequency, after which scanning
will continue until the entire band has beenscanned.
Press the “SCAN ”button again to cancel
the SCAN mode. If you press the “SCAN ”
button while the radio is stopped at a
station, the radio stays stopped at that
station. If you press the button while the
radio is scanning, the radio stops at the
next receivable station.
Automatic tuning may not function prop-
erly if the station reception is weakened by
distance from the station or proximity to tall buildings and hills. !
PTY (Program type) group tuning
(only FM reception)
Press the “PTY/CAT ”button to change to
the PTY selection mode. At this time, the
PTY group that you are currently listening
to will be displayed for 10 seconds. In PTY
selection mode, “PTY SEL ”is displayed
on the screen. Audio
5-11
– CONTINUED –
Page 188 of 448
5-12Audio
! PTY (Program type) group selection
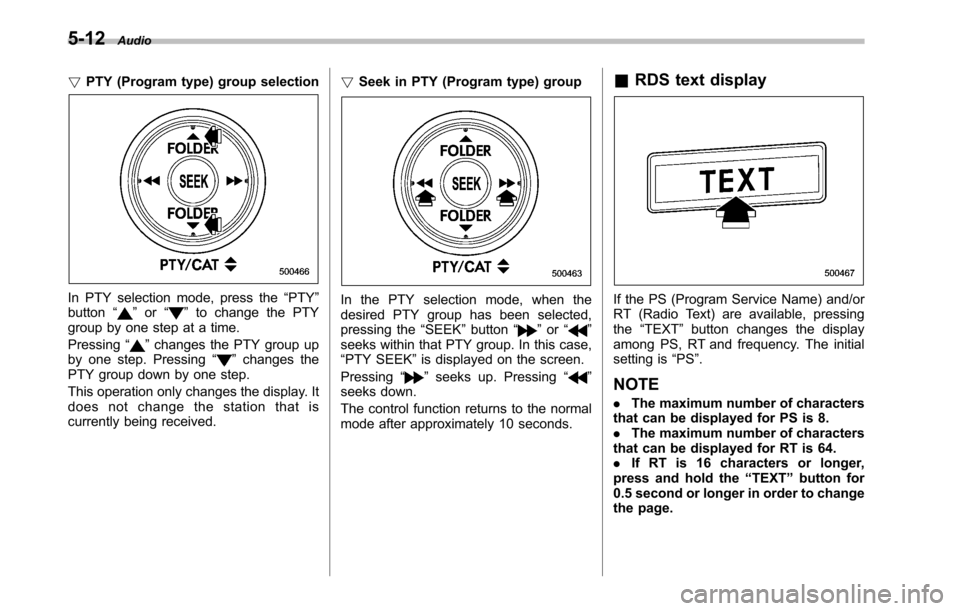
In PTY selection mode, press the “PTY ”
button “”or “”to change the PTY
group by one step at a time. Pressing “
”changes the PTY group up
by one step. Pressing “”changes the
PTY group down by one step.
This operation only changes the display. It
does not change the station that is
currently being received. !
Seek in PTY (Program type) group
In the PTY selection mode, when the
desired PTY group has been selected,
pressing the “SEEK ”button “
”or “”
seeks within that PTY group. In this case, “ PTY SEEK ”is displayed on the screen.
Pressing “
”seeks up. Pressing “”
seeks down.
The control function returns to the normal
mode after approximately 10 seconds. &
RDS text display
If the PS (Program Service Name) and/or
RT (Radio Text) are available, pressingthe “TEXT ”button changes the display
among PS, RT and frequency. The initial
setting is “PS ”.
NOTE . The maximum number of characters
that can be displayed for PS is 8. . The maximum number of characters
that can be displayed for RT is 64.. If RT is 16 characters or longer,
press and hold the “TEXT ”button for
0.5 second or longer in order to change
the page.
Page 193 of 448

pressing the“FOLDER ”button “”
changes the category up by one step. Pressing “
”changes the category down
by one step.
When a category is selected, pressing the “ SEEK ”button selects channels only with-
in the selected category.
The control function returns to the normal
mode after approximately 10 seconds. ! Channel scan
If you press the “SCAN ”button while the
radio is in the category search mode, the
radio turns to the category SCAN mode. In
the category SCAN mode, the radio scans
only channels in the selected category.
If you press the “SCAN ”button while the
radio is not in the category search mode,
the radio turns to the ALL SCAN mode. In the ALL SCAN mode, the radio scans allchannels.
In both SCAN modes, the radio will stop at
the station for 5 seconds while displaying
the channel number, after which scanning
will continue until the entire channel has
been scanned from the low end to the highend.
Press the
“SCAN ”button again to cancel
the SCAN mode and to stop on any
displayed channel.
& Channel preset
Preset buttons !
How to preset channels
1. Press the “SAT ”button to select SAT1,
SAT2 and SAT3 reception.
2. Select the desired channel.
3. Press one of the preset buttons for
more than 1.5 seconds to store the
channel. If the button is pressed for less
than 1.5 seconds, the preceding selection
will remain in memory.
NOTE
If the connection between the radio and
battery is broken for any reason such
as vehicle maintenance or radio re-
moval, all channels stored in the preset
buttons are cleared. If this occurs, it is
necessary to reset the preset channels. ! Selecting preset channels
Presetting a channel with a preset button
allows you to select that channel in a
single operation. Up to six SAT1, SAT2
and SAT3 channels each may be preset. Audio
5-17
– CONTINUED –
Page 195 of 448

If no indicator blinks, it means that there is
no idle position in the magazine.
2. When the“LOAD ”indicator illumi-
nates, insert the disc. Once you have
inserted the disc, the “LOAD ”indicator will
turn off and the “LOADING ”indicator will
illuminate. The disc will then be automa-
tically drawn in, the player will begin to
play back the first track of the disc, the“ LOADING ”indicator will turn off and the
“ READING ”indicator will illuminate.
. To insert more discs in succession,
repeat steps 1 and 2. The magazine will
be loaded with discs in the ascending
order of position number. . If you do not insert any disc in 15
seconds after you have pressed the “ LOAD ”button, the player will return to
the original mode that was selected beforethe “LOAD ”button was pressed.
. The disc indicator steadily lights up if a
disc is already inserted in the correspond-
ing position of the magazine. . While the player is in the loading mode,
if you press “FM ”, “AM ”or “SAT ”button,
the player will enter the standby mode.
Press the “CD/AUX ”button to start play-
back. !
Inserting a disc in a desired posi-tion
1. Briefly press the “LOAD ”button. If the
magazine in the player has an idle
position where you can insert a disc, the
disc number indicator associated with the
idle position will blink.
The positions in the magazine the indica-
tor of which steadily lights up are already
loaded with discs.
Disc select buttons
2. Press the disc select button at the
position where you want to insert a disc.
3. When the “LOAD ”indicator illumi-
nates, insert the disc. Once you have
inserted the disc, the “LOAD ”indicator will
turn off. The disc will then be automatically
drawn in, and the player will begin to play
the first track on the disc. . If you wish to insert another disc,
repeat the procedure beginning with step 1. . If you do not insert any disc in 15
seconds after you have pressed the “ LOAD ”button, the player will return to
the original mode that was selected beforethe “LOAD ”button was pressed.
. While the player is in the loading mode, Audio
5-19
– CONTINUED –
Page 196 of 448
5-20Audio
if you press “FM ”, “AM ”or “SAT ”button,
the player will enter standby mode. Press the “CD/AUX ”button to start playback.
! Loading all the magazine (full disc
loading mode)
1. If you continue to press the “LOAD ”
button for more than 1.5 seconds, the
player will produce beep sound and will
enter the full disc loading mode.
2. When the disc number indicator
flashes and “ALL LOAD ”indicator illumi-
nates, insert a disc within 15 seconds. If a
disc is successfully loaded during this
period, the disc number indicator will stop
blinking and will steadily light.
3. When the loading of a disc is com-
plete, the next idle disc number indicator
will blink. Then repeat step 2. 4. When the magazine is filled with discs
by repeating steps 2 and 3, the player will
start playback of the discs, beginning with
the one inserted first.
If you fail to insert any disc during each 15
seconds interval, the full disc loading
mode will be canceled, and the player will
start playback of the disc inserted first.
& How to play back a CD
NOTE
For type A audio, if a disc that the
player cannot read has been loaded,
the player will display the message “ CHECK DISC ”.
! When there is no CD inserted
Insert a CD by referring to “How to insert a
CD (type A) ”F 5-18 / “How to insert a CD
(s) (type B) ”F 5-18.
When a CD is loaded, the player will start
playback of the CD, beginning with the
first track. !
When CD is in the player (type A)/
When playing back all CDs in the
player (type B)
When the “CD/AUX ”button is pressed, the
player will start playback.