ECO mode SUBARU LEGACY 2010 5.G Service Manual
[x] Cancel search | Manufacturer: SUBARU, Model Year: 2010, Model line: LEGACY, Model: SUBARU LEGACY 2010 5.GPages: 448, PDF Size: 7.36 MB
Page 200 of 448
5-24Audio
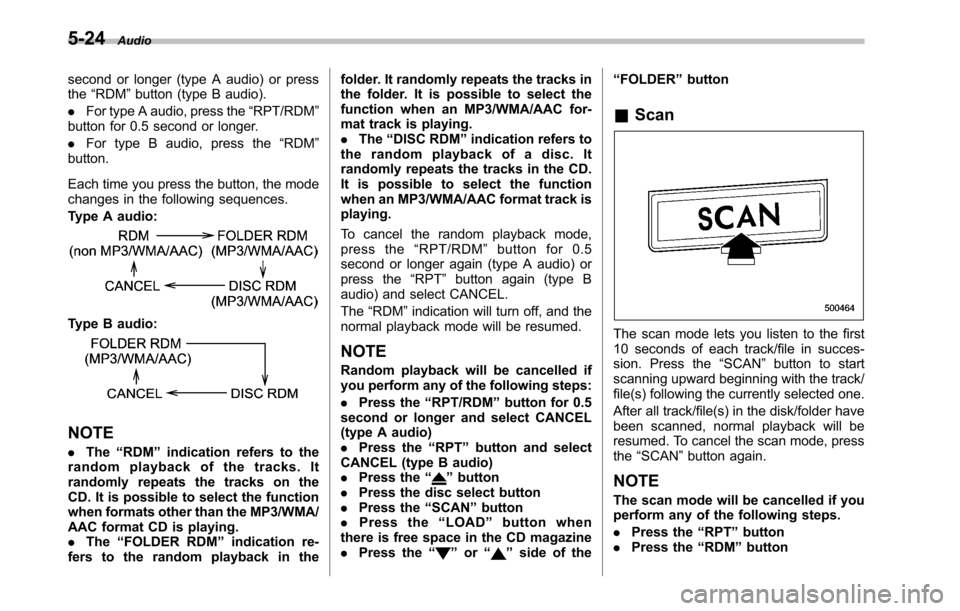
second or longer (type A audio) or press the “RDM ”button (type B audio).
. For type A audio, press the “RPT/RDM ”
button for 0.5 second or longer. . For type B audio, press the “RDM ”
button.
Each time you press the button, the mode
changes in the following sequences.
Type A audio:
Type B audio:
NOTE . The “RDM ”indication refers to the
random playback of the tracks. It
randomly repeats the tracks on the
CD. It is possible to select the function
when formats other than the MP3/WMA/
AAC format CD is playing.. The “FOLDER RDM ”indication re-
fers to the random playback in the folder. It randomly repeats the tracks in
the folder. It is possible to select the
function when an MP3/WMA/AAC for-
mat track is playing..
The “DISC RDM ”indication refers to
the random playback of a disc. It
randomly repeats the tracks in the CD.
It is possible to select the function
when an MP3/WMA/AAC format track isplaying.
To cancel the random playback mode,
press the “RPT/RDM ”button for 0.5
second or longer again (type A audio) or
press the “RPT ”button again (type B
audio) and select CANCEL. The “RDM ”indication will turn off, and the
normal playback mode will be resumed.
NOTE
Random playback will be cancelled if
you perform any of the following steps: . Press the “RPT/RDM ”button for 0.5
second or longer and select CANCEL
(type A audio). Press the “RPT ”button and select
CANCEL (type B audio). Press the “
”button
. Press the disc select button
. Press the “SCAN ”button
. Press the “LOAD ”button when
there is free space in the CD magazine . Press the “
”or “”side of the “
FOLDER ”button
& Scan
The scan mode lets you listen to the first
10 seconds of each track/file in succes-
sion. Press the “SCAN ”button to start
scanning upward beginning with the track/
file(s) following the currently selected one.
After all track/file(s) in the disk/folder have
been scanned, normal playback will be
resumed. To cancel the scan mode, pressthe “SCAN ”button again.
NOTE
The scan mode will be cancelled if you
perform any of the following steps. . Press the “RPT ”button
. Press the “RDM ”button
Page 201 of 448
.Press the “RPT/RDM ”button
. Turn the “TUNE/TRACK/CH ”dial
. Press the “
”or “”side of the
“ FOLDER ”button
. Press the “
”button
. Press the “”or “”side of the
“ SEEK ”button
. Press the disc select button
. Select the radio or AUX mode
. Press the “LOAD ”button when
there is free space in the CD magazine . Turn off the power of the audio
equipment. Turn the ignition switch to the
“ LOCK ”position
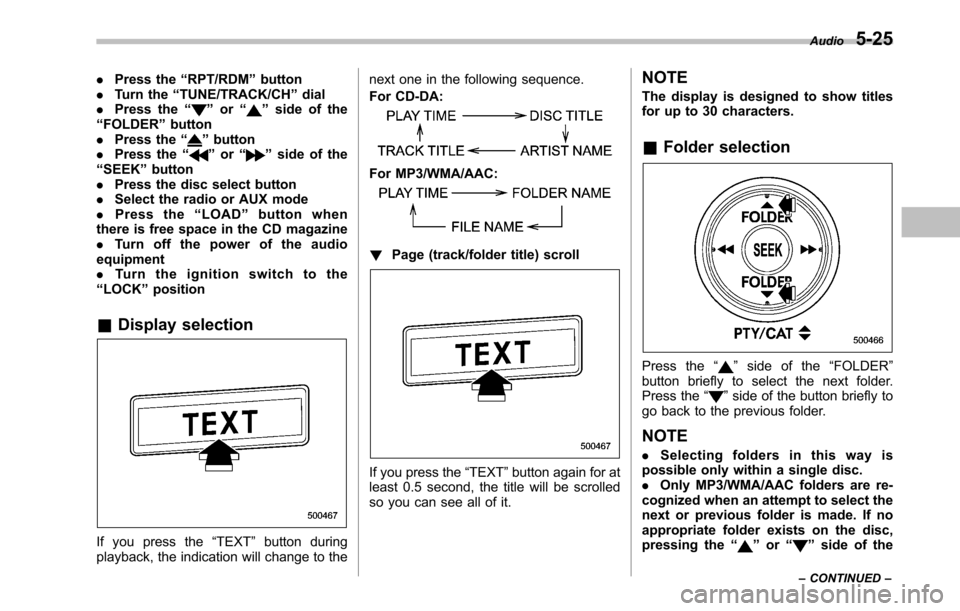
& Display selection
If you press the “TEXT ”button during
playback, the indication will change to the next one in the following sequence.
For CD-DA:
For MP3/WMA/AAC:
!
Page (track/folder title) scroll
If you press the “TEXT ”button again for at
least 0.5 second, the title will be scrolled
so you can see all of it. NOTE
The display is designed to show titles
for up to 30 characters. &
Folder selection
Press the “”side of the “FOLDER ”
button briefly to select the next folder.
Press the “
”side of the button briefly to
go back to the previous folder.
NOTE . Selecting folders in this way is
possible only within a single disc. . Only MP3/WMA/AAC folders are re-
cognized when an attempt to select the
next or previous folder is made. If no
appropriate folder exists on the disc,
pressing the “
”or “”side of the
Audio
5-25
– CONTINUED –
Page 203 of 448
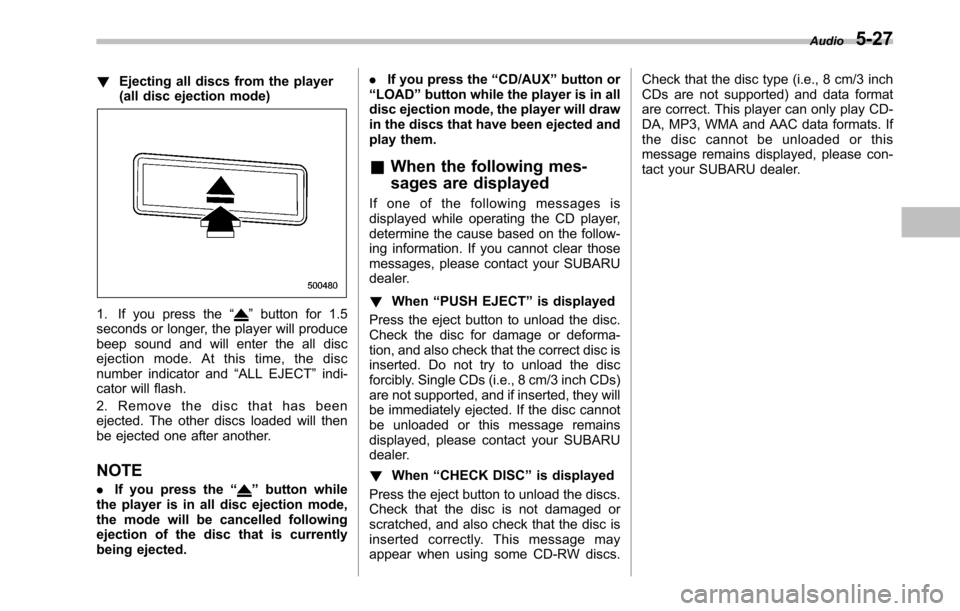
!Ejecting all discs from the player
(all disc ejection mode)
1. If you press the “”button for 1.5
seconds or longer, the player will produce
beep sound and will enter the all disc
ejection mode. At this time, the disc
number indicator and “ALL EJECT ”indi-
cator will flash.
2. Remove the disc that has been
ejected. The other discs loaded will then
be ejected one after another.
NOTE . If you press the “
”button while
the player is in all disc ejection mode,
the mode will be cancelled following
ejection of the disc that is currently
being ejected. .
If you press the “CD/AUX ”button or
“ LOAD ”button while the player is in all
disc ejection mode, the player will draw
in the discs that have been ejected and
play them.
& When the following mes-
sages are displayed
If one of the following messages is
displayed while operating the CD player,
determine the cause based on the follow-
ing information. If you cannot clear those
messages, please contact your SUBARU
dealer. ! When “PUSH EJECT ”is displayed
Press the eject button to unload the disc.
Check the disc for damage or deforma-
tion, and also check that the correct disc is
inserted. Do not try to unload the disc
forcibly. Single CDs (i.e., 8 cm/3 inch CDs)
are not supported, and if inserted, they will
be immediately ejected. If the disc cannot
be unloaded or this message remains
displayed, please contact your SUBARU
dealer. ! When “CHECK DISC ”is displayed
Press the eject button to unload the discs.
Check that the disc is not damaged or
scratched, and also check that the disc is
inserted correctly. This message may
appear when using some CD-RW discs. Check that the disc type (i.e., 8 cm/3 inch
CDs are not supported) and data format
are correct. This player can only play CD-
DA, MP3, WMA and AAC data formats. If
the disc cannot be unloaded or this
message remains displayed, please con-
tact your SUBARU dealer.
Audio
5-27
Page 207 of 448
These buttons are located on the spokes
of the steering wheel. They allow the
driver to control audio functions without
taking his/her hands off the steeringwheel. &MODE button
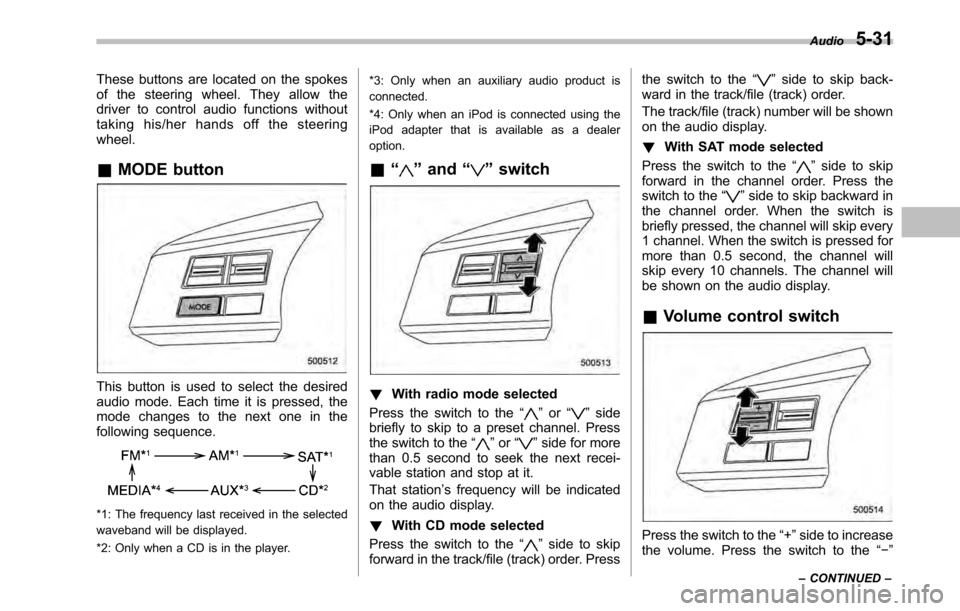
This button is used to select the desired
audio mode. Each time it is pressed, the
mode changes to the next one in the
following sequence.
*1: The frequency last received in the selected
waveband will be displayed.
*2: Only when a CD is in the player. *3: Only when an auxiliary audio product is
connected.
*4: Only when an iPod is connected using the
iPod adapter that is available as a dealeroption.
& “
”and “”switch
! With radio mode selected
Press the switch to the “
”or “”side
briefly to skip to a preset channel. Press
the switch to the “
”or “”side for more
than 0.5 second to seek the next recei-
vable station and stop at it.
That station ’s frequency will be indicated
on the audio display. ! With CD mode selected
Press the switch to the “
”side to skip
forward in the track/file (track) order. Press the switch to the
“
”side to skip back-
ward in the track/file (track) order.
The track/file (track) number will be shown
on the audio display. ! With SAT mode selected
Press the switch to the “
”side to skip
forward in the channel order. Press the
switch to the “
”side to skip backward in
the channel order. When the switch is
briefly pressed, the channel will skip every
1 channel. When the switch is pressed for
more than 0.5 second, the channel will
skip every 10 channels. The channel will
be shown on the audio display.
& Volume control switch
Press the switch to the “+ ”side to increase
the volume. Press the switch to the “� ”
Audio
5-31
– CONTINUED –
Page 210 of 448
5-34Audio
would void the user ’s authority to
operate this device.
CAUTION
. Do not leave the cell phone in the
vehicle. The temperature in the
vehicle may become extremely
high and cause a malfunction of
the cell phone.
. When using the cell phone, be
careful not to get it close to the
in-vehicle equipment. Getting it
too close to the in-vehicle equip-
ment may result in deterioration
in tone quality or a poor connect-
ing condition.
. In the frequency band used by
this equipment, along with indus-
trial, scientific and medical
equipment such as a microwave
oven, radio stations (a license is
required) to be used by the
production line in the factory to
identify movable bodies, specific
small power radio stations (a
license is not required) and ama-
teur radio stations (a license is
required) are being operated.
(These three types of radio sta-
tions are hereinafter referred to as
“other radio stations ”.) Before
using this equipment, be sure to
check to see if “other radio
stations ”are being operated in
the vicinity. If there is detrimental
radio interference from this
equipment to “other radio sta-
tions ”, move the equipment to
another location as soon as
possible to avoid radio interfer-
ence. The frequency band used
by this equipment is in the 2.4
GHz zone. The FH-SS modulation
is employed as a modulation
method. The expected inflicting
interference distance is less than
33 ft (10 m). This equipment uses
a full band and can avoid a band
used by a movable body identifi-
cation device. &
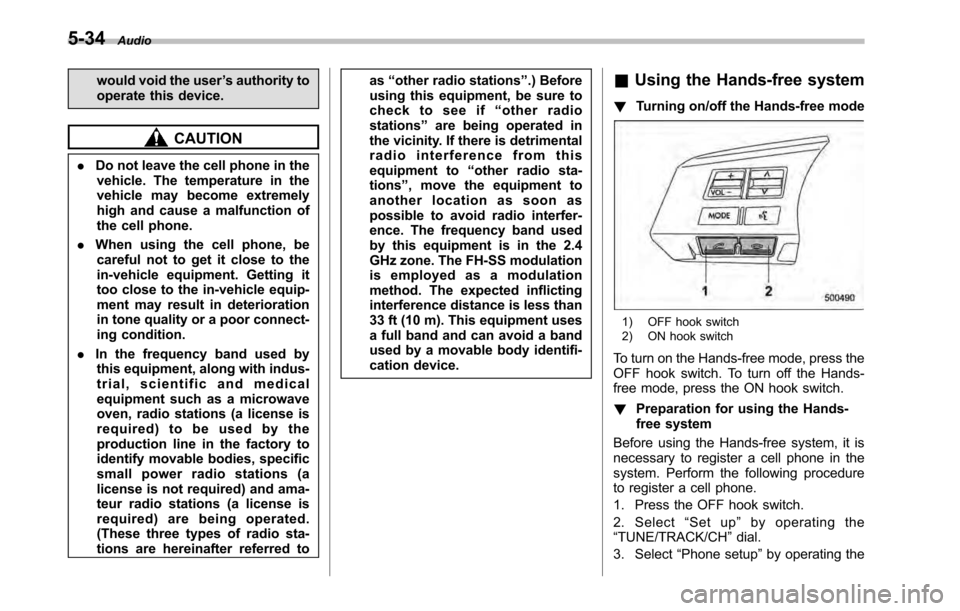
Using the Hands-free system
! Turning on/off the Hands-free mode
1) OFF hook switch
2) ON hook switch
To turn on the Hands-free mode, press the
OFF hook switch. To turn off the Hands-
free mode, press the ON hook switch. ! Preparation for using the Hands-
free system
Before using the Hands-free system, it is
necessary to register a cell phone in the
system. Perform the following procedure
to register a cell phone.
1. Press the OFF hook switch.
2. Select “Set up ”by operating the
“ TUNE/TRACK/CH ”dial.
3. Select “Phone setup ”by operating the
Page 220 of 448
6-2Interior equipment
Interior light
When leaving your vehicle, make sure the
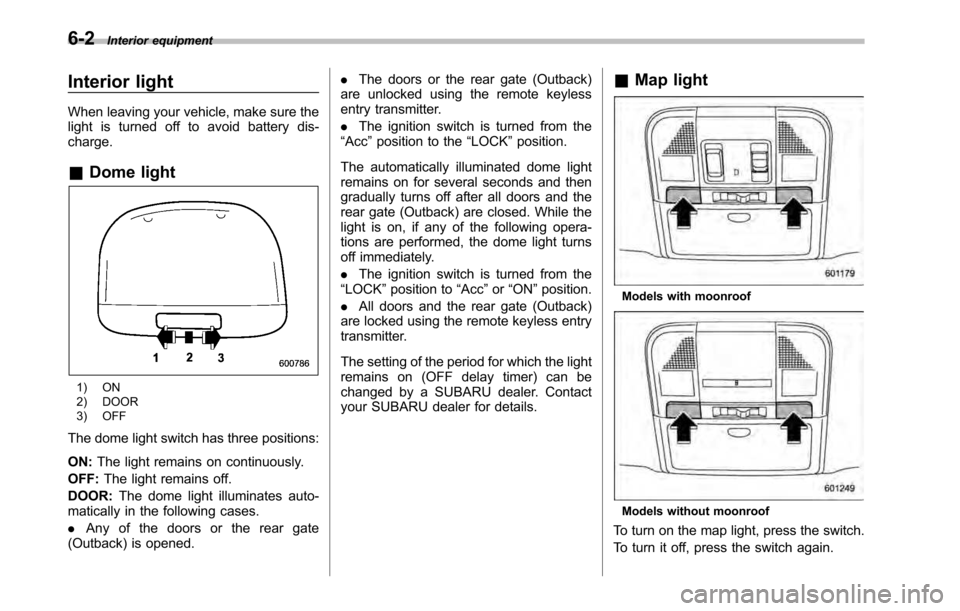
light is turned off to avoid battery dis-charge. &Dome light
1) ON
2) DOOR
3) OFF
The dome light switch has three positions: ON: The light remains on continuously.
OFF: The light remains off.
DOOR: The dome light illuminates auto-
matically in the following cases. . Any of the doors or the rear gate
(Outback) is opened. .
The doors or the rear gate (Outback)
are unlocked using the remote keyless
entry transmitter. . The ignition switch is turned from the
“ Acc ”position to the “LOCK ”position.
The automatically illuminated dome light
remains on for several seconds and then
gradually turns off after all doors and the
rear gate (Outback) are closed. While the
light is on, if any of the following opera-
tions are performed, the dome light turns
off immediately. . The ignition switch is turned from the
“ LOCK ”position to “Acc ”or “ON ”position.
. All doors and the rear gate (Outback)
are locked using the remote keyless entry
transmitter.
The setting of the period for which the light
remains on (OFF delay timer) can be
changed by a SUBARU dealer. Contact
your SUBARU dealer for details. &
Map light
Models with moonroof
Models without moonroof
To turn on the map light, press the switch.
To turn it off, press the switch again.
Page 238 of 448
6-20Interior equipment
malfunction.
. If the rear view camera is used for
a long time while the engine is
not operated, the battery may
become completely discharged.
NOTE . Do not wipe the camera with alcohol,
benzine or paint thinner. Otherwise,
discoloration may occur. To remove
contamination, wipe the camera with a
cloth moistened with a diluted neutral
detergent and then wipe it with a soft,
dry cloth.. When waxing the vehicle, be careful
not to apply the wax to the camera. If it
comes in contact with the camera,
moisten a clean cloth with a diluted
neutral detergent to remove the wax. . The camera lens has hard coating to
help prevent scratches. However, when
washing the vehicle or cleaning the
camera lens, be careful not to scratch
the camera lens. Do not use a washing
brush directly on the camera lens. The
monitor screen may be adversely af-fected.. Strong light shined on the camera
lens may develop white light stripes
around the light source. This is not amalfunction. .
Under fluorescent light, the display
may flicker. However, this is not amalfunction.. The image of the rear view camera
may be slightly different from the
actual color of the objects.
& How to use the rear view camera
When the shift lever or select lever is set to “R ”, the rear view camera automatically
displays the rear view image from the
vehicle. When the lever is set to other
positions, the image before setting to “R ”
is displayed.
1. Set the ignition switch to “ON ”.
2. Set the shift lever or select lever to “R ”.
NOTE . For models with the genuine
SUBARU navigation system, the image
of the rear view camera has priority
over other screen displays. Therefore,
while the rear view camera is in opera-
tion, the operations of other screens
are disabled. To operate other screens,
set the shift lever or select lever to a
position other than “R ”.
. The image of the rear view camera is
horizontally reversed as is the case
with the vehicle rearview mirror or the side view mirror..
It may be difficult to see the image of
the rearview camera in the following
cases. This is not a malfunction of thecamera.
–The vehicle is in a dark place (at
night, in a tunnel, etc.). – The vehicle is in an extremely hot
or cold place.– An object (such as raindrops,
snow, dirt, etc.) that disturbs the
view of the rear view camera sticks
to the lens of the camera. – Strong light shined directly on
the camera lens (occasionally, there
are vertical lines on the screen).
Page 244 of 448
7-2Starting and operating
Fuel
CAUTION
Use of a fuel which is low in quality
or use of an inappropriate fuel
additive may cause engine damage.
& Fuel requirements
! Non-turbo models
The non-turbo engine is designed to
operate using unleadedgasoline with an
octane rating of 87 AKI or higher .
! Turbo models
The engine is designed to operate at
maximum performance using unleaded
gasoline with an octane rating of 93 AKI
or higher . If 93 AKI fuel is not readily
available in your area, unleaded gasoline
with an octane rating of 91 AKI may be
used with no detriment to engine durability
or driveability. However, you may notice a
slight decrease in maximum engine per-
formance while using 91 AKI fuel. Use of
91 AKI fuel will not affect your warranty
coverage. If premium unleaded gasoline is
not available, regular unleaded gasoline
with an octane rating of 87 AKI or higher
may be temporarily used. For optimum engine performance and driveability, it is
required that you use premium grade
unleaded gasoline.
NOTE
Be sure to use premium unleaded
gasoline of 91 AKI or higher for a turbo
engine model. If other gasoline (lower
than 91 AKI) is used, knocking, re-
duced output and poor accelerator
response will result. ! Fuel octane rating
This octane rating is the average of the
Research Octane and Motor Octane
numbers and is commonly referred to as
the Anti Knock Index (AKI).
Using a gasoline with a lower octane
rating can cause persistent and heavy
knocking, which can damage the engine.
Do not be concerned if your vehicle
sometimes knocks lightly when you drive
up a hill or when you accelerate. See your
dealer or a qualified service technician if
you use a fuel with the specified octane
rating and your vehicle knocks heavily or
persistently. ! Unleaded gasoline
The neck of the fuel filler pipe is designed
to accept only an unleaded gasoline filler
nozzle. Under no circumstances should
leaded gasoline be used because it will damage the emission control system and
may impair driveability and fuel economy. !
California fuel
If your vehicle was certified to California
Emission Standards as indicated on the
underhood tune-up label, it is designed to
optimize engine and emission control
system performance with gasoline that
meets the clean burning low-sulfur Cali-
fornia gasoline specifications. If you live in
any other state than California, your
vehicle will operate on gasoline meeting
Federal specifications. Gasoline sold out-
side California is permitted to have higher
sulfur levels, which may affect the perfor-
mance of your vehicle ’s catalytic converter
and may produce a sulfur exhaust odor or
smell. SUBARU recommends that you try
a different brand of unleaded gasoline
having lower sulfur to determine if the
problem is fuel related before returning
your vehicle to an authorized dealer for
service. The CHECK ENGINE warning
light/malfunction indicator lamp may also
turn on. If this occurs, return to your
authorized SUBARU dealer for diagnosis.
If it is determined that the condition is
caused by the type of fuel used, repairs
may not be covered by your warranty.
Page 250 of 448
7-8Starting and operating
NOTE
Engine oil, engine coolant, brake fluid,
washer fluid and other fluid levels
should be checked daily, weekly or at
fuel stops. Starting the engine &
MT models
1. Apply the parking brake.
2. Turn off unnecessary lights and ac- cessories.
3. Depress the clutch pedal to the floor
and shift the shift lever into neutral. Hold
the clutch pedal to the floor while starting
the engine. The starter motor will only
operate when the clutch pedal is de-
pressed fully to the floor.
4. Turn the ignition switch to the “ON ”
position and check the operation of the
warning and indicator lights. Refer to“ Warning and indicator lights ”F 3-9.
CAUTION
Do not operate the starter motor
continuously for more than 10 sec-
onds. If the engine fails to start after
operating the starter for 5 to 10
seconds, wait for 10 seconds or
more before trying again.
5. Turn the ignition switch to the “START ”
position without depressing the accelera-
tor pedal. Release the key immediately
after the engine has started.
If the engine does not start, perform the
following procedure. (1) Turn the ignition switch to the“
LOCK ”position and wait for at least
10 seconds. After checking that the
parking brake is firmly applied, turn the
ignition switch to the “START ”position
while depressing the accelerator pedal
slightly (approximately a quarter of the
full stroke). Release the accelerator
pedal as soon as the engine starts.
(2) If this fails to start the engine, turn
the ignition switch back to the “LOCK ”
position and wait for at least 10
seconds. Then fully depress the accel-
erator pedal and turn the ignition
switch to the “START ”position. If the
engine starts, quickly release the
accelerator pedal.
(3) If this does not start the engine,
turn the ignition switch again to the“ LOCK ”position. After waiting for 10
seconds or longer, turn the ignition
switch to the “START ”position without
depressing the accelerator pedal.
(4) If the engine still refuses to start,
contact your nearest SUBARU dealer
for assistance.
Page 251 of 448
6. Confirm that all warning and indicator
lights have turned off after the engine has
started. The fuel injection system auto-
matically lowers the idle speed as the
engine warms up.
NOTE (2.5 L non-turbo models)
To protect the engine while the shift
lever is in the neutral position, the
engine is controlled so that the engine
speed may not become too high even if
the accelerator pedal is depressedhard. &AT and CVT models
CAUTION
If you restart the engine while the
vehicle is moving, shift the select
lever into the “N ” position. Do not
attempt to place the select lever of a
moving vehicle into the “P ” posi-
tion.
1. Apply the parking brake.
2. Turn off unnecessary lights and ac- cessories.
3. Shift the select lever to the “P ” or “N ”
position (preferably “P ” position). The
starter will only operate when the select
lever is at the “P ”or “N ”position. 4. Turn the ignition switch to the
“ON ”
position and check the operation of the
warning and indicator lights. Refer to“ Warning and indicator lights ”F 3-9.
CAUTION
Do not operate the starter motor
continuously for more than 10 sec-
onds. If the engine fails to start after
operating the starter for 5 to 10
seconds, wait for 10 seconds or
more before trying again.
5. Turn the ignition switch to the “START ”
position without depressing the accelera-
tor pedal. Release the key immediately
after the engine has started.
If the engine does not start, perform the
following procedure.
(1) Turn the ignition switch to the“LOCK ”position and wait for at least
10 seconds. After checking that the
parking brake is firmly applied, turn the
ignition switch to the “START ”position
while depressing the accelerator pedal
slightly (approximately a quarter of the
full stroke). Release the accelerator
pedal as soon as the engine starts.
(2) If this fails to start the engine, turn
the ignition switch back to the “LOCK ”
position and wait for at least 10 seconds. Then fully depress the accel-
erator pedal and turn the ignition
switch to the
“START ”position. If the
engine starts, quickly release the
accelerator pedal.
(3) If this fails to start the engine, turn
the ignition switch again to the “LOCK ”
position. After waiting for 10 seconds
or longer, turn the ignition switch to the“ START ”position without depressing
the accelerator pedal.
(4) If the engine still refuses to start,
contact your nearest SUBARU dealer
for assistance.
6. Confirm that all warning and indicator
lights have turned off after the engine has
started. The fuel injection system auto-
matically lowers the idle speed as the
engine warms up.
While the engine is warming up, make
sure that the select lever is at the “P ” or
“ N ”position and that the parking brake is
applied.
NOTE (2.5 L non-turbo and 3.6 L models)
To protect the engine while the select
lever is in the “P ” or “N ” position, the
engine is controlled so that the engine
speed may not become too high even if
the accelerator pedal is depressed Starting and operating
7-9
– CONTINUED –