light SUBARU LEGACY 2012 5.G Owners Manual
[x] Cancel search | Manufacturer: SUBARU, Model Year: 2012, Model line: LEGACY, Model: SUBARU LEGACY 2012 5.GPages: 474, PDF Size: 17.45 MB
Page 419 of 474
11-48Maintenance and service
& Front turn signal light
NOTE
It may be difficult to replace the bulbs.
We recommend that you have the bulbs
replaced by your SUBARU dealer if
necessary.
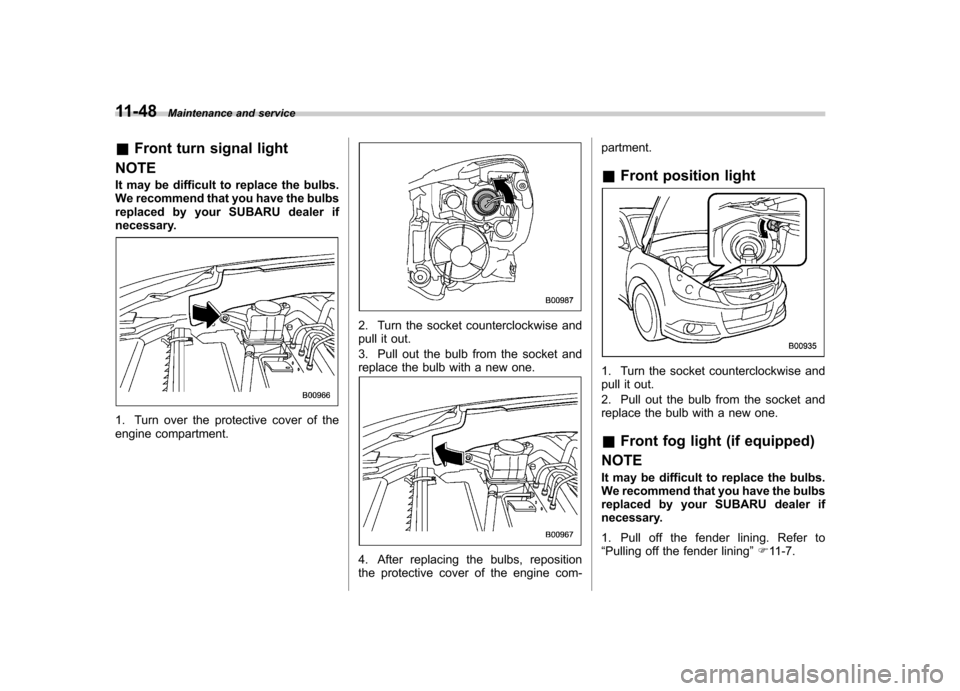
1. Turn over the protective cover of the
engine compartment.
2. Turn the socket counterclockwise and
pull it out.
3. Pull out the bulb from the socket and
replace the bulb with a new one.
4. After replacing the bulbs, reposition
the protective cover of the engine com- partment. &
Front position light
1. Turn the socket counterclockwise and
pull it out.
2. Pull out the bulb from the socket and
replace the bulb with a new one. &Front fog light (if equipped)
NOTE
It may be difficult to replace the bulbs.
We recommend that you have the bulbs
replaced by your SUBARU dealer if
necessary.
1. Pull off the fender lining. Refer to “ Pulling off the fender lining ”F 11-7.
Page 420 of 474
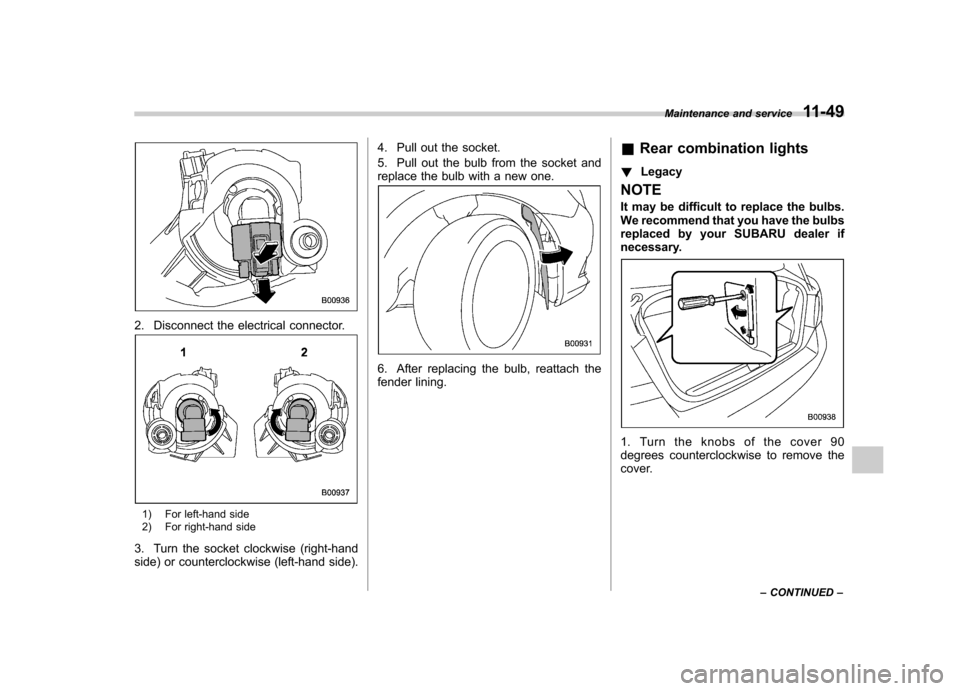
2. Disconnect the electrical connector.
1) For left-hand side
2) For right-hand side
3. Turn the socket clockwise (right-hand
side) or counterclockwise (left-hand side). 4. Pull out the socket.
5. Pull out the bulb from the socket and
replace the bulb with a new one.
6. After replacing the bulb, reattach the
fender lining.
&
Rear combination lights
! Legacy
NOTE
It may be difficult to replace the bulbs.
We recommend that you have the bulbs
replaced by your SUBARU dealer if
necessary.
1. Turn the knobs of the cover 90
degrees counterclockwise to remove the
cover. Maintenance and service
11-49
– CONTINUED –
Page 421 of 474
11-50Maintenance and service
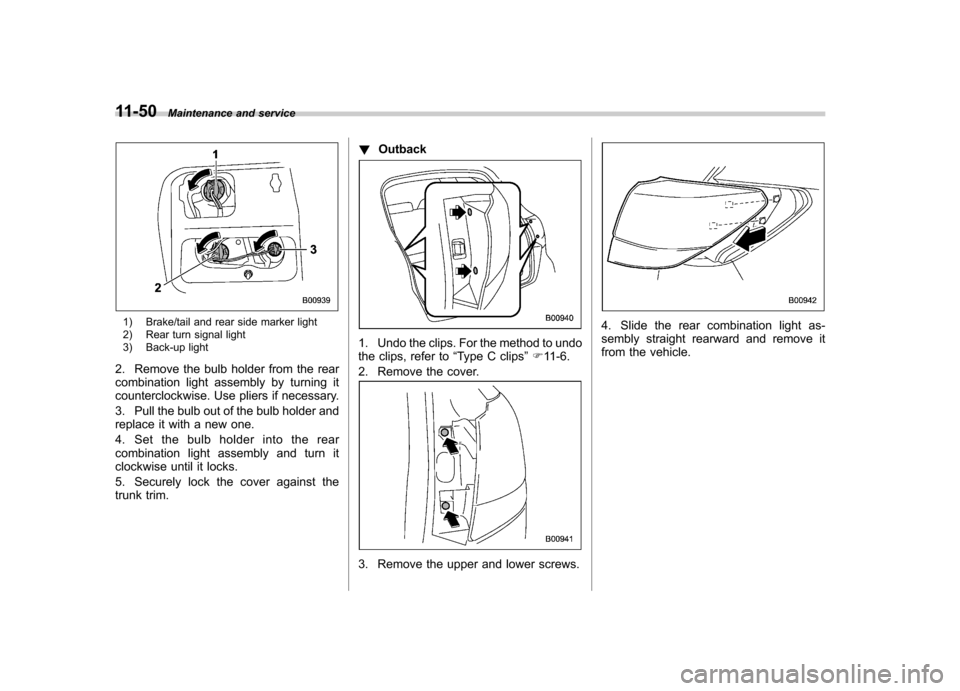
1) Brake/tail and rear side marker light
2) Rear turn signal light
3) Back-up light
2. Remove the bulb holder from the rear
combination light assembly by turning it
counterclockwise. Use pliers if necessary.
3. Pull the bulb out of the bulb holder and
replace it with a new one.
4. Set the bulb holder into the rear
combination light assembly and turn it
clockwise until it locks.
5. Securely lock the cover against the
trunk trim. !
Outback
1. Undo the clips. For the method to undo
the clips, refer to “Type C clips ”F 11-6.
2. Remove the cover.
3. Remove the upper and lower screws.
4. Slide the rear combination light as-
sembly straight rearward and remove it
from the vehicle.
Page 422 of 474
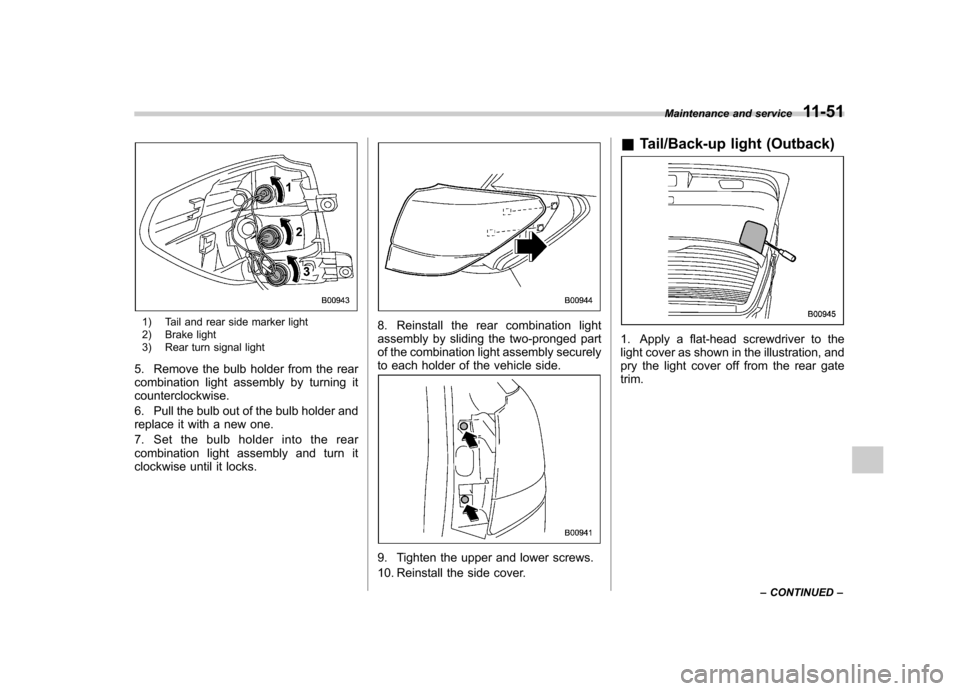
1) Tail and rear side marker light
2) Brake light
3) Rear turn signal light
5. Remove the bulb holder from the rear
combination light assembly by turning itcounterclockwise.
6. Pull the bulb out of the bulb holder and
replace it with a new one.
7. Set the bulb holder into the rear
combination light assembly and turn it
clockwise until it locks.8. Reinstall the rear combination light
assembly by sliding the two-pronged part
of the combination light assembly securely
to each holder of the vehicle side.
9. Tighten the upper and lower screws.
10. Reinstall the side cover. &
Tail/Back-up light (Outback)
1. Apply a flat-head screwdriver to the
light cover as shown in the illustration, and
pry the light cover off from the rear gatetrim. Maintenance and service
11-51
– CONTINUED –
Page 423 of 474
11-52Maintenance and service
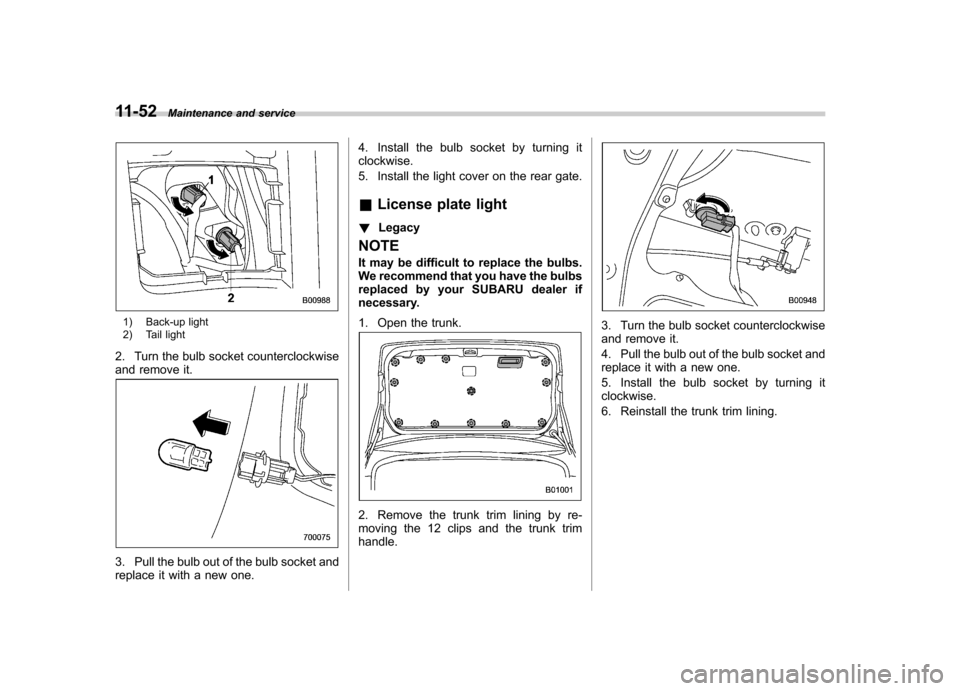
1) Back-up light
2) Tail light
2. Turn the bulb socket counterclockwise
and remove it.
3. Pull the bulb out of the bulb socket and
replace it with a new one. 4. Install the bulb socket by turning itclockwise.
5. Install the light cover on the rear gate.
& License plate light
! Legacy
NOTE
It may be difficult to replace the bulbs.
We recommend that you have the bulbs
replaced by your SUBARU dealer if
necessary.
1. Open the trunk.
2. Remove the trunk trim lining by re-
moving the 12 clips and the trunk trimhandle.
3. Turn the bulb socket counterclockwise
and remove it.
4. Pull the bulb out of the bulb socket and
replace it with a new one.
5. Install the bulb socket by turning it clockwise.
6. Reinstall the trunk trim lining.
Page 424 of 474
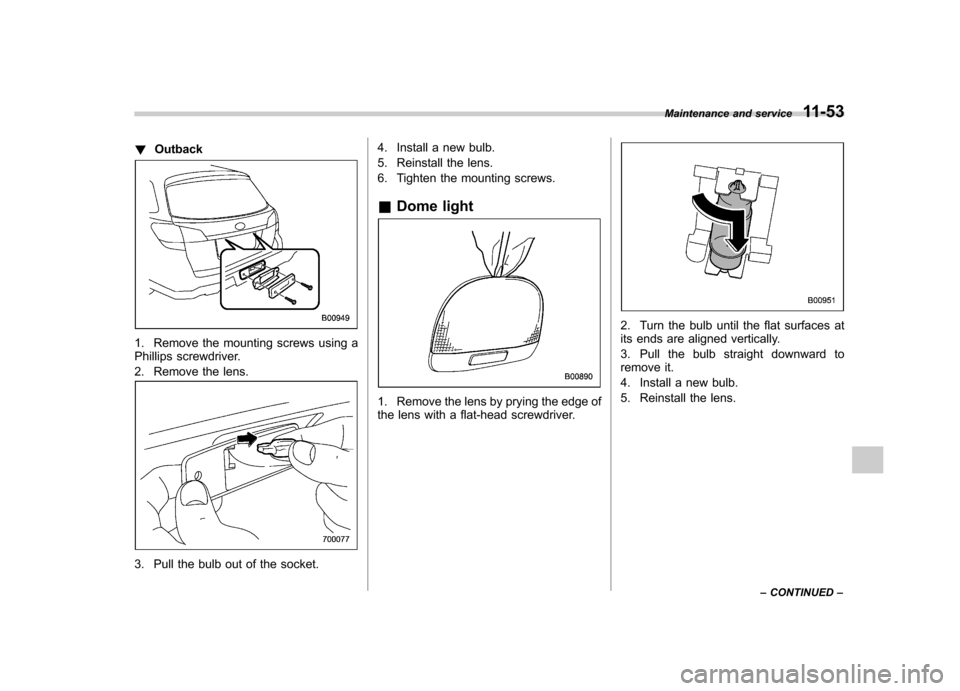
!Outback
1. Remove the mounting screws using a
Phillips screwdriver.
2. Remove the lens.
3. Pull the bulb out of the socket. 4. Install a new bulb.
5. Reinstall the lens.
6. Tighten the mounting screws.
& Dome light
1. Remove the lens by prying the edge of
the lens with a flat-head screwdriver.
2. Turn the bulb until the flat surfaces at
its ends are aligned vertically.
3. Pull the bulb straight downward to
remove it.
4. Install a new bulb.
5. Reinstall the lens. Maintenance and service
11-53
– CONTINUED –
Page 425 of 474
11-54Maintenance and service
& Map light
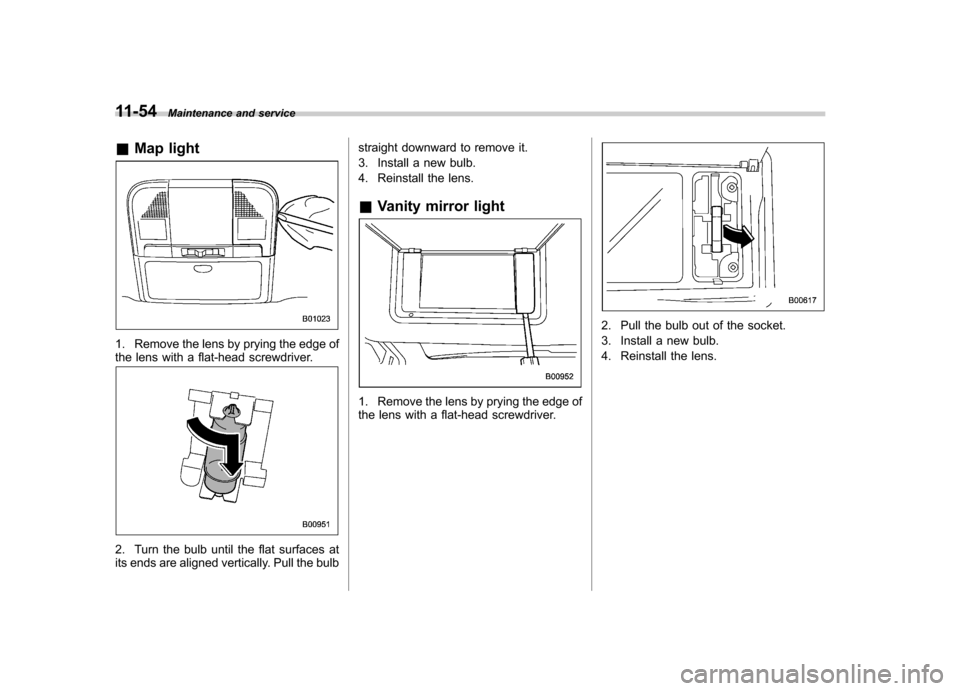
1. Remove the lens by prying the edge of
the lens with a flat-head screwdriver.
2. Turn the bulb until the flat surfaces at
its ends are aligned vertically. Pull the bulb straight downward to remove it.
3. Install a new bulb.
4. Reinstall the lens.
& Vanity mirror light
1. Remove the lens by prying the edge of
the lens with a flat-head screwdriver.
2. Pull the bulb out of the socket.
3. Install a new bulb.
4. Reinstall the lens.
Page 426 of 474
&Door step light
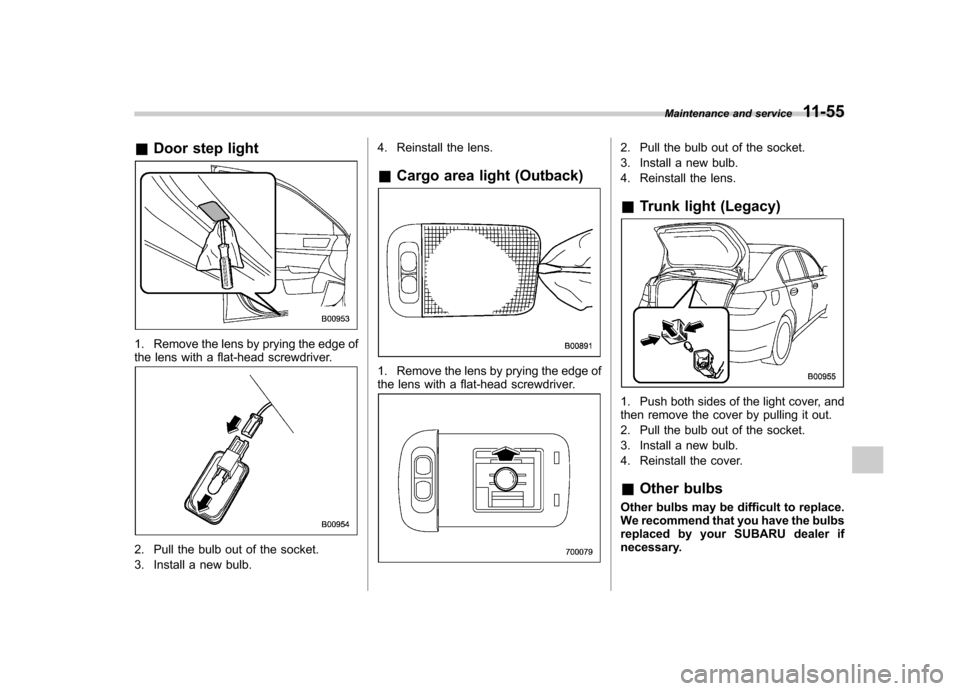
1. Remove the lens by prying the edge of
the lens with a flat-head screwdriver.
2. Pull the bulb out of the socket.
3. Install a new bulb. 4. Reinstall the lens.
& Cargo area light (Outback)
1. Remove the lens by prying the edge of
the lens with a flat-head screwdriver.
2. Pull the bulb out of the socket.
3. Install a new bulb.
4. Reinstall the lens. &Trunk light (Legacy)
1. Push both sides of the light cover, and
then remove the cover by pulling it out.
2. Pull the bulb out of the socket.
3. Install a new bulb.
4. Reinstall the cover. &Other bulbs
Other bulbs may be difficult to replace.
We recommend that you have the bulbs
replaced by your SUBARU dealer if
necessary. Maintenance and service
11-55
Page 431 of 474
12-4Specifications
& Engine oil
For the checking, adding and replacing procedure or other details, refer to “Engine oil ”F 11-12.
NOTE
The procedure for changing the engine oil and oil filter should be performed by a properly-trained expert. It is recommended
that you have this service performed by your SUBARU dealer. ! Approved engine oil
Always use the SUBARU approved engine oil. For further details, please contact your SUBARU dealer.
If the approved engine oil is unavailable, use the alternative engine oil described on the next page. ! Alternative engine oil
If the SUBARU approved oil is unavailable, the following alternative oil can be used. NOTE . Each quantity indicated is only a guideline. The necessary quantity for replacement may differ slightly depending on the
temperature and other factors. . In choosing an oil, you want the proper quality and viscosity, as well as one that will enhance fuel economy. Oils of lower
viscosity provide better fuel economy. However, in hot weather, oil of higher viscosity is required to properly lubricate the
engine. The following table lists the recommended viscosities and applicable temperatures.. When adding oil, different brands may be used together as long as they are the same API classification and SAE viscosity
as those recommended by SUBARU.
Page 434 of 474
&Manual transmission, front differential and rear differential gear oil
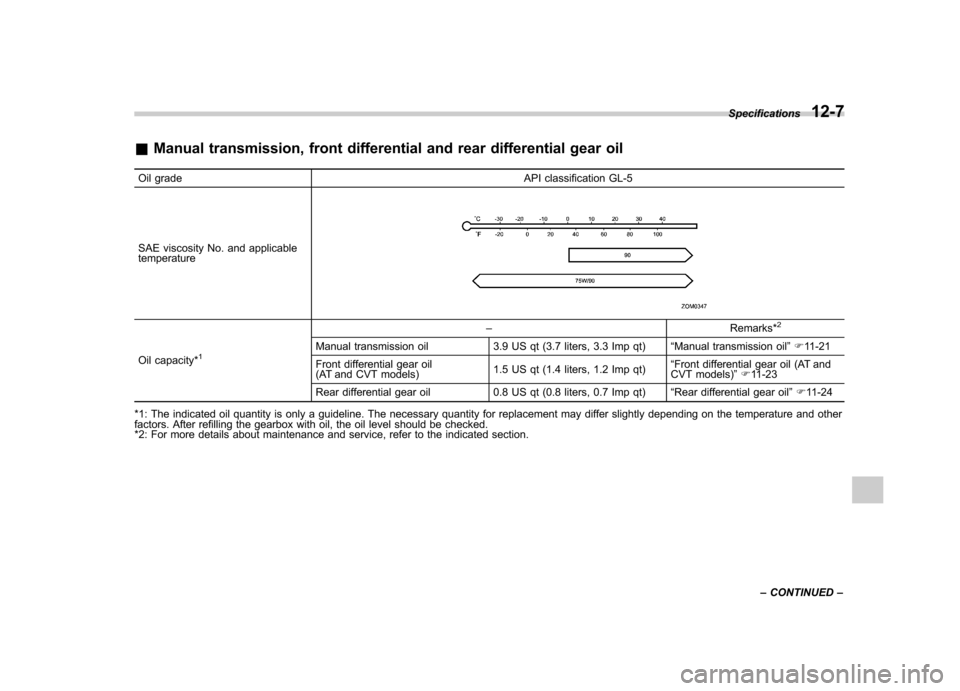
Oil grade API classification GL-5
SAE viscosity No. and applicable temperature
Oil capacity*1
– Remarks*2
Manual transmission oil 3.9 US qt (3.7 liters, 3.3 Imp qt) “Manual transmission oil ”F 11-21
Front differential gear oil
(AT and CVT models) 1.5 US qt (1.4 liters, 1.2 Imp qt)“
Front differential gear oil (AT and
CVT models) ”F 11-23
Rear differential gear oil 0.8 US qt (0.8 liters, 0.7 Imp qt) “
Rear differential gear oil ”F 11-24
*1: The indicated oil quantity is only a guideline. The necessary quantity for replacement may differ slightly depending on the temperature and other
factors. After refilling the gearbox with oil, the oil level should be checked.
*2: For more details about maintenance and service, refer to the indicated section. Specifications
12-7
– CONTINUED –